
DIY S2000 Mud Flaps for Racers!

Thread Starter

Joined: May 2004
Posts: 1,531
Likes: 3
From: Tucson
Are you annoyed by chipping paint behind your front wheel and especially the fender edge right behind the front wheel? If you run sticky race tires this can happen very quickly because of the pebbles that get shot out. On my MY00 there was no paint left on this edge when I sold the car. I had given up trying to keep up with taping the edges before each autocross or using touch-up paint. Below is a DIY solution/procedure to eliminate pebble induced chipping on that fender edge and reduce it down the side of the car.
Observations
1. Race tires kick up sand, pebbles, rocks that chip away paint at the fender edge right behind the front wheels.
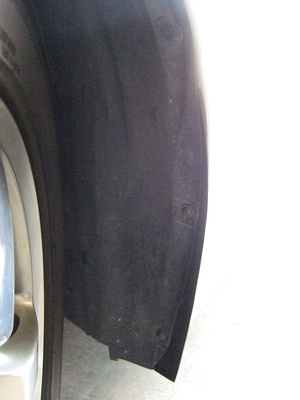
2. The front fender liners on the S2000 are not the same left to right and leave metal/paint exposed behind the front wheels. It's more exposed on the driver side for all years of S2K. The mold never changed.
3. On my first S2000 there was no paint left on the fender edge behind the front wheels, just bare metal.
I just bought a 2003 in nice condition would like to avoid the sand blasting on the edge of the fender.
Solution - make mud flaps or debris blockers from a door sweep
Below is a link to all of the photos.
http://random1photo.zenfolio.com/p184817405
Here is the step-by-step. READ entirely before starting and plan ahead!
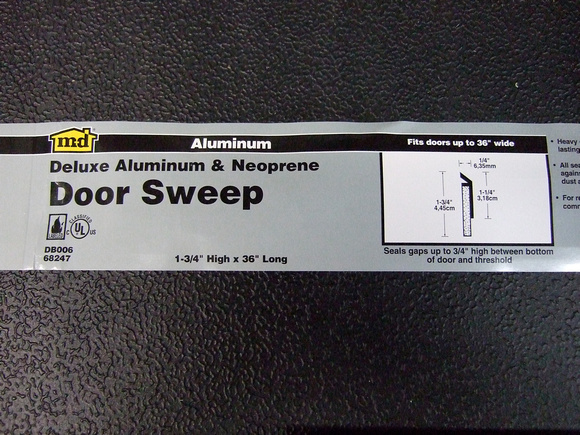
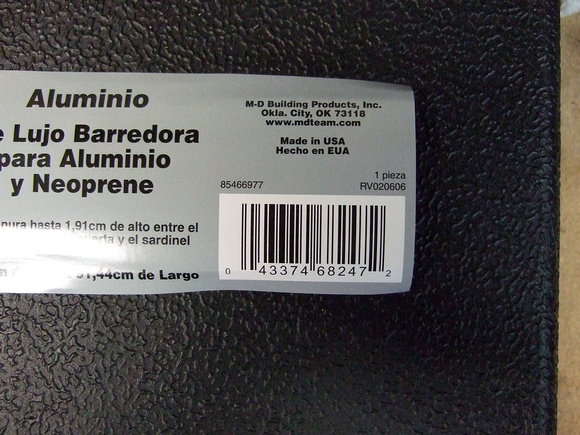
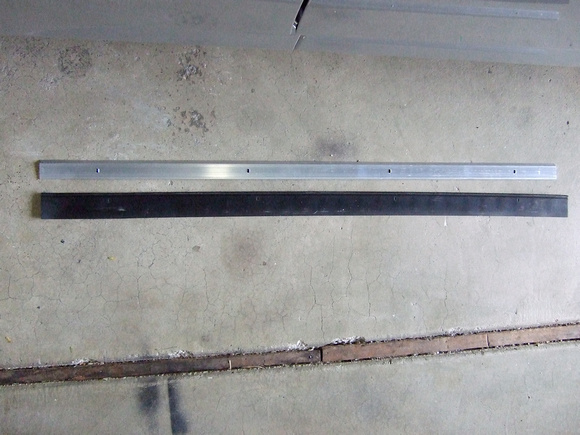
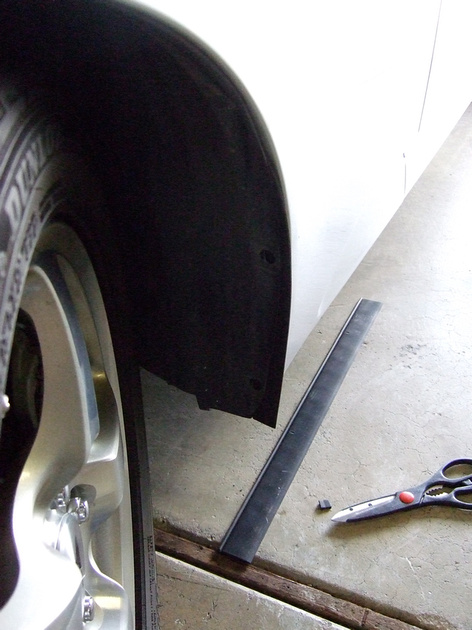
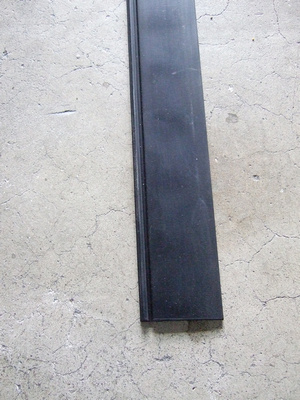
1. Buy an appropriate door sweep from Home Depot, Lowes, or some where else. This is what I used, and it works well. There is a taper to this material. If you can find something like this that is flat and about the thickness of the thinnest edge that would be perfect. Pull the rubber (neoprene) from the aluminum.
2. Cut two 15 inch pieces.
3. Remove the two screws on the front fender liner at the back edge. I did one side at a time with the wheels turned for easy access to the screws.
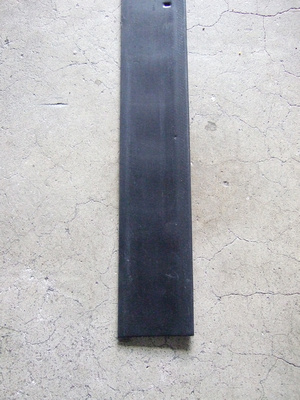
4. Insert one of the 15 inch pieces behind the fender liner with the flat side toward the metal. Notice it is tapered on the other side (side with groove). Line up the bottom edge with the fender liner. Taper in the top so that the top outside edge lines up with the edge of the fender liner up near the first plastic retainer clip.
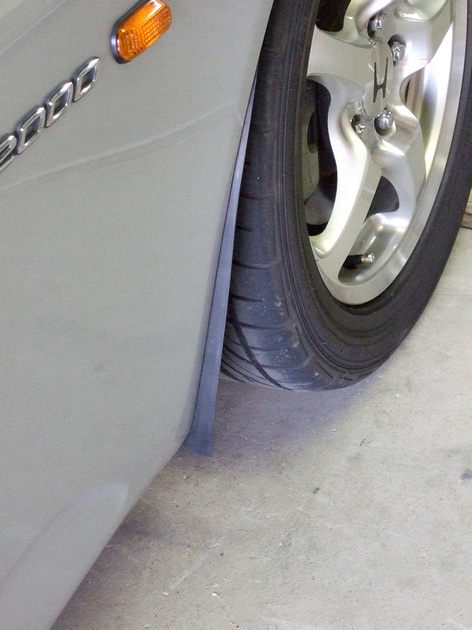
5. If you like the basic fit then pull out the rubber and cut a square notch out of the bottom inside corner. This will allow the rubber to tuck in nicely near the bottom of the fender liner. It's about 1/4 inch. You can cut the notch longer so the rubber does not protrude out as much if so desired. I used scissors, but a razor would probably work better. My original intention was to just protect the very edge of the fender, but I have it out farther to hopefully reduce the paint chips down the side of the car.
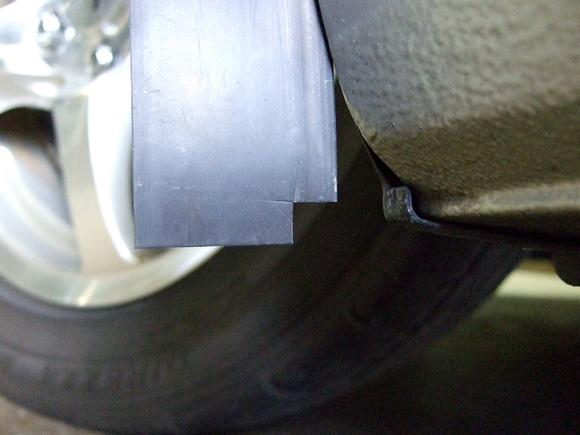
6. Tuck the rubber back behind the fender liner the way you want it to be. Make sure the bottom is aligned with the fender liner or however you want it. Also make sure it's in far enough so the groove and existing holes do not show.
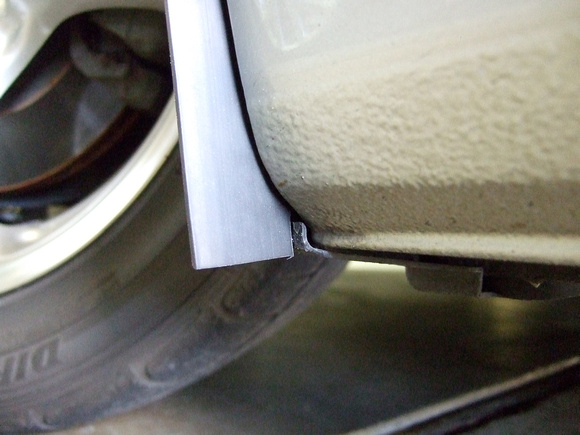
7. Carefully put the two screws back in by pushing and turning through the rubber. Before tightening all the way make sure everything is lined up the way you want it. Don't over tighten. A better way to make the holes would be to mark and punch them out with a leather punch.
That's it! I hope more paint will be saved then before. Any feedback and improvement ideas? Post them here.
Observations
1. Race tires kick up sand, pebbles, rocks that chip away paint at the fender edge right behind the front wheels.
2. The front fender liners on the S2000 are not the same left to right and leave metal/paint exposed behind the front wheels. It's more exposed on the driver side for all years of S2K. The mold never changed.
3. On my first S2000 there was no paint left on the fender edge behind the front wheels, just bare metal.
I just bought a 2003 in nice condition would like to avoid the sand blasting on the edge of the fender.
Solution - make mud flaps or debris blockers from a door sweep
Below is a link to all of the photos.
http://random1photo.zenfolio.com/p184817405
Here is the step-by-step. READ entirely before starting and plan ahead!
1. Buy an appropriate door sweep from Home Depot, Lowes, or some where else. This is what I used, and it works well. There is a taper to this material. If you can find something like this that is flat and about the thickness of the thinnest edge that would be perfect. Pull the rubber (neoprene) from the aluminum.
2. Cut two 15 inch pieces.
3. Remove the two screws on the front fender liner at the back edge. I did one side at a time with the wheels turned for easy access to the screws.
4. Insert one of the 15 inch pieces behind the fender liner with the flat side toward the metal. Notice it is tapered on the other side (side with groove). Line up the bottom edge with the fender liner. Taper in the top so that the top outside edge lines up with the edge of the fender liner up near the first plastic retainer clip.
5. If you like the basic fit then pull out the rubber and cut a square notch out of the bottom inside corner. This will allow the rubber to tuck in nicely near the bottom of the fender liner. It's about 1/4 inch. You can cut the notch longer so the rubber does not protrude out as much if so desired. I used scissors, but a razor would probably work better. My original intention was to just protect the very edge of the fender, but I have it out farther to hopefully reduce the paint chips down the side of the car.
6. Tuck the rubber back behind the fender liner the way you want it to be. Make sure the bottom is aligned with the fender liner or however you want it. Also make sure it's in far enough so the groove and existing holes do not show.
7. Carefully put the two screws back in by pushing and turning through the rubber. Before tightening all the way make sure everything is lined up the way you want it. Don't over tighten. A better way to make the holes would be to mark and punch them out with a leather punch.
That's it! I hope more paint will be saved then before. Any feedback and improvement ideas? Post them here.

 Thanks for the post!


 Great idea! I'll be tracking my '08 this year, and this looks like it will help keep the car from getting beat up. Thanks!


