
That pesky latch rattle... Fixed!

Thread Starter


Joined: Sep 2004
Posts: 6,223
Likes: 4
From: Orange County, CA
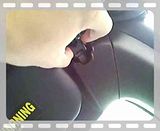
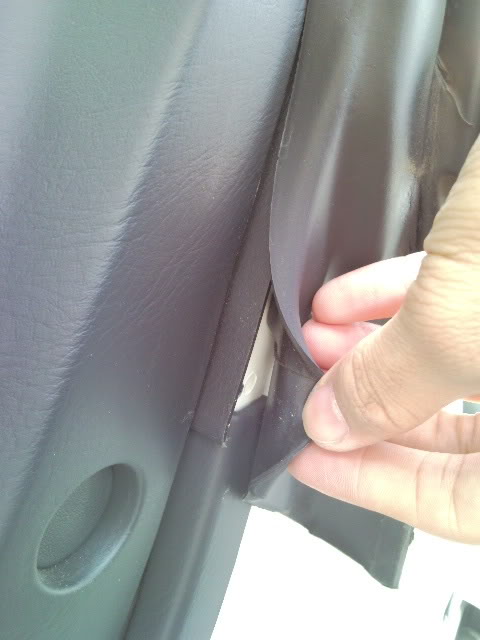
That pesky latch rattle had been haunting me for 30k+ miles. I tried everything. I repositioned the hardtop. I took it off and put it back on, trying different spots. I tried the EPT fix (see: https://www.s2ki.com/forums/index.php?showtopic=372605 ). I literally stuffed a FOOT of rubber weather stripping into my latches. Nothing worked. NOTHING. I was baffled.
Today, I got the inspiration to dig deeper. I'm not sure why. I started poking, prodding, shaking, and.... discovered this.

The striker is LOOSE?!?!?
So, to fix it...
First, the tools I used.
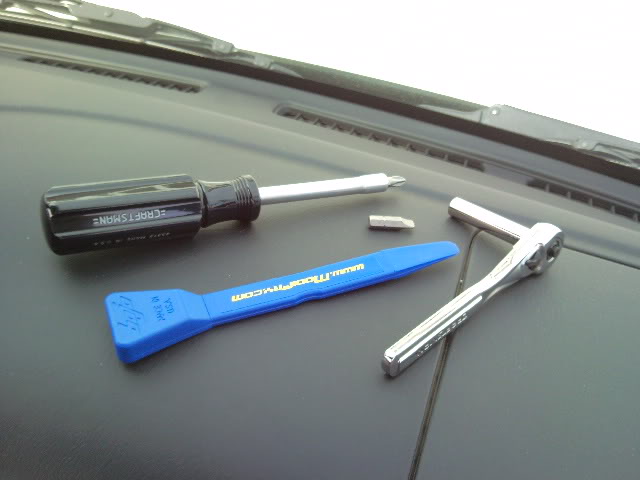
Left to right:
Screwdriver with Philips and Flat bits
Modifry plastic pry-tool (helps prevent scratches on your trim)
1/4" drive ratchet with 8mm deep socket
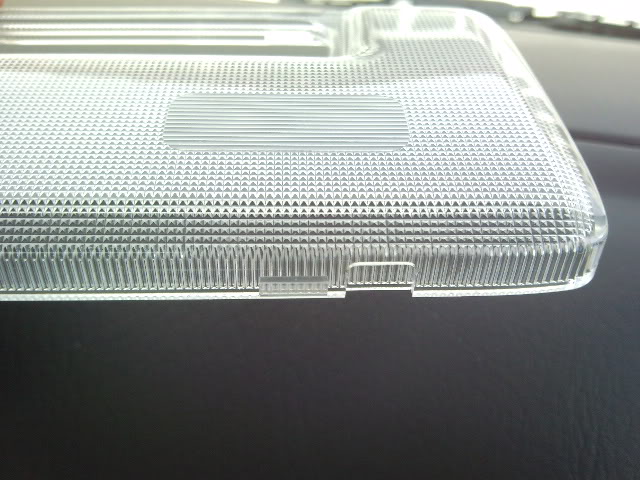
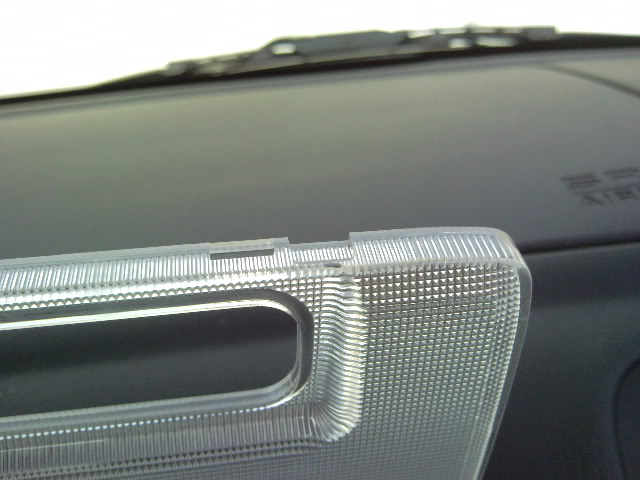
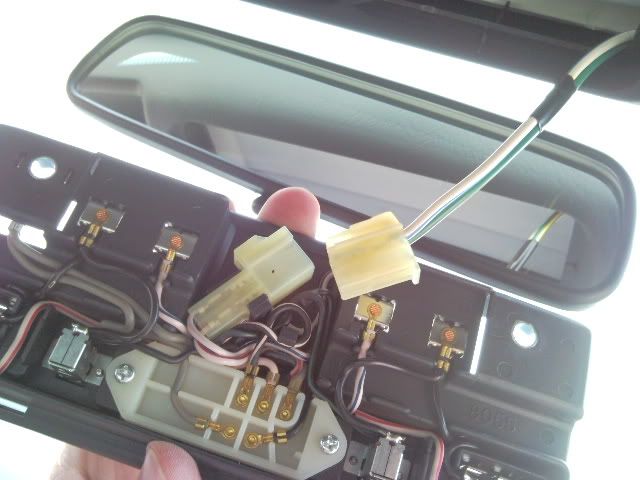
First, you remove the lens from the overhead light. There are two "pry points" toward the front of the car.
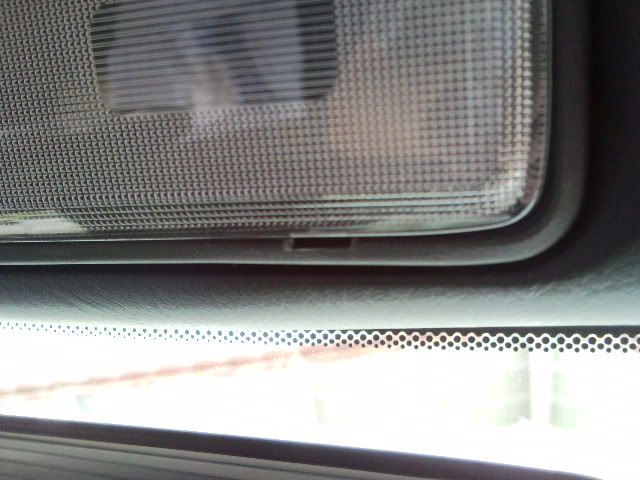
Insert your pry tool (or key/screwdriver, being careful not to scratch) and twist. The lens will easily pop out. Here's a few pictures of the tabs that hold it in.
Next, remove the light fixture. There are two bolts that hold it in. I used the 8mm deep socket to loosen it, and then a screw driver to take it out the rest of the way. (When putting it back, the factory manual states 7 ft/lbs, or hand tight with the screwdriver. There will be resistance for quite a few turns, but keep going until it stops. The bolt sits in metal, not plastic.)
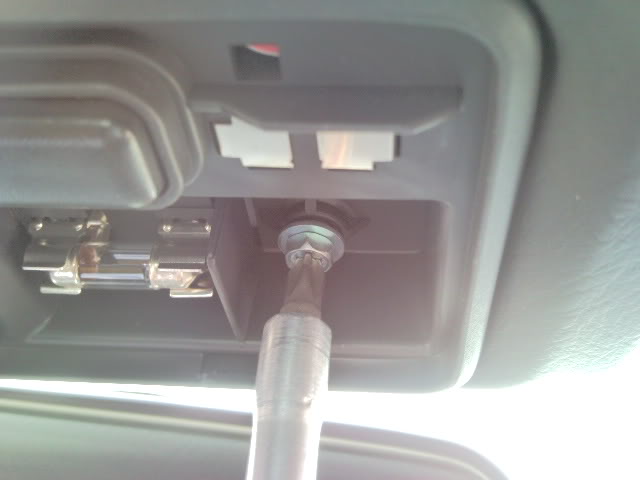
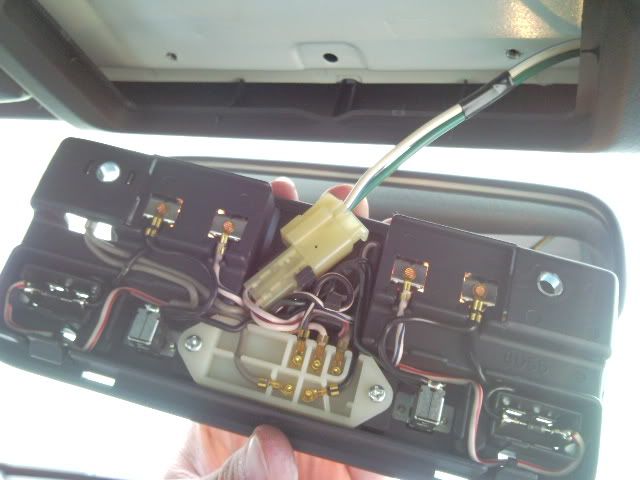
After you pop out the light, you'll need to disconnect it. Push down on the tab, and pull.
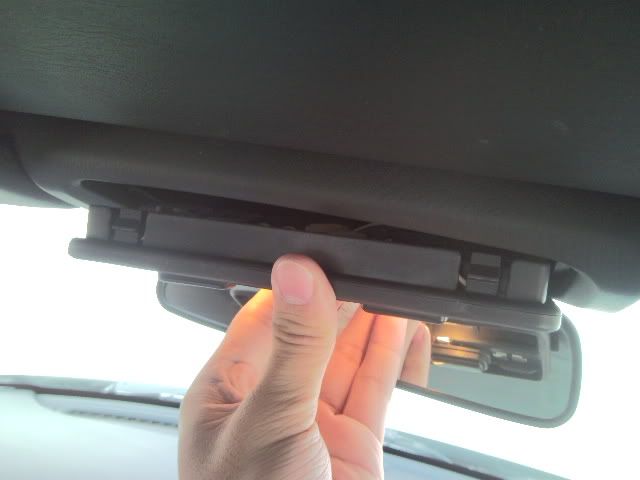
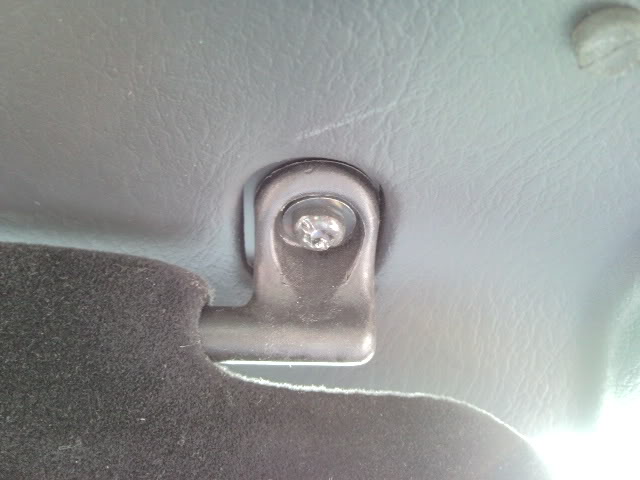
Next are the visors. I will show the passenger side. It is held on by one screw. This one will require a flathead. Torque this one hand-tight when replacing; it should be pretty loose from the factory, as the spec is only 3 ft/lbs.
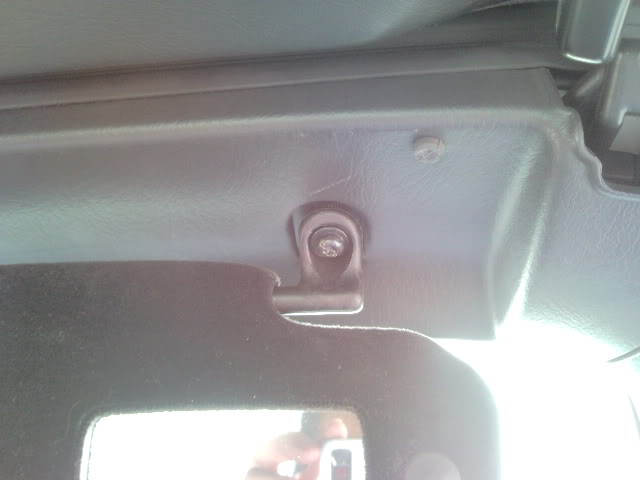
After the visors are off, you will pop off the A-piller covers. You'll want to use the pry tool near the top of the cover. Same as before, insert, and twist. Here is a picture of the two tabs that hold the pillar in. If you are only needing access to one side, you can leave the other side's cover on.
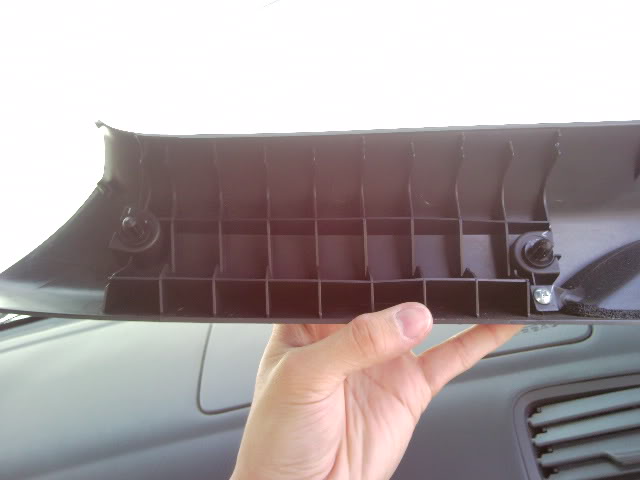
When replacing the pillar covers, make sure you put the weather stripping ABOVE the trim piece, not under, all the way down the side, and up to the top.
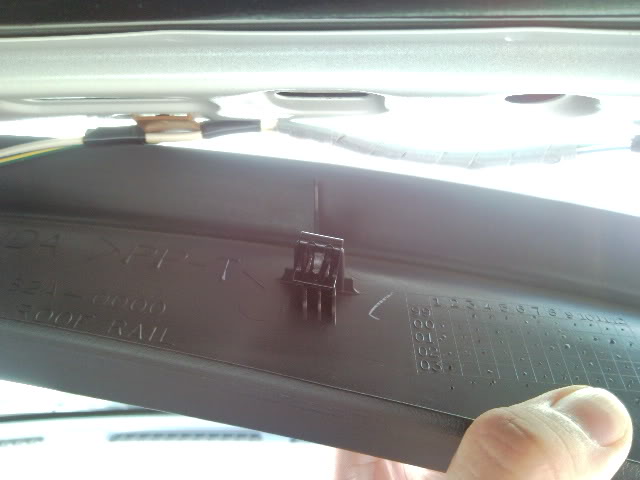
After the two A-piller pieces are removed, you can take off the top. If you are doing only one side, you can leave it hanging. Here is a picture of the passenger side tab on the top piece that holds it in. There are only two tabs.
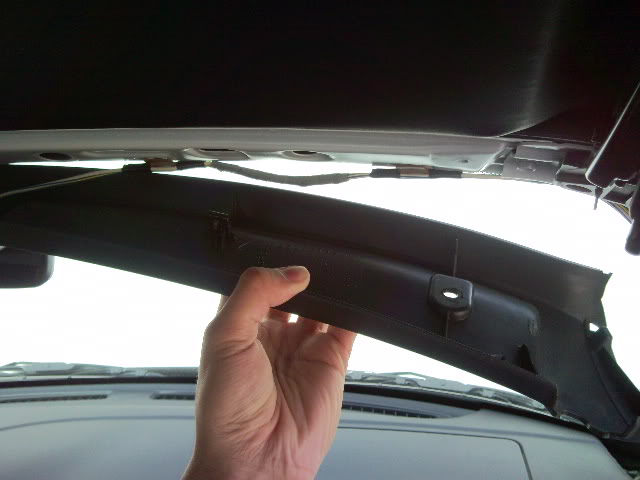
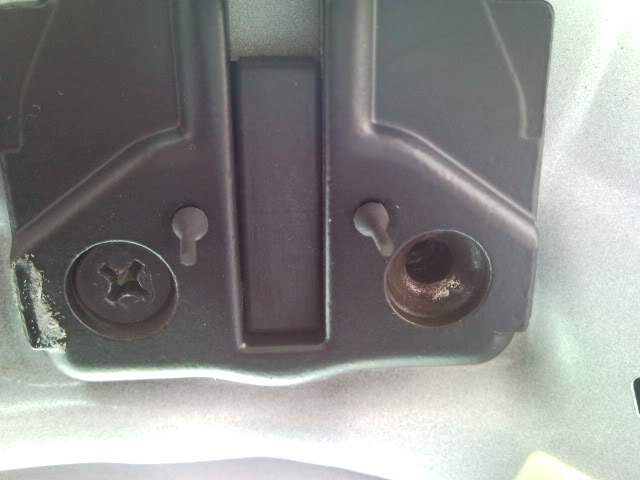
A picture of the striker. Mine had a screw that had completely backed out and the other was loose!
Reverse steps to replace the trim pieces.
The end result? My car is as quiet as new. I went on all the roads I typically avoided because the rattle was so jarringly loud. All gone. Success!
My car is new to me again!
Today, I got the inspiration to dig deeper. I'm not sure why. I started poking, prodding, shaking, and.... discovered this.
The striker is LOOSE?!?!?
So, to fix it...
First, the tools I used.
Left to right:
Screwdriver with Philips and Flat bits
Modifry plastic pry-tool (helps prevent scratches on your trim)
1/4" drive ratchet with 8mm deep socket
First, you remove the lens from the overhead light. There are two "pry points" toward the front of the car.
Insert your pry tool (or key/screwdriver, being careful not to scratch) and twist. The lens will easily pop out. Here's a few pictures of the tabs that hold it in.
Next, remove the light fixture. There are two bolts that hold it in. I used the 8mm deep socket to loosen it, and then a screw driver to take it out the rest of the way. (When putting it back, the factory manual states 7 ft/lbs, or hand tight with the screwdriver. There will be resistance for quite a few turns, but keep going until it stops. The bolt sits in metal, not plastic.)
After you pop out the light, you'll need to disconnect it. Push down on the tab, and pull.
Next are the visors. I will show the passenger side. It is held on by one screw. This one will require a flathead. Torque this one hand-tight when replacing; it should be pretty loose from the factory, as the spec is only 3 ft/lbs.
After the visors are off, you will pop off the A-piller covers. You'll want to use the pry tool near the top of the cover. Same as before, insert, and twist. Here is a picture of the two tabs that hold the pillar in. If you are only needing access to one side, you can leave the other side's cover on.
When replacing the pillar covers, make sure you put the weather stripping ABOVE the trim piece, not under, all the way down the side, and up to the top.
After the two A-piller pieces are removed, you can take off the top. If you are doing only one side, you can leave it hanging. Here is a picture of the passenger side tab on the top piece that holds it in. There are only two tabs.
A picture of the striker. Mine had a screw that had completely backed out and the other was loose!
Reverse steps to replace the trim pieces.
The end result? My car is as quiet as new. I went on all the roads I typically avoided because the rattle was so jarringly loud. All gone. Success!
My car is new to me again!


Joined: Jan 2003
Posts: 2,184
Likes: 95
From: Granville OH
Wow... Great writeup.
I'm starting to get a little rattle up there and I know that it's a matter of time before I need to dig into it. It's nice to have step-by-step instructions.
Thanks, Psychoazn!!!!!!
I'm starting to get a little rattle up there and I know that it's a matter of time before I need to dig into it. It's nice to have step-by-step instructions.
Thanks, Psychoazn!!!!!!


Trending Topics
Registered User
Joined: Jan 2003
Posts: 3,081
Likes: 2
From: Temecula, CA
The creaking I'm getting is from the side of the latches, the plastic housing itself. IF I squeeze on I can hear it squeak. My strikers are secure and the hook does not move.
Will stuffing some kind of foam in there cure this? Agye, where did you get that rubber foam weather stripping? Hardware store?
Will stuffing some kind of foam in there cure this? Agye, where did you get that rubber foam weather stripping? Hardware store?

Registered User
Joined: Mar 2012
Posts: 21
Likes: 0
Since d strikers r properly secured, d rattles r more likely generated by the movement between d strikers n latches that utilizes a hook to lock itself to d striker. What I did was using either fuel lines/silicone vacuum hosing by cutting out abt 5mm of it n inserting it around d hook, so that when d latch is locked in place, d layer of hose was in between d latch hook n d striker eliminating all vibrations not to mention tightening d soft/hardtop to d windshield. Trust me it works.