2008 IS250 Resurrected from the "Grey"

Thread Starter
Registered User
Joined: Mar 2006
Posts: 17,670
Likes: 0
From: Bay Area
This one was especially fun. It's an '08 IS250 with 24k on the odo  . And it definietly had signs of being beaten hard, and put away wet. Remember AJ's who I told you all about on my recent S4 thread? Well this one was another victim. Only it didn't get just washes from them.. they attempted to polish the car!
  So I knew I was in store for a rough couple of days. After 20 hours of work, I was fairly satisfied with the car
  .
.
To start things off, I got the car late Thursday morning, and after getting my things all sorted out I had started washing the car at around noon. For once over the past month or two, the sun was shining, and it was quite pleasant out (around mid-60s). So I was in for a treat!! Here's some pics of the car, it hasn't been washed in a few months.. :doh:


So when I say "grey" you know what I mean.. the car? SUPPOSED to be beautiful Obsidian Black, the wheels? Not supposed to be matte gunmetal, they're supposed to be gloss black!
The first thing I tackled was the rims/tires/wheel wells. I used Eimann Fabrik HI Cleaner for the wheels/wheel wells, and Eimann Farbik Tire Cleaner for the tires (duh). I then agitated it with various brushes. I had the opportunity to get a beta version of the new Gloss-It Wheel brush. I can say I am VERY impressed with the brush. It has longer bristles than the Swissvax brush, so it's easier to get to calipers, and around mesh rims. But the bristles aren't as stuff, so it molds istelf around the wheel faces effortlessly. I found myself grabbing the brush more than I did the swissvax or megs slidelock brush.


(using the GI Beta Brush).
After I had finished cleaning the rims, I moved on to the pre-foaming. I opted to use Optimum Power Clean at a heavy dilution rate as we can see the car is VERY soiled.


after I had let the suds sit in for a few minutes, while I was prepping my two buckets, I then pressure rinsed the car filtered with DI water.

Even with the temps only in the low-to-mid 60s, the paint was EXTREMELY hot, as you can see I'm right in the sun. While I was washing using the 2BM, even with the DI water, it was drying on the car, even if I were to rinse a panel at a time, it would still dry extrememly fast. So I decided it was a lost cause to try and finish the wash outside. So I rinsed it off real quick, and pulled it in to the garage dripping wet.

And then prepped my ONR! Again, using DI water and the 2BM (I rinsed out the buckets and cleaned them before re-using them for ONR), I onr'd the entire car; with the garage door shut! Worked like a charm.

You can see the difference.. hood onr'd, fender not.

..Even the doorjambs

..And under the hood

..And the engine cover(s)

After that, and claying with my new Riccardo yellow clay(!!), with Luber as lube. I brought the car out in the gorgeous sun to examine the paint work. HEre's what I found the last "detail" left behind..


Look at the holograms!


After the inspection, I brought the car back in to prep for surgery. I also got to play with the Highline ptg Denzil let me borrow! (Thanks Denzil!!). Paint readings were relatively thin throughout the car, but overall workable. The doorjambs read a low of 29, and a high of 44 microns . The rest of the car was in the 130-145 range. Not a LOT but enough

On to the paint correction. I started off planning on using all of the gloss-it products because I had just received the pads, and the beta of GI's new finishing polish.
So a pass with beta polish+GI'S yellow cutting pad, and finished with the beta polish and the blue finishing pad, this is what I got:

after 3 hours of messing with the products I had called it a day (around 6pm by now). GI products, while being made for the DA work VERY well with the Rotary once you get the process down. I was on a time table with the car, and unfortunately I couldn't get them 100% like I had wanted to. I haven't given up yet.. I have an X5 hood, and Mercedes fender to practice on over the next few weeks. If David(dsms), Bob(AutoConcierge), Rich(mrgloss), Ken(911fanatic), and Brian Hare(bhare) can all get 95-100% with these products.. I know it can be done and I'm damn determined to make them work! I know they can.. I just have to find the process that works for me best.
So I switched up my process to the much hyper Kevin Brown Method. Using my Flex DA, I primed a Lake Country Orange pad with M105, and then laying a beed down, working it in at speed 5-6 until it breaks down (usually a couple of minutes), using A LOT of pressure. I achieved almost 95% correction with this one step, only slight micromarring remained, which I cleaned up perfectly with a LC Black Pad, and M205 at speed 5.
These are after just the first step


As you can see here the slight mircromarring left by m105+orange pad (no hologramming though!!):

Then it was cleaned up 100% with m205:

. And it definietly had signs of being beaten hard, and put away wet. Remember AJ's who I told you all about on my recent S4 thread? Well this one was another victim. Only it didn't get just washes from them.. they attempted to polish the car! So I knew I was in store for a rough couple of days. After 20 hours of work, I was fairly satisfied with the car .To start things off, I got the car late Thursday morning, and after getting my things all sorted out I had started washing the car at around noon. For once over the past month or two, the sun was shining, and it was quite pleasant out (around mid-60s). So I was in for a treat!! Here's some pics of the car, it hasn't been washed in a few months.. :doh:
So when I say "grey" you know what I mean.. the car? SUPPOSED to be beautiful Obsidian Black, the wheels? Not supposed to be matte gunmetal, they're supposed to be gloss black!
The first thing I tackled was the rims/tires/wheel wells. I used Eimann Fabrik HI Cleaner for the wheels/wheel wells, and Eimann Farbik Tire Cleaner for the tires (duh). I then agitated it with various brushes. I had the opportunity to get a beta version of the new Gloss-It Wheel brush. I can say I am VERY impressed with the brush. It has longer bristles than the Swissvax brush, so it's easier to get to calipers, and around mesh rims. But the bristles aren't as stuff, so it molds istelf around the wheel faces effortlessly. I found myself grabbing the brush more than I did the swissvax or megs slidelock brush.
(using the GI Beta Brush).
After I had finished cleaning the rims, I moved on to the pre-foaming. I opted to use Optimum Power Clean at a heavy dilution rate as we can see the car is VERY soiled.
after I had let the suds sit in for a few minutes, while I was prepping my two buckets, I then pressure rinsed the car filtered with DI water.
Even with the temps only in the low-to-mid 60s, the paint was EXTREMELY hot, as you can see I'm right in the sun. While I was washing using the 2BM, even with the DI water, it was drying on the car, even if I were to rinse a panel at a time, it would still dry extrememly fast. So I decided it was a lost cause to try and finish the wash outside. So I rinsed it off real quick, and pulled it in to the garage dripping wet.
And then prepped my ONR! Again, using DI water and the 2BM (I rinsed out the buckets and cleaned them before re-using them for ONR), I onr'd the entire car; with the garage door shut! Worked like a charm.
You can see the difference.. hood onr'd, fender not.
..Even the doorjambs
..And under the hood
..And the engine cover(s)
After that, and claying with my new Riccardo yellow clay(!!), with Luber as lube. I brought the car out in the gorgeous sun to examine the paint work. HEre's what I found the last "detail" left behind..
Look at the holograms!
After the inspection, I brought the car back in to prep for surgery. I also got to play with the Highline ptg Denzil let me borrow! (Thanks Denzil!!). Paint readings were relatively thin throughout the car, but overall workable. The doorjambs read a low of 29, and a high of 44 microns
. The rest of the car was in the 130-145 range. Not a LOT but enough On to the paint correction. I started off planning on using all of the gloss-it products because I had just received the pads, and the beta of GI's new finishing polish.
So a pass with beta polish+GI'S yellow cutting pad, and finished with the beta polish and the blue finishing pad, this is what I got:
after 3 hours of messing with the products I had called it a day (around 6pm by now). GI products, while being made for the DA work VERY well with the Rotary once you get the process down. I was on a time table with the car, and unfortunately I couldn't get them 100% like I had wanted to. I haven't given up yet.. I have an X5 hood, and Mercedes fender to practice on over the next few weeks. If David(dsms), Bob(AutoConcierge), Rich(mrgloss), Ken(911fanatic), and Brian Hare(bhare) can all get 95-100% with these products.. I know it can be done and I'm damn determined to make them work! I know they can.. I just have to find the process that works for me best.
So I switched up my process to the much hyper Kevin Brown Method. Using my Flex DA, I primed a Lake Country Orange pad with M105, and then laying a beed down, working it in at speed 5-6 until it breaks down (usually a couple of minutes), using A LOT of pressure. I achieved almost 95% correction with this one step, only slight micromarring remained, which I cleaned up perfectly with a LC Black Pad, and M205 at speed 5.
These are after just the first step
As you can see here the slight mircromarring left by m105+orange pad (no hologramming though!!):
Then it was cleaned up 100% with m205:
Thread Starter
Registered User
Joined: Mar 2006
Posts: 17,670
Likes: 0
From: Bay Area
Hood done, fender not:

Look at the clearity achieved after perfecting a panel!!


Sorry I didn't take very many pictures.. I was so excited about the process working like the hype said it did.. I just kept going and going. Never did I thought I'd see the day where I would fully correct a BLACK car non the less in under 8 hours time!!!
After polishing, there was a LOT of dust, but no polish sling thank god! So I brought it outside for a nice wash. And then dried it with a blow dryer, followed up with GI Gloss Enhancer as a drying agent. After reading here how everyone dries cars with the aid of a QD I thought I'd give it a shot. Works really well!!

I then applied Gloss-It Signature gloss x2 with the flex DA and CCS Gold Pad, followed by Gloss-It Concorso Gloss x2 applied with a blackfire gold applicator pad.


I then turned my attention to the exhaust tips. They got the usual deoxidizer (I know that's not a word..) Mothers Mag & Aluminum Polish:


I then turned my attention to the interior. Before:


First things first was the all weather mats. I rinsed them down, sprayed Megs APC 7:1 on them, and agitated with an OXO brush, then rinsed off and left to dry:


I then turned my attention to the wood. They received ZAIO which was applied via the white side of a blackfire applicator pad:


Also (not pictured), the door jambs, and under hood areas were cleaned/protected with ZAIO and blackfire white pad.
The dash was first cleaned with 1Z Cockpit Premium, and then protected with 303.

The glass was treated with Werkstat Acrylic and then Acrylic Glos:

Not picture.. the rubber seals were treated with 1Z Gummi Pfledge, and the black trim by the windshield was treated with Black Wow.
Next was the leather. I tackled this with the Leather Masters Trio and various applicators.

Oops.. didn't make the timer, lets try again

Better
. I followed strong cleaner by Leather Vital, which was let to sit for an hour or so, and then followed up by Protection Creme.Some final touches included the tires and wheel wells being dressed with megs HD 3:1. The rims received Werkstat Prime Strong, followed by Werkstat Acrylic Jett, and then finally topped with Acrylic Glos.
Not on to a slew of afters.. but here's a reminder..
Now:


As always, C/C welcome!
Thanks for looking!!
Aaron


Thread Starter
Registered User
Joined: Mar 2006
Posts: 17,670
Likes: 0
From: Bay Area
Originally Posted by krshultz,Mar 15 2009, 08:01 PM
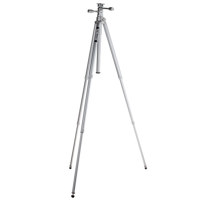
That's a damn good job when (I think) I can identify that you, too, use a Tiltall tripod for your picture taking...
 my dad bought it in the 70's when you were lucky to get a 35mm film camera with an adjustable lense.
  . If tiltall was in the 70's.. could be it!!

Registered User
Joined: Jan 2007
Posts: 1,511
Likes: 1
From: NC
Originally Posted by espelirS2K,Mar 15 2009, 07:35 PM
Thanks! Tiltall? my dad bought it in the 70's when you were lucky to get a 35mm film camera with an adjustable lense. . If tiltall was in the 70's.. could be it!!
my dad bought it in the 70's when you were lucky to get a 35mm film camera with an adjustable lense. . If tiltall was in the 70's.. could be it!!