
Full suspension fitting guide

Thread Starter
Registered User
Joined: May 2006
Posts: 12,330
Likes: 0
From: Frustration
Right, I started to fit the suspension today but have been hampered by really crap weather.
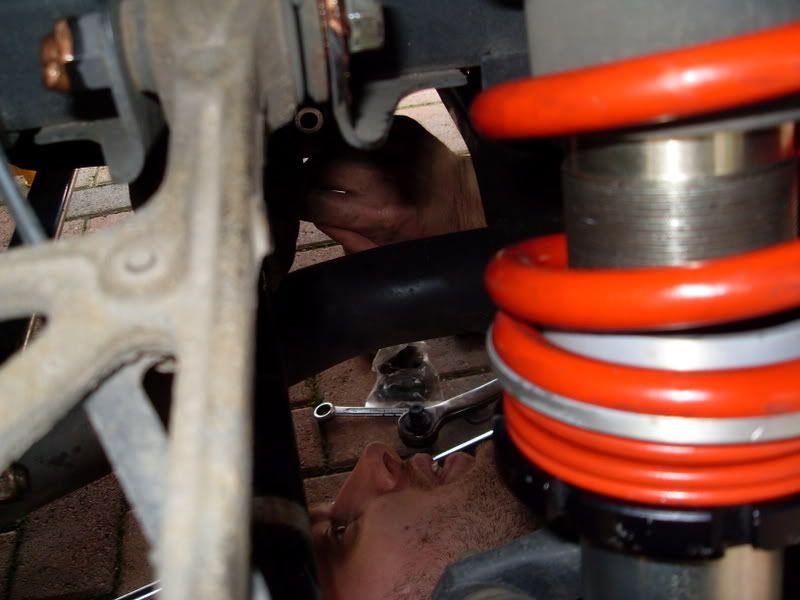
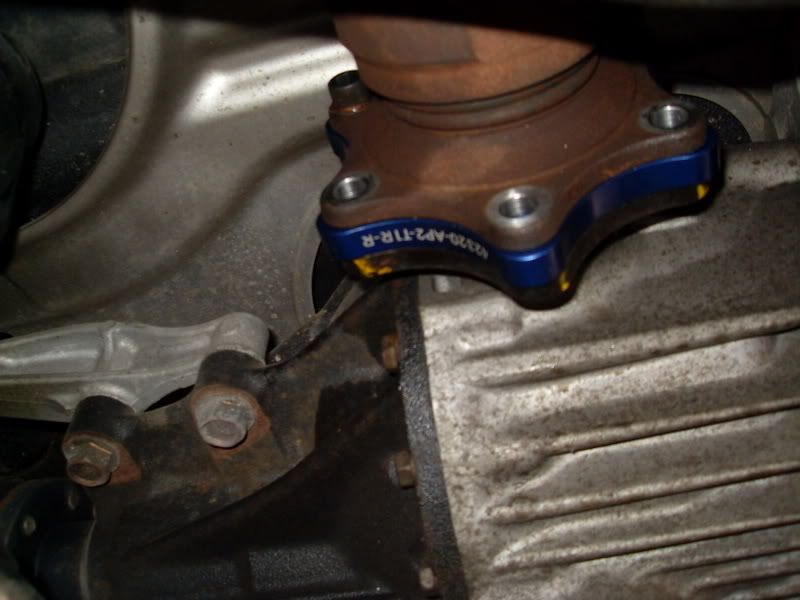
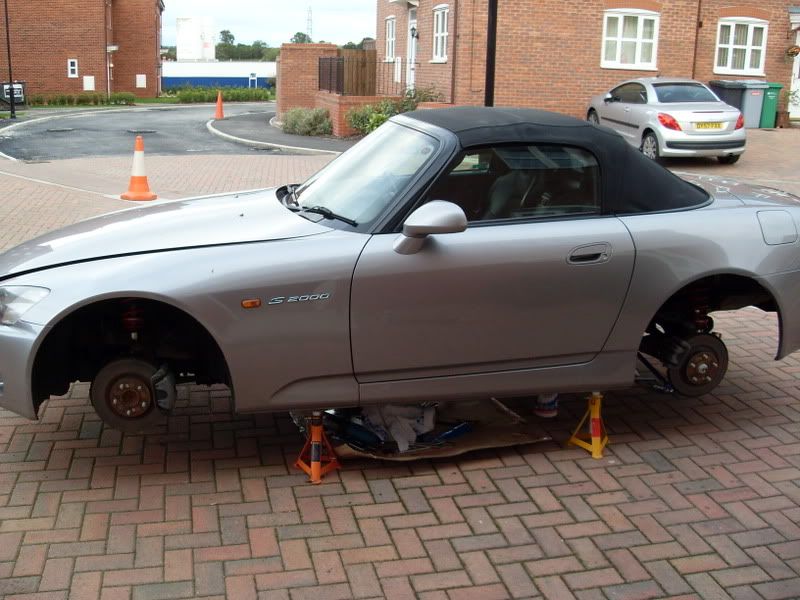
Good news is that between rain, I managed to get the hardest corner (the N/S/R) done including shaft spacer fitment.
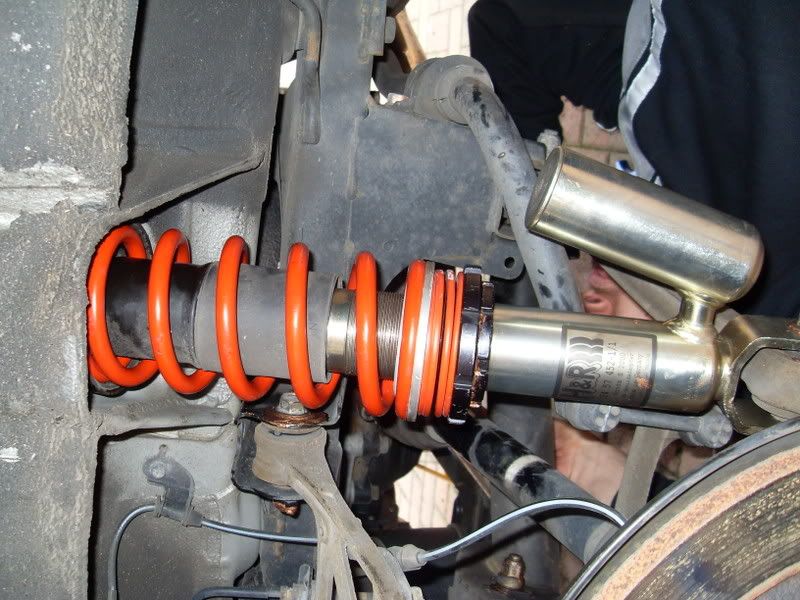
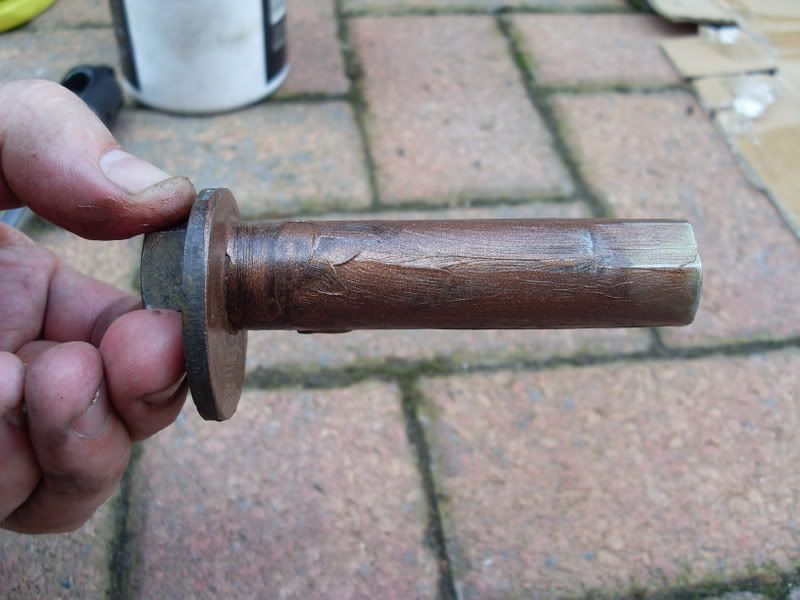
Also copper slipped all the bolts that connect the suspension. On my particlular car - the bolts were pretty much like new with near zero corrosion. JDM FTW I think
Anyway, if you are going to plan to do it all in one hit like I am doing, then i'll tell you about the PITA pitfalls I have been falling into so you can save yourself some precious time.
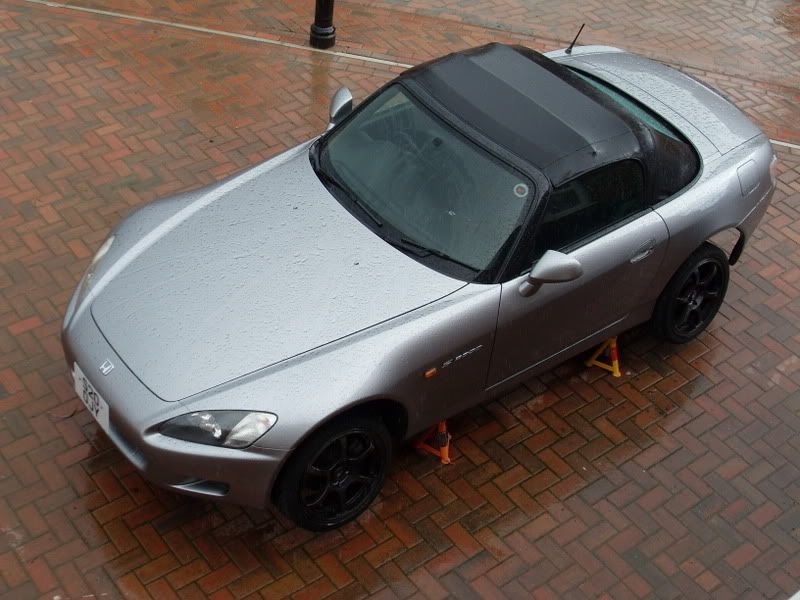
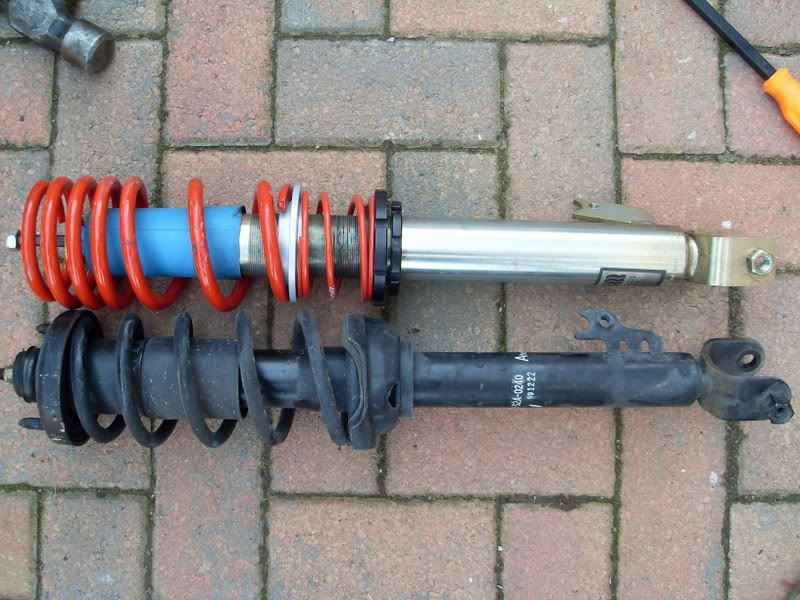
For now here are some pics of where i'm at:
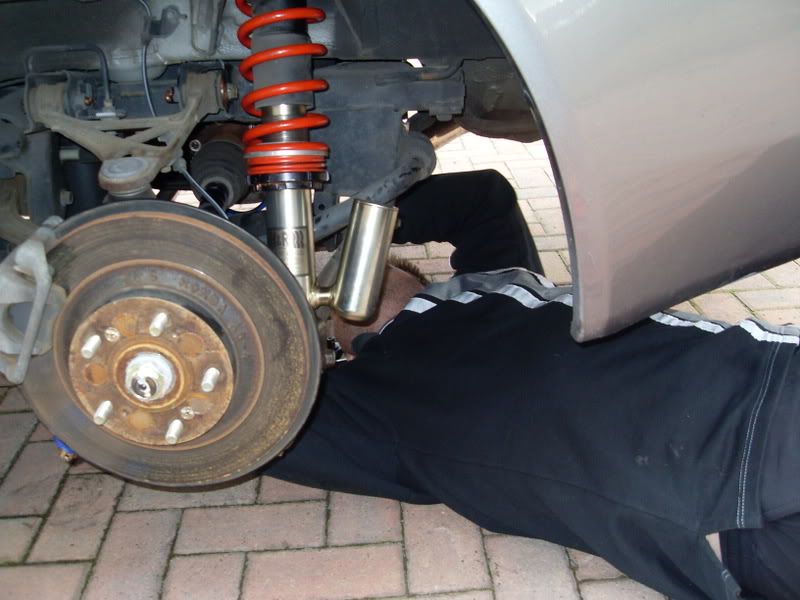
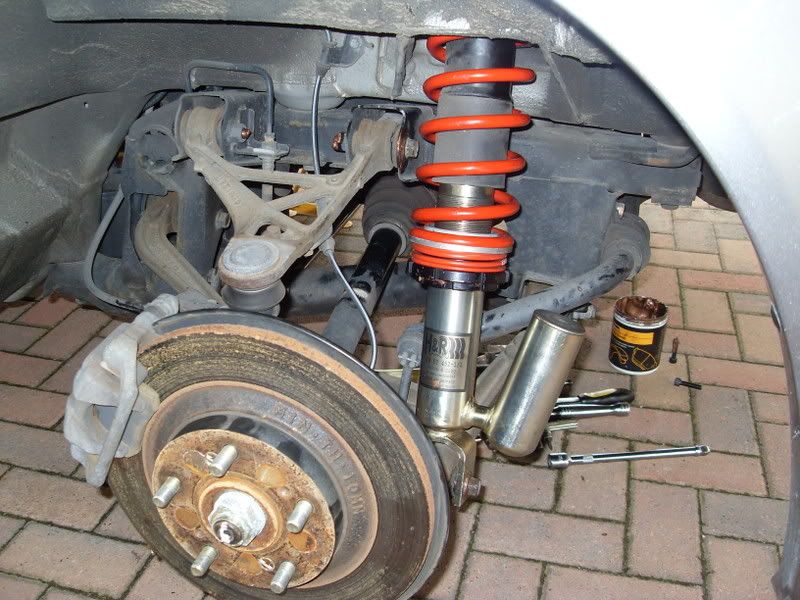
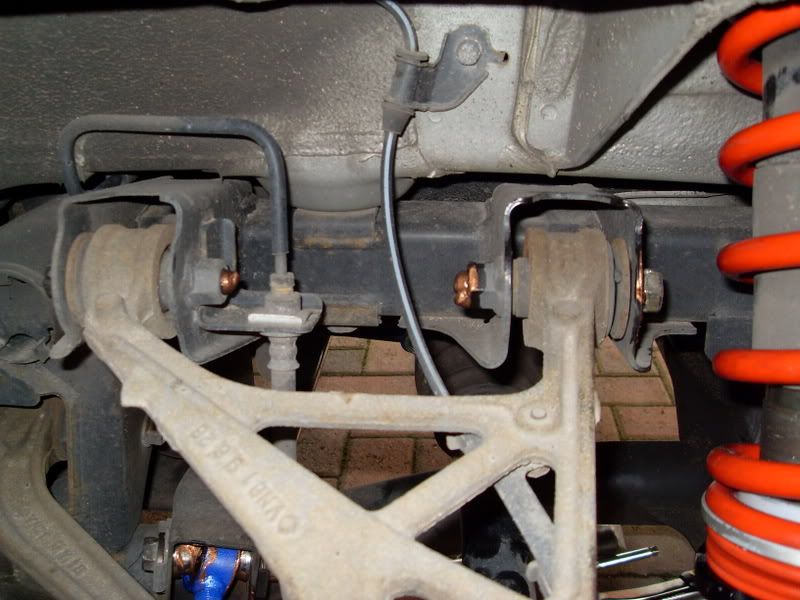

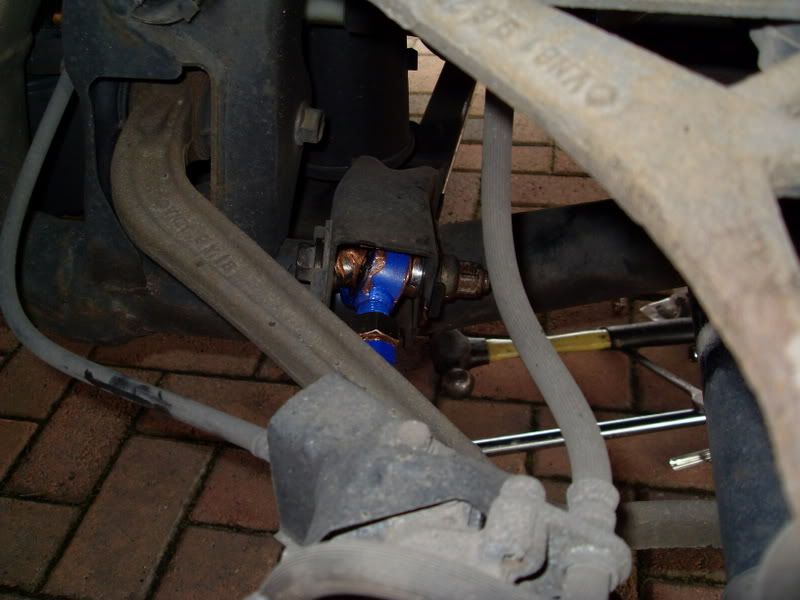
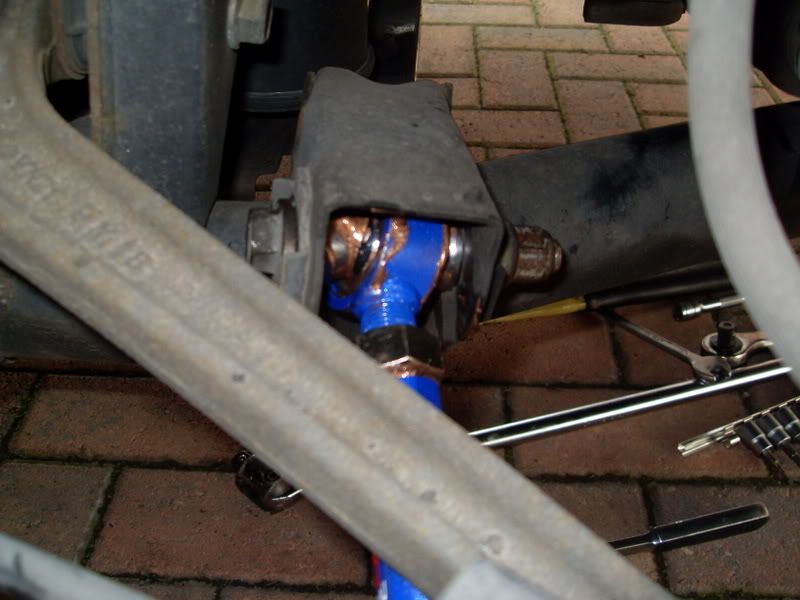
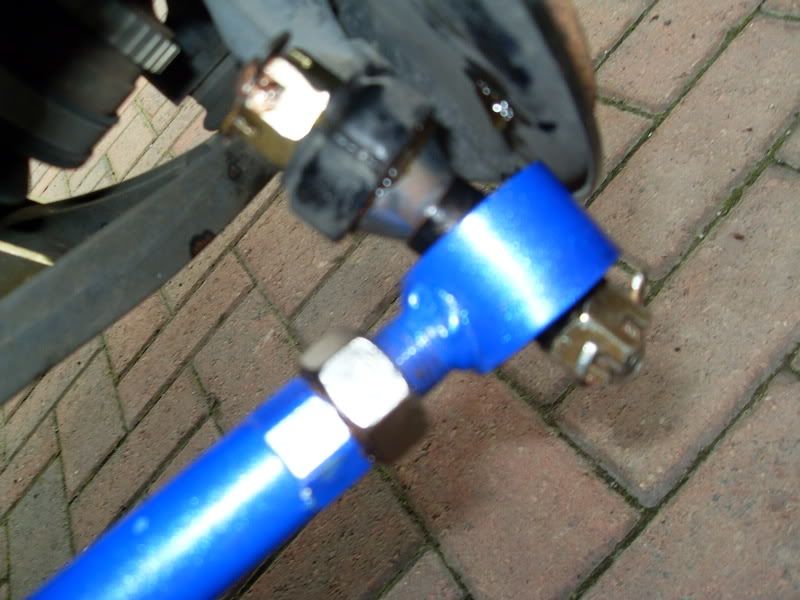
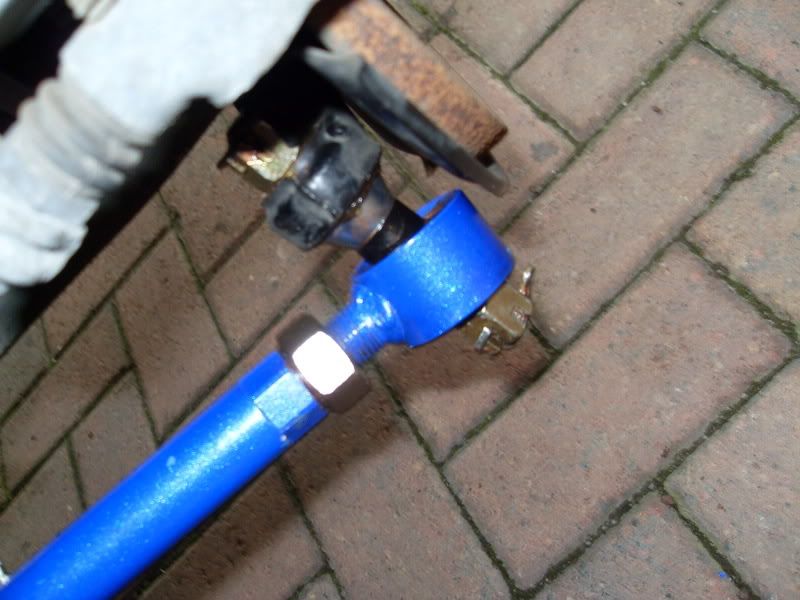
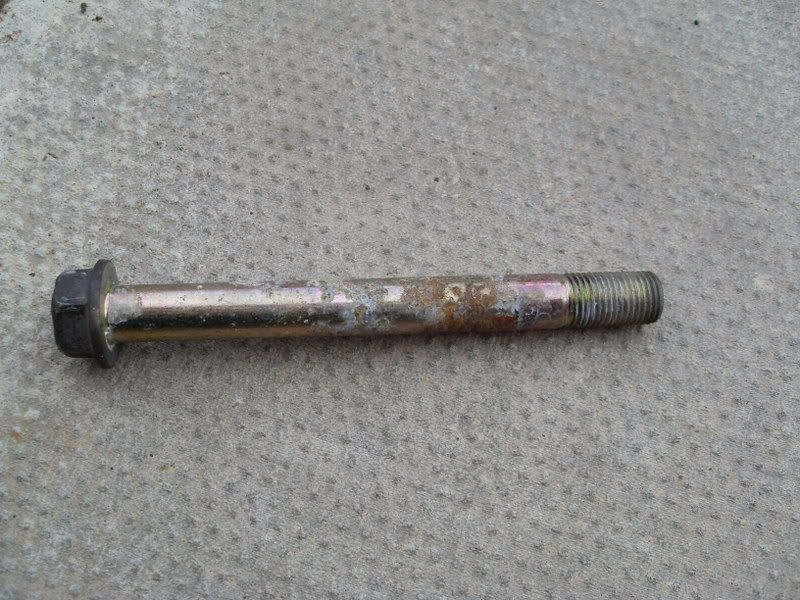
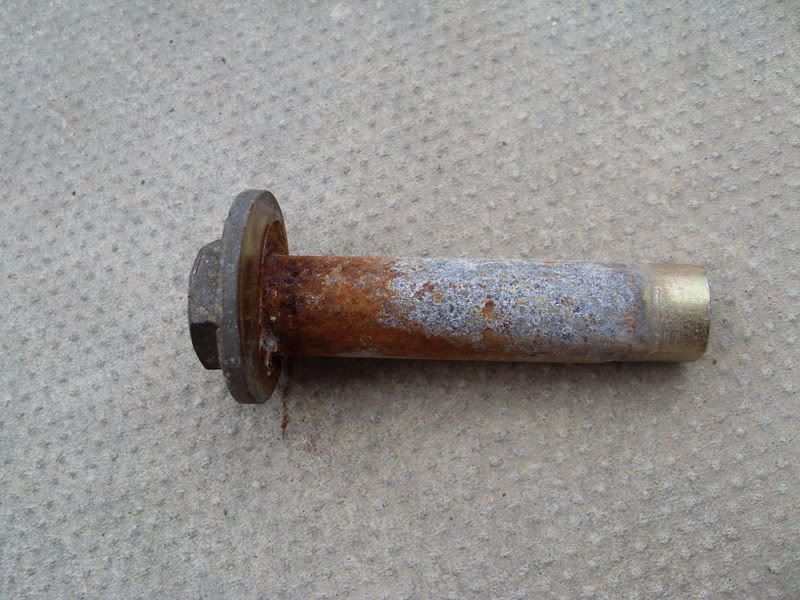
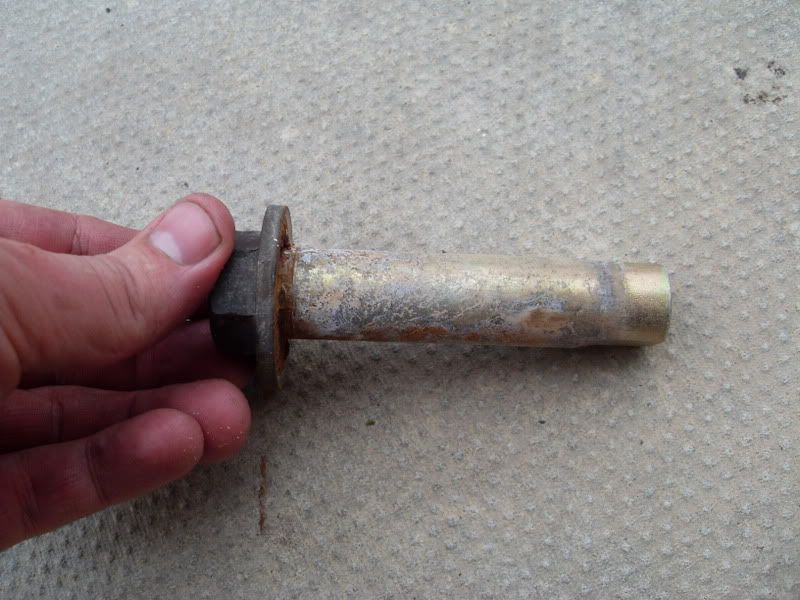
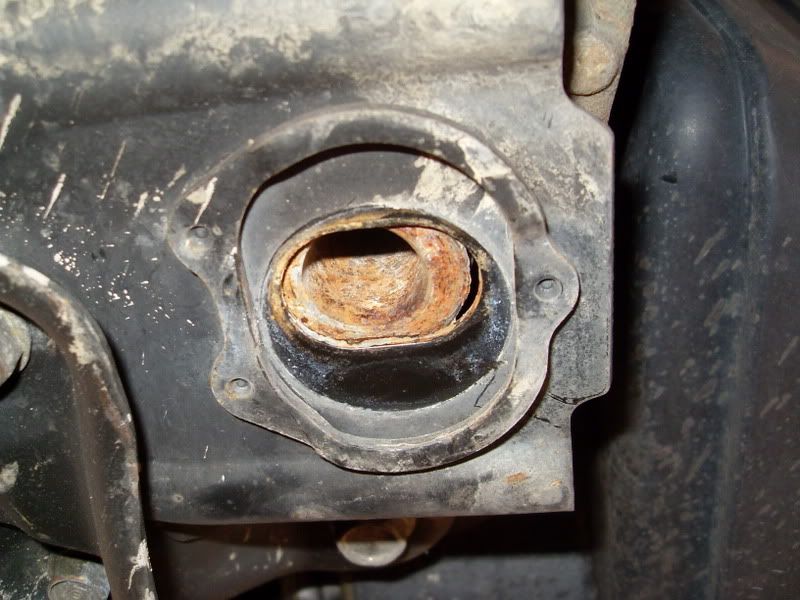
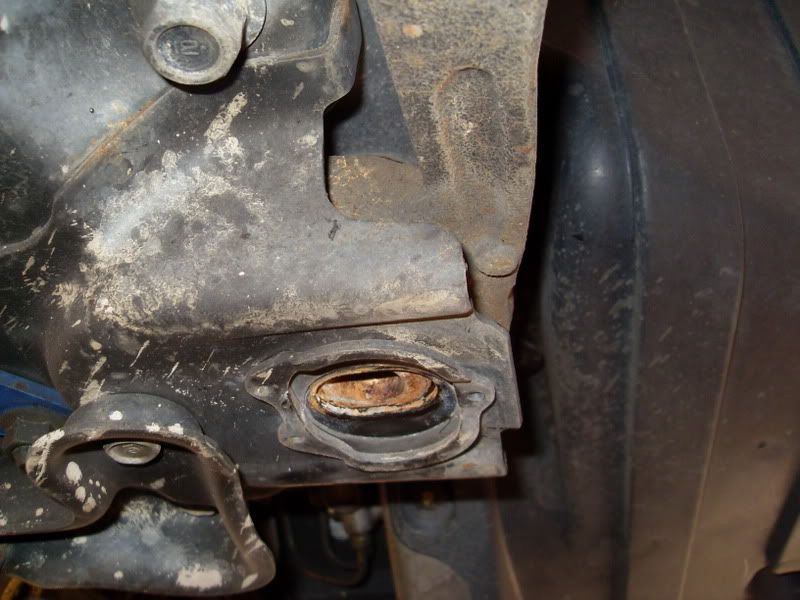
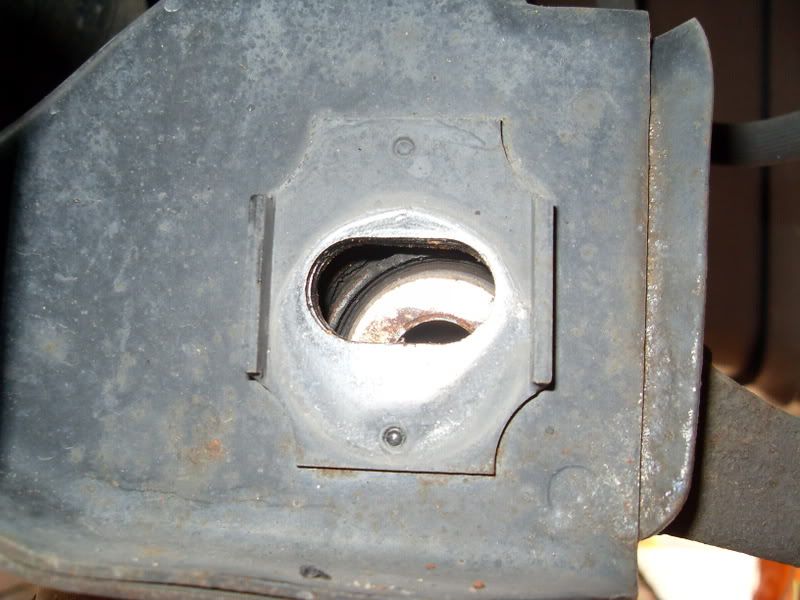
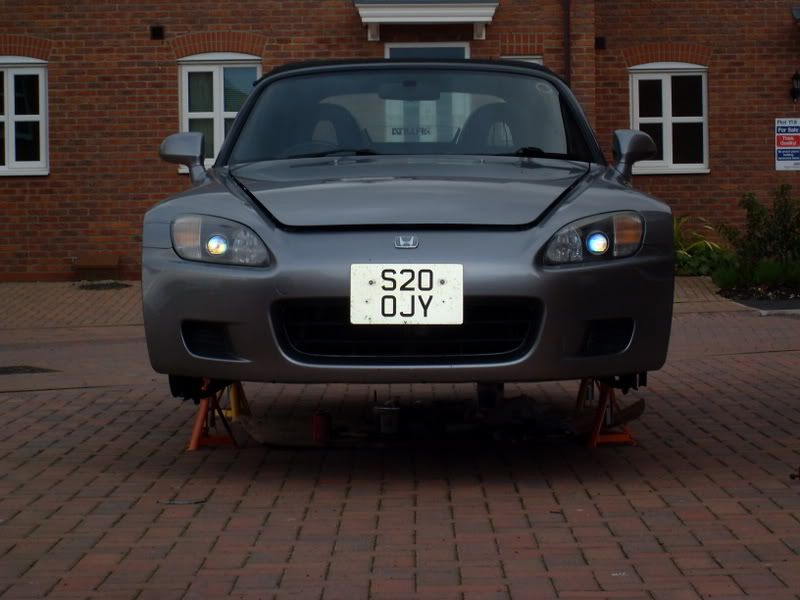
And then I got to the front. The corrosion here was more intense. TBH, I think I got there just in time, but I know there have been much worse:
Rest will wait till tomorrow now. I'll be doing some more video in the hope it proves as useful as the last ones
Good news is that between rain, I managed to get the hardest corner (the N/S/R) done including shaft spacer fitment.
Also copper slipped all the bolts that connect the suspension. On my particlular car - the bolts were pretty much like new with near zero corrosion. JDM FTW I think
Anyway, if you are going to plan to do it all in one hit like I am doing, then i'll tell you about the PITA pitfalls I have been falling into so you can save yourself some precious time.
For now here are some pics of where i'm at:
And then I got to the front. The corrosion here was more intense. TBH, I think I got there just in time, but I know there have been much worse:
Rest will wait till tomorrow now. I'll be doing some more video in the hope it proves as useful as the last ones


Joined: Nov 2003
Posts: 25,566
Likes: 2
From: Heart of England
Good work
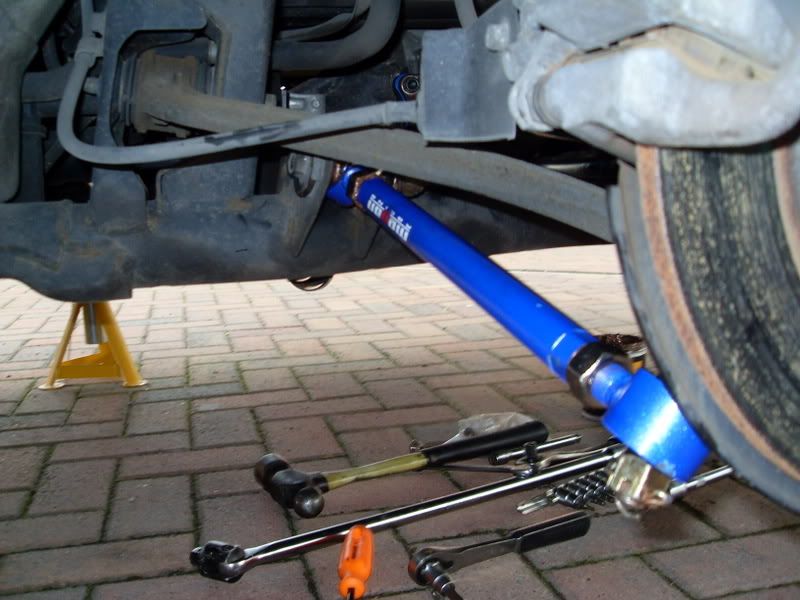
Did the top wishbone bolts as well
I did the rear lower wishbone front bolt as well.
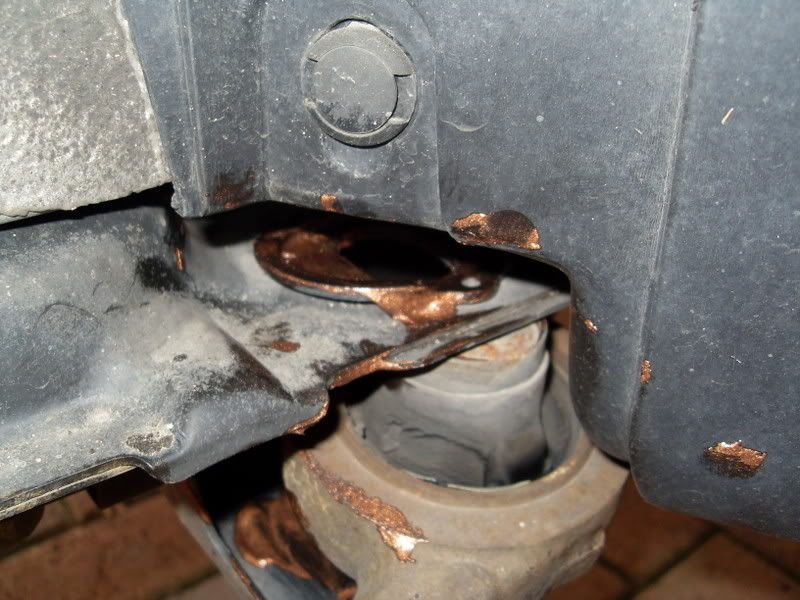
Caught those camber adjusters just in time, I've seen 18 month old UK cars worse!
Don't forget to preload it all before you torque it up!
Did the top wishbone bolts as well
I did the rear lower wishbone front bolt as well.
Caught those camber adjusters just in time, I've seen 18 month old UK cars worse!
Don't forget to preload it all before you torque it up!

Registered User

Joined: Jun 2006
Posts: 2,142
Likes: 2
From: Upper West Side
Nice work Helen on the photo's.
Ron I am sure, me bein the cooper grease expert, I don't think you have used enough
 Nice work by the way
 Kiwi
P.S> I am sure Puppy will be along shortly to verify, I am the copper grease expert user

Thread Starter
Registered User
Joined: May 2006
Posts: 12,330
Likes: 0
From: Frustration
Thanks for the comments!
Mark - Yeah, I will have a new plate for JAE Geometry will be getting done at buckley tyres. I will be 'borrowing' the fast road specs from Paul 'Nut's car
MBK - The two I have just done were a recce for my instructional that I will perform tomorrow. There will be detail photos plus instructions and video to guide everyone through the process. It's not mega hard, but it will prepare you and save you a LOT of time I was going to do the video for the front spacer fitting but my g/f has just cooked me steak
Mikey - I'm many things but not one to perform half arsed jobs. The upper wishbone bolts were actually in very good condition. As for preloading - I have a feeling that I have set the car low. I'll give it a test, adjust the height and then torque up The geometry will be getting done pretty much immediately anyways
Col - The copper grease is everywhere. I must say, it takes 3 times as long to clean, apply, then refit, but I know it'll be worth it.
Mark - Yeah, I will have a new plate for JAE
Geometry will be getting done at buckley tyres. I will be 'borrowing' the fast road specs from Paul 'Nut's car MBK - The two I have just done were a recce for my instructional that I will perform tomorrow. There will be detail photos plus instructions and video to guide everyone through the process. It's not mega hard, but it will prepare you and save you a LOT of time
I was going to do the video for the front spacer fitting but my g/f has just cooked me steak Mikey - I'm many things but not one to perform half arsed jobs. The upper wishbone bolts were actually in very good condition. As for preloading - I have a feeling that I have set the car low. I'll give it a test, adjust the height and then torque up
The geometry will be getting done pretty much immediately anyways Col - The copper grease is everywhere. I must say, it takes 3 times as long to clean, apply, then refit, but I know it'll be worth it.


Trending Topics
Joined: Aug 2002
Posts: 14,318
Likes: 3
From: West Midlands
The upper wishbone bolts are usually fine as they are "ribbed" (Someone correct my slightly-lewd description with the proper description) and so it is more difficult for the corrosion to build up. I had several problematic lower wishbone bolts but the top wishbone bolts were perfectly clean.