

CURT Hitch review

Thread Starter

Joined: Aug 2010
Posts: 412
Likes: 2
From: Fog City
When I was looking for solution I didn't find any more or less full review here (including closeup pictures).
Picked up:
CURT Class I Hitch - 1-1/4" Receiver Tube opening
Product # 111980
Weight Carrying:2000 lb.
Tongue Weight:200 lb.
Seems like best price can be found here: http://www.hitchdepotusa.com
I bought mine here since I didn't catch it was actually CURT hitch and not their own design and manufacturing. Tom price-matched it at the end and was super tolerant and nice.
Few things to notice:
Weight: ~40lbs
Design and construction: very nice and solid.
Once installed clears the bottom of the bumper nicely with just right amount of gap.
I didn't look at installation instructions first but only later and found few steps somewhat misleading. So basically I jacked up the rear, removed bumper and slided hitch in to test-fit it. There are two holes in the frame tube/bar on each side. And so you can use those to align the hitch and then drill two more. Now comes fun part: I had to completely remove exhaust since there was no enough clearance to dill those holes. Instructions suggest to drill access hole to fishwire bolts - I didn't want to do that. Instead decided to remove rear cross bar (three bolts on the left and two on the right) and really hoped to see holes to get inside of the frame. There is hole on each side that I had to drill out to let bolt/washer through (pic #2). It works out just great. So with second pair of hands holding the hitch (or if you're by yourself you can use flat piece of wood and jacks to support the hitch) wishwire first bolt and use hole most close to the front. Once it's sticking out I used thin pliers to hold it in place and make sure I won't loose it while aligning hitch and putting it in place. Slightly tight up the nut and move to the other side. Then repeat with two remaining holes. Do not tight nuts too much since you may need to make little adjustments to the hitch position - though there is no much play and room to do so. Now drill two holes. You need 1/2 inch drill bit for that. Fishwire remaining two bolts. Double check alignment - and tight up all six nuts. Now comes second fun part - most rear bolts will stick out too much and so there is no enough clearance for exhaust (mine is stock); Cut the bolt flat to the bottom of the nut. Grinder can help. Now ready to put exhaust back. Double check clearance everywhere. Don't forget removed cross bar before installing the bumper back. You're done.
Below are few pictures I took during the process. I figured it will help more to understand how it looks like and what are possible concerns related to the installation and use. I'm lowered but with Yakima highlite aluminum (http://www.etrailer.com/Hitch-Bike-R...ma/Y02438.html - 20lbs btw) I didn't scratch anywhere (yet); Overall I like it and to me it's the best solution available. Comments/concerns - please post here. Hope it helps somebody.
#1
#2
#3
#4
#5
#6
#7
#8
#9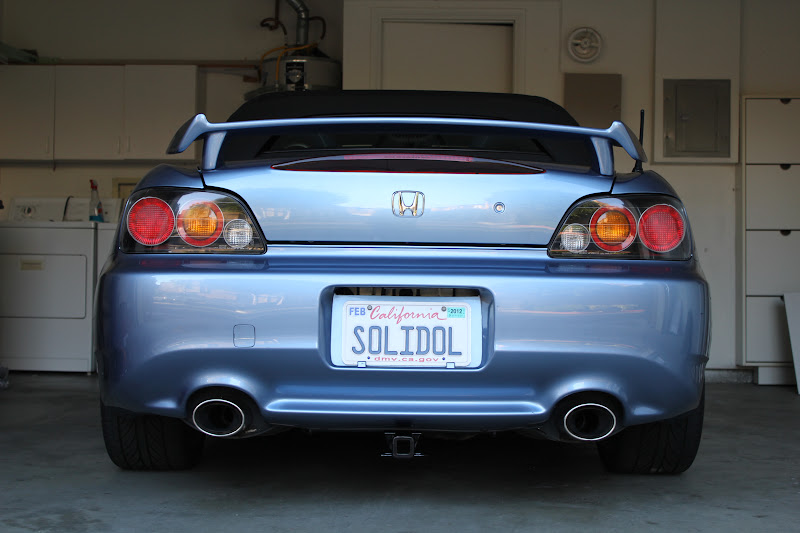
#10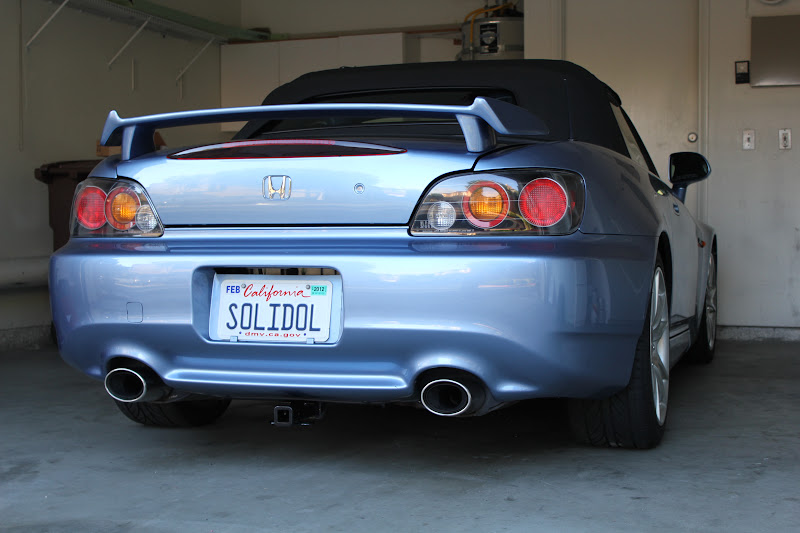
#11
With my drop bike rack most lowest point is just shy of coke can

And finally with my bike on:

Picked up:
CURT Class I Hitch - 1-1/4" Receiver Tube opening
Product # 111980
Weight Carrying:2000 lb.
Tongue Weight:200 lb.
Seems like best price can be found here: http://www.hitchdepotusa.com
I bought mine here since I didn't catch it was actually CURT hitch and not their own design and manufacturing. Tom price-matched it at the end and was super tolerant and nice.
Few things to notice:
Weight: ~40lbs
Design and construction: very nice and solid.
Once installed clears the bottom of the bumper nicely with just right amount of gap.
I didn't look at installation instructions first but only later and found few steps somewhat misleading. So basically I jacked up the rear, removed bumper and slided hitch in to test-fit it. There are two holes in the frame tube/bar on each side. And so you can use those to align the hitch and then drill two more. Now comes fun part: I had to completely remove exhaust since there was no enough clearance to dill those holes. Instructions suggest to drill access hole to fishwire bolts - I didn't want to do that. Instead decided to remove rear cross bar (three bolts on the left and two on the right) and really hoped to see holes to get inside of the frame. There is hole on each side that I had to drill out to let bolt/washer through (pic #2). It works out just great. So with second pair of hands holding the hitch (or if you're by yourself you can use flat piece of wood and jacks to support the hitch) wishwire first bolt and use hole most close to the front. Once it's sticking out I used thin pliers to hold it in place and make sure I won't loose it while aligning hitch and putting it in place. Slightly tight up the nut and move to the other side. Then repeat with two remaining holes. Do not tight nuts too much since you may need to make little adjustments to the hitch position - though there is no much play and room to do so. Now drill two holes. You need 1/2 inch drill bit for that. Fishwire remaining two bolts. Double check alignment - and tight up all six nuts. Now comes second fun part - most rear bolts will stick out too much and so there is no enough clearance for exhaust (mine is stock); Cut the bolt flat to the bottom of the nut. Grinder can help. Now ready to put exhaust back. Double check clearance everywhere. Don't forget removed cross bar before installing the bumper back. You're done.
Below are few pictures I took during the process. I figured it will help more to understand how it looks like and what are possible concerns related to the installation and use. I'm lowered but with Yakima highlite aluminum (http://www.etrailer.com/Hitch-Bike-R...ma/Y02438.html - 20lbs btw) I didn't scratch anywhere (yet); Overall I like it and to me it's the best solution available. Comments/concerns - please post here. Hope it helps somebody.
#1
#2
#3
#4
#5
#6
#7
#8
#9
#10
#11
With my drop bike rack most lowest point is just shy of coke can
And finally with my bike on:


Thread Starter
Joined: Aug 2010
Posts: 412
Likes: 2
From: Fog City
I've seen your thread before when was browsing around for available solutions - very nice.

Registered User
Joined: Apr 2008
Posts: 137
Likes: 0
From: Alamo, CA USA
It looks good. The hitch sits a little low, but I'm not too concerned for my stock height AP2. Just looking for a little more clarification. It seems there was drilling involved. but was it required to get the hitch installed or was that something you decided to do?

Registered User
Joined: Dec 2011
Posts: 2
Likes: 0
Great thread! I just picked up the Curt hitch for my '04 to carry my Yakima rack with my mountain bike and plan on doing this Friday.
Last night I got the car on ramps, took one look and said "no way this is happening tonight" when I realized the entire exhaust has to basically be removed for clearance.
I really like the idea of feeding the bracket/carriage bolt through the end of the rail. You mentioned picture #2 but I don't see any holes that were rounded out. Are you referring to the two larger (look to be ~3/4") holes? Pic #8 shows one of the two I'm referring to.
Registered User
Joined: Dec 2011
Posts: 2
Likes: 0
[media]http://a2.sphotos.ak.fbcdn.net/hphotos-ak-ash4/409476_2997094617174_1556493335_32793445_106960313 3_n.jpg[/media]
So I'm rolling the dice with a Harbour Freight step bit to round of the end of the frame rails to get the six reinforcement brackets and carriage bolts in there.
Thanks again for the write up.
So I'm rolling the dice with a Harbour Freight step bit to round of the end of the frame rails to get the six reinforcement brackets and carriage bolts in there.
Thanks again for the write up.
Trending Topics
Thread Starter
Joined: Aug 2010
Posts: 412
Likes: 2
From: Fog City
Great thread! I just picked up the Curt hitch for my '04 to carry my Yakima rack with my mountain bike and plan on doing this Friday.
Last night I got the car on ramps, took one look and said "no way this is happening tonight" when I realized the entire exhaust has to basically be removed for clearance.
I really like the idea of feeding the bracket/carriage bolt through the end of the rail. You mentioned picture #2 but I don't see any holes that were rounded out. Are you referring to the two larger (look to be ~3/4") holes? Pic #8 shows one of the two I'm referring to.
Last night I got the car on ramps, took one look and said "no way this is happening tonight" when I realized the entire exhaust has to basically be removed for clearance.
I really like the idea of feeding the bracket/carriage bolt through the end of the rail. You mentioned picture #2 but I don't see any holes that were rounded out. Are you referring to the two larger (look to be ~3/4") holes? Pic #8 shows one of the two I'm referring to.
[media]http://a2.sphotos.ak.fbcdn.net/hphotos-ak-ash4/409476_2997094617174_1556493335_32793445_106960313 3_n.jpg[/media]
So I'm rolling the dice with a Harbour Freight step bit to round of the end of the frame rails to get the six reinforcement brackets and carriage bolts in there.
Thanks again for the write up.
So I'm rolling the dice with a Harbour Freight step bit to round of the end of the frame rails to get the six reinforcement brackets and carriage bolts in there.
Thanks again for the write up.
And sure.. NP. Glad it's helpful.

Registered User
Joined: Feb 2014
Posts: 25
Likes: 5
Great thread, thanks Solidol for your tips! They helped me out quite a bit. I just installed my Curt Hitch on my MY ‘05. Here’s some notes that might help others.
The Part # that I purchased is #11198. I got it thru www.etrailer.com Their prices are very competitive, and they’re very responsive with the emails. I had bought a Curt hitch thru them before for my ‘05 STi. No complaints here.
Here are the official instructions:
http://www.curtmfg.com/part/11198
The weight of this hitch is 22.8 lbs., not including hardware or any attachments. Feels very solid. The paint job is pretty good. Made in USA!
Removing bumper - there’s a good procedure here:
http://www.chaserace.com/s2k.php
There’s separate threads on taking off the exhaust. This one’s the most-helpful. I’m going to add some pics at that link, since the pic links are dead now.
https://www.s2ki.com/s2000/topic/173...your-comments/
So…..the most time-intensive part of the install is taking off the exhaust! As Solidol pointed out, there’s no way you’re going to be able to drill those two ½” holes required. The directions state that you can lower the exhaust. Actually, that is the way I went, since I could not get one of the three 14mm bolts holding the exhaust to the cat. I let it soak in PB Blaster for hours. I also applied a little heat to it. The weird thing is the nut in question seemed rounded already. Didn’t looked stripped. I started to Dremel off the nut but eventually just moved the exhaust to the side.
Save a LOT of time and elbow grease by spraying those hangers with Silicon Spray. I had this on-hand. I could easily pull those hangers off with my hands without any pry bars or tools...
Removing the rear bumper cover and beam is key….*great* tip. The existing hole that the instructions say to expand to create an access hole is pretty hard to drill through. I agree with Solidol on taking this approach and avoid this. You can see through the end of the beam, so it makes fishing those wiring really easy.
See below, this is the hole you need to make a bit bigger. Actually the bolts fit thru, but it’s the square hole spacers that don’t. I had a ‘nibbler’ tool. The metal isn’t so thick here, so it worked great. I didn’t have to round out the holes, since the square slots provided clearance.


The four existing holes (2 per side) work ‘as-is’. This shows the one you need to drill (on each side):

Since you’re fishing the hardware through the end of the beam, you don’t need to make the front holes any larger for access. Ignore the ‘reverse pull fishwire technique’ in the instructions.


Another key is follow Solidol’s tip and cut off the two rear bolts, the one’s closest to you. Cut them flush, leaving no threads exposed. I have stock exhaust, and had left a couple of threads exposed because I couldn’t get my Dremel cutting wheel in there without an angled cut. It was rubbing, so I went back in with a hacksaw and made it flush. Those carriage bolts take an 11/16” Socket and are torqued to 70 ft-lbs, per instructions.

So far...if I did it again, I’d probably get a step drill bit or reamer tool to make those two drill holes quicker. I used my on-hand stock of bits and kept stepping up. That steel is thick there. I’d also soak those three exhaust bolts overnight, so that I could have successfully removed the entire exhaust.
Also, an angle grinder would make quick work of those two bolts that need trimming. Took a long time with a Dremel and heavy duty cutting wheel.
Review and final pix coming...
Registered User
Joined: Feb 2014
Posts: 25
Likes: 5
Some final pix here....and a bunch of misc. 'supporting' pix 
I like the fact that the hitch is recessed...you really can't see the supporting beam. I plan on leaving it on year round.


Clearance looks ok so far. I'm lowered 1" on Eibach Pro-Kit Springs. This bike rack holds two. I like the fact that it holds two bikes and supports the wheels. It's from Performance Bike. It's pretty old, actually, not sure if they make an updated model.


Parts from Kit:

By the way, take note of how those foam blocks go back on the bumper beam. You'll have a hard time putting the bumper cover back on if you reverse them (don't ask me how I know )
)

The "before" drilling pic:

Part #:

I installed this solo. The "crate" method helped me line up the hitch so I could mark the hole. Re-check your hole after drilling.

The recommended 1/2" mounting hole gives you a little lateral adjustment, but no front-back. Might consider making that bigger just in case.

Goin' fishin'

I like the fact that the hitch is recessed...you really can't see the supporting beam. I plan on leaving it on year round.


Clearance looks ok so far. I'm lowered 1" on Eibach Pro-Kit Springs. This bike rack holds two. I like the fact that it holds two bikes and supports the wheels. It's from Performance Bike. It's pretty old, actually, not sure if they make an updated model.


Parts from Kit:

By the way, take note of how those foam blocks go back on the bumper beam. You'll have a hard time putting the bumper cover back on if you reverse them (don't ask me how I know
)
The "before" drilling pic:

Part #:

I installed this solo. The "crate" method helped me line up the hitch so I could mark the hole. Re-check your hole after drilling.

The recommended 1/2" mounting hole gives you a little lateral adjustment, but no front-back. Might consider making that bigger just in case.

Goin' fishin'
