Engine Bay Tuck Over Winter...
 09-26-2011, 07:30 PM
#1
Registered User
Thread Starter

Join Date: Jul 2010
Location: Geneva, NY 14456
Posts: 1,023
Likes: 0
Received 0 Likes
on
0 Posts
Hello everyone,
So i have been buying/making "bling" and performance parts for the engine bay all last winter and this summer and i think i am to that point where i want to start tucking some of the uglies away this winter. Why am i doing this? To get more familiar with the car and to give the bay a cleaner look. I am NOT pulling the motor and do not plan on filling all the holes at this time. This thread will help me keep track of all the threads i will be referencing and allow me to post my progress as well as allow you to help me along the way
Removing:
Washer Fluid bottle
Air Pump (Kit on the way)
I don't think there is anything else i want to leave out...
Relocation:
Battery to the trunk
Main Fuse Box to the Passenger footwell
Secondairy Fusebox and cruise to Driver fender
EPS and horn to passenger fender
AC Lines Relocation Kit $285.00
I would also like to clean up all the wires on the driver side
Some cleanup on the fuel rail?
The less showing the better!
I think thats about it...
Im really not sure where to start when it comes to all of this or what i will need to spend to extend wires and purchase fittings. As soon as December comes the car will be in the garage lifted up with the front bumper fenders and wheels pulled off ready for this job. Although if i can get some of this done on a weekend i wouldnt mind getting started early although i just starrted the research process and i would like to give myself enough time before pulling stuff apart.
There is so much to do i understand all this wouldn't be in one thread and i am having a hard time finding DIY's
This is what i have found so far. I will update this post when i get more information.
Washer fluid Tank:
Looks simple enough
Air Pump Removal:
Quoted from Caleb
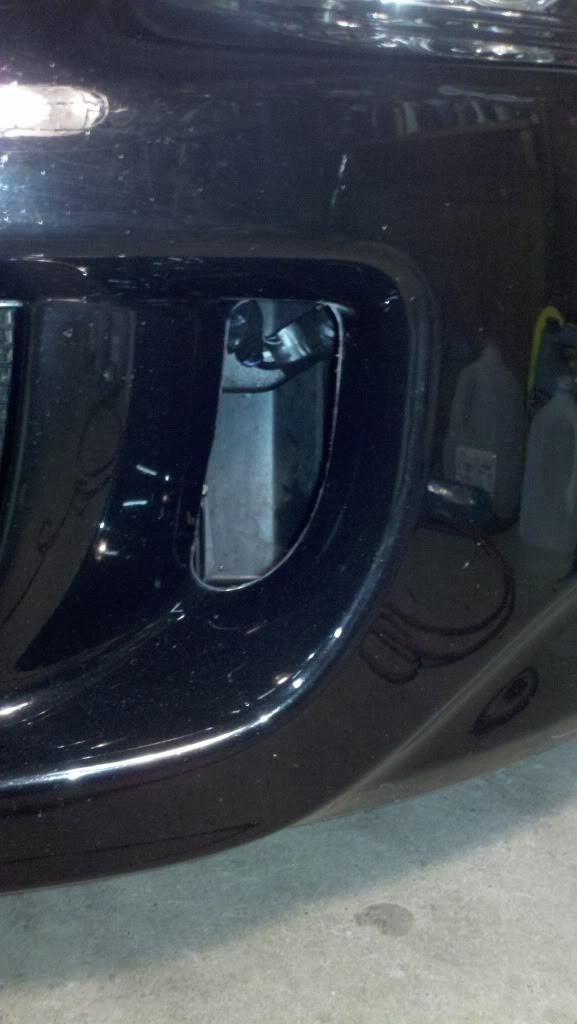
"It's quite easy. The air pump itself is located behind the front bumper, driver side corner. It's best if you remove the front bumper, or you can remove the front driver side fender liner (more difficult IMO). Remove the air pump and the large relay attached to it.
There are two hoses leading to the pump, ones hose goes from the air filter neck to the air pump inlet, the other hose goes from the air injection valve (located near the intake manifold and fire wall, it has the hose going into it and a small vacuum hose) to the air pump outlet. These hoses can be removed. It can be a little tricky removing some of the bolts but the process is self explanatory. Be sure to cap off the air filter neck with a rubber cap or tape.
Next, you can remove the vacuum solenoid (attached to the rear corner of the air box), it associated vacuum hoses (small diameter), and the reservoir (located below the rear of the air box). Be sure to cap off the vacuum hose inlet on the intake manifold with a rubber cap.
Finally, the current sensor is a black box located under the front driver side fender liner, in the upper right hand corner. It can be removed too.
See the instructions for pictures of all these parts, which will help when your removing them. As I state in the instructions, you don't need to remove any or all of these parts with the simulator installed. For example, you can choose to leave the current sensor alone, the simulator will still work properly."
Battery to the trunk:
https://www.s2ki.com/s2000/topic/715...ry-relocation/
https://www.s2ki.com/s2000/topic/436...o-heat-issues/
https://www.s2ki.com/s2000/topic/554...#entry20577656
Main Fuse Box to the Passenger footwell
https://www.s2ki.com/s2000/topic/896325-fuse-box-tuck/
Small fusebox and cruise control to driver fender
Still Searching
EPS and Horn to Passenger fender
Still Searching
AC Lines relocated
https://www.s2ki.com/s2000/topic/734...r-boosted-car/
https://www.s2ki.com/s2000/topic/724...kit-installed/
Misc Tuck/Shave Threads
https://www.s2ki.com/s2000/topic/758...-s2000-thread/
https://www.s2ki.com/s2000/topic/731...ation-painted/
https://www.s2ki.com/s2000/topic/847...-scroll-setup/
https://www.s2ki.com/s2000/topic/884...#entry20795368
https://www.s2ki.com/s2000/topic/579...-should-avoid/
Intake Manifold:
I also plan to remove and powder coat this and found a very helpful site
http://www.s2000.org/mods/insulator/
Any information you can share would be great!
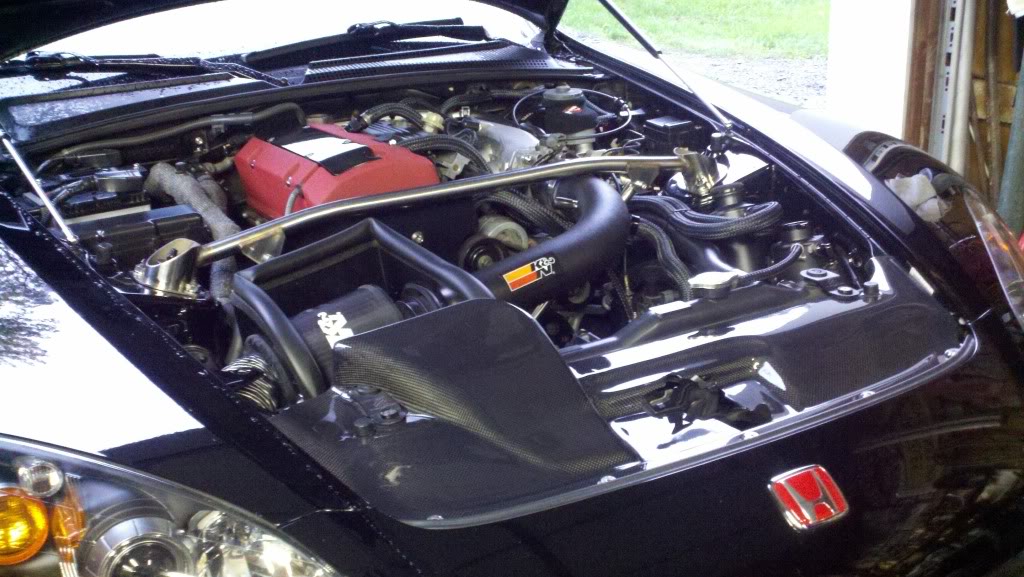
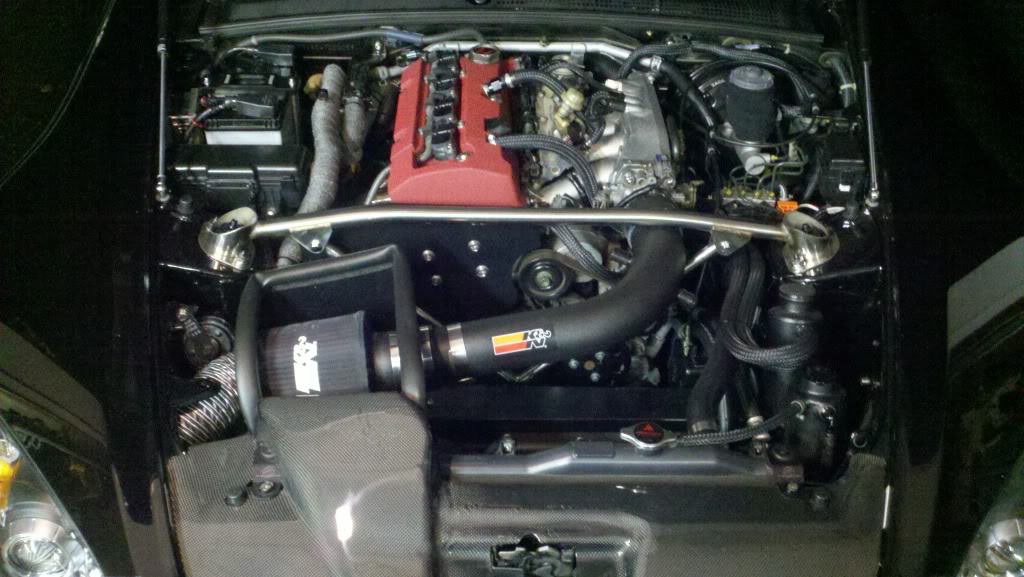
My bay now:

So i have been buying/making "bling" and performance parts for the engine bay all last winter and this summer and i think i am to that point where i want to start tucking some of the uglies away this winter. Why am i doing this? To get more familiar with the car and to give the bay a cleaner look. I am NOT pulling the motor and do not plan on filling all the holes at this time. This thread will help me keep track of all the threads i will be referencing and allow me to post my progress as well as allow you to help me along the way
Removing:
Washer Fluid bottle
Air Pump (Kit on the way)
I don't think there is anything else i want to leave out...
Relocation:
Battery to the trunk
Main Fuse Box to the Passenger footwell
Secondairy Fusebox and cruise to Driver fender
EPS and horn to passenger fender
AC Lines Relocation Kit $285.00
I would also like to clean up all the wires on the driver side
Some cleanup on the fuel rail?
The less showing the better!
I think thats about it...
Im really not sure where to start when it comes to all of this or what i will need to spend to extend wires and purchase fittings. As soon as December comes the car will be in the garage lifted up with the front bumper fenders and wheels pulled off ready for this job. Although if i can get some of this done on a weekend i wouldnt mind getting started early although i just starrted the research process and i would like to give myself enough time before pulling stuff apart.
There is so much to do i understand all this wouldn't be in one thread and i am having a hard time finding DIY's
This is what i have found so far. I will update this post when i get more information.
Washer fluid Tank:
Looks simple enough
Air Pump Removal:
Quoted from Caleb
"It's quite easy. The air pump itself is located behind the front bumper, driver side corner. It's best if you remove the front bumper, or you can remove the front driver side fender liner (more difficult IMO). Remove the air pump and the large relay attached to it.
There are two hoses leading to the pump, ones hose goes from the air filter neck to the air pump inlet, the other hose goes from the air injection valve (located near the intake manifold and fire wall, it has the hose going into it and a small vacuum hose) to the air pump outlet. These hoses can be removed. It can be a little tricky removing some of the bolts but the process is self explanatory. Be sure to cap off the air filter neck with a rubber cap or tape.
Next, you can remove the vacuum solenoid (attached to the rear corner of the air box), it associated vacuum hoses (small diameter), and the reservoir (located below the rear of the air box). Be sure to cap off the vacuum hose inlet on the intake manifold with a rubber cap.
Finally, the current sensor is a black box located under the front driver side fender liner, in the upper right hand corner. It can be removed too.
See the instructions for pictures of all these parts, which will help when your removing them. As I state in the instructions, you don't need to remove any or all of these parts with the simulator installed. For example, you can choose to leave the current sensor alone, the simulator will still work properly."
Battery to the trunk:
https://www.s2ki.com/s2000/topic/715...ry-relocation/
https://www.s2ki.com/s2000/topic/436...o-heat-issues/
https://www.s2ki.com/s2000/topic/554...#entry20577656
Main Fuse Box to the Passenger footwell
https://www.s2ki.com/s2000/topic/896325-fuse-box-tuck/
Small fusebox and cruise control to driver fender
Still Searching
EPS and Horn to Passenger fender
Still Searching
AC Lines relocated
https://www.s2ki.com/s2000/topic/734...r-boosted-car/
https://www.s2ki.com/s2000/topic/724...kit-installed/
Misc Tuck/Shave Threads
https://www.s2ki.com/s2000/topic/758...-s2000-thread/
https://www.s2ki.com/s2000/topic/731...ation-painted/
https://www.s2ki.com/s2000/topic/847...-scroll-setup/
https://www.s2ki.com/s2000/topic/884...#entry20795368
https://www.s2ki.com/s2000/topic/579...-should-avoid/
Intake Manifold:
I also plan to remove and powder coat this and found a very helpful site
http://www.s2000.org/mods/insulator/
Any information you can share would be great!
My bay now:


 09-27-2011, 08:01 PM
#5
Registered User
Thread Starter
Join Date: Jul 2010
Location: Geneva, NY 14456
Posts: 1,023
Likes: 0
Received 0 Likes
on
0 Posts
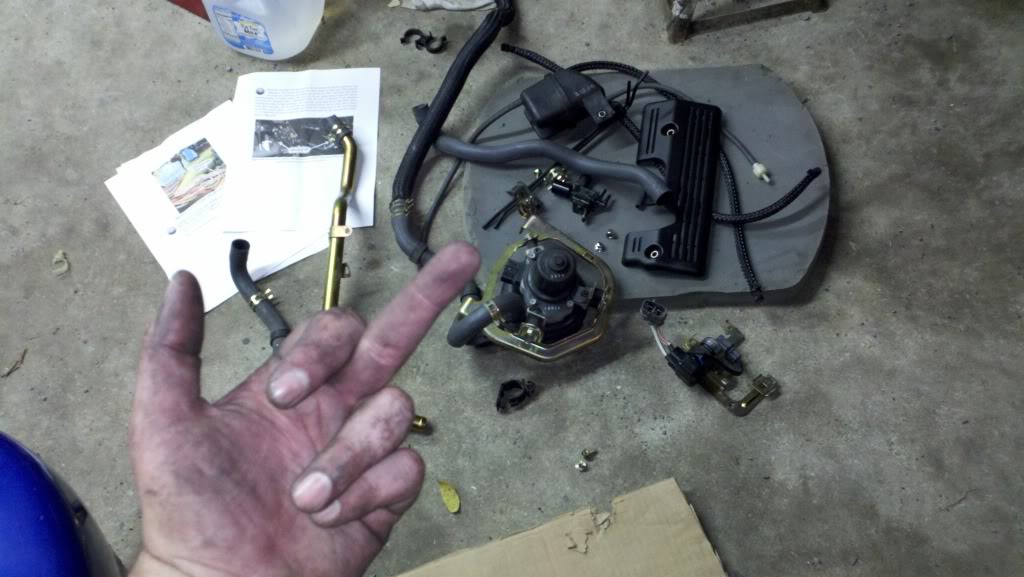
So i was able to make some small progress tonight removing 80% of the Air pump and instaling the simulator under the dash to take care of the CEL. Took it for a short ride and no light yet..

I Think i am going to leave the little plastic cover off of the fuel rail but i would like to do some cleanup on it. Are all the bolts threaded into it removable without any issue? I will be swapping them out with better stainless looking ones. Is there anything else i can do to clean up this area? Oh and i will be making an aluminum cover for the air pump part all the way to the right tomorrow...
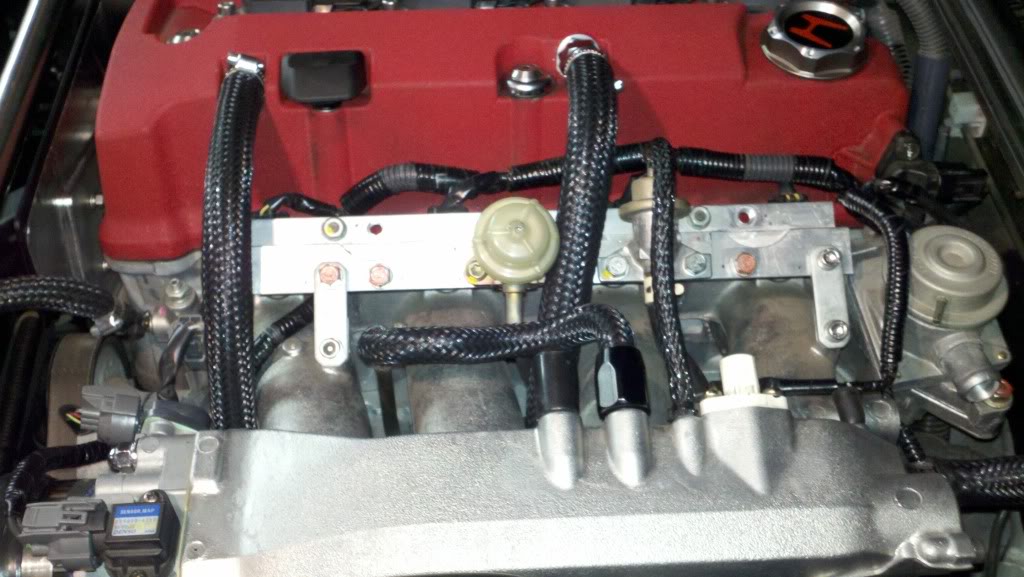
I Think i am going to leave the little plastic cover off of the fuel rail but i would like to do some cleanup on it. Are all the bolts threaded into it removable without any issue? I will be swapping them out with better stainless looking ones. Is there anything else i can do to clean up this area? Oh and i will be making an aluminum cover for the air pump part all the way to the right tomorrow...
09-27-2011, 08:07 PM
#6
Registered User


So let me ask, what is the purpose of doing all this...reduce weight? Increase power? Less clutter under the hood? All of these? None of these? Something else?
Trending Topics
09-27-2011, 10:05 PM
#8

I Think i am going to leave the little plastic cover off of the fuel rail but i would like to do some cleanup on it. Are all the bolts threaded into it removable without any issue? I will be swapping them out with better stainless looking ones. Is there anything else i can do to clean up this area? Oh and i will be making an aluminum cover for the air pump part all the way to the right tomorrow...

If you would like any other/better photos let me know
Scott-
09-28-2011, 03:25 AM
#9
Registered User
Thread Starter
Join Date: Jul 2010
Location: Geneva, NY 14456
Posts: 1,023
Likes: 0
Received 0 Likes
on
0 Posts
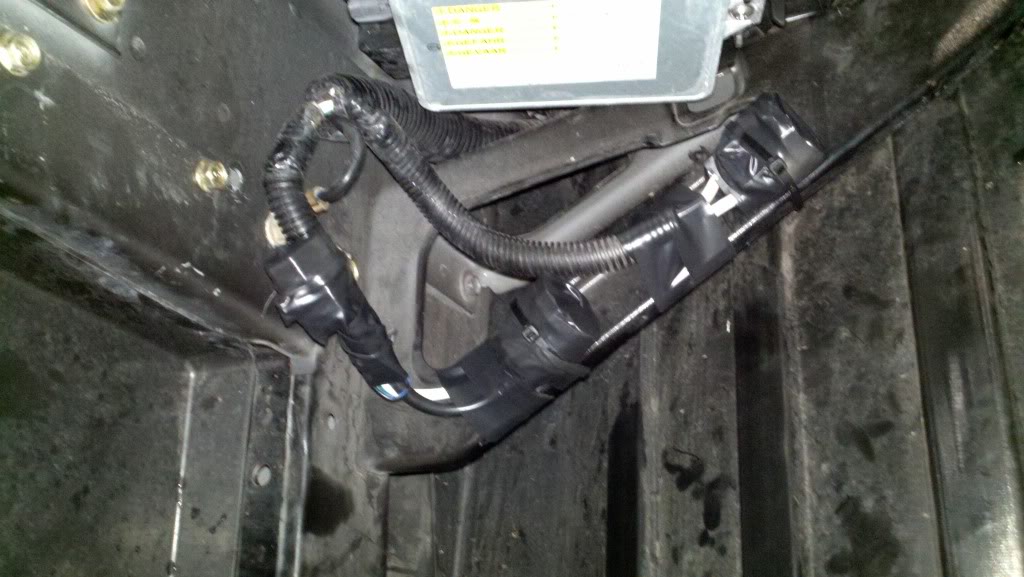
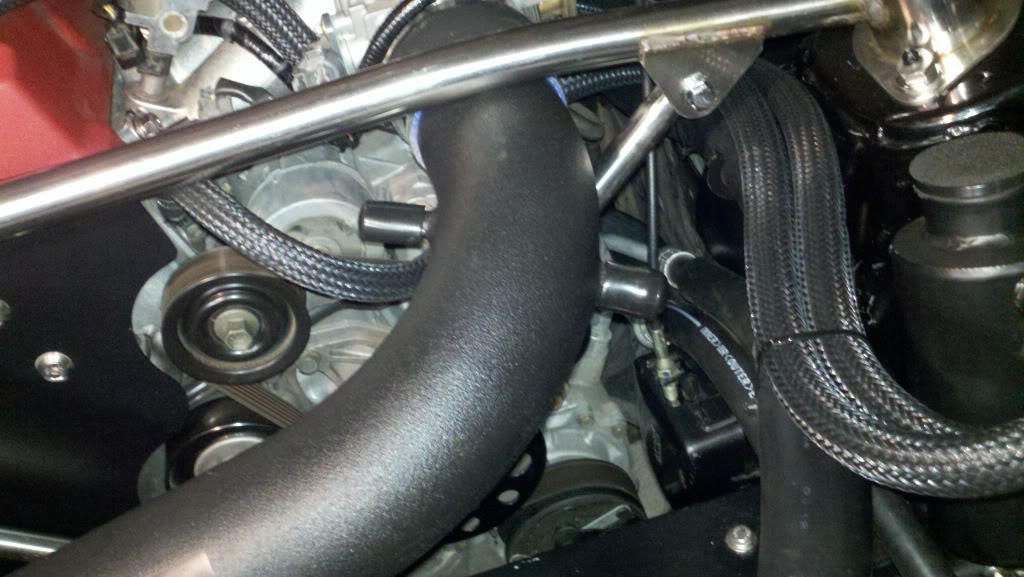
Here's what I did....unclipped all the injectors, MAP sensor, and whatever else is attached. Pull the harness back to the firewall, then run under the fuel rail. MAP sensor plug (and other plugs at the end) were run down in between the 1st and 2nd runner on the IM and come out under the 1st runner (it was a b*tch to fit the plugs through).

If you would like any other/better photos let me know
Scott-
[/quote]
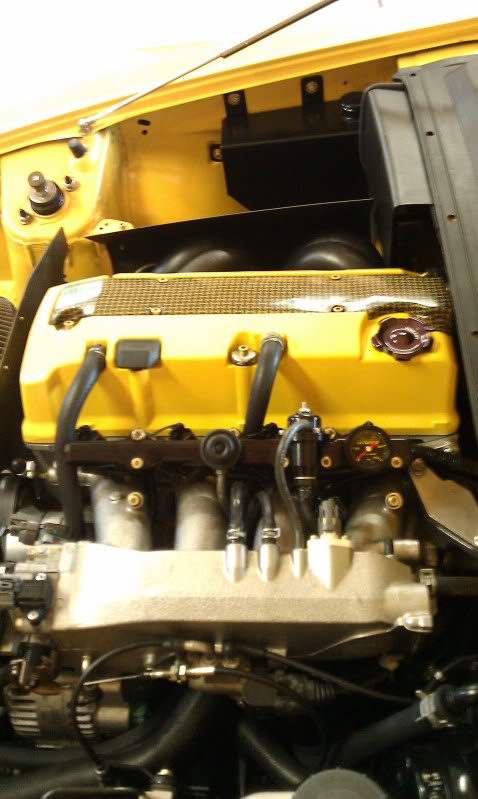
I think i understand what you are saying and i actually tried this but the (4) plug wires were not long enough to reach once i had everything pulled through :-/ Can you post a pic from the passenger side of the car so i can see what it looks like from that angle? Also what kind of fuel rail is that? How much was it and is it an easy bolt on?
Thanks for the help!!!
If you would like any other/better photos let me know
Scott-
[/quote]
I think i understand what you are saying and i actually tried this but the (4) plug wires were not long enough to reach once i had everything pulled through :-/ Can you post a pic from the passenger side of the car so i can see what it looks like from that angle? Also what kind of fuel rail is that? How much was it and is it an easy bolt on?
Thanks for the help!!!
09-28-2011, 11:13 AM
#10
I think i understand what you are saying and i actually tried this but the (4) plug wires were not long enough to reach once i had everything pulled through :-/ Can you post a pic from the passenger side of the car so i can see what it looks like from that angle? Also what kind of fuel rail is that? How much was it and is it an easy bolt on?
Thanks for the help!!!
Thanks for the help!!!
I picked up the fuel rail and AEM fpr from "RealStreet". They are a vendor on S2Ki and were great to deal with...and gave me a great price!
Scott-