
Fernando's S2000 // Daily Driven Build Thread

Thread Starter


Joined: May 2011
Posts: 5,424
Likes: 162
From: Great White North
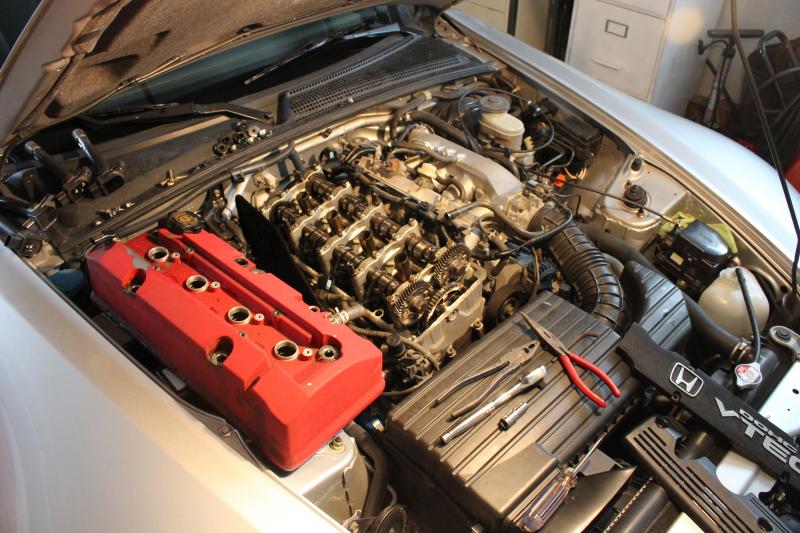
Not much of an update but I decided to do some checks on the retainers now that the car is parked for the season, I over-revved the car ever so slightly last year on a downshift so I constantly check the retainers to make sure they're still doing OK. It's really not that fun working on my car at home with no hoist and no power/air tools because what normally would've taken me ~10 minutes took me almost an hour, lol.
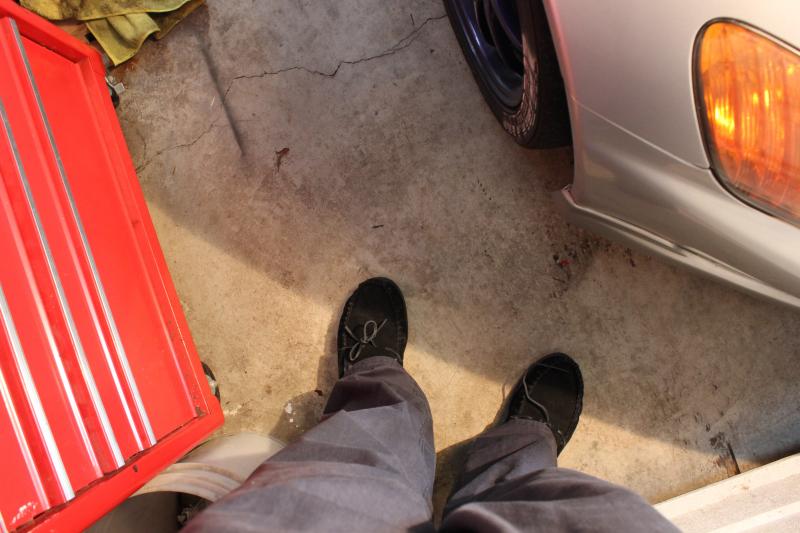
Yeah I wear slippers and coveralls when I work at home. #thuglife
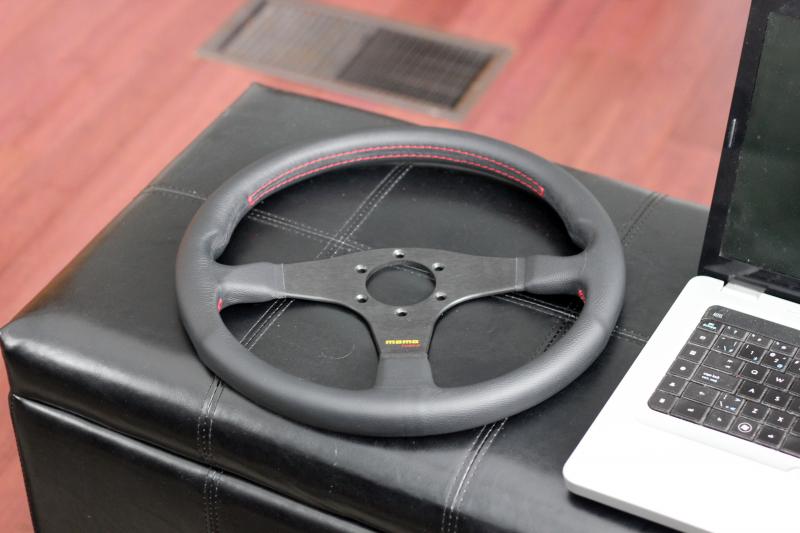
I bought this Momo Tuner 350mm on Boxing Day at my friends shop for $160. I'm just waiting for the hub and quick release to come in the mail - which reminds me, I also bought a Jersey Red Recaro Pole Position which should be shipping out today.
I'm also on the fence about selling my hardtop so I can repaint the car due to it's many dents/dings that cannot be removed my PDR.
Yeah I wear slippers and coveralls when I work at home. #thuglife
I bought this Momo Tuner 350mm on Boxing Day at my friends shop for $160. I'm just waiting for the hub and quick release to come in the mail - which reminds me, I also bought a Jersey Red Recaro Pole Position which should be shipping out today.
I'm also on the fence about selling my hardtop so I can repaint the car due to it's many dents/dings that cannot be removed my PDR.

Thread Starter
Joined: May 2011
Posts: 5,424
Likes: 162
From: Great White North
Ya I can't decide if I want to keep the Tuner and get a 1.5" spacer, or sell it and get a Nardi Deep Corn in 350mm.
My GSR has a Momo Mod 08 and I absolutely love how close the wheel sits to me since I have to have my seat all the way back, but I think it'll look too rice-y in the S2000 with a red Pole Position.
My GSR has a Momo Mod 08 and I absolutely love how close the wheel sits to me since I have to have my seat all the way back, but I think it'll look too rice-y in the S2000 with a red Pole Position.
Thread Starter
Joined: May 2011
Posts: 5,424
Likes: 162
From: Great White North
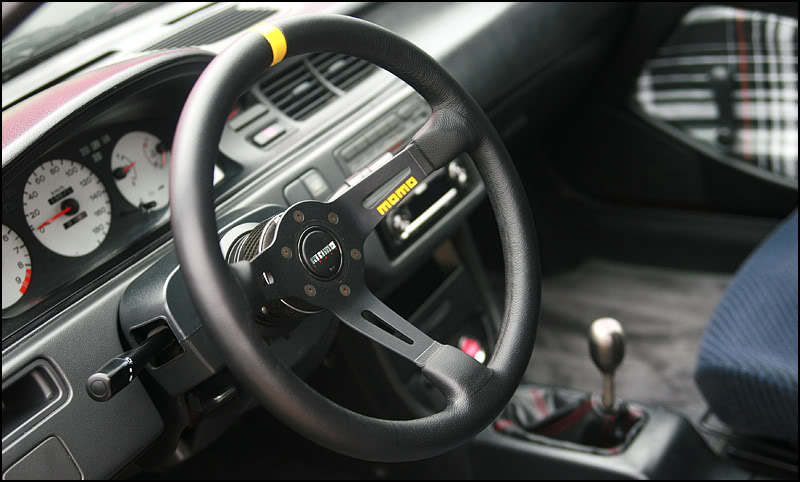
Decided to install my wheel today, it was pretty straight forward.
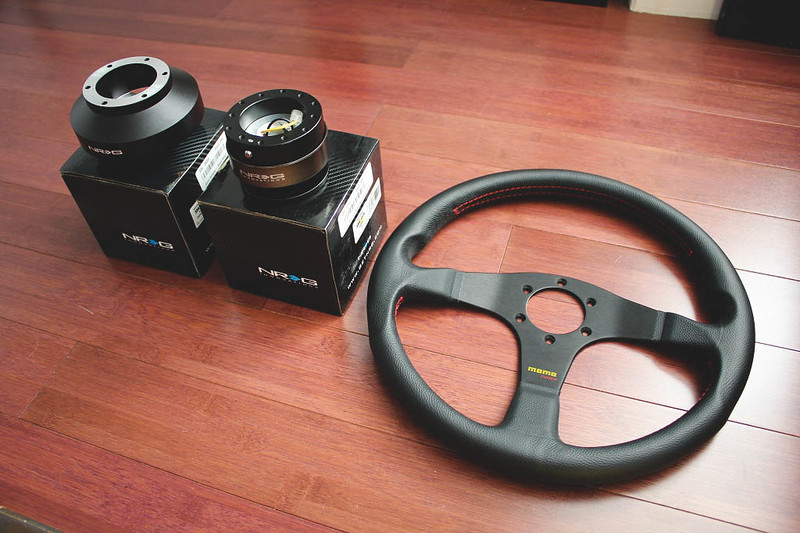
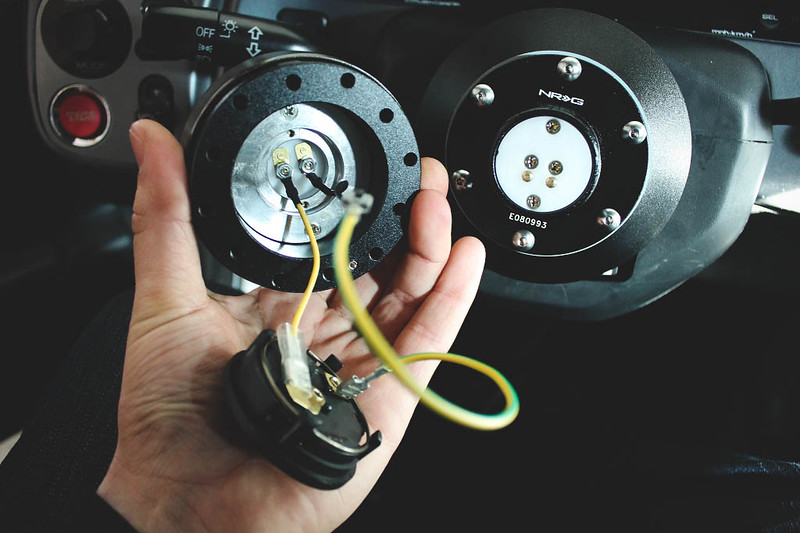
Here's what you're going to need. I opted to go with a Momo Tuner 350mm + NRG 2.0 Quick Release + NRG Short Hub which lets you keep the factory cable reel in the car, it makes installing the horn a breeze.
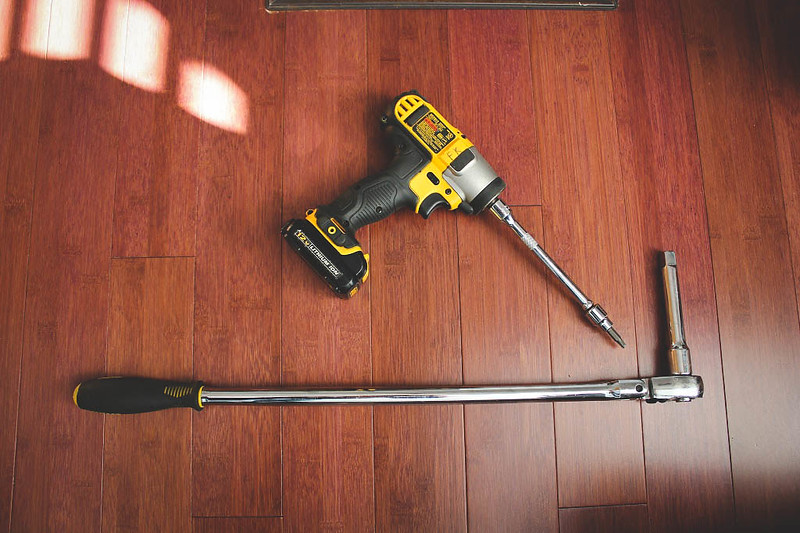
After trying to remove the two T30 Torx bits from the side of the air bag with a screwdriver, I gave up and drove to work to grab my proper tools. Funny thing is I didn't even need my 1/2" ratchet to remove the steering wheel bolt, my 12v DeWalt had enough juice to do the job.
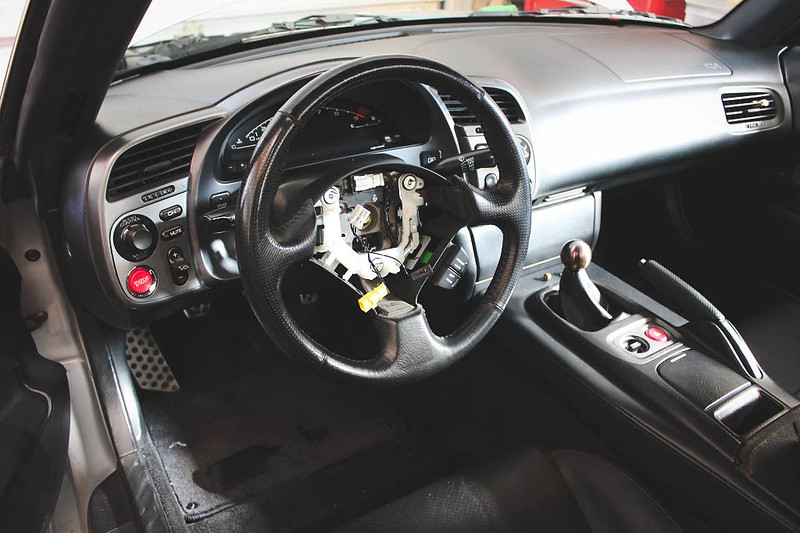
First step is to remove the OEM wheel, obviously.
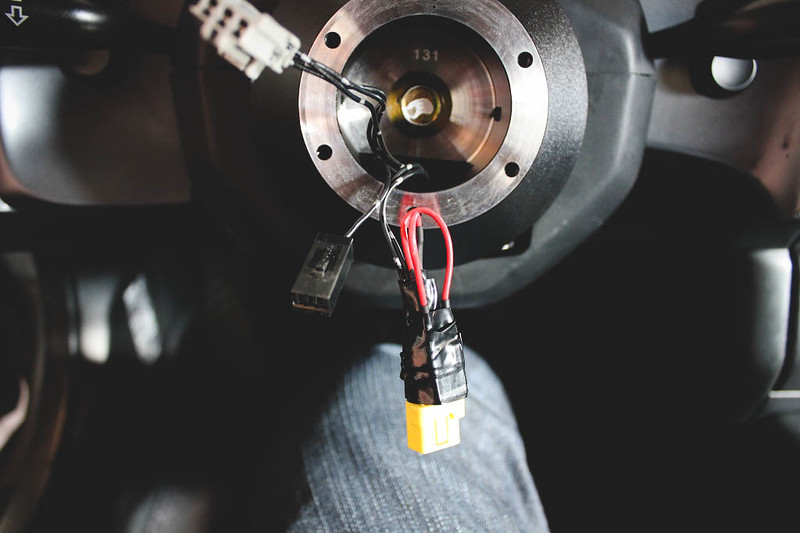
Next I bolted on the NRG Short Hub. I used a 2.2ohm resistor and back probed the SRS connector, turned the key on and the SRS light went out after 3 seconds. Much better than just pulling the bulb. To do this properly I would've liked to cut/solder the connections, but I went with the back probe/tape method just to keep things reversible if I ever want to go back to OEM.
I didn't take a picture of the horn wire up, but anyone with a basic knowledge of how an electrical circuit functions should be able to figure it out. I took the black horn wire plug as seen in the picture above and pulled it into the yellow wire on the back of the quick release. I used another horn grounding plate sandwiched between the hub/QR and plugged the other wire into that. Then on the front side of the quick release I just plugged the yellow and black wires into the horn button. You basically just want to create a loop to be able to ground the circuit. OEM Horn Wire > Yellow wire > Yellow wire to one side of horn button > Black wire to ground side of horn button > Black wire to grounding plate. It's harder to explain than it actually is.
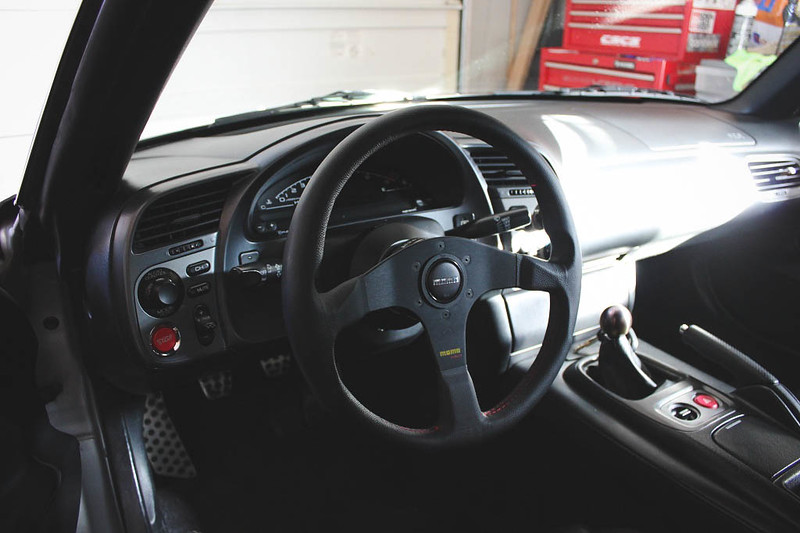
And the final product. I love it. I'll take better picture out in the day light once I get my Recaro in.
Here's what you're going to need. I opted to go with a Momo Tuner 350mm + NRG 2.0 Quick Release + NRG Short Hub which lets you keep the factory cable reel in the car, it makes installing the horn a breeze.
After trying to remove the two T30 Torx bits from the side of the air bag with a screwdriver, I gave up and drove to work to grab my proper tools.
Funny thing is I didn't even need my 1/2" ratchet to remove the steering wheel bolt, my 12v DeWalt had enough juice to do the job.First step is to remove the OEM wheel, obviously.
Next I bolted on the NRG Short Hub. I used a 2.2ohm resistor and back probed the SRS connector, turned the key on and the SRS light went out after 3 seconds.
Much better than just pulling the bulb. To do this properly I would've liked to cut/solder the connections, but I went with the back probe/tape method just to keep things reversible if I ever want to go back to OEM.I didn't take a picture of the horn wire up, but anyone with a basic knowledge of how an electrical circuit functions should be able to figure it out. I took the black horn wire plug as seen in the picture above and pulled it into the yellow wire on the back of the quick release. I used another horn grounding plate sandwiched between the hub/QR and plugged the other wire into that. Then on the front side of the quick release I just plugged the yellow and black wires into the horn button. You basically just want to create a loop to be able to ground the circuit. OEM Horn Wire > Yellow wire > Yellow wire to one side of horn button > Black wire to ground side of horn button > Black wire to grounding plate. It's harder to explain than it actually is.
And the final product. I love it. I'll take better picture out in the day light once I get my Recaro in.