Ketchup to Mustard - Vboy's slow build thread 2.0 (Spa Yellow AP1)
 02-22-2018, 08:23 AM
#31
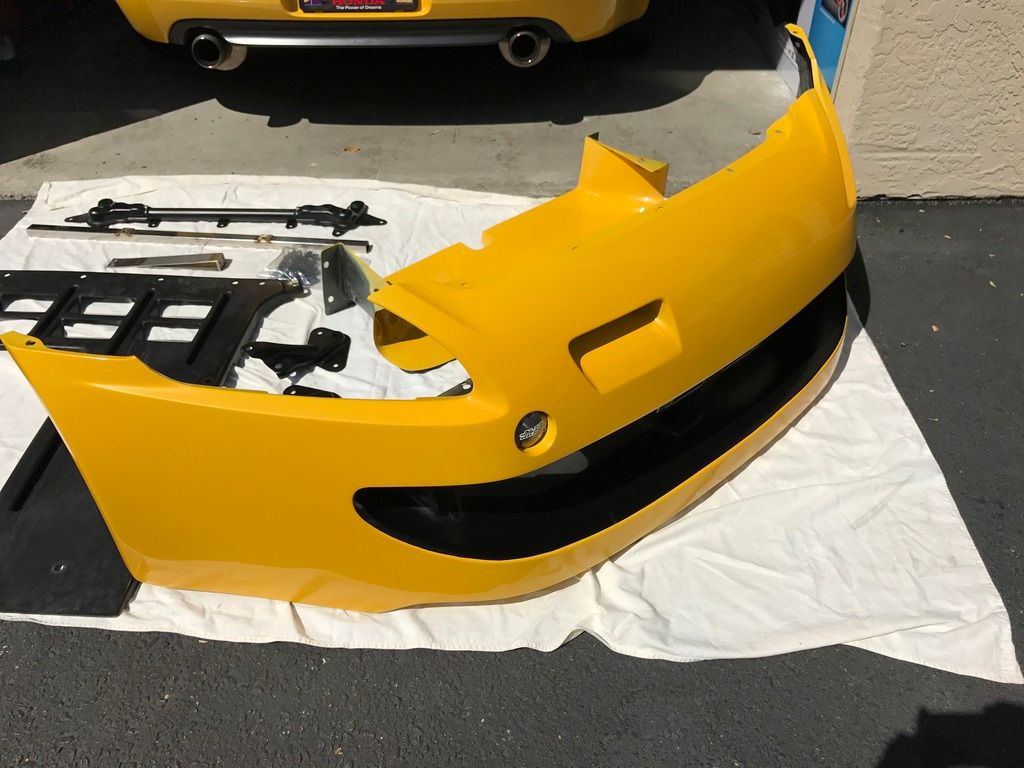
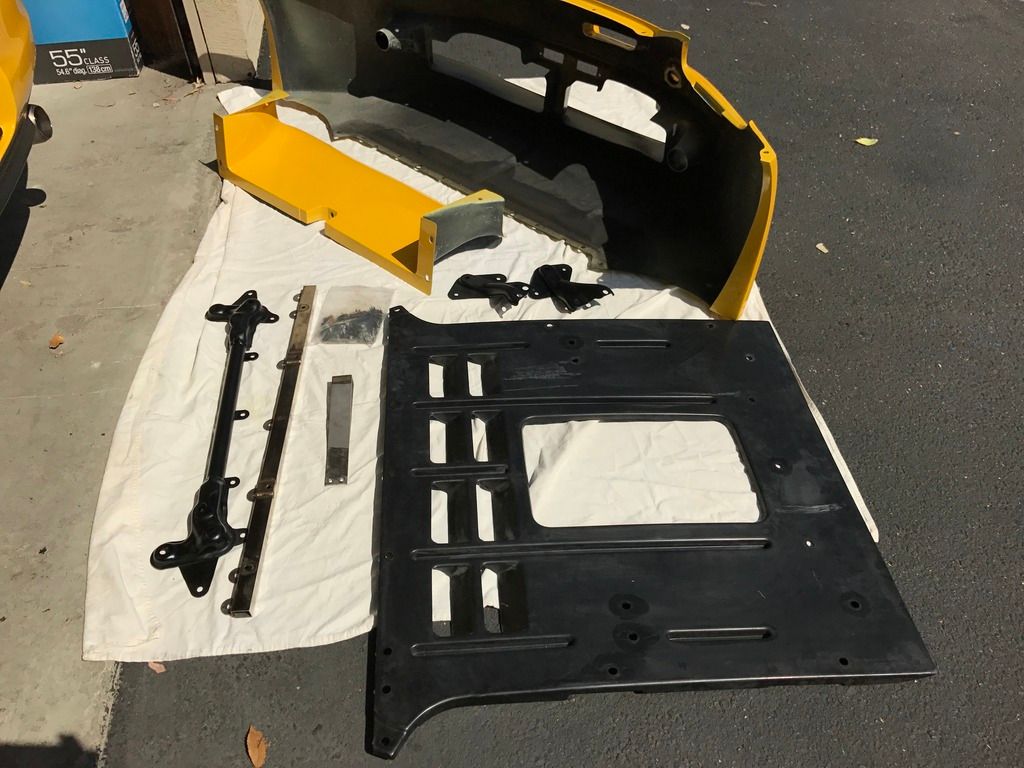
My next post is a bit of a moot point. As I had mentioned earlier when I made the trip down to SoCal to pick up the Mugen Sport exhaust I also purchased an authentic Spa Yellow painted Mugen SS front bumper. This was a bit of a special find ‘cause the seller had ALL the necessary brackets, undertray, etc. that normally come with the bumper brand new. Often times these bumpers second hand are missing a bracket or two. Plus it was already painted Spa, so it was a no brainer. The paint on the bumper was in decent condition and would eventually need a repaint, but the match was really good. Structurally it was in perfect condition and I could tell the previous owner took great care.
After bringing home the bumper and exhaust there was A LOT of deliberation about whether or not I wanted to install the bumper. With an overall more aggressive and “modified” look on the front end I knew I would have to add or change out other exterior bits to really do the front bumper justice. Perhaps a rear diffuser or hunt down a Mugen SS rear (and consequently the exhaust) and some side diffusers… maybe even a wing and opt for an aftermarket hardtop. Having the front bumper alone on an otherwise stock-bodied car would look odd IMO. Searching around online I was able to find one example from years ago of a stock-bodied Spa with a Mugen front (granted the front opening wasn’t painted black) and what appeared to be S2k spec MF10s as well. My hunch was true.
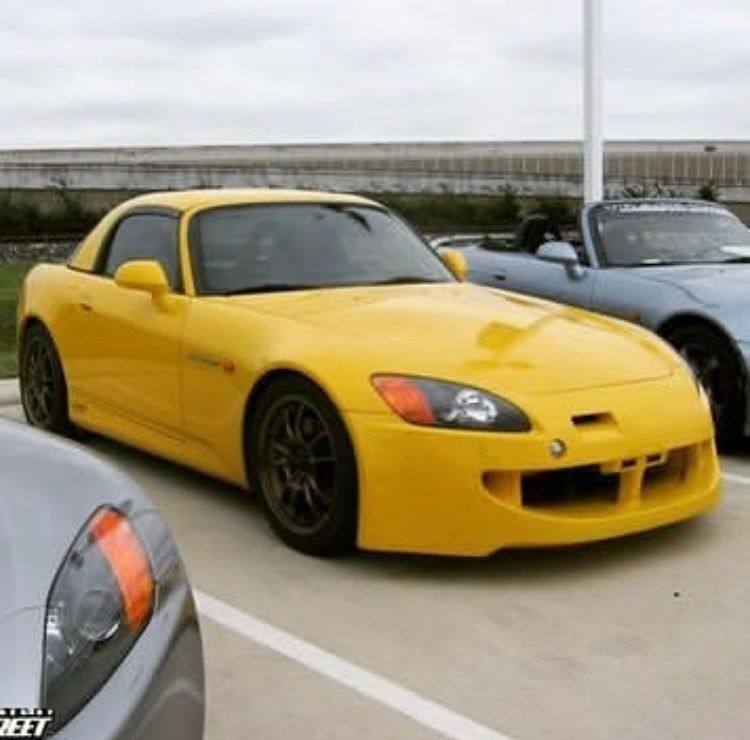
Sure it’d have the “mad tyte JDM” factor but purely from an aesthetic standpoint the car would just look out of balance.
Ultimately I finally decided to sell the bumper. I realized that I wanted to maintain an overall “stock” appearance and try to bring out the best of the original Honda design, leaving the stock body panels alone as much as I could. I also like to drive this car, HARD and I knew the moment I put that bumper on I’d be hesitant to really push it in fear of damaging a relatively rare, quality (and expensive) piece.
I found a buyer quite quickly (as one would expect) and they came and picked the bumper up, clearing some storage space for more parts.
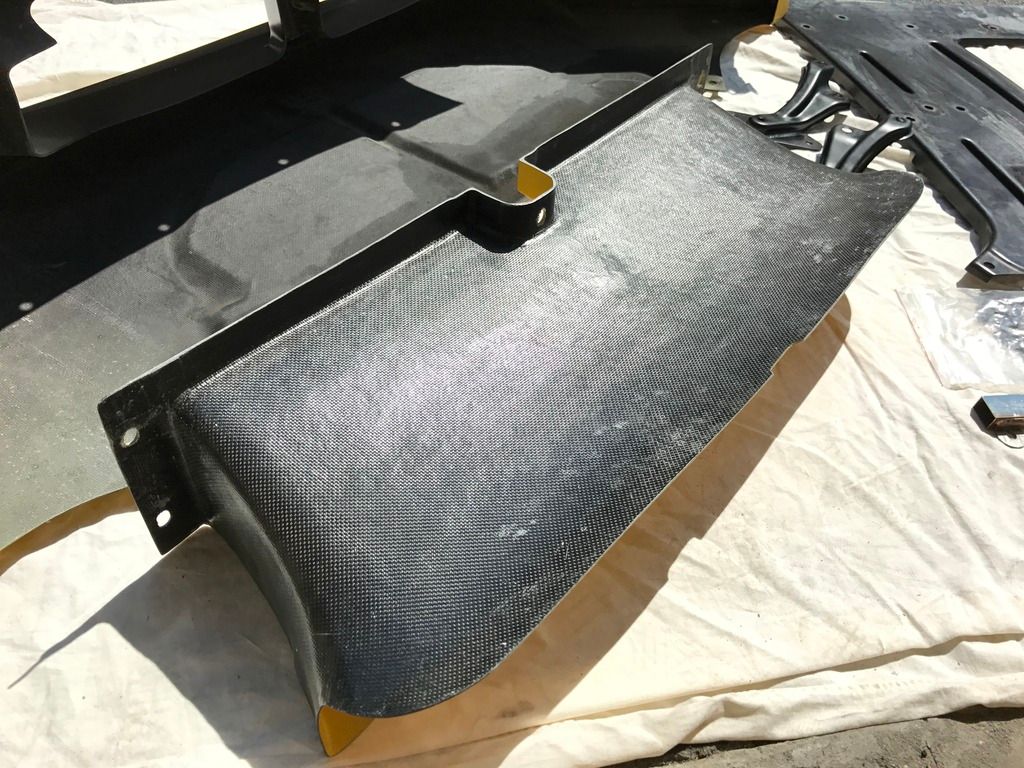
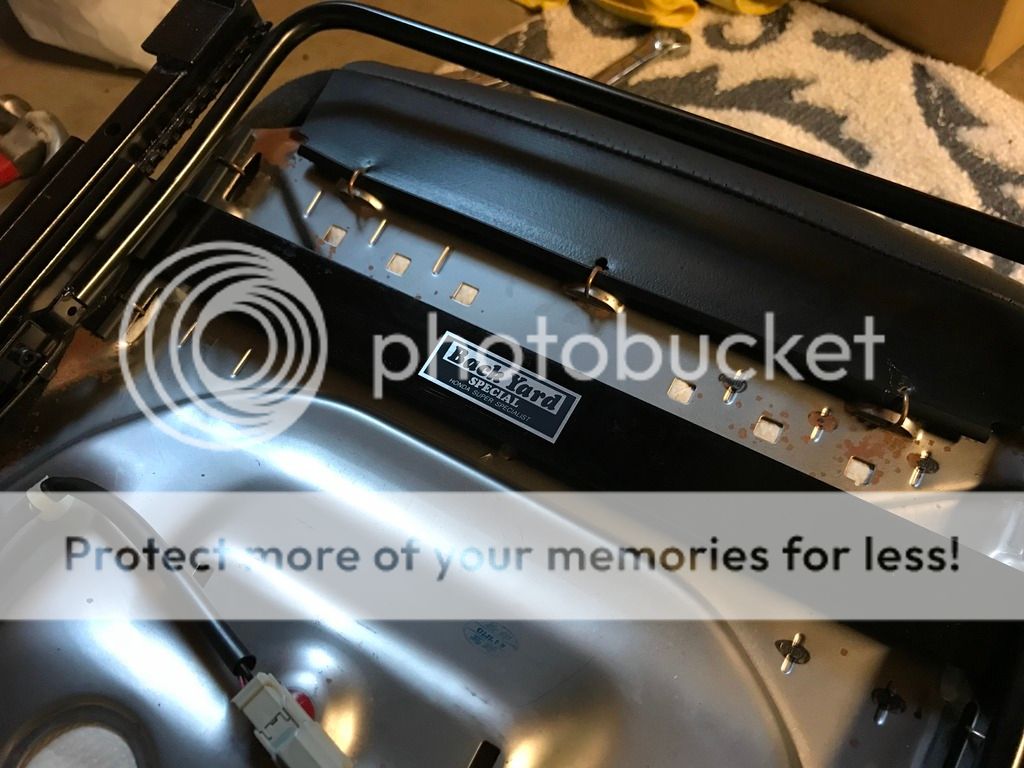
I still can’t help but share some photos of the bumper though. I mean who doesn't love a little CFRP action?? The quality and attention to detail was EXCEPTIONAL. If you’re ever considering this front bumper have no fear in the build quality and materials of construction.

After bringing home the bumper and exhaust there was A LOT of deliberation about whether or not I wanted to install the bumper. With an overall more aggressive and “modified” look on the front end I knew I would have to add or change out other exterior bits to really do the front bumper justice. Perhaps a rear diffuser or hunt down a Mugen SS rear (and consequently the exhaust) and some side diffusers… maybe even a wing and opt for an aftermarket hardtop. Having the front bumper alone on an otherwise stock-bodied car would look odd IMO. Searching around online I was able to find one example from years ago of a stock-bodied Spa with a Mugen front (granted the front opening wasn’t painted black) and what appeared to be S2k spec MF10s as well. My hunch was true.
Sure it’d have the “mad tyte JDM” factor but purely from an aesthetic standpoint the car would just look out of balance.
Ultimately I finally decided to sell the bumper. I realized that I wanted to maintain an overall “stock” appearance and try to bring out the best of the original Honda design, leaving the stock body panels alone as much as I could. I also like to drive this car, HARD and I knew the moment I put that bumper on I’d be hesitant to really push it in fear of damaging a relatively rare, quality (and expensive) piece.
I found a buyer quite quickly (as one would expect) and they came and picked the bumper up, clearing some storage space for more parts.
I still can’t help but share some photos of the bumper though. I mean who doesn't love a little CFRP action?? The quality and attention to detail was EXCEPTIONAL. If you’re ever considering this front bumper have no fear in the build quality and materials of construction.
 05-22-2018, 02:36 PM
#32
Windshield frame / Valve cover / Oil cap
A few small aesthetic updates to ALMOST get me caught up to how the car currently sits. Another update to follow this one shortly.
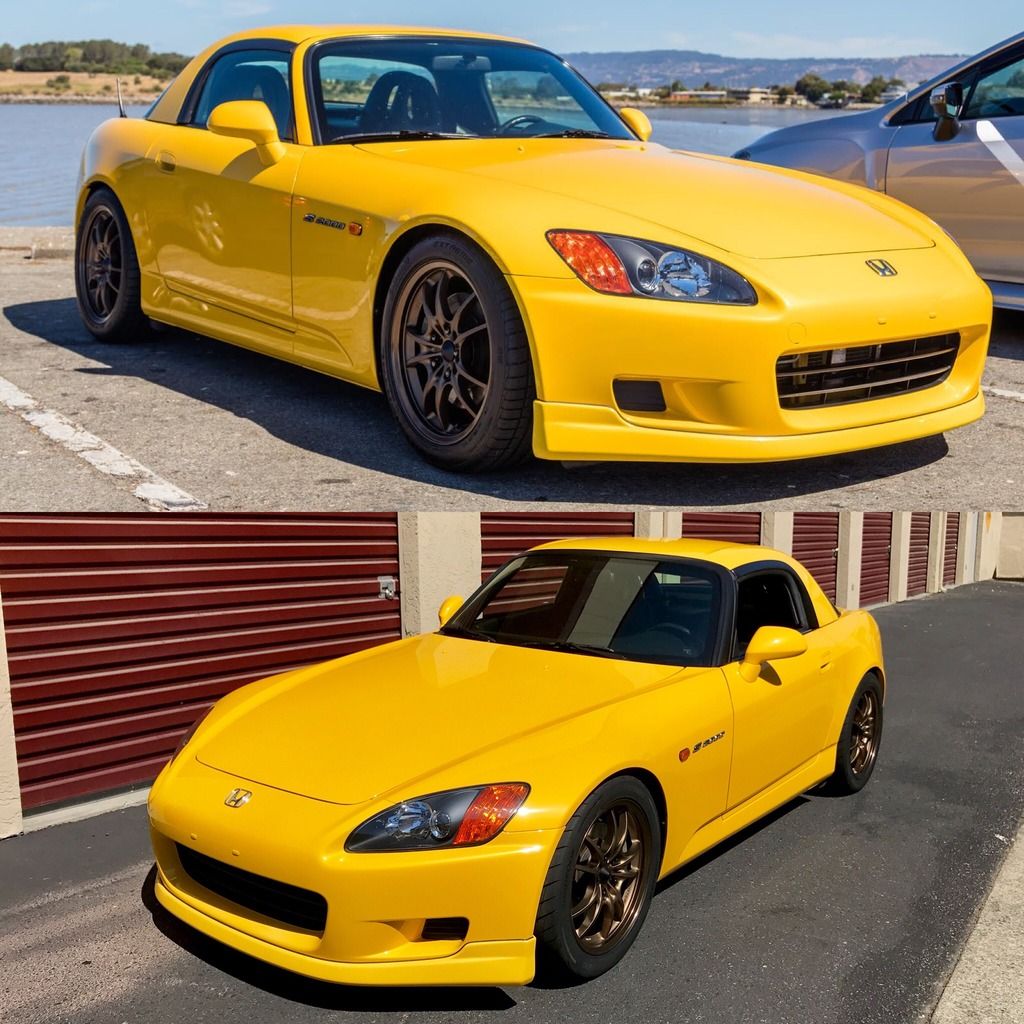
I purchased the car with the factory black windshield tape already removed. Assuming this was done very early on since the car originally came with the OEM hardtop. I've always preferred the look of the black windshield frame, so this was a relatively quick change. Instead of going with the factory windshield tape I went to a local automotive vinyl/clearbra installer and had them apply an automotive 3M satin black vinyl around the frame. I avoided gloss black due to the likelihood of scratches showing on it over time. IMO I think the satin black looks even better as it matches perfectly with the black plastic trim on the factory hardtop.
Again, a small change, but makes a huge visual difference:
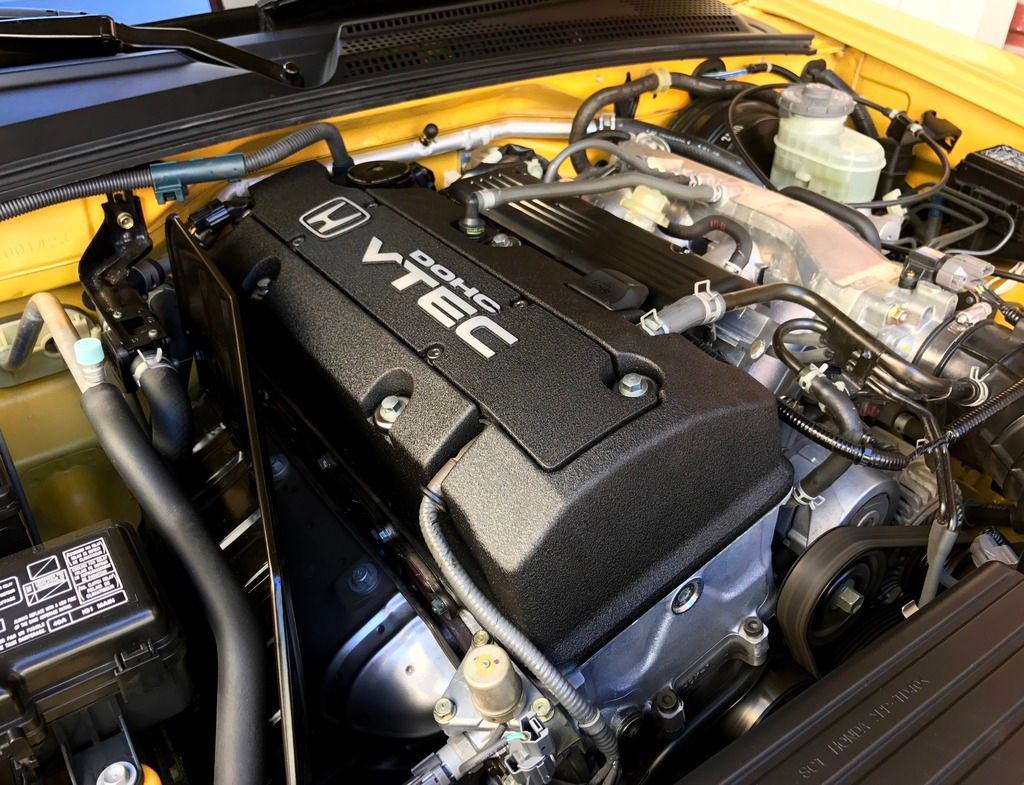
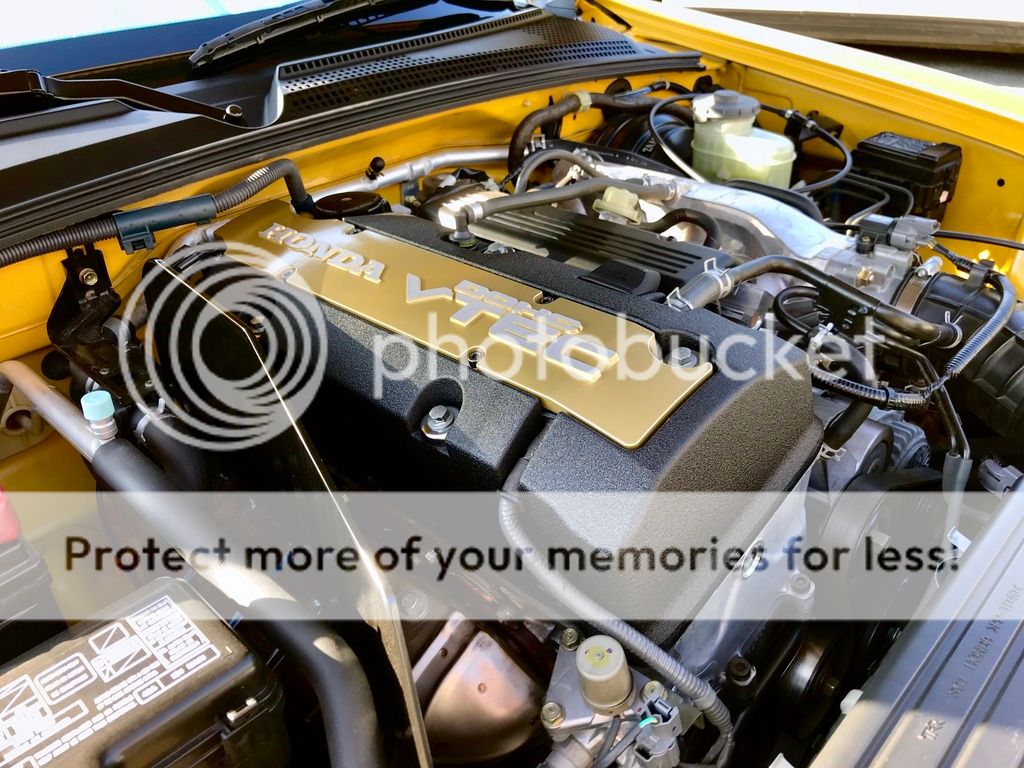
I do like the factory red valve cover on S2000s, but decided to go with a more understated route with the yellow engine bay. Had the VC powder coated a nice wrinkle black. It's not pictured here, but I also replaced the raw aluminum radiator stays with some black ones to keep with the theme. Eventually I will probably replace the spark plug cover, with a Spoon Sports kevlar or Mugen CF piece (if I can find one), so that there isn't so much wrinkle black.
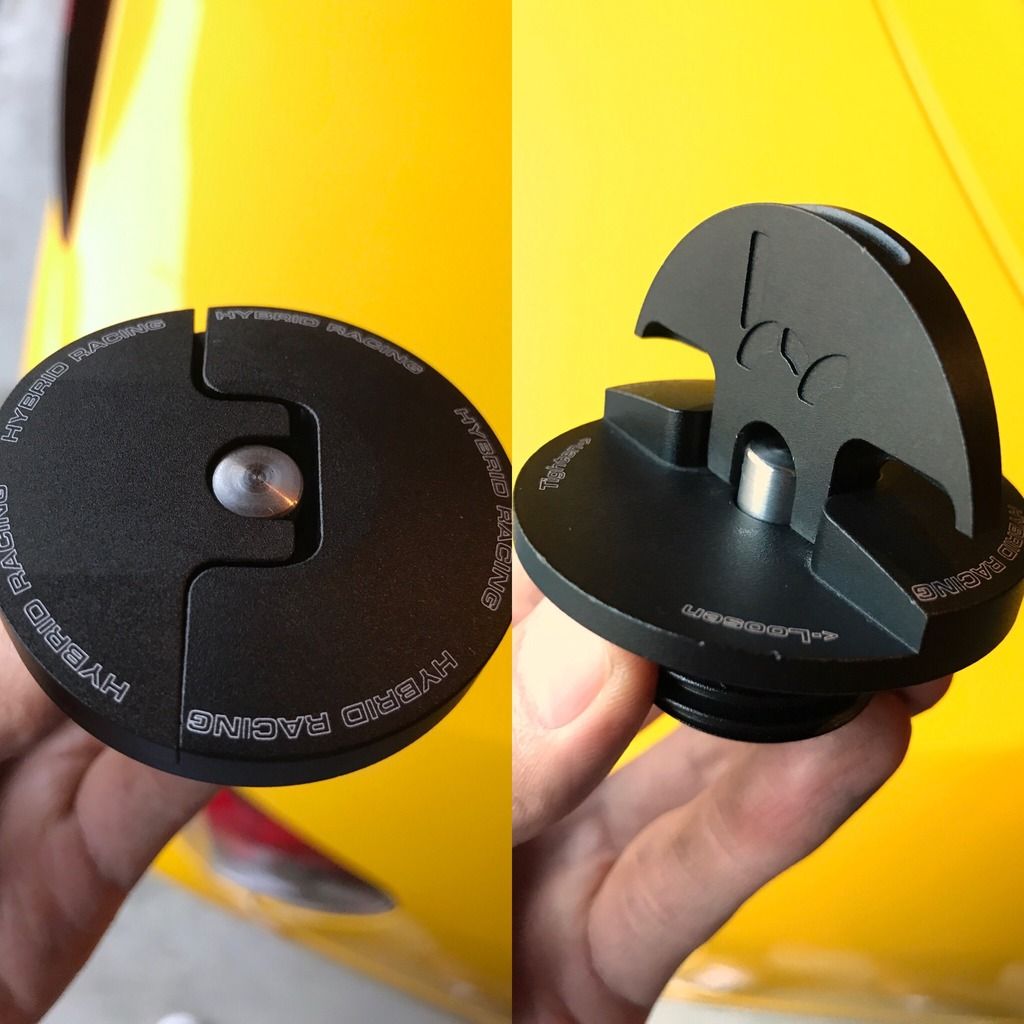
And a small part that addressed the issue of a hot or difficult to remove oil cap - Hybrid Racing Slim Oil Cap. A simple concept/design that makes taking off the oil cap SO MUCH easier. I highly recommend this thing, just from a functionality standpoint; plus it looks pretty cool.
A few small aesthetic updates to ALMOST get me caught up to how the car currently sits. Another update to follow this one shortly.
I purchased the car with the factory black windshield tape already removed. Assuming this was done very early on since the car originally came with the OEM hardtop. I've always preferred the look of the black windshield frame, so this was a relatively quick change. Instead of going with the factory windshield tape I went to a local automotive vinyl/clearbra installer and had them apply an automotive 3M satin black vinyl around the frame. I avoided gloss black due to the likelihood of scratches showing on it over time. IMO I think the satin black looks even better as it matches perfectly with the black plastic trim on the factory hardtop.
Again, a small change, but makes a huge visual difference:
I do like the factory red valve cover on S2000s, but decided to go with a more understated route with the yellow engine bay. Had the VC powder coated a nice wrinkle black. It's not pictured here, but I also replaced the raw aluminum radiator stays with some black ones to keep with the theme. Eventually I will probably replace the spark plug cover, with a Spoon Sports kevlar or Mugen CF piece (if I can find one), so that there isn't so much wrinkle black.
And a small part that addressed the issue of a hot or difficult to remove oil cap - Hybrid Racing Slim Oil Cap. A simple concept/design that makes taking off the oil cap SO MUCH easier. I highly recommend this thing, just from a functionality standpoint; plus it looks pretty cool.
05-24-2018, 01:24 PM
#33
Hankook RS4 and BYS Seat rail
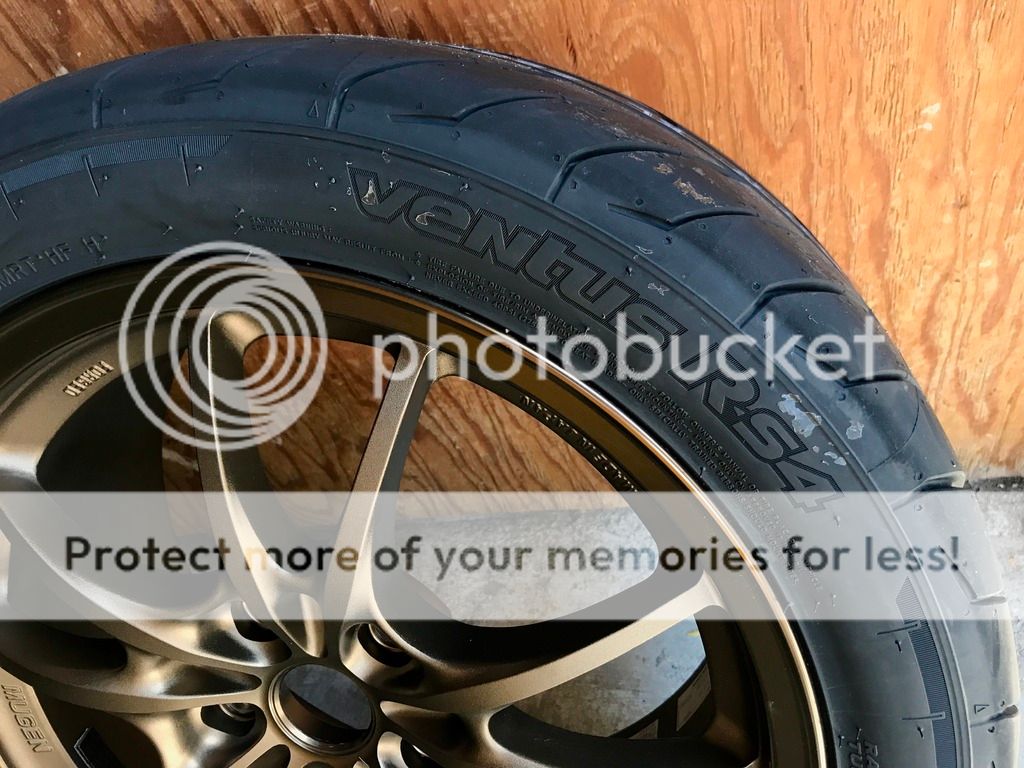
The Continental ExtremeContact DW tires that I had originally installed on the Advan wheels and later swapped over to the Mugen MF10s were okay. The grip was decent for the street, comfort/noise levels were excellent (due to soft sidewall), and the wet weather capabilities were a plus. However, once I realized that the S would be more of just a weekend/good weather car and not a daily I wanted some stickier rubber. I swapped in some Hankook Ventus RS4 and this was a definite upgrade. The limit of these tires is well beyond what I can push on the street, and the additional feedback and feel from the slightly stiffer sidewalls is great. The relatively low cost of entry for these tires is also a great selling point:
Next up was a Backyard Special lowered seat rail for the driver's OEM seat. Being 6-feet tall with relatively long legs I always had an issue with both visibility out the front windshield (near the top, especially at stop lights where I'd have to tilt my head down to see the light) and my legs constantly hitting the bottom of the steering wheel. This made it pretty difficult to practice and improve upon any heel-toe shifting. Product data for the seat rail says a 20mm drop of the seat bottom which does not sound like much, but it definitely made a huge difference for me. My legs/knees only hit the steering wheel now if I really try and my eye level out of the front is just right! Well worth the cost if you want to keep your OEM seats, but need a little drop. I don't have any pics of the height differences, but that can be found online. I now feel more like I sit IN the car and less so ON it if that makes sense.
06-05-2018, 04:13 PM
#34
Alignment and North Bay cruise
I am FINALLY caught up with my thread and any updates from here on should be “real time”. Although it seems like the traffic on forums in general has slowed down significantly (I’m not on FB anymore as that seems to be where most people have gone) I will continue to update this thread as I progress.
The latest change to the car was an alignment done by local shop Blacktrax Performance. This was my first time working with Jei and his team since moving to the Bay Area and it was a great experience. A very knowledgeable group of technicians/enthusiasts and most definitely an excellent local resource to S2k owners in the Bay.
Regarding my alignment settings I went with a slightly modified “UK spec” alignment:
Front Caster: 7.0*
Front Camber: -1.5*
Front Toe: 0* 00’
Rear Camber: -2.5*
Rear Toe: 0* 20’
Total Rear Toe: 0* 40’ in
The previous owner apparently had a more track-driven alignment spec (-2.5 front camber, slight toe out in front, -3.5 rear camber, and slight toe in). Following this alignment I felt an immediate difference and much preferred my alignment spec for the primarily street application of this car.
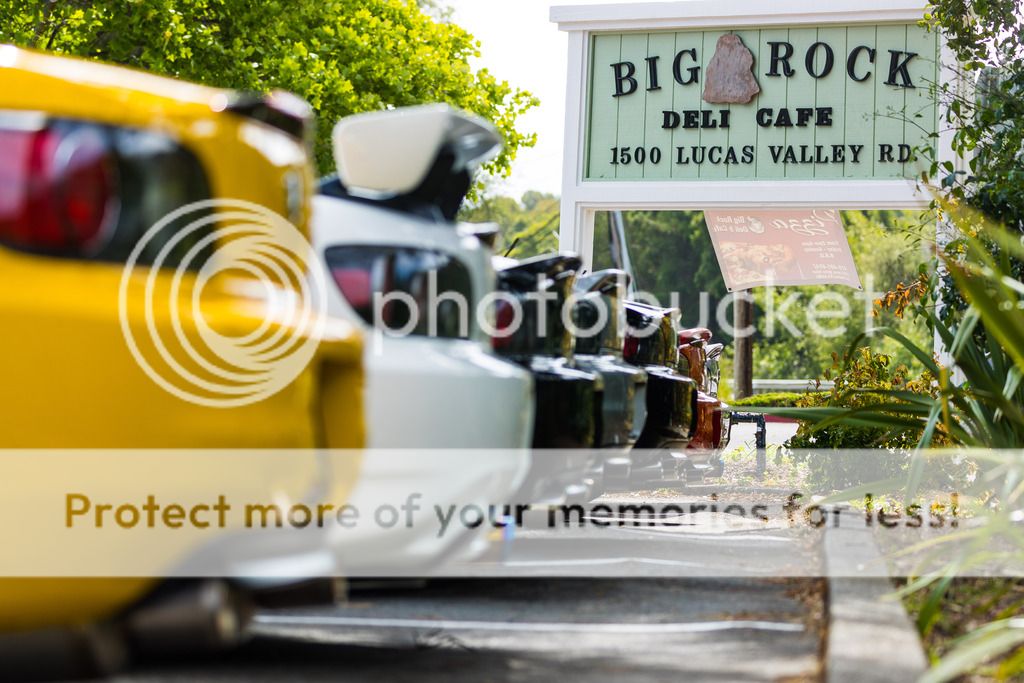
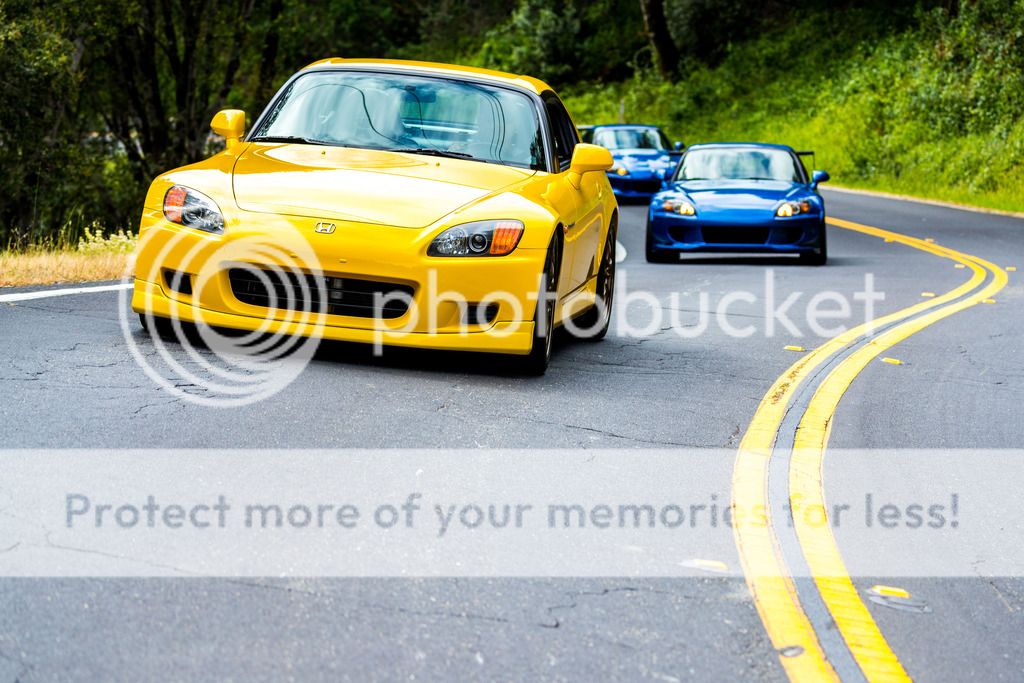
Since the alignment I’ve just been taking the car out on various drives during the weekends, both solo and group, to get to know the local roads and explore the Bay Area in general. One of the more recent events worth noting was a north Bay drive set up by the local Bay Area group (thanks again Drdoc). I had a fantastic time and there happened to be a photographer riding shotgun in one of the the S2000s (opsdave777’s). He risked his personal safety to take quite a few shots of all the S2000s there, but I think the photos speak for themselves (FYI his Insta is @acaurora):

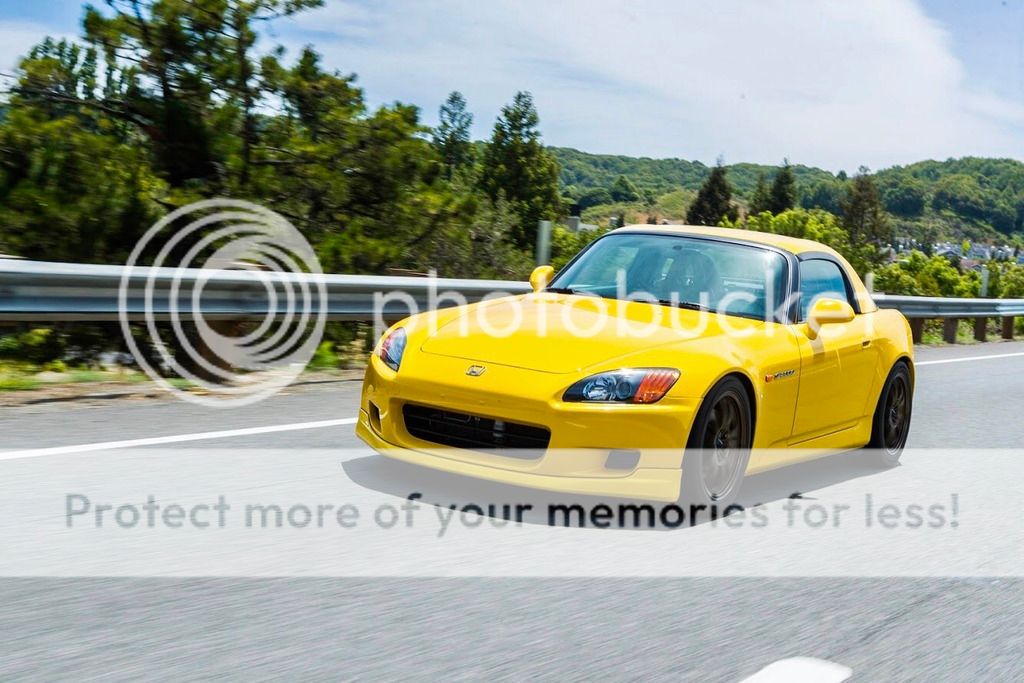
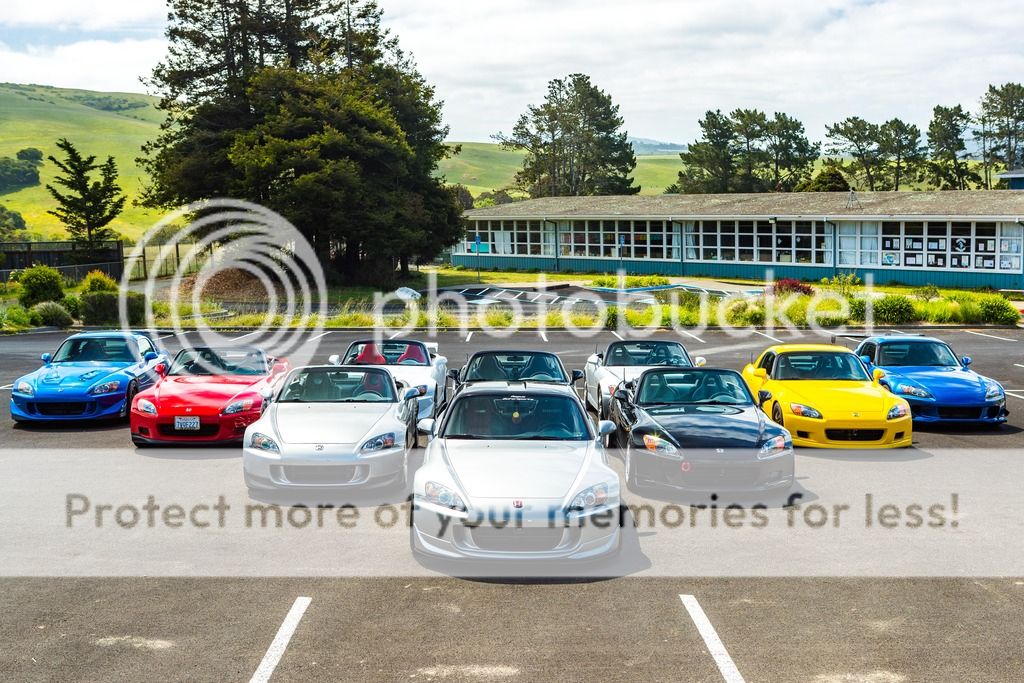
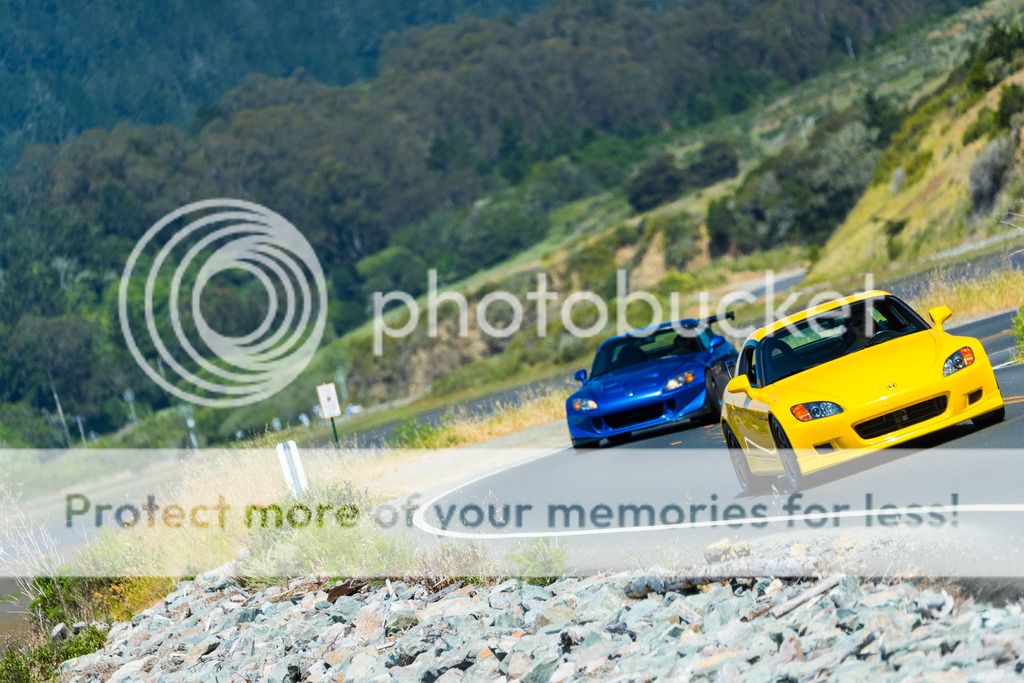


And last but not least my personal favorite from the set
I am FINALLY caught up with my thread and any updates from here on should be “real time”. Although it seems like the traffic on forums in general has slowed down significantly (I’m not on FB anymore as that seems to be where most people have gone) I will continue to update this thread as I progress.
The latest change to the car was an alignment done by local shop Blacktrax Performance. This was my first time working with Jei and his team since moving to the Bay Area and it was a great experience. A very knowledgeable group of technicians/enthusiasts and most definitely an excellent local resource to S2k owners in the Bay.
Regarding my alignment settings I went with a slightly modified “UK spec” alignment:
Front Caster: 7.0*
Front Camber: -1.5*
Front Toe: 0* 00’
Rear Camber: -2.5*
Rear Toe: 0* 20’
Total Rear Toe: 0* 40’ in
The previous owner apparently had a more track-driven alignment spec (-2.5 front camber, slight toe out in front, -3.5 rear camber, and slight toe in). Following this alignment I felt an immediate difference and much preferred my alignment spec for the primarily street application of this car.
Since the alignment I’ve just been taking the car out on various drives during the weekends, both solo and group, to get to know the local roads and explore the Bay Area in general. One of the more recent events worth noting was a north Bay drive set up by the local Bay Area group (thanks again Drdoc). I had a fantastic time and there happened to be a photographer riding shotgun in one of the the S2000s (opsdave777’s). He risked his personal safety to take quite a few shots of all the S2000s there, but I think the photos speak for themselves (FYI his Insta is @acaurora):
And last but not least my personal favorite from the set
07-23-2018, 01:35 PM
#35
A tiny update. The odometer clocked 44,444 miles yesterday which was pretty cool. Unfortunately I couldn't take a pic of it 'cause I was on a narrow two lane road. 
Also found out the Spoon kevlar spark plug cover has been discontinued (was told they are working on a Version 2) and the Mugen one costs quite literally an arm and a leg nowadays on the used market. I get it, a discontinued Mugen part can pull a premium, but WELL over four figures for a ~3" x 18" piece of CF? Too rich for my blood...
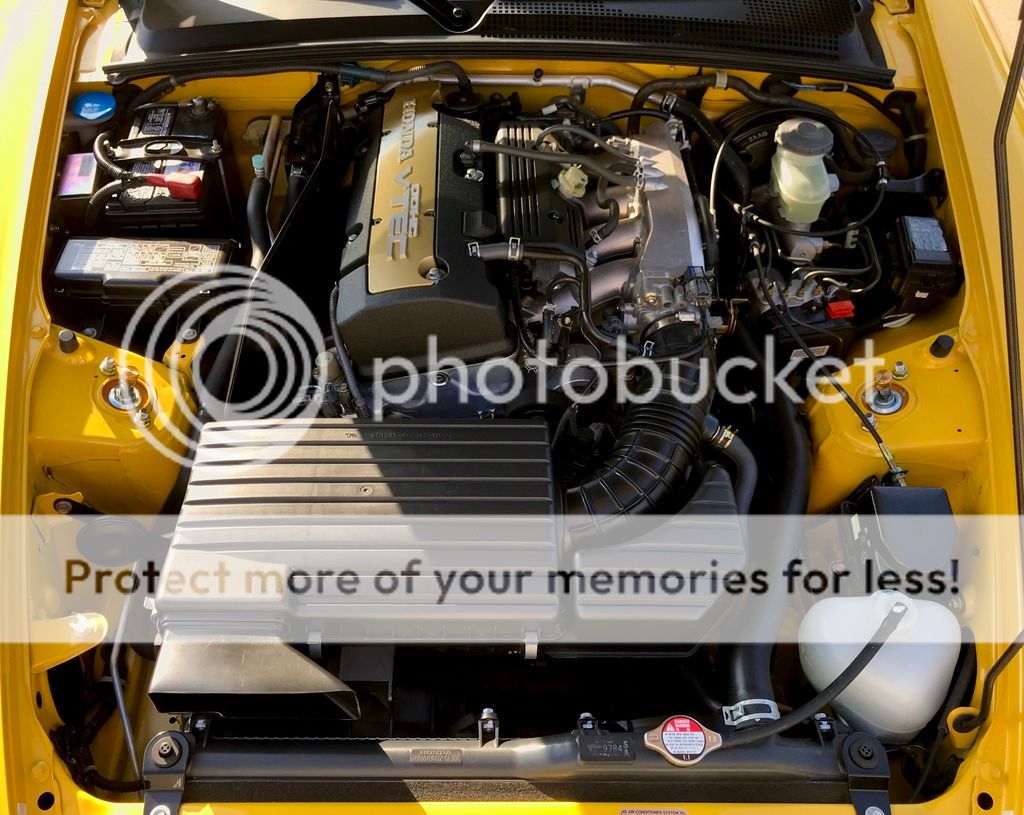
So for the mean time I picked up an OEM AP2 gold spark plug cover to contrast with my wrinkle black powdercoated valve cover (wasn't a fan of the wrinkle black on wrinkle black). An OEM part so fitment was obviously spot on. The gold gives the engine bay a nice "pop" and works quite well with the yellow exterior.
Also found out the Spoon kevlar spark plug cover has been discontinued (was told they are working on a Version 2) and the Mugen one costs quite literally an arm and a leg nowadays on the used market. I get it, a discontinued Mugen part can pull a premium, but WELL over four figures for a ~3" x 18" piece of CF? Too rich for my blood...
So for the mean time I picked up an OEM AP2 gold spark plug cover to contrast with my wrinkle black powdercoated valve cover (wasn't a fan of the wrinkle black on wrinkle black). An OEM part so fitment was obviously spot on. The gold gives the engine bay a nice "pop" and works quite well with the yellow exterior.
07-24-2018, 06:35 AM
#36

car looks great as usual Nate, I follow you on IG as well, its a shame you didnt take the S to San Diego on your last visit, our cars would have made for a pretty clean shoot!
-Carlo
-Carlo
07-24-2018, 09:04 AM
#37
I agree, a clean pair of OEM+ AP1s in black and yellow would make for some great shots. I'll hit you up next time I plan to visit and we can get together for a shoot and then some Hodad's afterwards!
08-14-2018, 03:54 PM
#38
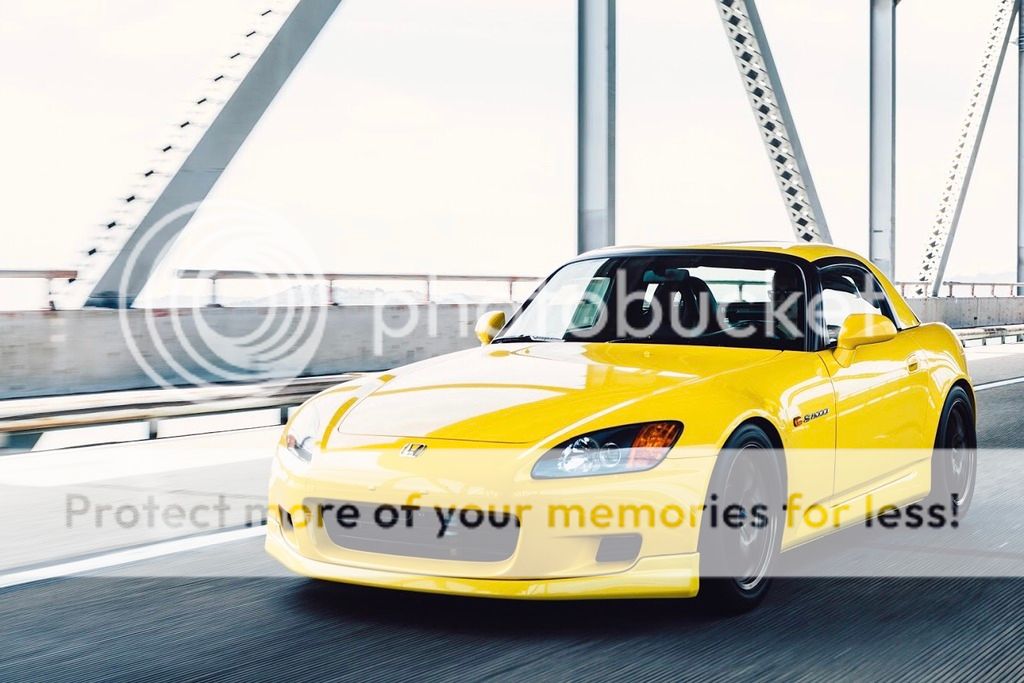
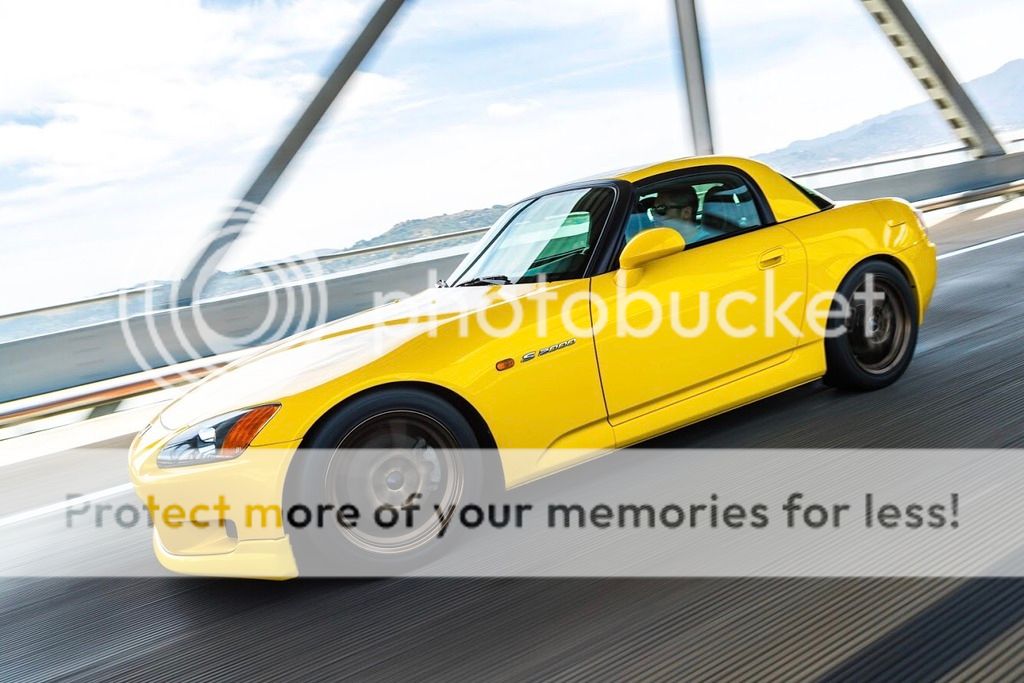
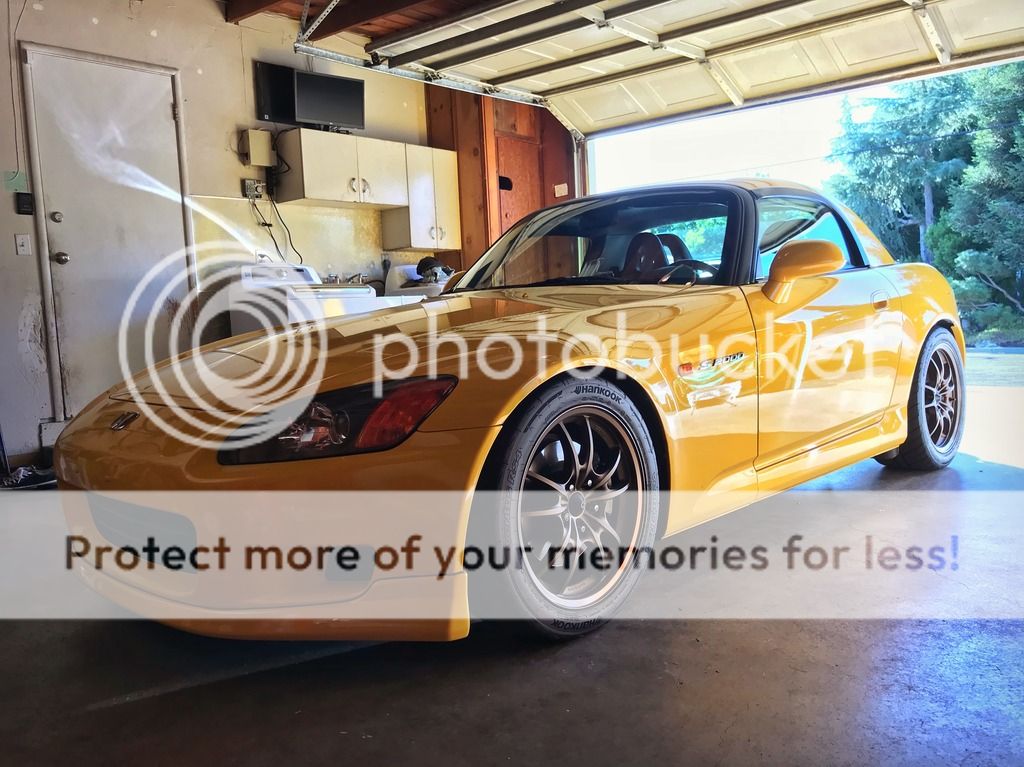
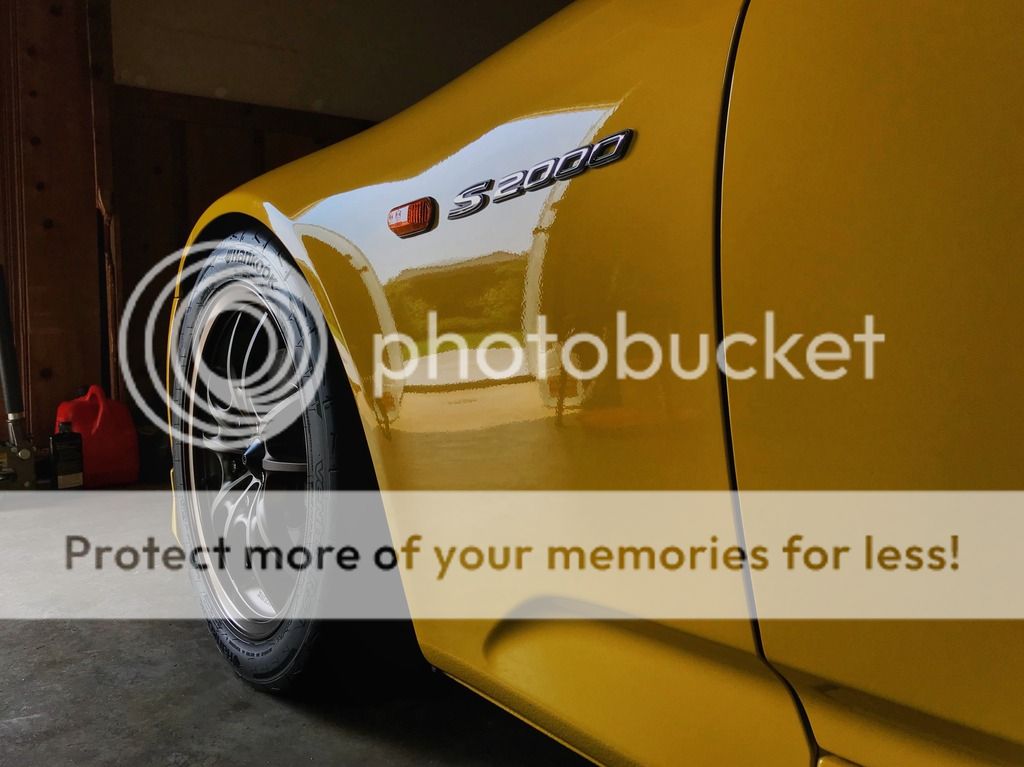
Quick photo update. No changes other than a deep clean, seal with Blackfire Wet Diamond, and Midnight Sun wax for this year's Norcal Mega Meet. The sealant gave the paint a wet glossy look and the wax gave it some depth. Too bad the shine didn't show up very well in the pic at the actual event...

08-14-2018, 04:16 PM
#39
Moderator


Car is so good! Awesome to see the progression since the AZ days. Looking better than ever.
08-14-2018, 08:21 PM
#40

Ugh, I love this. Basically would've gone the Spa route if I didn't get white. I have a bronze wheel fetish, I think they look good on every car, and ironically I have a set of RZII on order in Racing Bronze, it's a "new" color for the RZ series that came out late last year or early this year I think? I ended up going 17x9 +63 square, I'm hoping I'm still safe up front, I don't plan on going too low. I'm really getting pushed hard in the direction of an AP1 front lip myself....I have the RSG Gears lip waiting to go on, but nothing beats the AP1 imo....All I know is if I do decide to go that route it won't be cheap.
Beautiful car man, I hope mine comes out this clean once I take some elbow grease to it and get the parts on it that I've been wanting. Keep this one!
Beautiful car man, I hope mine comes out this clean once I take some elbow grease to it and get the parts on it that I've been wanting. Keep this one!