When you click on links to various merchants on this site and make a purchase, this can result in this site earning a commission. Affiliate programs and affiliations include, but are not limited to, the eBay Partner Network.
Hi all. Here's my take on the oil bolt install, along with a couple pics to help you visualize what you're getting into if you choose to do it yourself.
Infinite thanks to Prolene, our intrepid trailblazer in all sorts of installs. He helped with mine and it went amazingly smoothly. See his original install thread (which has many great tips that I won't repeat here): https://www.s2ki.com/forums/showthread.php?...?threadid=84710
And, as always, please consult your Helm manual.
---
Edit: To clarify, this DIY applies only to F20 engines from '00, '01, and about the first half of '02 (cars with *engine number* lower than about F20C-1025386). The basic issue was this: it was found that *prolonged*, *high-rpm* operation (think 6000+rpm for 30+minutes non-stop) would cause oil starvation and cylinder scoring, usually in cylinder #4. To address the issue, the engine's "oil jet bolts" were updated (new part number: 15290-PCX-000) providing better cylinder oiling. Honda issued a recall in Europe for earlier cars, but refused to do so for the U.S./Canada, so North American '00-'02 owners are on their own to do this if they wish.
The oil jet bolts (often called banjo bolts because they resemble guitar-tuning pegs) feed oil from the block into small squirters (the actual oil jets), which themselves spray oil onto the cylinder walls and the underside of the pistons, allowing for proper lubrication and cooling. Here's is Billman's photo and description of the bolts and jets, from his post later on in this thread:
Originally Posted by Billman250
Left: oil jet bolt
Middle: oil jet, with oil jet bolt inside (as it sits in the engine. note the round button sticking off of the jet, which must fit into a hole in the block)
right: jet laying on its side with no bolt
And here's a photo comparison of the old and new bolts (right photo by GoTuning):
---
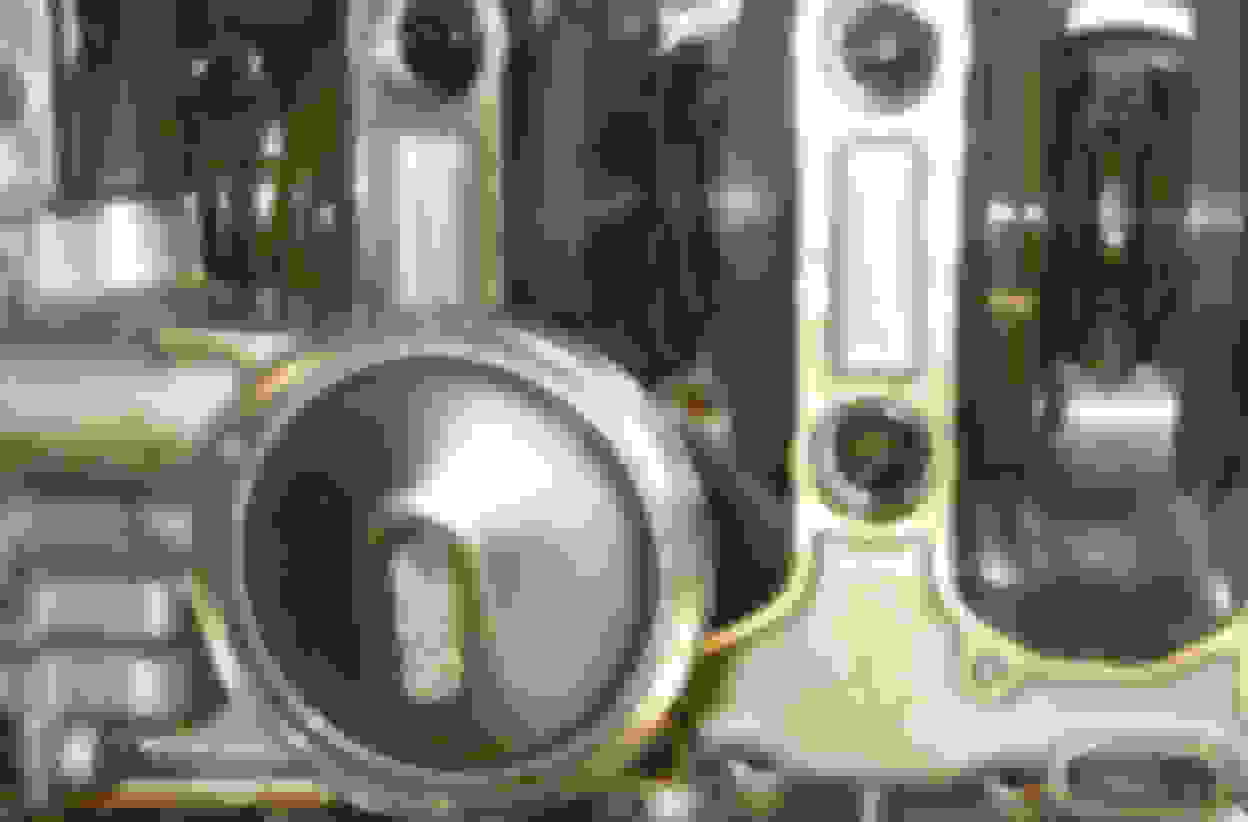
OK. First, drain the oil, and remove the front chassis brace, the rubber bump-stop forward of the oil pan, and about a gazillion bolts from the oil pan (23 or 24 as I recall). (Note: no need to remove the spark plugs as some have said.) There are two (3?) long bolts that fasten the oil pan to the transmission bell housing, also. When all are removed, there's a small lip on each side of the pan where you can get leverage to pry off the pan (to break the old sealant). More oil will now spill everywhere, and will continue to drip slowly from the block for, well, probably several days. Don't worry about it. Here's what the crankcase looks like with the pan off:
And the oil pan, after a wipe-down:
Now, peering up into the crankcase past the crankshaft (you'll want lots of light -- get an extra shop light if possible), there's visible a 10mm bolt head near each rod. Here's a closeup of one:
One by one, just remove and replace them with the new bolts. The oil jet itself will come off with the bolt, and when replacing it, it needs to be returned to its correct orientation. Not to worry, though, there's a little metal nubbin on the jet that fits into a corresponding pit in the crankcase; this "locks" the jet in its proper orientation. You'll see what I mean. As you tighten the bolt, when it's mostly in, stop and use the socket extension to rotate the jet to the right place and push that nubbin up into its pit. It will "want" to stay there once it's in. Then finish tightening to 12 lb-ft.
The only tricky part is the #1 cylinder, which is partially blocked by the oil pickup assembly. You can see what I mean here:
It's actually no problem when removing the bolt, but when re-threading the new one, you can't get a "straight shot", so you need to use a flex shaft or a universal-joint. Be patient with this one, and do it first; that way if you screw up the first couple threads on the new bolt, you can just use it in one of the other cylinders, which are easy to thread. So you'll get four chances on #1.
Oh, one more thing. To get a better view/access to each cylinder in turn, rotate the crank from the (external) 19mm bolt on the forward side of the engine.
Finally, when they're all in, clean the lip of the oil pan, apply a bead of gasket material (e.g. Permatex), and replace the pan. There's an order to tightening the bolts that's called out in the Helm manual. Let the material cure for 24 hours, replace chassis braces, add fresh oil (I needed 5-3/4 qts) and filter, and you're good to go!
-------------------------------------------------------- A little extra Clarification - Quick Read
-------------------------------------------------------- IMPORTANT NOTE, Sept. 2020:
There is growing evidence that the internal spring in the updated 4-hole bolts can fail, leaving the holes stuck open. This failure mechanism does NOT compromise the high-rpm protection of the new bolts, i.e., even failed 4-hole bolts will prevent the scoring of cylinder 4 in the conditions described above. However, by remaining stuck open, these failed bolts can temporarily cause (or extend) a brief period of low oil pressure at start-up, particularly in warm starts. It's not clear what, if any, long-term risks this may pose to engine health.
As of now, I continue to recommend replacing the old 2-hole bolts with the newer 4-hole bolts. This is because, again, the failure mechanism in the new bolts does NOT compromise the high-rpm protection they provide. So, even failed 4-hole bolts can prevent a catastrophic engine failure, which far outweighs the (theoretical risk of) minor added wear during start-up. Nevertheless, I'll be following the community's findings, and if it ever becomes clear that this recommendation should change, I'll update this post immediately.
It probably took about 4-5 hours to get the bolts in and the pan back on. Of course you also need to budget 24 hrs for the RTV to cure. (Yes, the Honda stuff also needs 24 hrs.)


 Don't worry about it. Here's what the crankcase looks like with the pan off:


 I don't have confidence in the dealer doing that.

