
DIY: How to replace Window Regulator/Motor

Thread Starter
Joined: Mar 2005
Posts: 5,662
Likes: 4
Hi everyone,
This might not be a common problem, but it's one that sucks all the same. You're driving along as usual, you roll up the window, and then POP! there is a loud sound and your window mysteriously starts going down. WTF?!?
It's likely (in my case at least) that the cable/wire for your automatic window has snapped or popped off. This may not sound like a huge deal, but as you quickly realize...you cannot put your window back up!! Hopefully there is no rain coming
You first may do what I did: call the dealer to hear the Joke of the Day. In my case, I called one of the Honda dealers near Springfield. The parts department quoted me $333 for the part, and the service department said parts + labor would be $595.
So that's out. I have better things to do with my $600. The best course of action is to source a window regulator on Ebay or from a junkyard. You can also get them cheaper online (but still paying around $200) if you decide you want brand spankin' new. I found one for $65 shipped on Ebay (from a wrecked 2004 model). I am not sure if there are any differences with AP1 and AP2 but I decided to get one for an AP2 just in case.
But that's going to take a couple days to get. In the meantime, you have a nice car sitting outside with skeezballs creeping around trying to jack your seats and stereo and air freshner. So you'll have to do a makeshift "prop up" to keep the window up.
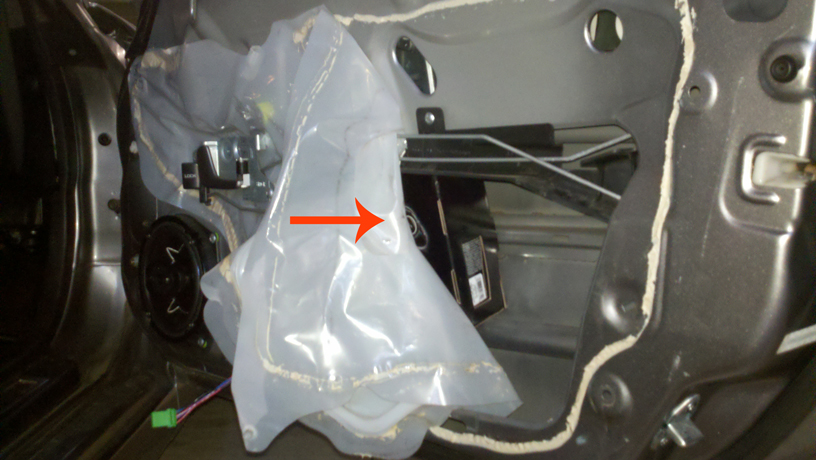
Step 1: Remove the door panels
For more information, refer to this DIY: https://www.s2ki.com/forums/index.php?showtopic=483031
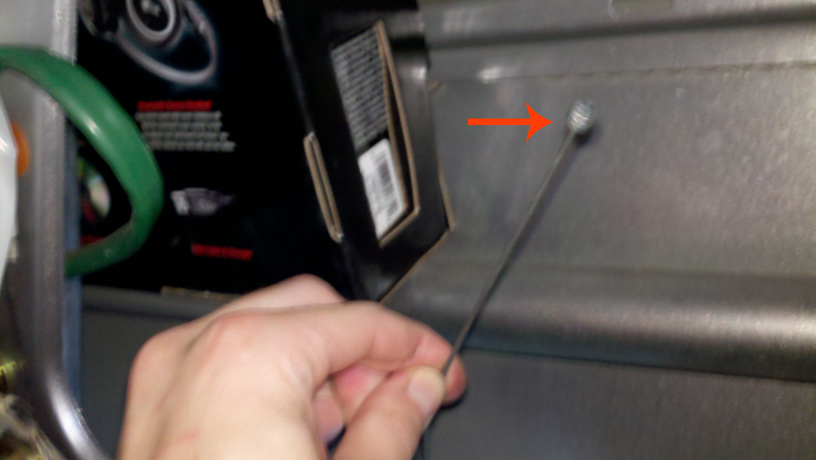
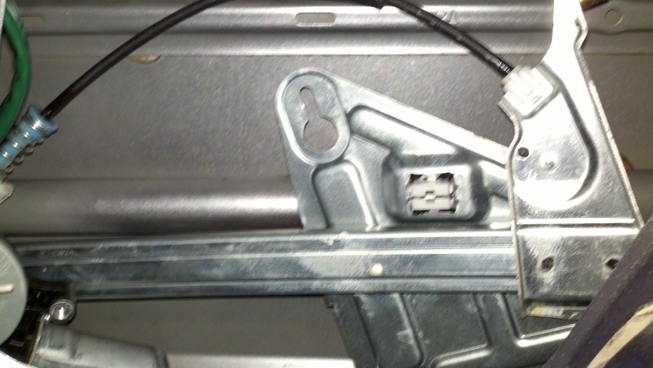
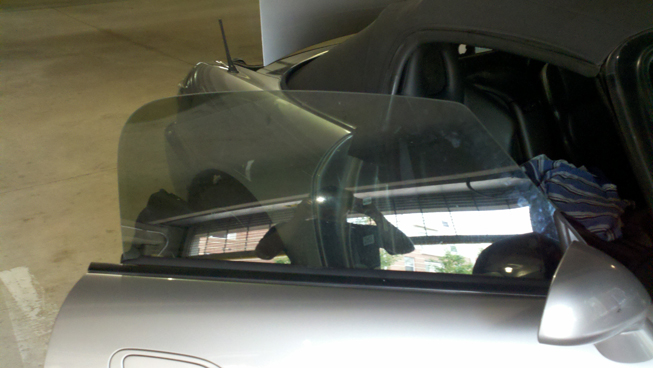
Step 2: Pull back the plastic covering and see if you can locate the problem. This is what I found:
Step 3: Push the window upward from the bottom (you can then pull it out the top once it gets up halfway). It is best to have someone help hold the window up for you or you can try using heavy duty tape to hold it up. Or you can do what I do and hold it with one hand, try to do stuff with the other hand, and curse with the mouth.
Step 4: This probably should have been step 3, but you should have something to prop up the window with. I was able to make use of this heavy duty cardboard cell phone box I had still, plus I wedged in a couple towels on top.
Step 5: Prop up the window and drive.
Step 6: Send a semi-threatening message to the ebay guy who sold you the part asking where your tracking information is.
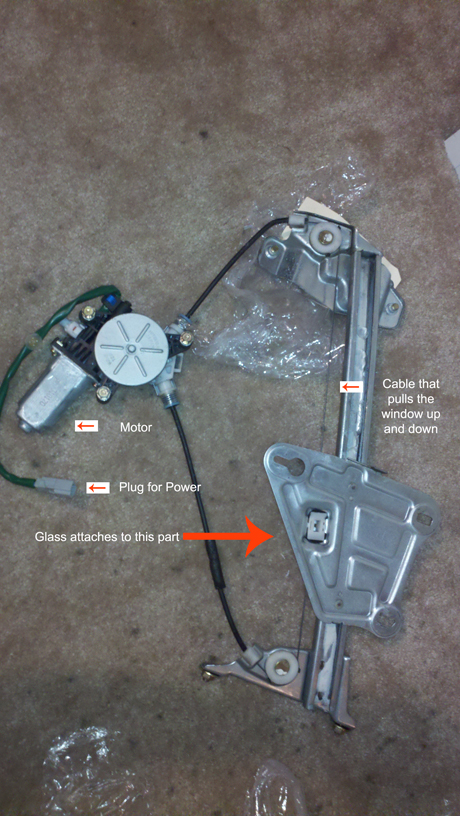
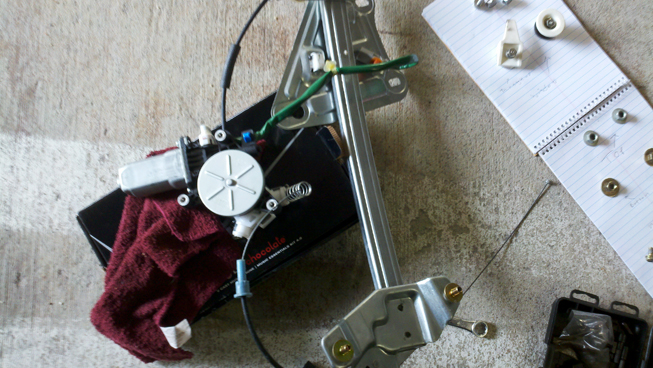
Step 7: Get your window regulator in the mail. For me, this made it A LOT easier to understand what was going on, because there is very poor visibility inside the door frame to be able to see the broken regulator and how it is held in. Once you see the new regulator you'll begin to understand. This is basically what is going on with it:
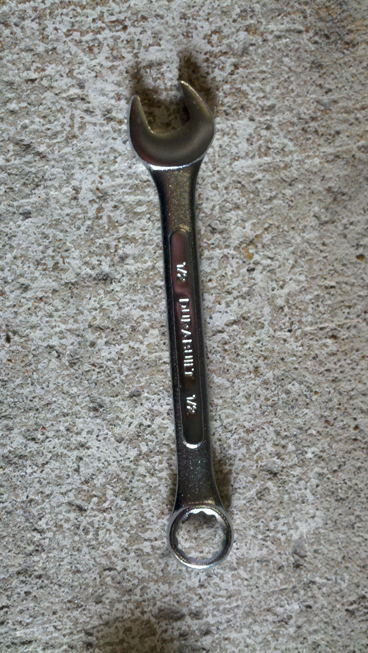
Step 8: Gather necessary tools: I don't have many tools, but I used a Phillips head screwdriver, a 1/2" wrench, and a 10 mm nut turner (or whatever it's called), and a smoothie (no pic of the smoothie) to keep me refreshed.
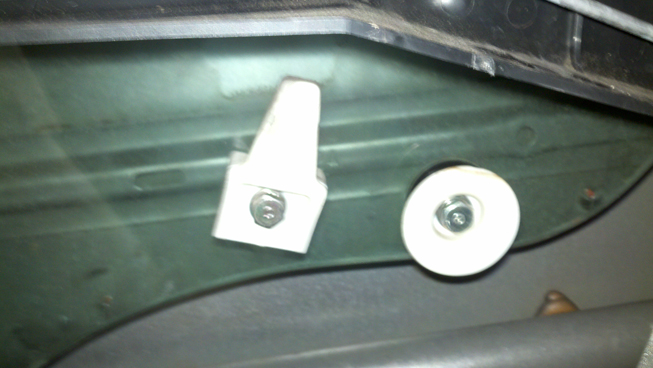
Step 9: I found it was easier to remove the glass first. This way there is less weight and less risk of messing anything up. Plus I am not sure if it would be possible to remove the regulator with the glass still in it. I removed the glass out the top. To do this, you need to remove the three nuts holding the glass on, plus these two white things that help stop the window when it gets to the top. There is a third white thing you do not need to necessarily remove. It is best to have someone holding the glass that can take the brunt of the weight and is able to slide it up and down as you need it.
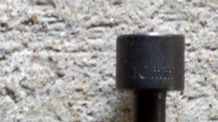
Using the 1/2" wrench (or if you have the necessary nut grabber size that would probably work better), take the three nuts off the window. I found it easiest to do the bottom right first, then the left one, and then the top right one. Using your 10 mm tool, take off the white round thing and the other white piece. Be careful to note the order that the white pieces come off, as there are additional plastic pieces that help protect the window.
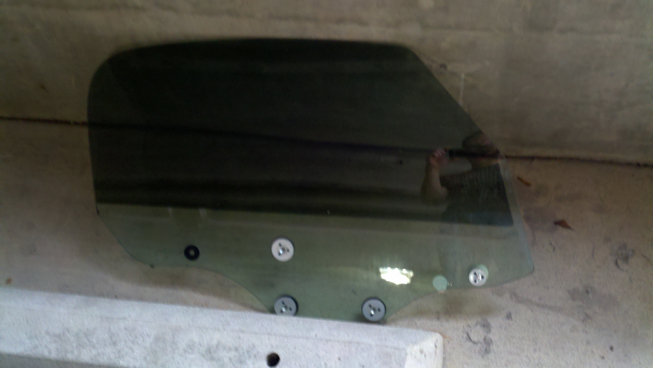
Set these aside and pull the glass from the top. There is one more white round bumper piece that will make it a little bit difficult to pull out, but not too much. Carefully set the glass aside. Take a drink of your smoothie.
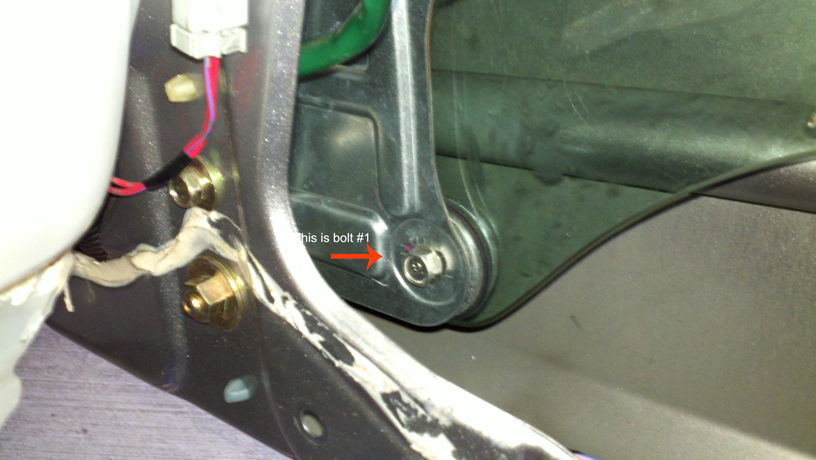
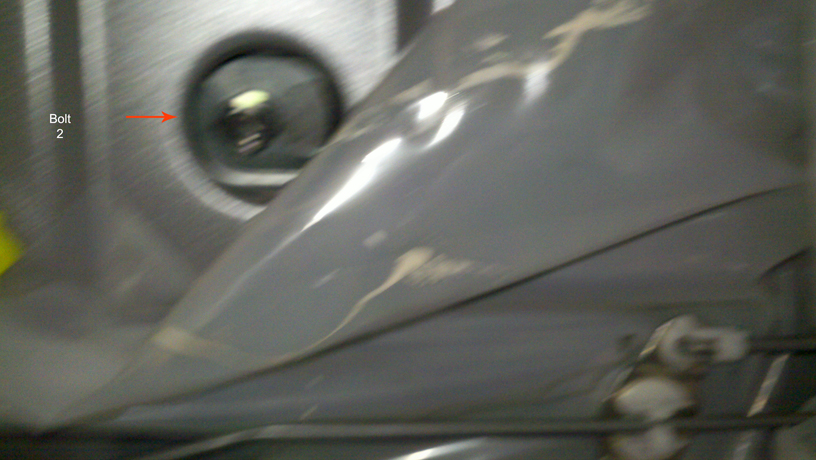
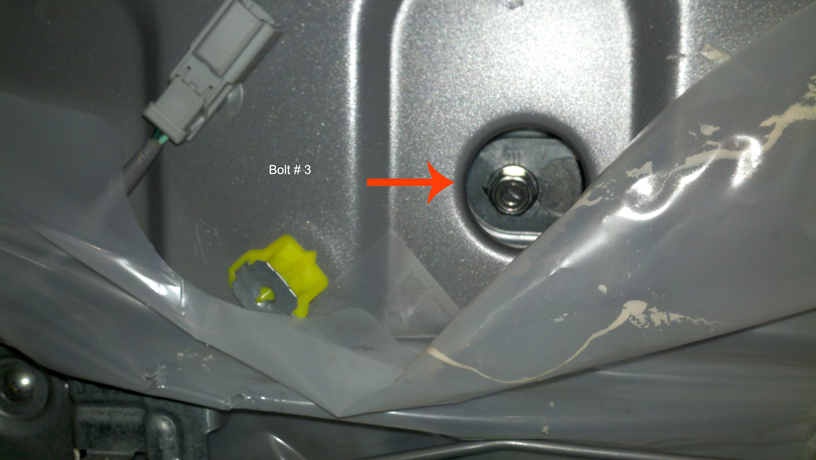
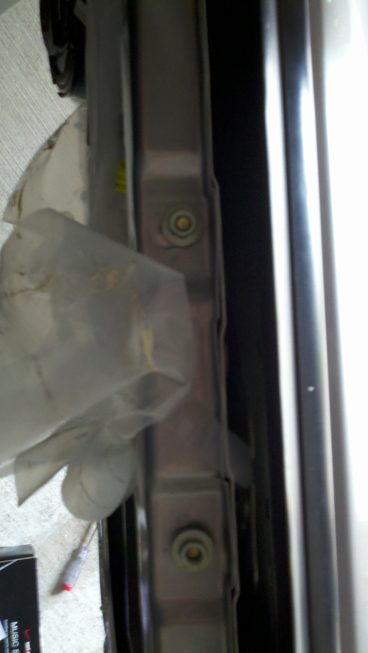
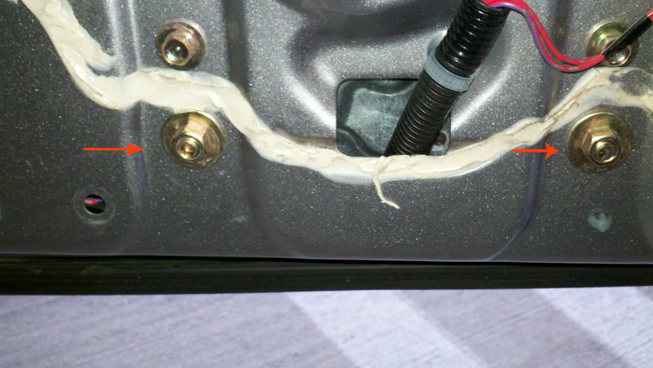
Step 10: Now it's time to remove the motor and regulator. There are 7 nuts in total that need to be removed. There are three that hold in the motor, and two on top and two on the bottom holding in the regulator.
Using a 1/2" wrench, remove these nuts.
Using the 1/2" wrench, remove the bottom nuts.
Now the regulator is free to come out, but the motor itself needs to be unbolted. There are two steps to this. NOTE: Take a good look how the motor is mounted before taking it off.
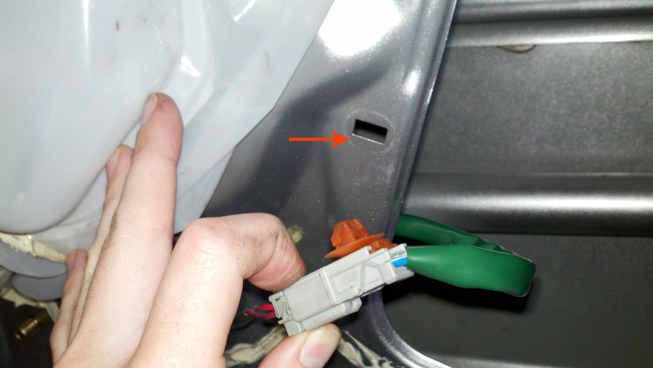
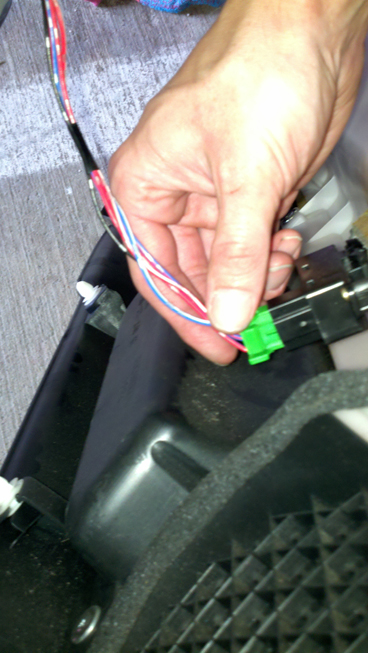
Pull the green wire that is clipped in to the door out, and then unclip it from the red ones.
Next, using the 10 mm tool, take off the three nuts for the motor assembly. They are:
Now you should be able to slowly wiggle the regulator and motor out the door. Thhis took a little trial and error, but I found it best to lay the whole thing down to the left towards the engine and pull it out.
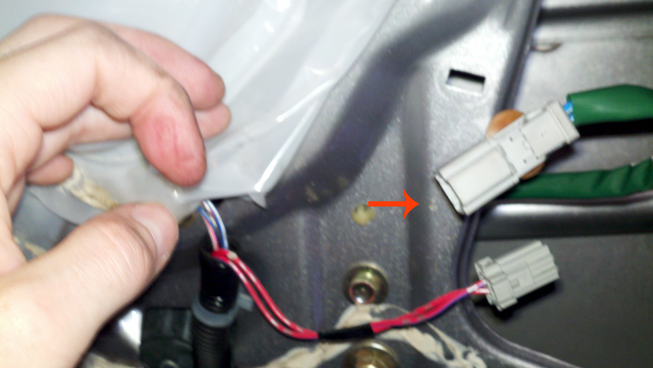
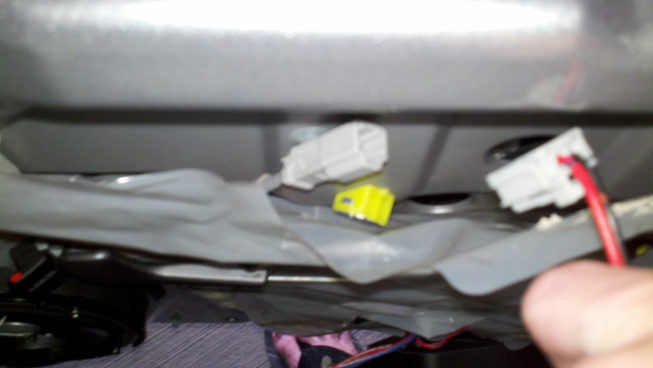
But wait! One more little clip holding the green wires. I used a very small flathead screwdriver and with some poking and prodding was able to pop it out.
And there you go! Here is your current hunk o' junk.
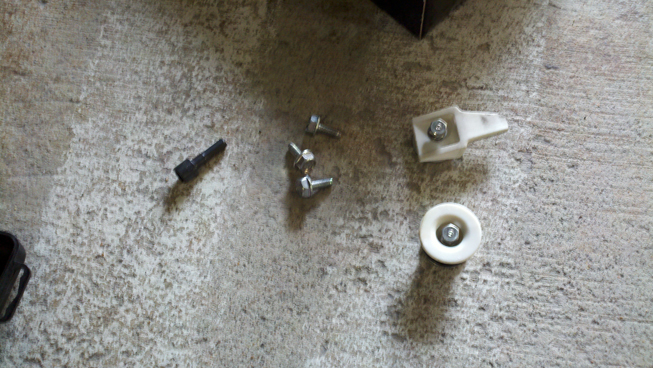
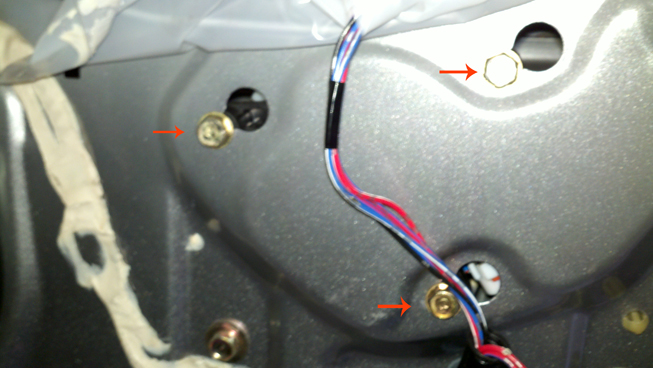
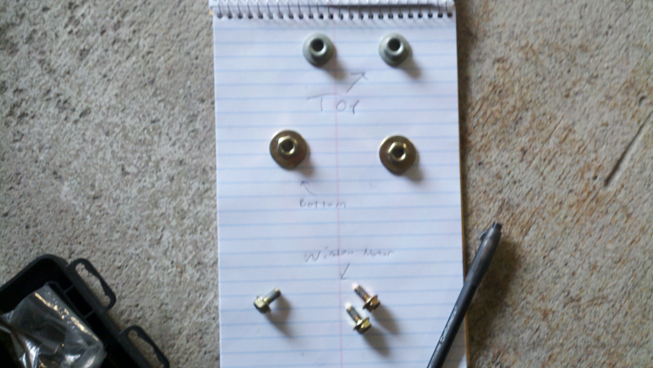
And for those who are like me and scared to death about taking apart something without actually being able to put it back together or replace it, I wrote down what nuts go where:
Step 11: Have another drinnk of smoothie.
Step 12: Okay! Now you have the old one out, you just have to follow the steps in reverse. It's actually not as difficult as you may think. The trickiest part is putting the motor back in. Everything else bolts right up. I started with the top two nuts holding the regulator, then the bottom two. However, I did put one nut in to hold the motor in place.
Step 13: Now it is time to put the glass in. This is where I had a headache, so I will tell you how to solve the problem if you have the same thing. So I had the regulator and motor all bolted up and I decided to test things before putting the glass in. So I turn on the car and use the driver's side window switch and the part that holds the glass goes down but won't go back up. There is a clicking sound if you push down but no sound if you push up. I then plug in the broken regulator and motor and it does the same thing. I pull the fuses and check them but they are fine. I am getting very frustrated. I decide to go get the passenger door panel and see if that switch will work. I plug it in, and lo and behold, it works fine! The driver's side was letting me go down but the up was not working.
So now that I found this out, it was easy. I used the switch to put up the part the glass attaches to to an appropriate level. Now, this time you do not need anybody to hold the glass for you as it will not slide down anymore. So with a little careful trial and error, I slid the glass back in:
Then it is just a matter of putting the three nuts that hold on the glass back in. Remember, there are three of them (here are two):
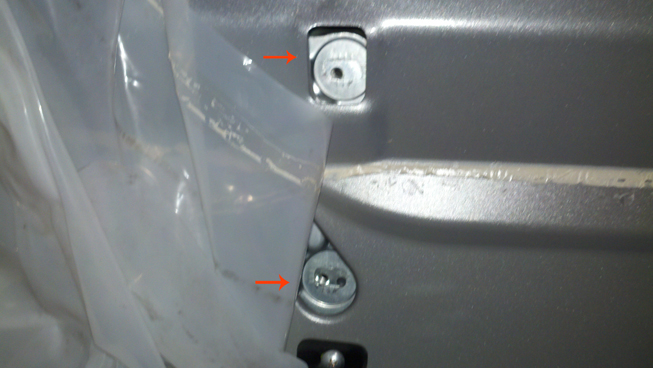
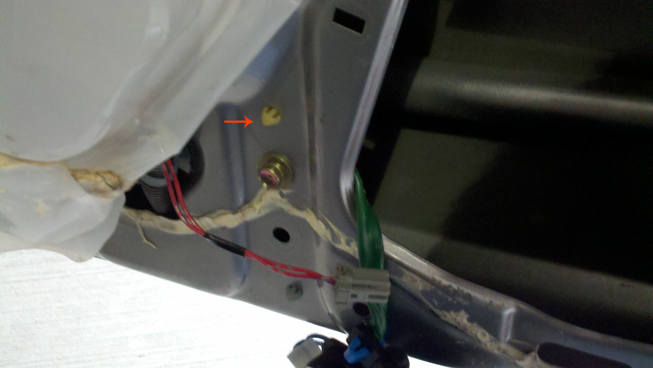
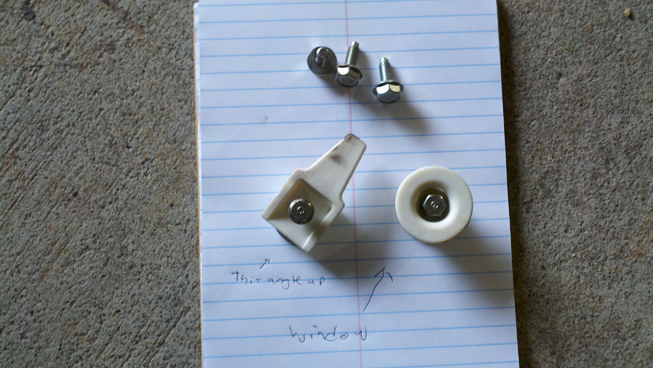
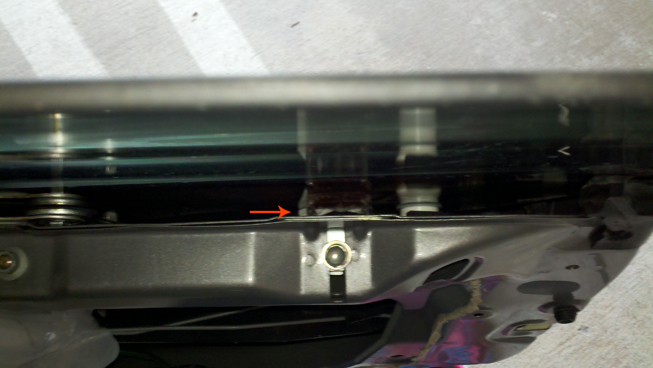
Next, you need to put the two little white plastic pieces back on. What you are looking to do is to get the upward angle of the non-round square piece to go in between where I marked with an arrow:
Congratulations, you have a window!
Step...what step am I on? Oh yeah, 14: Ok, now you got the window working, it is just a matter of putting the plastic covering back on and then reattaching the door panel. Don't forget to
1: Plug in the window switch. Otherwise you won't be able to roll it up and down!
2: Plug in your tweeter. Unless you don't want to heaer it anymore.
Then, follow all the steps in reverse order that you used to take off the door panel. Remember, there are two screws in the "oh shit" handle, one behind the door latch, and a clip style tab towards the front of the door panel.
Step 15: You're done! Immediately put the top down and go for a drive. Oh yeah, I forgot to tell you, your driver's side switch should suddenly be working! It must only work when the passenger's one is plugged in? Either way, doesn't matter, you just saved $500+ the dealer would have charged you. Make sure to drive by the Honda dealer and
Disclaimer: I am no certified mechanic and this was in fact my very first project, so unfortunately for you, I am going to put in writing I cannot be held liable for any damages
Well I hoped you enjoyed reading all that! It took me longer to do this than the actual repair I think! Can this be stickied since I worked so hard?

Kevin
This might not be a common problem, but it's one that sucks all the same. You're driving along as usual, you roll up the window, and then POP! there is a loud sound and your window mysteriously starts going down. WTF?!?
It's likely (in my case at least) that the cable/wire for your automatic window has snapped or popped off. This may not sound like a huge deal, but as you quickly realize...you cannot put your window back up!! Hopefully there is no rain coming
You first may do what I did: call the dealer to hear the Joke of the Day. In my case, I called one of the Honda dealers near Springfield. The parts department quoted me $333 for the part, and the service department said parts + labor would be $595.
So that's out. I have better things to do with my $600. The best course of action is to source a window regulator on Ebay or from a junkyard. You can also get them cheaper online (but still paying around $200) if you decide you want brand spankin' new. I found one for $65 shipped on Ebay (from a wrecked 2004 model). I am not sure if there are any differences with AP1 and AP2 but I decided to get one for an AP2 just in case.
But that's going to take a couple days to get. In the meantime, you have a nice car sitting outside with skeezballs creeping around trying to jack your seats and stereo and air freshner. So you'll have to do a makeshift "prop up" to keep the window up.
Step 1: Remove the door panels
For more information, refer to this DIY: https://www.s2ki.com/forums/index.php?showtopic=483031
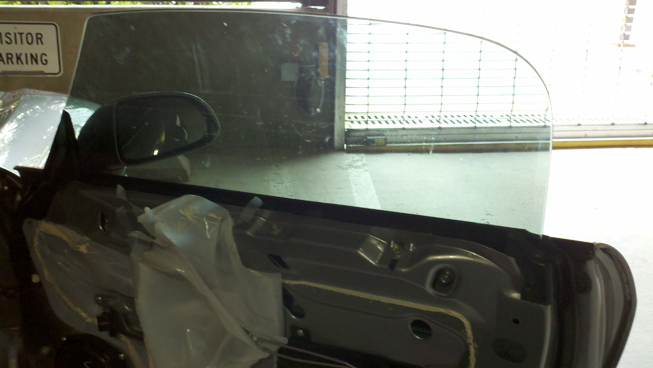
Step 2: Pull back the plastic covering and see if you can locate the problem. This is what I found:
Step 3: Push the window upward from the bottom (you can then pull it out the top once it gets up halfway). It is best to have someone help hold the window up for you or you can try using heavy duty tape to hold it up. Or you can do what I do and hold it with one hand, try to do stuff with the other hand, and curse with the mouth.
Step 4: This probably should have been step 3, but you should have something to prop up the window with. I was able to make use of this heavy duty cardboard cell phone box I had still, plus I wedged in a couple towels on top.
Step 5: Prop up the window and drive.
Step 6: Send a semi-threatening message to the ebay guy who sold you the part asking where your tracking information is.
Step 7: Get your window regulator in the mail. For me, this made it A LOT easier to understand what was going on, because there is very poor visibility inside the door frame to be able to see the broken regulator and how it is held in. Once you see the new regulator you'll begin to understand. This is basically what is going on with it:
Step 8: Gather necessary tools: I don't have many tools, but I used a Phillips head screwdriver, a 1/2" wrench, and a 10 mm nut turner (or whatever it's called), and a smoothie (no pic of the smoothie) to keep me refreshed.
Step 9: I found it was easier to remove the glass first. This way there is less weight and less risk of messing anything up. Plus I am not sure if it would be possible to remove the regulator with the glass still in it. I removed the glass out the top. To do this, you need to remove the three nuts holding the glass on, plus these two white things that help stop the window when it gets to the top. There is a third white thing you do not need to necessarily remove. It is best to have someone holding the glass that can take the brunt of the weight and is able to slide it up and down as you need it.
Using the 1/2" wrench (or if you have the necessary nut grabber size that would probably work better), take the three nuts off the window. I found it easiest to do the bottom right first, then the left one, and then the top right one. Using your 10 mm tool, take off the white round thing and the other white piece. Be careful to note the order that the white pieces come off, as there are additional plastic pieces that help protect the window.
Set these aside and pull the glass from the top. There is one more white round bumper piece that will make it a little bit difficult to pull out, but not too much. Carefully set the glass aside. Take a drink of your smoothie.
Step 10: Now it's time to remove the motor and regulator. There are 7 nuts in total that need to be removed. There are three that hold in the motor, and two on top and two on the bottom holding in the regulator.
Using a 1/2" wrench, remove these nuts.
Using the 1/2" wrench, remove the bottom nuts.
Now the regulator is free to come out, but the motor itself needs to be unbolted. There are two steps to this. NOTE: Take a good look how the motor is mounted before taking it off.
Pull the green wire that is clipped in to the door out, and then unclip it from the red ones.
Next, using the 10 mm tool, take off the three nuts for the motor assembly. They are:
Now you should be able to slowly wiggle the regulator and motor out the door. Thhis took a little trial and error, but I found it best to lay the whole thing down to the left towards the engine and pull it out.
But wait! One more little clip holding the green wires. I used a very small flathead screwdriver and with some poking and prodding was able to pop it out.
And there you go! Here is your current hunk o' junk.
And for those who are like me and scared to death about taking apart something without actually being able to put it back together or replace it, I wrote down what nuts go where:
Step 11: Have another drinnk of smoothie.
Step 12: Okay! Now you have the old one out, you just have to follow the steps in reverse. It's actually not as difficult as you may think. The trickiest part is putting the motor back in. Everything else bolts right up. I started with the top two nuts holding the regulator, then the bottom two. However, I did put one nut in to hold the motor in place.
Step 13: Now it is time to put the glass in. This is where I had a headache, so I will tell you how to solve the problem if you have the same thing. So I had the regulator and motor all bolted up and I decided to test things before putting the glass in. So I turn on the car and use the driver's side window switch and the part that holds the glass goes down but won't go back up. There is a clicking sound if you push down but no sound if you push up.
I then plug in the broken regulator and motor and it does the same thing. I pull the fuses and check them but they are fine. I am getting very frustrated. I decide to go get the passenger door panel and see if that switch will work. I plug it in, and lo and behold, it works fine! The driver's side was letting me go down but the up was not working.So now that I found this out, it was easy. I used the switch to put up the part the glass attaches to to an appropriate level. Now, this time you do not need anybody to hold the glass for you as it will not slide down anymore. So with a little careful trial and error, I slid the glass back in:
Then it is just a matter of putting the three nuts that hold on the glass back in. Remember, there are three of them (here are two):
Next, you need to put the two little white plastic pieces back on. What you are looking to do is to get the upward angle of the non-round square piece to go in between where I marked with an arrow:
Congratulations, you have a window!
Step...what step am I on? Oh yeah, 14: Ok, now you got the window working, it is just a matter of putting the plastic covering back on and then reattaching the door panel. Don't forget to
1: Plug in the window switch. Otherwise you won't be able to roll it up and down!
2: Plug in your tweeter. Unless you don't want to heaer it anymore.
Then, follow all the steps in reverse order that you used to take off the door panel. Remember, there are two screws in the "oh shit" handle, one behind the door latch, and a clip style tab towards the front of the door panel.
Step 15: You're done! Immediately put the top down and go for a drive. Oh yeah, I forgot to tell you, your driver's side switch should suddenly be working! It must only work when the passenger's one is plugged in?
Either way, doesn't matter, you just saved $500+ the dealer would have charged you. Make sure to drive by the Honda dealer and Disclaimer: I am no certified mechanic and this was in fact my very first project, so unfortunately for you, I am going to put in writing I cannot be held liable for any damages
Well I hoped you enjoyed reading all that! It took me longer to do this than the actual repair I think! Can this be stickied since I worked so hard?
Kevin


Trending Topics
Thread Starter
Joined: Mar 2005
Posts: 5,662
Likes: 4
Originally Posted by 21337R,Aug 16 2010, 10:23 PM
Smoothie < Beer
 Great write up! I hope I'll never need it.
Great write up! I hope I'll never need it.  Beer def would be better, unfortunately I didn't have any plus I am on this health kick lately!

