
Brake duct DIY (with many photos)
 04-08-2014, 01:55 AM
#1
Registered User

Thread Starter

I'm not sure it is the right place to post, but it's about brake. please move the thread if not
Also, English is not my first language so if you don't understand any sentence, let me know. I'll try my best to explain
I'm a noob driver, but this happened to me last weekend

So I finally did it while I was waiting for a new set of RB 2 piece rotors
---------------------------------------------------------------------------------------------------------------------------------------------------------------
What you need(for AP2 S2000):
1. 2-1/2 inches (or sizes of your tube) hole saw with an arbor, about $13 from Home Depot
--- http://www.homedepot.com/p/Milwaukee...9631/202327753
If you want a quality one,
http://www.amazon.com/gp/product/B00...?ie=UTF8&psc=1
and http://www.amazon.com/gp/product/B00...?ie=UTF8&psc=1
2. High Temp Silicone Air Duct, 2.5 inch dia., 12 foot length. $98.99, parts# 3621-2.50-12 FOOT
https://www.pegasusautoracing.com/pr...p?Product=3621
3. 2 of 2-1/2 inch hose clamps, $2.89 each, parts# 3613-2.75
https://www.pegasusautoracing.com/pr...p?Product=3613
4. 2 of 2-1/2 inch aluminum flanges (2 for bumper, 2 for dust shield), $7.75 each, parts# 10350-10
http://www.aircraftspruce.com/catalo...uctflanges.php
5. 6 of bolts and nuts. I believe I used M8-1.25 x 10mm bolts from Home Depot
6. Epoxy or Silicone adhesive from Home Depot
7. Brake duct from WASP composite. $150
8. Center punch (since we are drilling on a flat metal surface, this will make your life A LOT easier)
http://www.amazon.com/gp/product/B00...=ATVPDKIKX0DER
9. Cutting wheel --- If you have an angle grinder with a thin cutting wheel, it'd be the best, but if you don't, you can simply buy a Dremel arbor and cutting wheel. you need to be patient, but it works
10. WD-40 or any other lub
11. 8mm, 10mm, 12mm, 17mm socket
12. Masking tape, duct tape
Total costs about $300
---------------------------------------------------------------------------------------------------------------------------------------------------------------
First thing first, if you did find other DIY, read it until you do understand. I read Rob's DIY about 30 times before started
http://robrobinette.com/S2000BrakeDucts.htm
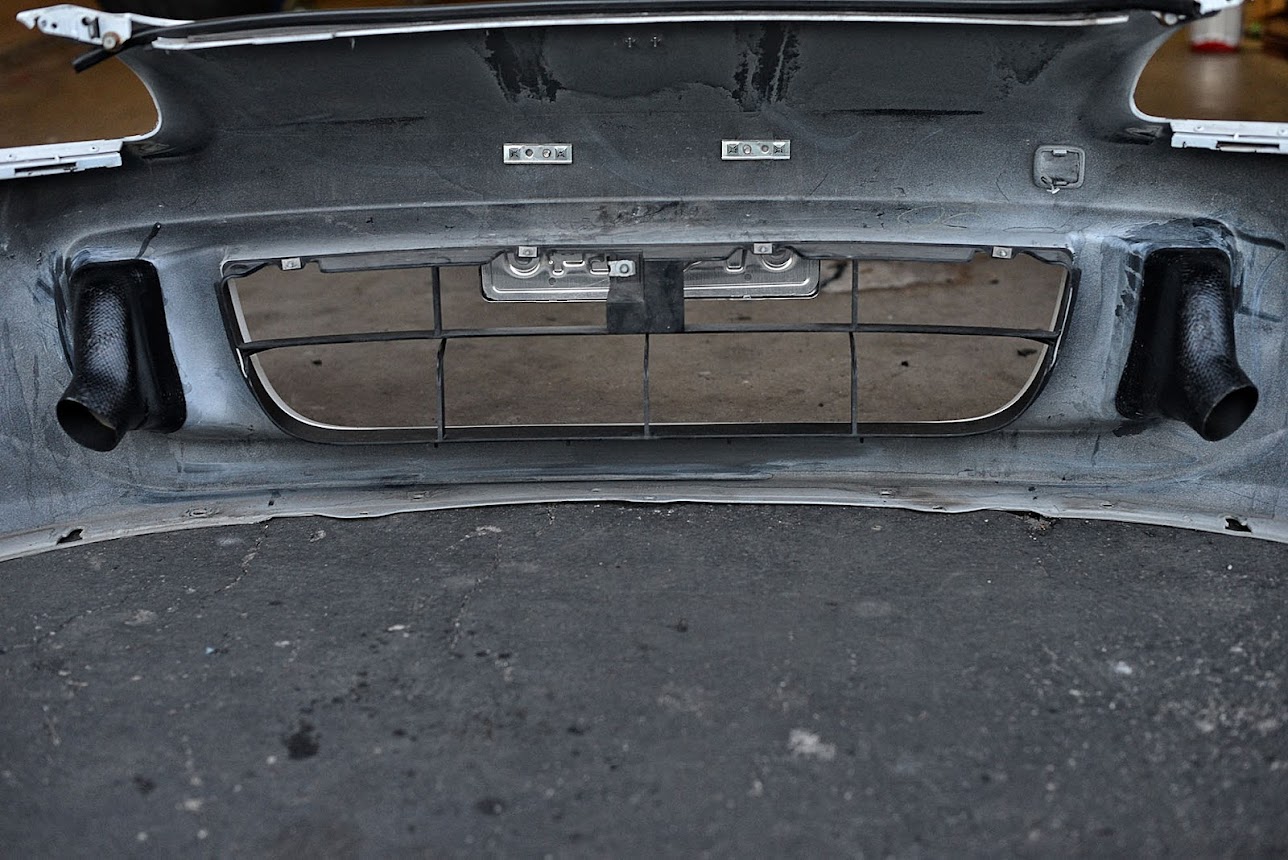
For brake duct installation, you need to remove bumper, brake pad and brake rotor.
Here is bumper removal DIY
https://www.s2ki.com/s2000/topic/507...d-how-to-long/
I didn't remove brake dust cover because I thought it is hard, but it is not. Also, since I don't have a bench vice, I have nothing to hold them for me.
So, if you remove all the parts mentioned, you will be here

wipe the brake dust, have a clear visual.
we need to choose where we are going to drill. Top right side of dust cover (for passenger side) is the good place. it is sinked, bolts don't bother brake rotor, and don't interfere with steering arm movement. Also, there is a bump and grooves, which is a good guide line to align a flange later.

once you align your flange, draw a circle for the hole. Mine is

Now, time to drill. Use a center punch to mark a center. Also, cover your ABS sensor and ball joint with paper towel. There will be a lot of debris falling out.
To give some tips for those of you who've never used a hole saw, you can plug a drill bit at the enter of a hole saw arbor. This is your center guide. If you don't use it(which is what I did first time lol,) you will see your hole saw dances very good
Also, make sure to lubricate your drill bit and hole saw, use slow speed on your drill and give just little pressure. You are cutting a steel


My hole saw madrel failed at this point, so I had to wait a new hole saw and mandrel arriving
meanhile I changed brake fluid. can you see the march of bubbles?

Just be patient and check if you are cutting straight and no other stuffs.
If you are succeessful, it would be like this


Clean the debris and lubricant. If you have a touch up paint, paint the edge where it is cut to prevent rust.
okay, we have to drill holes to hold the flanges in place.
put your flange on the hole cut, and see where is suitable. My first hole is right below the small bump. If you place the hole too close, it will hold unstable, and the flange wall will interfere with nuts. so if you are not sure, measure, measure and measure. I just did eye balling


Once you drill the hole through, place the flange, and use a center punch to mark where you need to drill. Since the flange is made of aluminum, it is easy to drill. Put it on the ground and just use your tool weight. Don't press it. you'll most likely break your drill bit and hurt yourself.

For second and third hole, you can secure the flange with a bolt, and check the next place to drill.
This is how I installed

Next, you need intake duct from the bumper. with AP1 bumper, you can do the same procedure on fog light block, but unfortunately this is not an option for AP2 bumper. I bought a brake duct from WASP compostie. I thought this is just a piece of crap rubber, but it is made of FRP and has good quality. You can use any duct you want. I know there are several manufacturers.

Also, English is not my first language so if you don't understand any sentence, let me know. I'll try my best to explain
I'm a noob driver, but this happened to me last weekend
So I finally did it while I was waiting for a new set of RB 2 piece rotors
---------------------------------------------------------------------------------------------------------------------------------------------------------------
What you need(for AP2 S2000):
1. 2-1/2 inches (or sizes of your tube) hole saw with an arbor, about $13 from Home Depot
--- http://www.homedepot.com/p/Milwaukee...9631/202327753
If you want a quality one,
http://www.amazon.com/gp/product/B00...?ie=UTF8&psc=1
and http://www.amazon.com/gp/product/B00...?ie=UTF8&psc=1
2. High Temp Silicone Air Duct, 2.5 inch dia., 12 foot length. $98.99, parts# 3621-2.50-12 FOOT
https://www.pegasusautoracing.com/pr...p?Product=3621
3. 2 of 2-1/2 inch hose clamps, $2.89 each, parts# 3613-2.75
https://www.pegasusautoracing.com/pr...p?Product=3613
4. 2 of 2-1/2 inch aluminum flanges (2 for bumper, 2 for dust shield), $7.75 each, parts# 10350-10
http://www.aircraftspruce.com/catalo...uctflanges.php
5. 6 of bolts and nuts. I believe I used M8-1.25 x 10mm bolts from Home Depot
6. Epoxy or Silicone adhesive from Home Depot
7. Brake duct from WASP composite. $150
8. Center punch (since we are drilling on a flat metal surface, this will make your life A LOT easier)
http://www.amazon.com/gp/product/B00...=ATVPDKIKX0DER
9. Cutting wheel --- If you have an angle grinder with a thin cutting wheel, it'd be the best, but if you don't, you can simply buy a Dremel arbor and cutting wheel. you need to be patient, but it works
10. WD-40 or any other lub
11. 8mm, 10mm, 12mm, 17mm socket
12. Masking tape, duct tape
Total costs about $300
---------------------------------------------------------------------------------------------------------------------------------------------------------------
First thing first, if you did find other DIY, read it until you do understand. I read Rob's DIY about 30 times before started
http://robrobinette.com/S2000BrakeDucts.htm
For brake duct installation, you need to remove bumper, brake pad and brake rotor.
Here is bumper removal DIY
https://www.s2ki.com/s2000/topic/507...d-how-to-long/
I didn't remove brake dust cover because I thought it is hard, but it is not. Also, since I don't have a bench vice, I have nothing to hold them for me.
So, if you remove all the parts mentioned, you will be here
wipe the brake dust, have a clear visual.
we need to choose where we are going to drill. Top right side of dust cover (for passenger side) is the good place. it is sinked, bolts don't bother brake rotor, and don't interfere with steering arm movement. Also, there is a bump and grooves, which is a good guide line to align a flange later.
once you align your flange, draw a circle for the hole. Mine is
Now, time to drill. Use a center punch to mark a center. Also, cover your ABS sensor and ball joint with paper towel. There will be a lot of debris falling out.
To give some tips for those of you who've never used a hole saw, you can plug a drill bit at the enter of a hole saw arbor. This is your center guide. If you don't use it(which is what I did first time lol,) you will see your hole saw dances very good
Also, make sure to lubricate your drill bit and hole saw, use slow speed on your drill and give just little pressure. You are cutting a steel
My hole saw madrel failed at this point, so I had to wait a new hole saw and mandrel arriving
meanhile I changed brake fluid. can you see the march of bubbles?
Just be patient and check if you are cutting straight and no other stuffs.
If you are succeessful, it would be like this
Clean the debris and lubricant. If you have a touch up paint, paint the edge where it is cut to prevent rust.
okay, we have to drill holes to hold the flanges in place.
put your flange on the hole cut, and see where is suitable. My first hole is right below the small bump. If you place the hole too close, it will hold unstable, and the flange wall will interfere with nuts. so if you are not sure, measure, measure and measure. I just did eye balling
Once you drill the hole through, place the flange, and use a center punch to mark where you need to drill. Since the flange is made of aluminum, it is easy to drill. Put it on the ground and just use your tool weight. Don't press it. you'll most likely break your drill bit and hurt yourself.
For second and third hole, you can secure the flange with a bolt, and check the next place to drill.
This is how I installed
Next, you need intake duct from the bumper. with AP1 bumper, you can do the same procedure on fog light block, but unfortunately this is not an option for AP2 bumper. I bought a brake duct from WASP compostie. I thought this is just a piece of crap rubber, but it is made of FRP and has good quality. You can use any duct you want. I know there are several manufacturers.

The following 2 users liked this post by tbpom1003:
Soviet (01-01-2021),
TrumpetTitan (07-09-2019)
04-08-2014, 01:56 AM
#2
Registered User
Thread Starter
Here you need to cut the bumper. If you do have an angle grinder, it would be an easy job. If you don't, get a dremel mandrel and cutting wheel. It works with your drill anyways.
place your duct in place, and draw a line where it touches. Then you can plan how much to cut and leave some space to glue them. Since wasp duct have one inch of overlap, you will be okay even though you cut little more(but not too much.) I cut little bit above the jade green line, and sand it down to the line.


I'm really surprised Dremel parts are very fragile. I didn't give any push to the tool, but mandrel lost its holding arms and cutting wheels lost center brackets.

If you are done with cutting, sand the cutting surface clean.
Clean the inside of bumper, and glue them with an epoxy glue. Do it one by one so that you can hold a duct in place until they are dry. They will take about 5 minutes.


Last step!!! cutting the fender inner brace
From 2006 AP2 doesn't have air pump on the driver side, so you can cut where you want. I wanted the tubes to be straight (to Z direction) so I drilled the highest possible place level to the flange.
one thing I didn't think is clearance with wheel. I drilled it to the far left, but it wasn't enough. I had to drill further

For passenger side, I have an injen cold air intake so I had to drill it from the inside. Here also clearance with wheel was not enough, so I had to cut further right side.


full lock to right , driver side

full lock to left, driver side

The clearance with 255 tire with 17x9.0 +45 wheel is about 1cm at full lock. I'm pretty sure it won't rub because I barely go lock to lock. Anyways I'll check it later.

minions with a new rotor lol

place your duct in place, and draw a line where it touches. Then you can plan how much to cut and leave some space to glue them. Since wasp duct have one inch of overlap, you will be okay even though you cut little more(but not too much.) I cut little bit above the jade green line, and sand it down to the line.
I'm really surprised Dremel parts are very fragile. I didn't give any push to the tool, but mandrel lost its holding arms and cutting wheels lost center brackets.
If you are done with cutting, sand the cutting surface clean.
Clean the inside of bumper, and glue them with an epoxy glue. Do it one by one so that you can hold a duct in place until they are dry. They will take about 5 minutes.
Last step!!! cutting the fender inner brace
From 2006 AP2 doesn't have air pump on the driver side, so you can cut where you want. I wanted the tubes to be straight (to Z direction) so I drilled the highest possible place level to the flange.
one thing I didn't think is clearance with wheel. I drilled it to the far left, but it wasn't enough. I had to drill further
For passenger side, I have an injen cold air intake so I had to drill it from the inside. Here also clearance with wheel was not enough, so I had to cut further right side.
full lock to right , driver side
full lock to left, driver side
The clearance with 255 tire with 17x9.0 +45 wheel is about 1cm at full lock. I'm pretty sure it won't rub because I barely go lock to lock. Anyways I'll check it later.
minions with a new rotor lol
04-08-2014, 08:28 AM
#4

Nice write up!
BTW, AP2's do have air pumps. If your car does not have one then you must have a check engine light, an air pump delete kit installed, and/or a standalone aftermarket ECU.
Thanks for sharing, this is a mod I must perform in the near future.
BTW, AP2's do have air pumps. If your car does not have one then you must have a check engine light, an air pump delete kit installed, and/or a standalone aftermarket ECU.
Thanks for sharing, this is a mod I must perform in the near future.
04-08-2014, 03:24 PM
#5
Registered User
Thread Starter
 04-08-2014, 03:30 PM
#6
Registered User
Thread Starter
check here http://honda-tech.com/showthread.php?t=2173176
04-09-2014, 08:26 AM
#7
Originally Posted by Arro' timestamp='1396974501' post='23103119
Nice write up!
BTW, AP2's do have air pumps. If your car does not have one then you must have a check engine light, an air pump delete kit installed, and/or a standalone aftermarket ECU.
Thanks for sharing, this is a mod I must perform in the near future.
BTW, AP2's do have air pumps. If your car does not have one then you must have a check engine light, an air pump delete kit installed, and/or a standalone aftermarket ECU.
Thanks for sharing, this is a mod I must perform in the near future.
check here http://honda-tech.com/showthread.php?t=2173176
Trending Topics
04-10-2014, 06:10 AM
#8
Registered User

Join Date: May 2008
Location: Scotland
Posts: 2,016
Likes: 0
Received 0 Likes
on
0 Posts
looks great, especially the incorporation of the inlets to the bumper. Quick question do you need some sort of mesh to try and stop stuff getting up in to the hose (small rocks) and also what about water, as we all know having wet discs isn't the best for performance... there any way around this (again with mesh or some sort of water trap like the S2000 engine air intake)
04-12-2014, 10:26 PM
#9
Registered User
Thread Starter
looks great, especially the incorporation of the inlets to the bumper. Quick question do you need some sort of mesh to try and stop stuff getting up in to the hose (small rocks) and also what about water, as we all know having wet discs isn't the best for performance... there any way around this (again with mesh or some sort of water trap like the S2000 engine air intake)
so far water isn't trapped. I filled the water in the hose when washing the car, and air is mostly able to purge them out from 30 mph. After I drive about 5 minutes, the hose was dry clean. anyways your car will lose traction way before you reach the maximum brake performance. I don't think brake performance is a big concern here.
I was thinking about adding grill mesh, but I was lazy and tired haha the inlet is heading down, so debris doesn't really hit the hose. I had two track days this month, and there were only few dusts and tire debris. it's easy to clean since you can just unplug hoses from the bumper. Maybe I'll add mesh if I'll have some left over when I'm installing oil cooler and radiator later

Thread
Thread Starter
Forum
Replies
Last Post
AliGod78
UK & Ireland S2000 Community
2
11-09-2015 02:31 AM
ScienceofSpeed
Sponsor S2000 Suspension, Brake and Handling Deals
2
04-11-2008 04:46 PM