
2005 turbo setup


Thread Starter


Joined: Sep 2009
Posts: 460
Likes: 90
I relocated my fusebox to the floor years ago. I finally made a bracket to mount it up. The bottom of it isn't really supported but I think it will hold up.


I should have grinded the blower box instead of trying to snip it. More of the plastic chipped off than I wanted. Also I didn't notice at first that the threaded oem holes aren't at the same height, so I just added more material to the flat piece.

Here are the tabs that will support the fusebox. They will just get tacked to the cylinder supports.


It stays out of view decently


Getting close.....most of the car is buttoned back up. Just need to get the battery and power wires put in I think.

I should have grinded the blower box instead of trying to snip it. More of the plastic chipped off than I wanted. Also I didn't notice at first that the threaded oem holes aren't at the same height, so I just added more material to the flat piece.
Here are the tabs that will support the fusebox. They will just get tacked to the cylinder supports.
It stays out of view decently
Getting close.....most of the car is buttoned back up. Just need to get the battery and power wires put in I think.


Thread Starter
Joined: Sep 2009
Posts: 460
Likes: 90
I want to use the trunk well to house the battery. I will probably seal it off with a flat sheet of aluminum. I will also probably vent the trunk well to the outside for possible battery fumes.
Found some rust on the bottom. I'm pretty sure water is getting through the pressure vent flap on the rear wall of the trunk. I will clean this up and try and find a durable coating.

This is kind of how I'd like the battery to sit. It is sitting on a 2x3 under the cardboard, which gives me a little over an inch from the top of the posts to the possible floor. I may have to make some structure up high so the floor doesn't bow and ground out on the battery post.
I am also hoping to house some fuse holders or circuit breakers in here (with an access panel) as well as a shut off switch down the road.


Cleaned off most of the rusted areas. Nothing too serious yet, but it has pitted the steel in a few places. I still need to pull the plugs and clean the metal around them.

These are just to get the shape of the floor and touch where it is raised. It will be made with a bend on top so it will be a right angle. I may make some forward-aft frame pieces as well. Then I will cut a floor to bolt to the top of the structure.


I used to solder battery terminals but I got this crimp tool about a year ago. It isn't perfect....I had to modify the dies a little to get them to fit decent. It does crush the wire pretty well though. I cut a crimp in half with the bandsaw. It cuts it to give it a solid look, so I "uncrimped" the terminal back into a circle and used a pick to make the strands more visible.


Found some rust on the bottom. I'm pretty sure water is getting through the pressure vent flap on the rear wall of the trunk. I will clean this up and try and find a durable coating.
This is kind of how I'd like the battery to sit. It is sitting on a 2x3 under the cardboard, which gives me a little over an inch from the top of the posts to the possible floor. I may have to make some structure up high so the floor doesn't bow and ground out on the battery post.
I am also hoping to house some fuse holders or circuit breakers in here (with an access panel) as well as a shut off switch down the road.
Cleaned off most of the rusted areas. Nothing too serious yet, but it has pitted the steel in a few places. I still need to pull the plugs and clean the metal around them.
These are just to get the shape of the floor and touch where it is raised. It will be made with a bend on top so it will be a right angle. I may make some forward-aft frame pieces as well. Then I will cut a floor to bolt to the top of the structure.
I used to solder battery terminals but I got this crimp tool about a year ago. It isn't perfect....I had to modify the dies a little to get them to fit decent. It does crush the wire pretty well though. I cut a crimp in half with the bandsaw. It cuts it to give it a solid look, so I "uncrimped" the terminal back into a circle and used a pick to make the strands more visible.
Thread Starter
Joined: Sep 2009
Posts: 460
Likes: 90
Ran into some issues trying to make my battery supports. I couldn't get a clean 90° bend without the metal bowing in another direction, so I tried to make a bending brake.
It probably needs a stiffener on the lower section as well....but it seems to work for what I'll need. The bend radius is a little lazy at around 1/8".


Reused some s2000 valvesprings to keep it raised.


The supports will hold this plate up. And the battery will secure to the plate.


I'll probably put a battery cutoff switch in this area down the road. Maybe install some circuit breakers or fuses also in this area....then close off the top with an aluminum sheet or something.
My only concern is the trunk well getting hit and moving the battery around.
It probably needs a stiffener on the lower section as well....but it seems to work for what I'll need. The bend radius is a little lazy at around 1/8".
Reused some s2000 valvesprings to keep it raised.
The supports will hold this plate up. And the battery will secure to the plate.
I'll probably put a battery cutoff switch in this area down the road. Maybe install some circuit breakers or fuses also in this area....then close off the top with an aluminum sheet or something.
My only concern is the trunk well getting hit and moving the battery around.
Thread Starter
Joined: Sep 2009
Posts: 460
Likes: 90
Thanks...crawling along...hopefully can drive it before gasoline cars are banned.
The baseplate had issues with flexing a little bit so I added a third support to sit under the battery. For now I will keep the carpet in there. It just made more sense to cut the bottom out and mount the plate on top of carpet around the edges.


Screwed on some raised aluminum to secure the battery laterally. Then bolted 2 posts onto the plate that a tie-down will bolt to.


While I was at the rear of the car I sealed the leaking vent. Also had a ton of gravel on the bumper support.


Thread Starter
Joined: Sep 2009
Posts: 460
Likes: 90
I ordered some 7075 aluminum to make the tie down. 6061 has a little too much flex for this span. The tie down bottoms out on some nuts installed upside-down so it won't crush the battery too much.


Making the fuse/circuit breaker access panel. I was going to tie it into the floor, but it is pretty sturdy with the temporary fasteners. I may make storage to the left of the battery eventually too.


This spacer will make the fusebox level with the floor of the trunk, since it mounts to the bottom of the "flange"


Finished the front wall of the box. I tried to keep "soft" edges where the wire will be ran. Will try and clamp the wire to the floor with rivnuts and clamps.


I ordered a set of this bulkhead fitting. I had used a circular one before in the engine bay. I didn't like that it could rotate when tightening the nut holding the cable. This one is more work, but I won't have any issue with it staying in place.


Going to install the fuel pump fuse up higher so larger wires can run underneath it.


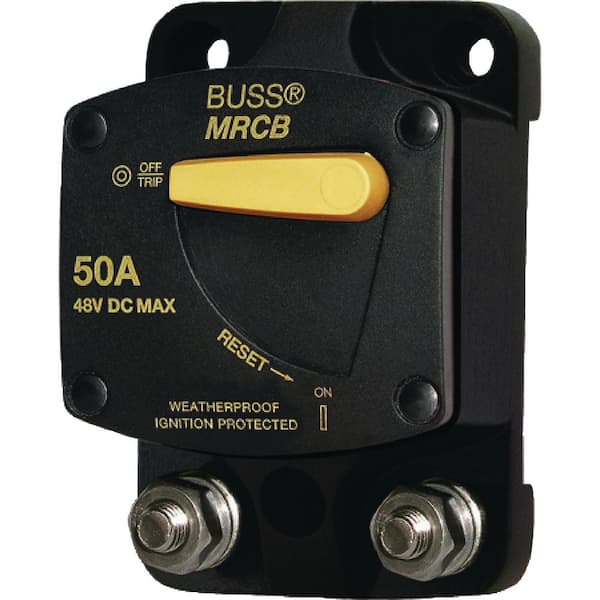
Going to run circuit breakers for the large wires running up front. I don't have the breakers yet so I just cut some cardboard templates.
Going to be running these.


Making the fuse/circuit breaker access panel. I was going to tie it into the floor, but it is pretty sturdy with the temporary fasteners. I may make storage to the left of the battery eventually too.
This spacer will make the fusebox level with the floor of the trunk, since it mounts to the bottom of the "flange"
Finished the front wall of the box. I tried to keep "soft" edges where the wire will be ran. Will try and clamp the wire to the floor with rivnuts and clamps.
I ordered a set of this bulkhead fitting. I had used a circular one before in the engine bay. I didn't like that it could rotate when tightening the nut holding the cable. This one is more work, but I won't have any issue with it staying in place.
Going to install the fuel pump fuse up higher so larger wires can run underneath it.
Going to run circuit breakers for the large wires running up front. I don't have the breakers yet so I just cut some cardboard templates.
Going to be running these.

Thread Starter
Joined: Sep 2009
Posts: 460
Likes: 90
Wired the circuit breakers and fuel pump fuse in. Battery wires to the breaker tray is 1/0 gauge. Fuel supply wire is generic 8 gauge wire. I have 2 gauge goint up front to the starter/radiator fans, and 4 gauge into the "engine bay" main fusebox.
I should have made this tray a little bigger as the wiring made it tight. I had to modify some of the terminals to organize and fit everything....also had to move the fuel pump fuseholder forward.


The fuel pump relay almost fits where these factory threaded holes are. The holes are about a hole too wide so I made a clamp type piece for the passenger side.


Drove the car for a little bit and logged the car to see if the oil pressure was more stable since I installed the "snubber" at the sensor. Nothing was changed beside adding the snubber.
It made a pretty big difference.
before

after

I should have made this tray a little bigger as the wiring made it tight. I had to modify some of the terminals to organize and fit everything....also had to move the fuel pump fuseholder forward.
The fuel pump relay almost fits where these factory threaded holes are. The holes are about a hole too wide so I made a clamp type piece for the passenger side.
Drove the car for a little bit and logged the car to see if the oil pressure was more stable since I installed the "snubber" at the sensor. Nothing was changed beside adding the snubber.
It made a pretty big difference.
before
after