Adjusting Ingalls ETD
#12
I had some trouble adjusting this at first too. I tried tightening the 24mm nut into 27mm nut with no luck. I then tried turning the 27mm nut counter clockwise while holding the shock body firmly with my hand. It took a bit of elbow grease but that's how i managed to break it loose. Once that 27mm was free it allowed me to adjust the 24mm nut clockwise towards the 27mm. When you're content with your adjustment, just tighten the 27mm clockwise towards the shock body.
#13
Ok just to update. I'm seriously frustrated with adjusting this Ingalls ETD. Maybe I have a dud?
I bought more tools and tried everything above. I still CANNOT crack loose that 27mm copper lock nut. I tried what osu1978 suggested by going straight for the 24mm, but that nut is stuck frozen too. I also don't see how the 24mm can even more when the 27mm is a LOCK NUT. Meaning no adjustments can be made unless this lock nut is cracked loose. I tried soaking the 27mm in PB Blaster and FIRMLY holding the shock body and using my huge breaker bar and still no go. At this point the only way I can see is clamping the unit with a bench vise, but that would totally destroy the shiny finish of the ETD.
Any other suggestions? Also any updates on your end JoJo Yoyo?
#14
It's really tight on there. If you can somehow fit a 24 and 27mm wrench onto the corresponding lock nuts then that would make it easier to break it loose. I also made the sure the silver lock nut was loose before going at it with the 27mm. I'm going to readjust mine again tomorrow. I'll update you on how I go about doing so incase you don't get it by then.
#15
It's really tight on there. If you can somehow fit a 24 and 27mm wrench onto the corresponding lock nuts then that would make it easier to break it loose. I also made the sure the silver lock nut was loose before going at it with the 27mm. I'm going to readjust mine again tomorrow. I'll update you on how I go about doing so incase you don't get it by then.
#16


Are you trying to adjust it while mounted to the car? I remember having some difficulty breaking things lose but removed mine from the car. Believe I ended up in the 12MM range.
#17

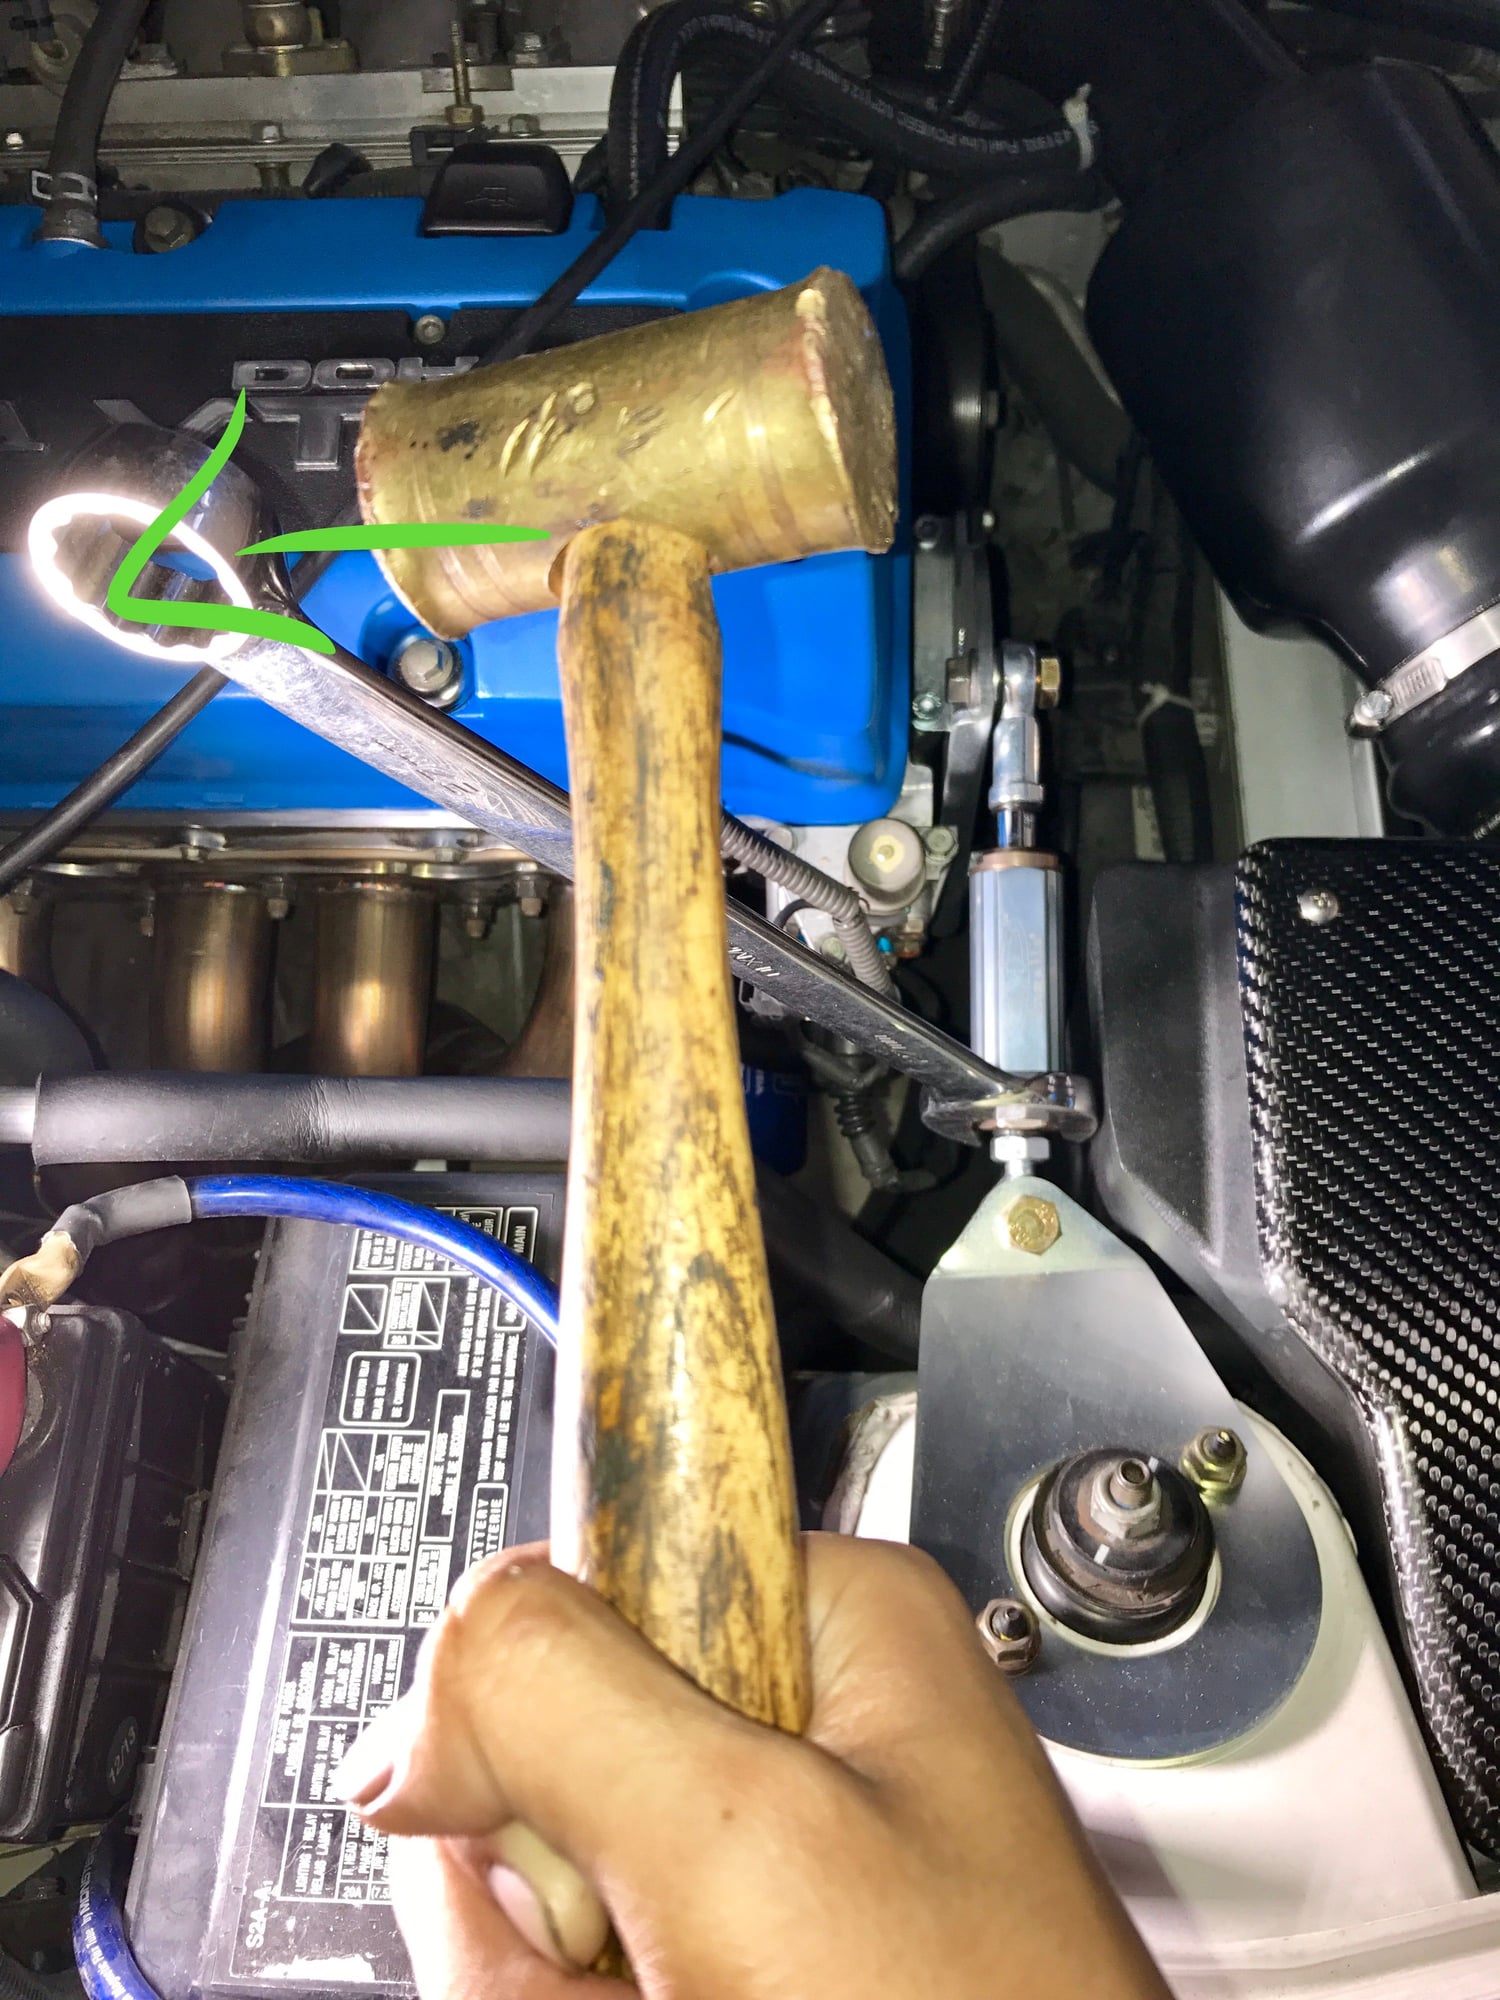
Ok I remember how I loosened that nut now. I got frustrated and used the 24mm to wack it loose. Tighten everything (silver nut, chassis brackets etc). Place the 27mm wrench on the nut as pictured.Take a hammer (or mallet) and take a good swing at it. If you're worried about marring the nut then tape it off. This SHOULD break it loose. If it doesn't, then you can try placing a 17mm wrench on the silver lock nut and use it as leverage while you try to loosen the 27mm copper nut. Turn the 17 clockwise and 27 counter clockwise. Good luck! Lmk how it goes.
#19
I used two small to medium adjustable wrenches on mine and was able to get them to fit side by side. May have to make a trip to the hardware store and find thinner ones.
Nice to see someone else running the Comptech intake and Engalls ETD at the same time. Awesome combo.
Nice to see someone else running the Comptech intake and Engalls ETD at the same time. Awesome combo.
#20
Ok just wanted to give a quick update. I FINALLY got the damn 27mm nut loose. I tighten EVERYTHING on the ETD just as if I were going to install the unit. Then I used a wrench on the 17mm silver nut to HOLD the unit in place, while using a wrench to break the 27mm loose. It worked like a charm.
I now have it around 11mm and wow what a difference. I'm loving how everything is absolutely rock solid from the shifter feel to gear changes. The funny thing is, I don't have any additional vibrations. If anybody has put off aftermarket motor mounts due to increased vibrations, then seriously consider an ETD because I can't feel any vibrations.
I now have it around 11mm and wow what a difference. I'm loving how everything is absolutely rock solid from the shifter feel to gear changes. The funny thing is, I don't have any additional vibrations. If anybody has put off aftermarket motor mounts due to increased vibrations, then seriously consider an ETD because I can't feel any vibrations.


