

Auxillary lights DIY.

Thread Starter


Joined: Nov 2007
Posts: 8,841
Likes: 1,705
From: Illnoise. WAY downtown, jerky.
A few people in another thread requested this DIY.
I did this back when I bought my S2000 in 06. I have an AP1. IIRC, I pioneered it ...but I guess I could be wrong. These are auxillary lights for the brights housing. They don't blind anyone as they're pretty dull...but as an effect of that, they don't really put out any useable light.
Before anyone starts asking sarcastic questions, I will say this: It is STRICTLY for looks. There's no real function to it. This means that opinions will be subjective on whether or not it looks good. Your opinion is welcome; good or bad. The sarcastic "so what do you use these for" questions are not.
- You start by taking off the bumper. It took me a while to find all the hidden bolts....plus my black car had a total of 1 small tiny little microscopic scratch on it when I bought it..so I was being super freaking careful.
- The bumper removal will give you access to the bolts for the lights. These are color coded silver. There are 1 or 2 obscure ones. Just look for silver bolts around the area. It would be a good idea to scribe marks around the bolts so you can put the headlight back in it's original orientation (so it looks flush with the bumper when you put it back on). A dry erase marker should work for every color but black. I just used the scratch marks that the bolts made on the paint as a marker. Remove the headlights carefully. Unplug the ballasts, brights, and parking lights.
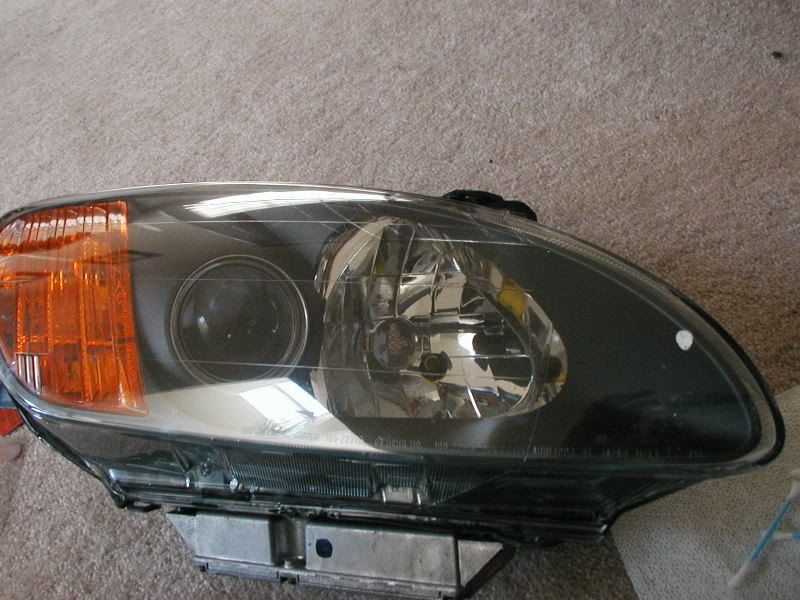
- Once you have the lights off the car, find a soft place where you can work on them so they won't get scratched. I used carpet. Remove the weather seal for the brights, and the brights bulb.
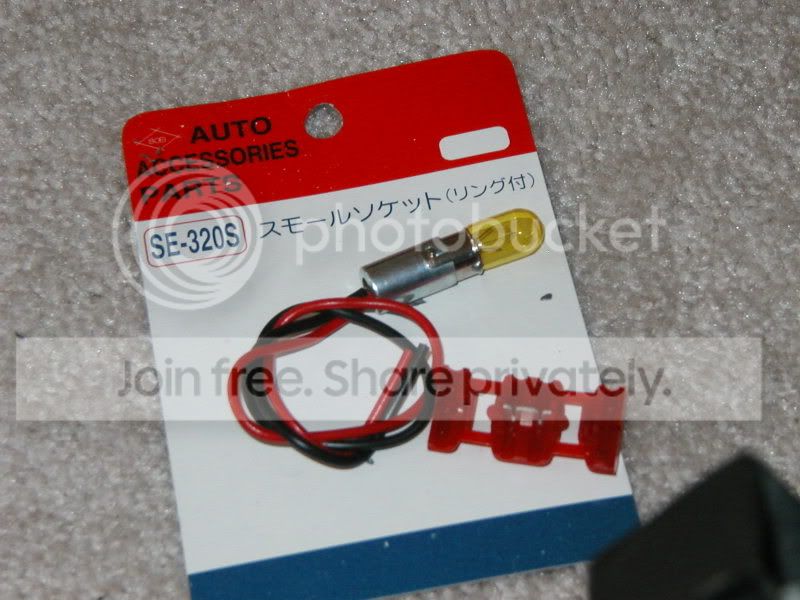
- These are the bulbs that I used. They're small yellow marker light bulbs. They came with a socket and wires. They also come with a grommet.
- Drill a small marker hole in the headlight. You're using the brights housing. You will find a few dimple marks on the back of the brights housing. Use those as markers so your aux. lights go into the same spot on both headlights. Work your way up in drill size slowly as not to chip the reflective tape on the inside of the headlight. Hold the drill underneath the light so that the shavings fall down and away from the headlight. This is so you don't have shavings inside your lights when you're done. More on that later.
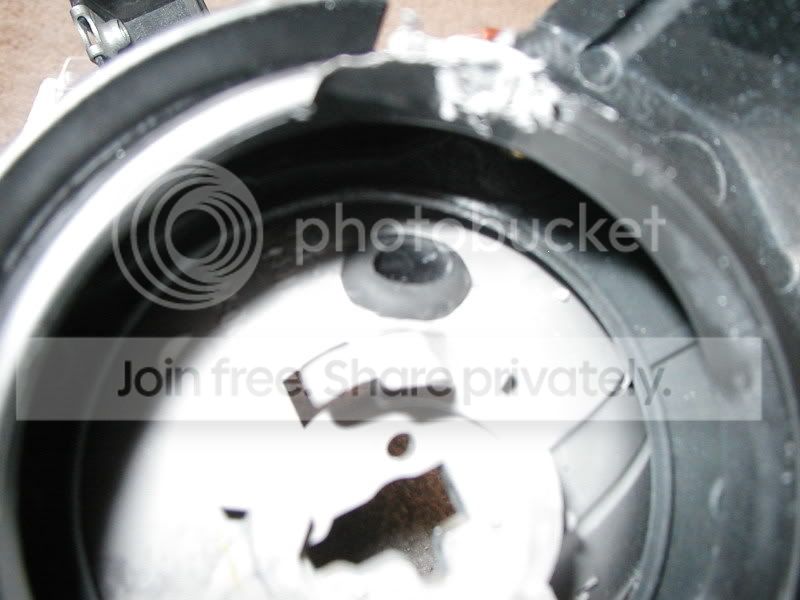
Here is the hole allready drilled and grommeted. If the grommet falls into the housing, dont panic. Get a hanger or hook tool and pull it out. I freaked out a bit...then realized it only took me about 10 seconds with a hanger.
- Clean the bulb with some rubbing alchohol...and use the rubbing alchohol as lube to push the light socket into the grommet.
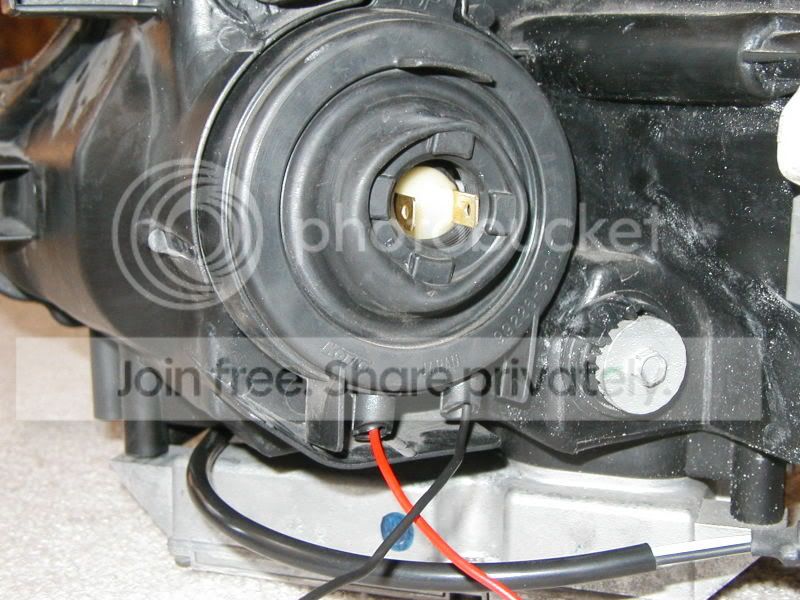
- This is the light installed. You can see the dimples I was talking about in this picture. Obviously, one of them is gone because I drilled thru it. Remember the dimple you used.

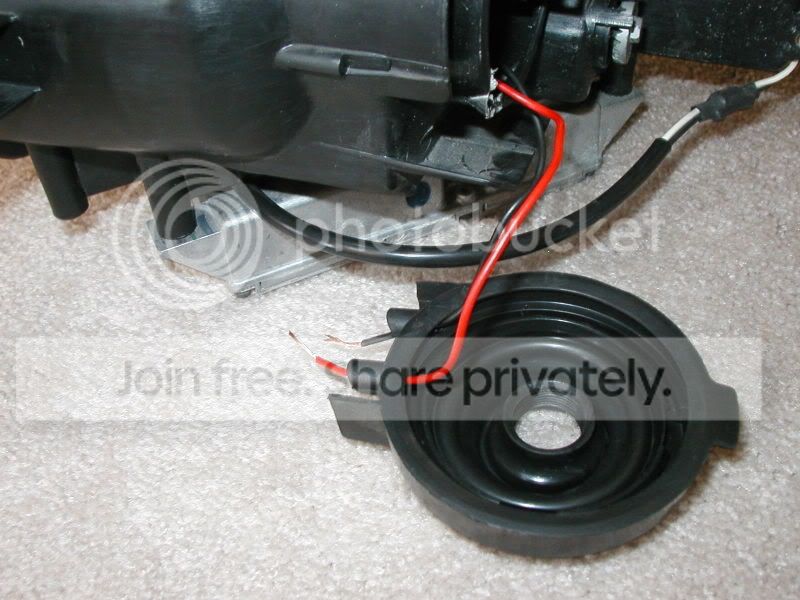
- Once you do that, reinstall the brights bulb. Then reinstall the rubber weather seal for the brights as shown. Push the wires thru the sweat holes in the weather seal...but make sure the gauge of wire you're using isn't so big that it totally plugs up the sweat holes.
** this is actually why it won't condensate. The brights bulb has no seal between the housing and itself. There's a big gaping hole. The weather seal seals 100% as it did normally. There are no additional holes made into it. The weather seal is what keeps all the water out of there. The sweat holes not being plugged up will let any normal condensation build up leak back out.
- Installed into the lights.
- Repeat for the other side.
Then it's just a matter of hard wiring into the parking lights and re-installing the headlights and bumper back on the car. I can still change out the bulb for the aux. lights and the brights with the headlights installed on the car normally. So I picked the right dimple .
The parking lights are the ones with the SMALL bulb in them. The larger of the two is the turn signal. I messed it up. Hilarious at first. But ultimately annoying because you have to re-wire.
**chances are that you have un-aligned the lights a bit, so check the alignment before you put the bumper back on. Then re-aim them up or down if nessecary.
Here's how they look on the car. I was afraid that they'd be too apparent...but from normal human height, they're pretty hidden (So again...I picked the right dimple ).
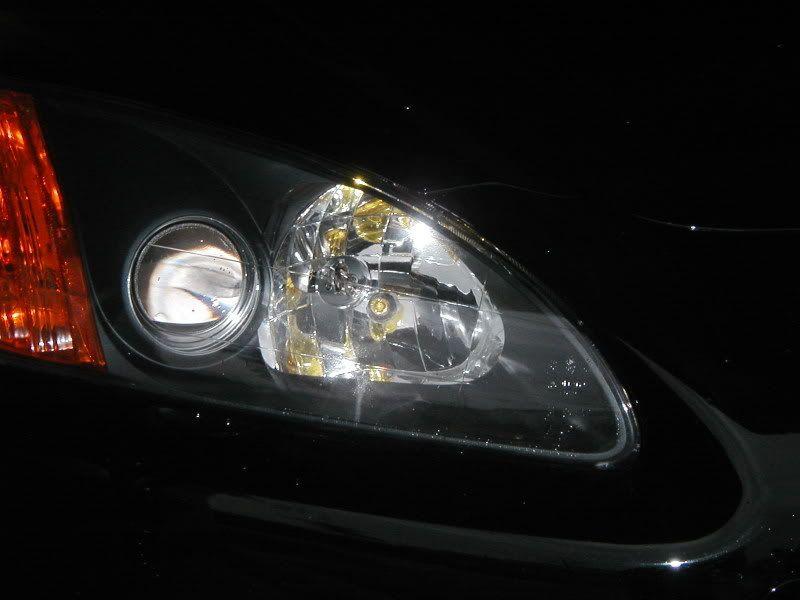
As you can see, they light up the whole housing, not just one hot spot. They are also pretty well visible with the HIDs on. I think it's a nice contrast.


** If little shavings fall into your headlight from drilling, first try to blow them out with DRY compressed air. I have access to this at work (nitrogen). But most compressed air has quite a bit of moisture. Try to blow it out anyway.
If you're unsatisfied with the results after trying to blow it out, you'll have to bake the headlights and clean them out. I had to to do this. It's a little intimidating, but ultimately very easy.
Use a wood block to place the headlights in the oven. If they're OEM sealed lights, you won't need much heat. Use about 250 degrees for like 5-10 min. That won't melt any plastic, but the sealant breaks apart at that temp.
It's a bitch to clean and scrape all the old sealant out. I spent time on this as I didn't want any condensation issues after they're resealed.
Clean the lights. USE A VERY VERY SOFT (MICROFIBER) CLOTH!!!! The reflective tape is easily scratched!! Use clay bar spray and mild rubbing alchohol as a cleaning solution. Liquid also prevents scratching. Use gentle hands when cleaning.
Reseal with something like Honda Bond that stays pliable, seals very well, but melts apart at fairly low temps. IIRC, this is the OEM sealant.
Good luck. Post any questions here.
I did this back when I bought my S2000 in 06. I have an AP1. IIRC, I pioneered it
...but I guess I could be wrong. These are auxillary lights for the brights housing. They don't blind anyone as they're pretty dull...but as an effect of that, they don't really put out any useable light. Before anyone starts asking sarcastic questions, I will say this: It is STRICTLY for looks. There's no real function to it. This means that opinions will be subjective on whether or not it looks good. Your opinion is welcome; good or bad. The sarcastic "so what do you use these for" questions are not.
- You start by taking off the bumper. It took me a while to find all the hidden bolts....plus my black car had a total of 1 small tiny little microscopic scratch on it when I bought it..so I was being super freaking careful.
- The bumper removal will give you access to the bolts for the lights. These are color coded silver. There are 1 or 2 obscure ones. Just look for silver bolts around the area. It would be a good idea to scribe marks around the bolts so you can put the headlight back in it's original orientation (so it looks flush with the bumper when you put it back on). A dry erase marker should work for every color but black. I just used the scratch marks that the bolts made on the paint as a marker. Remove the headlights carefully. Unplug the ballasts, brights, and parking lights.
- Once you have the lights off the car, find a soft place where you can work on them so they won't get scratched. I used carpet. Remove the weather seal for the brights, and the brights bulb.
- These are the bulbs that I used. They're small yellow marker light bulbs. They came with a socket and wires. They also come with a grommet.
- Drill a small marker hole in the headlight. You're using the brights housing. You will find a few dimple marks on the back of the brights housing. Use those as markers so your aux. lights go into the same spot on both headlights. Work your way up in drill size slowly as not to chip the reflective tape on the inside of the headlight. Hold the drill underneath the light so that the shavings fall down and away from the headlight. This is so you don't have shavings inside your lights when you're done. More on that later.
Here is the hole allready drilled and grommeted. If the grommet falls into the housing, dont panic. Get a hanger or hook tool and pull it out. I freaked out a bit...then realized it only took me about 10 seconds with a hanger.
- Clean the bulb with some rubbing alchohol...and use the rubbing alchohol as lube to push the light socket into the grommet.
- This is the light installed. You can see the dimples I was talking about in this picture. Obviously, one of them is gone because I drilled thru it. Remember the dimple you used.
- Once you do that, reinstall the brights bulb. Then reinstall the rubber weather seal for the brights as shown. Push the wires thru the sweat holes in the weather seal...but make sure the gauge of wire you're using isn't so big that it totally plugs up the sweat holes.
** this is actually why it won't condensate. The brights bulb has no seal between the housing and itself. There's a big gaping hole. The weather seal seals 100% as it did normally. There are no additional holes made into it. The weather seal is what keeps all the water out of there. The sweat holes not being plugged up will let any normal condensation build up leak back out.
- Installed into the lights.
- Repeat for the other side.
Then it's just a matter of hard wiring into the parking lights and re-installing the headlights and bumper back on the car. I can still change out the bulb for the aux. lights and the brights with the headlights installed on the car normally. So I picked the right dimple
. The parking lights are the ones with the SMALL bulb in them. The larger of the two is the turn signal. I messed it up. Hilarious at first. But ultimately annoying because you have to re-wire.
**chances are that you have un-aligned the lights a bit, so check the alignment before you put the bumper back on. Then re-aim them up or down if nessecary.
Here's how they look on the car. I was afraid that they'd be too apparent...but from normal human height, they're pretty hidden (So again...I picked the right dimple
). As you can see, they light up the whole housing, not just one hot spot. They are also pretty well visible with the HIDs on. I think it's a nice contrast.
** If little shavings fall into your headlight from drilling, first try to blow them out with DRY compressed air. I have access to this at work (nitrogen). But most compressed air has quite a bit of moisture. Try to blow it out anyway.
If you're unsatisfied with the results after trying to blow it out, you'll have to bake the headlights and clean them out. I had to to do this. It's a little intimidating, but ultimately very easy.
Use a wood block to place the headlights in the oven. If they're OEM sealed lights, you won't need much heat. Use about 250 degrees for like 5-10 min. That won't melt any plastic, but the sealant breaks apart at that temp.
It's a bitch to clean and scrape all the old sealant out. I spent time on this as I didn't want any condensation issues after they're resealed.
Clean the lights. USE A VERY VERY SOFT (MICROFIBER) CLOTH!!!! The reflective tape is easily scratched!! Use clay bar spray and mild rubbing alchohol as a cleaning solution. Liquid also prevents scratching. Use gentle hands when cleaning.
Reseal with something like Honda Bond that stays pliable, seals very well, but melts apart at fairly low temps. IIRC, this is the OEM sealant.
Good luck. Post any questions here.


Thread
Thread Starter
Forum
Replies
Last Post