

Custom Brake Ducts


Thread Starter
Registered User
Joined: Jul 2010
Posts: 1,023
Likes: 0
From: Geneva, NY 14456
Why hello there everyone, its been a few months since the last time i posted here and i have done a few things to the car that id like to document for everyone...
Materials:
Tip ties
(2) Air ducts: https://www.pegasusautoracing.com/pr...p?Product=3623
3" OD Duct Hose 3' Long: https://www.pegasusautoracing.com/pr...p?Product=3620
(2) 3" hose clamps
Duct Tape
1" x .12" Aluminum Bar
Tools:
Screw Driver: Flat and Phillips
Socket Wrench with 10mm
Dikes
Drill
Scissors
Dremel with mill tip
file
sand paper
A few cans of beer
Other Notes:
Must have "Air Pump" Assembly Removed (In driver side duct area)
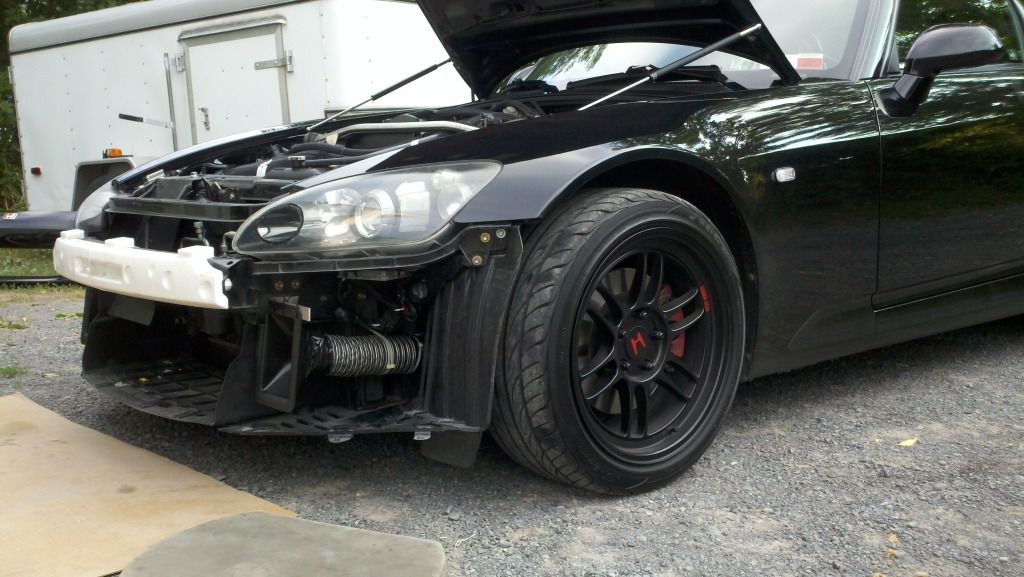
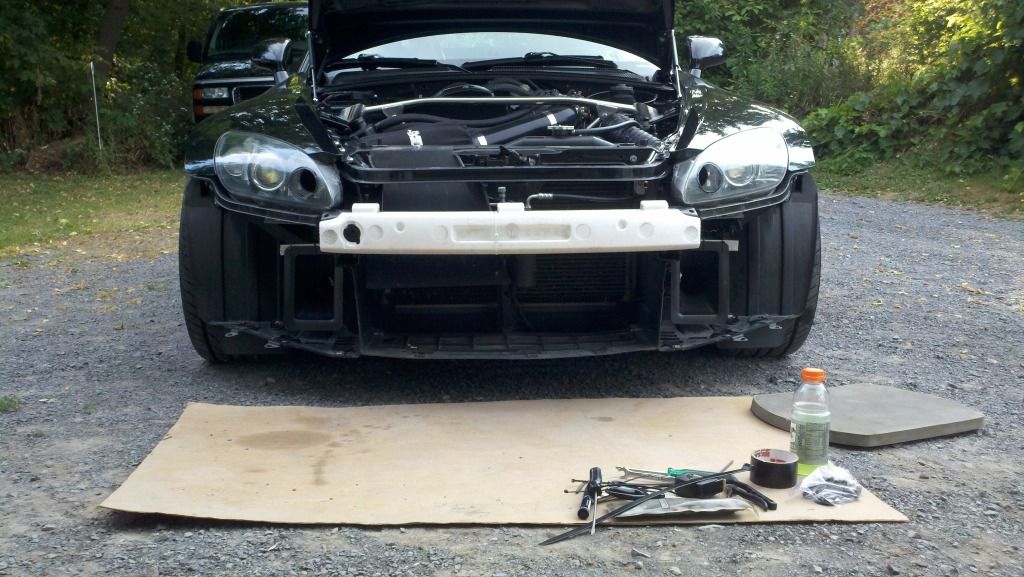
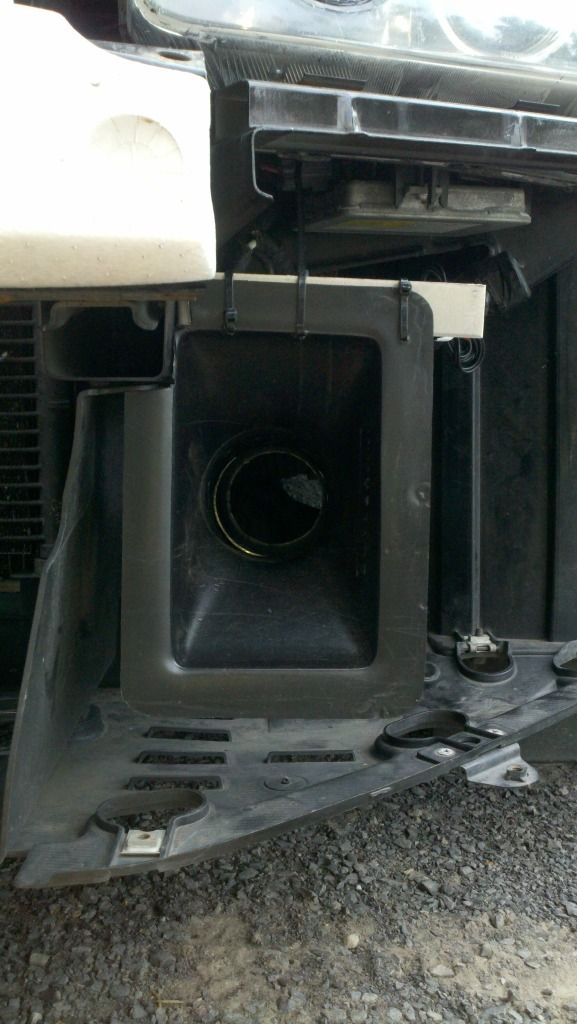
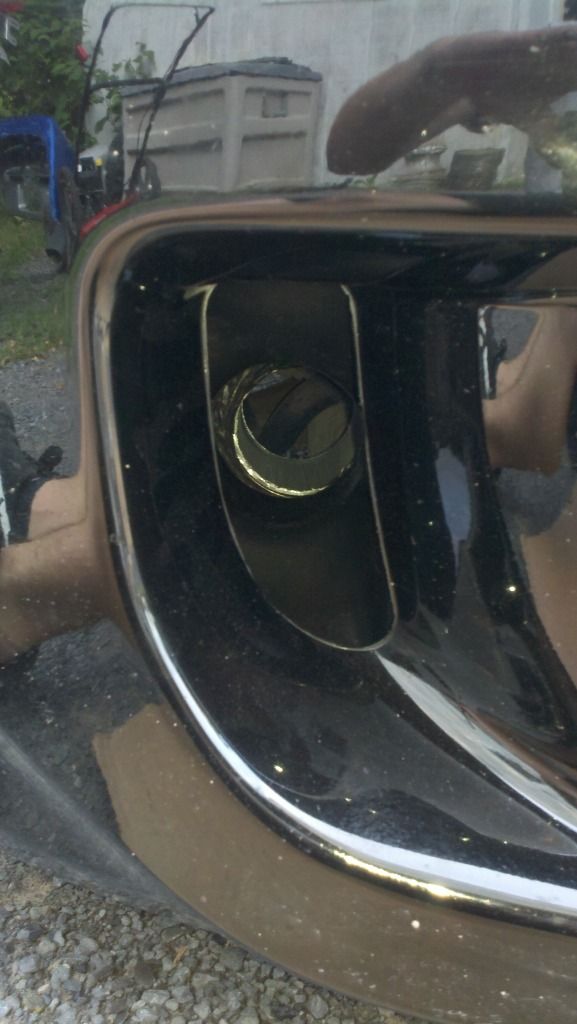
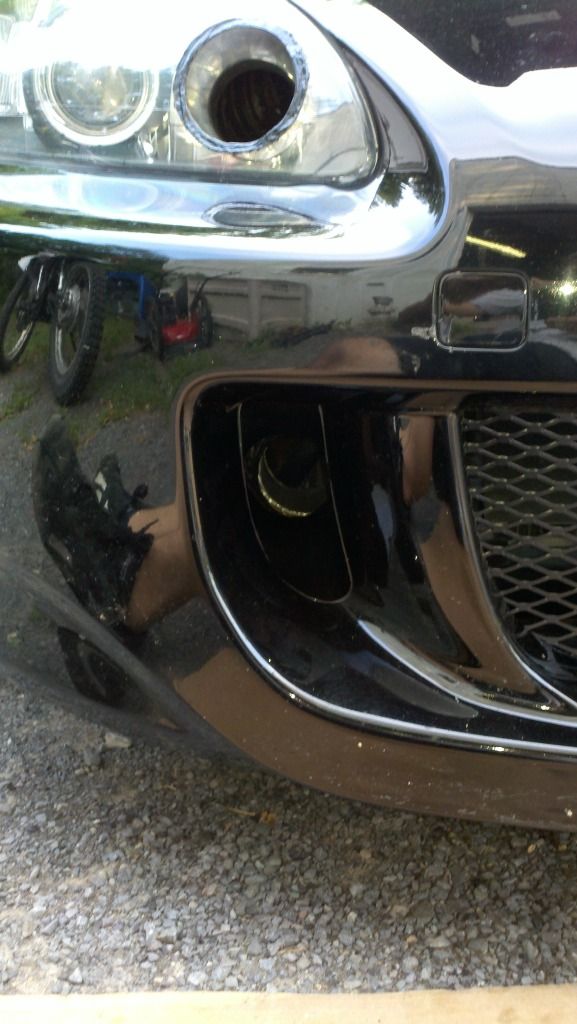
So remove the bumper and start with your dremel, remove a hole on each side about 3.5" in diameter, make sure they line up with your bumper ducts....
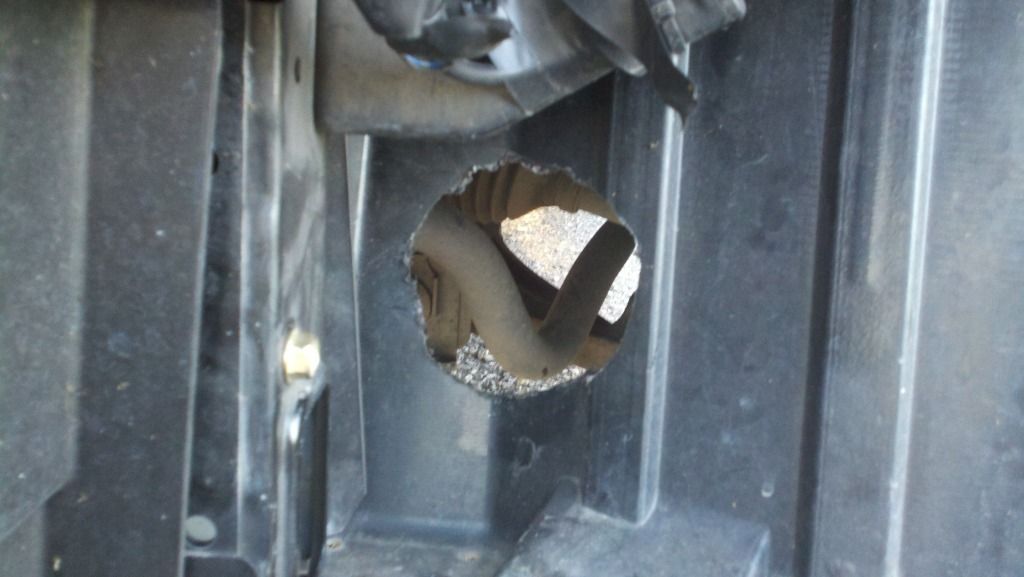
Also use the dremel to cut the bumps ducts out if you havent already... File around the cut try not to scuff the paint, finish with some sand paper.
The first thing i did was figure out where the scoops had to sit behined the bumper so look at my pictures and make a simple bracket as i did with (1) 90 degree bend in it and a hole to mount to the car. Test the placement by setting the bumper back on the car making sure the scoops line up well enough. Take the bumper back off and attach the duct tube to the scoops using a hose clamp and i decided to finish it up with duct tape. make sure the length is just enough to sit flush with the front fender liner. Zip tie the tubing and duct securely. See below...

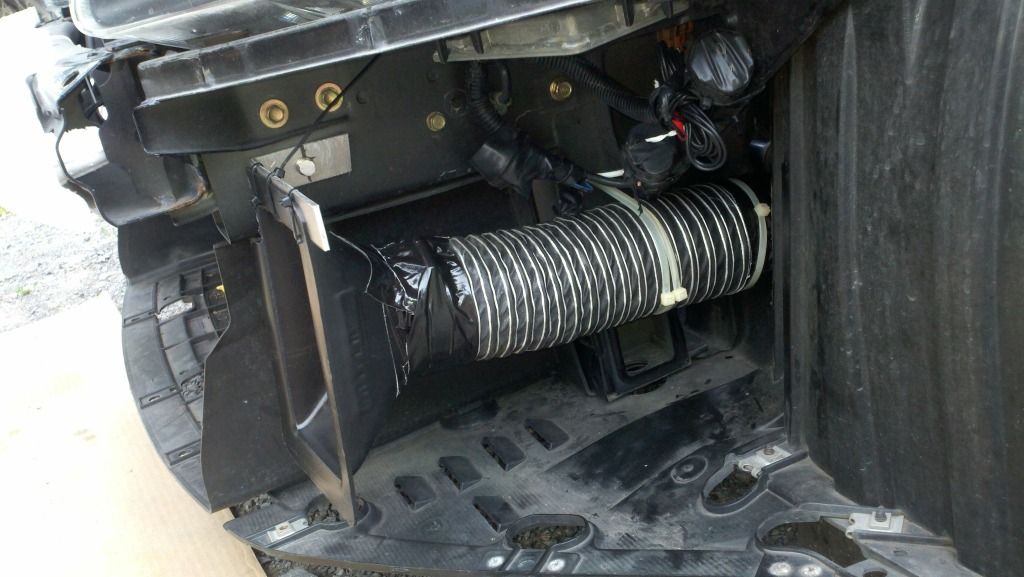
So thats half of it the other half i will finish another day...
It involves removing the front wheels and adding a second section of duct tube directly to the brakes. This way you can leave the front portion on the car for street use and just add the final duct work when hitting the track.
Hope this helps whoever may be interested
Thanks for reading!
Materials:
Tip ties
(2) Air ducts: https://www.pegasusautoracing.com/pr...p?Product=3623
3" OD Duct Hose 3' Long: https://www.pegasusautoracing.com/pr...p?Product=3620
(2) 3" hose clamps
Duct Tape
1" x .12" Aluminum Bar
Tools:
Screw Driver: Flat and Phillips
Socket Wrench with 10mm
Dikes
Drill
Scissors
Dremel with mill tip
file
sand paper
A few cans of beer
Other Notes:
Must have "Air Pump" Assembly Removed (In driver side duct area)
So remove the bumper and start with your dremel, remove a hole on each side about 3.5" in diameter, make sure they line up with your bumper ducts....
Also use the dremel to cut the bumps ducts out if you havent already... File around the cut try not to scuff the paint, finish with some sand paper.
The first thing i did was figure out where the scoops had to sit behined the bumper so look at my pictures and make a simple bracket as i did with (1) 90 degree bend in it and a hole to mount to the car. Test the placement by setting the bumper back on the car making sure the scoops line up well enough. Take the bumper back off and attach the duct tube to the scoops using a hose clamp and i decided to finish it up with duct tape. make sure the length is just enough to sit flush with the front fender liner. Zip tie the tubing and duct securely. See below...
So thats half of it the other half i will finish another day...
It involves removing the front wheels and adding a second section of duct tube directly to the brakes. This way you can leave the front portion on the car for street use and just add the final duct work when hitting the track.
Hope this helps whoever may be interested
Thanks for reading!


Joined: May 2003
Posts: 3,045
Likes: 45
From: Las Vegas
A few of us tried our hand on this in the R&C forum:
https://www.s2ki.com/s2000/topic/911...#entry21754445
06Estukay has a pretty trick setup, whereas mine looks like hell. Yours looks like it would flap around a lot. ask me how I know
https://www.s2ki.com/s2000/topic/911...#entry21754445
06Estukay has a pretty trick setup, whereas mine looks like hell. Yours looks like it would flap around a lot. ask me how I know
Thread Starter
Registered User
Joined: Jul 2010
Posts: 1,023
Likes: 0
From: Geneva, NY 14456
I actually zip tied it to the plastic "bumper cover" underneath the scoop. I hear no flapping or movement at speed, well at least up to 75. When i hit the track ill let ya know if that changes lol

Thread
Thread Starter
Forum
Replies
Last Post