

DIY Elbow Pad Wrap

Thread Starter
Joined: Aug 2009
Posts: 1,810
Likes: 7
So I got a JPM Coachworks elbow pad for an Xmas present from my wife and it has been sitting in the pile of S2k parts all winter waiting for a install... Went with perforated center, solid leather outer with silverstone thread to match with my current shifter boot. I got an itch to do something with all this cold weather so I pulled out the console for the install and figured I would do a write up too 
Never did anything like this and not a clue if it is right but it worked out and looks good so follow at your own risk
What you need
Leather to wrap the elbow pad
#2 screw driver
25 binder clips
Fabric Glue
Scissors
Step 1: Remove the shift knob
Step 2: Pull up on the console around the shifter, unplug the roof control and hazard connections, then fully remove the console
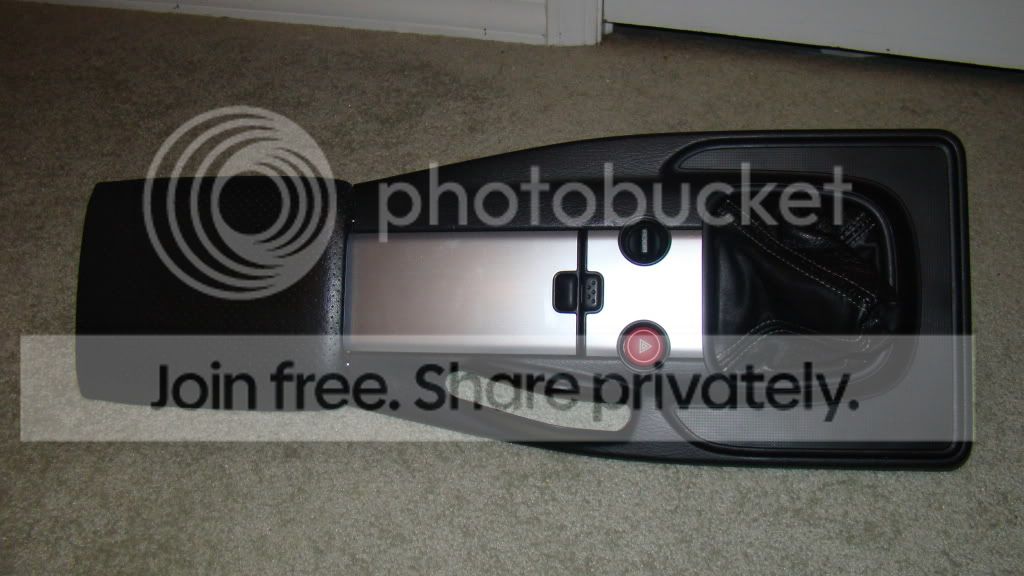
Step 3: On the back side of the console, remove the 4 screws holding the elbow pad on the rest of the console

Step 4: Mark the middle of the new elbow pad wrap if it is not to start

Step 5: Align the elbow pad with the center of the new elbow pad

Step 6: Now use a few binder clips to hold the new wrap along one of the long sides of the elbow pad frame, then do the same to the other side, then the short sides. This helps position it for the next step

Step 7: Remove the binder clips along one of the long sides of the elbow pad and apply a bead of Fabric glue along the inside of the frame. I decided to do it this way opposed to using spray adhesive just in case I wanted to remove it in the future. Then starting from the middle and working out to the ends placing binder clips side by side. The do the opposite and short sides the same way, being sure to pull the leather taught. Don't worry about the corners just yet. You may have to trim a bit on one of the short sides to clear a protrusion. The binder clips help hold it in place while the glue sets. You may need to use larger clips where the elbow pad seams wrap over.


Step 8: Now this was a bit more challenging, glue down the corners. You will have to trim and work this out for yourself. I ended up trimming material out of the corners and removing the clips at the end to get them pulled nice and tight. I used a few binder clips to tack the corners in place while the glue set.

Step 9: Gave the freshly wrapped elbow pad about 15mins of set-up time then removed the binder clips. Looking good!

Step 10: Reinstall the elbow pad onto the main console using the 4 screws you removed earlier.

Step 11: Check that the console door opens, mine rubbed a bit on the elbow pad seems but opened on it's own

Step 12: Reinstall in the car, being sure to reconnect the hazard lights and roof control leads and that the console is fully down. Once in the car the sliding compartment door opened a bit more slowly then it did on the counter, again because of the seam of the wrap. Either way ENJOY your new elbow pad!


Never did anything like this and not a clue if it is right but it worked out and looks good so follow at your own risk
What you need
Leather to wrap the elbow pad
#2 screw driver
25 binder clips
Fabric Glue
Scissors
Step 1: Remove the shift knob
Step 2: Pull up on the console around the shifter, unplug the roof control and hazard connections, then fully remove the console
Step 3: On the back side of the console, remove the 4 screws holding the elbow pad on the rest of the console
Step 4: Mark the middle of the new elbow pad wrap if it is not to start
Step 5: Align the elbow pad with the center of the new elbow pad
Step 6: Now use a few binder clips to hold the new wrap along one of the long sides of the elbow pad frame, then do the same to the other side, then the short sides. This helps position it for the next step
Step 7: Remove the binder clips along one of the long sides of the elbow pad and apply a bead of Fabric glue along the inside of the frame. I decided to do it this way opposed to using spray adhesive just in case I wanted to remove it in the future. Then starting from the middle and working out to the ends placing binder clips side by side. The do the opposite and short sides the same way, being sure to pull the leather taught. Don't worry about the corners just yet. You may have to trim a bit on one of the short sides to clear a protrusion. The binder clips help hold it in place while the glue sets. You may need to use larger clips where the elbow pad seams wrap over.
Step 8: Now this was a bit more challenging, glue down the corners. You will have to trim and work this out for yourself. I ended up trimming material out of the corners and removing the clips at the end to get them pulled nice and tight. I used a few binder clips to tack the corners in place while the glue set.
Step 9: Gave the freshly wrapped elbow pad about 15mins of set-up time then removed the binder clips. Looking good!
Step 10: Reinstall the elbow pad onto the main console using the 4 screws you removed earlier.
Step 11: Check that the console door opens, mine rubbed a bit on the elbow pad seems but opened on it's own
Step 12: Reinstall in the car, being sure to reconnect the hazard lights and roof control leads and that the console is fully down. Once in the car the sliding compartment door opened a bit more slowly then it did on the counter, again because of the seam of the wrap. Either way ENJOY your new elbow pad
!


Joined: Oct 2009
Posts: 29,896
Likes: 5,435
From: Ontario Canada
looks great, and nice job on the install. I sent JPM my oem elbowpad and they did the install for me at no charge. If you just buy the pad outright then you have to do the install like this. I didn't trust myself working with glue. This is a great upgrade IMO.

Joined: Oct 2009
Posts: 29,896
Likes: 5,435
From: Ontario Canada
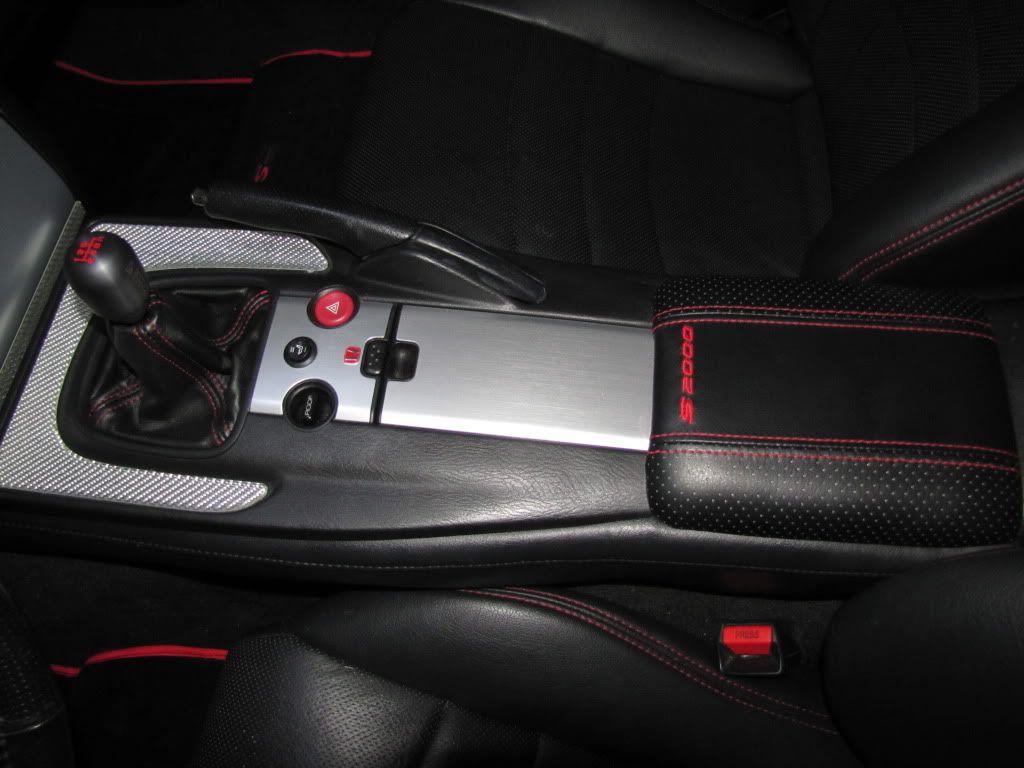
I got JPM to add extra padding under my elbowpad to give it a soft feel as the oem setup is so damn hard. I'll double check my door to see how it opens but i didn't notice any difference. My new pad is nice and cushiony. Here is my setup:
Joined: Oct 2009
Posts: 29,896
Likes: 5,435
From: Ontario Canada
yes they will install it for free, you just have to send the oem part to them and cover the shipping back to you. I just tried opening my console drawer cover and it does slow down a bit rubbing on the pad, but not a big issue. I actually never close the cover much, I leave it open most of the time.
Trending Topics
Thread Starter
Joined: Aug 2009
Posts: 1,810
Likes: 7
yes they will install it for free, you just have to send the oem part to them and cover the shipping back to you. I just tried opening my console drawer cover and it does slow down a bit rubbing on the pad, but not a big issue. I actually never close the cover much, I leave it open most of the time.
Joined: Oct 2009
Posts: 29,896
Likes: 5,435
From: Ontario Canada
Jordan, if you decide to do this, ask them to install some added foam under the pad, it makes a nice difference giving it a soft feel as compared to the harder oem piece. You have to ask them to do this as it isn't normally listed on their website. jpmcoachworks.com , one of the ownwers is Joe who is an S2000 owner and a member on the forums. Great guys to deal with.
Registered User
Joined: Dec 2006
Posts: 7,195
Likes: 0
the jpm stuff is good quality, and joe has been really helpful the couple times i have bought from him. i didnt quite use this method though, i opted to spray the whole back side of the fabric with 3m fabric adhesive instead. i was worried that over the course of time, the center part where you dont have any glue will start wearing and might stretch or something and not sit nicely flush anymore. the perforated center is nice nice 