
Personal project / build diary / T2000


Thread Starter

Joined: Jun 2009
Posts: 493
Likes: 4
From: Williamsburg
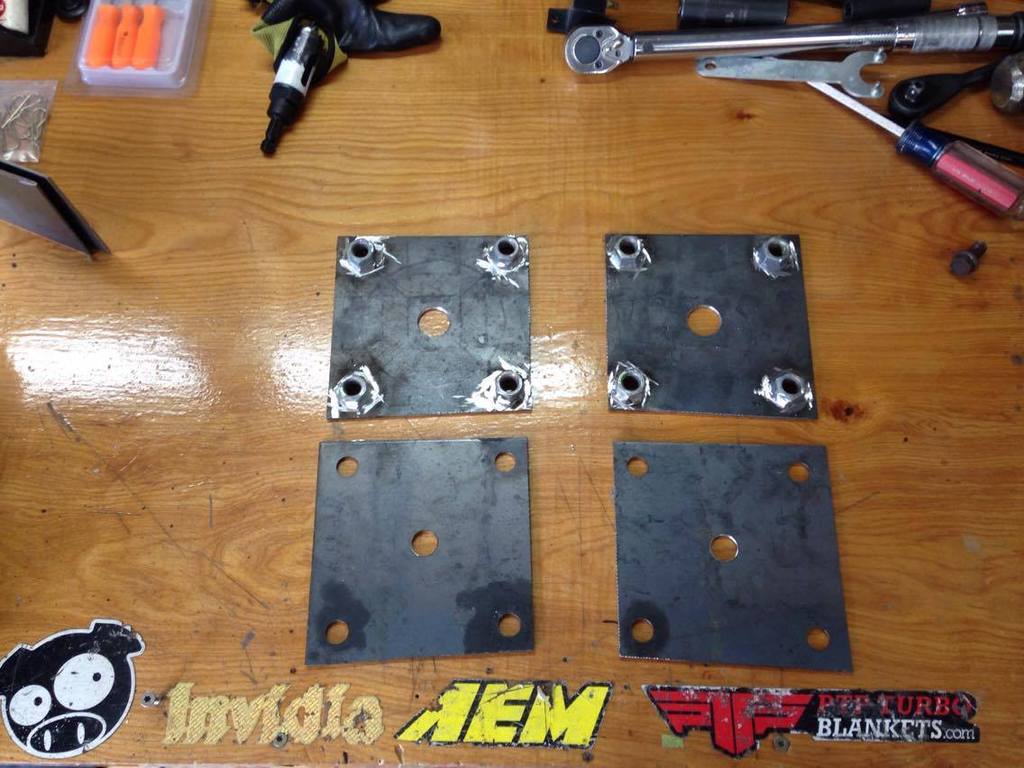
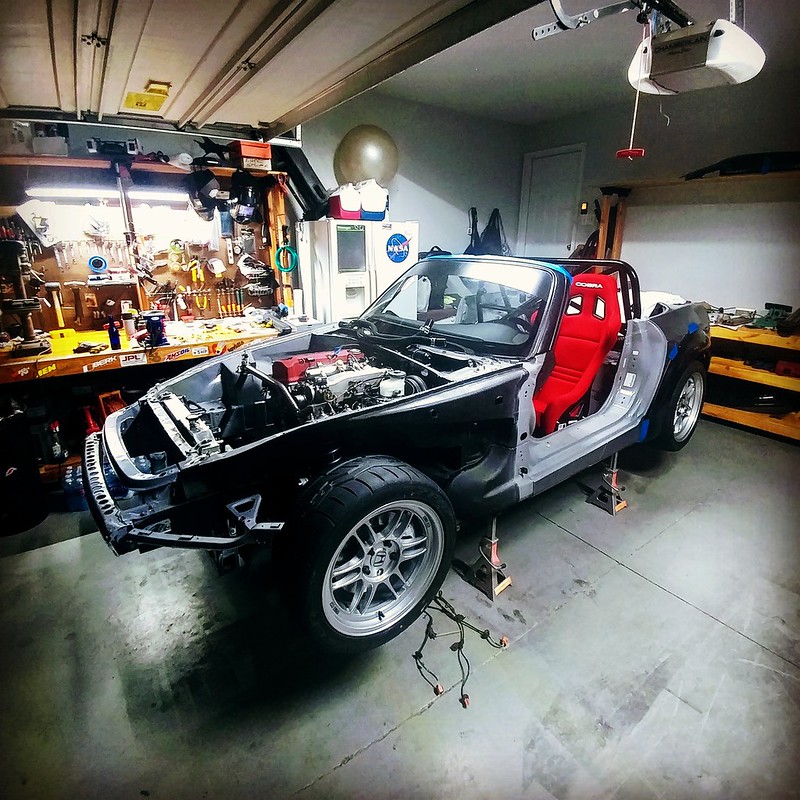
Here are some pics for the X-frame pieces I've started on. The clearance is fairly complex so I decided to do it in 3 pieces per side. Start of with the vertical strip, then make templates for the top and bottom plates


Thread Starter
Joined: Jun 2009
Posts: 493
Likes: 4
From: Williamsburg
1/2" Grade 8 hardware. Nuts welded onto the backing plates all the way around and ground down so they sit fluch in the 1" dia holes cut in the frame. Plates follow the bottom angle of the frame and are asymmetrical for that purpose
Cute notes to self *justcarguythings*
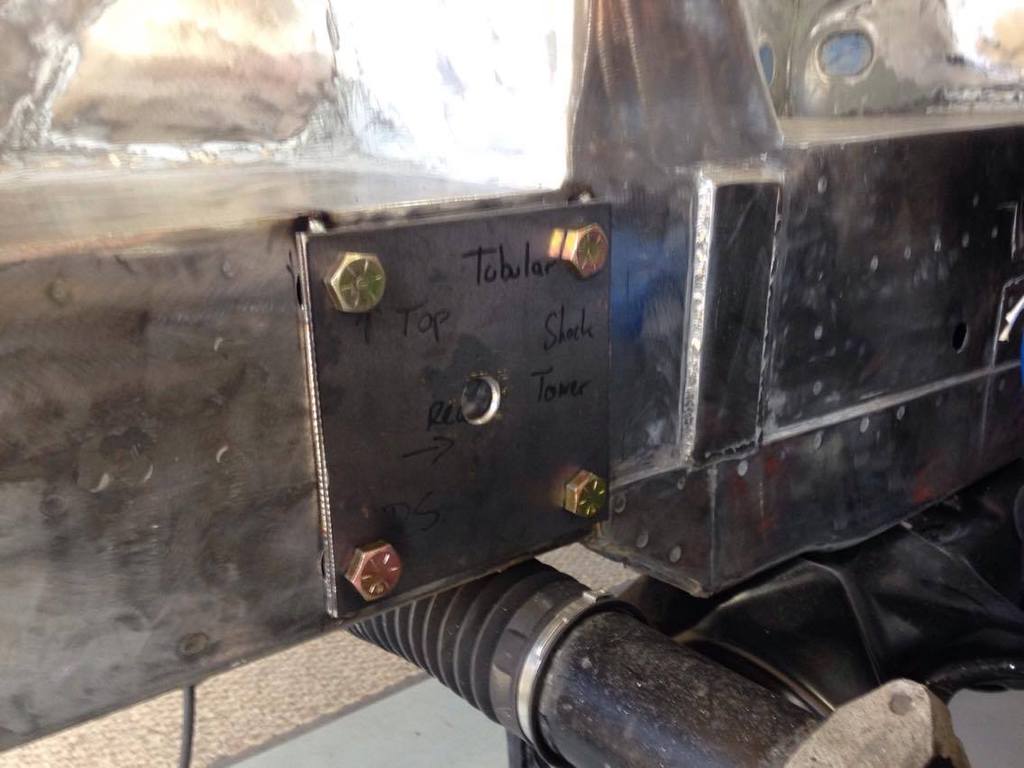
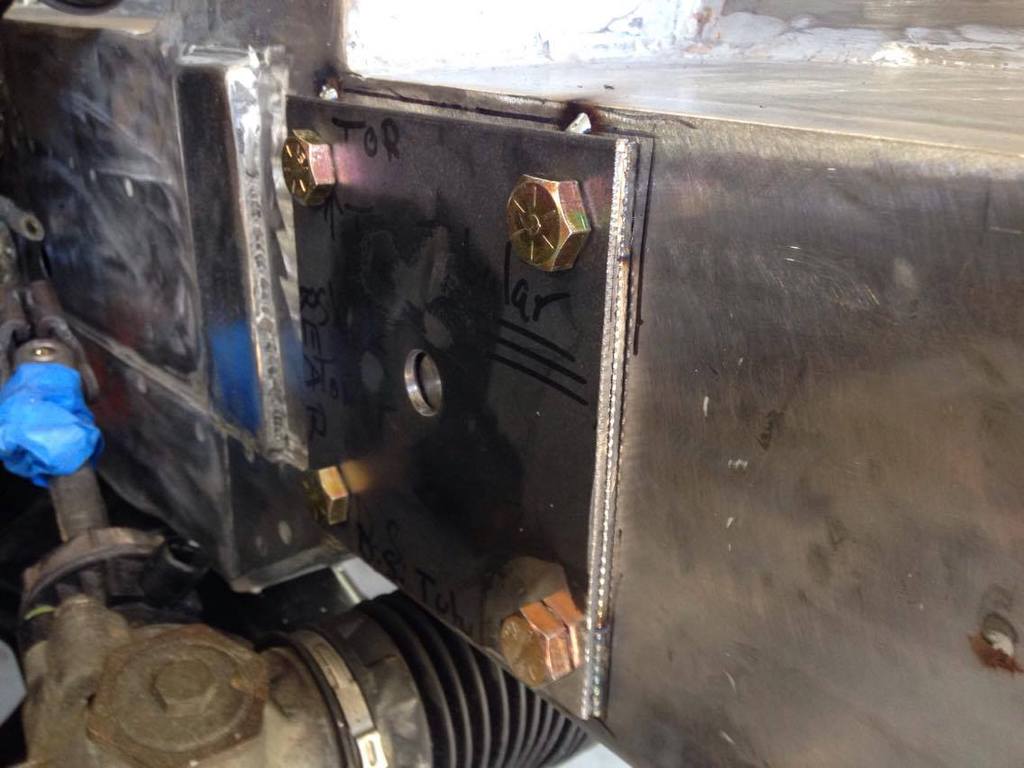
Tacked in place. Very tight fit, may need clearance for paint.
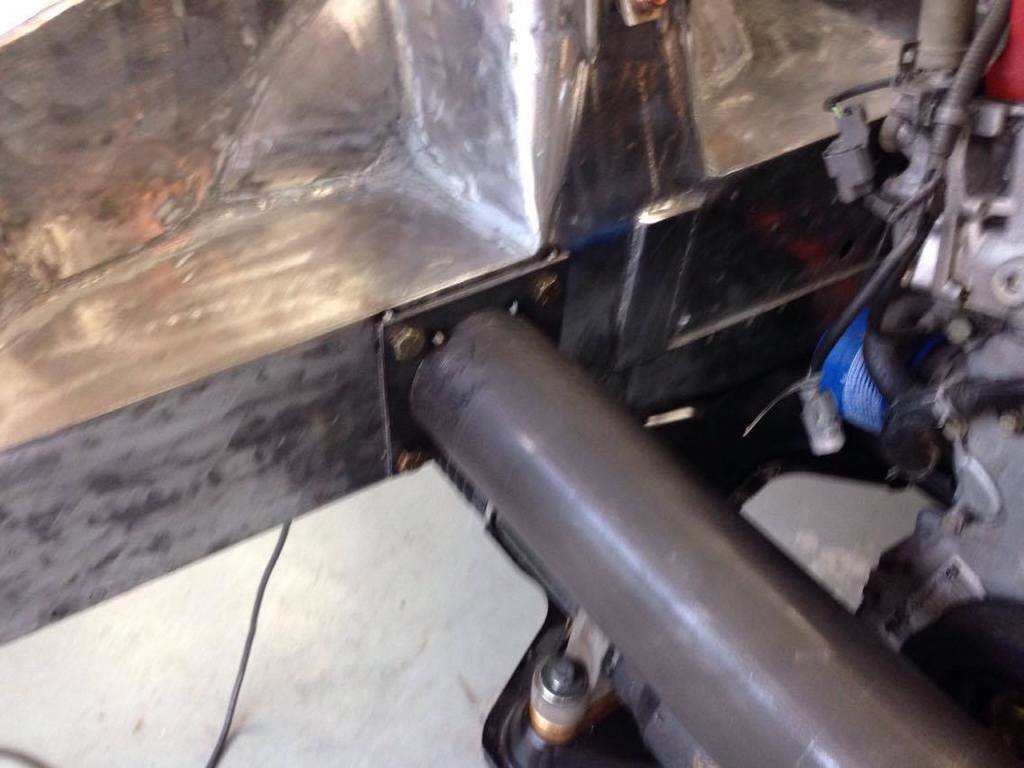
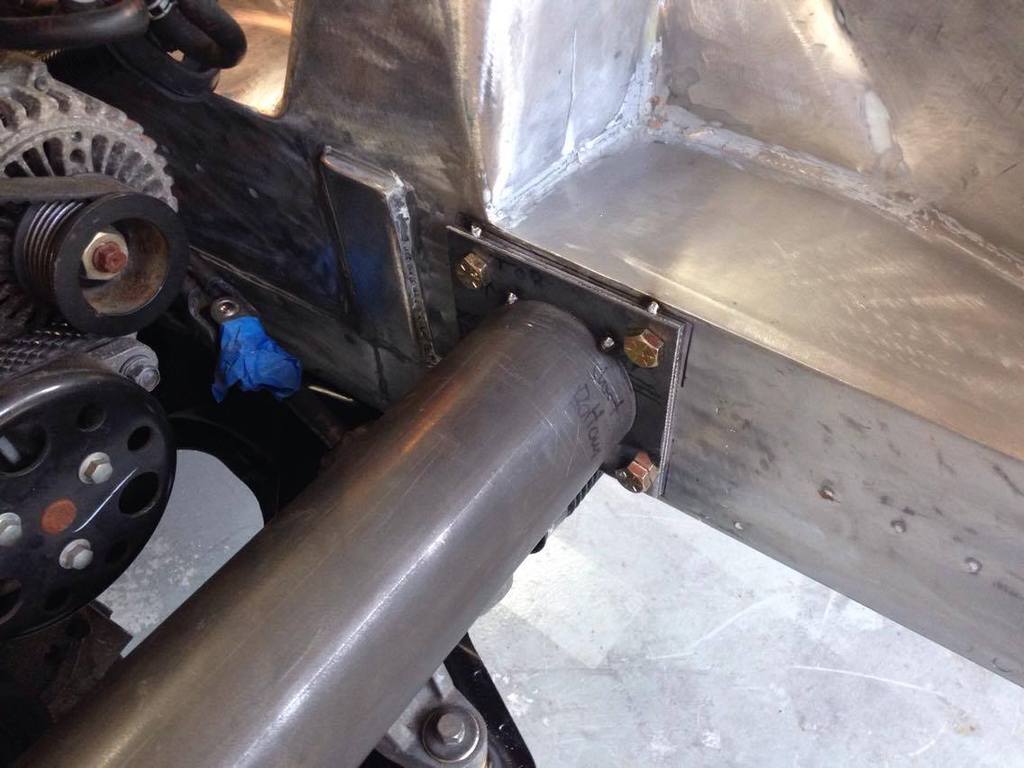
Steering rack clearance ~ 1/3"

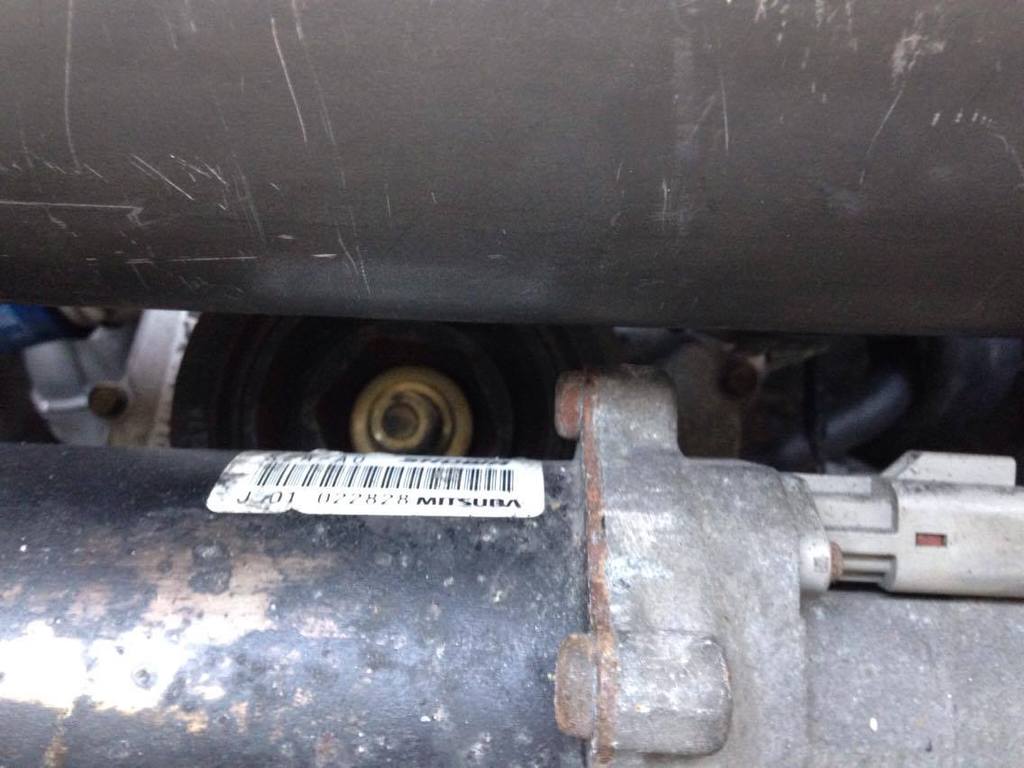
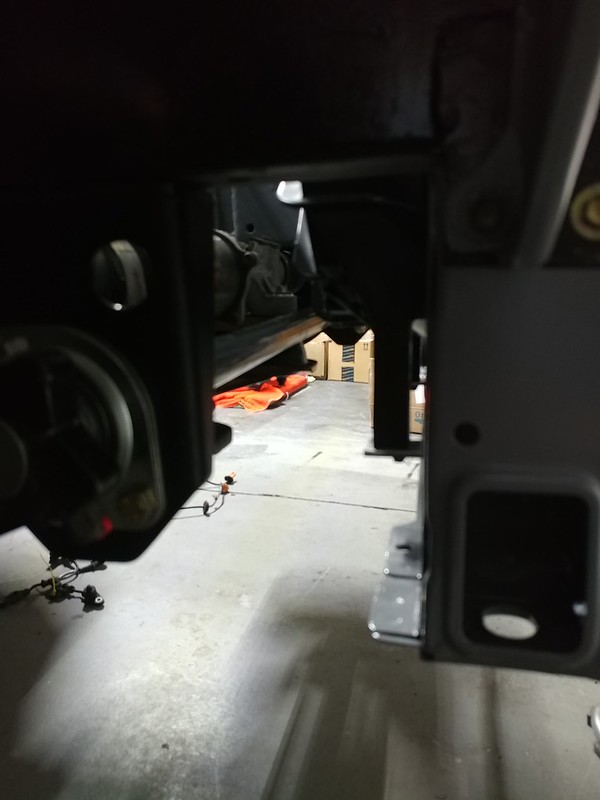
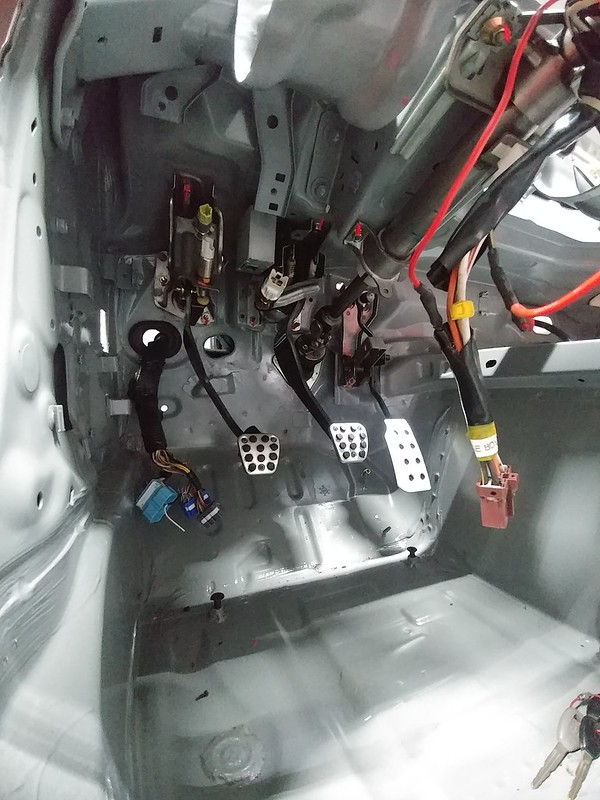
Hands are so shaky from grinding and drilling I can only take blurry pics

Cute notes to self *justcarguythings*


Tacked in place. Very tight fit, may need clearance for paint.


Steering rack clearance ~ 1/3"


Hands are so shaky from grinding and drilling I can only take blurry pics

Joined: Sep 2010
Posts: 563
Likes: 6
From: Northamptonshire
Looking good dude but from the pictures it looks like you tack welded the tube to the plate with the captive nuts on the back? Also how thick are your plates? And what wall thickness tube did you go for? Is it heavy?
sorry for the bombardment of questions but I'm doing this to at the moment.
sorry for the bombardment of questions but I'm doing this to at the moment.


Thread Starter
Joined: Jun 2009
Posts: 493
Likes: 4
From: Williamsburg
Looking good dude but from the pictures it looks like you tack welded the tube to the plate with the captive nuts on the back? Also how thick are your plates? And what wall thickness tube did you go for? Is it heavy?
sorry for the bombardment of questions but I'm doing this to at the moment.
sorry for the bombardment of questions but I'm doing this to at the moment.
Thread Starter
Joined: Jun 2009
Posts: 493
Likes: 4
From: Williamsburg
NEW: OEM clutch disk, 8lb flywheel, OEM pressure plate.
Re-used: pilot bearing, throw-out bearing, clutch slave and fork, Omni power clutch master.
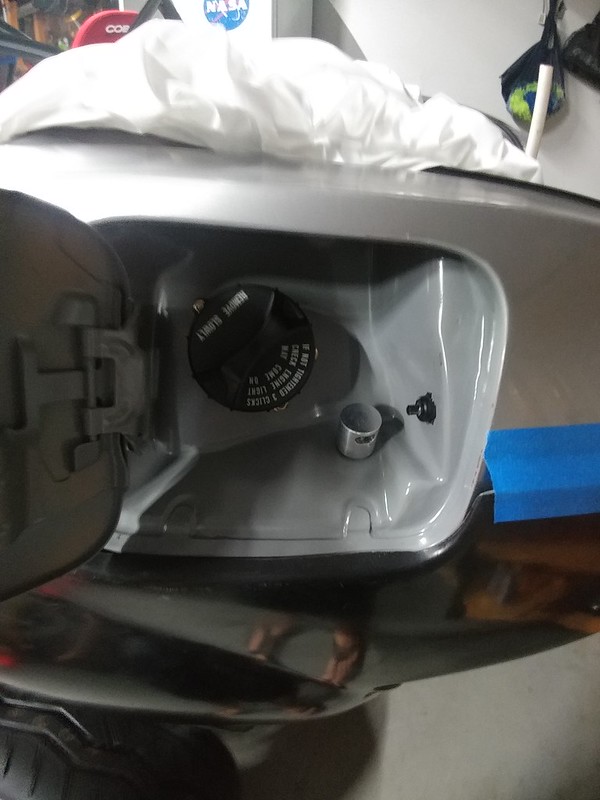
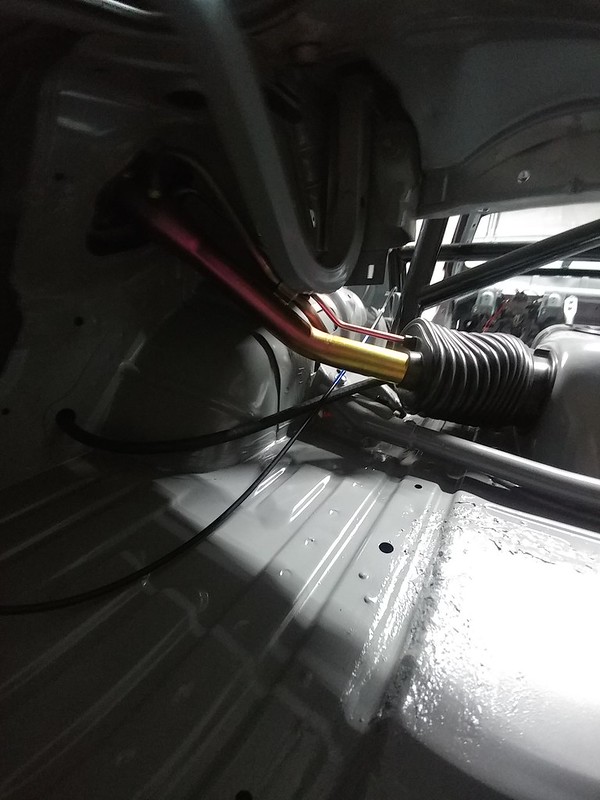
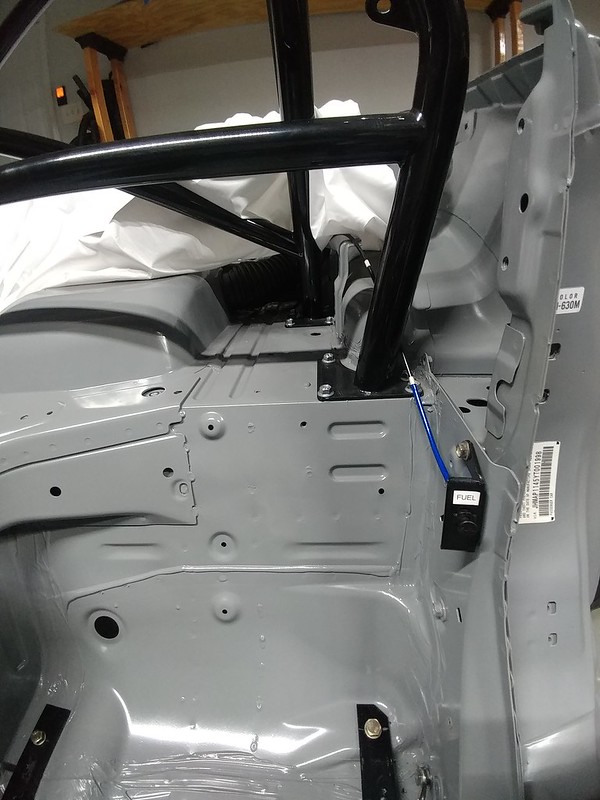
Fuel tank: Vented to atmosphere, roll over valve sits right next to the fuel cap. Fuel line goes through the rubber boot intto 2 way nipple on fuel pump cover which utilizes OEM lines, double sided barb used with constant velocity clamps. All other ports are closed off.
Water pump: Bypass hose retained, heater core fittings crimped then welded then sealed. Same as intake manifold nipple. Future: pull steel nipples and drop off spare water pump and intake manifold to weld ALL unused ports shut including coolant bypass.
Front brake lines: Passenger side - 60" line + coupler + 20" line, bent alongthe firewall inside the nook where an aluminum heater core pipe used to reside. Supported in center of firewal by 10mm nut and bolt. Drivers side - 20" line.
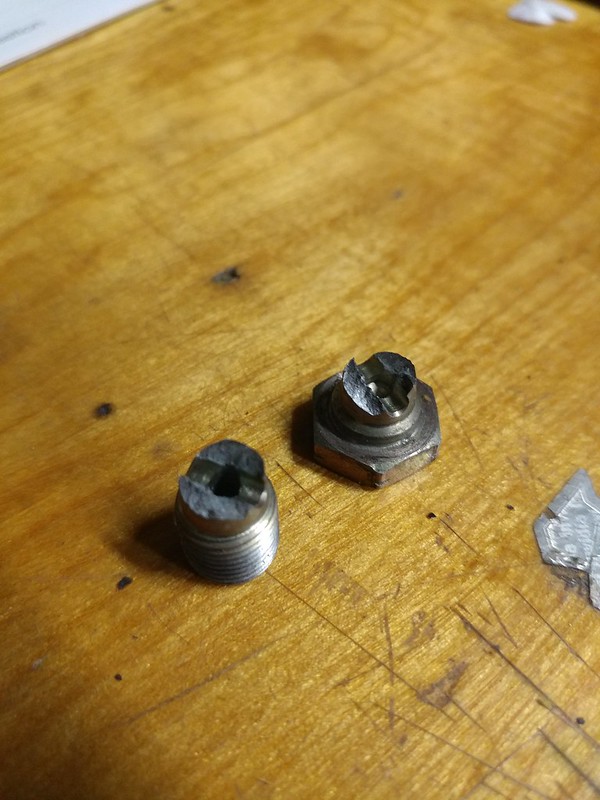
Braided line goodridge banjo bolts supplied only 17 ft-lb! Remember 3 spares are nickel plated steel alloy, New banjo bolts are 304SS part number as follows . M10x1mm short version.

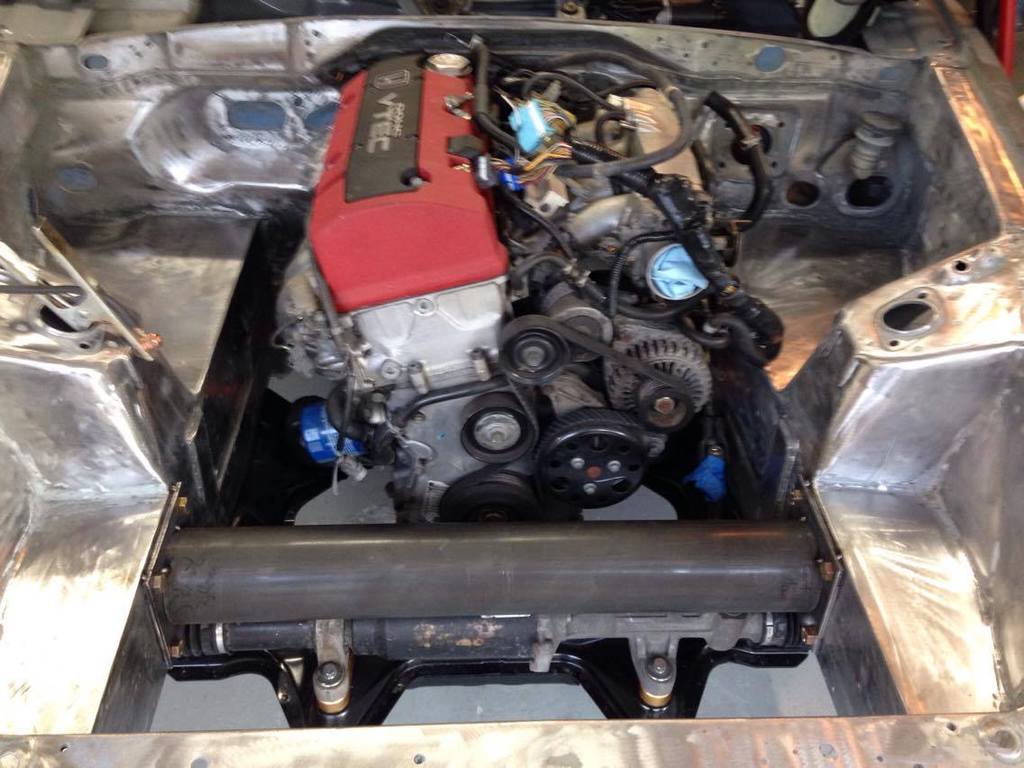
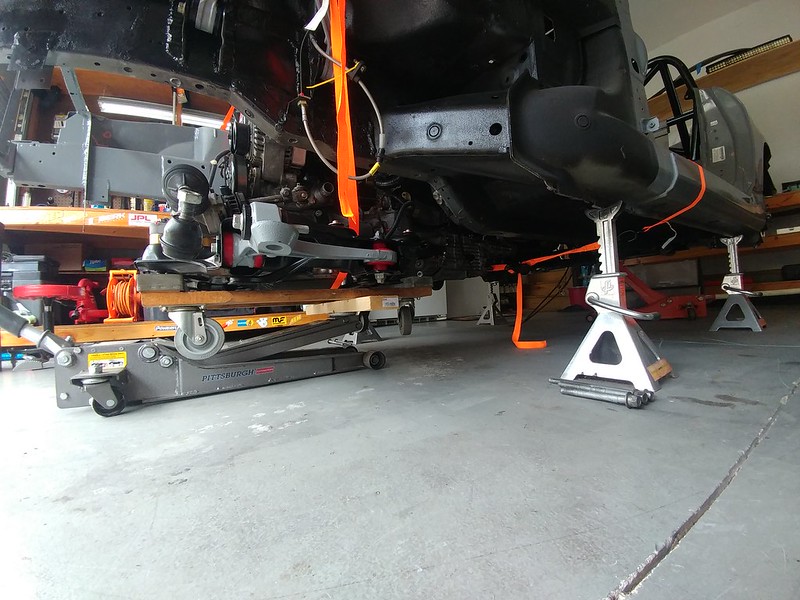
For future engine drop line up markings on dolly and place jack on subframe cross beam. Centroid only valid with engine and trans connected as pictured below, no radiator with coolant and hoses! DON'T REMOVE CRASH BEAM, FRAME RAILS WILL BEND INWARDS. instead raise front crash beam a few inches and pull motor straight through the front.
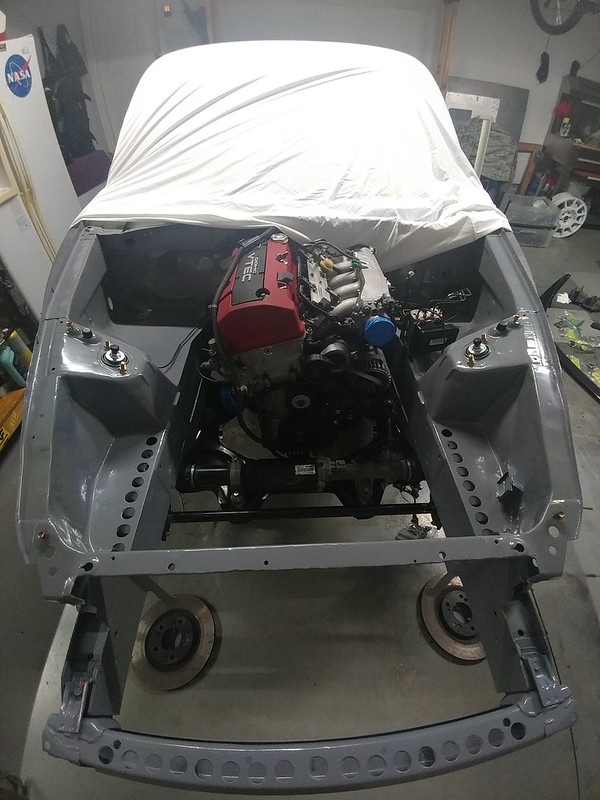
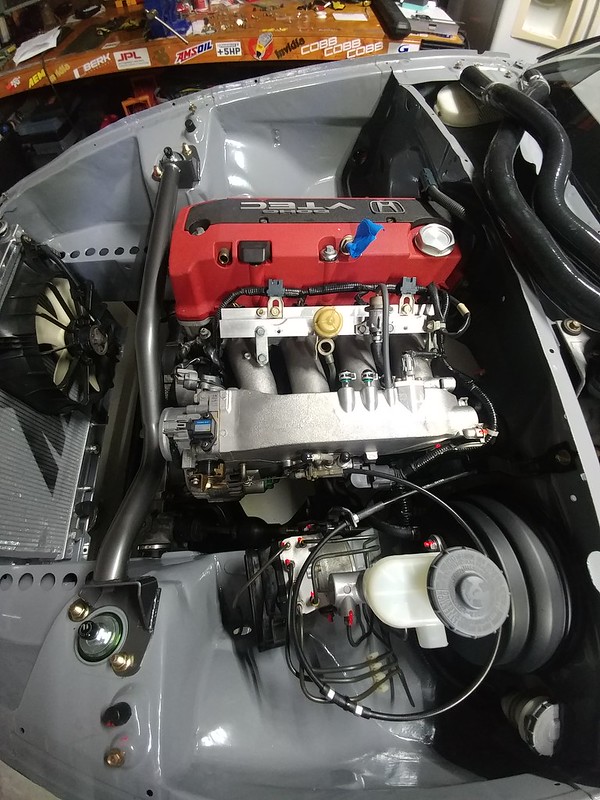
Sheared bolt in crash beam, extract before completing air dam. Brake booster is upside down, hose cut and rerouted under intake manifold by support bracket. Missing center loop support bracket for throttle cable, zip tied to brake line, remember to think of a fix at some point. Monitor for abrasion.
2.99" clearance, figure out intake situation.
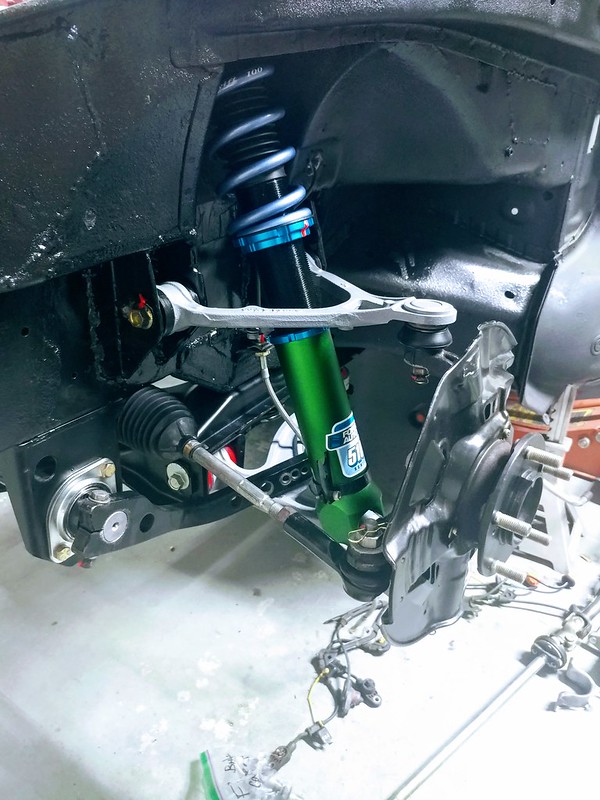
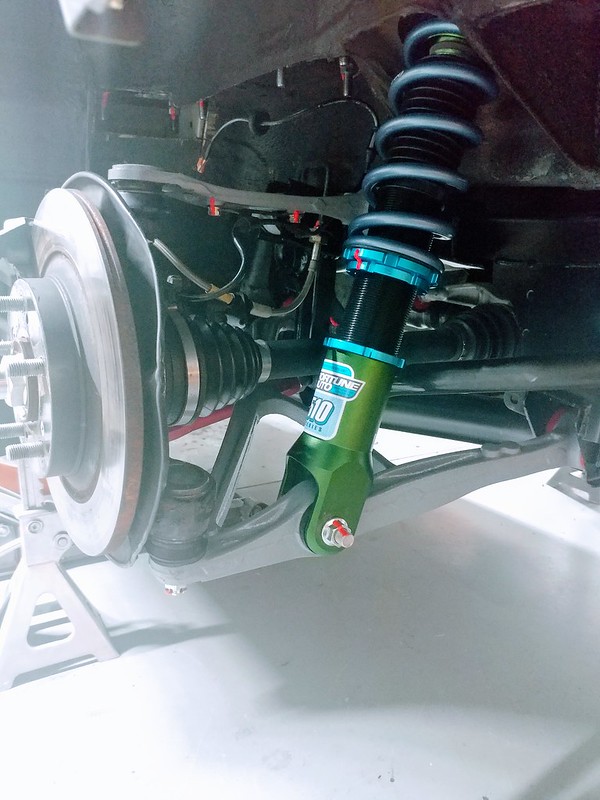
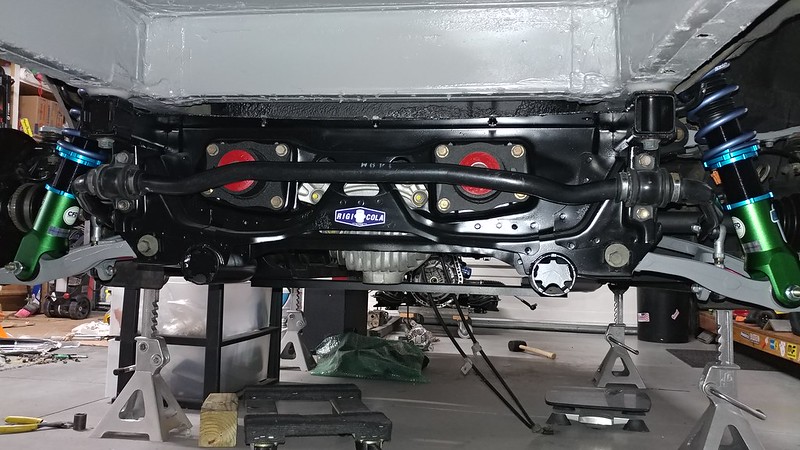
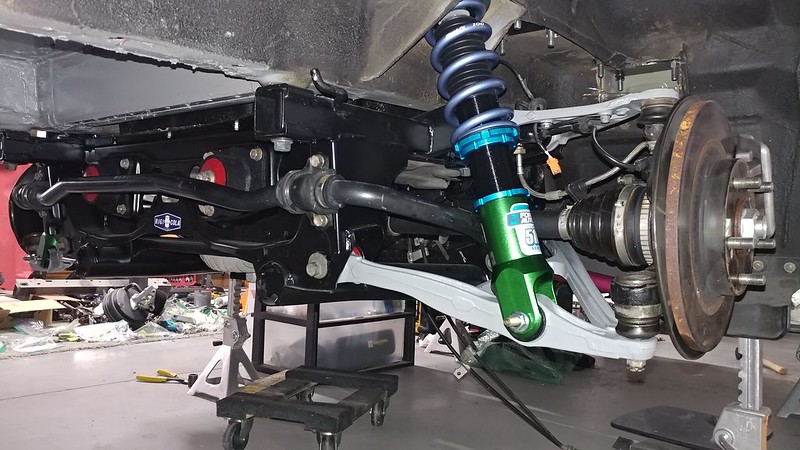
10K front springs. Pre-loaded 1/4". Power flex 90A upper control arm bushing, prothane 90A lower control arm bushings. Radial bearing gendron sway bar mounts for 1.25" bar. Remember to drill out sway bar arm holes to 3/8". Next time make own end links using 1/2" stud lower and 3/8" upper. Spoon subframe and steering rack collars, T1R steering rack spacers, hardrace offset ball joint roll center adjusters. JDM hubs, check for play.
10k rear springs. Pre-loaded 1/8". Power flex 90A upper control arm bushing, prothane 90A lower control arm bushings. Hardrace roll center adjusters. Evasive toe arms with spherical boots from a UK motorsports store. OEM sway bar with OEM bushings, lubed well. bearings replaced at 50k miles. OEM passenger side axle, OEM drivers side axles from YuJin with unknown miles, Megan racing axle spacers, none of the cups ever flipped.
Innovative diff mounts, OEM diff. New driveshaft bolts, flange markings worn off, old position assumed so check for vibration.
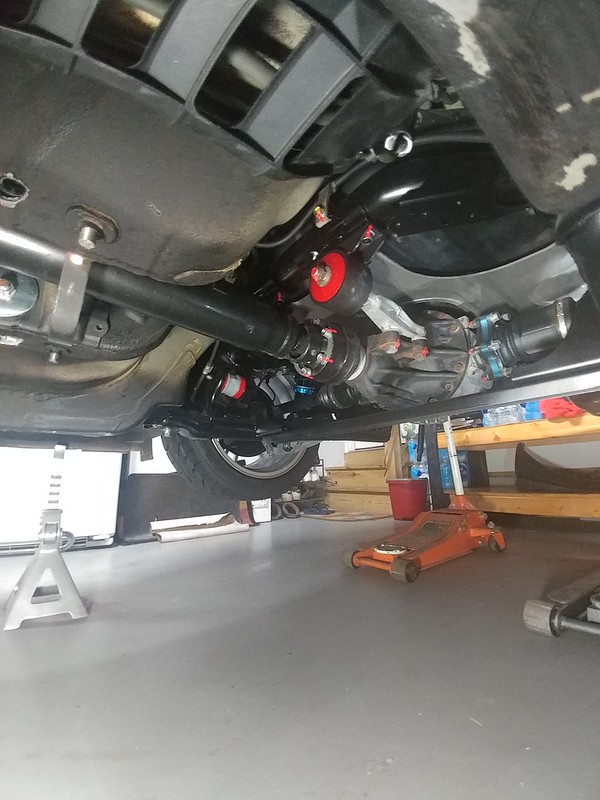
Innovative 90A motor mounts and possibly 80A trans mount, Ballade braided clutch line.

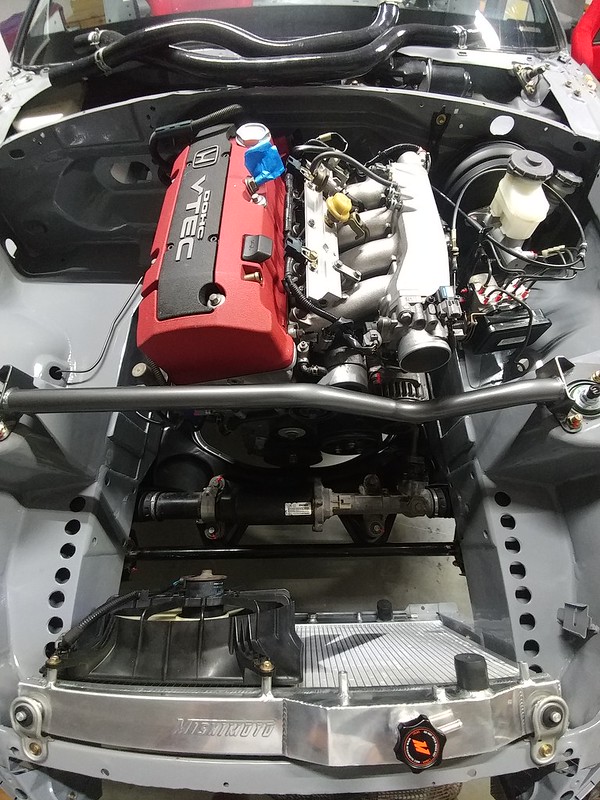
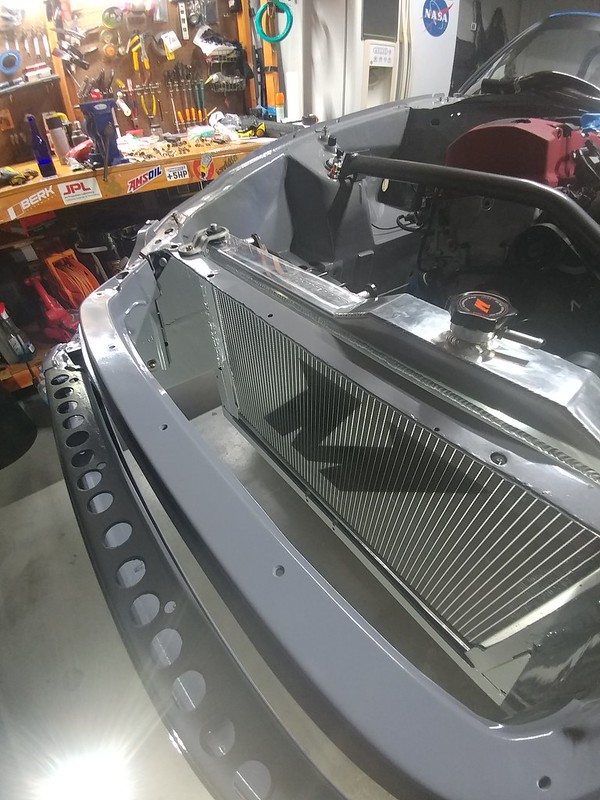
Mishimoto two row heat exchanger, ducting worked out really well.
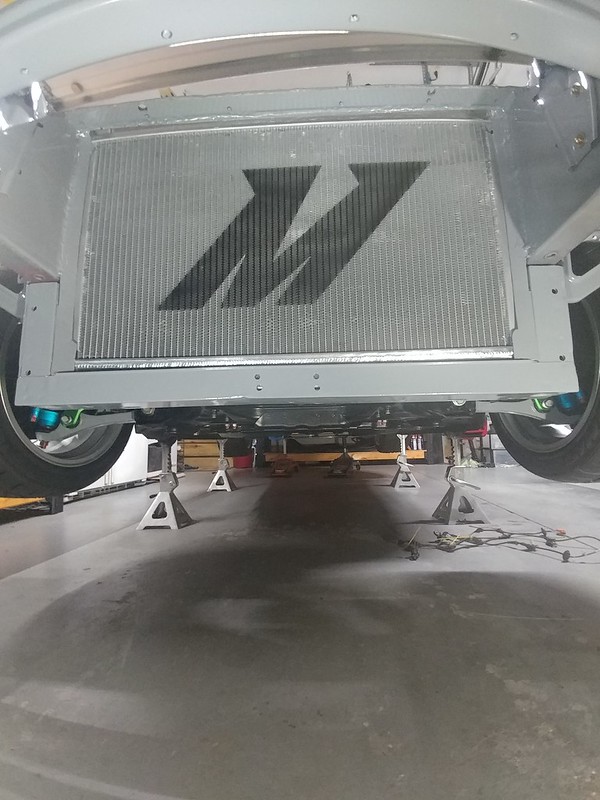
Remember to re-use plastic under tray for side coverage.
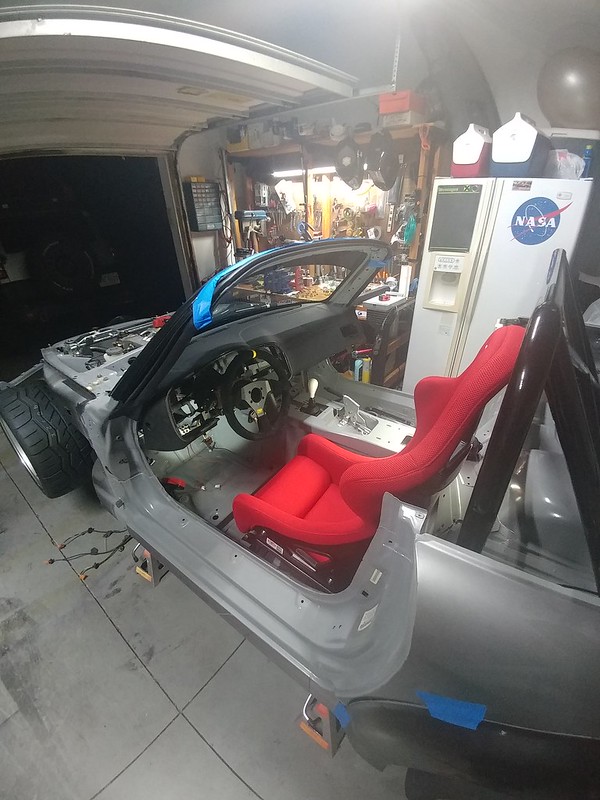
Dash from supplied shell re-used, find out if VIN plate can be swapped into mint dash. OMP targa 330mm wheel with OMP adapter, Cobra suzuka pro-fit seats with cobra 5mm aluminum bracket.
New mounting adapters from 1/8" normalized 4130, 2" wide, lengths are 2x20", 18", 19". Grab M10 hardware from fastenal and tack to adapter strips.
17x9 +45 RPF1, 255-40/17 RT615K+, Carbotech XP10 front and XP8 rear, balanced centric blanks.
Brake pedal bent towards has pedal, gas pedal adapter from some fancy place that's too expensive. Double check
Re-used: pilot bearing, throw-out bearing, clutch slave and fork, Omni power clutch master.
Fuel tank: Vented to atmosphere, roll over valve sits right next to the fuel cap. Fuel line goes through the rubber boot intto 2 way nipple on fuel pump cover which utilizes OEM lines, double sided barb used with constant velocity clamps. All other ports are closed off.
Water pump: Bypass hose retained, heater core fittings crimped then welded then sealed. Same as intake manifold nipple. Future: pull steel nipples and drop off spare water pump and intake manifold to weld ALL unused ports shut including coolant bypass.
Front brake lines: Passenger side - 60" line + coupler + 20" line, bent alongthe firewall inside the nook where an aluminum heater core pipe used to reside. Supported in center of firewal by 10mm nut and bolt. Drivers side - 20" line.
Braided line goodridge banjo bolts supplied only 17 ft-lb! Remember 3 spares are nickel plated steel alloy, New banjo bolts are 304SS part number as follows . M10x1mm short version.
For future engine drop line up markings on dolly and place jack on subframe cross beam. Centroid only valid with engine and trans connected as pictured below, no radiator with coolant and hoses! DON'T REMOVE CRASH BEAM, FRAME RAILS WILL BEND INWARDS. instead raise front crash beam a few inches and pull motor straight through the front.
Sheared bolt in crash beam, extract before completing air dam. Brake booster is upside down, hose cut and rerouted under intake manifold by support bracket. Missing center loop support bracket for throttle cable, zip tied to brake line, remember to think of a fix at some point. Monitor for abrasion.
2.99" clearance, figure out intake situation.
10K front springs. Pre-loaded 1/4". Power flex 90A upper control arm bushing, prothane 90A lower control arm bushings. Radial bearing gendron sway bar mounts for 1.25" bar. Remember to drill out sway bar arm holes to 3/8". Next time make own end links using 1/2" stud lower and 3/8" upper. Spoon subframe and steering rack collars, T1R steering rack spacers, hardrace offset ball joint roll center adjusters. JDM hubs, check for play.
10k rear springs. Pre-loaded 1/8". Power flex 90A upper control arm bushing, prothane 90A lower control arm bushings. Hardrace roll center adjusters. Evasive toe arms with spherical boots from a UK motorsports store. OEM sway bar with OEM bushings, lubed well. bearings replaced at 50k miles. OEM passenger side axle, OEM drivers side axles from YuJin with unknown miles, Megan racing axle spacers, none of the cups ever flipped.
Innovative diff mounts, OEM diff. New driveshaft bolts, flange markings worn off, old position assumed so check for vibration.
Innovative 90A motor mounts and possibly 80A trans mount, Ballade braided clutch line.
Mishimoto two row heat exchanger, ducting worked out really well.
Remember to re-use plastic under tray for side coverage.
Dash from supplied shell re-used, find out if VIN plate can be swapped into mint dash. OMP targa 330mm wheel with OMP adapter, Cobra suzuka pro-fit seats with cobra 5mm aluminum bracket.
New mounting adapters from 1/8" normalized 4130, 2" wide, lengths are 2x20", 18", 19". Grab M10 hardware from fastenal and tack to adapter strips.
17x9 +45 RPF1, 255-40/17 RT615K+, Carbotech XP10 front and XP8 rear, balanced centric blanks.
Brake pedal bent towards has pedal, gas pedal adapter from some fancy place that's too expensive. Double check
Last edited by rocketstarter; Jul 25, 2018 at 09:16 PM. Reason: removed clutter code in image lines
Thread Starter
Joined: Jun 2009
Posts: 493
Likes: 4
From: Williamsburg
I'm not planning on doing wheel to wheel racing anytime soon so caging it is not a priority at this point and would just lengthen this initial build. Car will go through multiple revisions undoubtedly, just need a solid baseline first. And yeah it may be driven to the track so street car or I might tow it if I'm not lazy, I don't know yet at this point