
Headlight restoration problem?

Thread Starter
Joined: Dec 2007
Posts: 4,289
Likes: 12
So I decided to give my headlights some love since they were looking pretty bad recently. I was going to do this the right way and decided to wetsand them down with 1000, 2000 and 3000 grit sandpaper from 3m that I got from autozone, and a bottle of plexus. I dont have a PC or an electric drill with me so I had 3 varying sizes of microfiber towels that I used.
The sanding looked fine, I had some pits that needed extra pressure but generally I used moderate pressure, with getting kind of heavy with the pressure on the finer grits like 3000 and sometimes 2000 in the nasty areas.
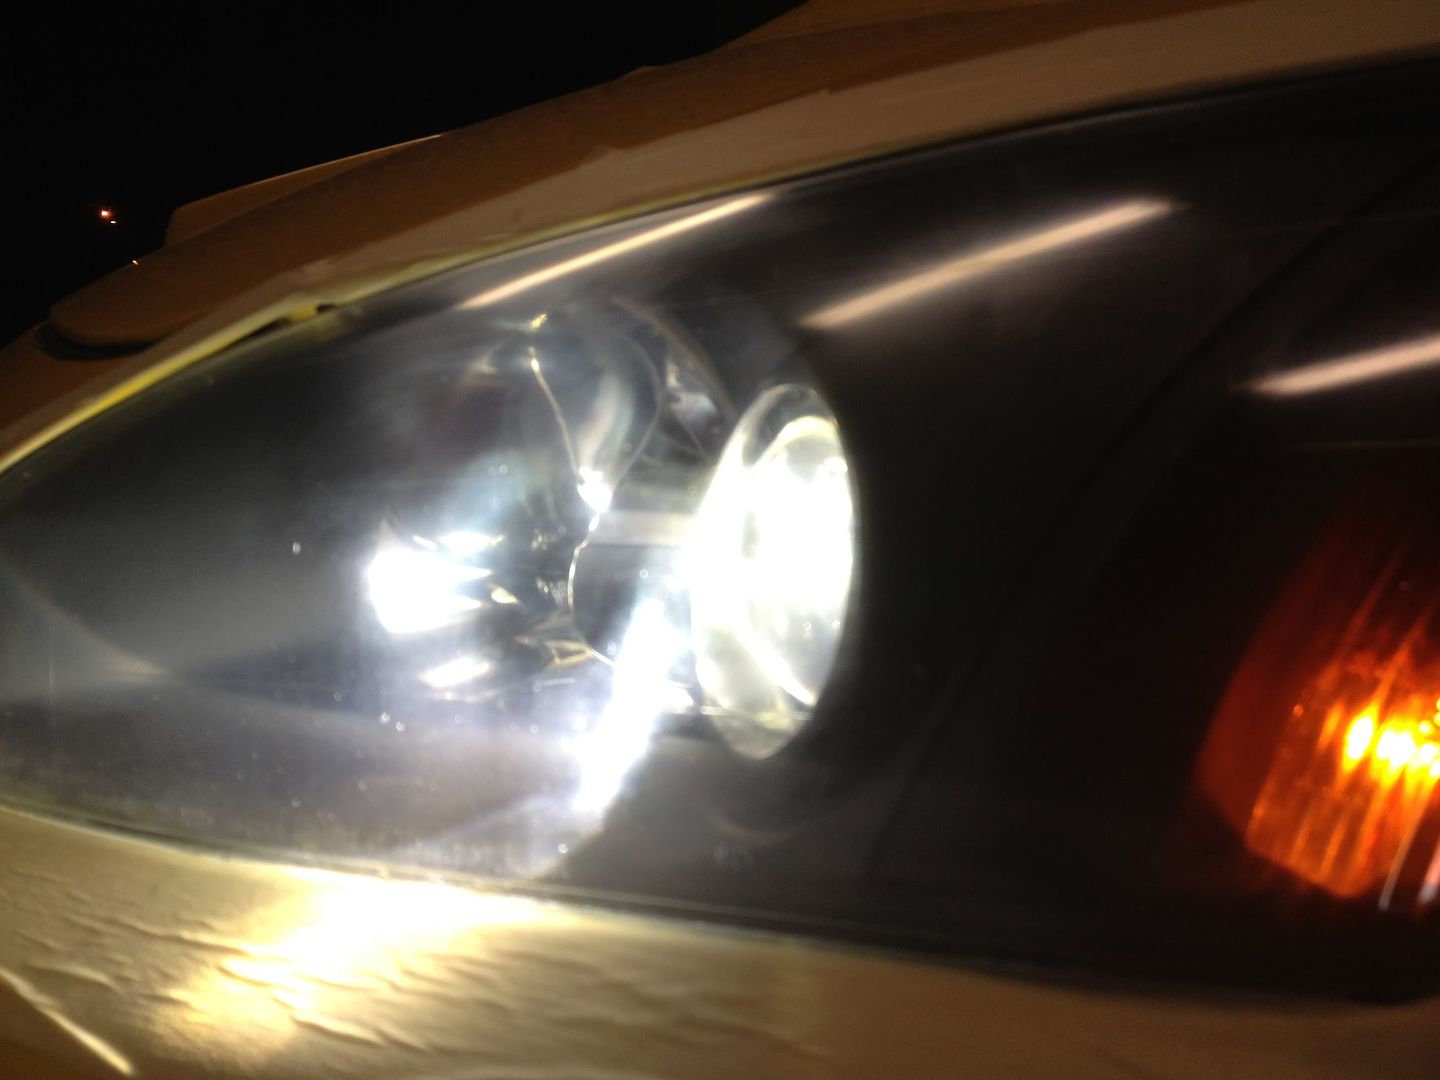
Anyways after it was all said and done, there was still some haziness to be seen, so I went at it with some Meguiar's polishing compound that I have which helped it a little bit, brought it from like an 8/10 to an 8.5/10. But I want 10/10 dammit! When I turn the headlight on one can notice that the beam kind of scatters across the whole headlight, and its not clear like it should be. Also, when you get up close, theres little swirl marks in the plastic that I wasnt expecting to be there.
Do I just need to go at it with the Plastx for longer or to get the results I need do I need to buff it with a powerball and a drill? I was considering going to Hobby Lobby and buying a pack of this super fine sanding fabric that they have (mentioned in a thread on here) and just sanding it down with finer and finer grits all the way up to 12000 and then hitting it with the Plastx and polishing compound.
Any help?
After 1000 grit
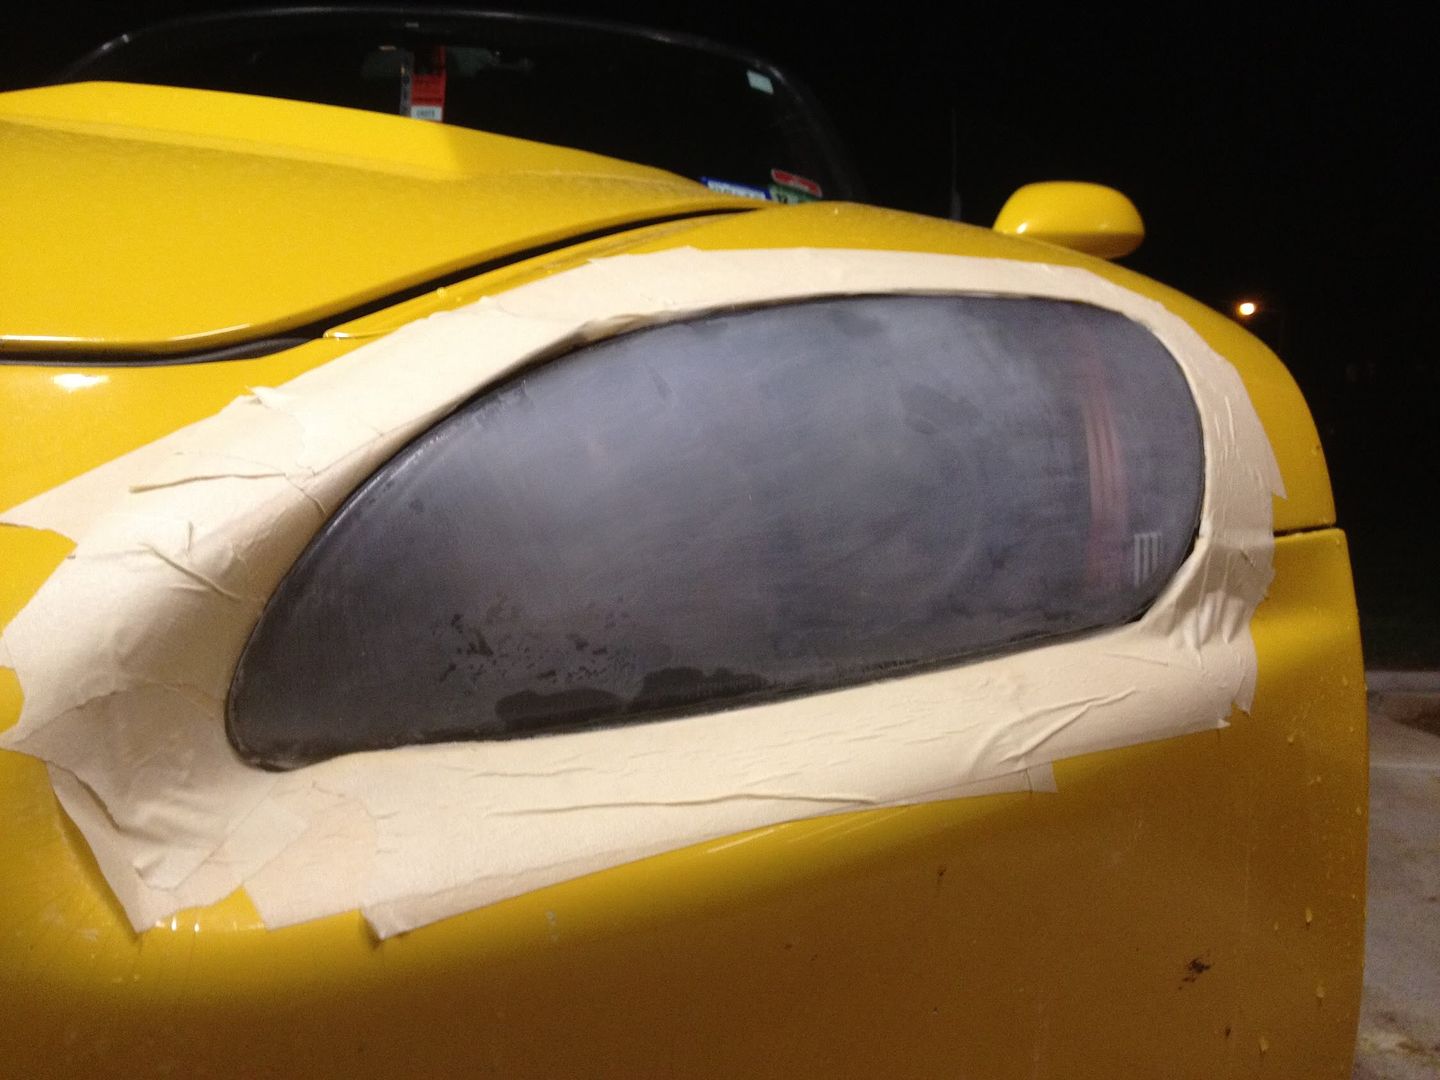
After 2000 grit
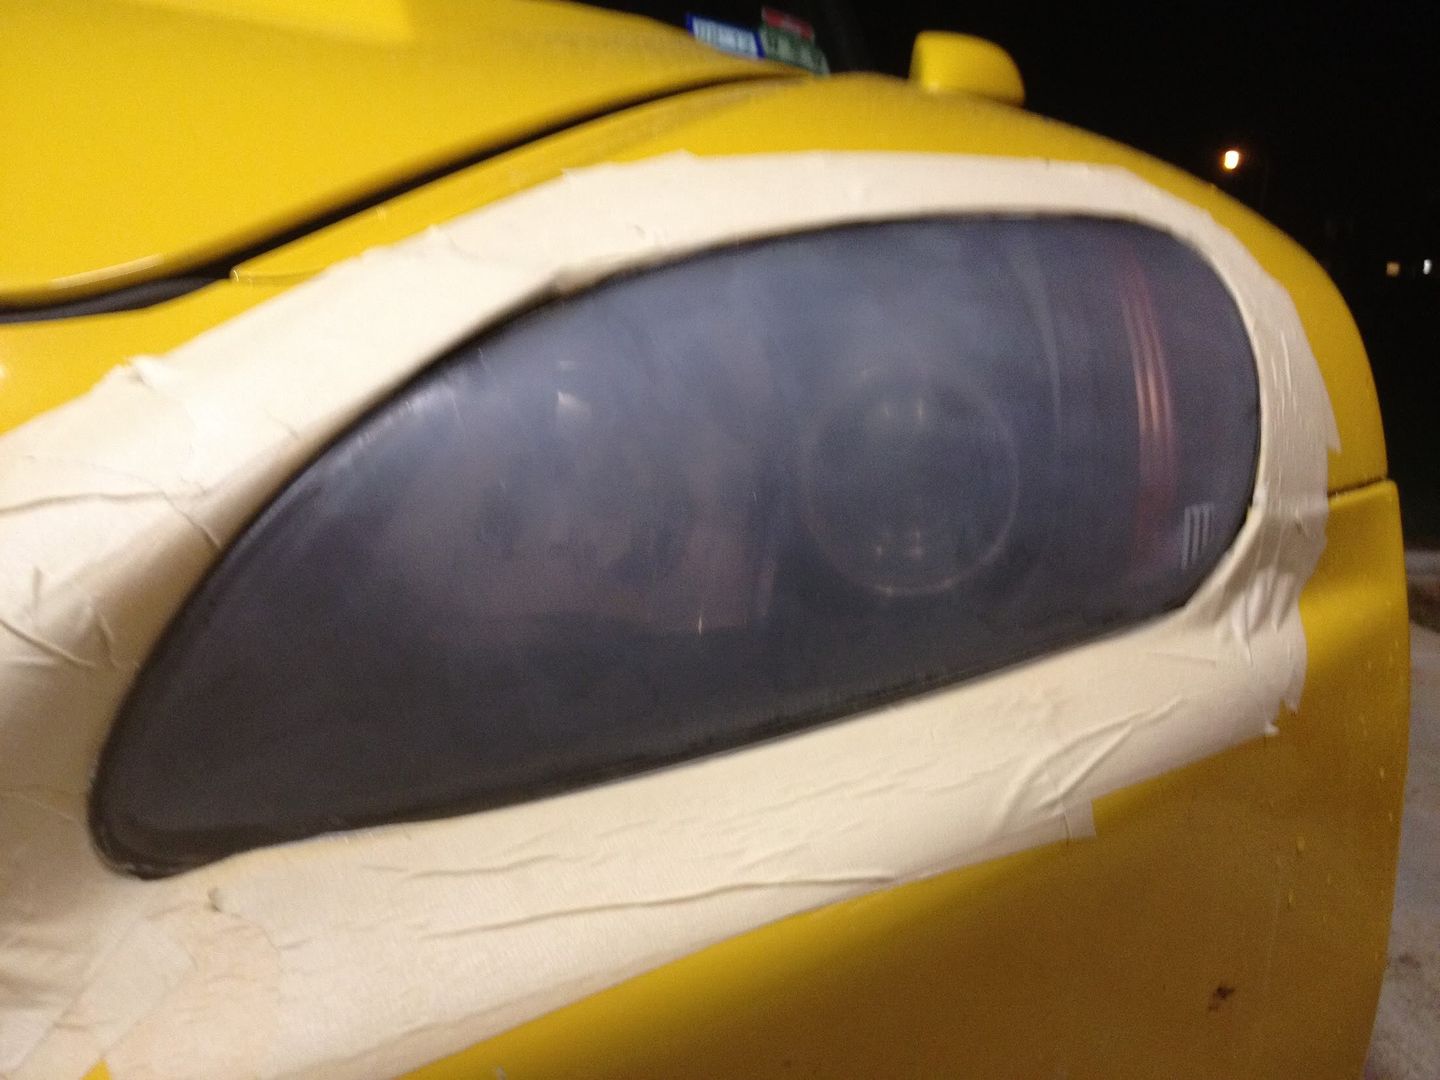
Half done with Plastx half sanded with 3000 grit
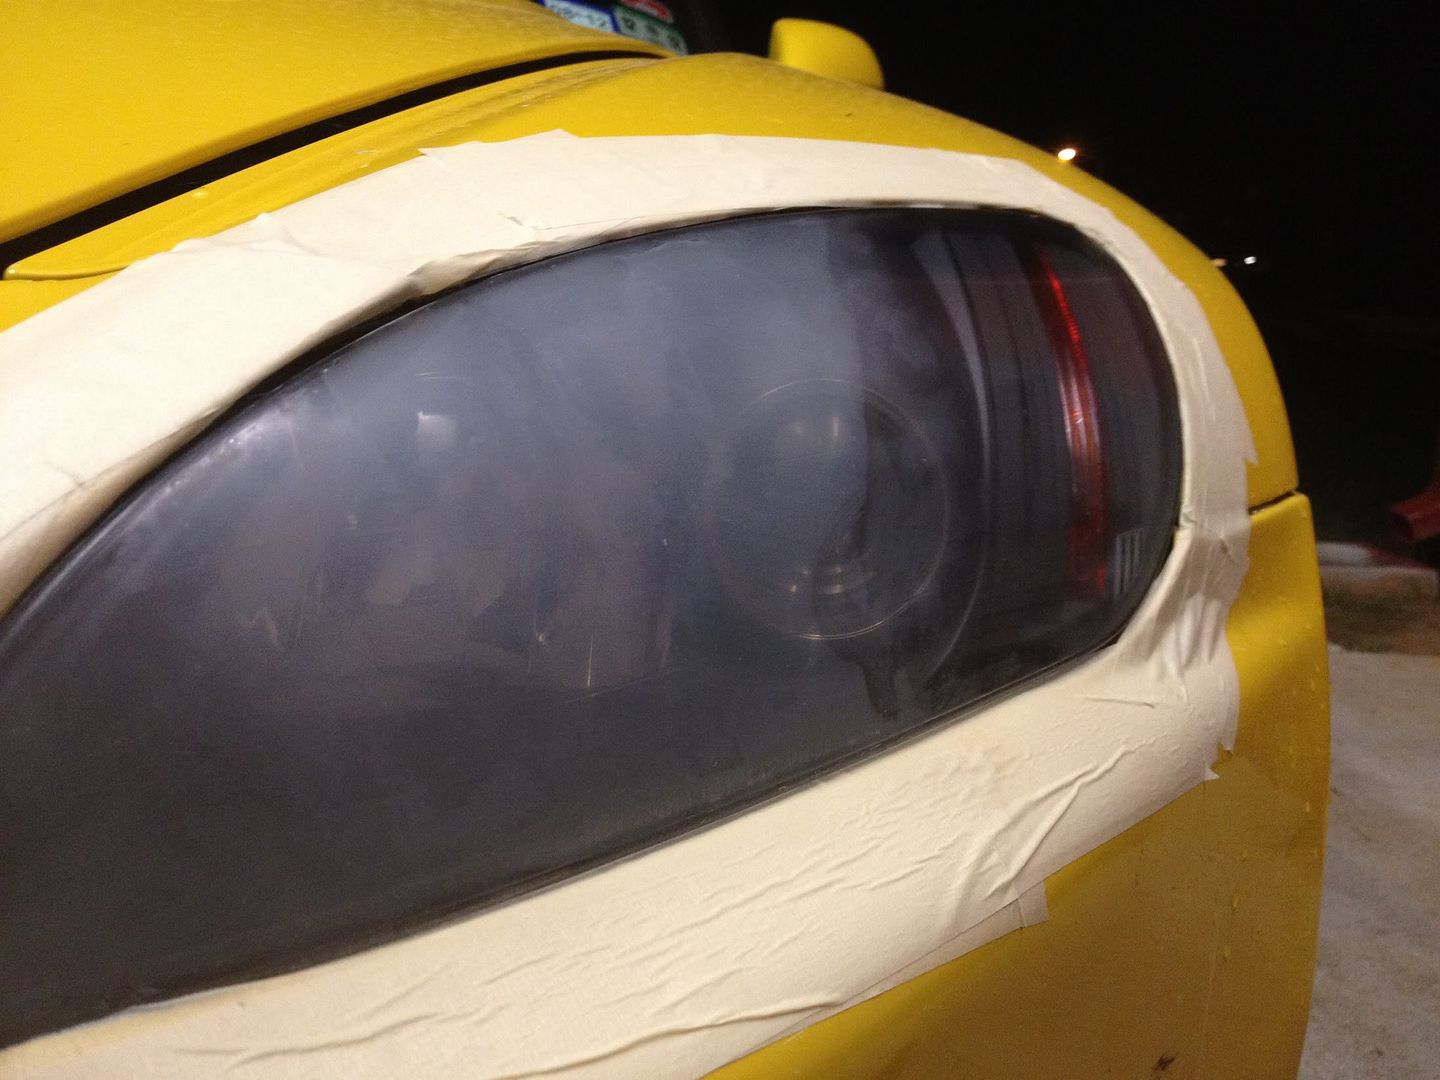
Finished result
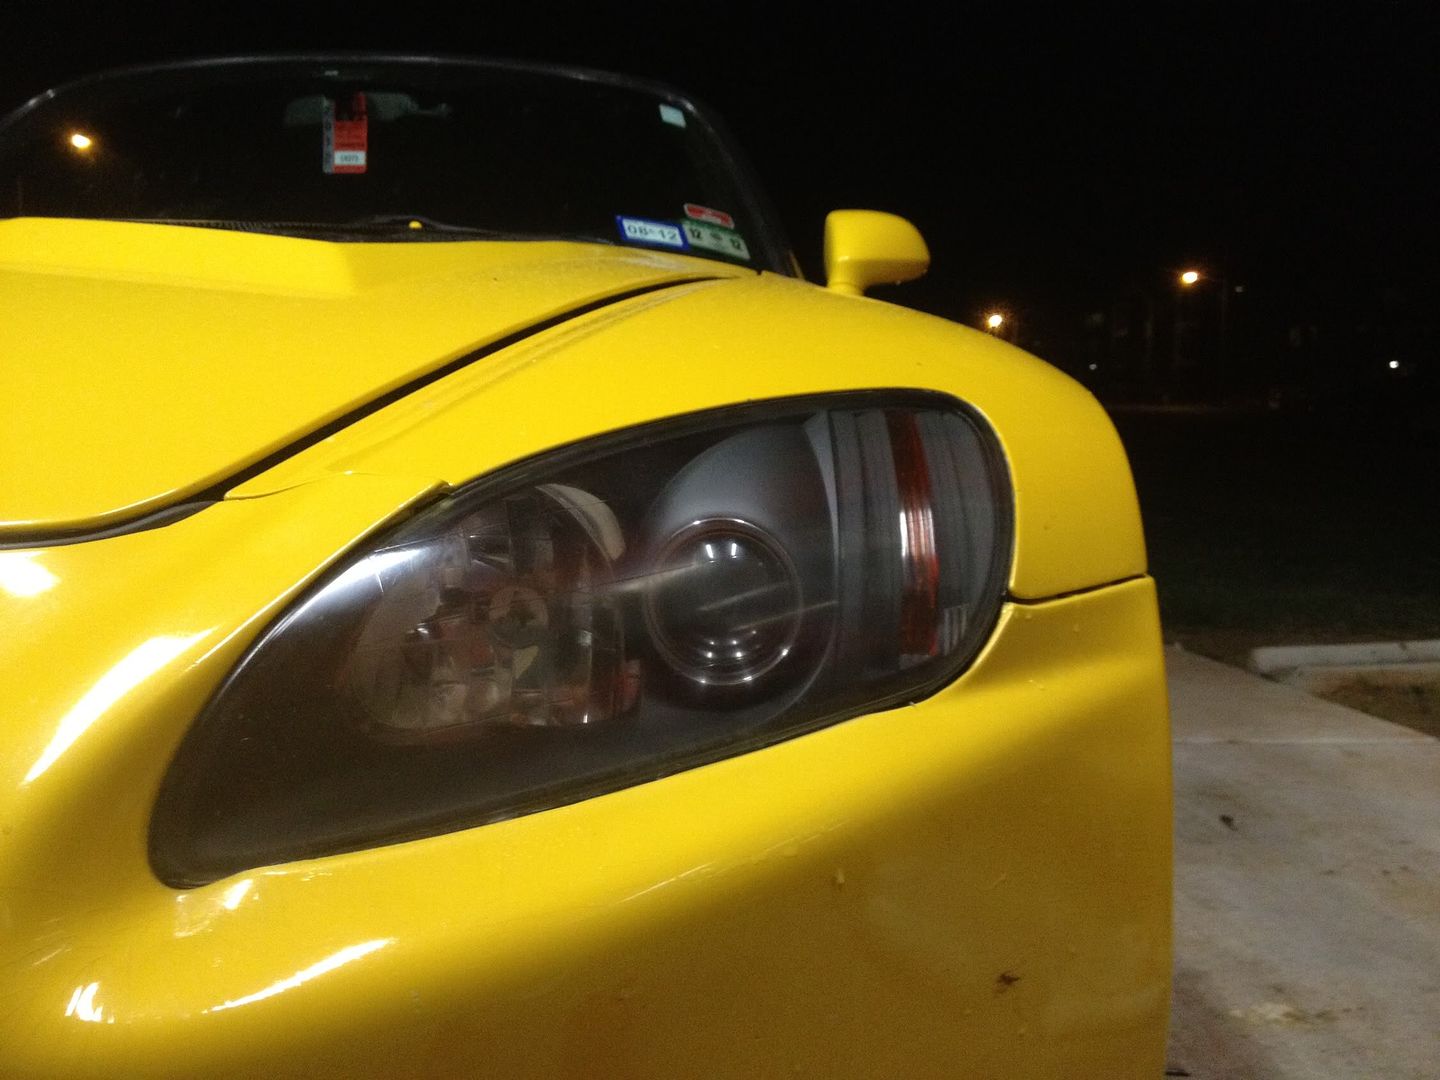
With headlight on, you can sort of see the the haziness Im talking about
The sanding looked fine, I had some pits that needed extra pressure but generally I used moderate pressure, with getting kind of heavy with the pressure on the finer grits like 3000 and sometimes 2000 in the nasty areas.
Anyways after it was all said and done, there was still some haziness to be seen, so I went at it with some Meguiar's polishing compound that I have which helped it a little bit, brought it from like an 8/10 to an 8.5/10. But I want 10/10 dammit! When I turn the headlight on one can notice that the beam kind of scatters across the whole headlight, and its not clear like it should be. Also, when you get up close, theres little swirl marks in the plastic that I wasnt expecting to be there.
Do I just need to go at it with the Plastx for longer or to get the results I need do I need to buff it with a powerball and a drill? I was considering going to Hobby Lobby and buying a pack of this super fine sanding fabric that they have (mentioned in a thread on here) and just sanding it down with finer and finer grits all the way up to 12000 and then hitting it with the Plastx and polishing compound.
Any help?
After 1000 grit
After 2000 grit
Half done with Plastx half sanded with 3000 grit
Finished result
With headlight on, you can sort of see the the haziness Im talking about


Thread Starter
Joined: Dec 2007
Posts: 4,289
Likes: 12
Well I sanded the headlights down with 3k, 4k, 8k and 12k grit sandpaper and then was able to take a powerball to the headlights with plastx and they turned out MUCH better. I would recommend hand buffing with this stuff, such a difference between what I could do by hand and what the drill can do!


Joined: Jan 2011
Posts: 2,207
Likes: 7
From: Long Island
How coarse? I've been using a LC CCS yellow and have been considering orange, but I'm usually happy with the yellow and stop there. After I put everything away I wonder to myself if I should have taken a second pass with the orange. 
Trending Topics
Registered User
Joined: May 2006
Posts: 2,162
Likes: 0
From: Hartselle, AL
I treat head lights just like paint. Medium cut polish on orange pad then fine cut polish on white pad. (4 inch pads of course) speed 5 on the PC. If you're super retentive or have really really bad lights you can take the 15-20 minutes to remove the front bumper and tape the fender to get a more even surface to cover with the PC.
Registered User
Joined: Mar 2012
Posts: 416
Likes: 2
From: ATL GA
here is mine after i cleaned them up. wish i had a before picture put just imagine pollen looking fog around the whole headlight. driver and passenger. so i pulled the headlight out and followed these steps to make it look like this...
1. 1200 grit wetsand... (the more time you spend wetsanding on each step the better the end result will look.)
2. 1500 grit wetsand
3. 2000 grit wetsand
4. 3000 grit wetsand
5. buff with "white" 3M pad with Meguiars 105
6. buff with "black" 3M pad with Meguiars 205
and this is what you get...
1. 1200 grit wetsand... (the more time you spend wetsanding on each step the better the end result will look.)
2. 1500 grit wetsand
3. 2000 grit wetsand
4. 3000 grit wetsand
5. buff with "white" 3M pad with Meguiars 105
6. buff with "black" 3M pad with Meguiars 205
and this is what you get...
Registered User
Joined: Jan 2012
Posts: 538
Likes: 0
From: Tennessee
Over a year old, I know, but...wow...that looks better than new.
I plan on doing this today or this weekend, but I have no experience with a buffer. I do have access to one, however. Is it possible to buy the pads and compound locally? I don't have any of them, but would really like to do this as a weekend project if at all possible.
Also, the buffer i have is huge, would it be better to use a drill with an attachment?
Thanks for any input!
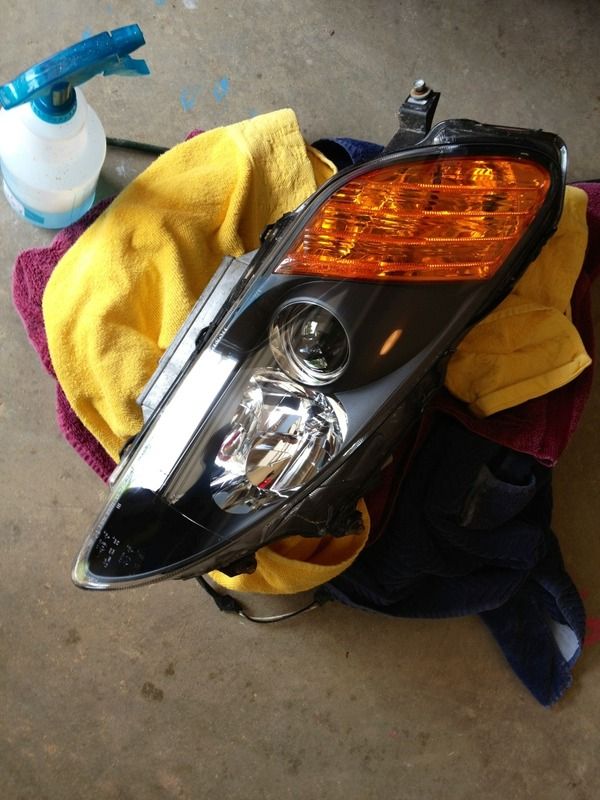
Here is what I'm dealing with..


I plan on doing this today or this weekend, but I have no experience with a buffer. I do have access to one, however. Is it possible to buy the pads and compound locally? I don't have any of them, but would really like to do this as a weekend project if at all possible.
Also, the buffer i have is huge, would it be better to use a drill with an attachment?
Thanks for any input!
Here is what I'm dealing with..

