Yet Another Headlight Restoration & Xpel Film
 07-21-2015, 10:19 AM
#1

Thread Starter

Join Date: Aug 2013
Posts: 5
Likes: 0
Received 0 Likes
on
0 Posts
I've lurked here for 2-3 years now and have used countless faqs, guides and walkthroughs with my ap1 over the last year, so I figured it was time to post SOMETHING. I know headlight restorations have been done before on here, but I also put on Xpel protectant film after, and that might be of interest to some.
Before / After
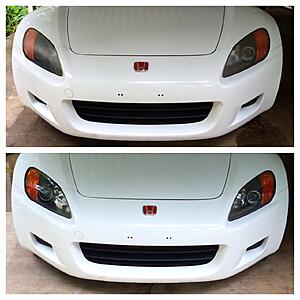
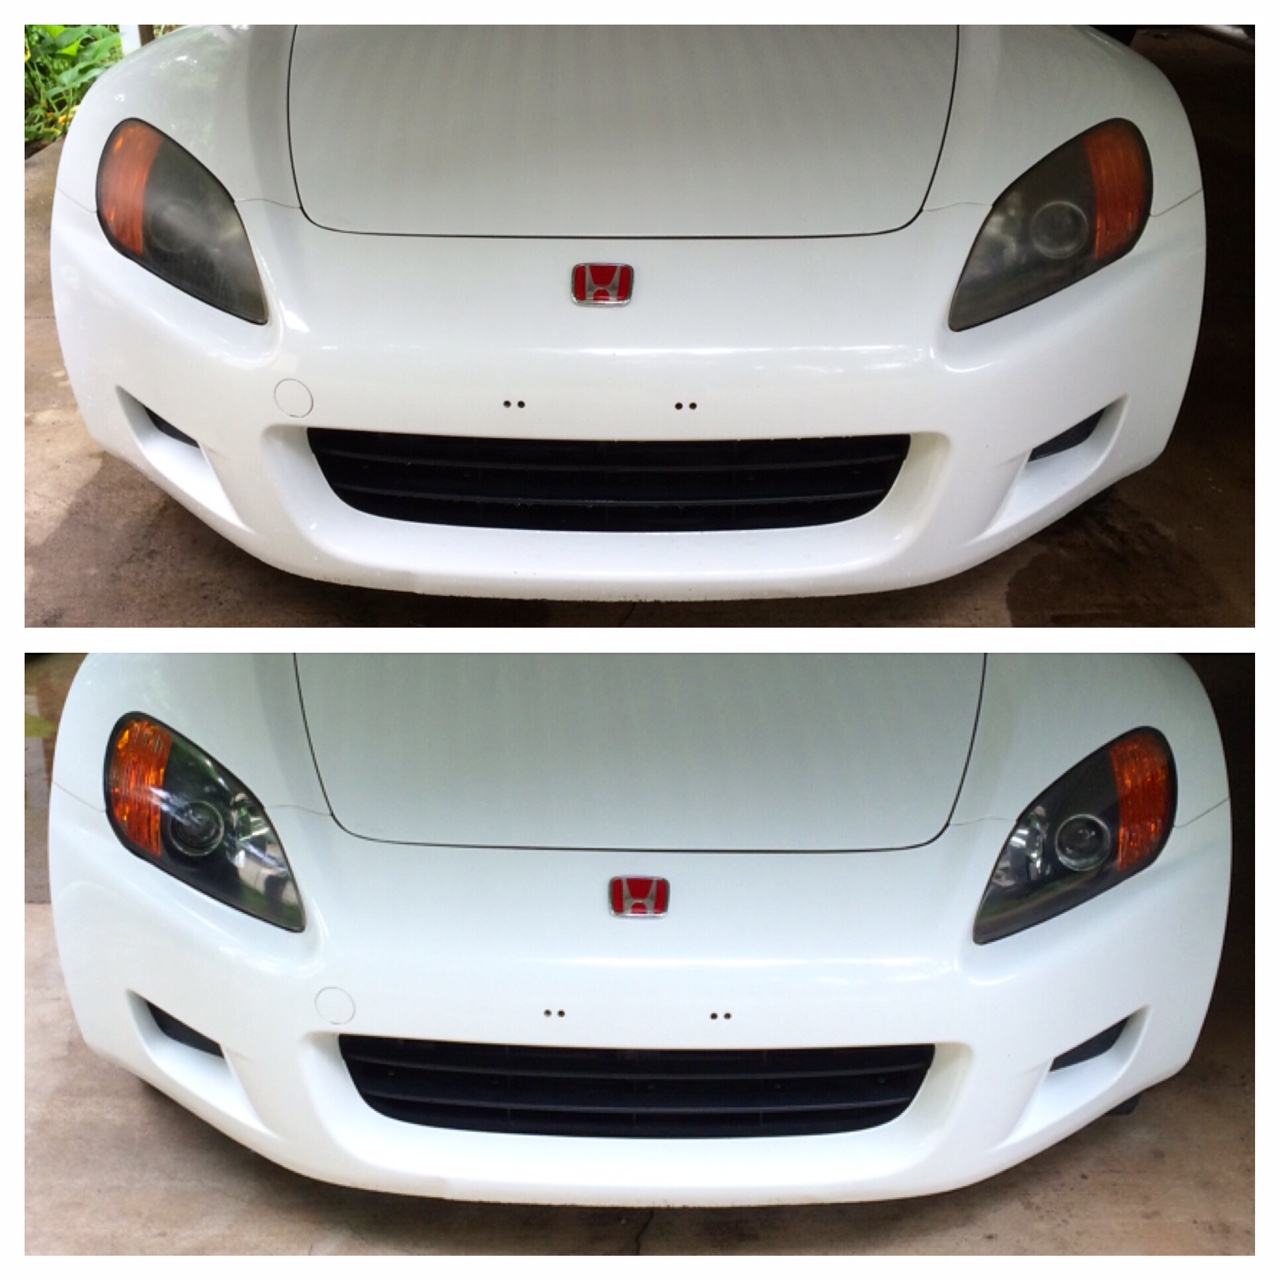
Before

My MY2000 was relatively low miles for it's age (<80k), but the headlights made it look a bit like a meth addict on an otherwise ok appearance, besides that damn dent along the lip.
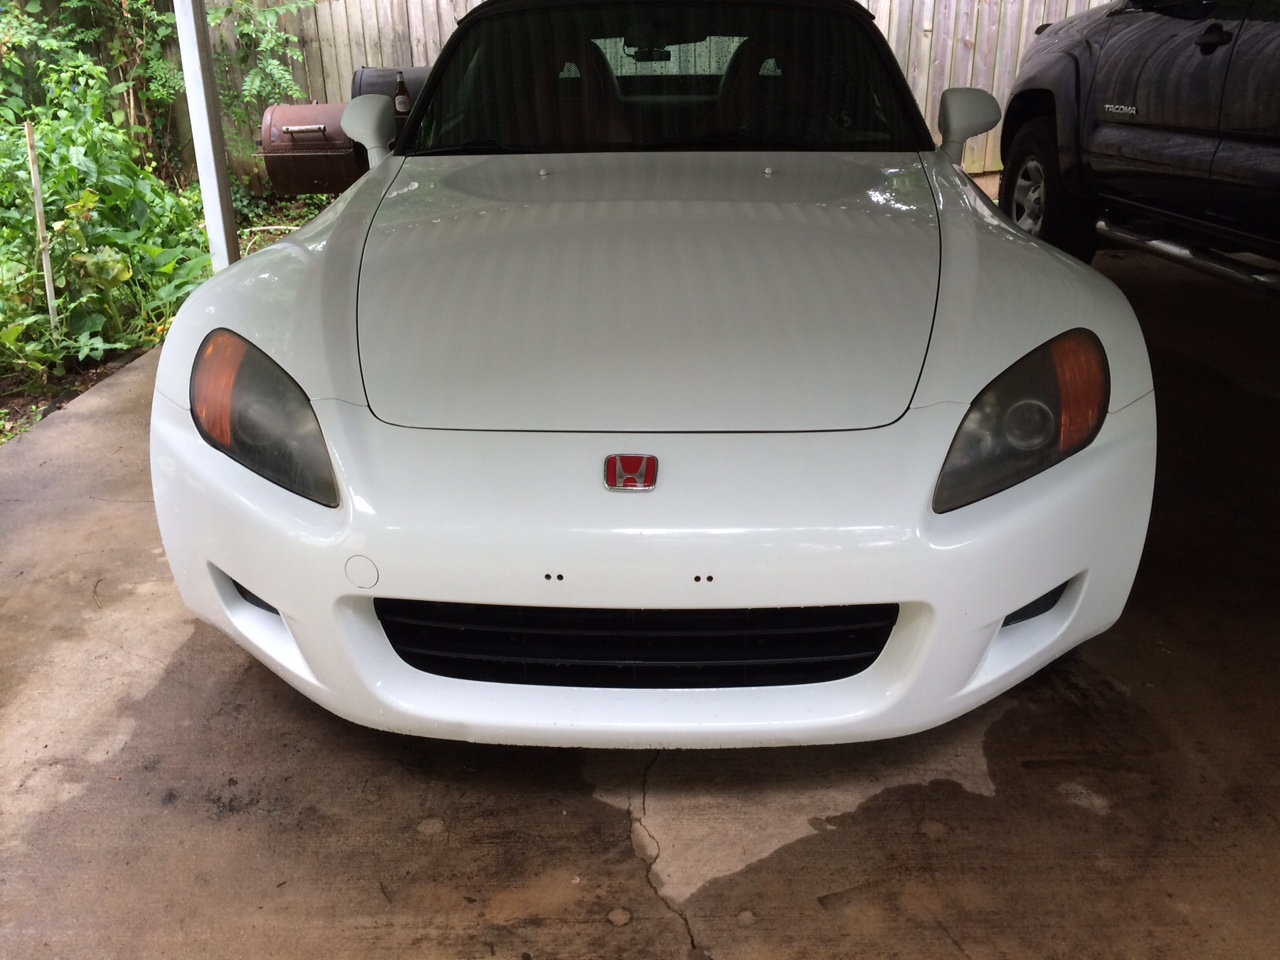
Before Up Close
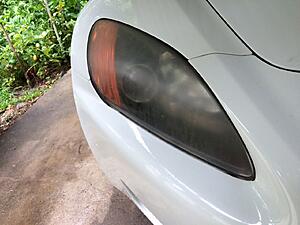
Gnarly. This is after washing the car. I used Meguiars Heavy Duty Headlight Restoration Kit and some Xpel Headlight Protection Film specific to S2000s. You'll also need a squirt bottle, rubbing alcohol, a few towels and some masking tape. The restoration kit is essentially just wet sandpaper, a round foam block for the sandpaper, polish, a drill compatible buffing pad, and some protectant that I didn't use. The problem with these kits is that the oxidation will usually return in 6-12 months, even with application of whatever protectant / wax. Some people take their lamps to a body shop and get them clear coated - I was hoping this film would both prevent oxidation and protect from road debris. I didn't want the protectant to compromise the adhesive on the film, so I didn't use it. Time will tell if that was a bad decision.
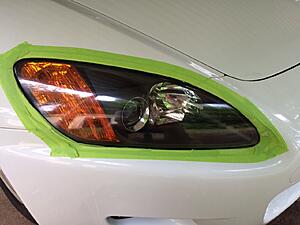
Tape and Sand
Apply tape directly to the forehead. No, seriously around the lamp. Don't scratch your paint. Following the instructions with the Meguiar's kit, start with the coarsest sanding disk and move to the finer one once your arm is ready to fall off and you have a nice even haze. This really kind of sucks to do by hand.
Admire your Sanding
Once you are satisfied with your haze, and unable to lift your arms, use a power drill with the buffing pad and polish it up.
Like So
Be astonished at your handiwork. I didn't use a significant amount of the polishing compound, and had quite a bit left over.
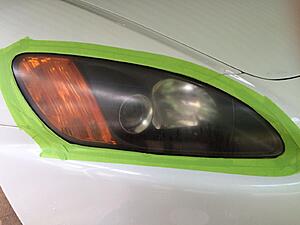
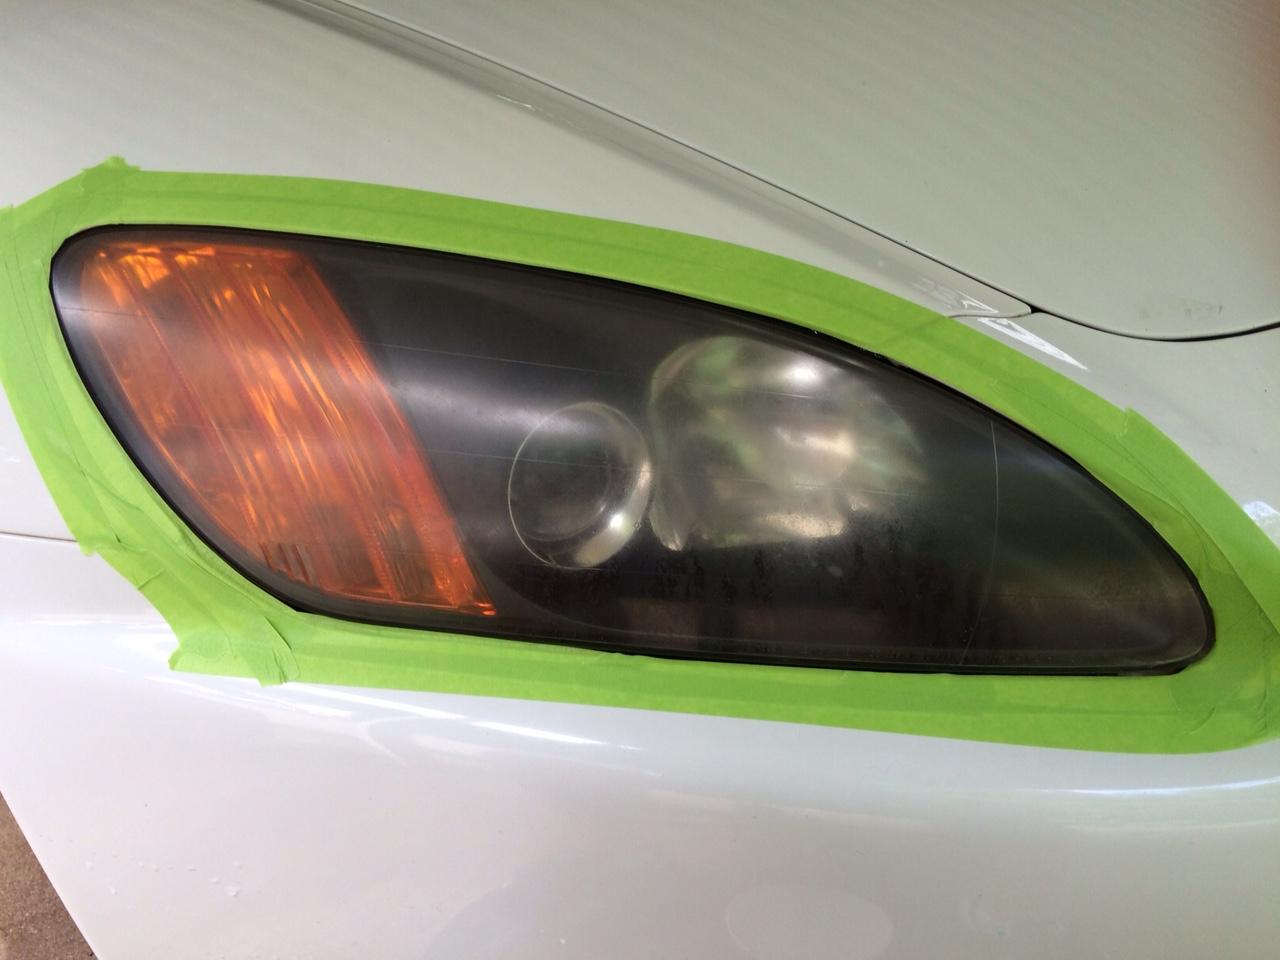
Test Fit Film
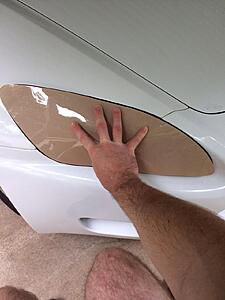
Definitely use this video for instructions on applying the film . A heat gun or hair drier is a must; I used the latter. Use a lot of the slip solution and work fast when you are first applying it to re-adjust as necessary to have a good fit all around. You can't really slide it that well and have to peel it up to adjust it, so don't press down more than necessary before finding the right position. Then squeegee like the video shows you, using the heat source to make the film more compliant around rounded areas and edges.
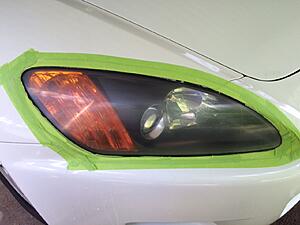
Film Applied
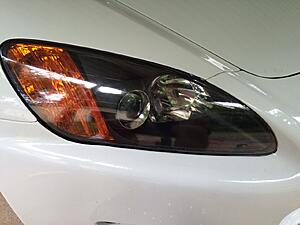
After applying the film. At this point there are still some super tiny bubbles in some places, which you can manipulate by pushing your finger on them, but I wasn't able to squeegee out. Reading around this seemed pretty normal, and I let it go.
2 Weeks Later
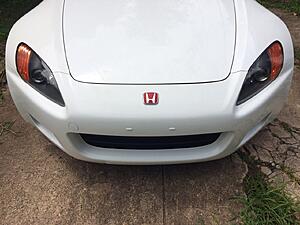
This is about two weeks later. I intentionally left the car in the sun some of the hotter days to accelerate the evaporation of the remaining slip solution. As of now there is a single foggy spot in each lamp, down from the tiny bubbles and much more widespread hazing from a day or two after I applied the film. Given the progress it has made already, I am confident it will all clear up in another couple of weeks. The car hasn't been washed since, and is a bit dirty now, but I finally got license plate plugs.
If I had to do it again, I would probably spend more money and buy a sanding and polishing tools for my air compressor instead of buying this kit. It would cost more, but it would be much quicker, easier, and the results would likely be a little better, That said, for about $70 between the restoration kit and the film, it isn't a bad way to go.
Bonus Flat Tire
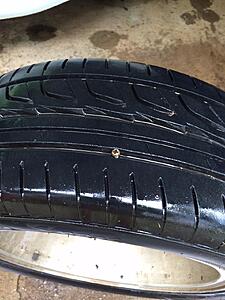
At least it was patchable, sigh.
Before / After
Before
My MY2000 was relatively low miles for it's age (<80k), but the headlights made it look a bit like a meth addict on an otherwise ok appearance, besides that damn dent along the lip.
Before Up Close

Gnarly. This is after washing the car. I used Meguiars Heavy Duty Headlight Restoration Kit and some Xpel Headlight Protection Film specific to S2000s. You'll also need a squirt bottle, rubbing alcohol, a few towels and some masking tape. The restoration kit is essentially just wet sandpaper, a round foam block for the sandpaper, polish, a drill compatible buffing pad, and some protectant that I didn't use. The problem with these kits is that the oxidation will usually return in 6-12 months, even with application of whatever protectant / wax. Some people take their lamps to a body shop and get them clear coated - I was hoping this film would both prevent oxidation and protect from road debris. I didn't want the protectant to compromise the adhesive on the film, so I didn't use it. Time will tell if that was a bad decision.
Tape and Sand
Apply tape directly to the forehead. No, seriously around the lamp. Don't scratch your paint. Following the instructions with the Meguiar's kit, start with the coarsest sanding disk and move to the finer one once your arm is ready to fall off and you have a nice even haze. This really kind of sucks to do by hand.
Admire your Sanding

Once you are satisfied with your haze, and unable to lift your arms, use a power drill with the buffing pad and polish it up.
Like So

Be astonished at your handiwork. I didn't use a significant amount of the polishing compound, and had quite a bit left over.
Test Fit Film

Definitely use this video for instructions on applying the film . A heat gun or hair drier is a must; I used the latter. Use a lot of the slip solution and work fast when you are first applying it to re-adjust as necessary to have a good fit all around. You can't really slide it that well and have to peel it up to adjust it, so don't press down more than necessary before finding the right position. Then squeegee like the video shows you, using the heat source to make the film more compliant around rounded areas and edges.
Film Applied

After applying the film. At this point there are still some super tiny bubbles in some places, which you can manipulate by pushing your finger on them, but I wasn't able to squeegee out. Reading around this seemed pretty normal, and I let it go.
2 Weeks Later

This is about two weeks later. I intentionally left the car in the sun some of the hotter days to accelerate the evaporation of the remaining slip solution. As of now there is a single foggy spot in each lamp, down from the tiny bubbles and much more widespread hazing from a day or two after I applied the film. Given the progress it has made already, I am confident it will all clear up in another couple of weeks. The car hasn't been washed since, and is a bit dirty now, but I finally got license plate plugs.
If I had to do it again, I would probably spend more money and buy a sanding and polishing tools for my air compressor instead of buying this kit. It would cost more, but it would be much quicker, easier, and the results would likely be a little better, That said, for about $70 between the restoration kit and the film, it isn't a bad way to go.
Bonus Flat Tire

At least it was patchable, sigh.


 02-23-2018, 03:55 PM
#6
Community Organizer


bump for later
02-23-2018, 10:58 PM
#7
Will also be doing this. Corrected my headlights, but obviously didn't take enough time and add in more finer wet sanding. Also picked up a DA polisher to compound and polish. Hoping for near clear/perfect lenses and finally cover in Xpel.
Trending Topics
02-24-2018, 02:27 PM
#8
Join Date: Aug 2012
Location: Foothills East of Sacramento
Posts: 5,607
Received 1,563 Likes
on
929 Posts
I have done my own headlights on 6 or so cars. I did completely replace headlights on my Tacoma. Cheap and easy.
I have a Porter Cable DA. I did the sandpaper, wet sand, polish in stages for the really bad ones. There is a learning curve. I still do a re-do to polish things up after a year or so. The lenses do cloud up again slowly. I found using some 3M glass polish on a Chemical Brother pad, with the DA, will polish a lens right up in less than 60 seconds.
Have avoided having to do my 2009 S as the car is always garaged and the lenses look new.
03-22-2018, 02:14 PM
#9

Lets say you had excellent condition low mileage headlights and your S is garaged generally but sits in a parking lot a couple of days a week in the summer in a northern climate. What would you do to protect them so you don't end up in this restoration cycle? Xpel?
I have a Porter Cable DA too. Its interesting you use glass polish. I understand the headlights have clear coat on them, so polishing would be the same as polishing the paint, no? What the heck is the difference between glass polish and paint polish anyway?
I have a Porter Cable DA too. Its interesting you use glass polish. I understand the headlights have clear coat on them, so polishing would be the same as polishing the paint, no? What the heck is the difference between glass polish and paint polish anyway?
Last edited by rpg51; 03-22-2018 at 02:21 PM.
03-22-2018, 02:16 PM
#10
Yes. Or any of the other paint protection films. In my opinion, it's sort of dumb to do anything else but that. For about 50 bucks, you get perfect protection for the life of the car pretty much. I don't really understand anybody that does all this crap with waxing and polishing on a regular basis.