HOW TO: Soft Top Removal
#41
Registered User

Join Date: Jul 2014
Location: Shropshire
Posts: 68
Likes: 0
Received 0 Likes
on
0 Posts
Wish I had read this 2 months ago before I changed my roof - I had to do a lot of guessing but got there in the end.
The only thing I would add is that you will need a pop rivet gun to attach the rubber strip to the bottom of the frame / vynil (when re-fitting). I think the rubber strip is actually there to stop water getting into the 'void' between the boot and rear bulck head.
Good work
The only thing I would add is that you will need a pop rivet gun to attach the rubber strip to the bottom of the frame / vynil (when re-fitting). I think the rubber strip is actually there to stop water getting into the 'void' between the boot and rear bulck head.
Good work

#42
Registered User
Thread Starter
I'm really glad this thread has helped so many already, it was all a bit of guess work and the extra tips and input others have contributed are greatly appreciated.
Rich - as I was swapping everything over rather than replacing the roof material I didn't need to do anything with regard to drilling out and replacing the rivets but thats a good heads up for those that are doing so.
The rubber channel filters the water down to the drain holes just behind the door shuts but if you don't get the lip of the rubber section underneath the sill section around the back end of the car then you're right, you'll end up with a boot/trunk full of water!
#43
What a great write up! This DIY will help me a lot when I'm taking off the soft top this long weekend coming up. I will be replacing it with a CR tonneou cover and hopefully it will be a breeze. Thank you so much for sharing it to us. 

#47
http://www.flickr.com/photos/alex-collins/8614744544/http://www.flickr.com/photos/alex-collins/8614744544/ by http://www.flickr.com/people/alex-collins/, on Flickr
why does everyone keep trying to remove these??? i've done several roof replacements and never had to touch roll hoops or the plastic!
why does everyone keep trying to remove these??? i've done several roof replacements and never had to touch roll hoops or the plastic!
#48
I can't thank you enough for putting together this write up - I've finally fixed the leak that had been impossible to locate with the roof on. I even considered getting rid of my S2k through frustration, but after seeing your step by step, I decided to give it a go.
The leak turned out to be nothing to do with the roof, but a small gap between the molding and the body, which I've black siliconed and bolted back on tight.
Better still, I have refurbed the soft top, replaced all the straps (including those near the doors that are riveted to the cloth) and also sorted out any wear and tear on the roof - between the rain rail and the frame where the it attaches near the door mainly. The cloth has become brittle and cracked, with a couple of minor tears. I used some waterproof material (free samples from a furniture shop) and the 3rd biggest 'must have' in a man's arsenal (after duct tape & WD40) - Stormsure.
I still need to put all the trim back in, and I'm sure this part will require some profanity on my part (given that it was originally installed by rubber midgets with tiny hands) but it'll be well worth it in the end. I could leave it out - it's not functional and it only adds weight, plus leaving the passenger seat out will mean the wife can't get in and decide to lower the windows cos she's warm... When it's SNOWING!
Again, massive thanks for this - now I can pit my FK8 undercover and get back to driving a real car!
#50

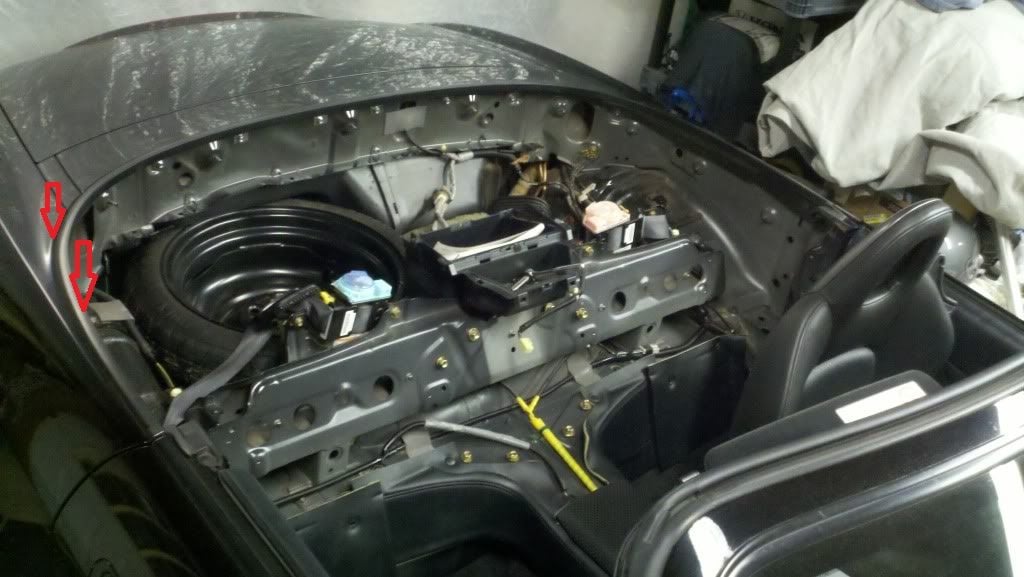
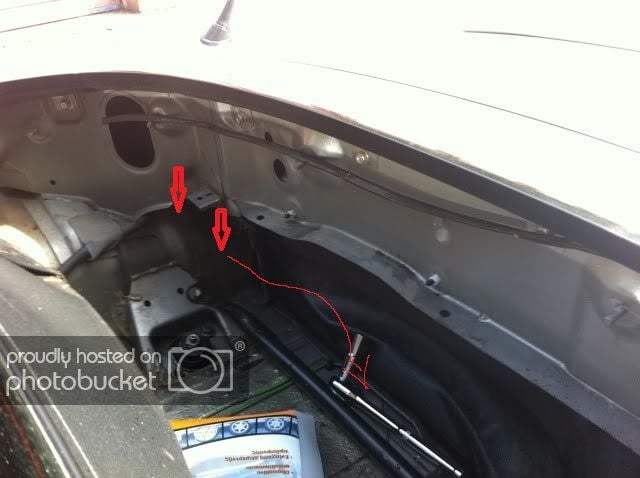
Te leak was between this molding and the bodywork - it had been in an accident before I bought it and the molding didn't sit flush to the body.

The big arrows are where the water was dripping down into the trunk. It was dripping from the holes below the antenna - which was annoying as I thought it was that which was leaking. It also collected in a pool under the rear lights, so I also thought that was where the water was coming in, so replaced the gaskets, which were definitely taking on water but not enough to flood the trunk well. These were old and tired and needed doing anyhow - I made new ones myself, using the original ones as a template.
I didn't actually find the source of the leak until I had taken the roof off ( a second time) - I then ran a jug of water around the molding. As there was still water coming in and no roof attached, I finally realised it wasn't the roof. I took the molding off and found that the foam inside was saturated on one side, so at that point it was obvious.
If I hadn't have seen exactly where it was dripping, I'd never have found it.


