Kraftwerks MCB build
 08-23-2014, 12:45 PM
#1
Registered User

Thread Starter

Join Date: Jun 2014
Posts: 99
Likes: 0
Received 0 Likes
on
0 Posts
UPDATE : 12 June 2014 - 08:46 AM
Hi Guys,
I've been on Honda forums since I was about 13 years old, always wanted an S2000 since a kid and decided to buy one now at 19 years old hahaha
Just looking around for S2000's for sale a decided to see this S2000 up for sale on Monday purchased it on Wednesday.
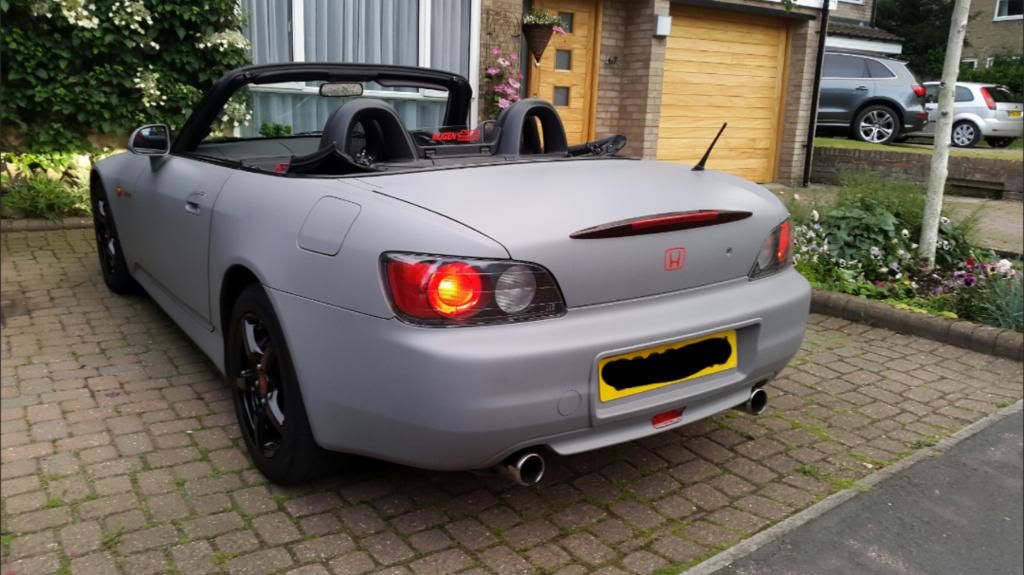
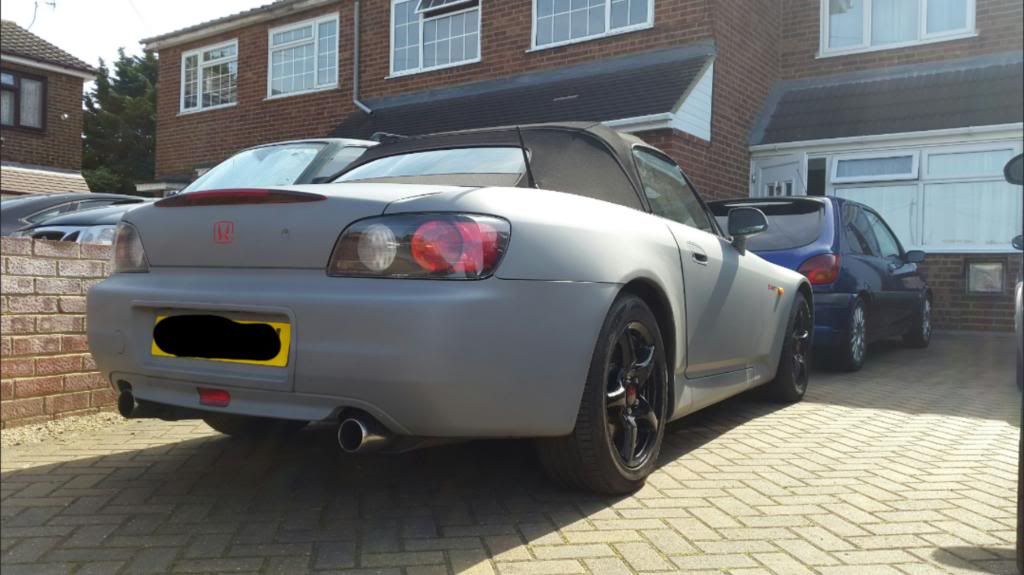
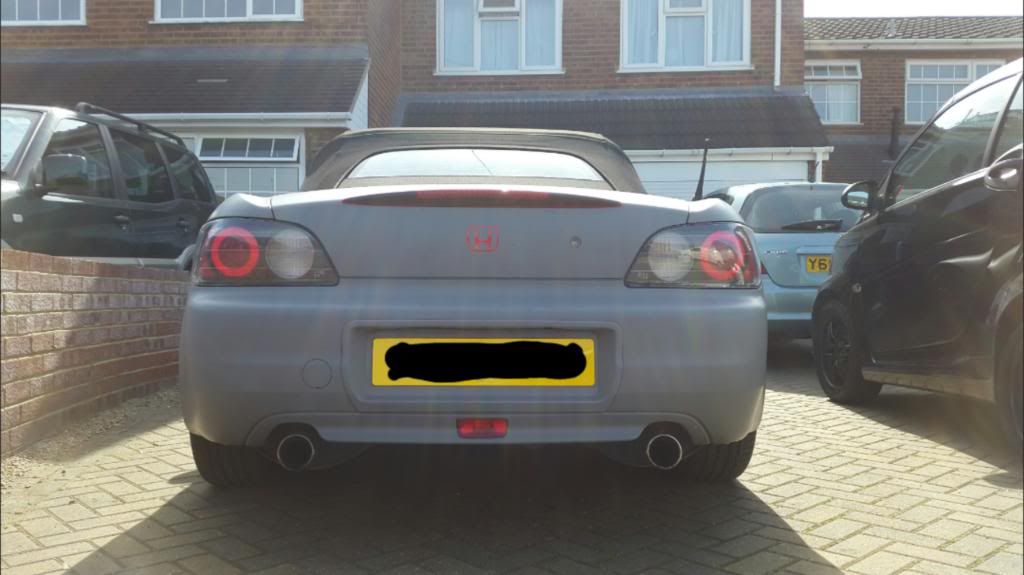
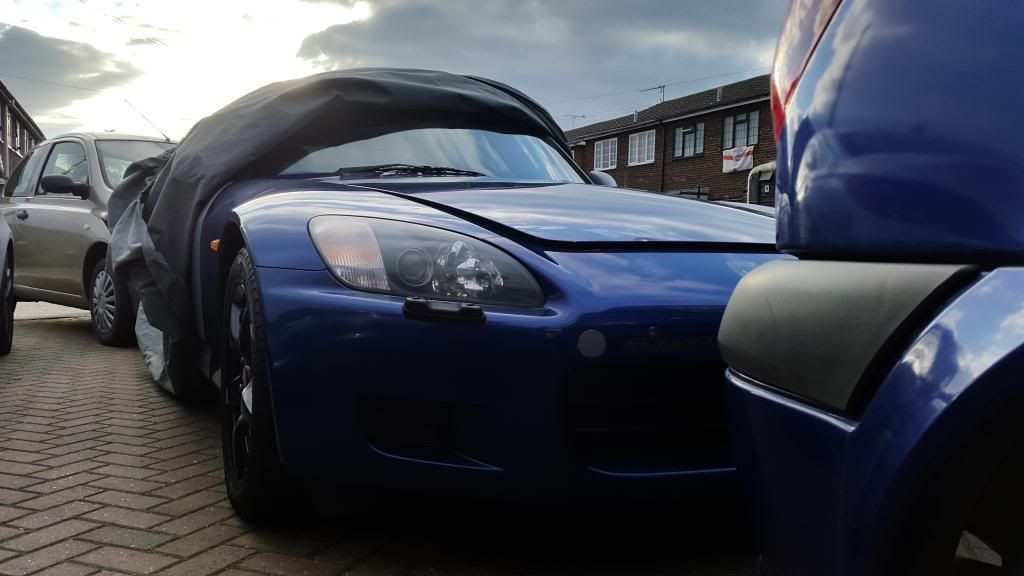
Vehicle is Monte Carlo Blue underneath I believe but could be wrong, and was wrapped nearly 3 years ago in Matt Grey by Totally Dynamics in Surrey. All Honda badges and S2000 badges have been replaced in mimicking vinyl.
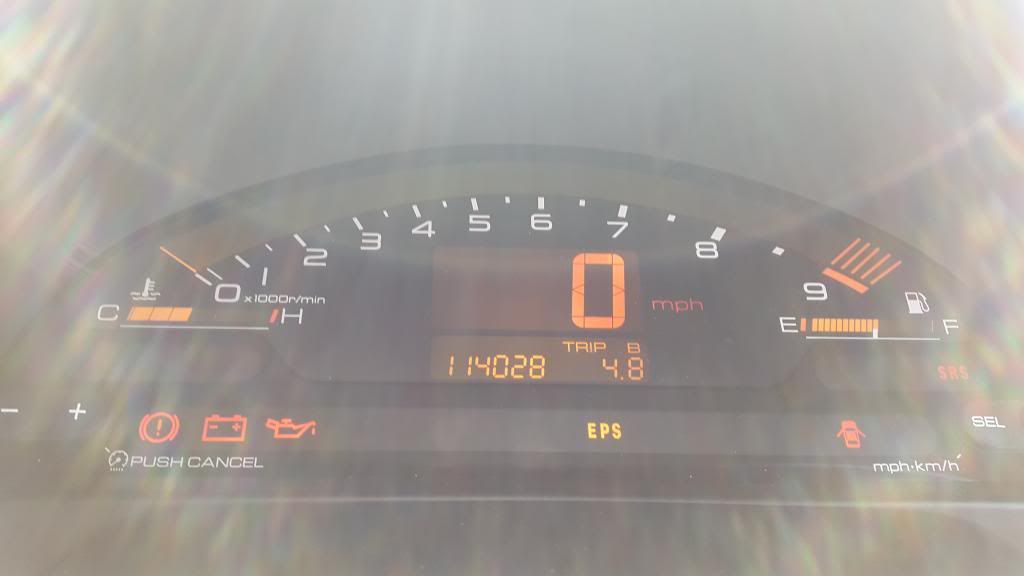
Just under 114000 miles, all Honda invoices, MOT's, services, parts receipts all documented.
When I went to see the car...
At home on the driveway just before I had a deep look around the car.
Found all this gunk up in the rear arches
Surface rust on both sides
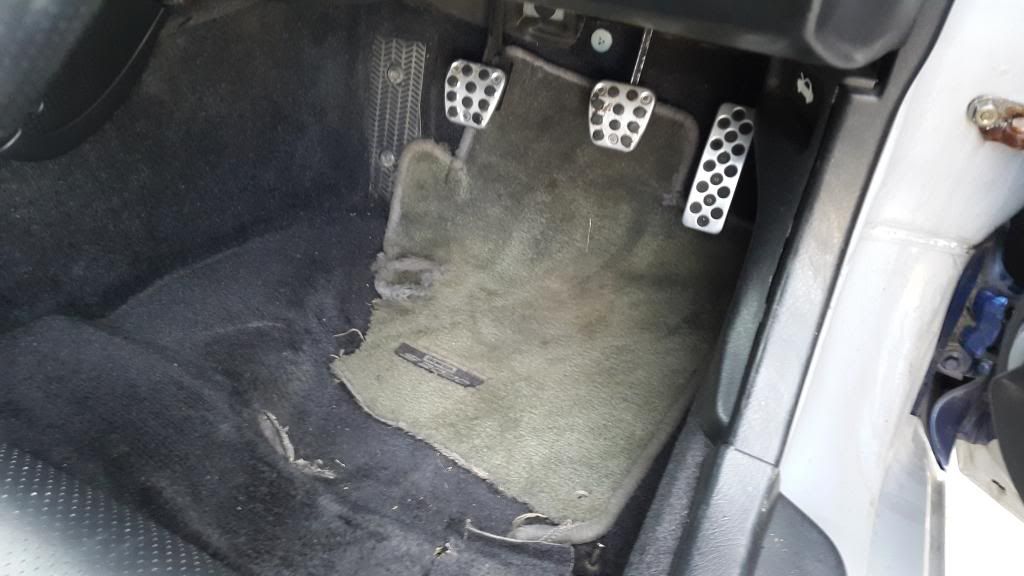
Common problem of ripped/ moving carpets
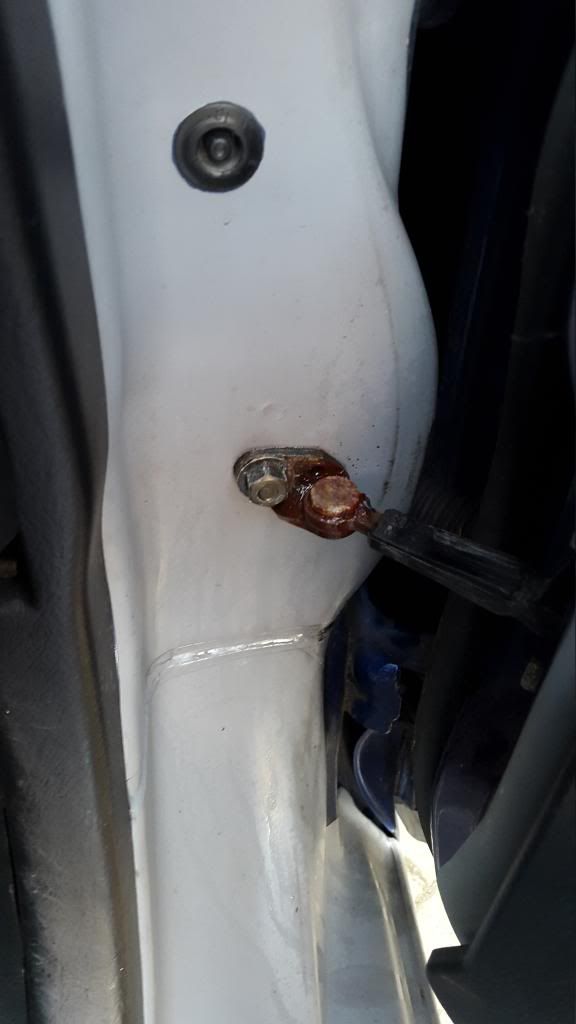
Rusted and creaking door hinge which need to be sorted
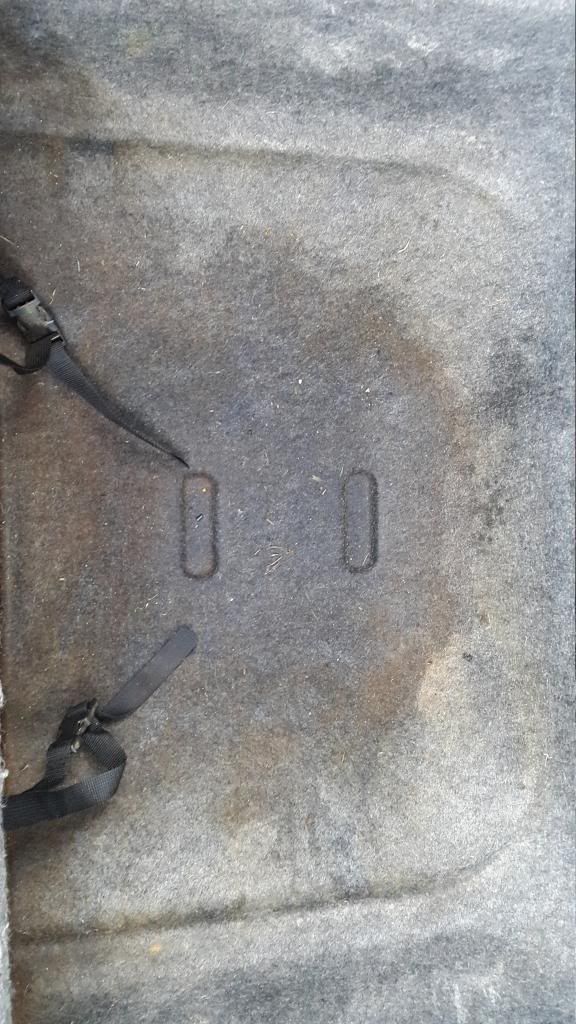
Mould in the boot under the tool box which all tools were rusted

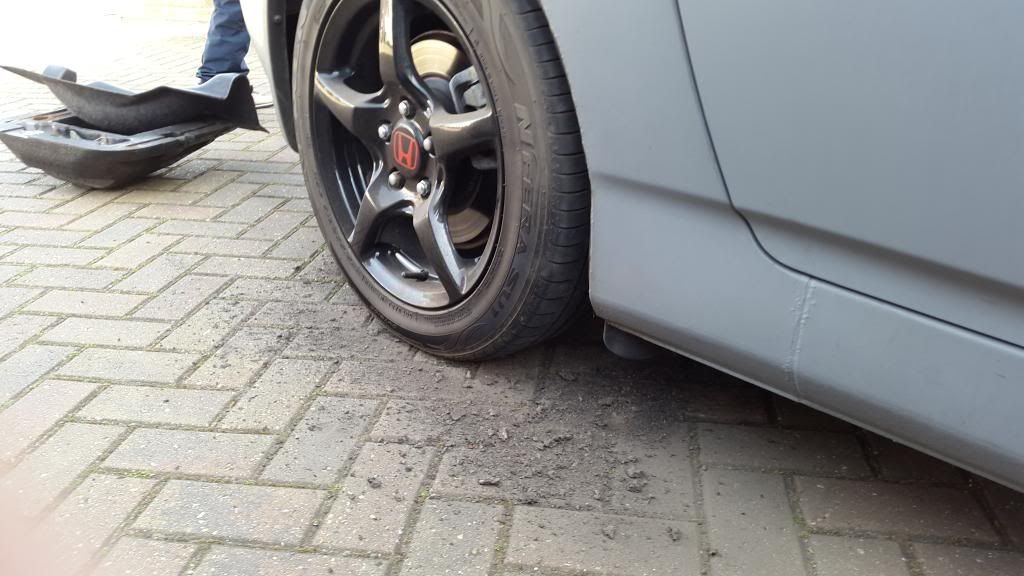
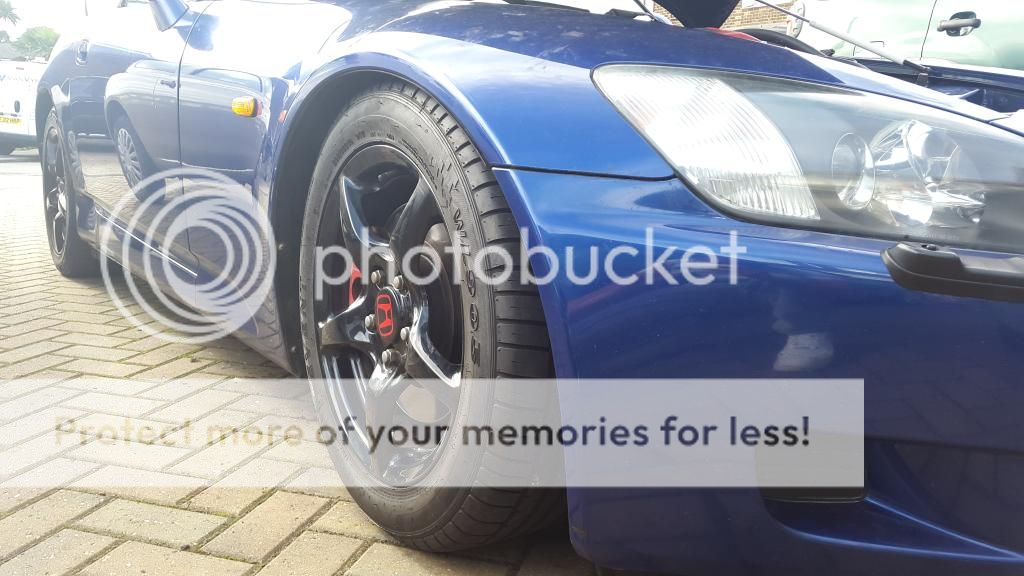
All wheels previously refurbed, painted in gloss black with red Honda logo's; looking beautiful
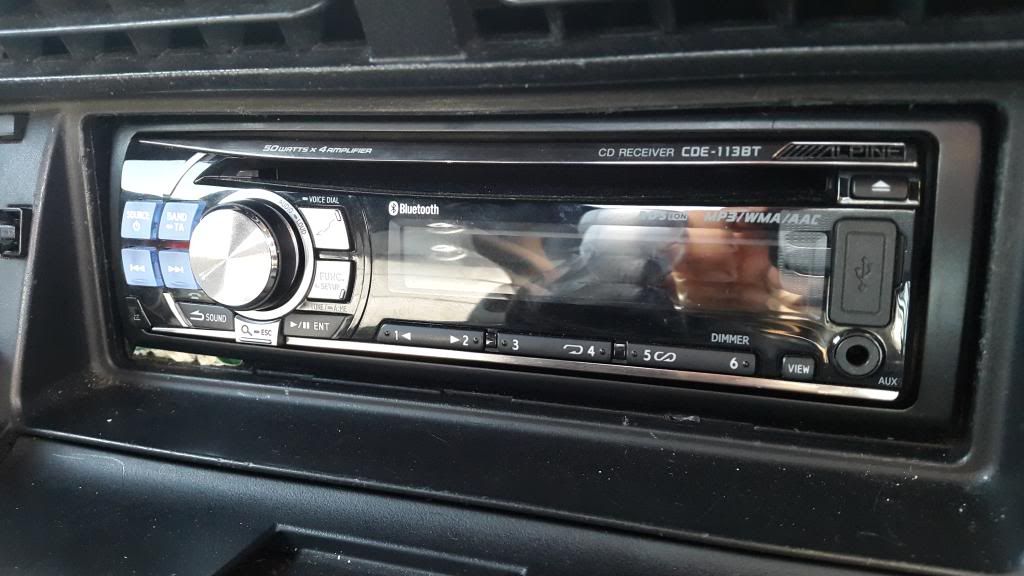
Alpine Bluetooth connectivity stereo with AUX and USB audio
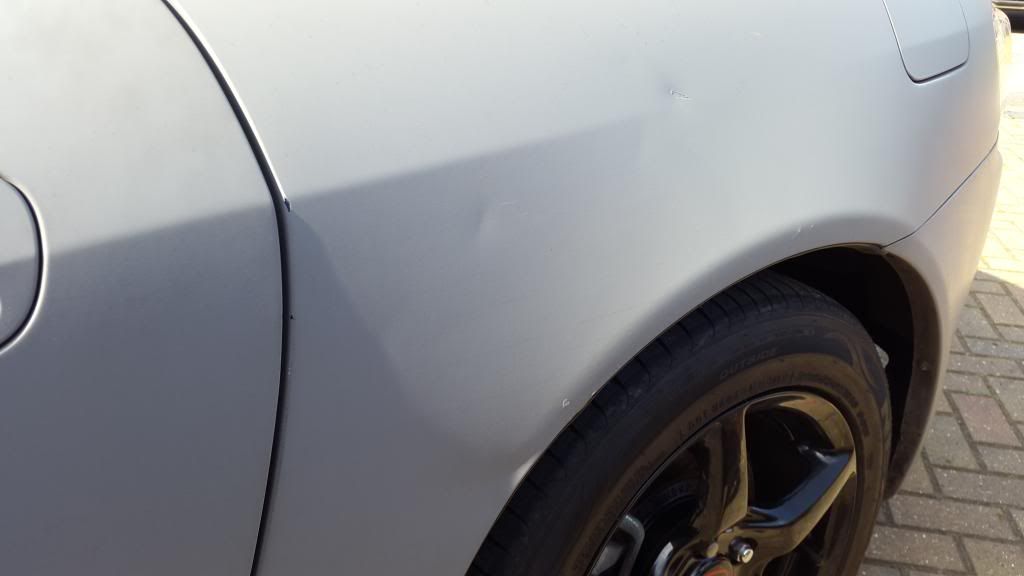
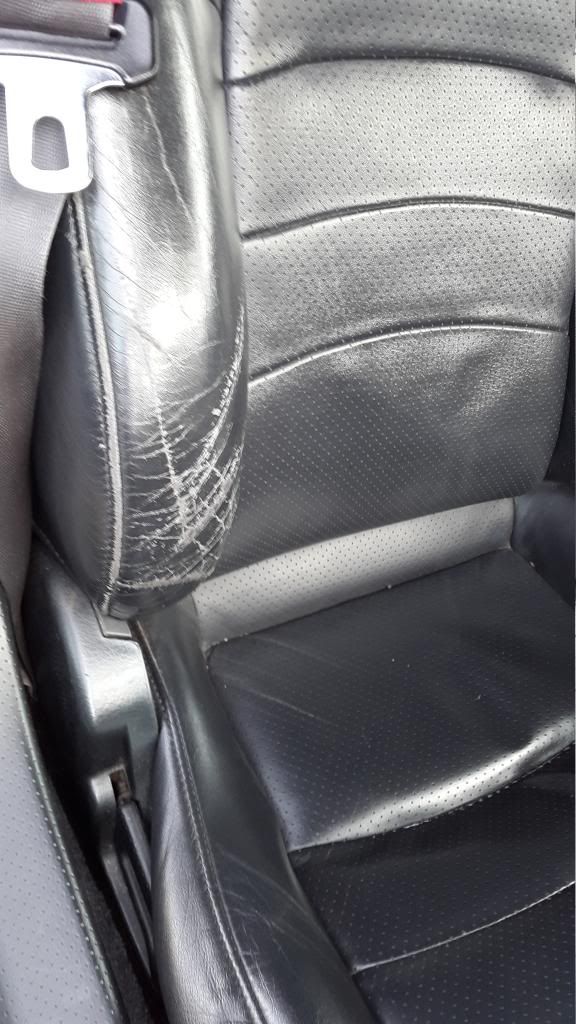
Few dings/ dents which I will get sorted out at work, and a crack in the matt grey vinyl
Any comments, DIY's or things to do please list here, I am open to listening on what you think looks good as well.
Will do a routine service at home soon, Plugs, Oils, Filters, bushes and so on.
List of things to buy:
ASIMO G-Force meter
UPDATE : 12 June 2014 - 09:59 PM
Thanks for the above post. I will look in maybe taking the wrap only reason why I don't want to is because it is quite different.
Took the centre console apart and covered the faded chrome plastic with 3m Carbon Fibre wrap. Cleaned all of the gunk inside the centre console, somehow found loads of coins of usual gubbins from buying a used car lol
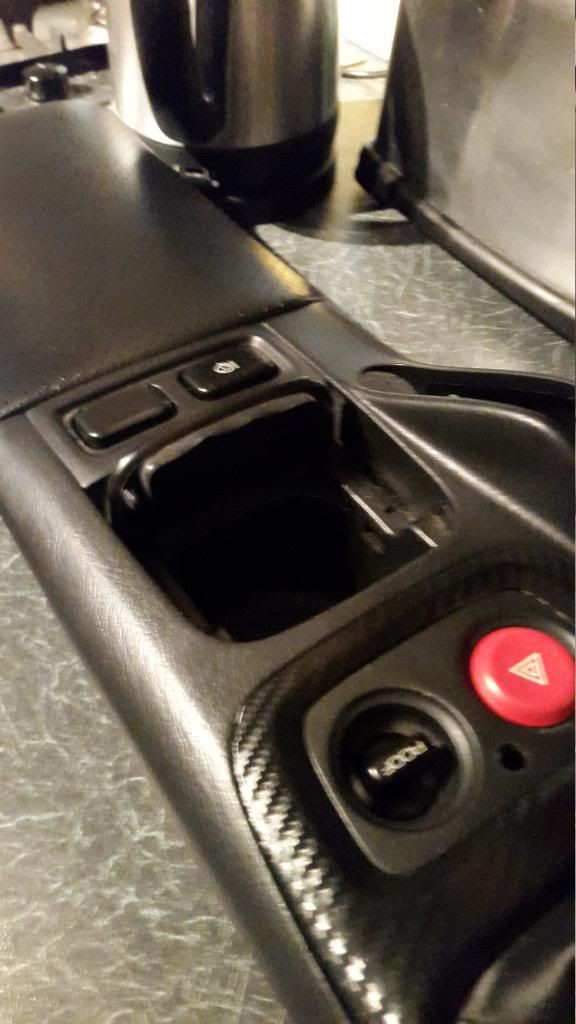
Fixed the little storage pocket as the flap wouldn't open, took damn nearly an hour to just get the tension on the spring!
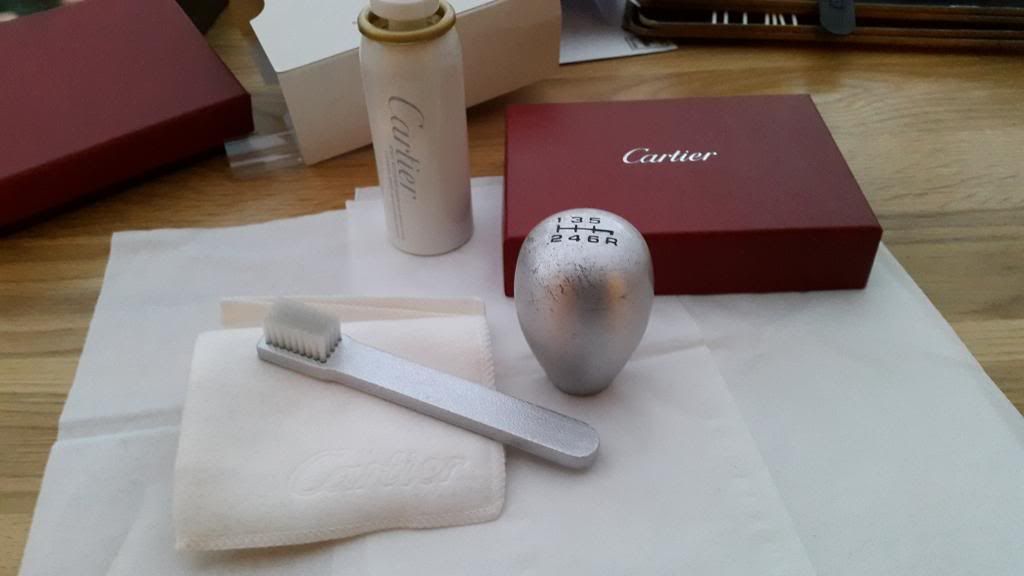
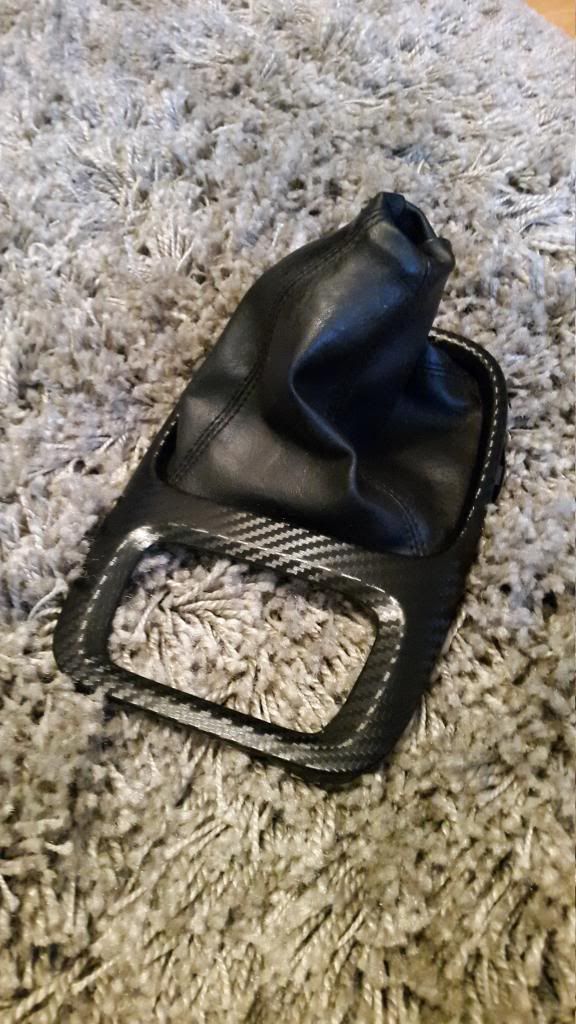
Tried to clean the gear knob with my watch cleaning kit haha, ended up looking the same as before the clean. Looks like I'll end with a skunk2 shift knob now...
Ordered red D1 spec lug nuts, hopefully will be fitted soon making these beauties look better and painting calipers red again.

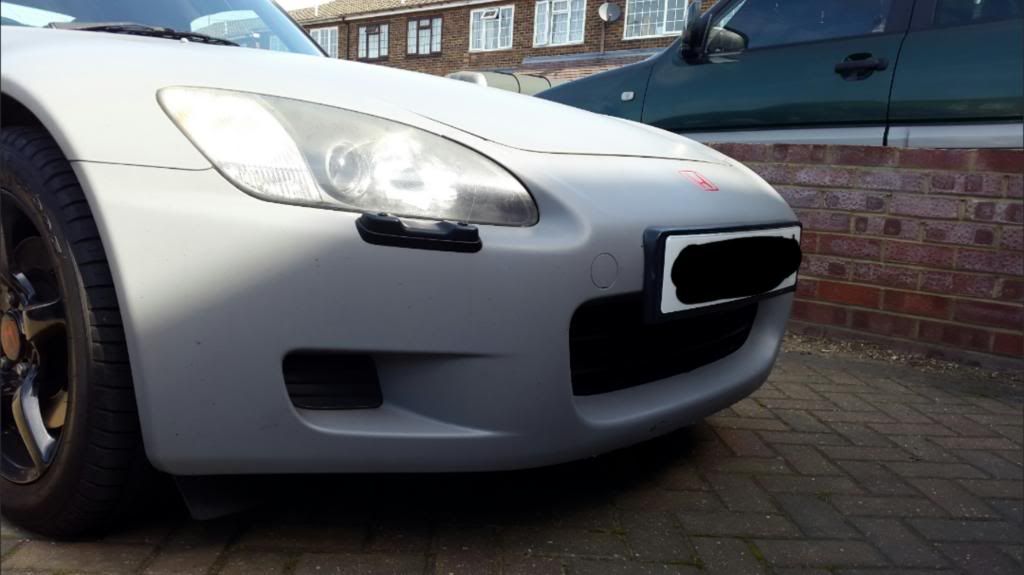
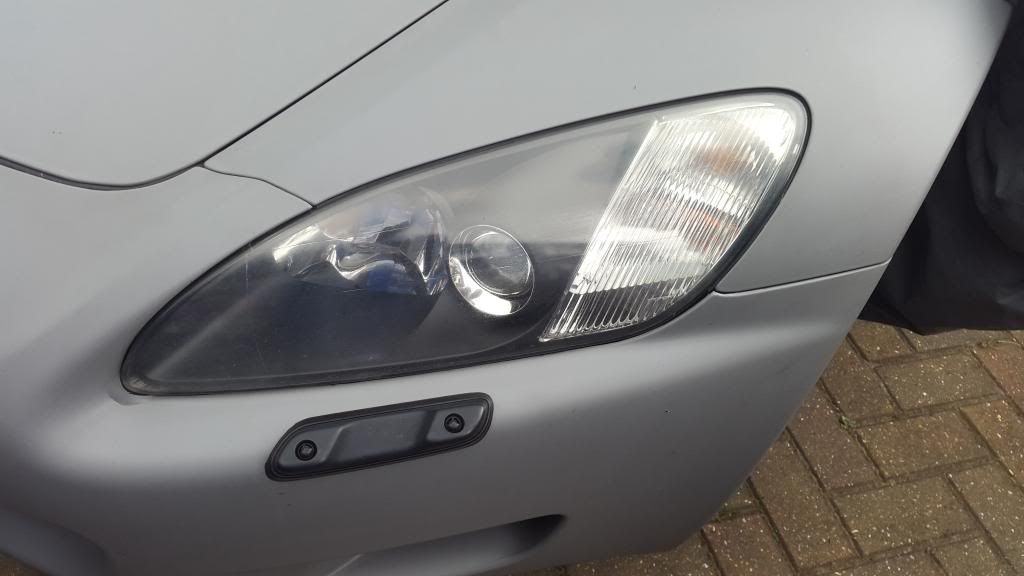
So managed to clean up the shift knob, and cleaned the headlight plastic with degreaser then plastic cleaner...
Finally, moving on... got to here just as it started raining... So looks like we'll be Monte Carlo Blue again!!!
Hi Guys,
I've been on Honda forums since I was about 13 years old, always wanted an S2000 since a kid and decided to buy one now at 19 years old hahaha
Just looking around for S2000's for sale a decided to see this S2000 up for sale on Monday purchased it on Wednesday.
Vehicle is Monte Carlo Blue underneath I believe but could be wrong, and was wrapped nearly 3 years ago in Matt Grey by Totally Dynamics in Surrey. All Honda badges and S2000 badges have been replaced in mimicking vinyl.
Just under 114000 miles, all Honda invoices, MOT's, services, parts receipts all documented.

When I went to see the car...

At home on the driveway just before I had a deep look around the car.


Found all this gunk up in the rear arches

Surface rust on both sides

Common problem of ripped/ moving carpets


Rusted and creaking door hinge which need to be sorted

Mould in the boot under the tool box which all tools were rusted

All wheels previously refurbed, painted in gloss black with red Honda logo's; looking beautiful


Alpine Bluetooth connectivity stereo with AUX and USB audio

Few dings/ dents which I will get sorted out at work, and a crack in the matt grey vinyl
Any comments, DIY's or things to do please list here, I am open to listening on what you think looks good as well.
Will do a routine service at home soon, Plugs, Oils, Filters, bushes and so on.
List of things to buy:
ASIMO G-Force meter
UPDATE : 12 June 2014 - 09:59 PM
Thanks for the above post. I will look in maybe taking the wrap only reason why I don't want to is because it is quite different.

Took the centre console apart and covered the faded chrome plastic with 3m Carbon Fibre wrap. Cleaned all of the gunk inside the centre console, somehow found loads of coins of usual gubbins from buying a used car lol

Fixed the little storage pocket as the flap wouldn't open, took damn nearly an hour to just get the tension on the spring!

Tried to clean the gear knob with my watch cleaning kit haha, ended up looking the same as before the clean. Looks like I'll end with a skunk2 shift knob now...
Ordered red D1 spec lug nuts, hopefully will be fitted soon making these beauties look better and painting calipers red again.

So managed to clean up the shift knob, and cleaned the headlight plastic with degreaser then plastic cleaner...

Finally, moving on... got to here just as it started raining... So looks like we'll be Monte Carlo Blue again!!!

 08-23-2014, 12:50 PM
#2
Registered User
Thread Starter
Join Date: Jun 2014
Posts: 99
Likes: 0
Received 0 Likes
on
0 Posts
UPDATE : 16 June 2014 - 07:15 PM
Slowly getting there lol. I need a heat gun, not hot enough with my mums hairdryer lmao
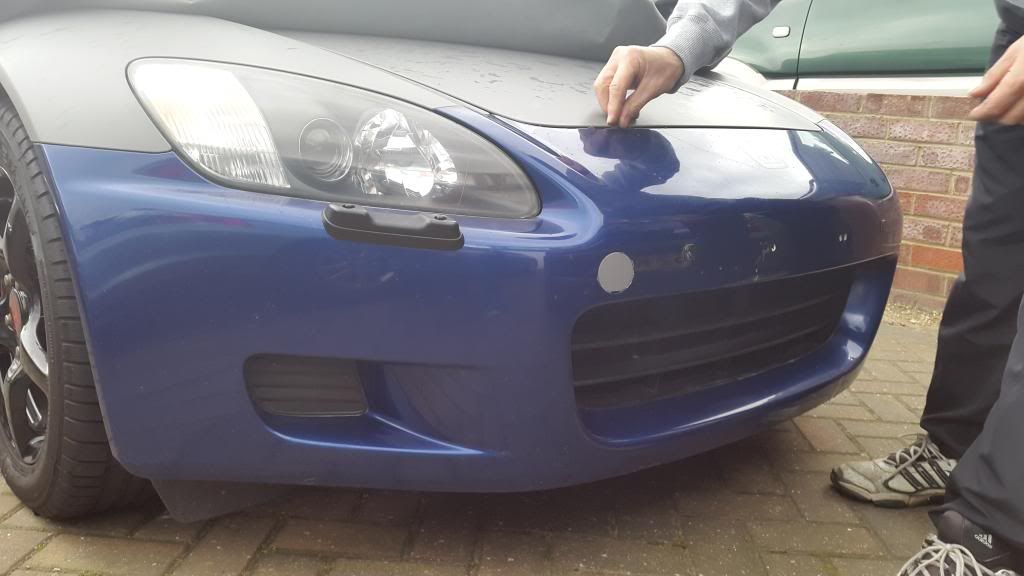
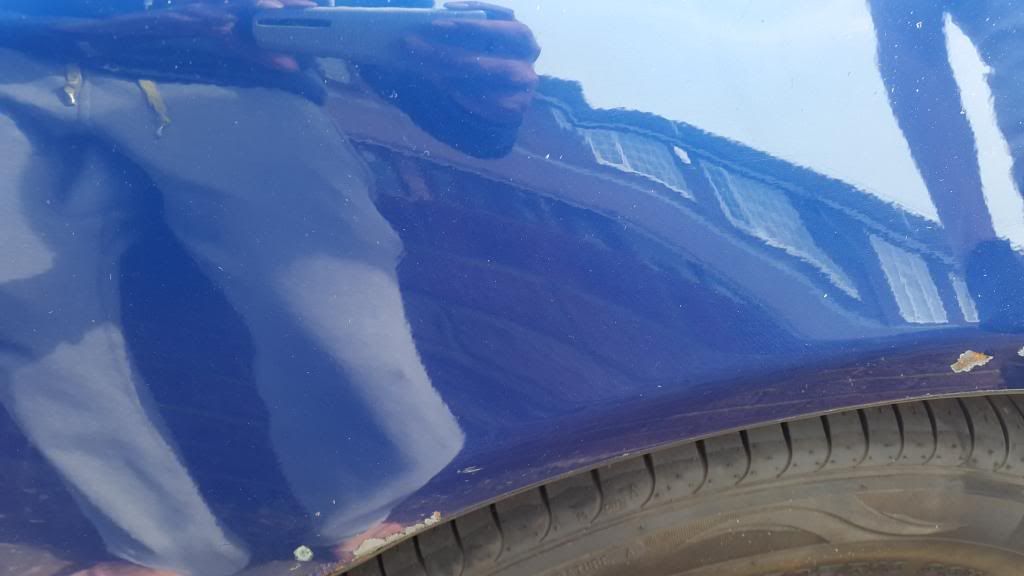
Bodywork is an average condition underneath, however will need paintwork... Will get the whole front bumper smoothed then attach a custom plate holder afterwards.
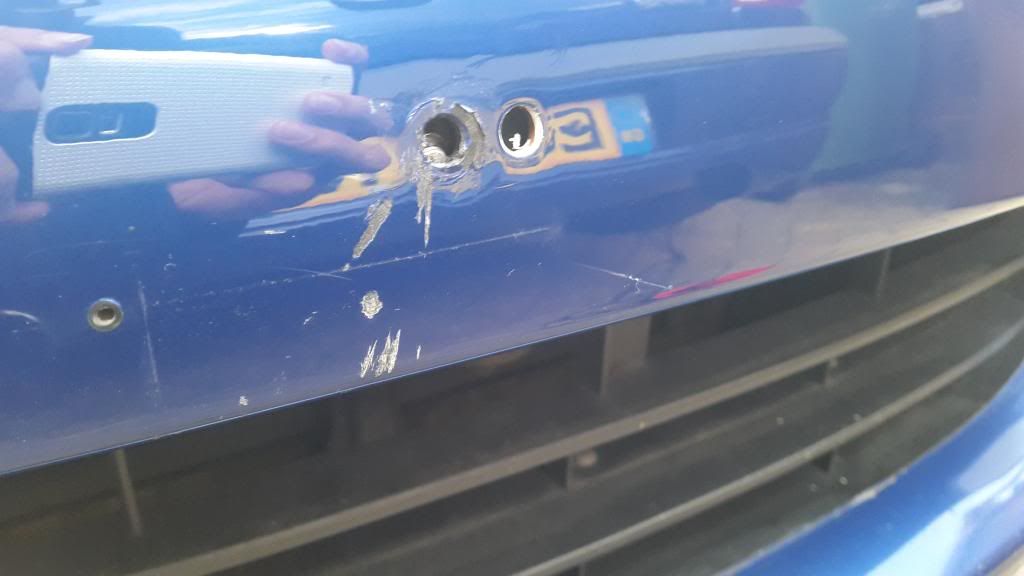
The Bonnet lip
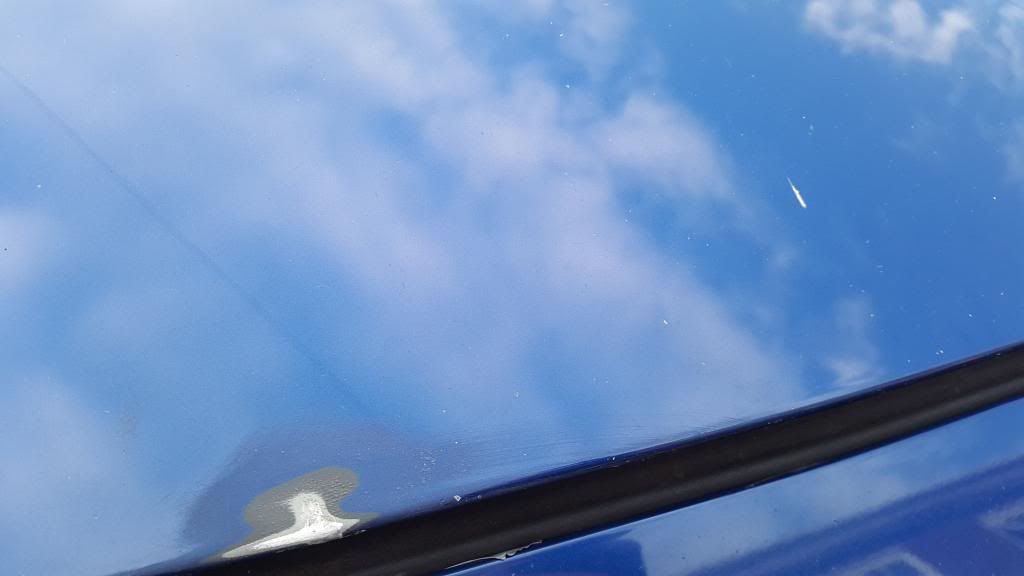
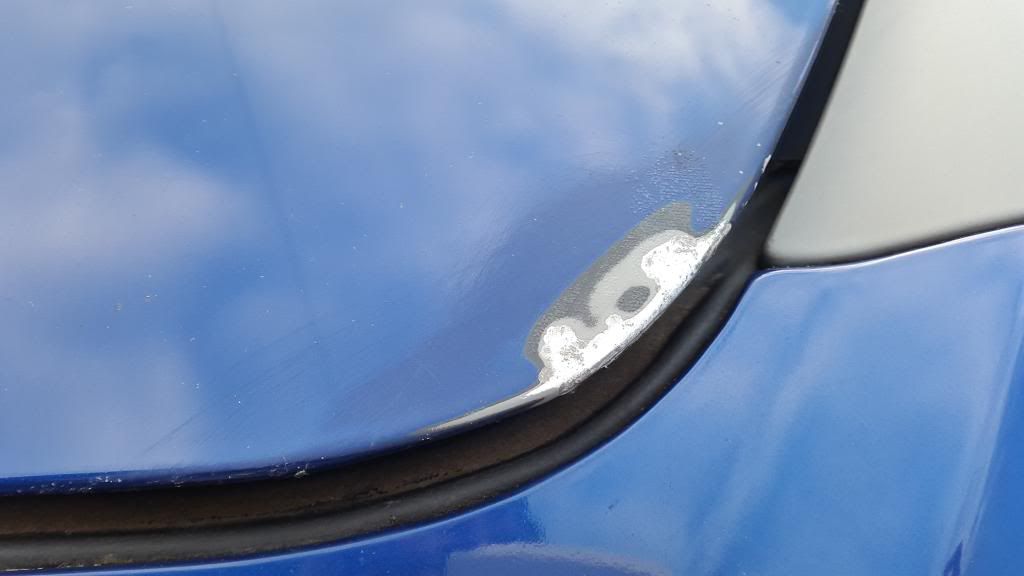
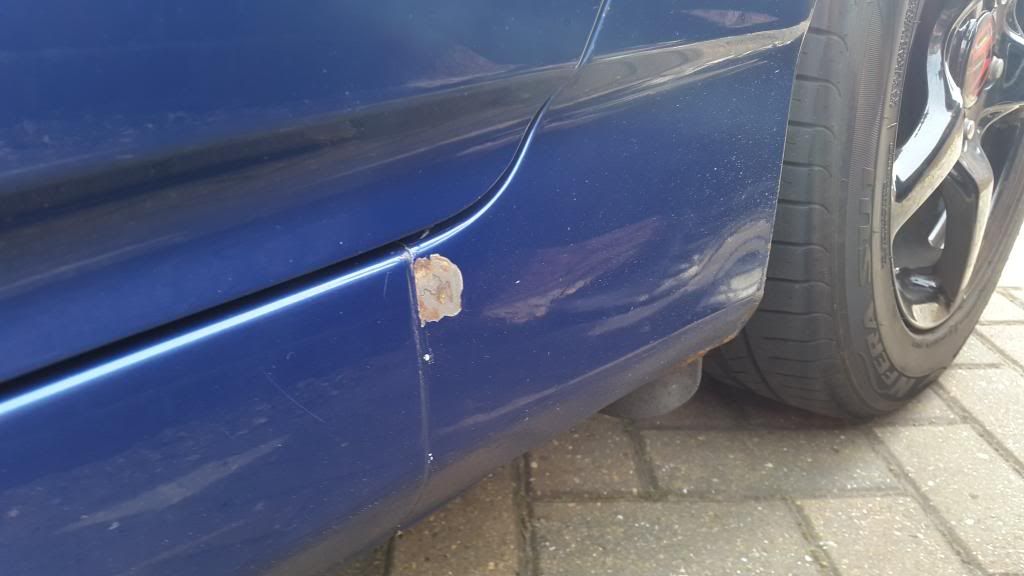
Right arch - small stone chip and light scratch (near top left of pic)
Will be sanding the TCT gear soon, rattling sound when the engine was warmed. Hopefully the dremel tool will help defeat the problem
UPDATE : Posted 17 June 2014 - 02:43 PM
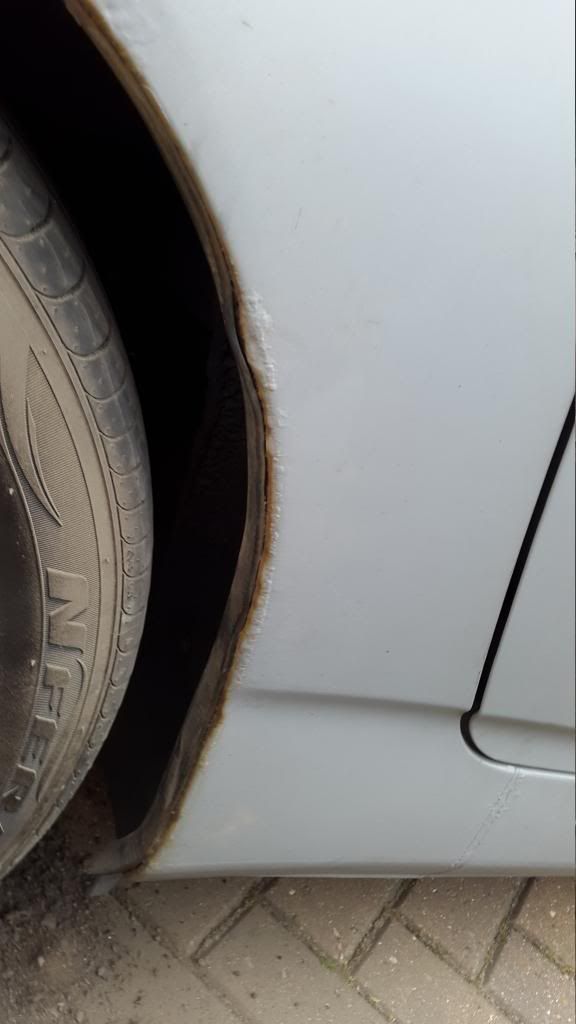
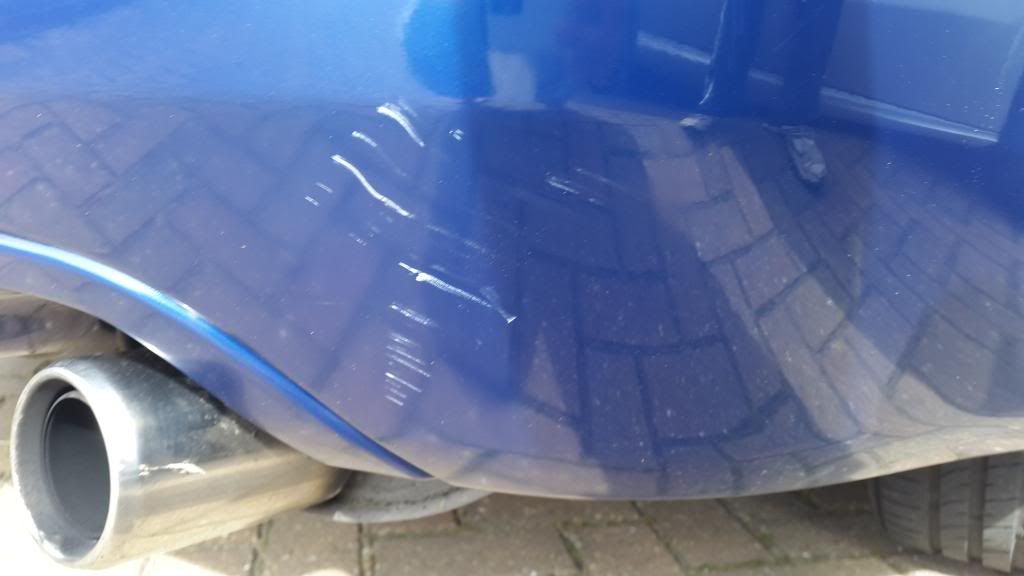
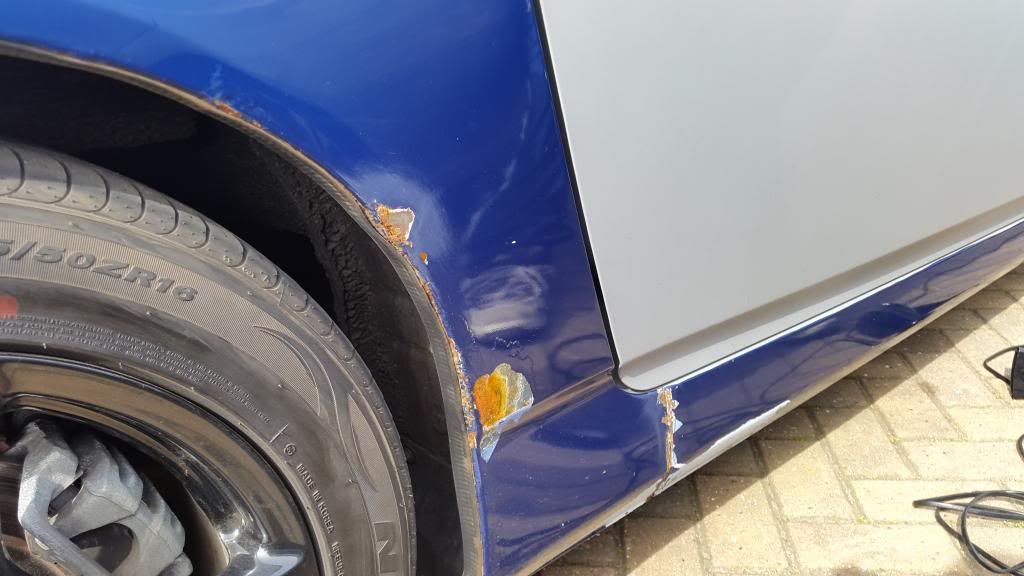
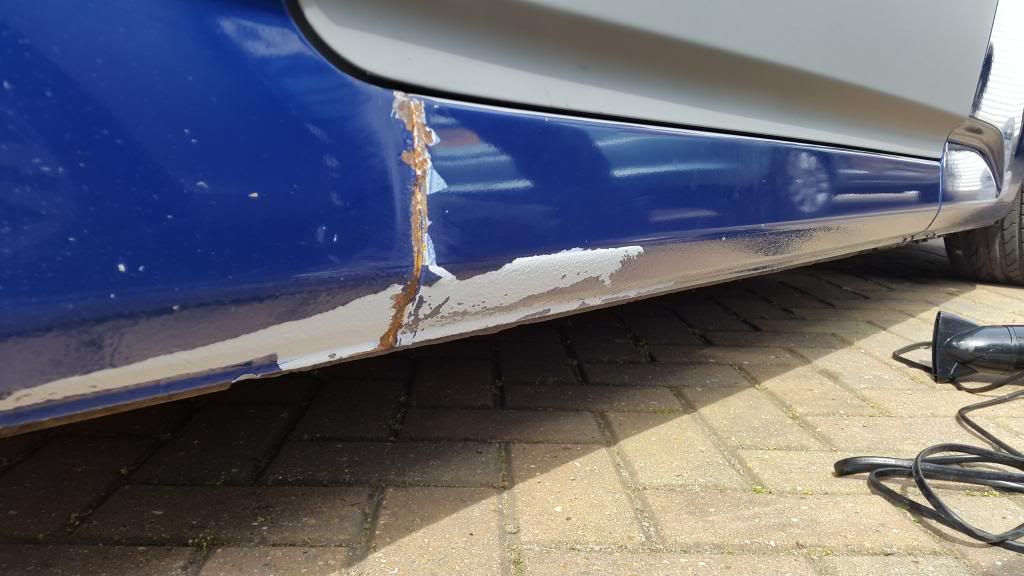
Now unfortunately I have pulled more of the wrap off today, just 3 panels left to being all Monte Carlo Blue and the underneath of the car is in a very bad state. I cannot believe the person that chose to wrap this car didn't have the bodywork at least treated before applying the wrap. Make me so sad to see an S2000 like this. There are a lot more dings and creases that I can now see, and a lot of rust spots all over the car.
I will be treating the rusted boot well now with direct metal to rust paint.
Pics of all the above will follow shortly...

I have a lot of work to do, but first the engine! Will get the TCT sorted as soon as the sandblaster arrives. (Thanks DrakeValle), then a routine service updating all fluids, then to the bodywork.
UPDATE : Posted 20 July 2014 - 08:34 AM
I have been very busy at work once again LOL
I managed to install the Billman TCT and what a difference it has made the old rattle that was there...
I haven't installed the K&N air filter yet as I am awaiting the vehicles rust removal and the respray in MCB.
I removed the seats and the carpets from the interior, gave them all a clean and sorted out the drivers seat bucket and bolsters.


Removed the rust from the undertray and sprayed in hammerite black.


More updates to come soon!!!
UPDATE : 20 July 2014 - 08:13 PM
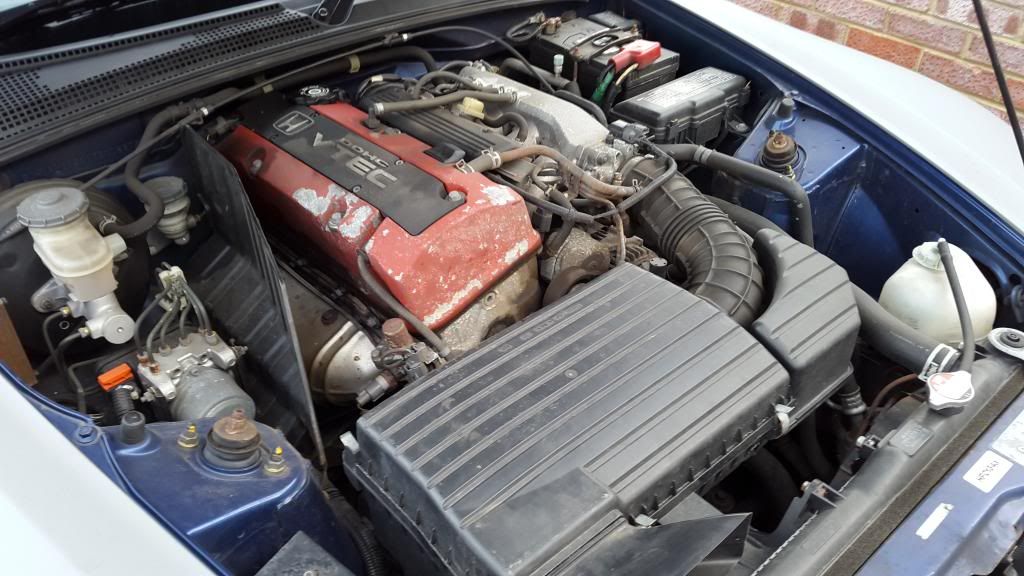
Also took the Valve cover off of the car and resprayed it at home with winkle VHT paint.


I know it looks orange LMAO, but that was because of the direct sunlight from the morning. It doesn't look stock in the sunlight, but it is pure red and no cracks!!!
When I went to play tennis at my usual place during the week I spotted an S2000 right outside the park and of course I had to park right next to it!!!


More to come hopefully on Tuesday!!!!!!!
Slowly getting there lol. I need a heat gun, not hot enough with my mums hairdryer lmao

Bodywork is an average condition underneath, however will need paintwork... Will get the whole front bumper smoothed then attach a custom plate holder afterwards.

The Bonnet lip


Right arch - small stone chip and light scratch (near top left of pic)
Will be sanding the TCT gear soon, rattling sound when the engine was warmed. Hopefully the dremel tool will help defeat the problem
UPDATE : Posted 17 June 2014 - 02:43 PM
Now unfortunately I have pulled more of the wrap off today, just 3 panels left to being all Monte Carlo Blue and the underneath of the car is in a very bad state. I cannot believe the person that chose to wrap this car didn't have the bodywork at least treated before applying the wrap. Make me so sad to see an S2000 like this. There are a lot more dings and creases that I can now see, and a lot of rust spots all over the car.
I will be treating the rusted boot well now with direct metal to rust paint.
Pics of all the above will follow shortly...


I have a lot of work to do, but first the engine! Will get the TCT sorted as soon as the sandblaster arrives. (Thanks DrakeValle), then a routine service updating all fluids, then to the bodywork.
UPDATE : Posted 20 July 2014 - 08:34 AM
I have been very busy at work once again LOL
I managed to install the Billman TCT and what a difference it has made the old rattle that was there...
I haven't installed the K&N air filter yet as I am awaiting the vehicles rust removal and the respray in MCB.
I removed the seats and the carpets from the interior, gave them all a clean and sorted out the drivers seat bucket and bolsters.


Removed the rust from the undertray and sprayed in hammerite black.


More updates to come soon!!!
UPDATE : 20 July 2014 - 08:13 PM
Also took the Valve cover off of the car and resprayed it at home with winkle VHT paint.


I know it looks orange LMAO, but that was because of the direct sunlight from the morning. It doesn't look stock in the sunlight, but it is pure red and no cracks!!!
When I went to play tennis at my usual place during the week I spotted an S2000 right outside the park and of course I had to park right next to it!!!


More to come hopefully on Tuesday!!!!!!!
08-23-2014, 12:51 PM
#3
Registered User
Thread Starter
Join Date: Jun 2014
Posts: 99
Likes: 0
Received 0 Likes
on
0 Posts
UPDATE : 27 July 2014 - 10:18 PM
Furthering a little bit more throughout the restoration and build.

Cleaning the car up decided to completely strip the interior out, give it a full clean, maybe rust remedy the floor plan and put the interior back in.


^^^ Rear fog light glue had diminished, my dad gluing it back in LOL


^^^ Sockie Tech hood dampers/struts in place. They seem to be very powerful, as soon as I undo the bonnet release the bonnet shoots up with quite a force. Not sure if this is good or not... Also K&N FIPK Gen 2 installed, makes a beautiful sound.


And finally I just wanted a bit of advice on how to go about cleaning the bottom half of the block, I hate opening my bonnet and seeing the gunk on it, just on how to make it nice and shiny again
A few good parts coming soon so updates will be on the way!!!!
UPDATE : Posted 08 August 2014 - 11:26 PM
Got a few more things done on Tuesday, spent about two hours removing rusted bolt on the front end of the car, an absolute nightmare.
Clean up the engine bay slightly, also Tegiwa radiator, PasswordJDM gold rad stay, PasswordJDM gold dress-up kit.


Removed some pieces and plastic trims and resprayed; new wipers, wiper blades, new windscreen fitted and heat shield resprayed.

And some more things to come and be fitted over the weekend. D2 Coilovers!!!!!!


UPDATE : Posted 18 August 2014 - 11:02 PM
Coilovers have now been fitted again an absolute nightmare as with everything I try to do to this car!!!
Tried replacing the callipers last Tuesday and spent all day trying to remove the brake disc screws, ended up drilling them out. Also tried placing the track rod ends and I have been unable to remove the seized alignment bolt that locks the end together!!! Starting to hit a brick wall, spending all day outside on the car and nothing seems to be getting done I think my neighbours are starting to hate 
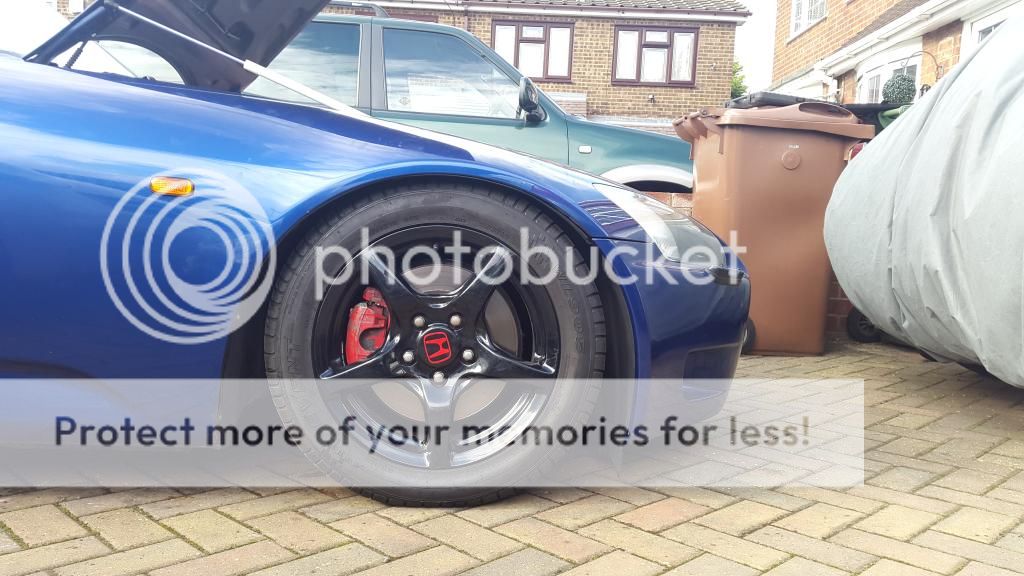

Stripping the callipers down from the failed paint attempt while to callipers where on the car and will be painted in VHT red and lacquered...
Also have order a Dual J's Racing 70RS exhaust which will be on the vehicle once it has built in Japan within 8-10 weeks or so
More updates soon...
Furthering a little bit more throughout the restoration and build.

Cleaning the car up decided to completely strip the interior out, give it a full clean, maybe rust remedy the floor plan and put the interior back in.


^^^ Rear fog light glue had diminished, my dad gluing it back in LOL


^^^ Sockie Tech hood dampers/struts in place. They seem to be very powerful, as soon as I undo the bonnet release the bonnet shoots up with quite a force. Not sure if this is good or not... Also K&N FIPK Gen 2 installed, makes a beautiful sound.


And finally I just wanted a bit of advice on how to go about cleaning the bottom half of the block, I hate opening my bonnet and seeing the gunk on it, just on how to make it nice and shiny again
A few good parts coming soon so updates will be on the way!!!!
UPDATE : Posted 08 August 2014 - 11:26 PM
Got a few more things done on Tuesday, spent about two hours removing rusted bolt on the front end of the car, an absolute nightmare.
Clean up the engine bay slightly, also Tegiwa radiator, PasswordJDM gold rad stay, PasswordJDM gold dress-up kit.


Removed some pieces and plastic trims and resprayed; new wipers, wiper blades, new windscreen fitted and heat shield resprayed.

And some more things to come and be fitted over the weekend. D2 Coilovers!!!!!!


UPDATE : Posted 18 August 2014 - 11:02 PM
Coilovers have now been fitted again an absolute nightmare as with everything I try to do to this car!!!
Tried replacing the callipers last Tuesday and spent all day trying to remove the brake disc screws, ended up drilling them out. Also tried placing the track rod ends and I have been unable to remove the seized alignment bolt that locks the end together!!! Starting to hit a brick wall, spending all day outside on the car and nothing seems to be getting done
I think my neighbours are starting to hate 


Stripping the callipers down from the failed paint attempt while to callipers where on the car and will be painted in VHT red and lacquered...
Also have order a Dual J's Racing 70RS exhaust which will be on the vehicle once it has built in Japan within 8-10 weeks or so
More updates soon...
08-23-2014, 01:19 PM
#5
Registered User


Join Date: Jul 2002
Location: ...by a lake...somewhere
Posts: 29,547
Likes: 0
Received 3 Likes
on
2 Posts
S2000s at 19. Feck me. When I were a lad it were all fields around here (and Ford orions).
Nice to see the good effort and progress. Keep the updates coming. Interesting read.
Nice to see the good effort and progress. Keep the updates coming. Interesting read.

Trending Topics


 08-24-2014, 04:35 AM
#9

Bravo on the restoration!
I'm curious if a "wrap" can trap moisture underneath and make a minor rust problem into a major problem. I can't imagine the sinking feeling when you started to peel it back.
-- Chuck
I'm curious if a "wrap" can trap moisture underneath and make a minor rust problem into a major problem. I can't imagine the sinking feeling when you started to peel it back.
-- Chuck