
Starter Replacement (WITH PICS)

Thread Starter
Registered User
Joined: Sep 2013
Posts: 36
Likes: 3
Had to replace the starter on my sister's car again so took some pics this time. Will pretty much just use krazik's write up from 06 but insert pictures.
Reason for replacing again was because she kept having problems with the nose of the housing breaking off of the NAPA replacement starters (will notice in steps 11 & 12 pics below). I believe that the NAPA starters have a difference in the teeth on the starter's pinion gear, causing it not to completely mesh with the teeth on the flywheel and push up on the pinion gear and break the starter housing. Used one from advance auto this last time and no problems so far. So from my experiences I would stay clear of NAPA's starter for the s2k.
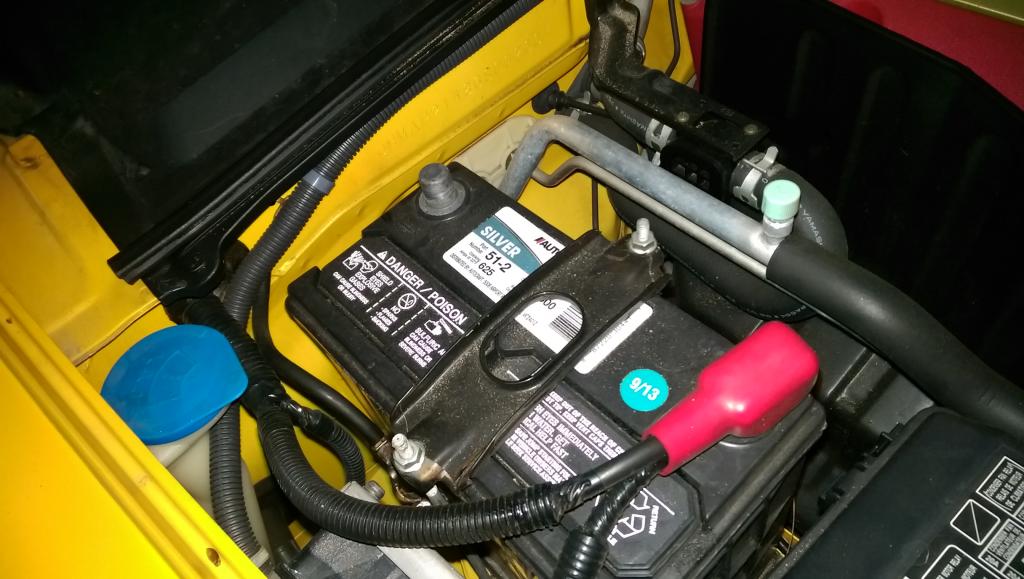
1) Disconnect Battery
2) Remove Air Intake
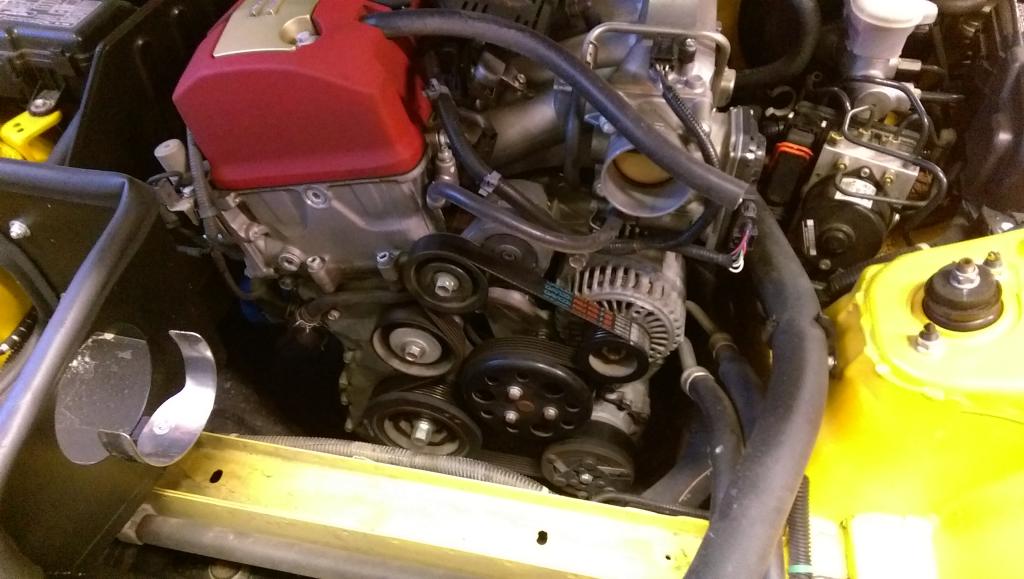
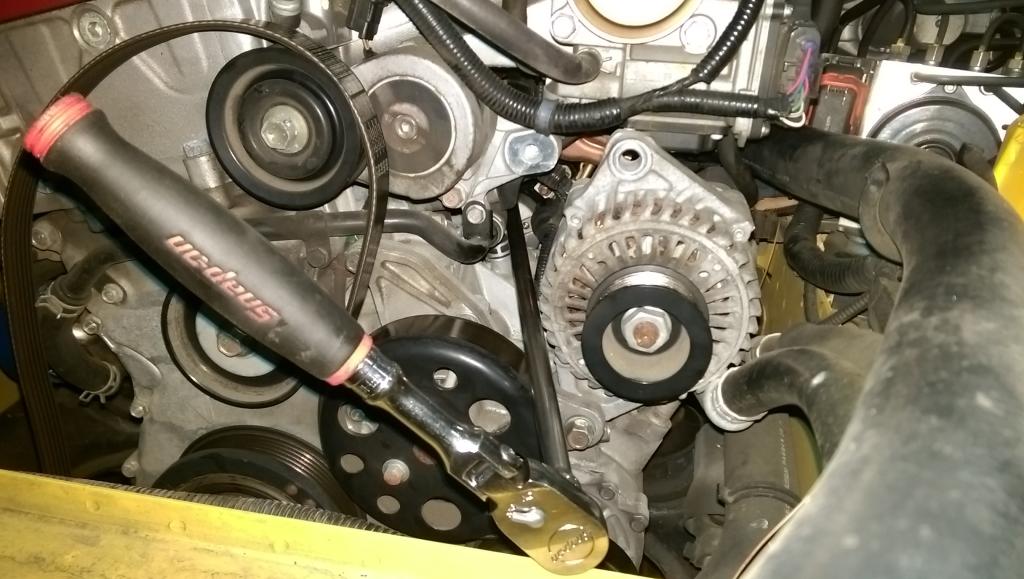
3) Remove Accessory Belt, take tension off with wrench and take belt off the alternator pulley.
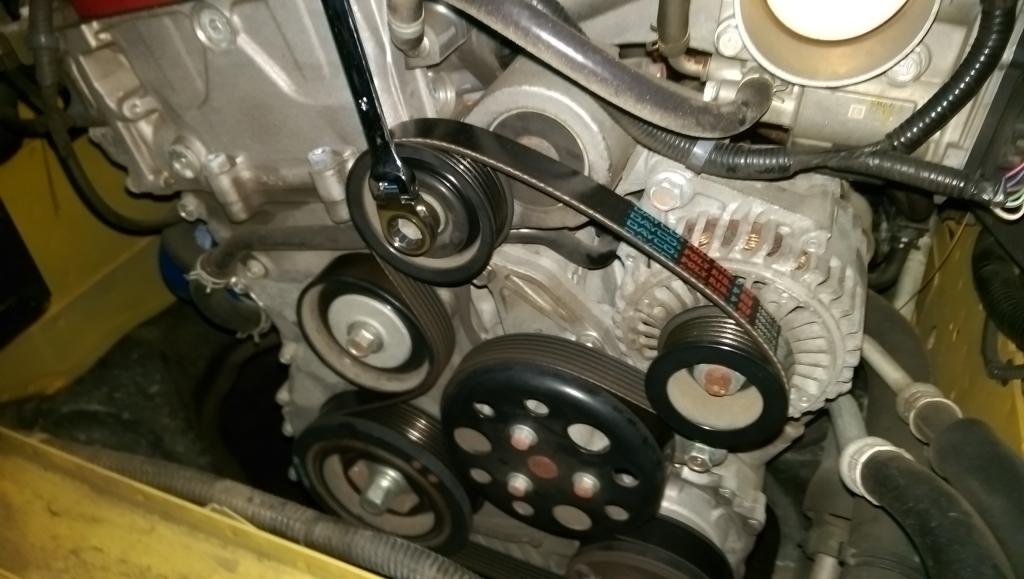
4) Remove top bolt of Alternator, losen lower bolt and rotate the alternator to the right.
This is where I veered off from krazik's write up a bit.
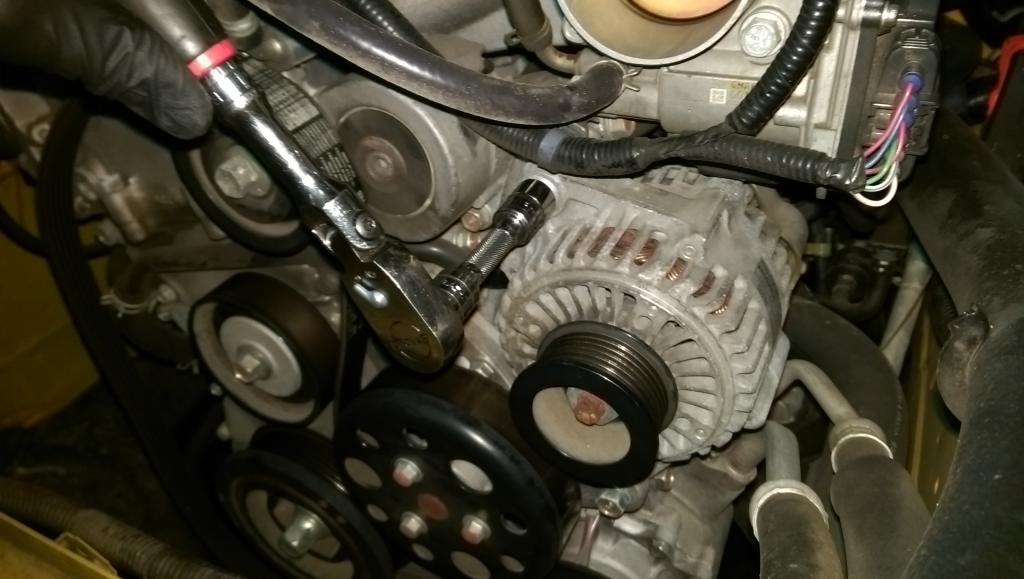
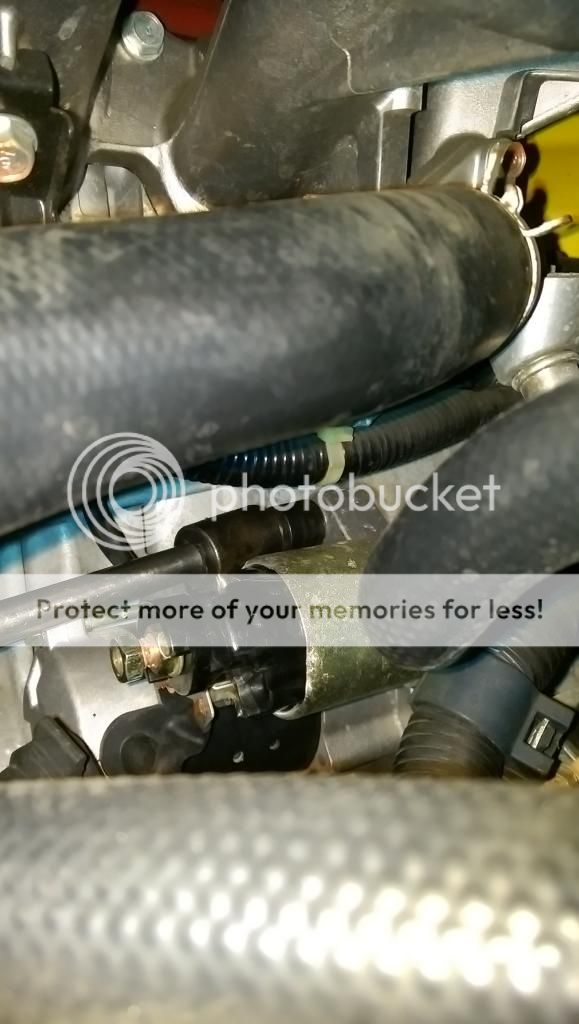
5) Reach under the intake manifold and removed the starter signal wire (spade connector -it pulls straight off, don't need to press anything) and power wire (12mm under rubber boot).
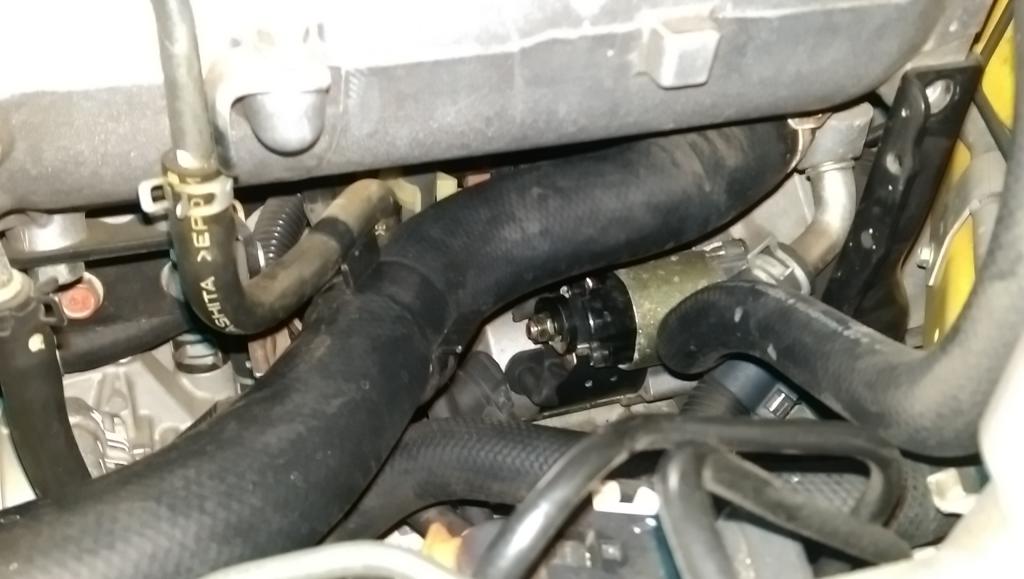
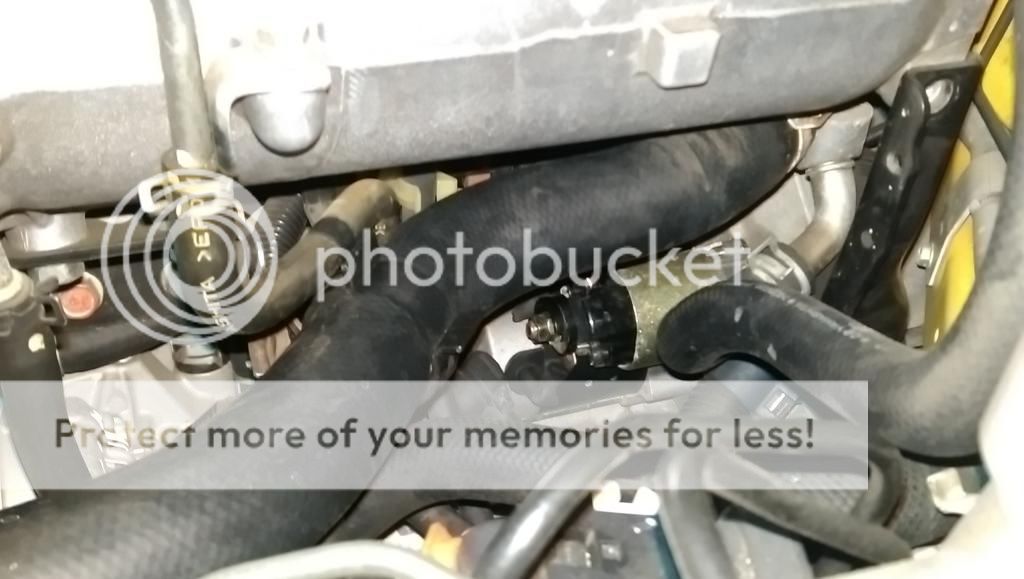
6) Unplugged the knock sensor (green plug in pic), the knock sensor is plastic and brittle. Don't break it. Seriously, its easy to do. Move that section of wiring harness out of the way to get a better view of starter.
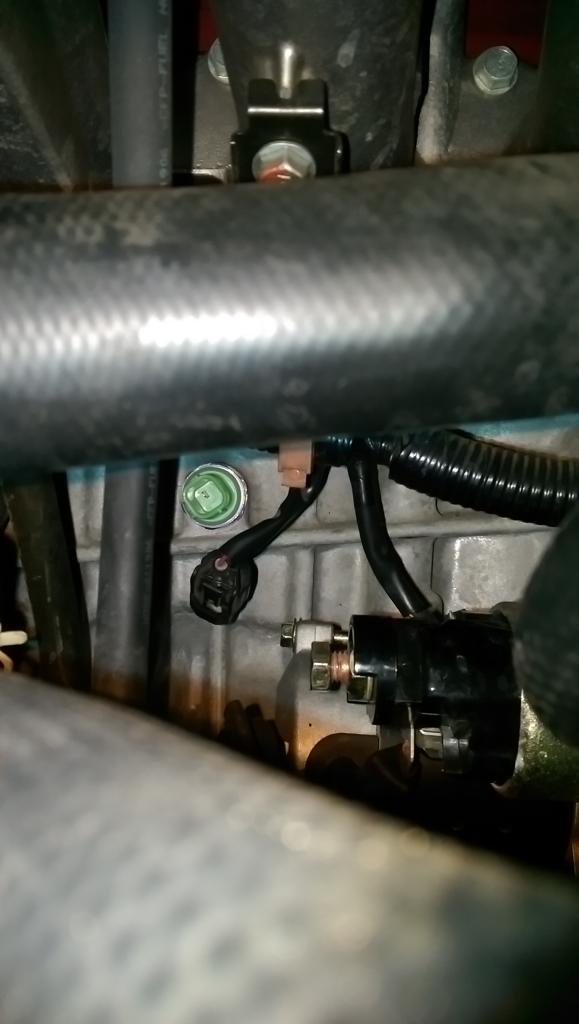
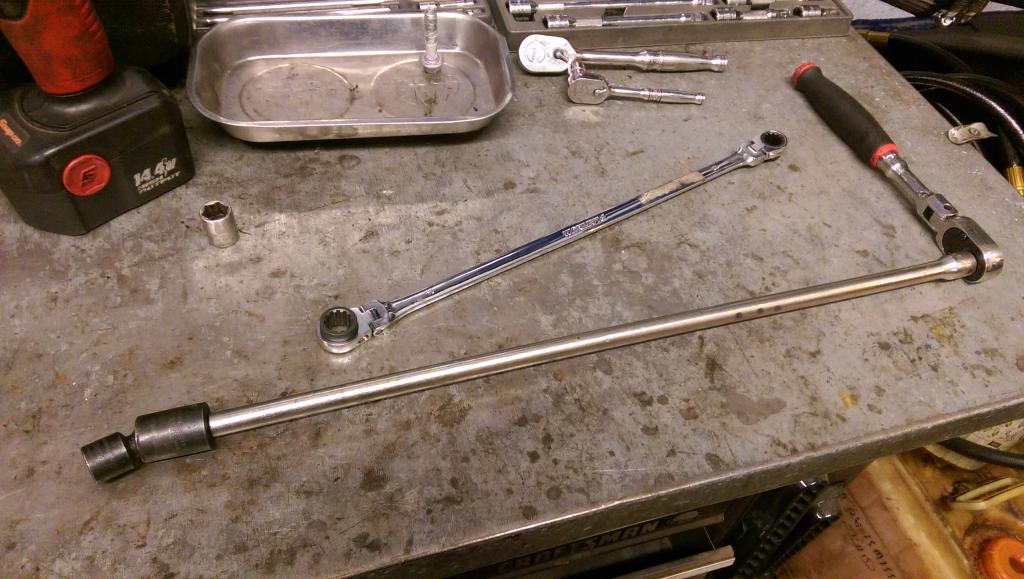
7) Remove the top bolt of the starter, you will need a long extension and a 14mm swivel socket helps.
I find that the easiest way to get on the top starter bolt is to shine a flashlight on the bolt from in between the intake runners and then feed the swivel socket in from the front towards the light. Remember don't break the knock sensor!
Now you're ready to go under the car. ALWAYS use jackstands!
8) Remove the lower starter bolt 14mm
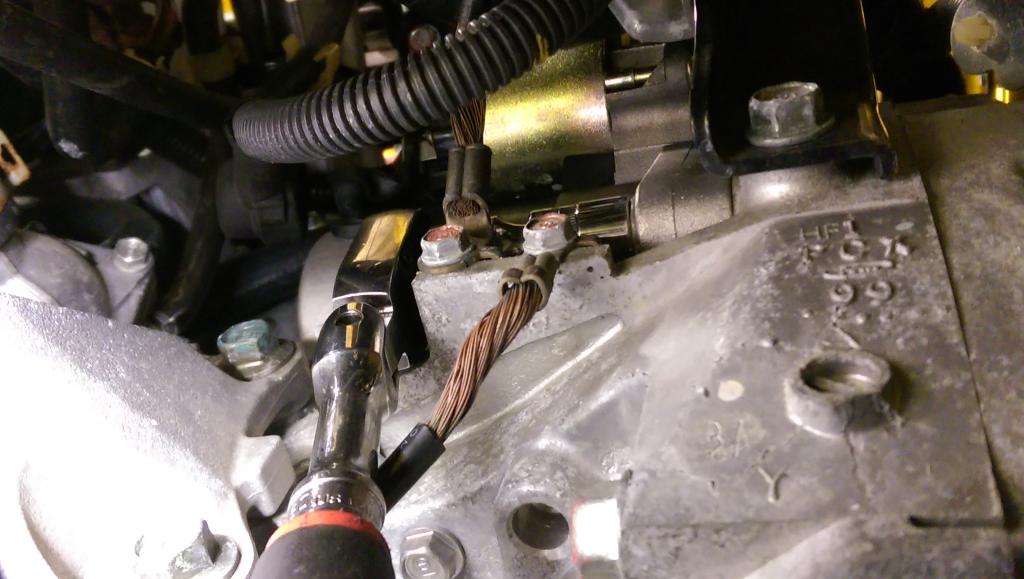
9) Remove the two ground wires seen in picture above^
10) Remove both 10mm bolts to fuel line bracket on frame where the hardline connects to the flexible one. This will give you more wiggle room to get the starter out. Didn't get a pic of this but you'll easily see it.
11) Back starter out of hole in block while paying attention to the knock sensor.
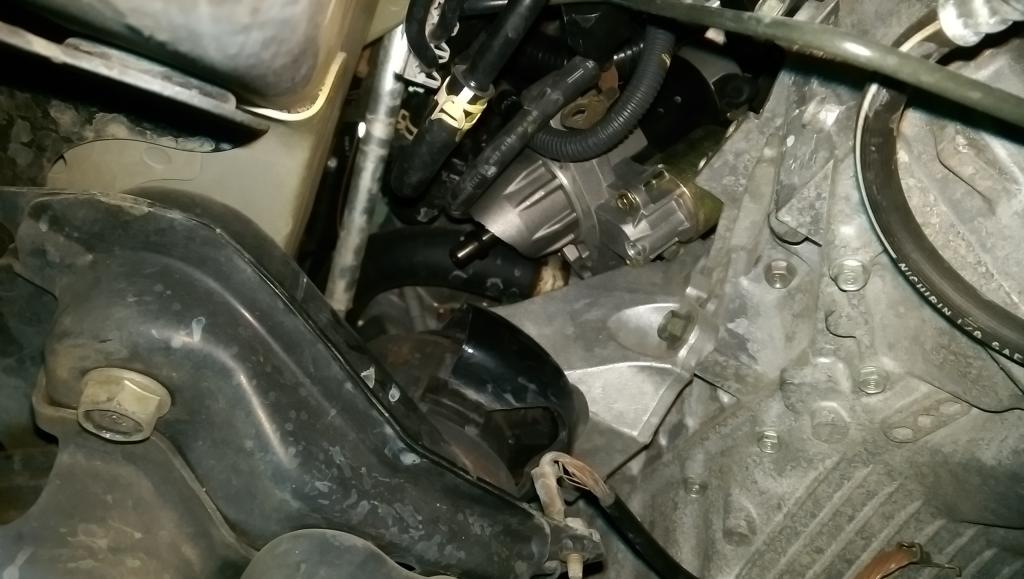
12) Twist and rotate starter to get it out. Takes a little time and finesse. Don't forget about that knock sensor.
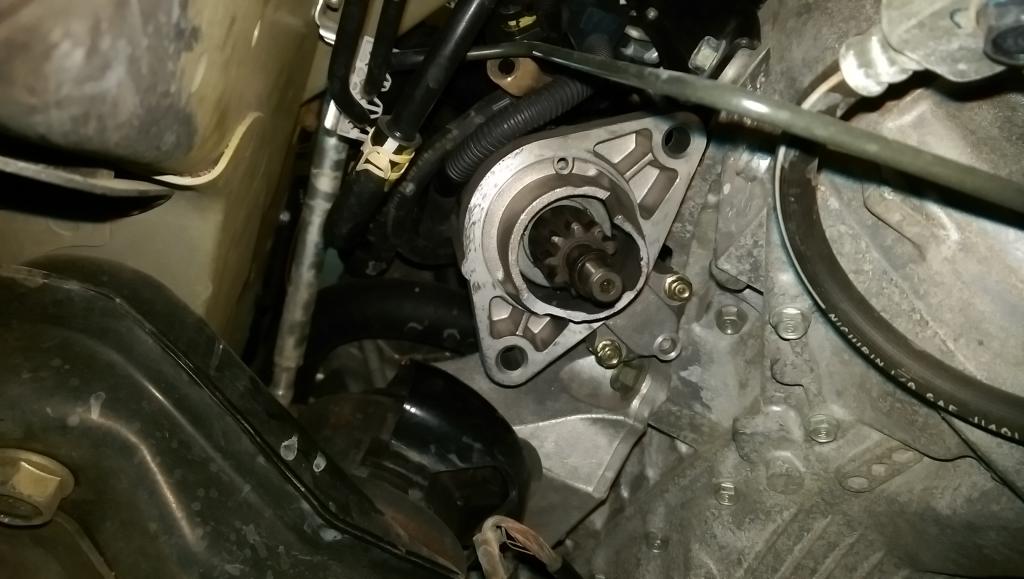
13) Reverse steps to put it all back together, and remember DON'T BREAK THE KNOCK SENSOR!
Reason for replacing again was because she kept having problems with the nose of the housing breaking off of the NAPA replacement starters (will notice in steps 11 & 12 pics below). I believe that the NAPA starters have a difference in the teeth on the starter's pinion gear, causing it not to completely mesh with the teeth on the flywheel and push up on the pinion gear and break the starter housing. Used one from advance auto this last time and no problems so far. So from my experiences I would stay clear of NAPA's starter for the s2k.
1) Disconnect Battery
2) Remove Air Intake
3) Remove Accessory Belt, take tension off with wrench and take belt off the alternator pulley.
4) Remove top bolt of Alternator, losen lower bolt and rotate the alternator to the right.
This is where I veered off from krazik's write up a bit.
5) Reach under the intake manifold and removed the starter signal wire (spade connector -it pulls straight off, don't need to press anything) and power wire (12mm under rubber boot).
6) Unplugged the knock sensor (green plug in pic), the knock sensor is plastic and brittle. Don't break it. Seriously, its easy to do. Move that section of wiring harness out of the way to get a better view of starter.
7) Remove the top bolt of the starter, you will need a long extension and a 14mm swivel socket helps.
I find that the easiest way to get on the top starter bolt is to shine a flashlight on the bolt from in between the intake runners and then feed the swivel socket in from the front towards the light. Remember don't break the knock sensor!
Now you're ready to go under the car. ALWAYS use jackstands!
8) Remove the lower starter bolt 14mm
9) Remove the two ground wires seen in picture above^
10) Remove both 10mm bolts to fuel line bracket on frame where the hardline connects to the flexible one. This will give you more wiggle room to get the starter out. Didn't get a pic of this but you'll easily see it.
11) Back starter out of hole in block while paying attention to the knock sensor.
12) Twist and rotate starter to get it out. Takes a little time and finesse. Don't forget about that knock sensor.
13) Reverse steps to put it all back together, and remember DON'T BREAK THE KNOCK SENSOR!


Thread Starter
Registered User
Joined: Sep 2013
Posts: 36
Likes: 3
![[zman]'s Avatar](data:image/svg+xml;utf8,<svg xmlns='http://www.w3.org/2000/svg' viewBox='0 0 50 50'><circle class='avatar-circle-default' fill='%23a86768' cx='25px' cy='25px' r='20px'></circle><text class='avatar-text-default' x='49%' y='53%' fill='white' text-anchor='middle' alignment-baseline='middle'>[</text></svg>)
Registered User
Joined: Jul 2004
Posts: 43
Likes: 0
Any tips on how to remove this 12mm nut? its physically impossible to get a socket in here.
I've been struggling for hours trying to wiggle the motor out from underneath. FML

Trending Topics


Joined: Jul 2002
Posts: 2,537
Likes: 101
From: Fort Lauderdale
Just wanted to say THANKS! Just finished replacing my starter, and these photos were very helpful. I couldn't even find the starter at first glance...
While the top bolt was challenging, I didn't think it was as bad as everyone makes it out to be. I will add a tip for getting the top bolt back in. I taped the bolt to my extension/swivel, and sighted it into the hole in the bracket..but I couldn't get the bolt aligned properly to thread. So, with the extensions laying on the front cross member, I went back under the car, manipulated the swivel by hand to get the bolt aligned and threaded. Once that was started, back to the top to finish and torque the bolt. Only took a few minutes, really. Overall, the job was quite a pain, just not easy to get to.
I left the knock sensor alone. Didn't even disconnect it. I just made it a point to know where it is and kept the starter away when removing/replacing.

Joined: Jul 2015
Posts: 550
Likes: 76
I had a friend assisting as we were reinstalling the transmission after a clutch replacement and having one person below while the other was in the engine bay made this easier. A second set of hands is not required, but definitely helped with guiding the bolt at the end of the long extension.