When you click on links to various merchants on this site and make a purchase, this can result in this site earning a commission. Affiliate programs and affiliations include, but are not limited to, the eBay Partner Network.
Snow has been crazy here in Sweden as well but last couple of weeks it has been melting away very fast.
Hope you get enough time to do everything before summer kicks in
Snow has been crazy here in Sweden as well but last couple of weeks it has been melting away very fast.
Hope you get enough time to do everything before summer kicks in
I hope so too. Got new seat! This is the ABE version of the Pole Position. Haven't ordered seat mount yet, but probably going with PCI mount.
Hello, I have a question about the ISC 165 ?
Did you have to modify something to install them ?
Hello!
I used these adapters PVC Speaker Adapters - CNC Machined - In Stock or Custom Made
Adapters needed some dremeling (if I remember correctly hole for the speaker was too small) and also I had to cut a bit from doors steel panel around the speaker hole.
On spring I did some basic maintenance. New fluids for tranny, diff and brakes and changed new brake pads to front, because old ones were worn out.
I have been happy with StopTech sport pads, so I didn't find any good reason to try anything else.
Also had to weld small piece of new metal to bottom of the car, bacause of rust:
This is from right front corner near the lifting point. Car was on jack stands and it was my first time welding under the car and had just small welding practice before, so not perfect result. Still good enough for me.
Of course added some anti rust spray and stone chip protection.
Edit. Forgot to mention that wheels got ceramic coating. I have never tried this before so let's see does it help to keep them clean.
Firtstly I want to say that if you want to mount the seat as low as possible buy the PCI mount. Based on my research with it you can get the seat lower and it is better than BuddyClub, Tegiwa etc. with their cracking welds.
-I started by removing rivets with angle grinder
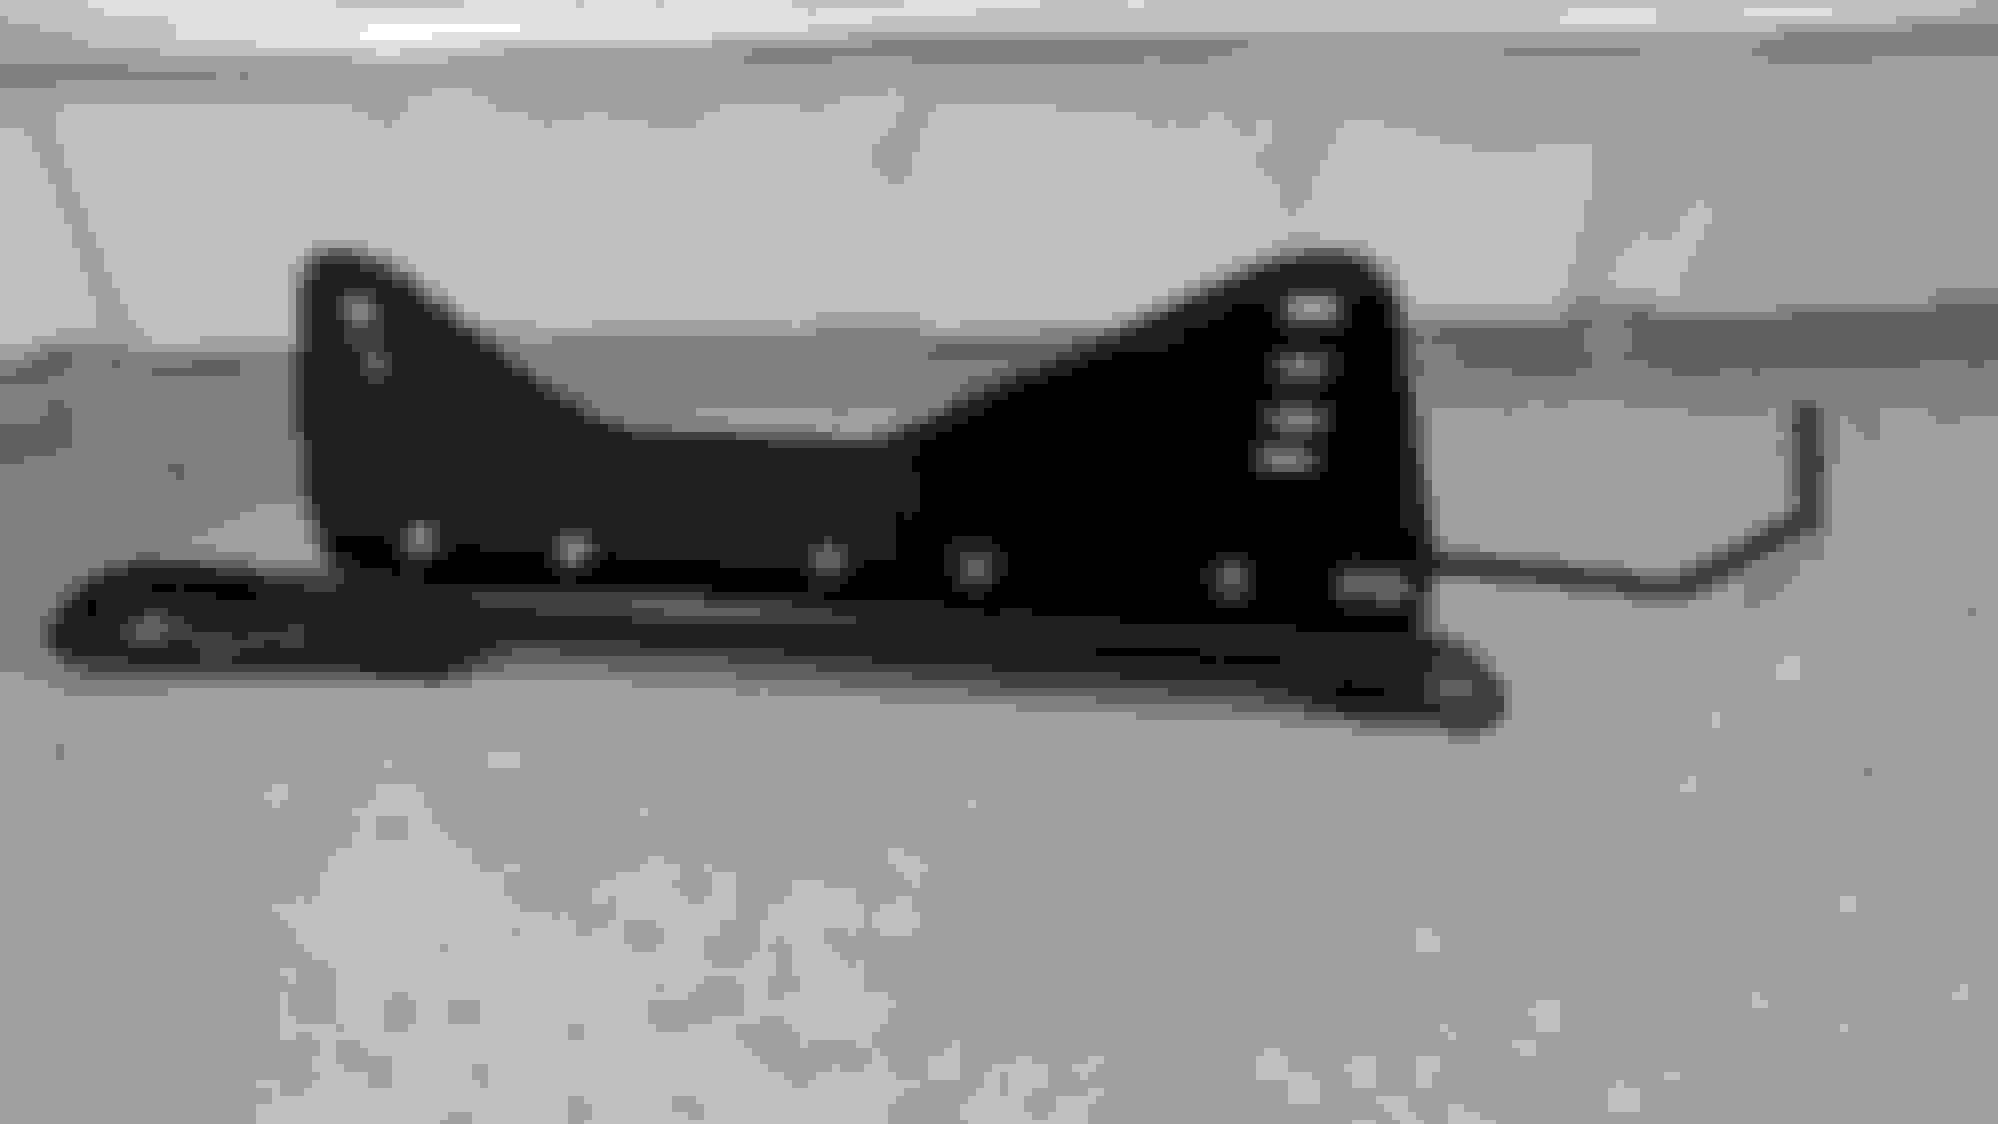
-Made cad images based on Chris_Lum:s pictures and oem Recaro side mounts
-Cutted side mounts from 3mm steel with plasma cutter (angle grinder works also)
-Welded side mounts together and drilled the holes with bench drill
-Front seat mounting holes was made with manual milling machine
-Painted the side mounts with spray can
-I also used steel wire to connect slider locking devices to each other, just like Chris_Lum
-When seat is mounted to holes where it is on the pictures rail locks won't fit because they touch to seat bottom, so I moved the spring to other side of the lock
-Also Pole Position ABE is wider than the FIA seat near the lower seat belt holes so I struggled with seat rubbing to tranny tunnel
-I had to move the seat about 7mm away from center to outside
-I made new mount for oem seat belt lock from 3mm steel
Ready for paint:
Moving spring to other side of the seat lock:
Spring removed:
I used coupling/extension nut to lock the spring to shaft.
Ready for welding (not in the picture, but I welded small piece of sheet metal on top of the spring to keep the end of the spring in the groove of the nut
The grey bolt is a flat head bolt, because normal won't fit.
In this picture you can see the seat lock spring is located to other side of the lock, because otherwise it would hit the seat.
Other side:
Left side mount:
Can't really go much lower:
Oem seat belt lock with diy mount from 3mm steel. For mounting I used 10mm 12.9 strength bolt:
As you may notice colour if the seat is not original. I used local upholstery shop to change color of the bottom- and back cushions with Alcantara type material.
Seat is still rubbing to tranny tunnel, but cannot really do anything about that. With FIA seat problem probably isn't this big.
Seat is bolted on rear to lower hole and on front to second lowest hole of the side mount.
I measured sitting position and it's about 2cm lower than oem seat and I can now totally understand when people talk about that you get more feel with racing seat.
Feels like now I can feel everything what is happening in the chassis and seat doesn't feel uncomfortable even on longer trips so I'm really happy with it


 03-01-2019, 11:37 PM