o_O S2000 | Mk I — Stage II


The following users liked this post:
mokinbird87 (04-27-2020)


 04-27-2018, 01:05 AM
#3106
Registered User

Join Date: Nov 2017
Posts: 6
Likes: 0
Received 0 Likes
on
0 Posts
-Schroth Racing SR S65 sleeves (SR S65) - https://www.schrothracing.com/produc...lt-in-brackets - These allow the mount to pivot at the mounting point when mounted properly with a washer, they can be pushed into the mounting bracket from one side and should sit up against the side mount, with a washer on the other side.
Follow-up questions:
Did you have to modify the seatbelt receiver hole to fit the sleeve? On my updated PCI kit, the sleeve is the same diameter as the hole on the seat belt receiver and won't fit.
Is the diameter different on the seatbelt receiver that came with the Pole Position specific side mounts?
04-27-2018, 12:22 PM
#3107

Thread Starter
Massive thank you for the research and instructions.
Follow-up questions:
Did you have to modify the seatbelt receiver hole to fit the sleeve? On my updated PCI kit, the sleeve is the same diameter as the hole on the seat belt receiver and won't fit.
Is the diameter different on the seatbelt receiver that came with the Pole Position specific side mounts?
 05-03-2018, 05:32 PM
#3109
Thread Starter
 05-05-2018, 11:35 PM
#3110
Thread Starter
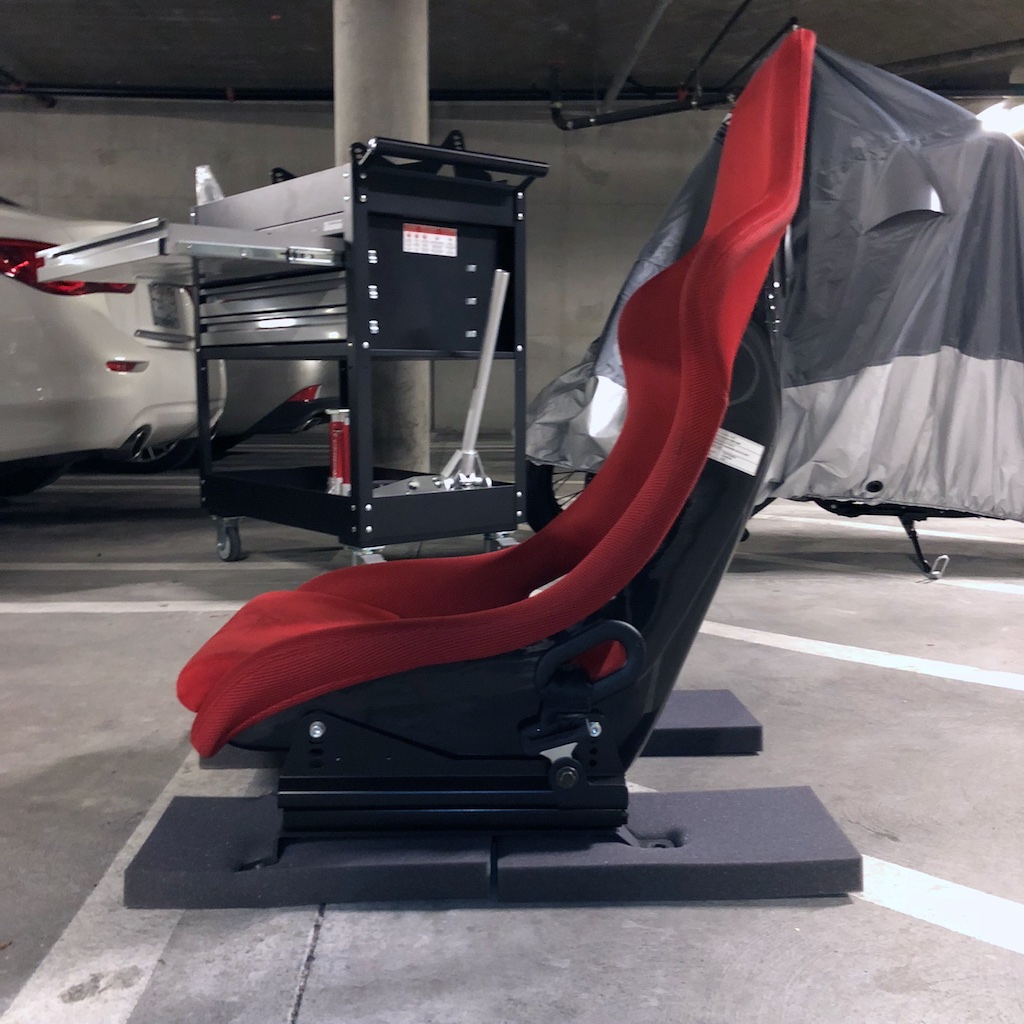
PCI passenger seat mounts installed
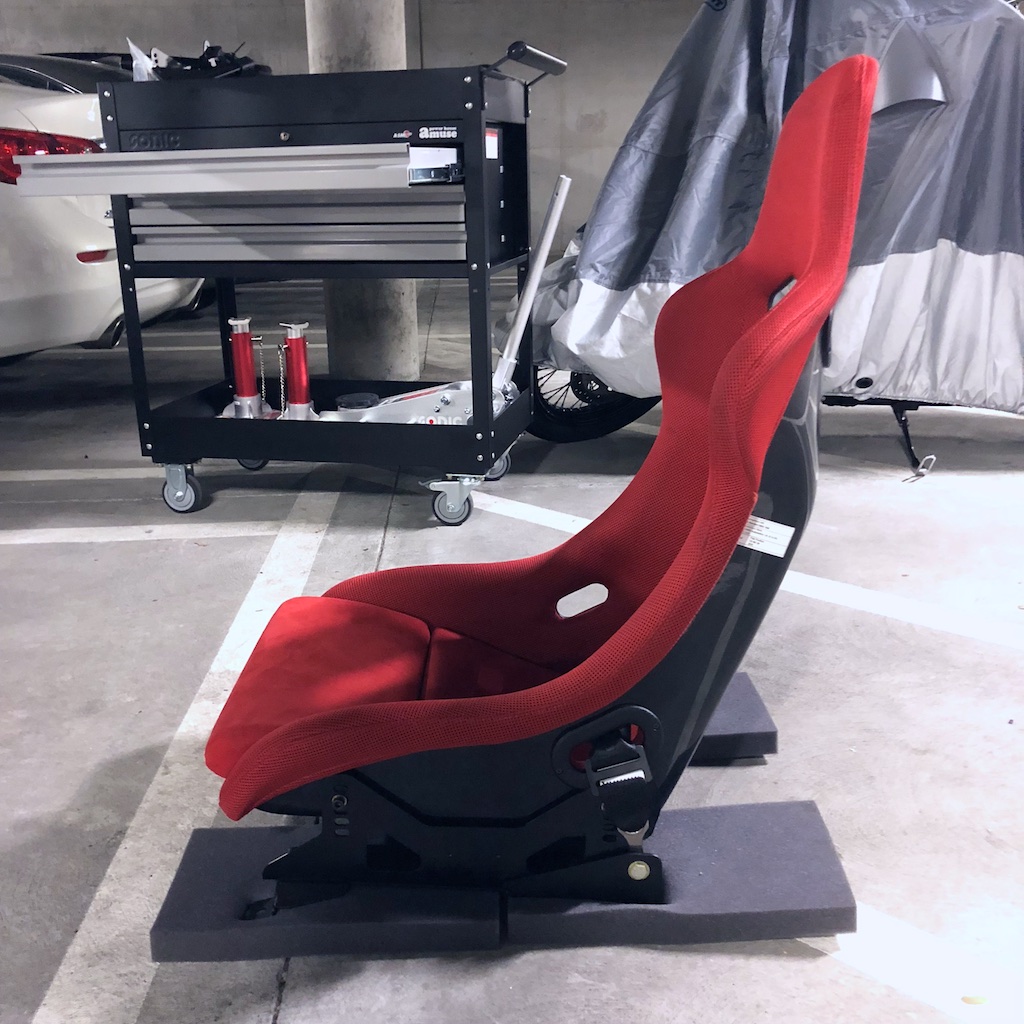
I installed the passenger side mount first. I decided to get these new mounts because the new passenger side mount design includes a redesigned 1-piece base with built in seat belt mounts on both sides to accommodate the way the 06+ S2000 passenger seats are setup. I listed all the different parts and hardware used for the Schroth lap belt setup in the previous post.
For the passenger side, I decided to use the "fixed" mounts that PCI calls their adjustable mount. This mount is adjustable by loosening the side mounts where they attach to the base. When using the Pole Position the adjustment bolts aren't really accessible so the base and everything needs to be removed from the car to adjust. With narrower seats the side mounts could be flipped to likely allow for adjustment with everything still in the car and some extensions. I never have any need to adjust the position of the passenger seat, so to save weight I went for this type. These are actually 4.7lbs lighter than the previous mount setup I had with sliders on the passenger side.
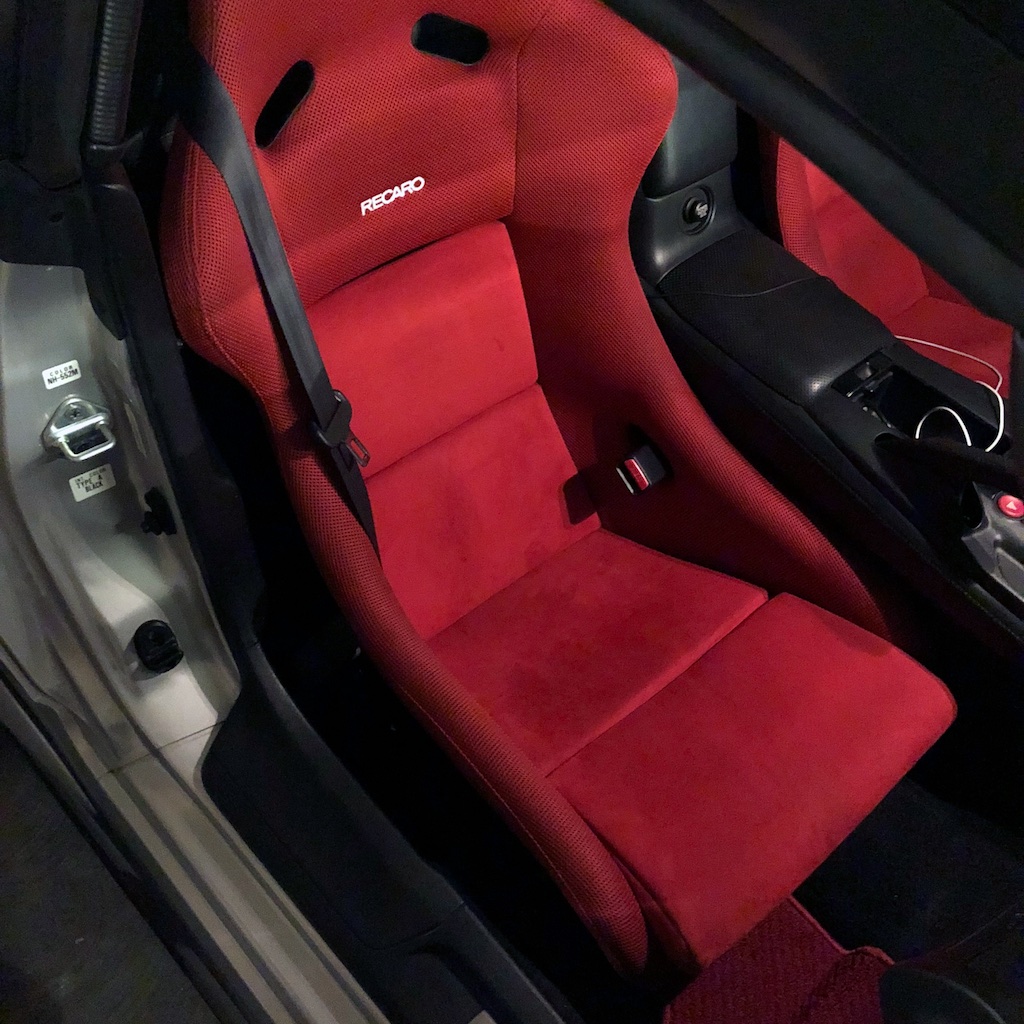
Here is the previous setup. The base on this is actually 2-piece so much trickier to install and setup compared to the single piece base on the new design. These side mounts also only allowed for a single rear position height with the Pole Position. You can also see how the seat belt extender was mounted to the base at a slightly compromised angle.
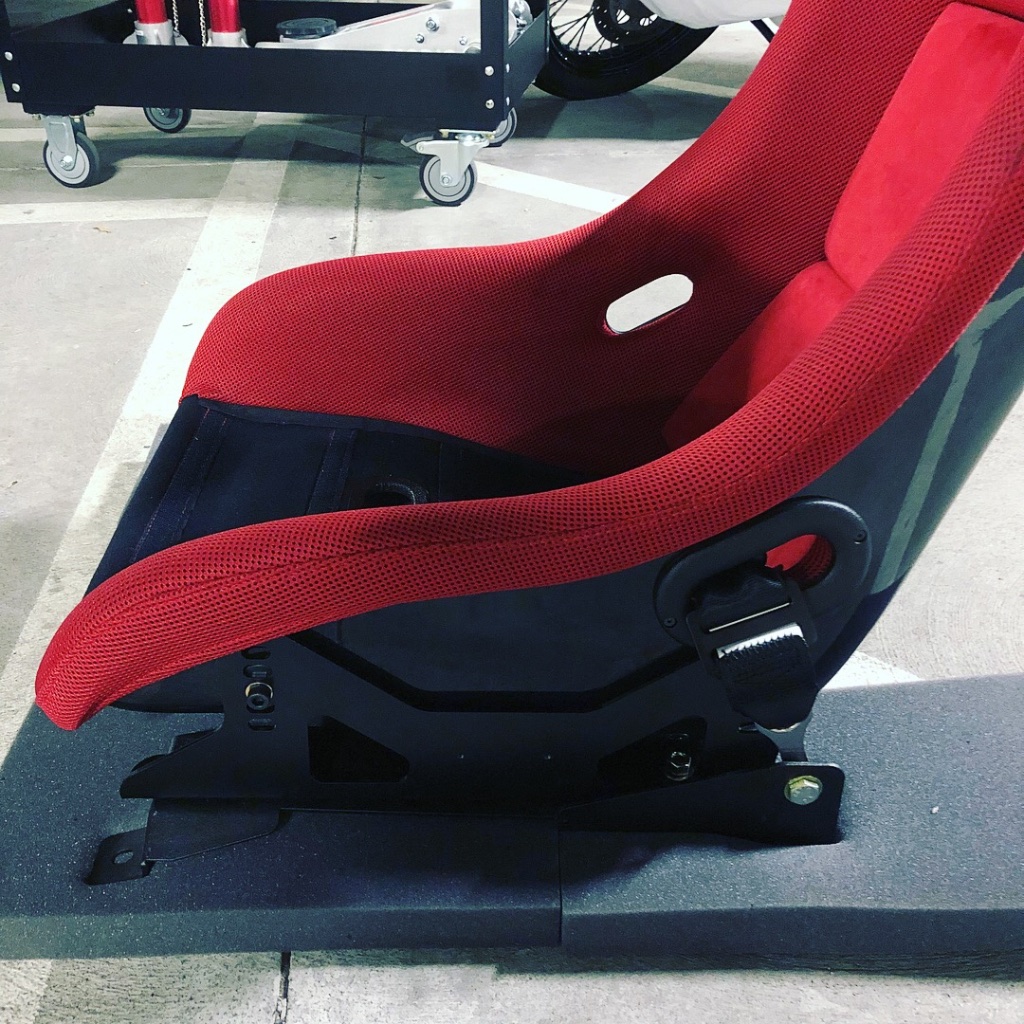
And the new mounts with the Schroth racing lap belt/OEM style receptacle setup. This mount puts the seat belt mount in a much nicer spot and is all just integrated directly into the base which is really cool. It is a CNC laser cut and bent base so it is extremely sturdy.
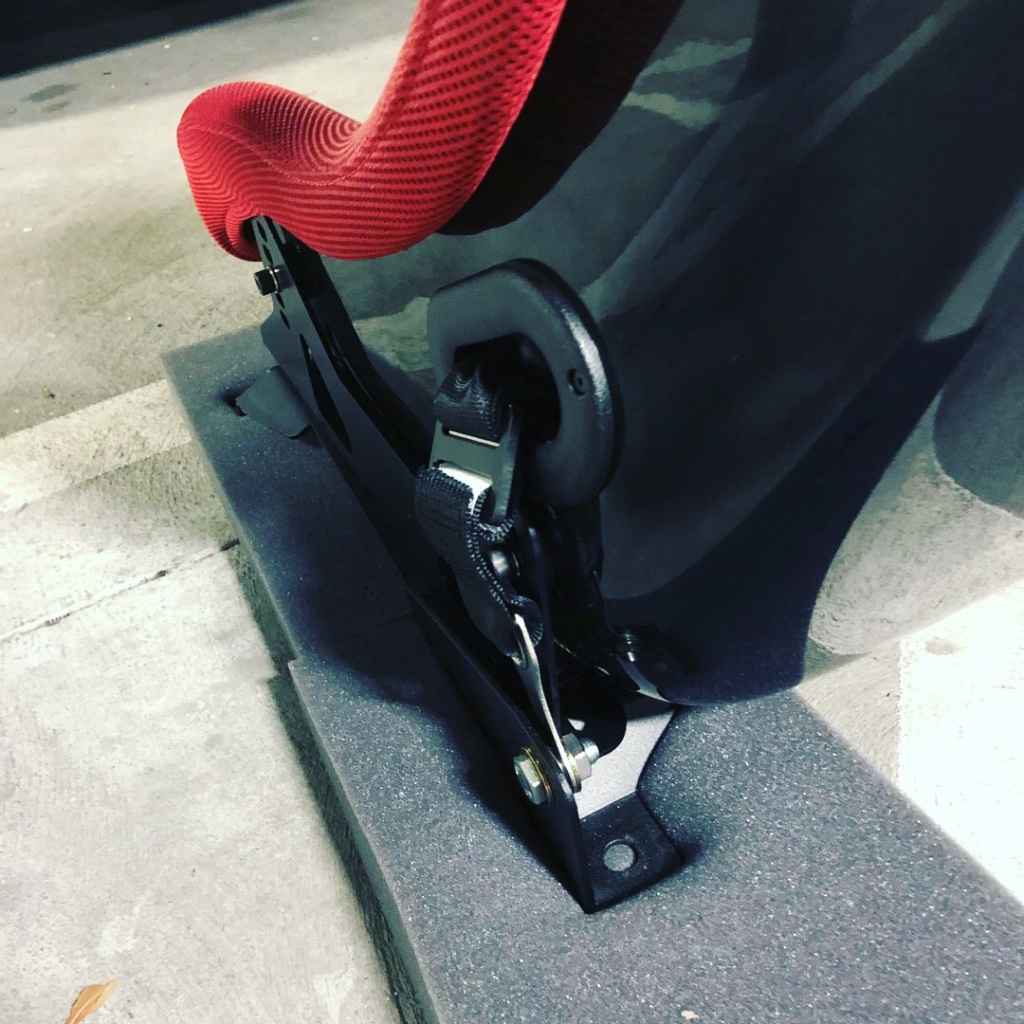
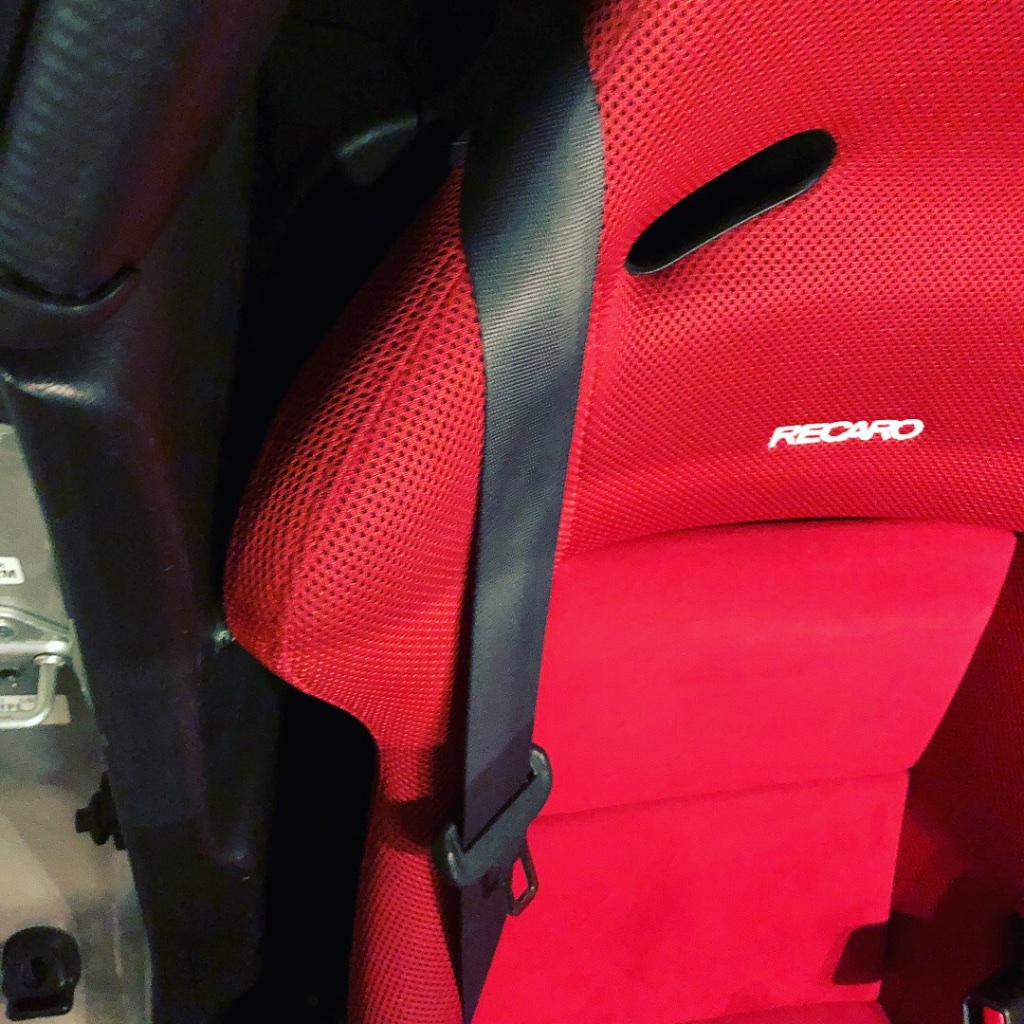
Here you can see the way the Schroth lap belt is wrapped and mounted. I am using a Schroth 7/16-20 x 25mm mounting bolt, Schroth mounting sleeve (which is pushed into the silver mounting bracket the webbing is sewn into), and washers on each side and nut. It is mounted like this from the outside in: Bolt, washer, side mount, Schroth sleeve, Schroth mounting bracket, washer, nut. This allows the mounting bracket to pivot on the sleeve and align itself when a small amount of force is applied.
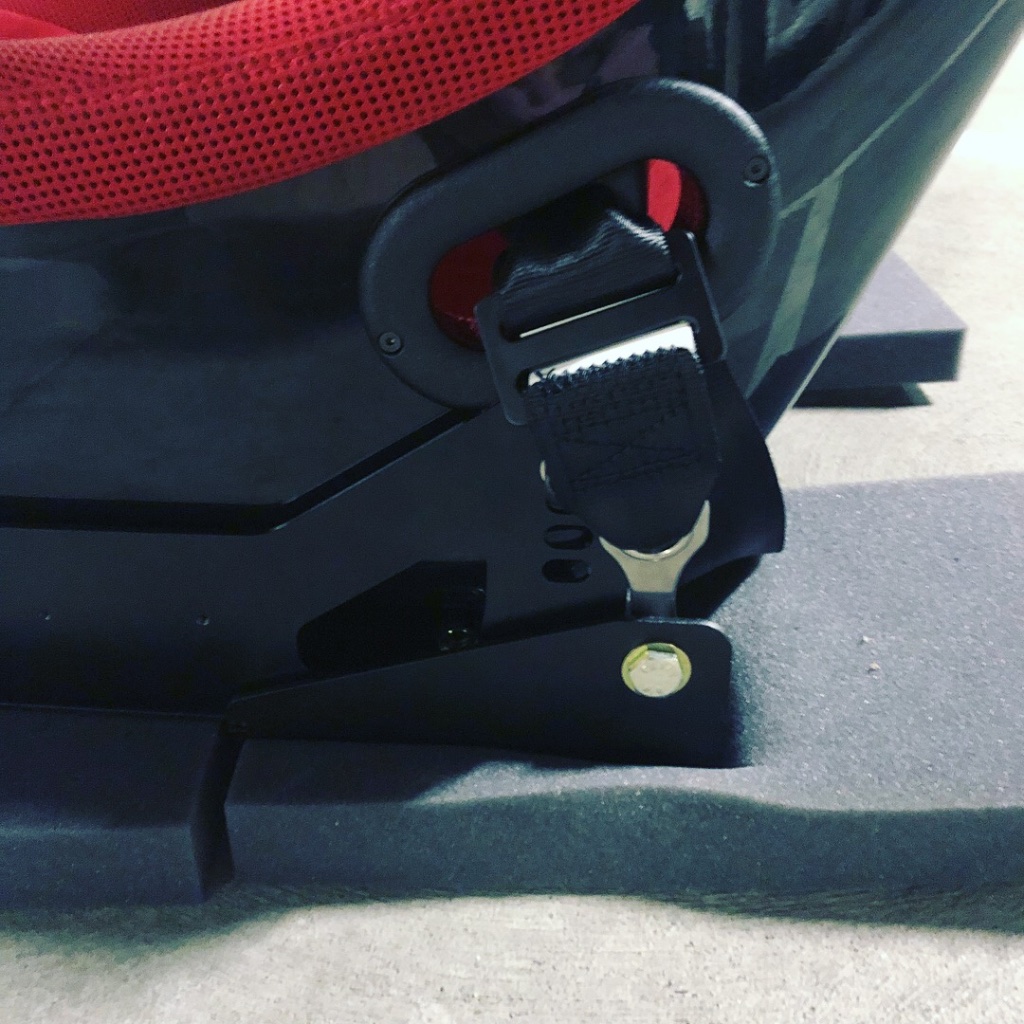
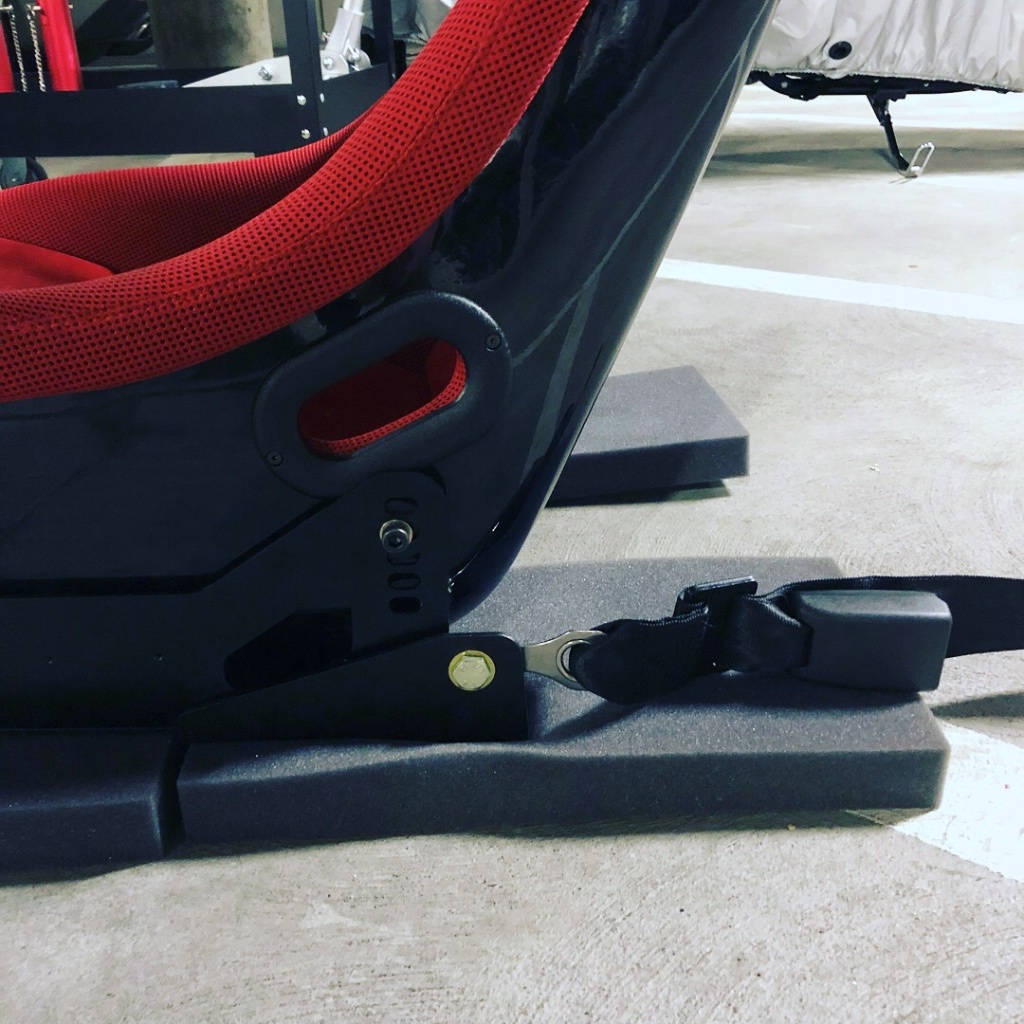
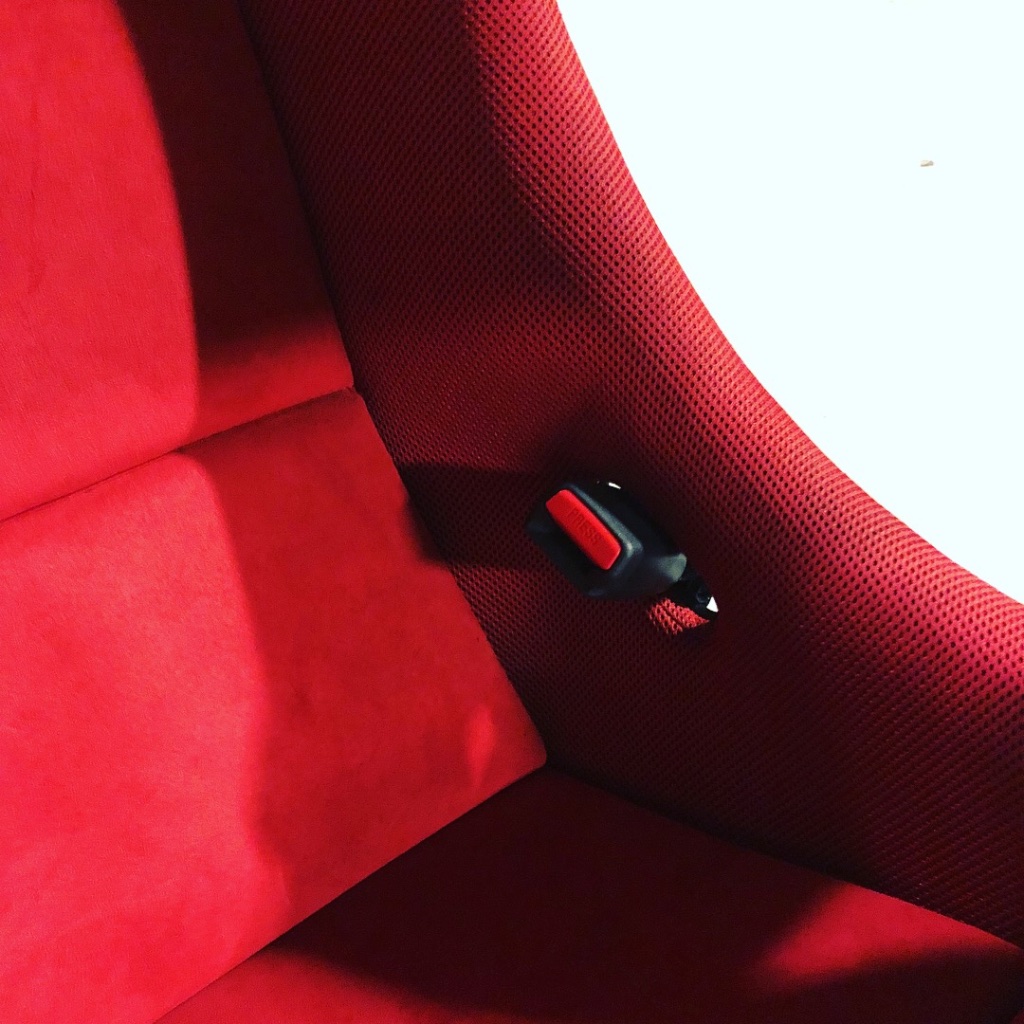
Because of the direction I wrapped the bracket, it also provides some tension to keep the receptacle up in the seat rather than falling down like when just using a seat belt extender. So no fishing the receptacle from under neath when getting into the seat.
Extremely happy with how I was able to get everything to fit into the car. To the limit of how it could fit in the car with no rubbing or clearance issues. So much easier to install with the 1 piece base. I just installed everything on the mount, with the side mounts loosely installed on the base. Mounted the seat in the car, making sure all the bolts were in place in the base to keep it from shifting. Got into the seat, and shifted it around and as far back as I could. I was able to slide the seat all the way back to the point of it being right up against the back of the cockpit. I moved it just forward enough from that point to where it wouldn't be contacting anything, and then got out of the seat and tighten up the front side mount bolts to lock the positioning into place. After that I just had to remove the seat from the car, remove the rear bolts that hold the seat to the side mount so I could rotate it up and tighten down the rear side mount bolts to the base. So with the seat position all locked in place it is just a matter of tightening everything back up in installing back into the car.
In my case I put the seat at 4/5 on both the front and rear of the side mounts. 4 was the lowest position the Pole Position could sit at the rear of the mount, which puts the rear of the seat on the floor, the front could be adjusted however you like but keeping it at the same position worked well to recline the seat the correct amount. The PCI mounts will include some 1/4" side mount spacers you will need to use when mounting a Pole Position to properly clear everything.
You will definitely need some extensions when installing the inside rear bolt on the base and for the other bolts. I also used a little magnetic extender arm to place the inside rear bolt, and of course a good light. You will also need to make sure the shoulder portion of the seat belt is passed through the outside harness hole and then mounted properly to the base before mounting the seat back into the car. If you forget to do this you will have to remove the seat from the car again to do it. The PCI mounts should include the 7/16-20 nut needed to mount the seat belt to the base. I had many available as I put in a Fastenal order for the M8 bolts used to mount the seat to the side mounts as well as washers and other things. If anyone has question about the hardware needed check my previous post or feel free to ask.
I installed the passenger side mount first. I decided to get these new mounts because the new passenger side mount design includes a redesigned 1-piece base with built in seat belt mounts on both sides to accommodate the way the 06+ S2000 passenger seats are setup. I listed all the different parts and hardware used for the Schroth lap belt setup in the previous post.
For the passenger side, I decided to use the "fixed" mounts that PCI calls their adjustable mount. This mount is adjustable by loosening the side mounts where they attach to the base. When using the Pole Position the adjustment bolts aren't really accessible so the base and everything needs to be removed from the car to adjust. With narrower seats the side mounts could be flipped to likely allow for adjustment with everything still in the car and some extensions. I never have any need to adjust the position of the passenger seat, so to save weight I went for this type. These are actually 4.7lbs lighter than the previous mount setup I had with sliders on the passenger side.
Here is the previous setup. The base on this is actually 2-piece so much trickier to install and setup compared to the single piece base on the new design. These side mounts also only allowed for a single rear position height with the Pole Position. You can also see how the seat belt extender was mounted to the base at a slightly compromised angle.
And the new mounts with the Schroth racing lap belt/OEM style receptacle setup. This mount puts the seat belt mount in a much nicer spot and is all just integrated directly into the base which is really cool. It is a CNC laser cut and bent base so it is extremely sturdy.
Here you can see the way the Schroth lap belt is wrapped and mounted. I am using a Schroth 7/16-20 x 25mm mounting bolt, Schroth mounting sleeve (which is pushed into the silver mounting bracket the webbing is sewn into), and washers on each side and nut. It is mounted like this from the outside in: Bolt, washer, side mount, Schroth sleeve, Schroth mounting bracket, washer, nut. This allows the mounting bracket to pivot on the sleeve and align itself when a small amount of force is applied.
Because of the direction I wrapped the bracket, it also provides some tension to keep the receptacle up in the seat rather than falling down like when just using a seat belt extender. So no fishing the receptacle from under neath when getting into the seat.
Extremely happy with how I was able to get everything to fit into the car. To the limit of how it could fit in the car with no rubbing or clearance issues. So much easier to install with the 1 piece base. I just installed everything on the mount, with the side mounts loosely installed on the base. Mounted the seat in the car, making sure all the bolts were in place in the base to keep it from shifting. Got into the seat, and shifted it around and as far back as I could. I was able to slide the seat all the way back to the point of it being right up against the back of the cockpit. I moved it just forward enough from that point to where it wouldn't be contacting anything, and then got out of the seat and tighten up the front side mount bolts to lock the positioning into place. After that I just had to remove the seat from the car, remove the rear bolts that hold the seat to the side mount so I could rotate it up and tighten down the rear side mount bolts to the base. So with the seat position all locked in place it is just a matter of tightening everything back up in installing back into the car.
In my case I put the seat at 4/5 on both the front and rear of the side mounts. 4 was the lowest position the Pole Position could sit at the rear of the mount, which puts the rear of the seat on the floor, the front could be adjusted however you like but keeping it at the same position worked well to recline the seat the correct amount. The PCI mounts will include some 1/4" side mount spacers you will need to use when mounting a Pole Position to properly clear everything.
You will definitely need some extensions when installing the inside rear bolt on the base and for the other bolts. I also used a little magnetic extender arm to place the inside rear bolt, and of course a good light. You will also need to make sure the shoulder portion of the seat belt is passed through the outside harness hole and then mounted properly to the base before mounting the seat back into the car. If you forget to do this you will have to remove the seat from the car again to do it. The PCI mounts should include the 7/16-20 nut needed to mount the seat belt to the base. I had many available as I put in a Fastenal order for the M8 bolts used to mount the seat to the side mounts as well as washers and other things. If anyone has question about the hardware needed check my previous post or feel free to ask.
The following users liked this post:
newold_m (08-15-2021)