

Extended Stud Install DIY - Front

Thread Starter


Joined: Nov 2013
Posts: 868
Likes: 22
So, my new wheels don't have the openings in the rear face to accommodate the oem stud heads when you use a version 2 spacers, so pretty much limited me to a 20MM being the smallest spacer I could run. I decided that OEM or aftermarket wheels, I'd never again run less than 10MM up front so bit the bullet on a set of Ichiba version one spacers with longer studs.
Now, I know I'll get flamed for it, but I still wanted to share with the community because I couldn't find any DIY threads on it with pictures. I know the right way to do it is pull and have bearing pressed etc, but I had gone this route on my Acura TL with great success. I do not track the car, but I do not feel unsafe with a small portion of the stud head shaved as I've been driving like that for years on a car that I drive spiritedly that weights a half ton more.
Also, the follow up is I hit the shaved area with some flameproof paint to keep it from rusting after.
Start by removing wheel, caliper, rotor. I'd done this recently to paint the hub so it was a breeze to come off.
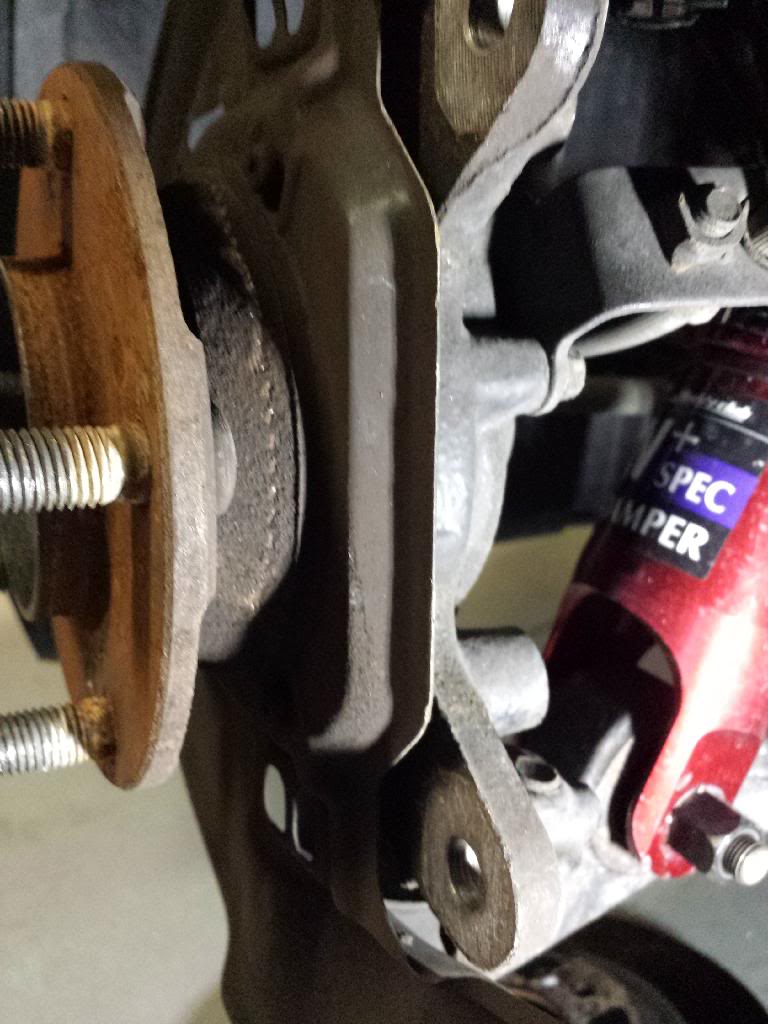
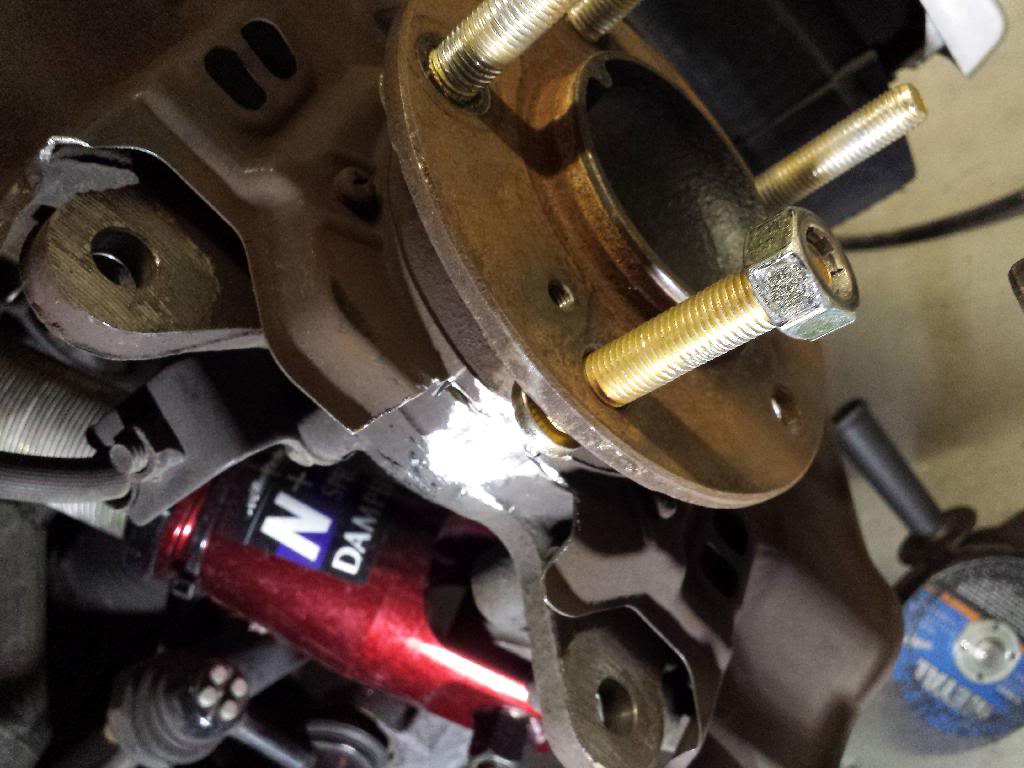
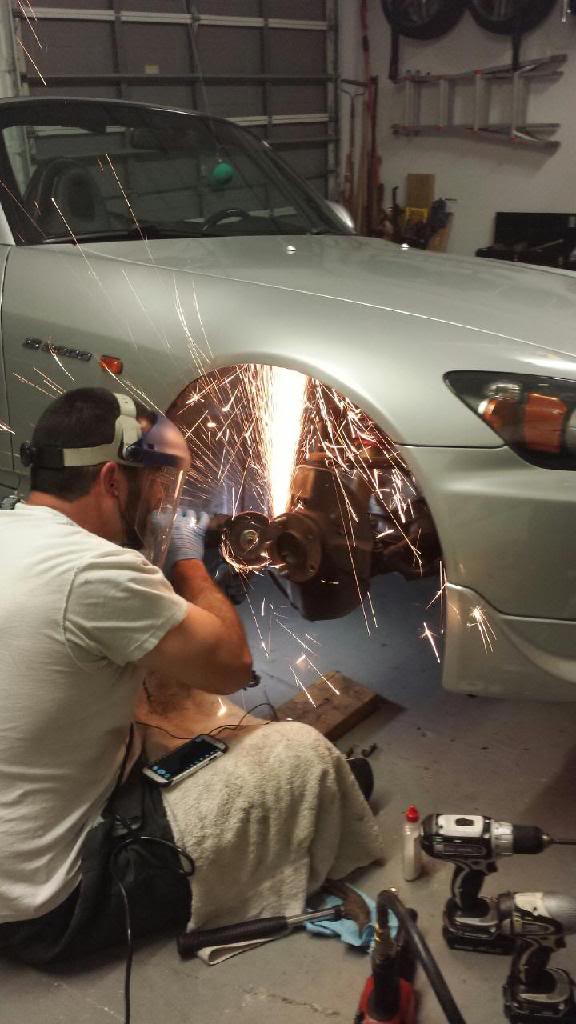
Here is where you'll need a combination of dremel and angle grinder to take out a chunk of the heat shield, as well as lightly shave the knuckle assembly housing slightly...on the TL, this was all I needed and I was able to hammer out (damaging) the old stud, shaving the new one and carefully putting it back into place. With the S2000 I highly suggest you buy a 12 x 1.5MM rethreading nut (good to have anyway) because I DID slightly damage every single extended stud on the way back in. I used the rethreading nut to fix the threads along with to pull them into place. Keep the threading lubricated as you do that.
Channel created
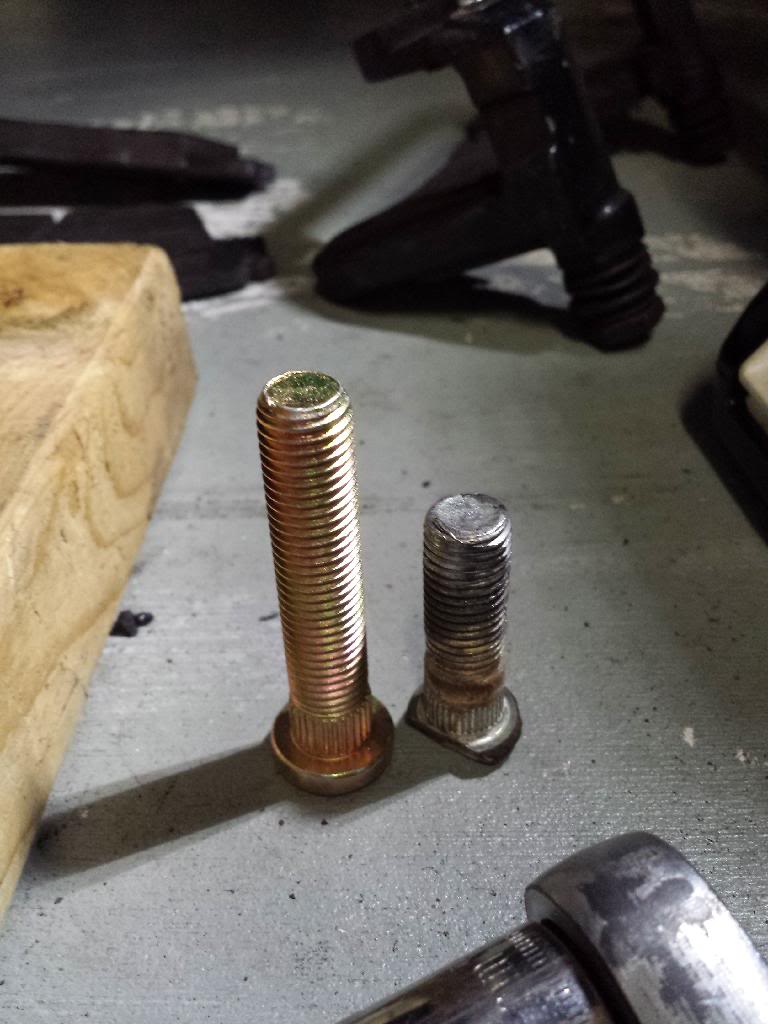
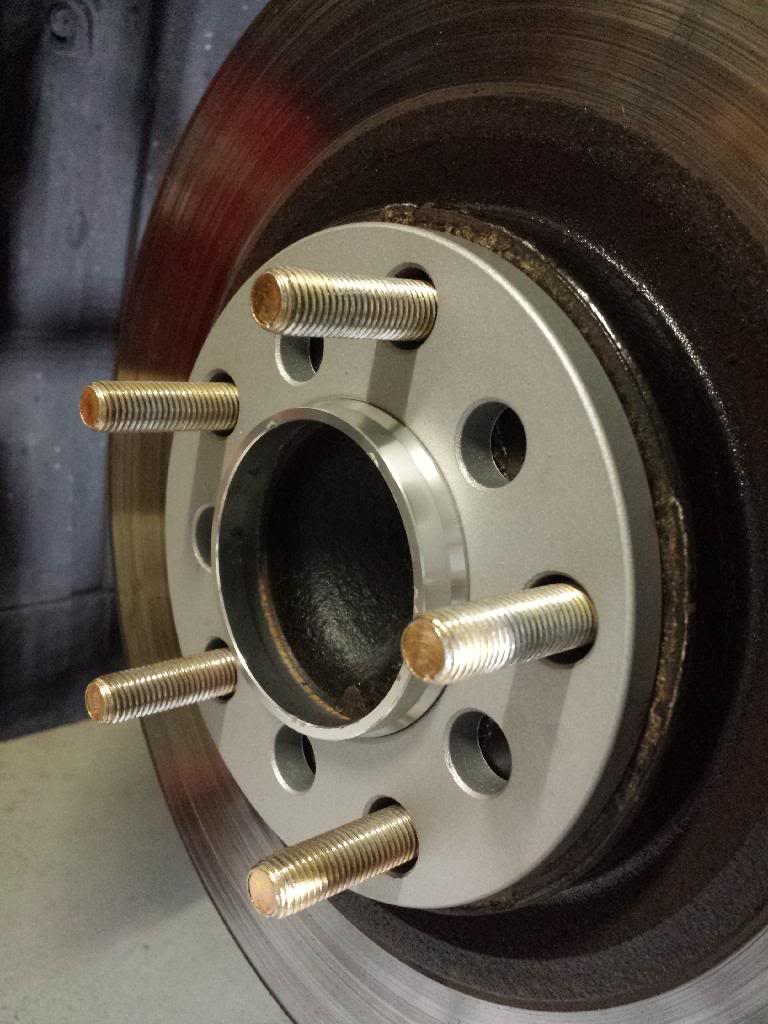
Size difference
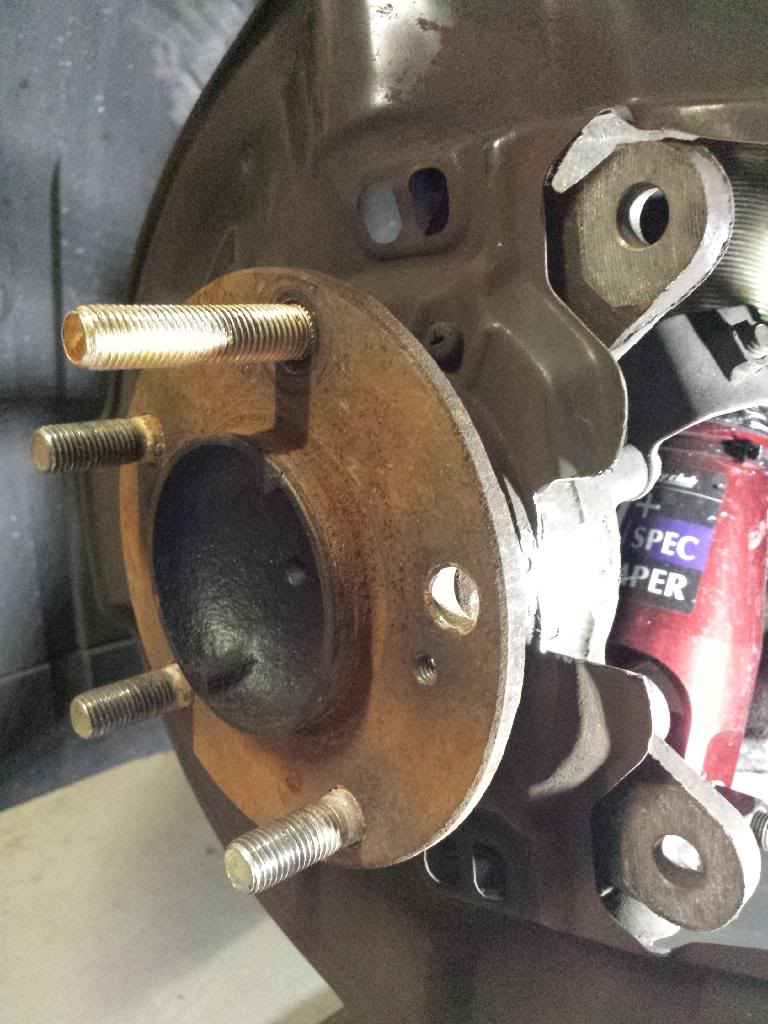
With an old lugnut you don't care about, carefully pound out the old stud (don't hit the hub, it'll suck to have to reshape it)...then use a punch with a smaller hammer to lightly push it all the way through...I use that same hammer from behind to gently knock the new stud in.
Shave down the new nut
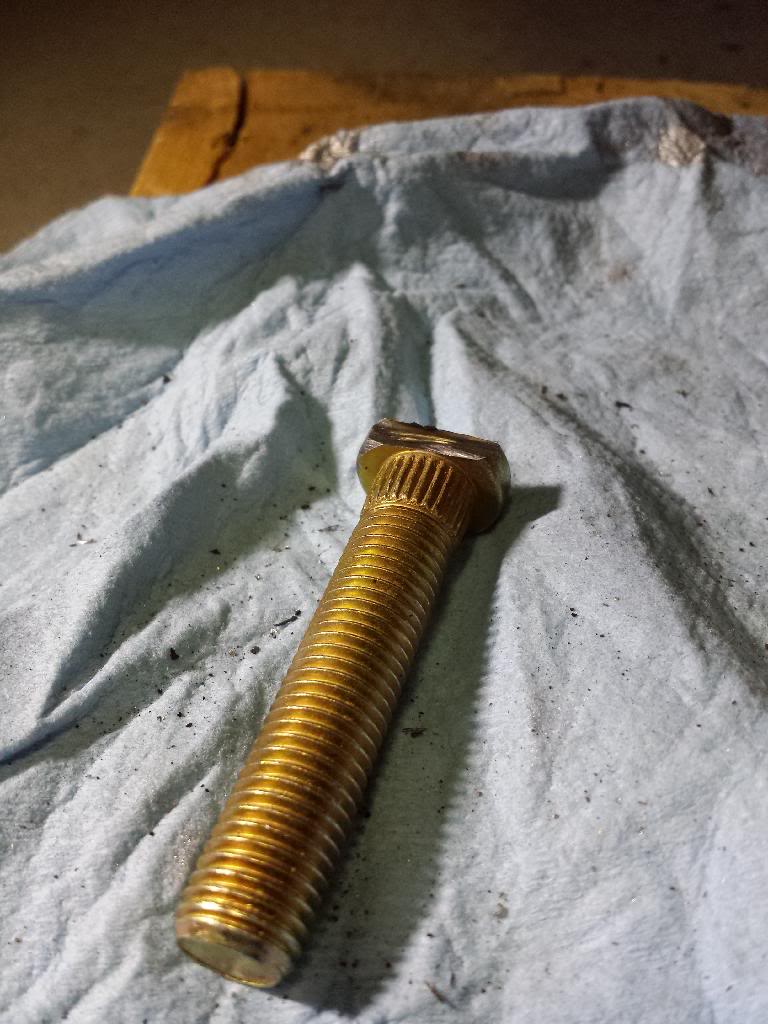
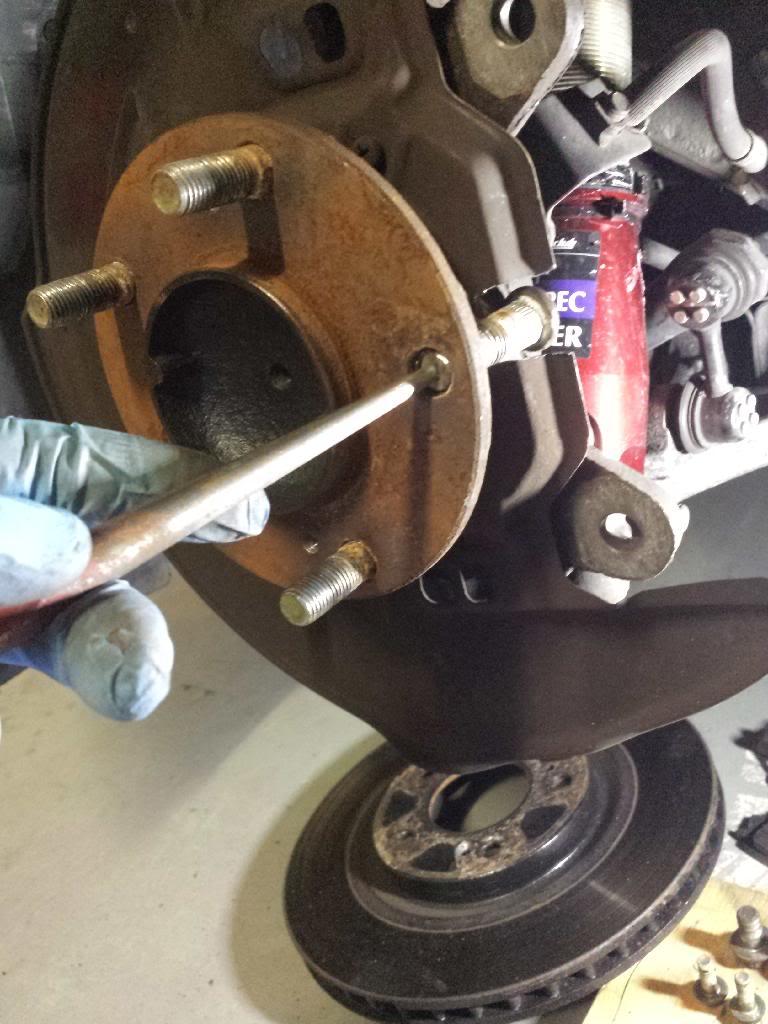
and voila...with help from the rethreading nut and my 650 ft/lb impact gun...
I hope that makes sense...I do have all the tools necessary and if I missed a step or something doesn't make sense...please feel free to PM me for more information.
just a typical Friday night, right?
Again, I realize this is uncouth approach to this, but it worked for me. I contemplated not sharing, but oh well, I'll put my thick skin on.
Now, I know I'll get flamed for it, but I still wanted to share with the community because I couldn't find any DIY threads on it with pictures. I know the right way to do it is pull and have bearing pressed etc, but I had gone this route on my Acura TL with great success. I do not track the car, but I do not feel unsafe with a small portion of the stud head shaved as I've been driving like that for years on a car that I drive spiritedly that weights a half ton more.
Also, the follow up is I hit the shaved area with some flameproof paint to keep it from rusting after.
Start by removing wheel, caliper, rotor. I'd done this recently to paint the hub so it was a breeze to come off.

Here is where you'll need a combination of dremel and angle grinder to take out a chunk of the heat shield, as well as lightly shave the knuckle assembly housing slightly...on the TL, this was all I needed and I was able to hammer out (damaging) the old stud, shaving the new one and carefully putting it back into place. With the S2000 I highly suggest you buy a 12 x 1.5MM rethreading nut (good to have anyway) because I DID slightly damage every single extended stud on the way back in. I used the rethreading nut to fix the threads along with to pull them into place. Keep the threading lubricated as you do that.
Channel created

Size difference

With an old lugnut you don't care about, carefully pound out the old stud (don't hit the hub, it'll suck to have to reshape it)...then use a punch with a smaller hammer to lightly push it all the way through...I use that same hammer from behind to gently knock the new stud in.

Shave down the new nut

and voila...with help from the rethreading nut and my 650 ft/lb impact gun...


I hope that makes sense...I do have all the tools necessary and if I missed a step or something doesn't make sense...please feel free to PM me for more information.
just a typical Friday night, right?

Again, I realize this is uncouth approach to this, but it worked for me. I contemplated not sharing, but oh well, I'll put my thick skin on.


Trending Topics


Joined: Jun 2009
Posts: 1,703
Likes: 34
From: PA
i know how u feel. i had 2 oem studs break on my left side rear so instead of new oems i opted for arp extended and new bearings. pain but i hope not to ever do again cause of the arp studs. now i just hope the fronts hold off or ill be doing that also but ill take it apart because its not bad thing to put new bearings even your idea is pretty clever 
Thread Starter
Joined: Nov 2013
Posts: 868
Likes: 22
No doubt, man...TBH, it's not even a matter of down time, it's just hating to have to outsource labor. If I can figure out a way to NOT have to go somewhere with a press, I'd rather. Although there are a few shops VERY near home that would likely charge me minimally if I were to remove the knuckles and have them press for me. We'll see. I'm happy with the extended studs although it's definitely a commitment as they are too long to run with closed ended lugnuts without the spacer.

Thread
Thread Starter
Forum
Replies
Last Post
zeroptzero
Wheels and Tires
5
May 29, 2014 03:46 AM