
S2000 Lift Kit
 11-28-2018, 12:53 PM
#1


Introducing, the first ever S2000 Lift Kit...
I didn't want to lower my car, but did want the other advantages of such springs. Higher spring rates, progressive springs (less roll, more immediate steering response), etc.
I chose H&R lowering springs, for a variety of reasons. These are among the most modest lowering, spec'ed at .75" front, .6" rear. But on my car, they lowered an inch in front, and barely any at all rear. Yes, I clocked bushings properly. Link below to thread on that. I was very thorough, and redid it twice just to make sure. No, I did not mix up front and rear.
Link to previous thread
For whatever reason, on my car the springs lowered off spec.
So...I raised the front by inventing a 'Lift Kit'. If you have lowering springs that are too low, but otherwise like them, you could do similar.
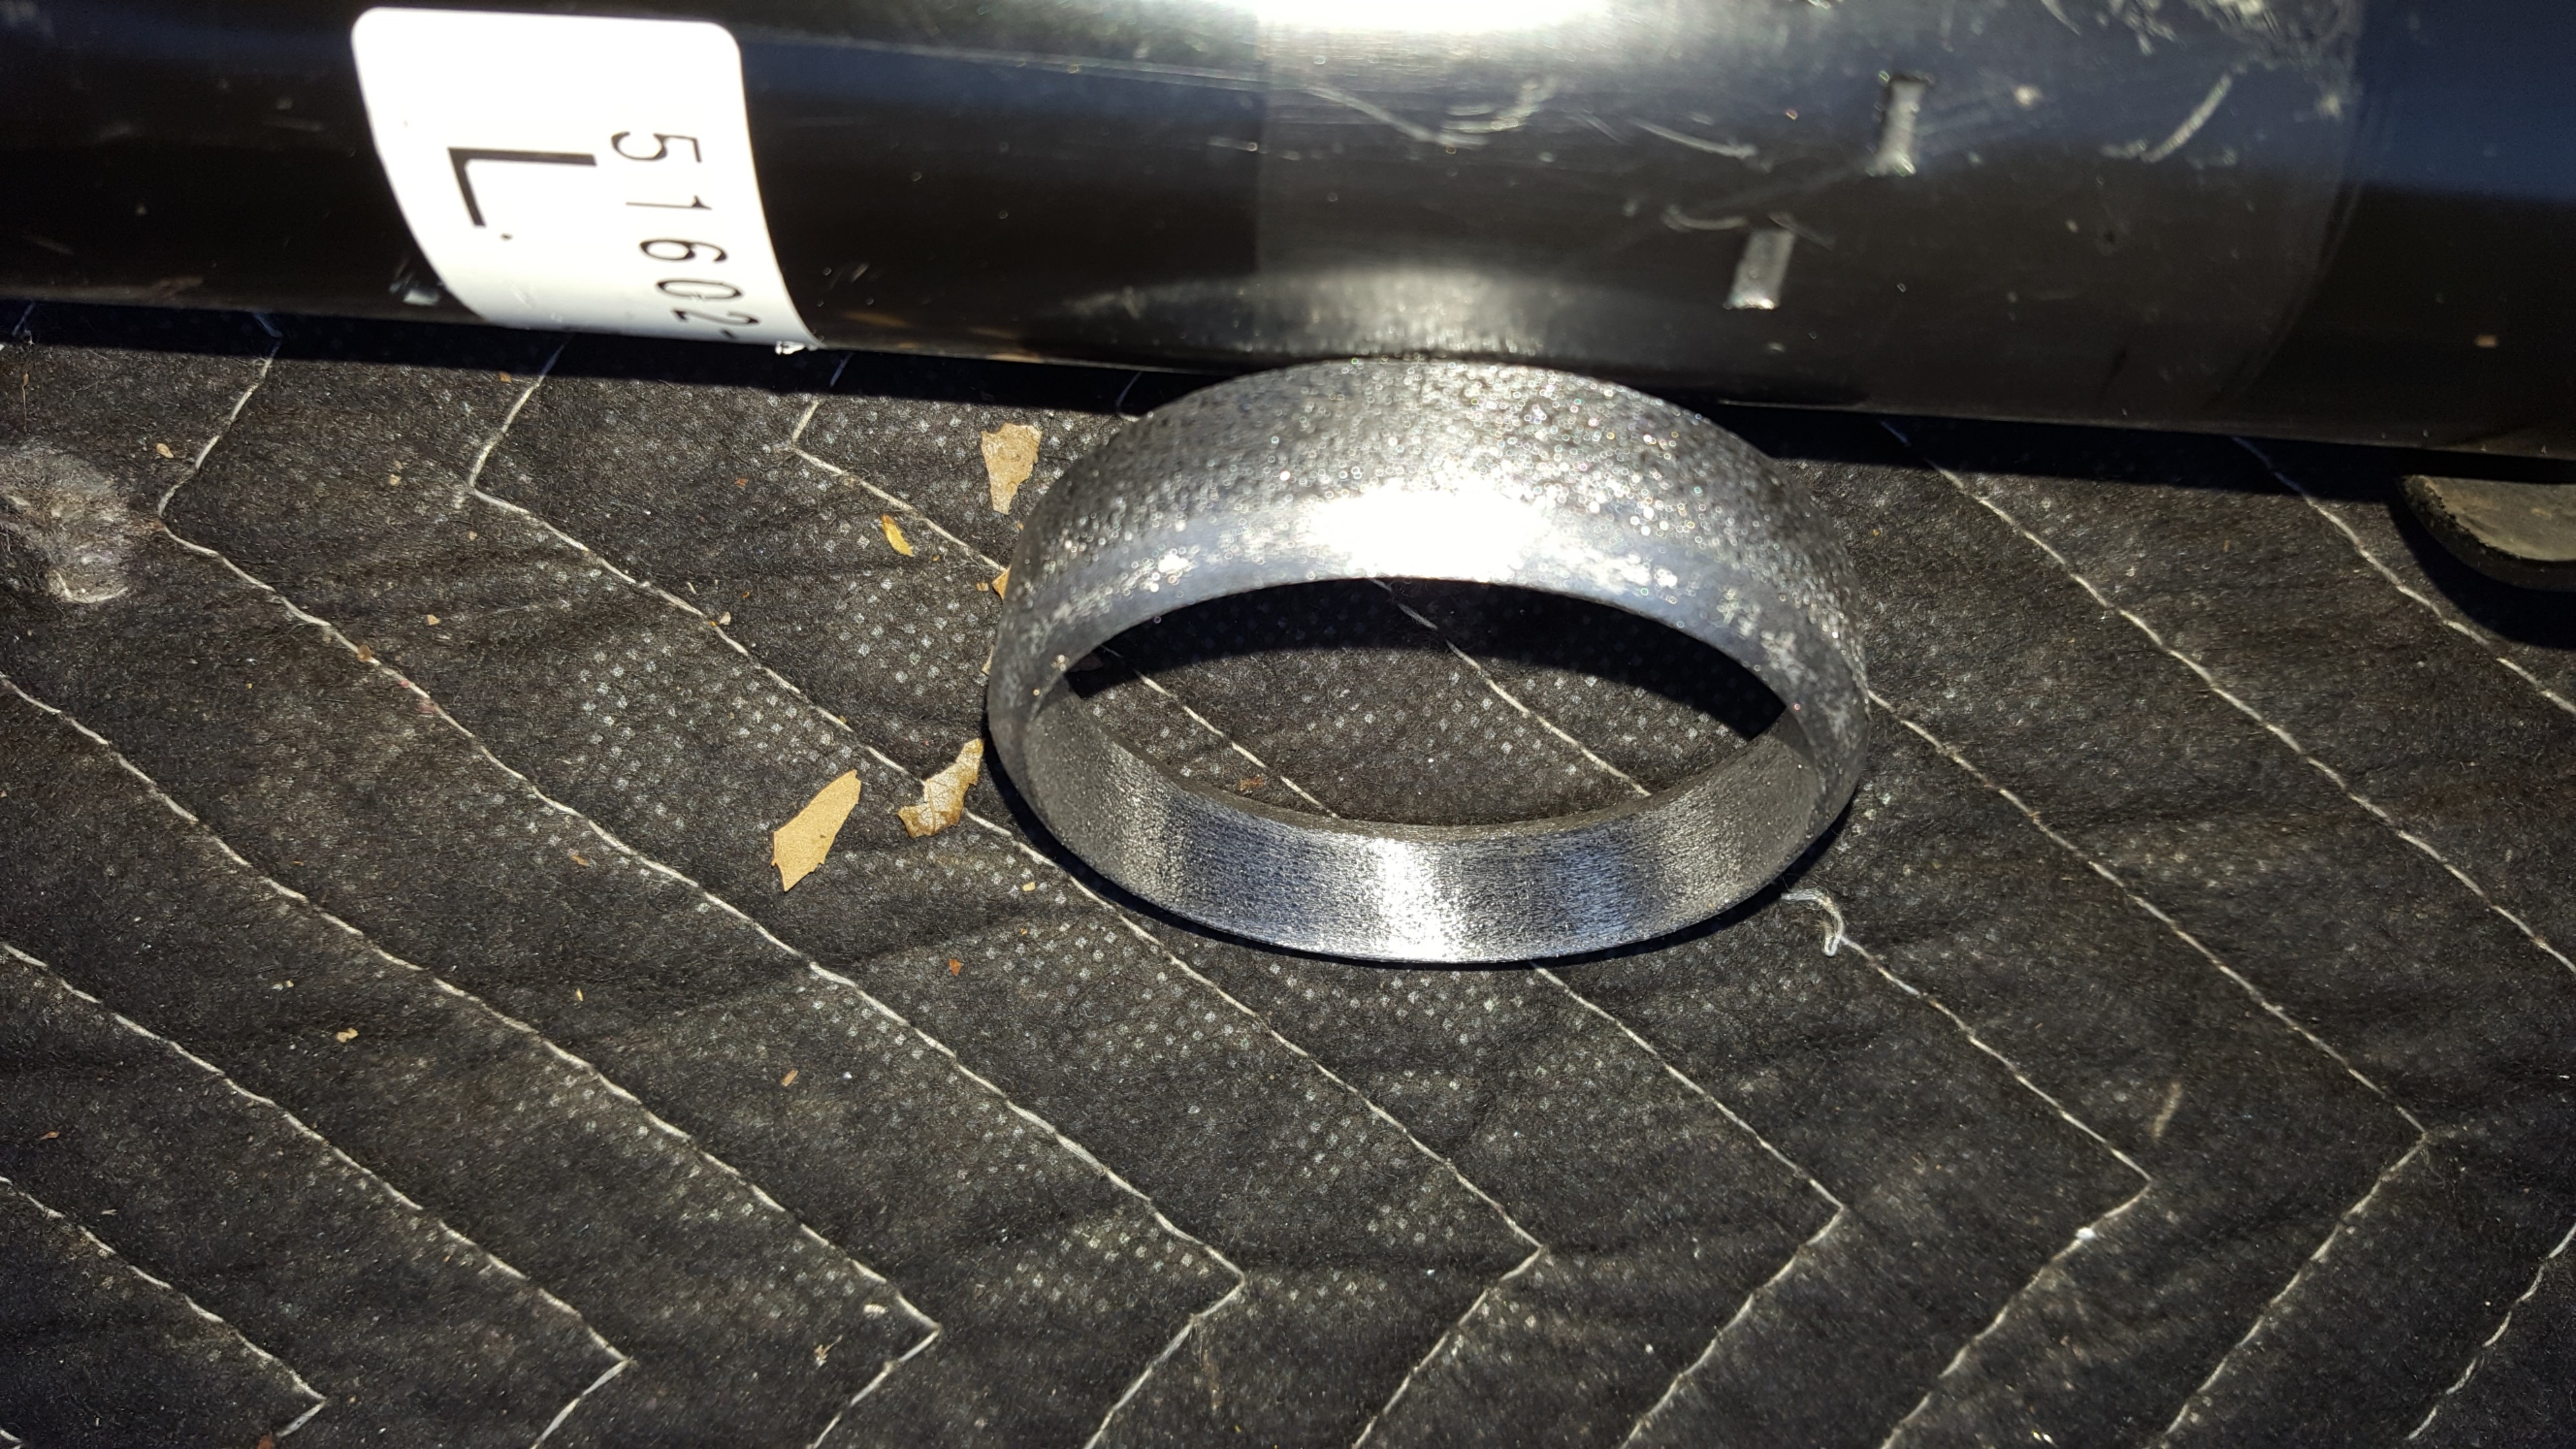
I raised the lower spring perch with a spacer ring I made. This essentially added preload. Since stock shock has no length adjustment, preload raises ride height at the same time that it changes ratio of compression vs rebound stroke length (bringing it back closer to stock values).
I used a 2" diameter cast iron pipe I bought on Amazon (home despot doesn't carry this size. A local plumbing store might). I bought shortest length I could find.
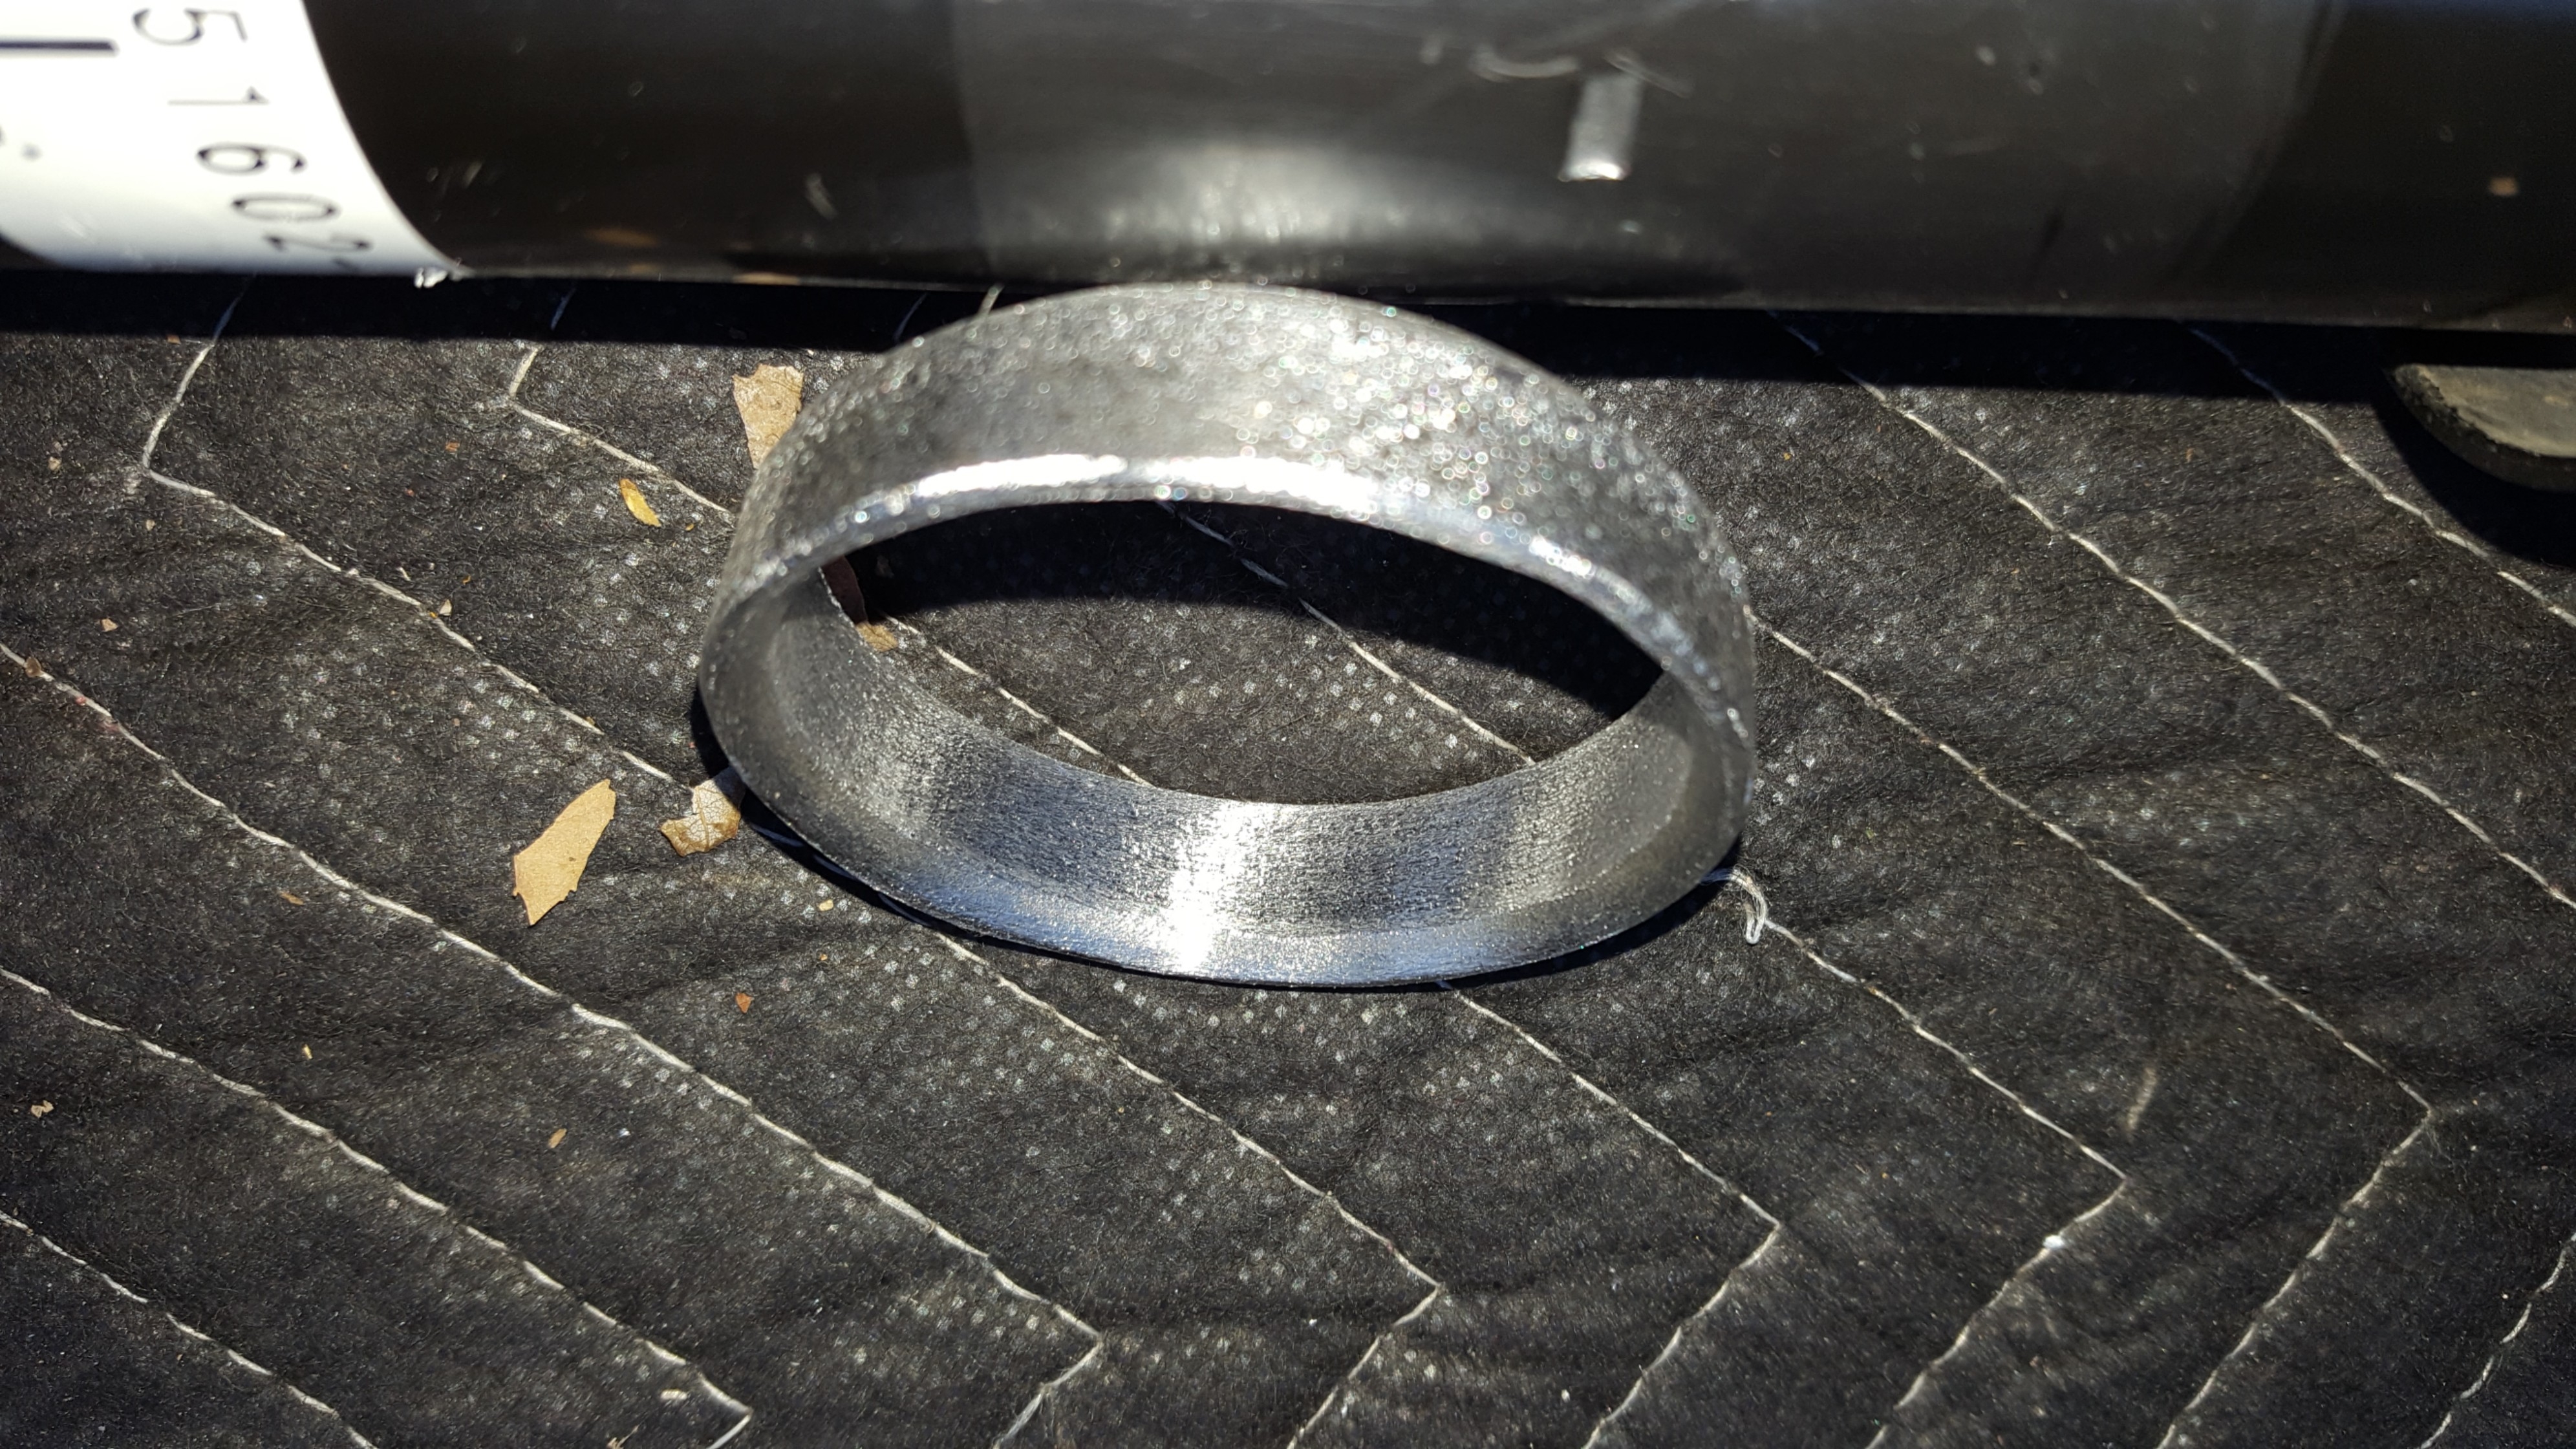
I cut the pipe to length, then ground a bevel top and bottom to fit bevel of shock and lower perch.
Photos:
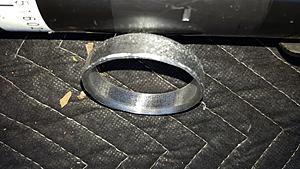
The spacer ring: (its about 3/8" of perch lift.)
Bottom side, note inward bevel:
Top side, note outward bevel:

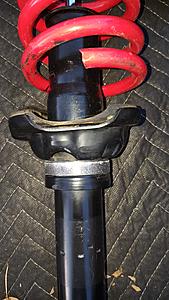
Test fit, unpainted ring:
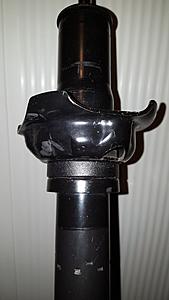
Test fit, completed ring;
Note that an alternative method is to add a spacer on top of tophat. Basically a big, thick washer, with holes for tophat studs. The studs are plenty long enough to accomodate such a spacer. So a plastic or metal spacer between tophat and body would accomplish a similar ride height increase, but not alter shock preload. I tried it first this way, as a Proof Of Concept, but decided to do the perch spacer since it brings suspension travel closer to stock.
I didn't want to lower my car, but did want the other advantages of such springs. Higher spring rates, progressive springs (less roll, more immediate steering response), etc.
I chose H&R lowering springs, for a variety of reasons. These are among the most modest lowering, spec'ed at .75" front, .6" rear. But on my car, they lowered an inch in front, and barely any at all rear. Yes, I clocked bushings properly. Link below to thread on that. I was very thorough, and redid it twice just to make sure. No, I did not mix up front and rear.
Link to previous thread
For whatever reason, on my car the springs lowered off spec.
So...I raised the front by inventing a 'Lift Kit'. If you have lowering springs that are too low, but otherwise like them, you could do similar.
I raised the lower spring perch with a spacer ring I made. This essentially added preload. Since stock shock has no length adjustment, preload raises ride height at the same time that it changes ratio of compression vs rebound stroke length (bringing it back closer to stock values).
I used a 2" diameter cast iron pipe I bought on Amazon (home despot doesn't carry this size. A local plumbing store might). I bought shortest length I could find.
I cut the pipe to length, then ground a bevel top and bottom to fit bevel of shock and lower perch.
Photos:
The spacer ring: (its about 3/8" of perch lift.)
Bottom side, note inward bevel:
Top side, note outward bevel:
Test fit, unpainted ring:

Test fit, completed ring;
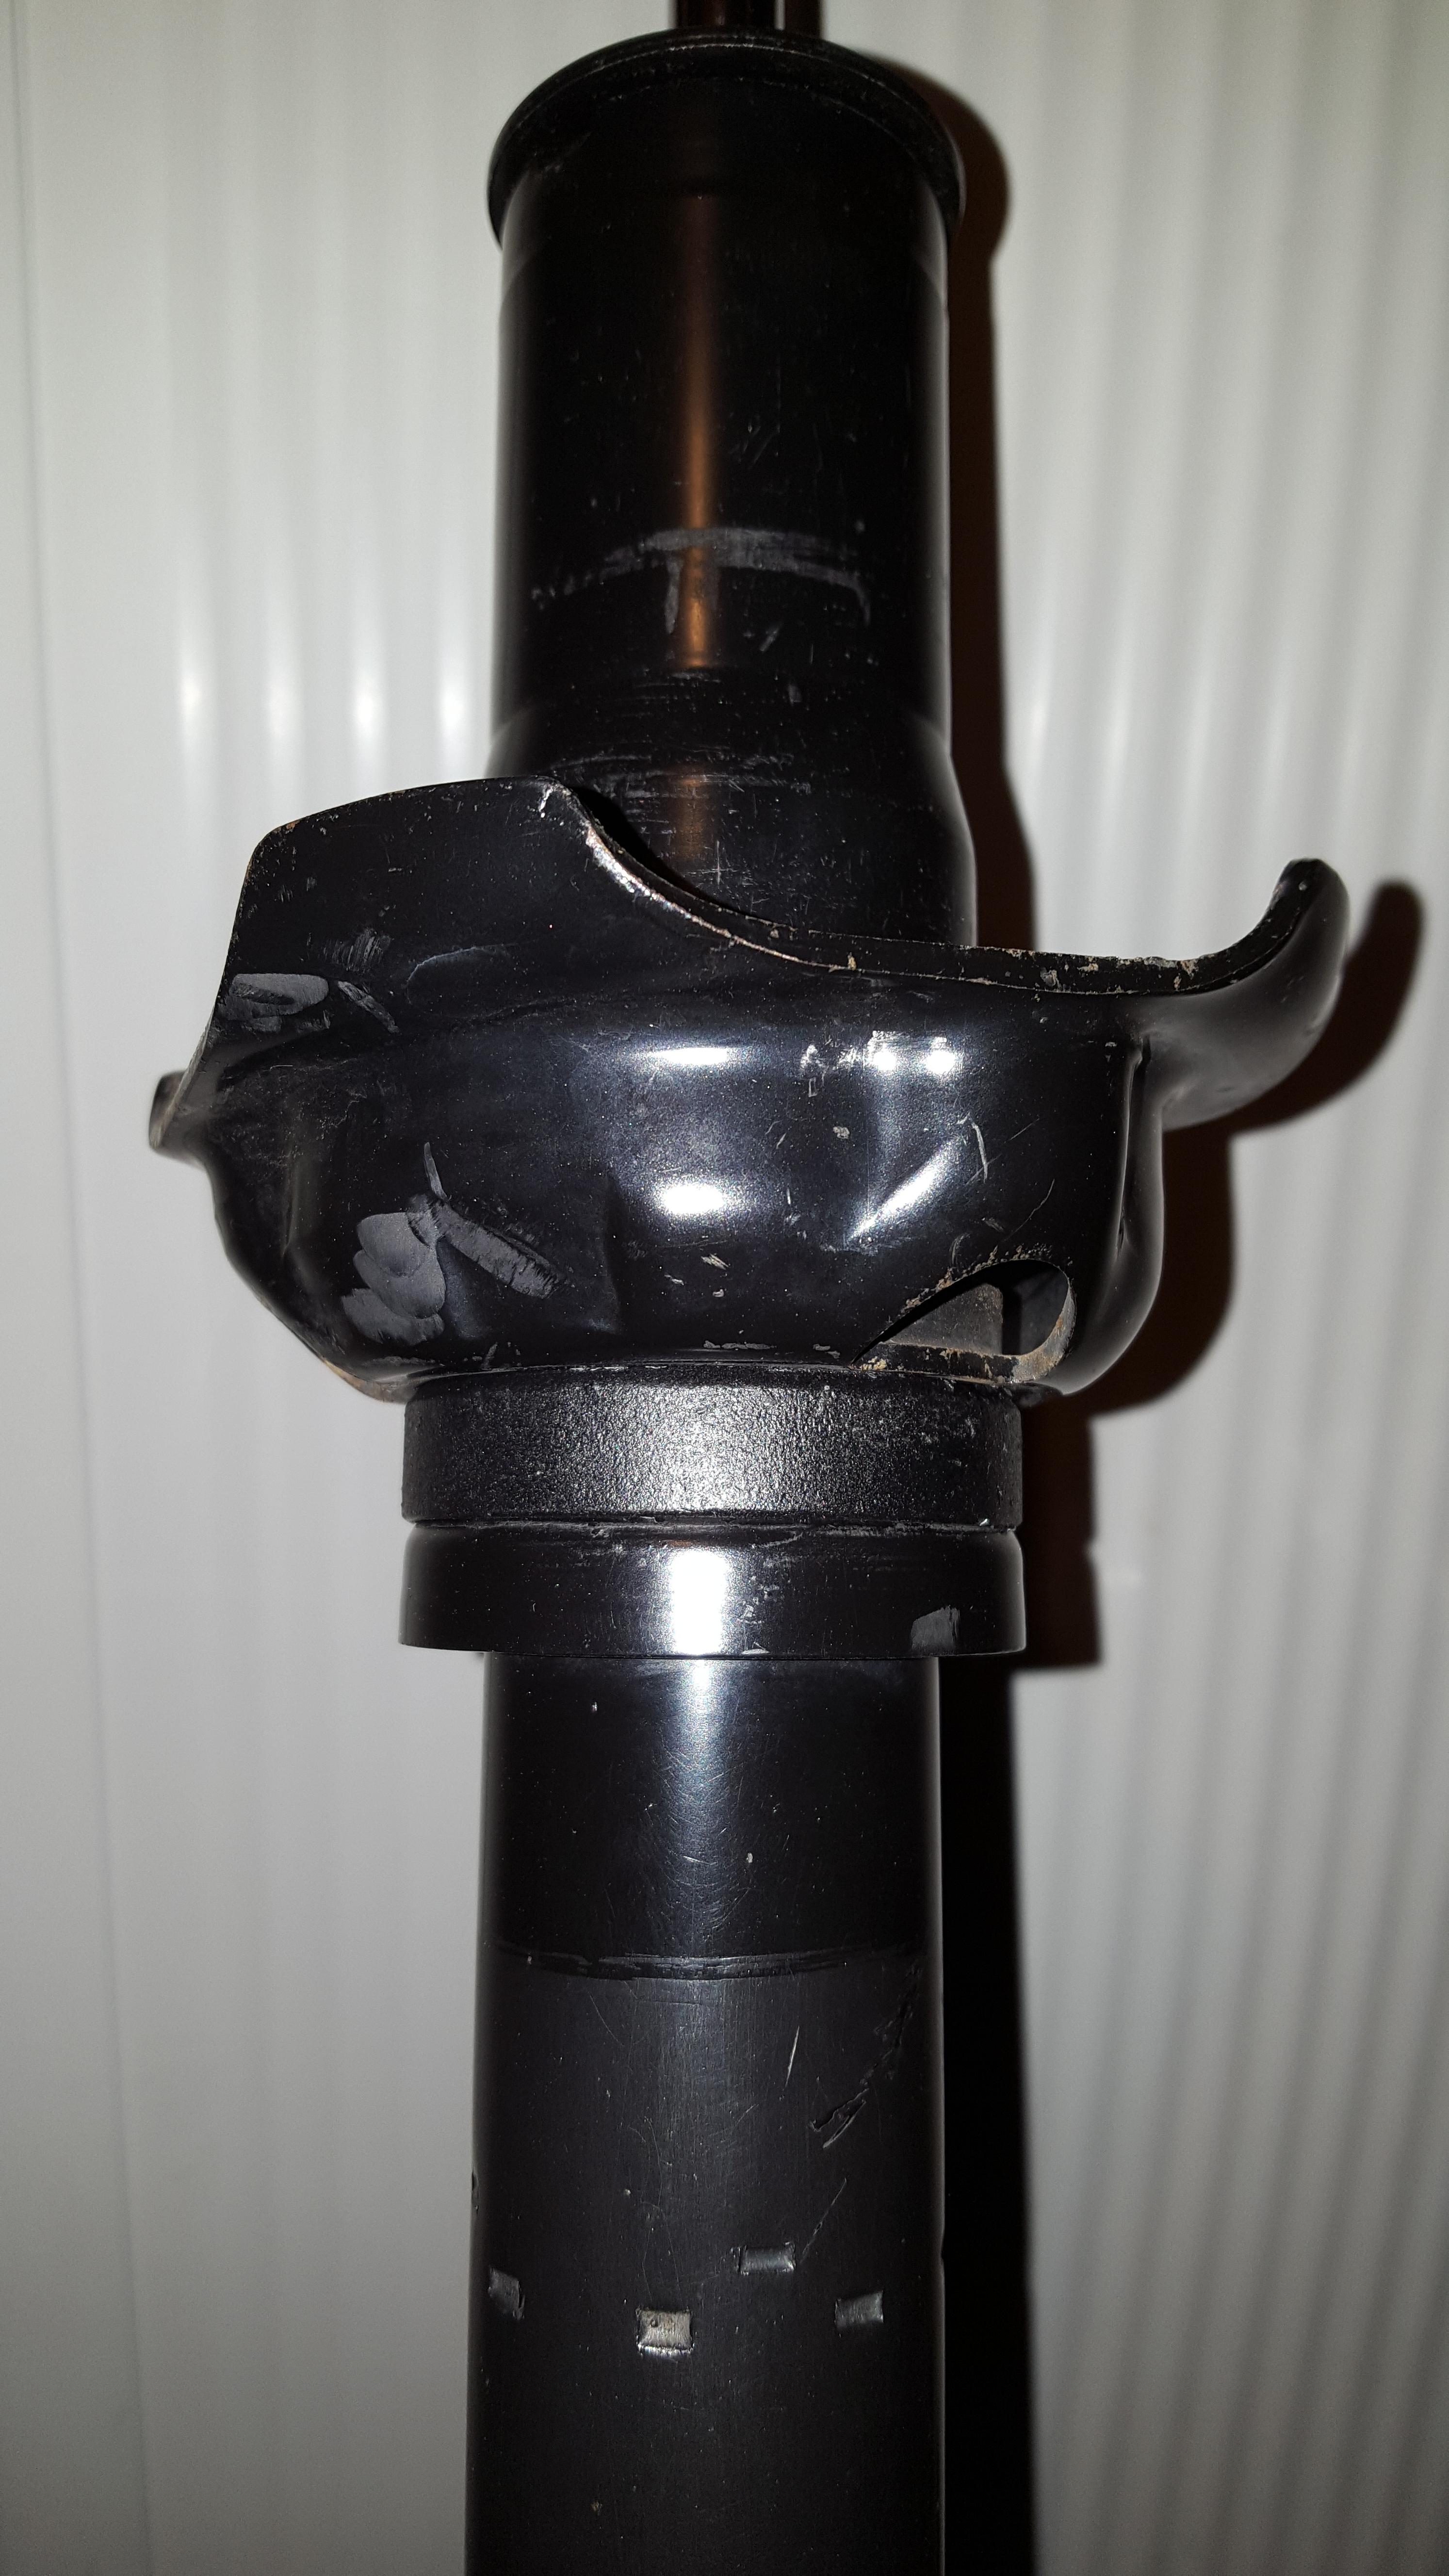
Note that an alternative method is to add a spacer on top of tophat. Basically a big, thick washer, with holes for tophat studs. The studs are plenty long enough to accomodate such a spacer. So a plastic or metal spacer between tophat and body would accomplish a similar ride height increase, but not alter shock preload. I tried it first this way, as a Proof Of Concept, but decided to do the perch spacer since it brings suspension travel closer to stock.
 11-28-2018, 01:11 PM
#2

That's a good idea for oem Honda shocks 
07-13-2020, 10:01 AM
#3
 07-13-2020, 01:07 PM
#4
About .6 inches.
To calculate lift at the tire, you would multipy the size of the spacer by the front suspension motion ratio. I'll look it up later, but the front motion ratio for our cars as measured and published by Sake Bomb Garage is around 1.6.
Edit. I looked it up. Front MR is .589. The 1.6 I quoted was the inverse of this (except the real value is closer to 1.7. Poor memory). So to find your needed spacer size, take desired lift, and multiply by .589. That size spacer would give that much lift. This also works in reverse. To lower X inches, how much to lower at shock. Multiply by .589 (front) or .578 (rear). That will tell you how much to lower at shock.
To do the reverse, calculate how thick a spacer you need, divide the height you want to gain by the motion ratio, to get size of spacer.
Note the spacer needsto have a cone shape top ans bottom. Height of spacer you calculate DOES NOT INCLUDE the height of one of these cone shapes.
So measure the height of the angled cone shape of the ring welded to shock body, and add that to your measurement calculated above.
 07-14-2020, 11:58 AM
#6
I found some mongo huge washers that might work for this. I found them at Grainger Supply. They have brick and mortar stores in many industrial locations. All their inventory is also online. So you can browse online, and buy local (if time is important).
Washers, 2"ID, 4.5"OD
At 4.5" OD, these would be significantly larger than the base of the perch, so would look odd. But no wider than the upper area of perch so overall shock width at its widest point would be no wider. So shouldn't have clearance issues. You could grind the OD down to similar size as the Koni spacer, then paint.
NOTE. These washers are 2" ID, which is the OD of the STOCK shocks. Measure OD of Koni at the point where perch goes. Make sure to find washers that have same ID as Koni OD.
You could also just add more Koni spring perches. But that would probably cost more than generic washers and take time to ship.
Oh, another thought, since the Koni washer spacer is already providing all the structural support needed, additional spacers would only need to be strong in compression. ABS plastic sheet, AKA Marine Board, should work well (compression strength -9,500 psi). Cheap. Easy to cut.
Available in different thicknesses. Available on Amazon, locally available at Marine boat shops (if large bodies of water exist in your location).
Trace the Koni washer onto board. Cut OD using something like metal shears or a jigsaw. Cut ID with a hole saw on a drill.
Stack plastic washer thickness as needed to achieve desired ride height.
If you want to glue ABS pieces together, plumbing ABS cement works fantastic. A little goes a long way. Available at Home Depot. But you don't really need to glue them together if you need stack sheets to get height.
07-17-2020, 09:17 AM
#7
My first thought was to completely replicate the koni perch holder with the extra length i need. Machinist said that it is ok just adding an extra shim with the length i want under the koni perch holder. He will make the same notch to fit nicely around the ring. You would do the same or you prefer to have them as one item? Thanks!
Trending Topics
The following users liked this post:
dim85 (07-17-2020)


Thread
Thread Starter
Forum
Replies
Last Post
mosmoe
Member S2000 Classifieds and For Sale
15
05-15-2012 11:49 AM