
Major Audio Upgrade - Many Pics & Long


Thread Starter
Registered User

Joined: Nov 2000
Posts: 259
Likes: 2
From: None
After a good 6 yrs with the S going through numerous DIY audio upgrades. It's now time for a system overhaul, in the relentless quest for perfection. This time it's not just about ripping the car apart to lay down the wires, etc. but it's all out for the next step up in SQ!!
Some of you may wonder why bother in the S. It's all in the eye of the beholder IMO. From every one of my upgrade, I noticed incremental improvements at city speed. Admittedly, these improvements diminished at highway speed and is zero while racing (coz I simply pull the fuse from the battery). I was lucky enough to spend the majority of my time at city speed to enjoy these improvements and product of hard work
Enough of babbling, let's get to business. I'll first start with my very first simple upgrade. It was a budget setup I'd recommend for starters (except for the HU, which cost me an arm and leg since it's one of the first one or two high end car MP3 player on the market back then.) Generally, this basic setup can be done <$500 and drops right in with very little modification.
OLD SETUP
BYE: HU - Kenwood Z919 MP3 Player
This was the 2nd MP3 player on the market AFAIK 6 yrs ago. I shelled out $600+ for it. Imagine what one can get with that now. Sorry to have to see it go.

Dynamat Xtreme Speaker Kit + Dyanmat Original Behind Speaker.
The optional task to snaking a few more wires through the door grommet and later re-wrap it with electrical tape wasn't fun but is well worth the effort for future upgrades. I didn't do that.
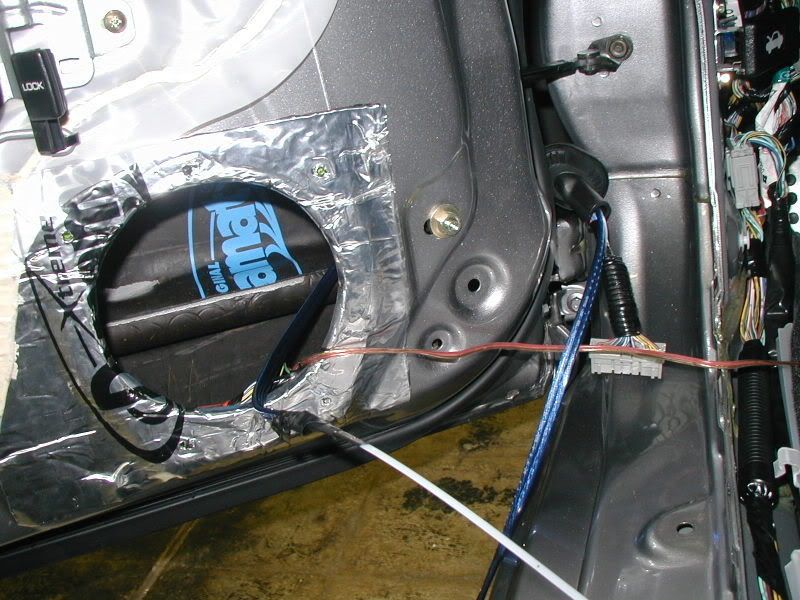
BYE: Speaker - Kenwood Excelon Coaxial KFC Series 6.5"
Coaxial works surprisingly well in the S. Better than a 2-way component setup without appropriate tuning.
BYE: Amp - Hifonics 75Wx4 RMS @ 4ohm, 260Wx2 bridge into 4ohm

Since then, the following happened, by accident. This was also when I started to lose track of how much I spent
Building a Custom Enclosure with Fiberglass and MDF
This was by far the most time consuming job. Took many many hours of matting, and waiting.
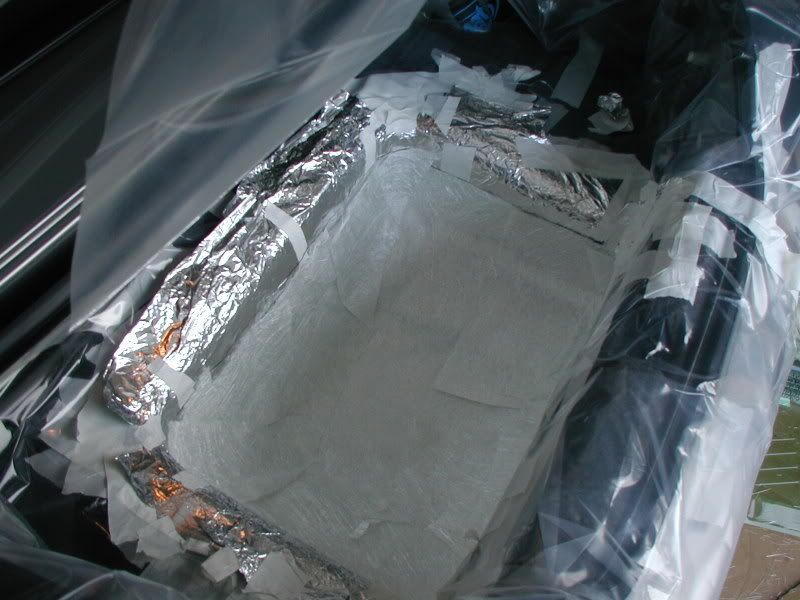
Enclosure - Base
It's not very pretty. Admittedly, my first FB job. Luckily carpeting fixed all of that [/b]
Enclosure - 3/4" MDF Baffle & Bracket
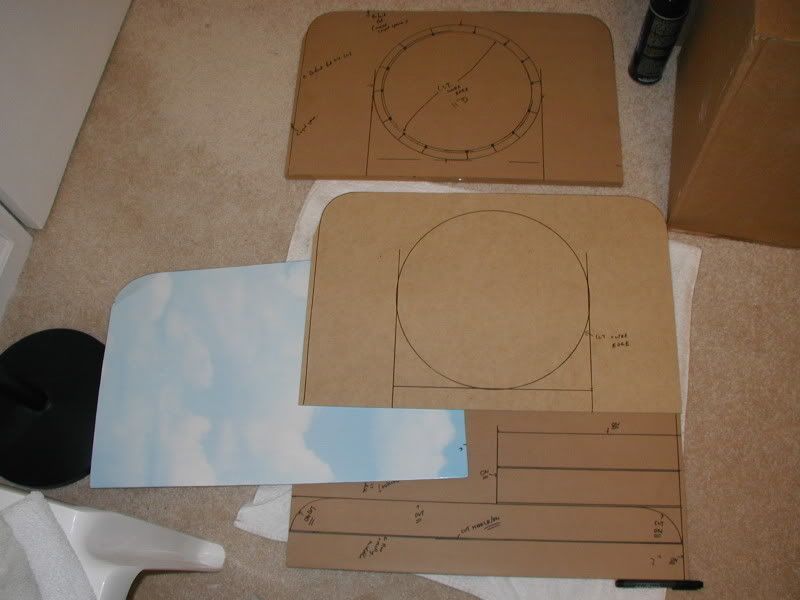
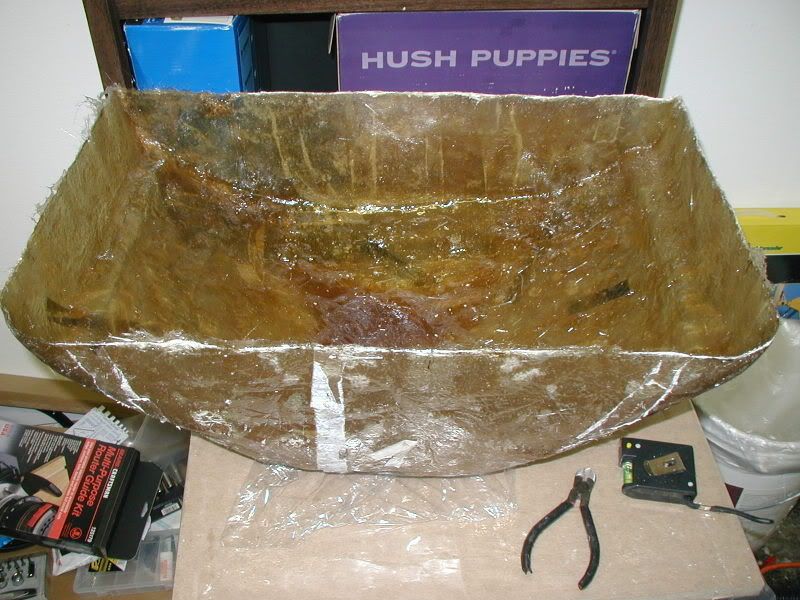
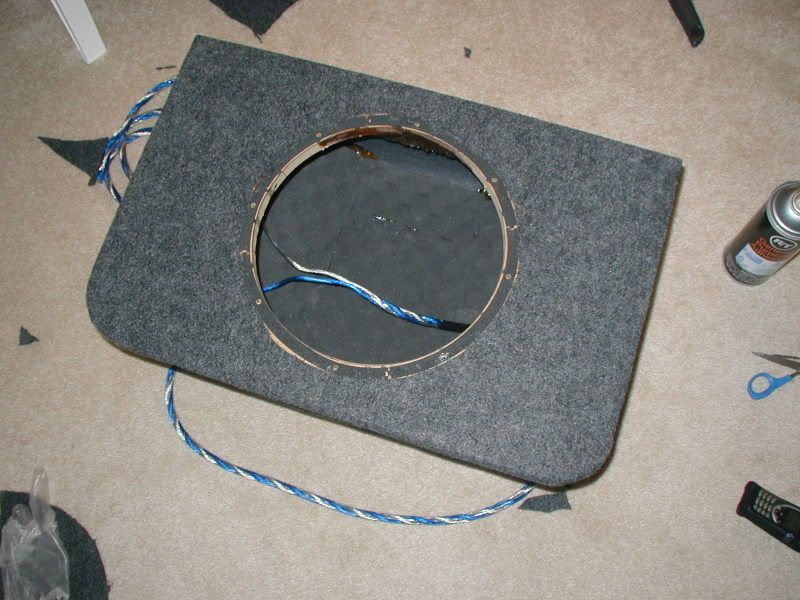
Enclosure - Finished product.
It's solid like a rock. You definitely don't want to run into/over one of this on the highway.
Other Recommendation: BUY AN ENCLOSURE, unless you are planning to do more custom work in the future.
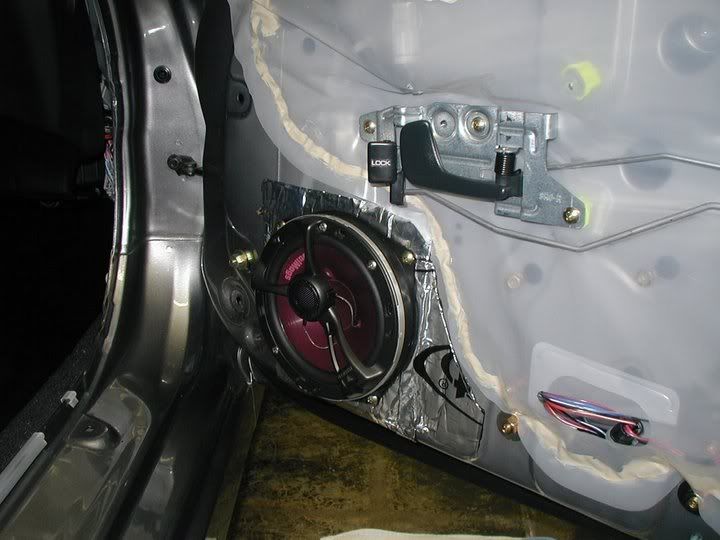
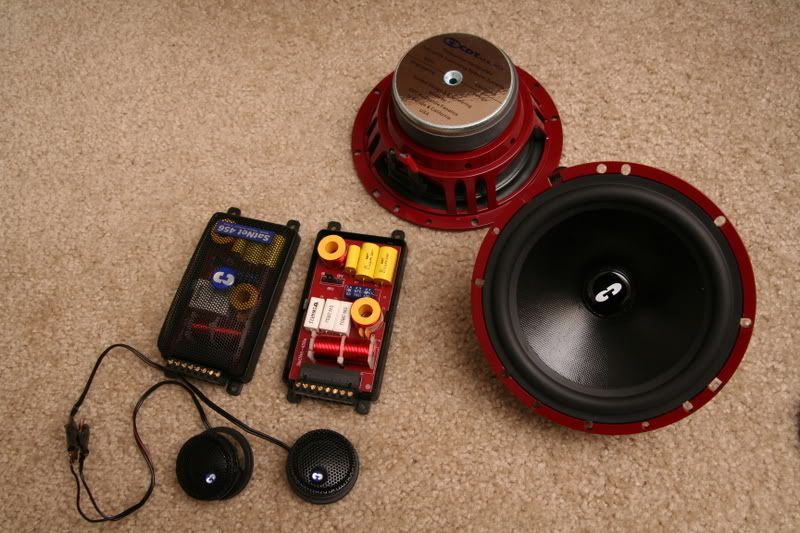
CDT 62EF (Euroframe)
And these went in to replace the Kenwoods, followed by the IDQ 12" sub (no pic). The 2-way components were CDT 62EF (Euroframe). The xovers were small so I can easily slide them under the dash using velcro. I had also installed an upstage kit not shown here.
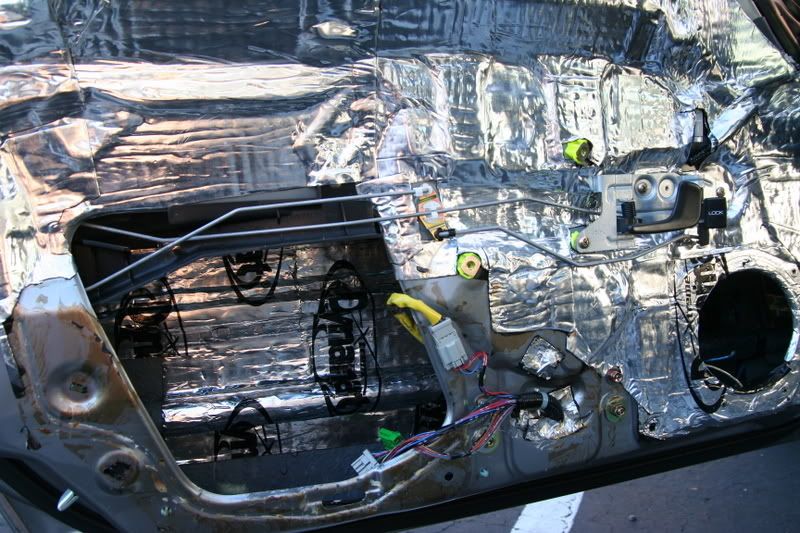
Some more of deadening helps
With old RAAMAT (asphault based) on inner panel. I wouldn't recommend any asphault base decoupler including the Dynamat Original - they melt at some places. This is a more recent pic that shows "the old meeting new". I had to rip off as much of the older version RAAMAT as I could, then added Dynamat Extreme to the outer door skin. The newer RAAMAT are supposed to be butyl base which I heard is better but I haven't tried it. Dynamat Extreme worked well for me over the years so I'm sticking with it. Obviously, much more to be done here but I left it as it is for now. More to come later.
This concluded a very rough history of my past setup. Too bad I didn't take a lot of pictures back then. I'll take a few more pics as I switch things around.
Some of you may wonder why bother in the S. It's all in the eye of the beholder IMO. From every one of my upgrade, I noticed incremental improvements at city speed. Admittedly, these improvements diminished at highway speed and is zero while racing (coz I simply pull the fuse from the battery). I was lucky enough to spend the majority of my time at city speed to enjoy these improvements and product of hard work
Enough of babbling, let's get to business. I'll first start with my very first simple upgrade. It was a budget setup I'd recommend for starters (except for the HU, which cost me an arm and leg since it's one of the first one or two high end car MP3 player on the market back then.) Generally, this basic setup can be done <$500 and drops right in with very little modification.
OLD SETUP
BYE: HU - Kenwood Z919 MP3 Player
This was the 2nd MP3 player on the market AFAIK 6 yrs ago. I shelled out $600+ for it. Imagine what one can get with that now. Sorry to have to see it go.
Dynamat Xtreme Speaker Kit + Dyanmat Original Behind Speaker.
The optional task to snaking a few more wires through the door grommet and later re-wrap it with electrical tape wasn't fun but is well worth the effort for future upgrades. I didn't do that.
BYE: Speaker - Kenwood Excelon Coaxial KFC Series 6.5"
Coaxial works surprisingly well in the S. Better than a 2-way component setup without appropriate tuning.
BYE: Amp - Hifonics 75Wx4 RMS @ 4ohm, 260Wx2 bridge into 4ohm
Since then, the following happened, by accident. This was also when I started to lose track of how much I spent
Building a Custom Enclosure with Fiberglass and MDF
This was by far the most time consuming job. Took many many hours of matting, and waiting.
Enclosure - Base
It's not very pretty. Admittedly, my first FB job. Luckily carpeting fixed all of that [/b]
Enclosure - 3/4" MDF Baffle & Bracket
Enclosure - Finished product.
It's solid like a rock. You definitely don't want to run into/over one of this on the highway.
Other Recommendation: BUY AN ENCLOSURE, unless you are planning to do more custom work in the future.
CDT 62EF (Euroframe)
And these went in to replace the Kenwoods, followed by the IDQ 12" sub (no pic). The 2-way components were CDT 62EF (Euroframe). The xovers were small so I can easily slide them under the dash using velcro. I had also installed an upstage kit not shown here.
Some more of deadening helps
With old RAAMAT (asphault based) on inner panel. I wouldn't recommend any asphault base decoupler including the Dynamat Original - they melt at some places. This is a more recent pic that shows "the old meeting new". I had to rip off as much of the older version RAAMAT as I could, then added Dynamat Extreme to the outer door skin. The newer RAAMAT are supposed to be butyl base which I heard is better but I haven't tried it. Dynamat Extreme worked well for me over the years so I'm sticking with it. Obviously, much more to be done here but I left it as it is for now. More to come later.
This concluded a very rough history of my past setup. Too bad I didn't take a lot of pictures back then. I'll take a few more pics as I switch things around.
Thread Starter
Registered User
Joined: Nov 2000
Posts: 259
Likes: 2
From: None
I've also put in other things in between but don't have pics. Anyway, enough of history, let's get onto the newer stuff. I'd expect this to be a 3-6 months project. Will continue to post more as it progress.
It all started with this:
NEW SETUP
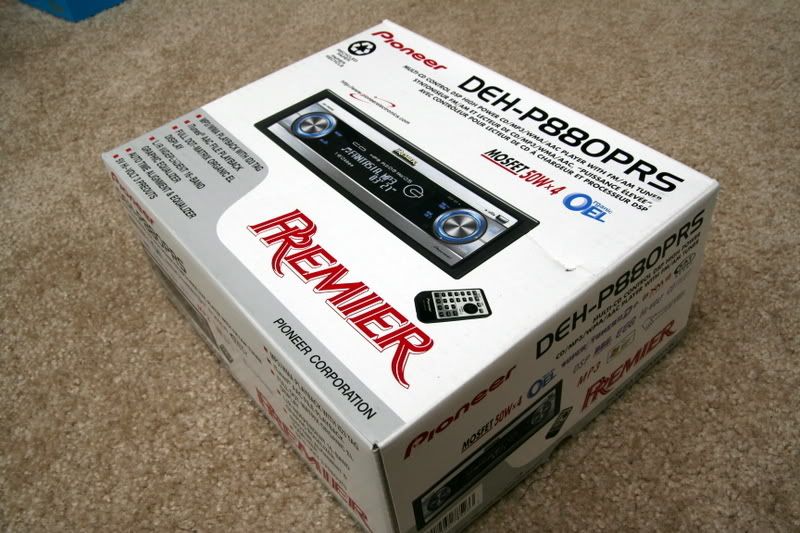
HU - Pioneer Premier DEH-880PRS.
Their premier line, although less visually stimulating, really nailed it on the head when it comes to flexibility. I've went through 2 other model lower in the series for other cars and they worked great. I'm sticking with them for now. The big big big reason for getting the 880PRS is the ability to tune Left, Right, High, Mid, Low speakers completely independently. Always plan for the next upgrade path, it'll save $$$ down the road. There are much more to it, search for another post on forum.
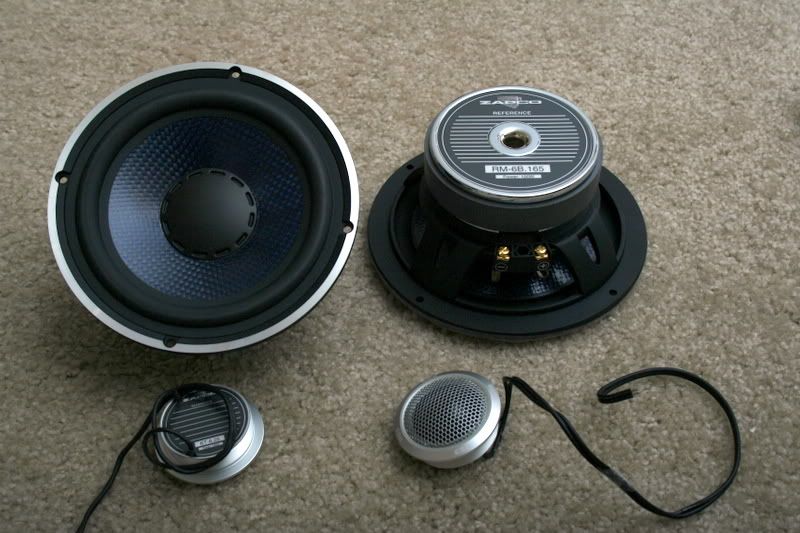
Zapco/ESB RB 16.2
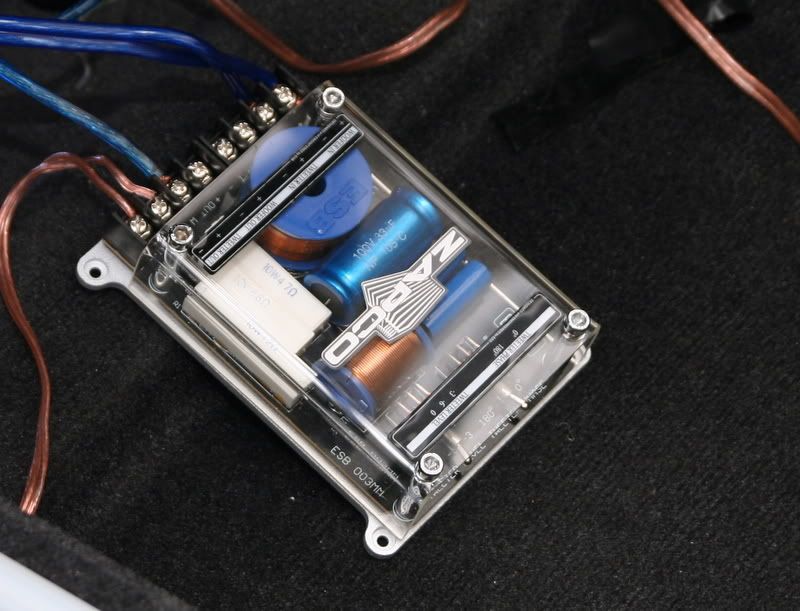
Why not get these as well to go along with it. I considered the Dynaudio, Hertz Mille, Alpine Type X, Zapco Competition, SEAS and Peerless before pulling the trigger. Price/Quality is a key consideration. These are the Zapco RB-16.2. They look fabulous, good on paper, and is made in Italy. I can look at it all day. The cross-over (not shown here) is built solid like an amp!!
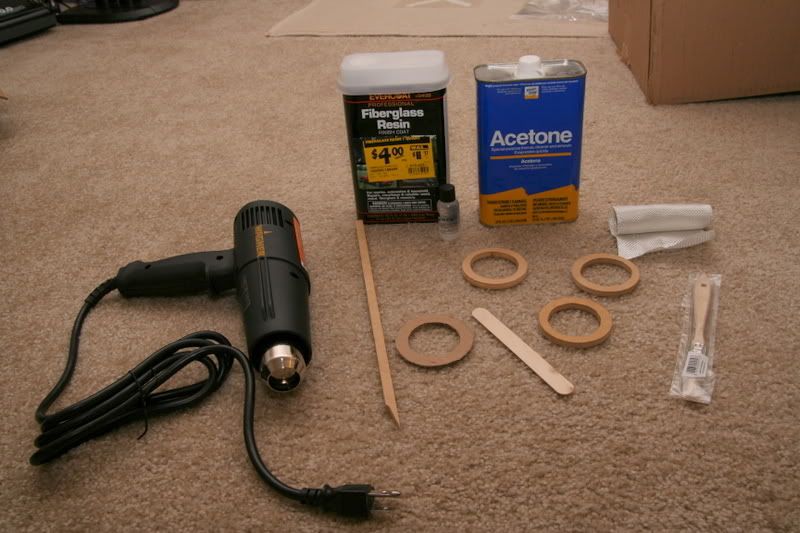
Some raw materials here to get things started.
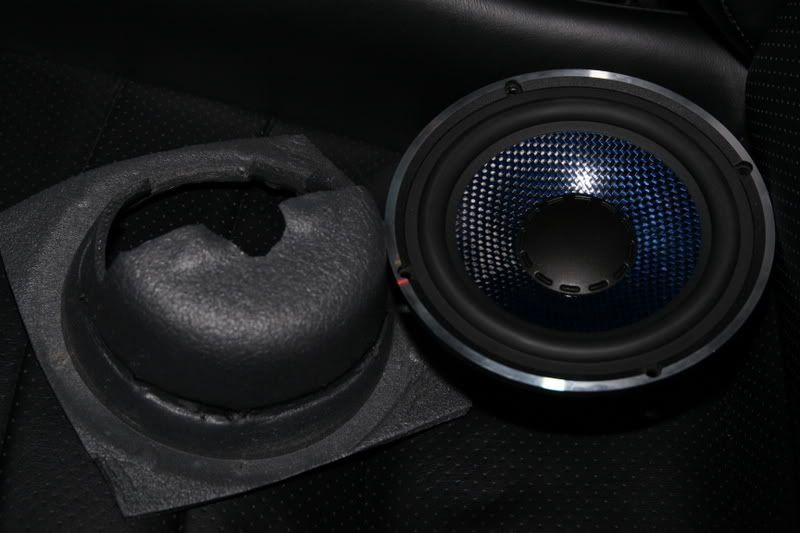
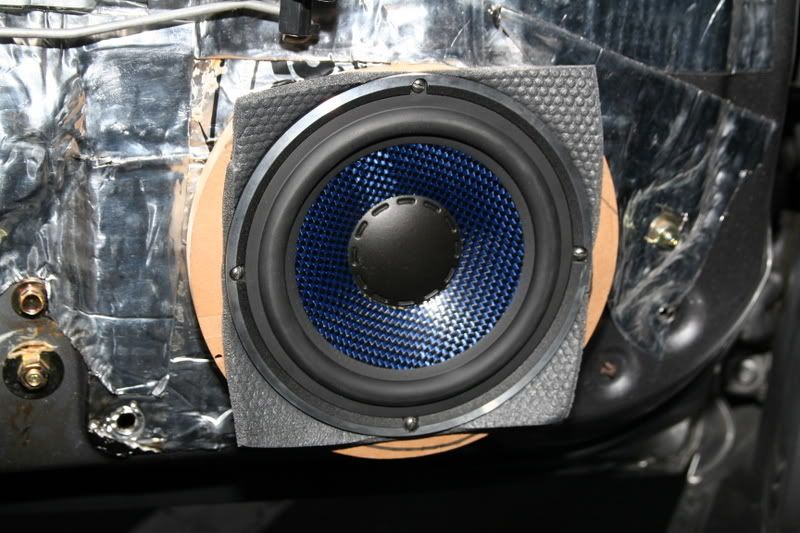
Woofer & Water Shield
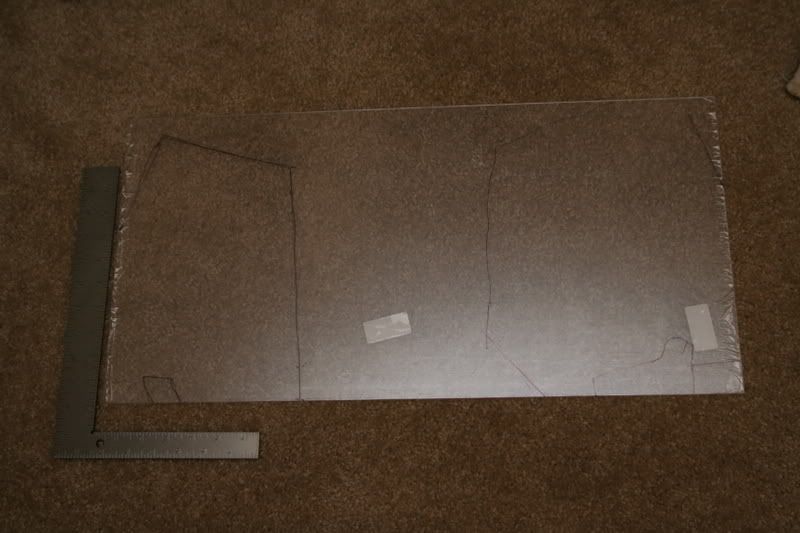
Cutting the foam baffle to help with breathing - I didn't want the foam baffle to become a tiny enclosure which will affect Qtc & Fc for an IB woofer. Btw, this is not the best way to cut the baffle because I recently learned that most of the water comes from underneath the door, not from the top/window. Worse, the inside of the door gets really wet only after 10-15 mins of driving in the rain. This is specific to the S, other cars will be different.
Some more deadening & blocking on resonant area of the door trim

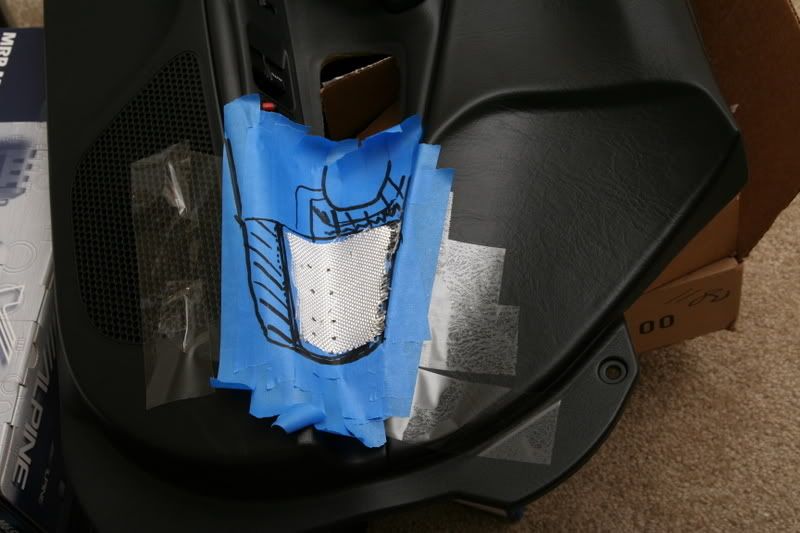
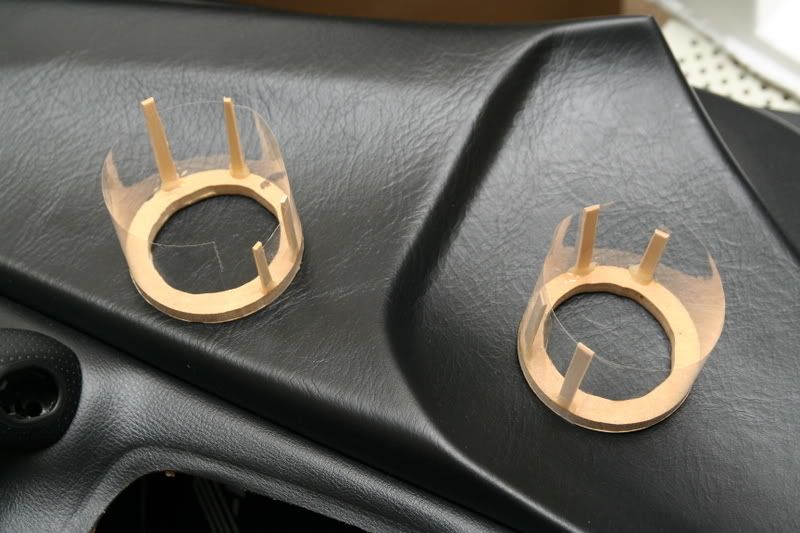
Now moving on to the main part of the install. Chose this location for the driver side tweeter after experimenting with numerous location.
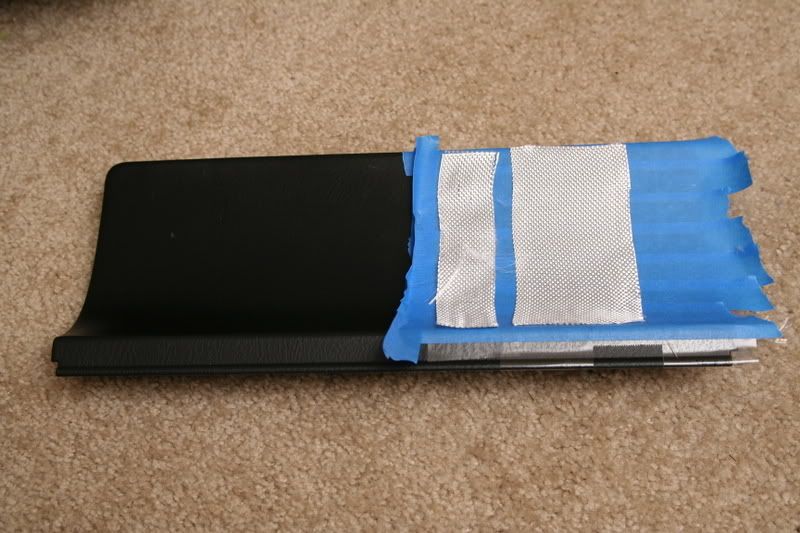
Here for the passenger side tweeter
Tweeter pods to go with it

It all started with this:
NEW SETUP
HU - Pioneer Premier DEH-880PRS.
Their premier line, although less visually stimulating, really nailed it on the head when it comes to flexibility. I've went through 2 other model lower in the series for other cars and they worked great. I'm sticking with them for now. The big big big reason for getting the 880PRS is the ability to tune Left, Right, High, Mid, Low speakers completely independently. Always plan for the next upgrade path, it'll save $$$ down the road. There are much more to it, search for another post on forum.
Zapco/ESB RB 16.2
Why not get these as well to go along with it. I considered the Dynaudio, Hertz Mille, Alpine Type X, Zapco Competition, SEAS and Peerless before pulling the trigger. Price/Quality is a key consideration. These are the Zapco RB-16.2. They look fabulous, good on paper, and is made in Italy. I can look at it all day. The cross-over (not shown here) is built solid like an amp!!
Some raw materials here to get things started.
Woofer & Water Shield
Cutting the foam baffle to help with breathing - I didn't want the foam baffle to become a tiny enclosure which will affect Qtc & Fc for an IB woofer. Btw, this is not the best way to cut the baffle because I recently learned that most of the water comes from underneath the door, not from the top/window. Worse, the inside of the door gets really wet only after 10-15 mins of driving in the rain. This is specific to the S, other cars will be different.
Some more deadening & blocking on resonant area of the door trim
Now moving on to the main part of the install. Chose this location for the driver side tweeter after experimenting with numerous location.
Here for the passenger side tweeter
Tweeter pods to go with it
Thread Starter
Registered User
Joined: Nov 2000
Posts: 259
Likes: 2
From: None
More toys arrived!!
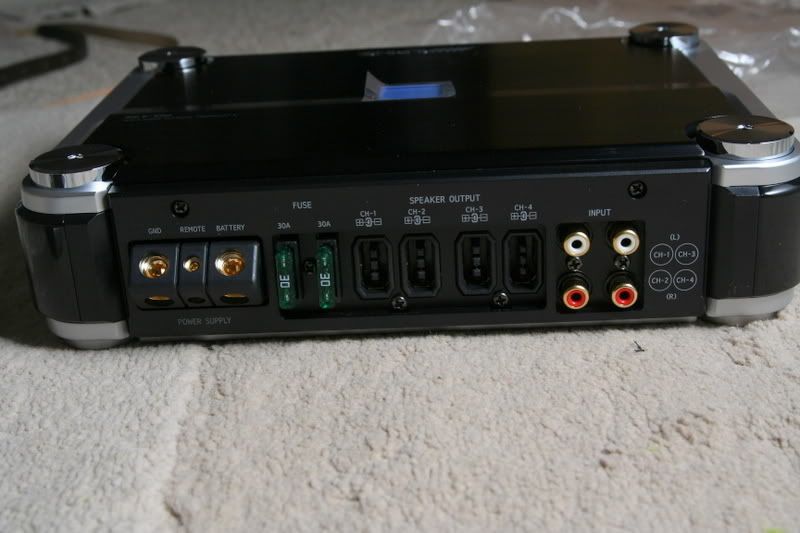
Alpine PDX 4.150
This will be replacing the MB Quart Premier 2-channel which previously replaced the Hifonics Zeus ZX6400. Chose this amp because it's very efficient (Type D - ICE design) - this will probably rob 1hp less than other amps :-)
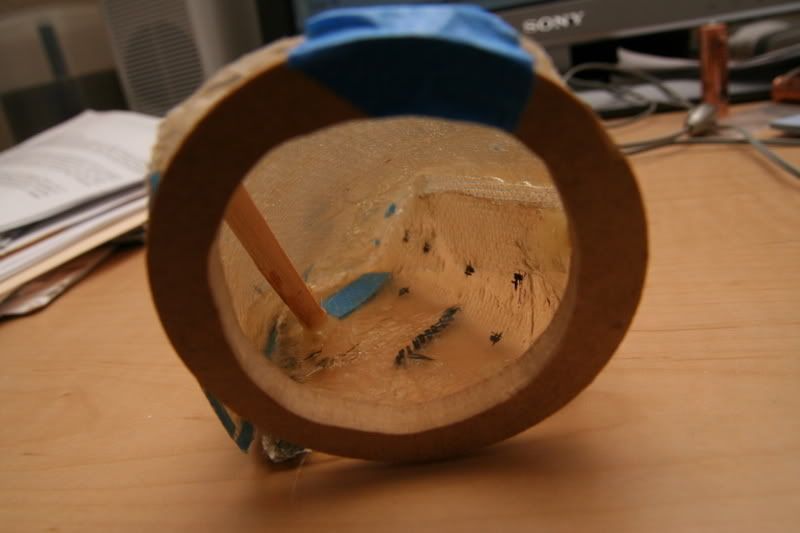
More tweeter podding
Wrap with rags.
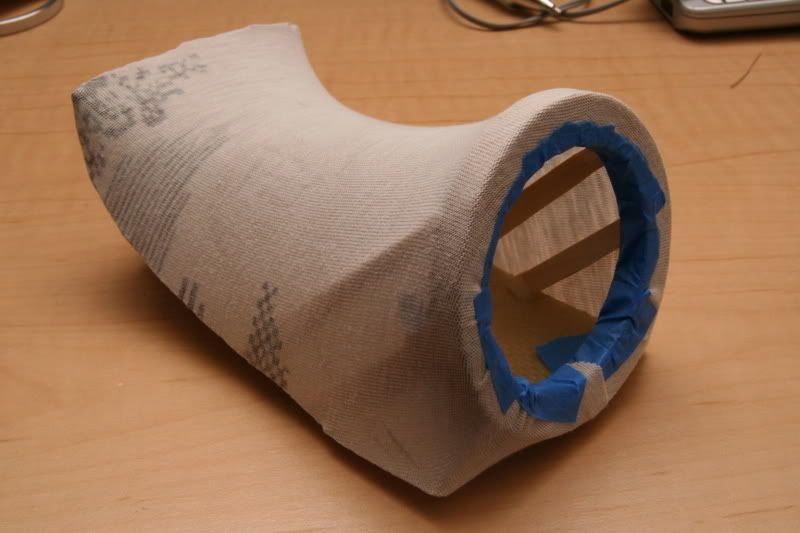
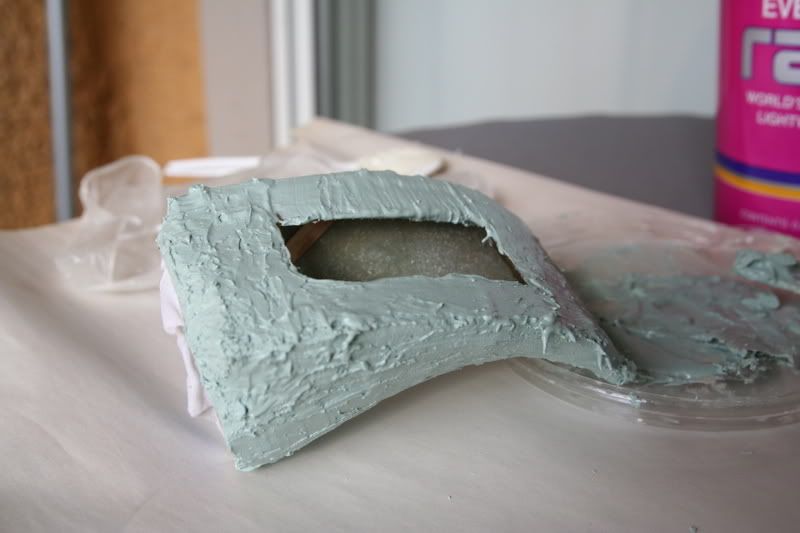
Then glass with fb mats. Turned out great.
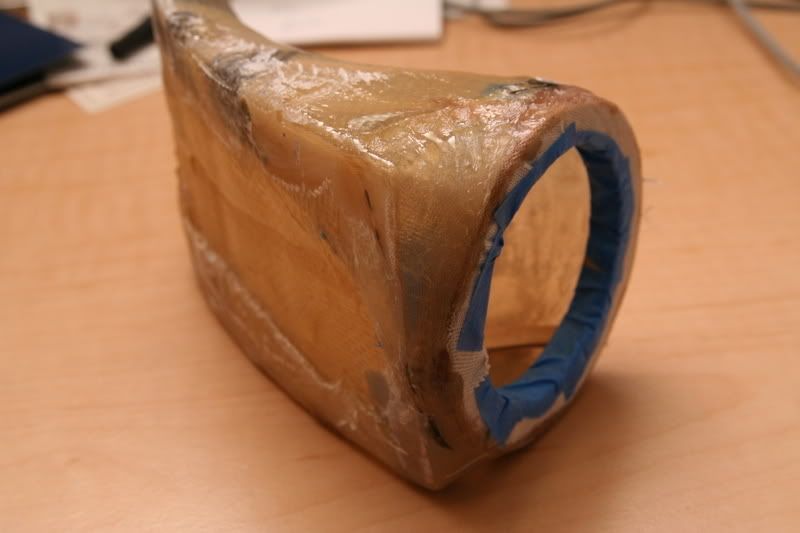
More glassing of tweeter pod on the driver side.
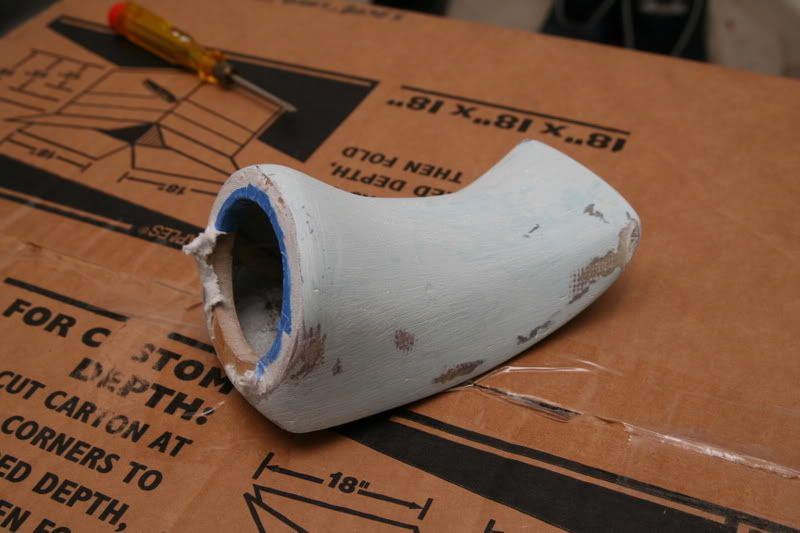
Applying "rage"
After 120-G sanding
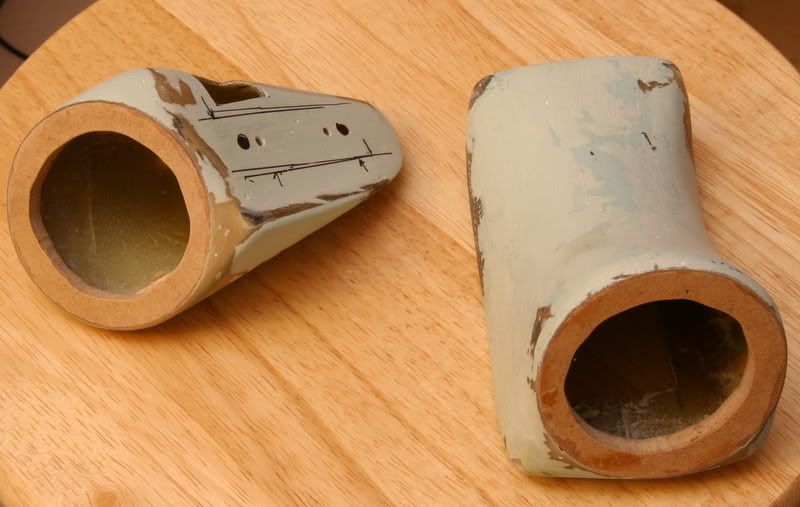
The final product - prettied up with 400-G sanding. Ready for the vinyl wrapping - only if I have it!
Alpine PDX 4.150
This will be replacing the MB Quart Premier 2-channel which previously replaced the Hifonics Zeus ZX6400. Chose this amp because it's very efficient (Type D - ICE design) - this will probably rob 1hp less than other amps :-)
More tweeter podding
Wrap with rags.
Then glass with fb mats. Turned out great.
More glassing of tweeter pod on the driver side.
Applying "rage"
After 120-G sanding
The final product - prettied up with 400-G sanding. Ready for the vinyl wrapping - only if I have it!
Thread Starter
Registered User
Joined: Nov 2000
Posts: 259
Likes: 2
From: None
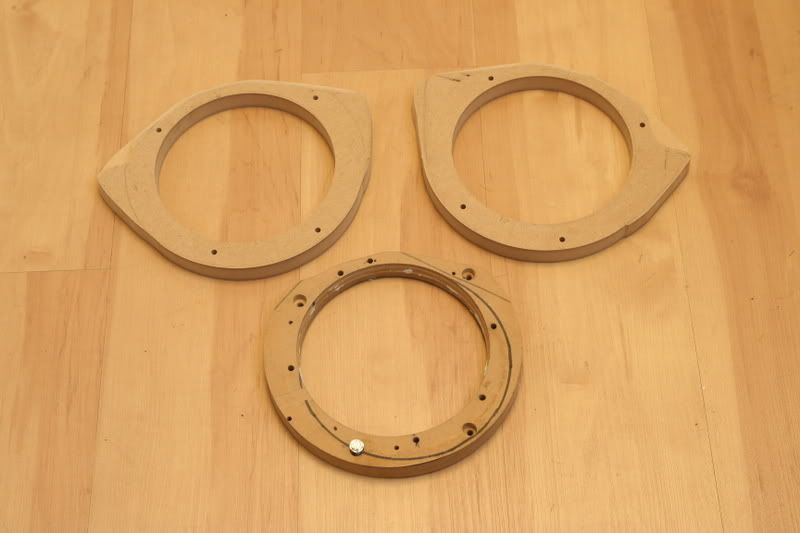
Door Upgrade
Despite the nice weather in California, the old MDF baffles are showing its age - likely due to rain and moist. This baffle also went through multiple sets of woofers with different mounting holes... I didn' drill all those holes just for fun
Old "Frankenstein" Baffle
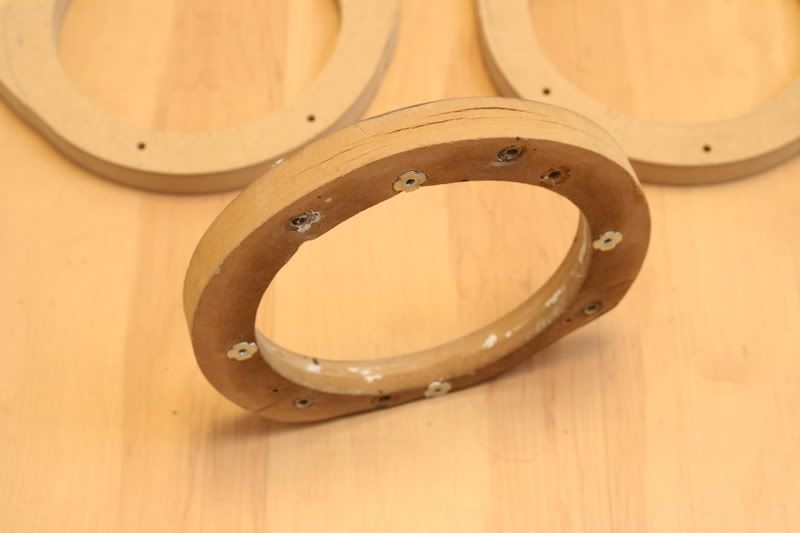
New Baffle
Gave me an excuse to make another set of baffle . Same old 3/4" MDF, but this time with a bit more mass. It'll be dipped in fiberglass resin next to make it water resistant.
2-Way Active Wiring
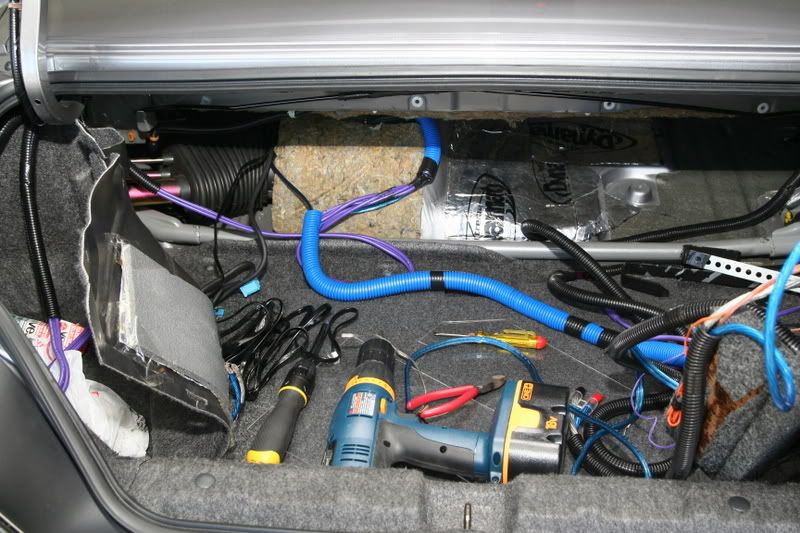
While I was waiting for the resin saturated baffle to air (a week), it's time to move on to the most painful part of the install.
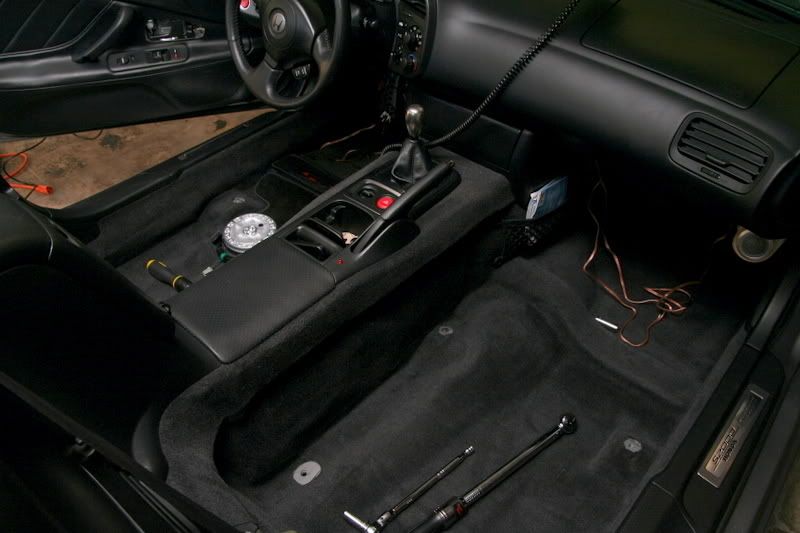
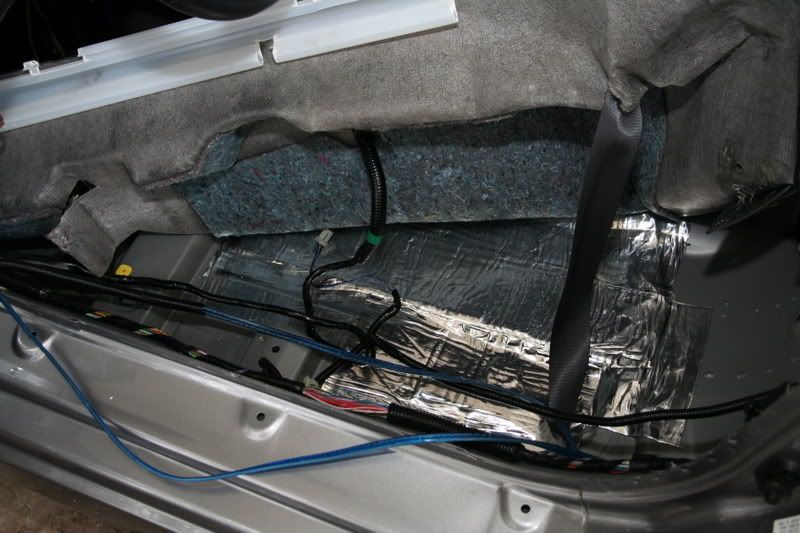
Out came both car seats. Didn't know the S can feel this roomy Perfect if I need to help someone move. It IS possible to fit a sofa in the S. You can also see the passenger side tweeter pod test mounted.
Then the carpet. The blue wire is used to run the front components. Guess what brand wire it is? It's made from multiple strands of oxygen-free copper, twisted and wrapped with 1mm insulating polymer with mystic ocean blue hue to deliver maximum sonic clarity with minimal distortion even in harsh environment.
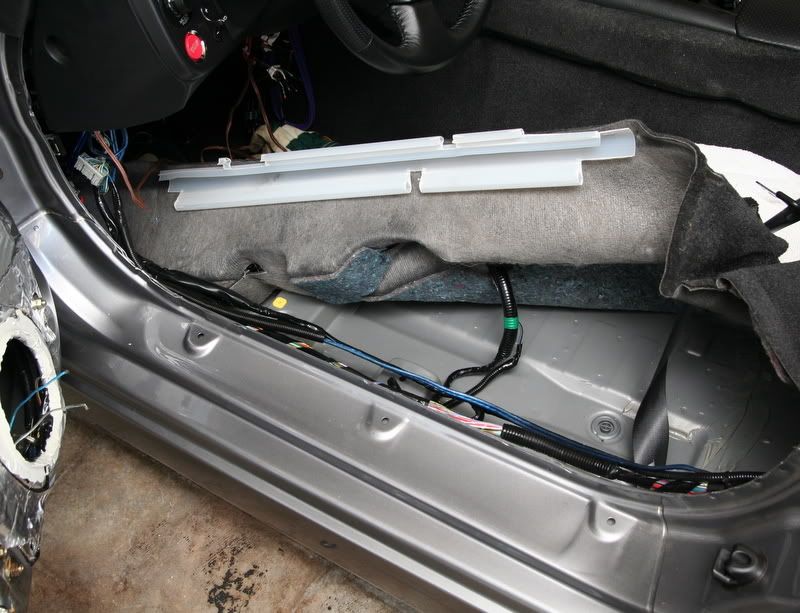
Added another blue wire to run the front tweeters separately. I had some some extra RAAMat sitting around in the garage. Might as well put them to good use while the carpet is out. I'm surprised by how thin the sheet metal is.
My ALL TIME least favorite part of the install - snake another wire to the door. I had to disconnect 3-5 connectors to make enough room to get started...
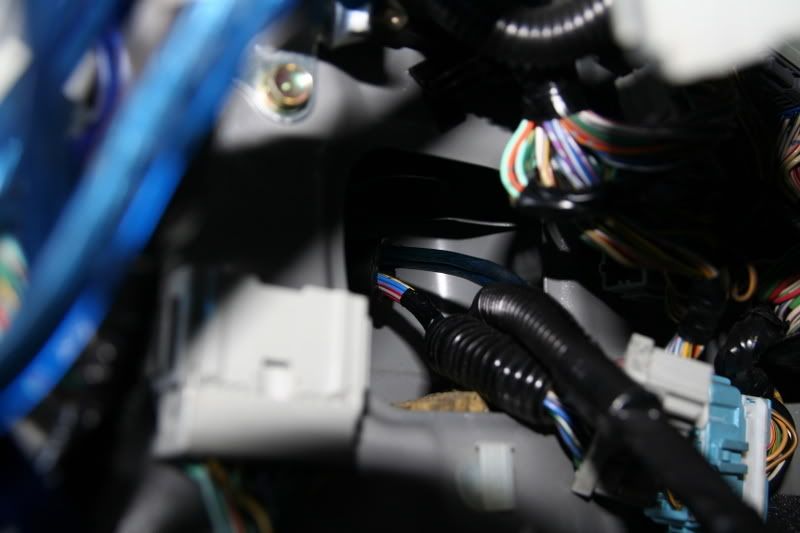
This new wire will power only the tweeter to be mounted on the driver-side door.
With 2 wires powering the tweeter and woofer separately, I don't need this anymore. This is the rock solid passive crossover that I mentioned earlier. The build quality of Zapco (ESB to be exact because Zapco acquired them) is top notch and it weights as much as the RAAMat that I just put in so I call it even
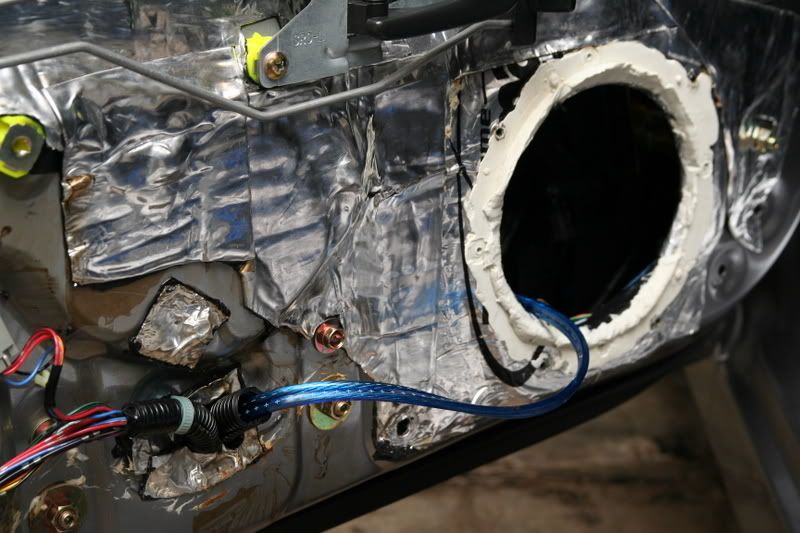
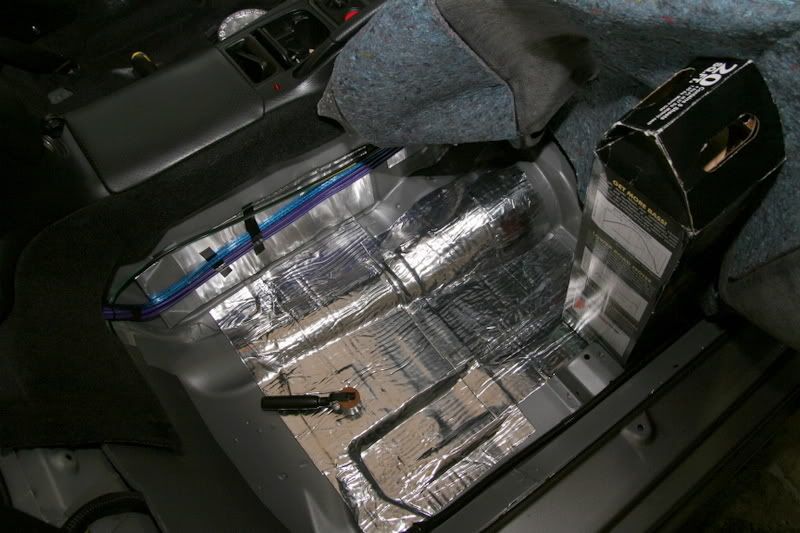
Carpet out from the passenger side. Again, the sheet metal looked lonely. You can see the 4AWG power wire towards the bottom of the image. I prefer running it far away from RCAs and speaker wires (on the other side).
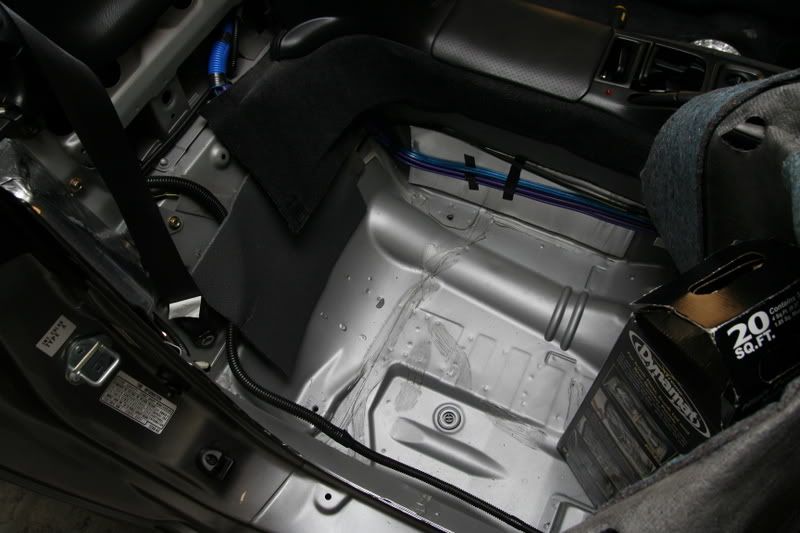
My RAAMat supply was still going strong. Took a few mins to roll them on with the roller (highly recommended). It sticked like swiss cheese*. Note that I just matted the part that sounded "hollow". Law of diminishing returns applies. This should be at least 90% as good as a fully matted floor. The Honda padding underneath the carpet looked pretty good already. The 20 sq ft Dynamat was serving one of its purpose now, more later
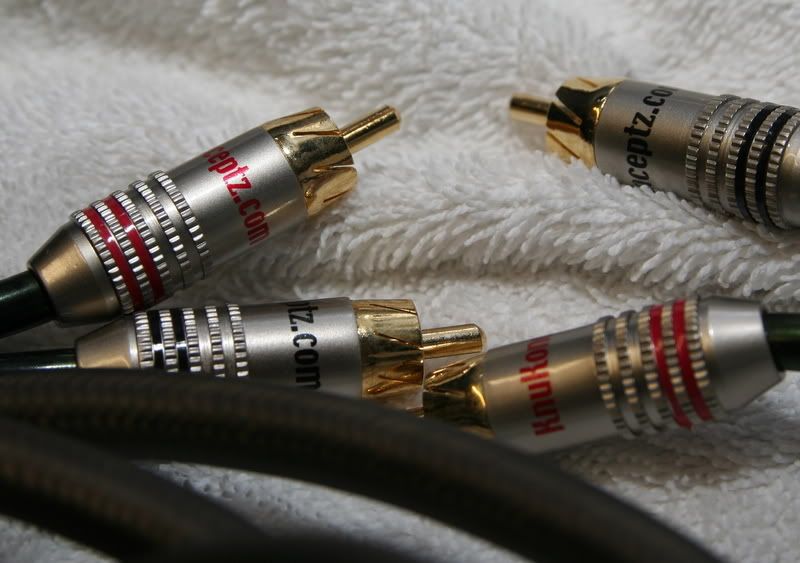
And the winner is... KnuKonceptz! I ran them all around my S. They are my favorite place to get car audio installation accessories.
Update: Due to quality issues I encountered with KnuKonceptz RCA cables, I can't say I'm a big fan anymore. More details below.
2 more RCAs went in, along with another mystic ocean blue wire.
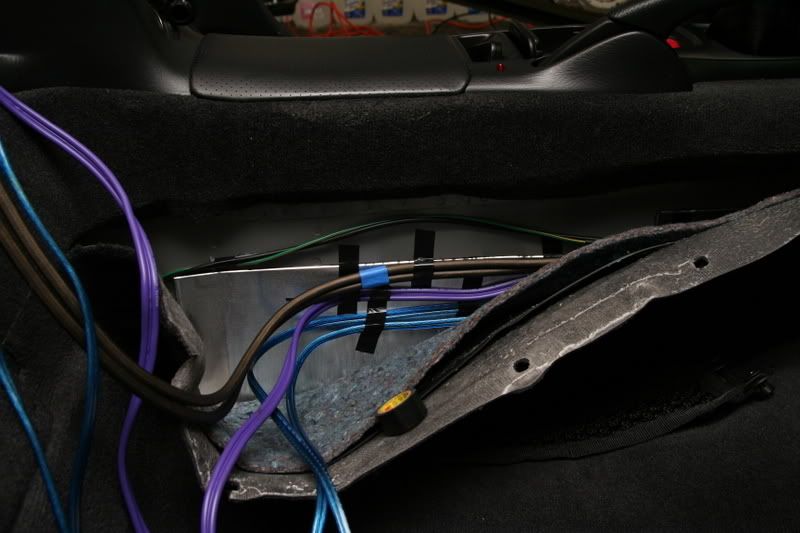
This explains why it is necessary to run 3 sets RCA cable.
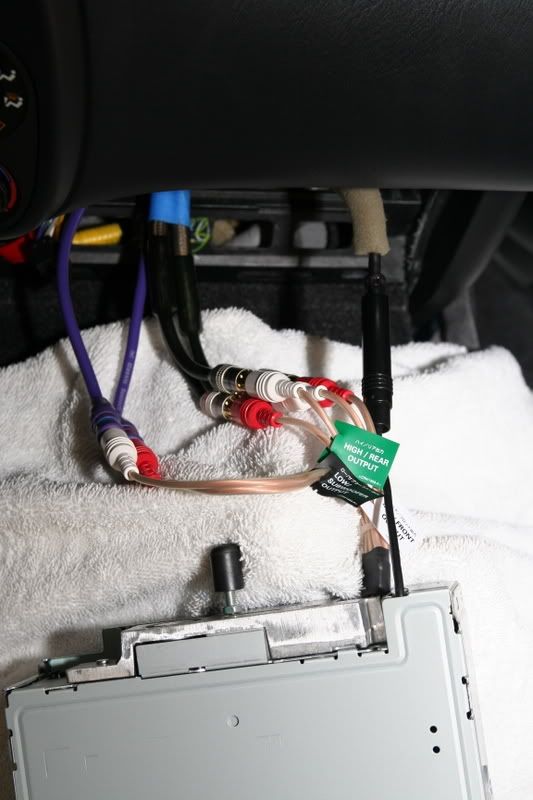
This explains why it is necessary to run 2 more speakers wires in addition to the 3 that were already there without rear speakers. Rear speakers are bad for the S, period.
Sometimes words are better than a thousand pictures. This is the 2-way active + sub configuration I'm moving towards gradually:
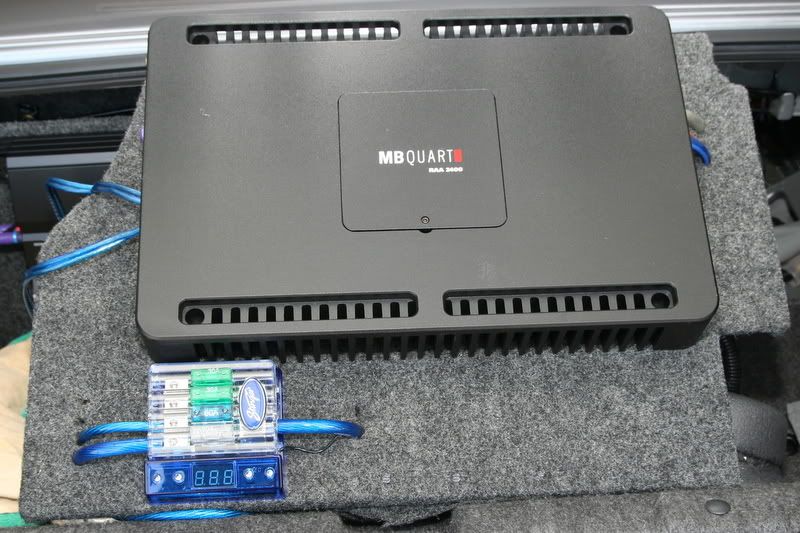
BYE - MBQ RAA 2400 2x100W RMS
I should have bought a 4 channel amp on hindsight. Now I have 2 well functioning amp sitting around, possibly for my other car. PM me if you are interested in buying them cheap.
- Hifonics ZX6400 4x75W RMS
- MBQ RAA 2400 2x100W RMS
To be continue...
Despite the nice weather in California, the old MDF baffles are showing its age - likely due to rain and moist. This baffle also went through multiple sets of woofers with different mounting holes... I didn' drill all those holes just for fun
Old "Frankenstein" Baffle
New Baffle
Gave me an excuse to make another set of baffle . Same old 3/4" MDF, but this time with a bit more mass. It'll be dipped in fiberglass resin next to make it water resistant.
2-Way Active Wiring
While I was waiting for the resin saturated baffle to air (a week), it's time to move on to the most painful part of the install.
Out came both car seats. Didn't know the S can feel this roomy
Perfect if I need to help someone move. It IS possible to fit a sofa in the S. You can also see the passenger side tweeter pod test mounted.Then the carpet. The blue wire is used to run the front components. Guess what brand wire it is? It's made from multiple strands of oxygen-free copper, twisted and wrapped with 1mm insulating polymer with mystic ocean blue hue to deliver maximum sonic clarity with minimal distortion even in harsh environment.
Added another blue wire to run the front tweeters separately. I had some some extra RAAMat sitting around in the garage. Might as well put them to good use while the carpet is out. I'm surprised by how thin the sheet metal is.
My ALL TIME least favorite part of the install - snake another wire to the door. I had to disconnect 3-5 connectors to make enough room to get started...
This new wire will power only the tweeter to be mounted on the driver-side door.
With 2 wires powering the tweeter and woofer separately, I don't need this anymore. This is the rock solid passive crossover that I mentioned earlier. The build quality of Zapco (ESB to be exact because Zapco acquired them) is top notch and it weights as much as the RAAMat that I just put in so I call it even
Carpet out from the passenger side. Again, the sheet metal looked lonely. You can see the 4AWG power wire towards the bottom of the image. I prefer running it far away from RCAs and speaker wires (on the other side).
My RAAMat supply was still going strong. Took a few mins to roll them on with the roller (highly recommended). It sticked like swiss cheese*. Note that I just matted the part that sounded "hollow". Law of diminishing returns applies. This should be at least 90% as good as a fully matted floor. The Honda padding underneath the carpet looked pretty good already. The 20 sq ft Dynamat was serving one of its purpose now, more later
And the winner is... KnuKonceptz! I ran them all around my S. They are my favorite place to get car audio installation accessories.
Update: Due to quality issues I encountered with KnuKonceptz RCA cables, I can't say I'm a big fan anymore. More details below.
2 more RCAs went in, along with another mystic ocean blue wire.
This explains why it is necessary to run 3 sets RCA cable.
This explains why it is necessary to run 2 more speakers wires in addition to the 3 that were already there without rear speakers. Rear speakers are bad for the S, period.
Sometimes words are better than a thousand pictures. This is the 2-way active + sub configuration I'm moving towards gradually:
- 1 RCA to run "High" frequency signal to the PDX 4.150, which then powers L & R front tweeters with 2 speaker wires
- 1 RCA to run "Mid" frequency signal to PDX 4.150, which powers L & R front woofer with another 2 speaker wires
- 1 RCA to run "Low" frequency signal to an Alpine Class-D to power a 12" sub mono with 2 speaker wires.
BYE - MBQ RAA 2400 2x100W RMS
I should have bought a 4 channel amp on hindsight. Now I have 2 well functioning amp sitting around, possibly for my other car. PM me if you are interested in buying them cheap.
- Hifonics ZX6400 4x75W RMS
- MBQ RAA 2400 2x100W RMS
To be continue...


Trending Topics
Thread Starter
Registered User
Joined: Nov 2000
Posts: 259
Likes: 2
From: None
It has been a while since I updated with my install; been traveling quite a bit lately with the S sitting in the garage. Now that the weather is getting better, it's time to get back to work. Added a few more updates (above) with new toys and new tweeter pods. Yesterday, I just picked up a few more parts from OSH for the install and ordered some vinyl wrapping. I still need to figure out how best to mount the pods.

