

Greyout does a mod and likes it


Thread Starter
Joined: Jan 2013
Posts: 98
Likes: 7
Hello all,
So for quite a while I've had a set of Autovation (autovation.net) pedals sitting on the shelf, destined to go into the AP1 race car. I decided to stick them in the new AP2 and see how they feel.
The reason... here are the pedals for a S2000. They are small, and far apart, at least for me. Especially for a Japanese car in my opinion. My heel-toe technique is more of a foot roll, and though it worked great in my TSX, I just can't quite get consistent with what Honda has given us.

The brake and clutch pedals go on pretty easy. I had my drivers seat out to make getting under the dash easier, but did not need to remove the pedals. The three rivet heads on each pedal come off very easy with just the touch of a drill bit. Once the pedal is off, you run a slightly larger drill bit through the rivet holes so that the supplied hardware will fit through the hole. Here is the pedal with the factory cover removed
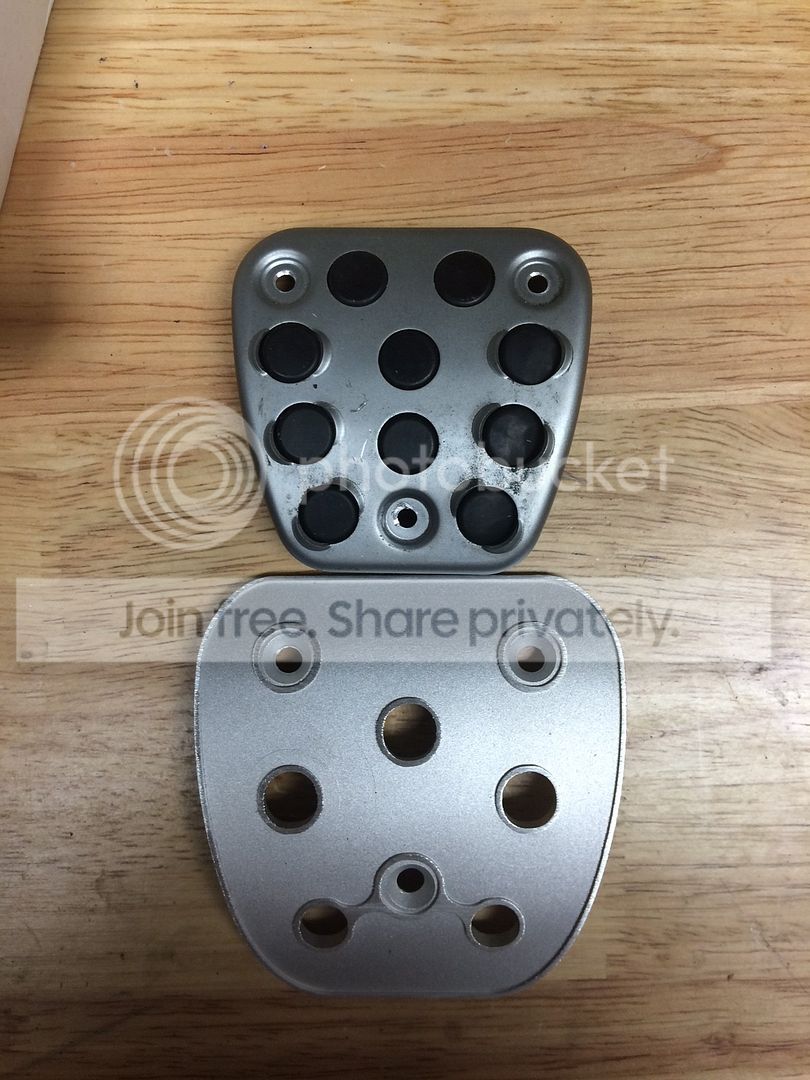
The factory pedal vs the new pedal
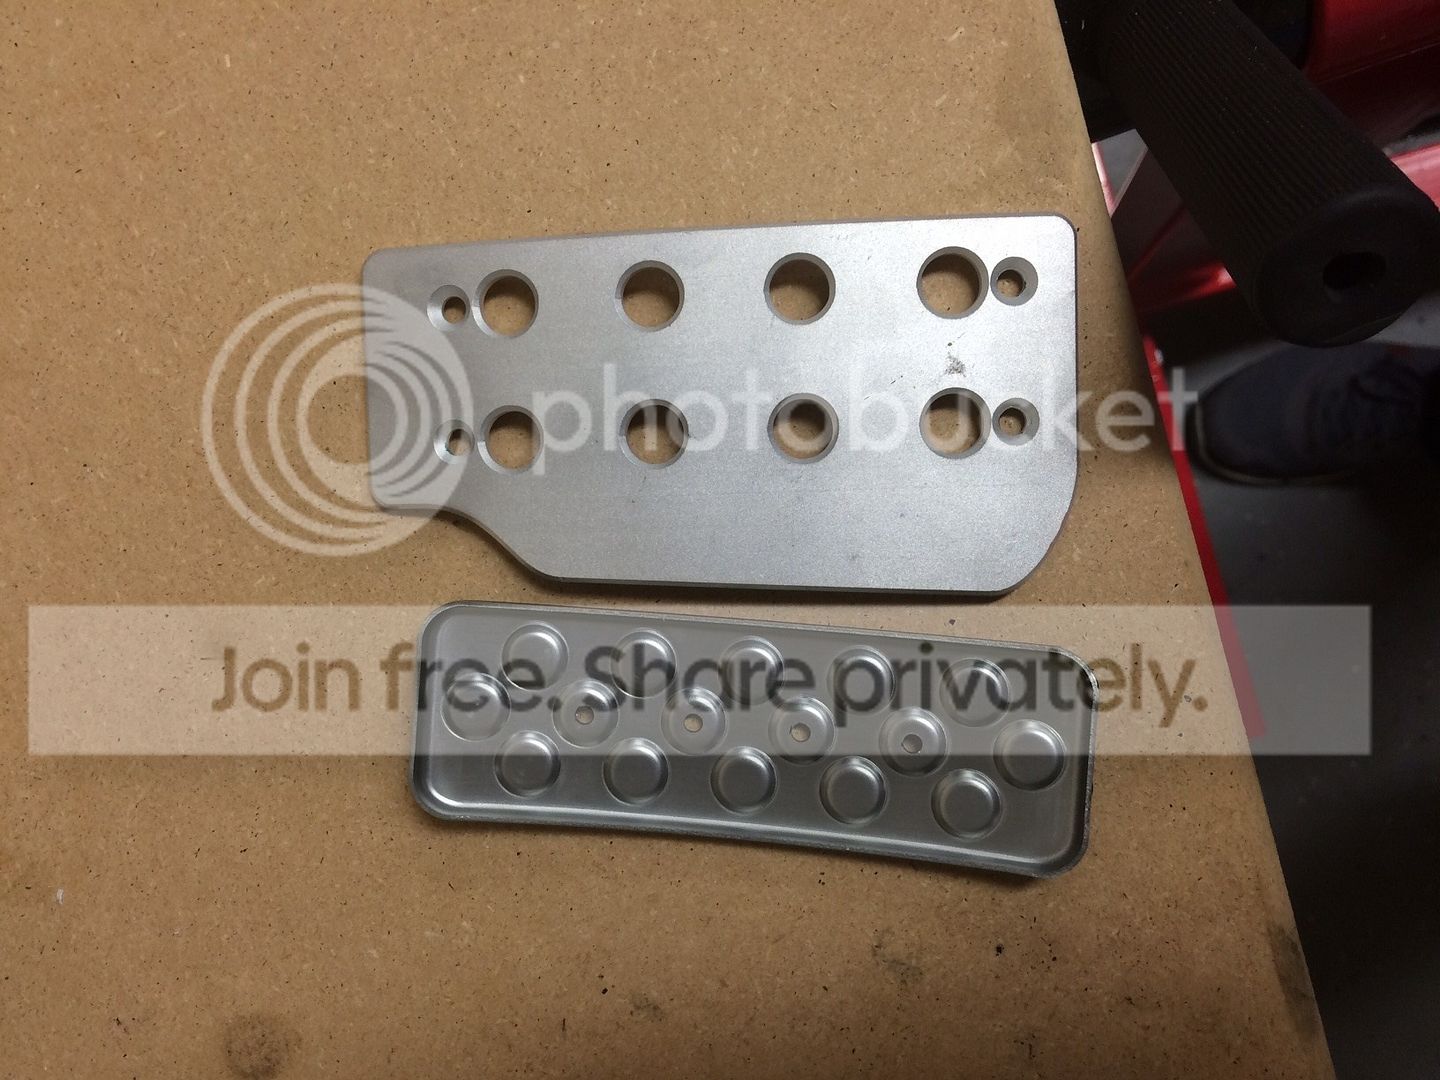
The hardware that the kit comes with:
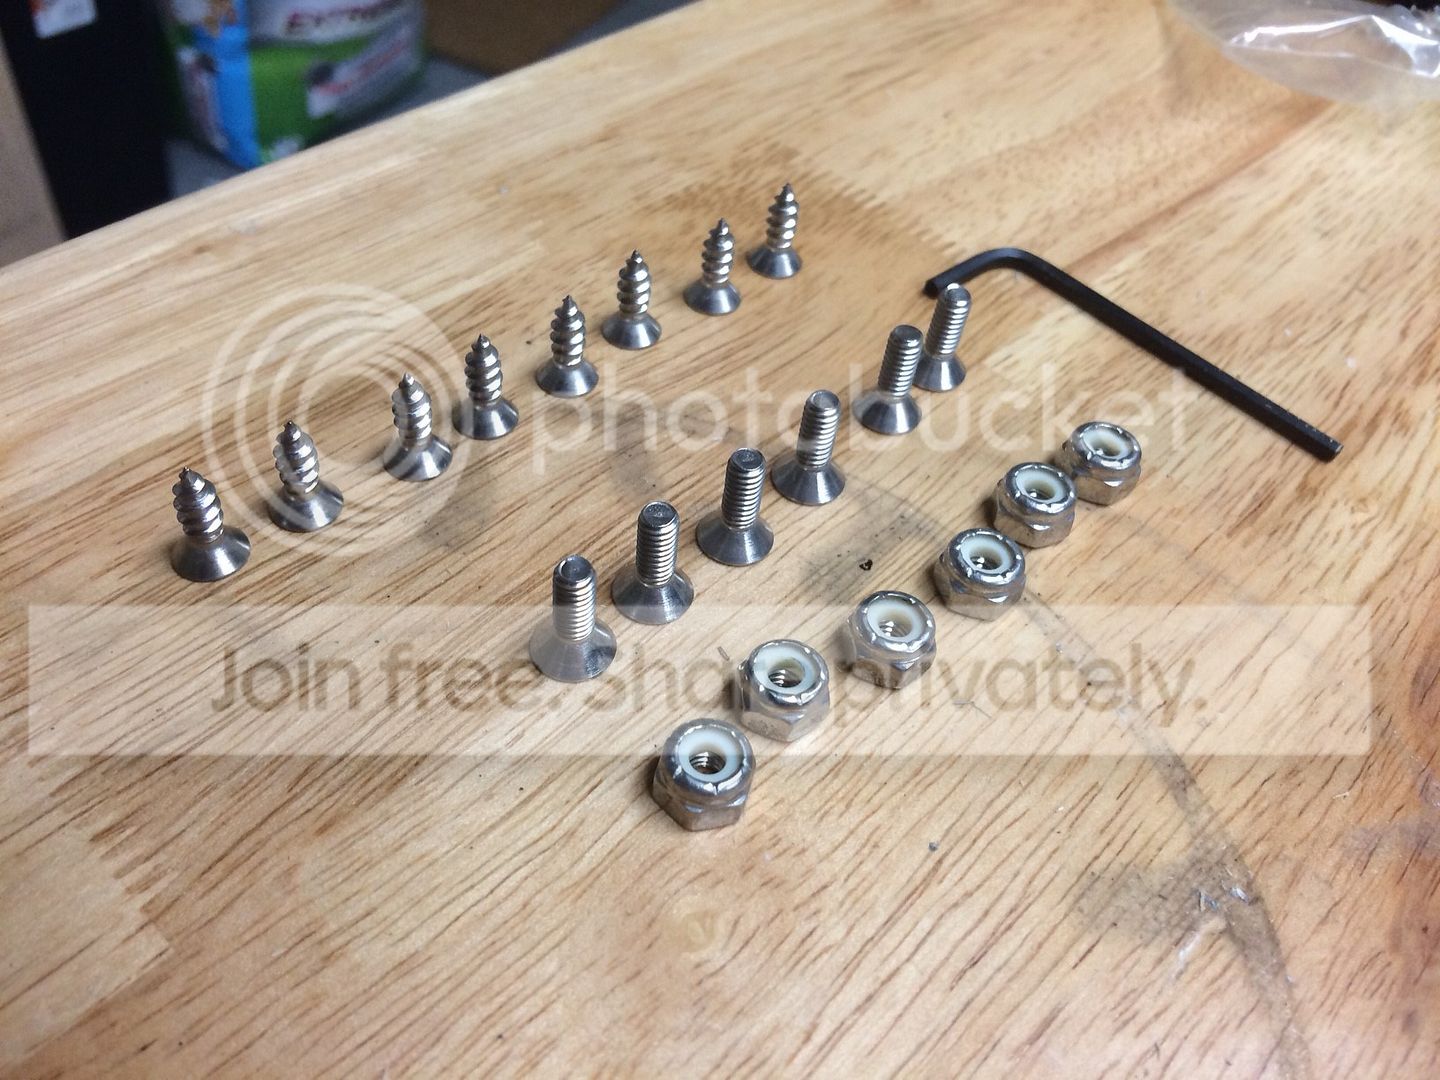
The brake and clutch pedal bolt on, each with 3 machine screws and the nylon-lined nuts. The holes in the new pedal cover lined up perfectly with the rivet holes on the factory pedal. The screws are used for the dead pedal, and the gas pedal.
The dead pedal and the gas pedal are a little more tricky. The screws provided are a bit low quality. The first one I tried to run into the sheet metal for the dead pedal, after drilling what I thought was a pilot hole plenty big, snapped in half once the threads bit. I suggest drilling the largest diameter pilot hole possible while still leaving just enough left for the screw to bite a little bit. The dead pedal surface is flat, and relatively easy to line up correctly. I didn't take a picture of that process.
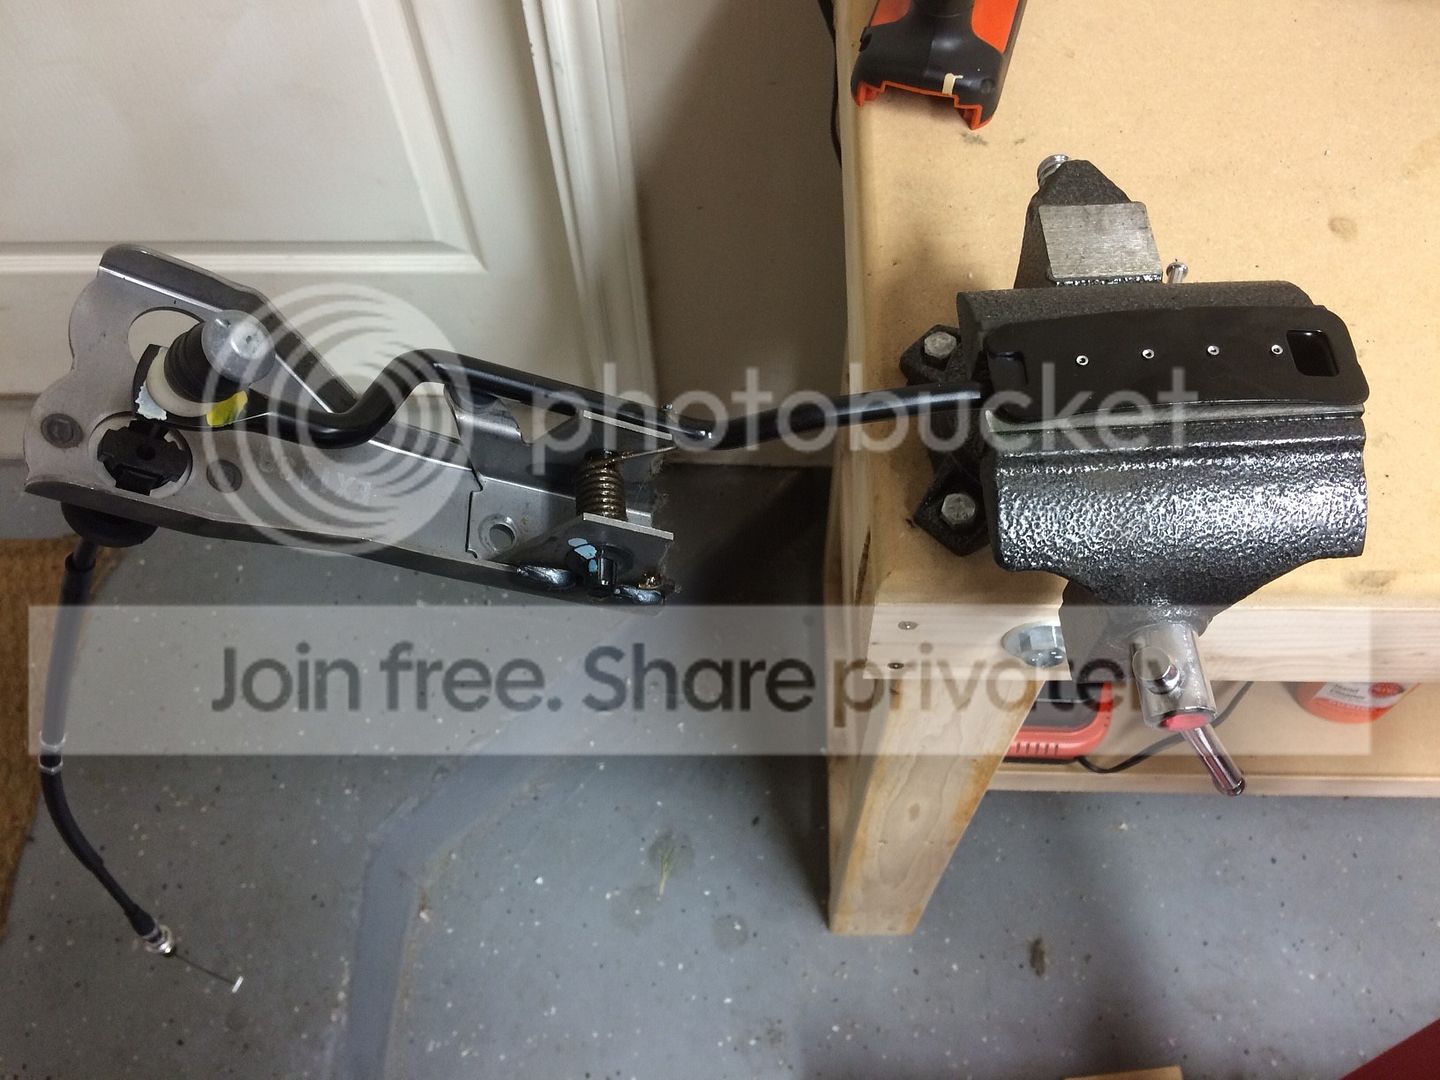
The gas pedal though, its curved, and I really wanted to get it right. So I took the pedal out... its really easy. Two 12mm nuts off on the pedal side, and then go under the hood and disconnect the throttle cable. Just pull the whole thing out rather then try to fiddle with getting the cable off the pedal. On my DBW car, it takes the removal of 2 10mm bolts to get the cover of the TPS sensor assembly off, and you just pop the cable out.
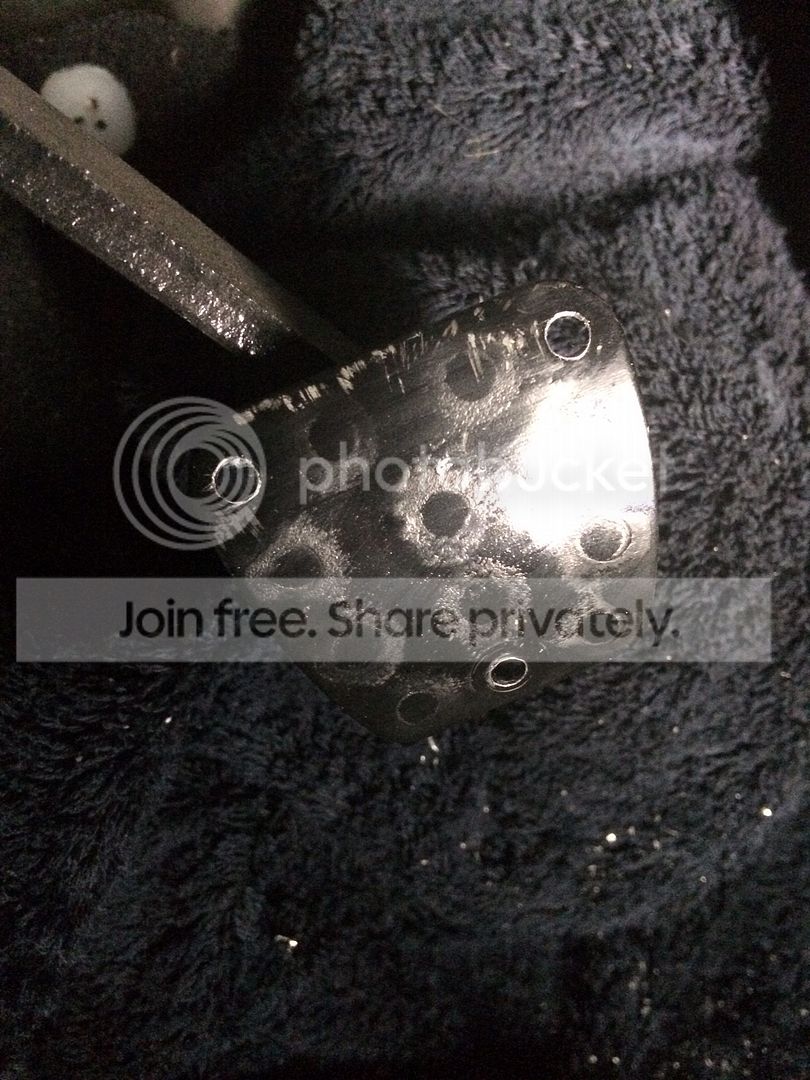
Drill the rivets out, and shake the leftover bits out of the conveniently placed opening.
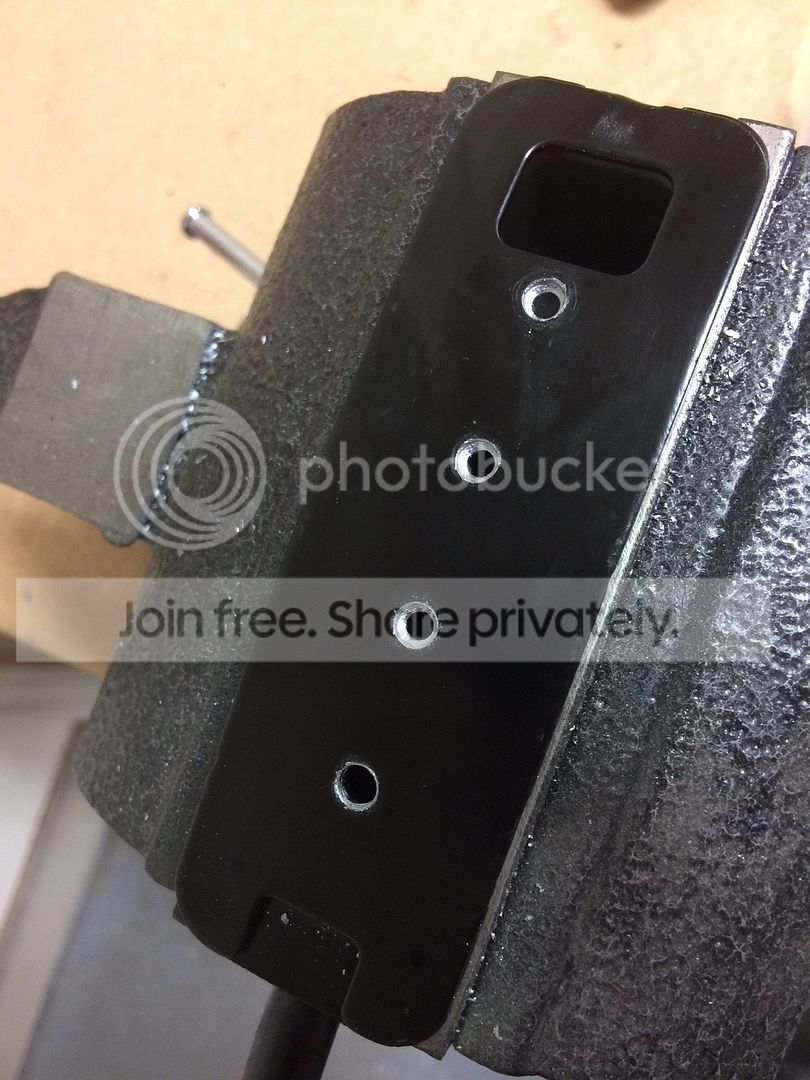
The old cover and the new. Notice two things: 1) The holes in the new pedal are spaced such that they will be at the very ends of the available mounting surface and 2) They don't use the 4 rivet holes. You have to drill your own. This was why I took the pedal out.
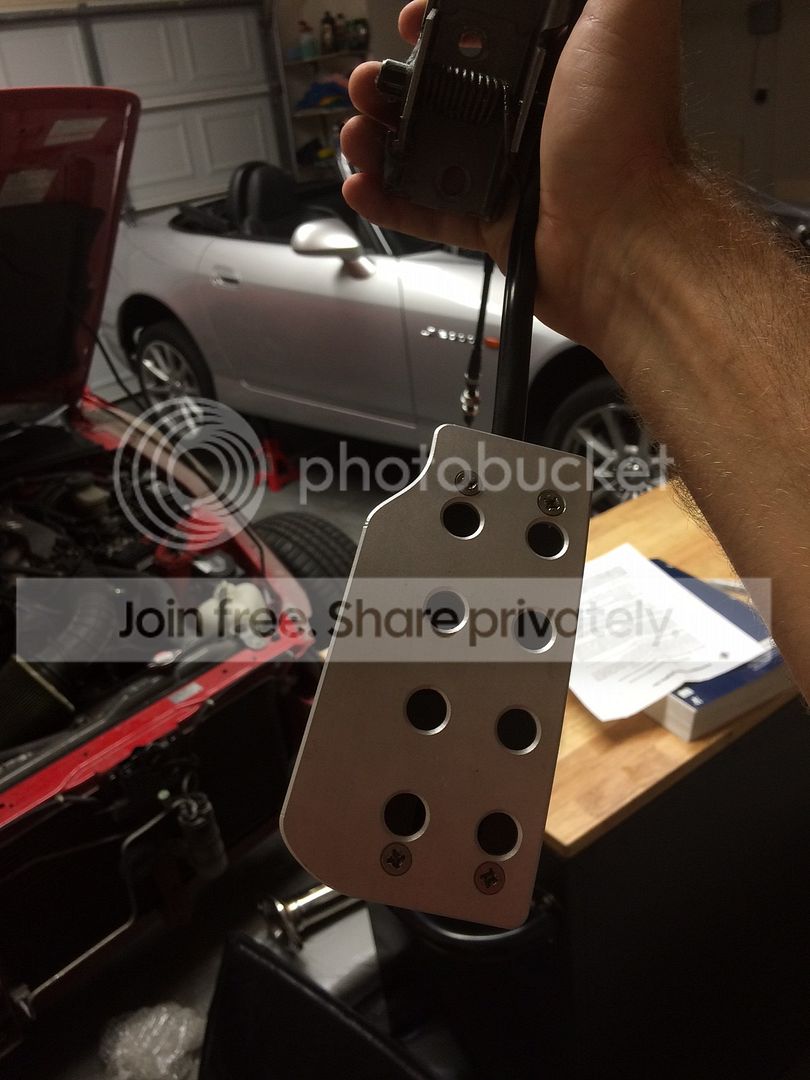
Boom. Make sure before you attach it, that the heel-toe-enabling extention is facing the right direction! You don't want to install it upside down, and therefore extending off the wrong side.
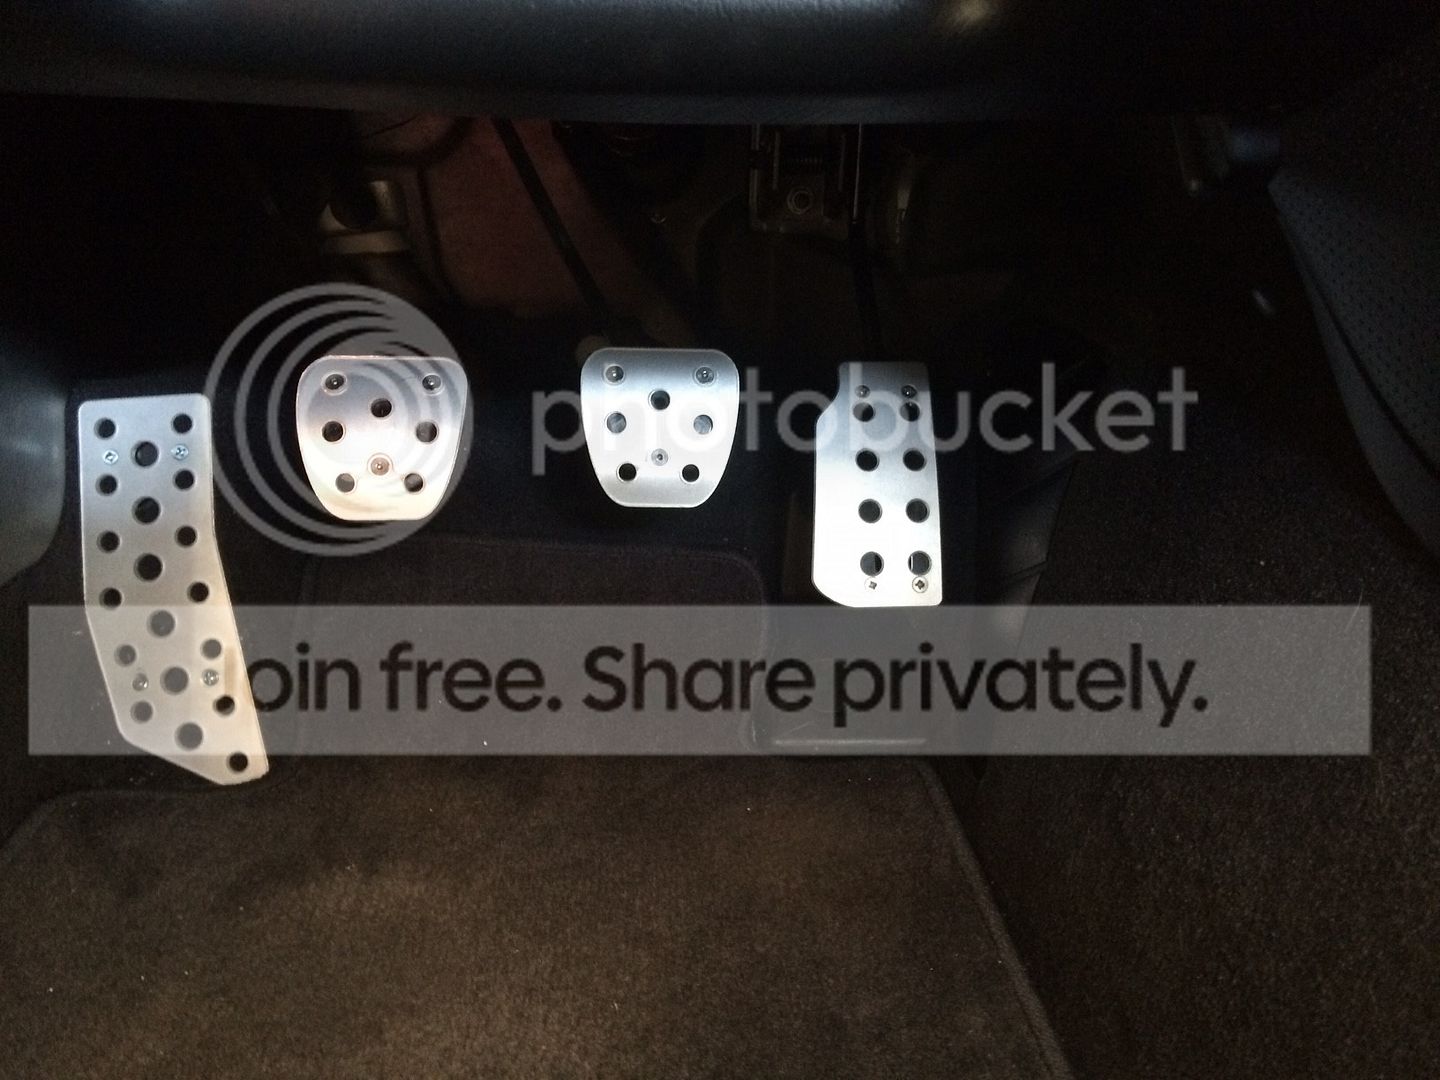
All done. Feels great. Wood buy again.
So for quite a while I've had a set of Autovation (autovation.net) pedals sitting on the shelf, destined to go into the AP1 race car. I decided to stick them in the new AP2 and see how they feel.
The reason... here are the pedals for a S2000. They are small, and far apart, at least for me. Especially for a Japanese car in my opinion. My heel-toe technique is more of a foot roll, and though it worked great in my TSX, I just can't quite get consistent with what Honda has given us.
The brake and clutch pedals go on pretty easy. I had my drivers seat out to make getting under the dash easier, but did not need to remove the pedals. The three rivet heads on each pedal come off very easy with just the touch of a drill bit. Once the pedal is off, you run a slightly larger drill bit through the rivet holes so that the supplied hardware will fit through the hole. Here is the pedal with the factory cover removed
The factory pedal vs the new pedal
The hardware that the kit comes with:
The brake and clutch pedal bolt on, each with 3 machine screws and the nylon-lined nuts. The holes in the new pedal cover lined up perfectly with the rivet holes on the factory pedal. The screws are used for the dead pedal, and the gas pedal.
The dead pedal and the gas pedal are a little more tricky. The screws provided are a bit low quality. The first one I tried to run into the sheet metal for the dead pedal, after drilling what I thought was a pilot hole plenty big, snapped in half once the threads bit. I suggest drilling the largest diameter pilot hole possible while still leaving just enough left for the screw to bite a little bit. The dead pedal surface is flat, and relatively easy to line up correctly. I didn't take a picture of that process.
The gas pedal though, its curved, and I really wanted to get it right. So I took the pedal out... its really easy. Two 12mm nuts off on the pedal side, and then go under the hood and disconnect the throttle cable. Just pull the whole thing out rather then try to fiddle with getting the cable off the pedal. On my DBW car, it takes the removal of 2 10mm bolts to get the cover of the TPS sensor assembly off, and you just pop the cable out.
Drill the rivets out, and shake the leftover bits out of the conveniently placed opening.
The old cover and the new. Notice two things: 1) The holes in the new pedal are spaced such that they will be at the very ends of the available mounting surface and 2) They don't use the 4 rivet holes. You have to drill your own. This was why I took the pedal out.
Boom. Make sure before you attach it, that the heel-toe-enabling extention is facing the right direction! You don't want to install it upside down, and therefore extending off the wrong side.
All done. Feels great. Wood buy again.
Site Moderator


Joined: May 2011
Posts: 13,625
Likes: 372
From: Seattle WA
Nice work. I did something similar with a set of mugen pedals and really like them over the OEM. The rubber on the OEM ones I found to be very slippery if the bottom of my foot was even barely damp.


Joined: Feb 2015
Posts: 69
Likes: 1
The pedals look good. I had a set on my old G35 and it made the worlds difference for heel toe downshift. I must say that I have had no issues with the pedals in the S2000. The pedal placement and size is perfect for me since I'm braking with the ball of my foot and roll my heel over to blip the throttle. I remember googling and finding a very old coupon code that gave me a nice discount on my pedals.

Thread Starter
Joined: Jan 2013
Posts: 98
Likes: 7
Good question, time will tell. The gas pedal is smooth, and per the instructions, this is intentional to allow your foot to easily slide on and off during a downshift.
Its hard to tell, even in the closeup pic, but the brake and clutch pedal have a rather sharp raised edge, and 3 of the circles on the pedal have the same sharp raised border. My gut feeling is that it at least won't be any worse than the stock rubber knobs, but we'll see.
Its hard to tell, even in the closeup pic, but the brake and clutch pedal have a rather sharp raised edge, and 3 of the circles on the pedal have the same sharp raised border. My gut feeling is that it at least won't be any worse than the stock rubber knobs, but we'll see.

Joined: Sep 2005
Posts: 2,973
Likes: 21
I actually like the stock brake and clutch pedal. Now the gas pedal I feel like it's too hard to heel toe so I did the same as you but I did not drill out the stock pedal. On the back there is a plastic cover which I don't see on yours. I believe it is a stop for the pedal when it hits the floor so the pedal doesn't get pinned or stuck.
I am about to make a new pedal and I might just take it out to install. I never thought of removing the whole cable but it makes sense.
I am about to make a new pedal and I might just take it out to install. I never thought of removing the whole cable but it makes sense.
Trending Topics
Community Organizer


Joined: Sep 2007
Posts: 10,599
Likes: 79
From: The 604
Nice work! Personally, I like the stock pedals; but I know of people that have difficulty with heel-toe in the S2000. I don't find the stock pedals to be slippery at all, and I wear dress shoes quite frequently. I had brushed Aluminum pedals in a previous car and those were really slippery.

Thread
Thread Starter
Forum
Replies
Last Post
bluejk09
S2000 Modifications and Parts
2
Aug 26, 2018 03:27 PM