
Behold my air / oil separator install


Thread Starter
Joined: Jan 2013
Posts: 98
Likes: 7
Hello all,
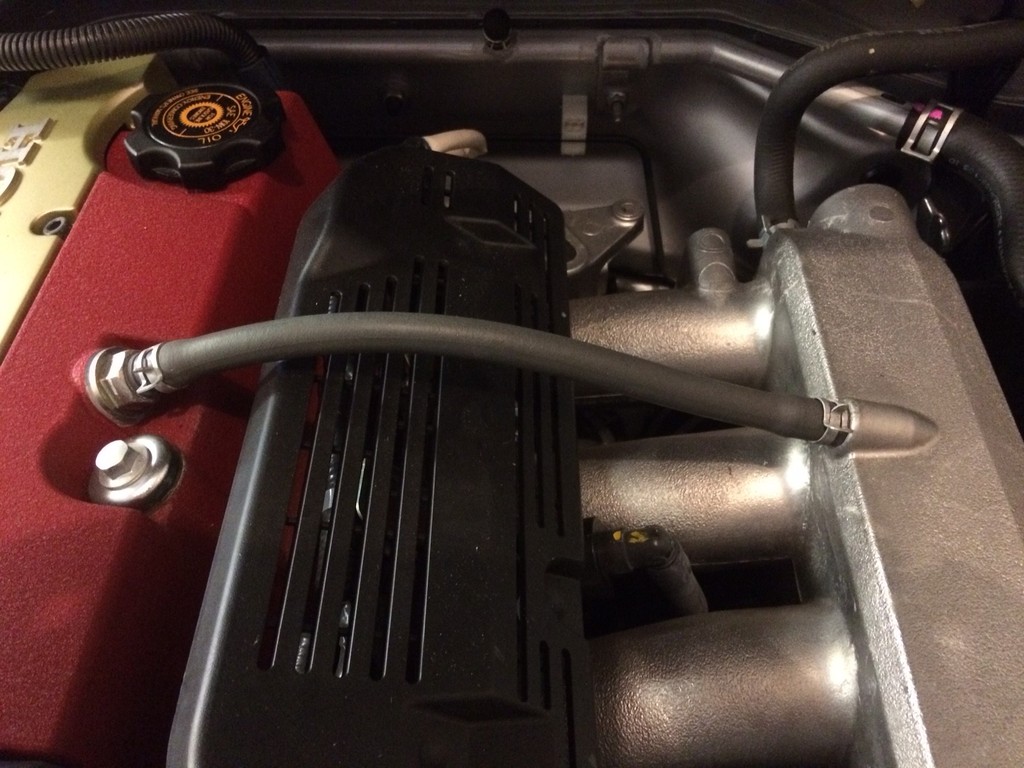
So just a little refresher on the valve cover vents we have:
Not the stock lines, but the stock layout. The PCV runs off the valve cover to the top of the intake manifold. This pulls crankcase gases out in high vacuum conditions, which is pretty much any off throttle moment. Particularly when decelerating in gear.
The Second line off the valve cover to the intake pipe assists with crankcase pressure venting in high throttle conditions.

There is a long thread sticky'ed in the road race forum detailing how in long right turns on track, oil is getting trapped up in the valve cover and just dumping into the intake manifold. The two big problems that result are A) a huge plume of smoke out the back in right turns and B) consuming a quart of oil in a 20 minute session.
My air / oil separator setup is NOT an ideal solution to this.
The capacity of the catch can is not enough to hold all the oil that an S2000 is capable of dumping into the PCV on track with sticky tires. One would be better off drilling the holes in the valve cover baffling described in that thread.
My solution is for a daily driver, that will see infrequent or no track use. My primary goal is to keep oil residue out of the intake manifold in daily driving conditions. When I DO get to the track with this car, I am hoping that the fact that I have an '06 (with a supposedly improved PCV / valve cover?) and that I am not on R-compound tires will result in minimal oil in the catch can after each session. I am accepting the cost of having to add oil after each session, as this car won't see the track too often.
Time will tell.
This install is just modifying the PCV setup. I might try a temporary setup on the breather line to the intake pipe just to see how much oil I get in there, but in daily driving I am expecting it would be VERY little. Driving around town, the intake manifold is nearly always under a fair amount of vacuum, so my guess is most crankcsae gunk gets sucked out the PCV.
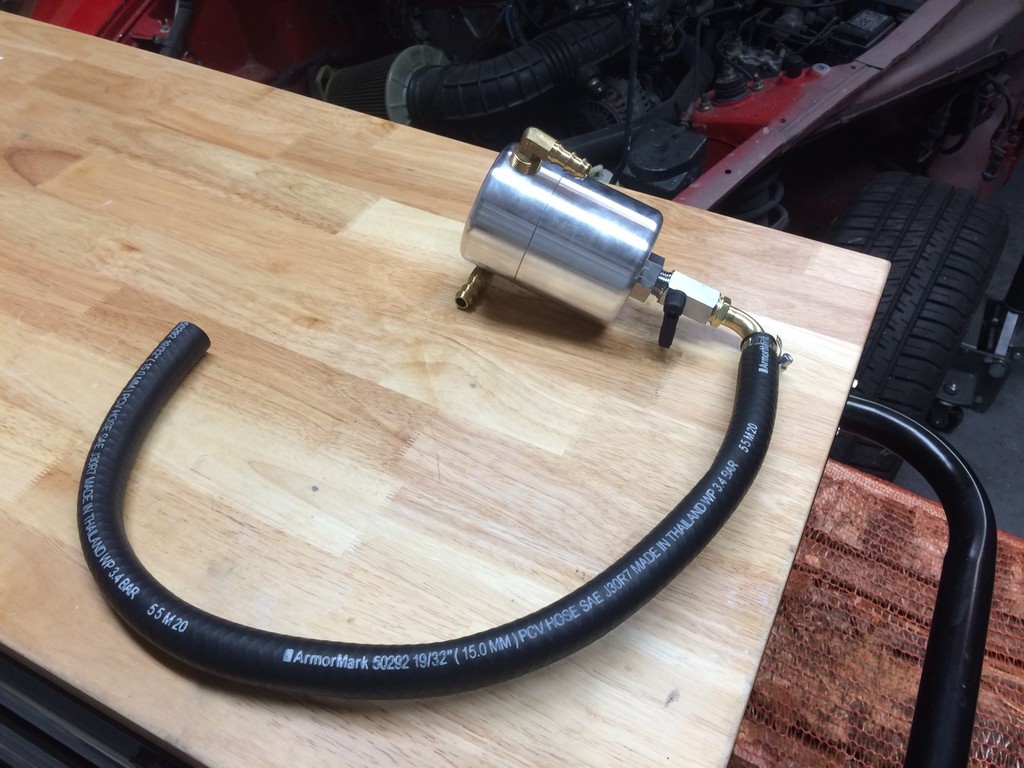
Anyway, so I ordered me a Morroso air / oil separator. They come in 3 sizes, this is the largest.
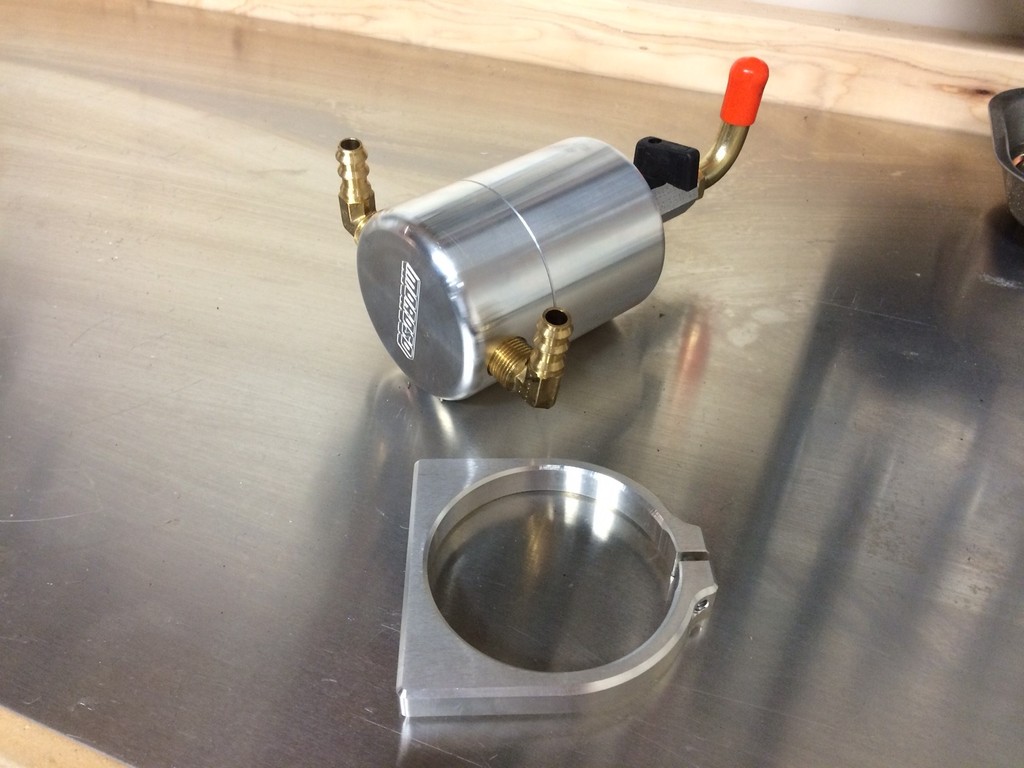
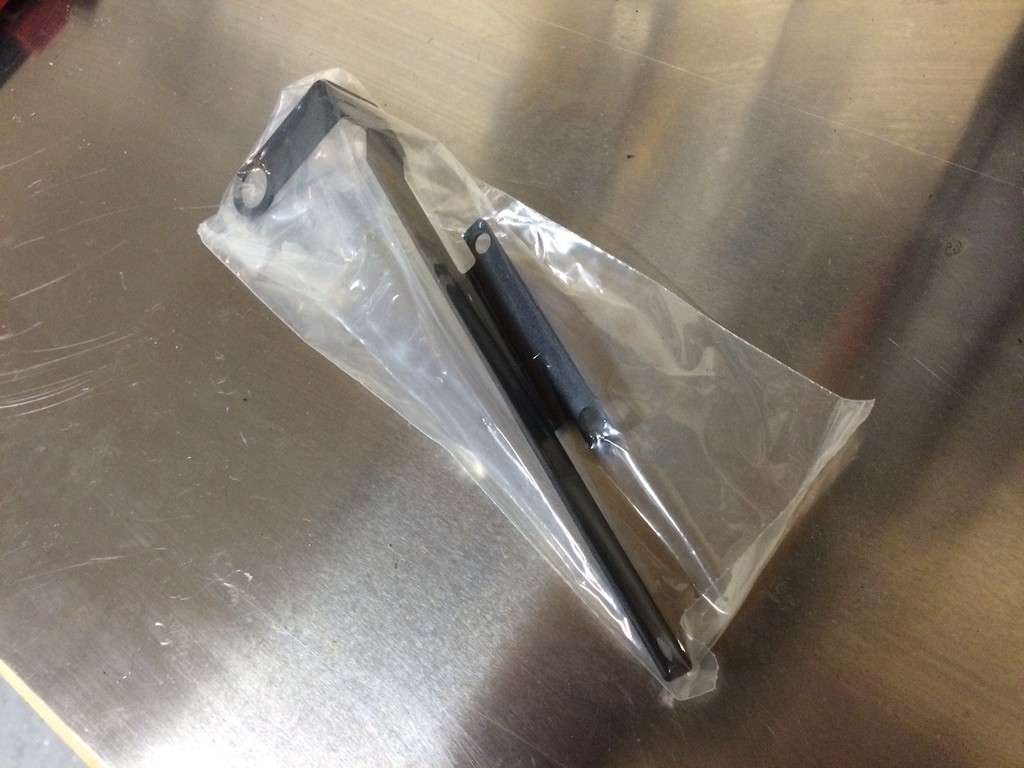
It's quite nice. The can has two ports that are part of the lid. The brass fittings are included. Shown here is the can all assembled with everything it comes with.
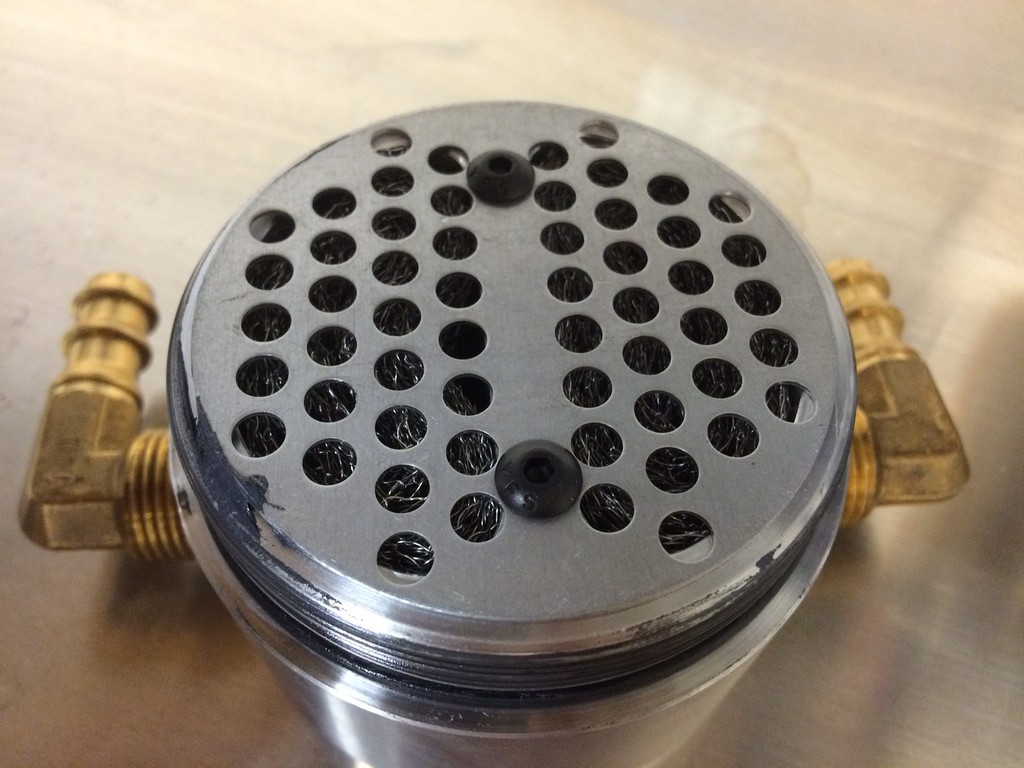
What makes this an air / oil separator is the filter inside. The lid is baffled, and each side is packed with steel wool. This causes the oil and water (yes, water) particles to get filtered out of the air before getting sucked out the other side.
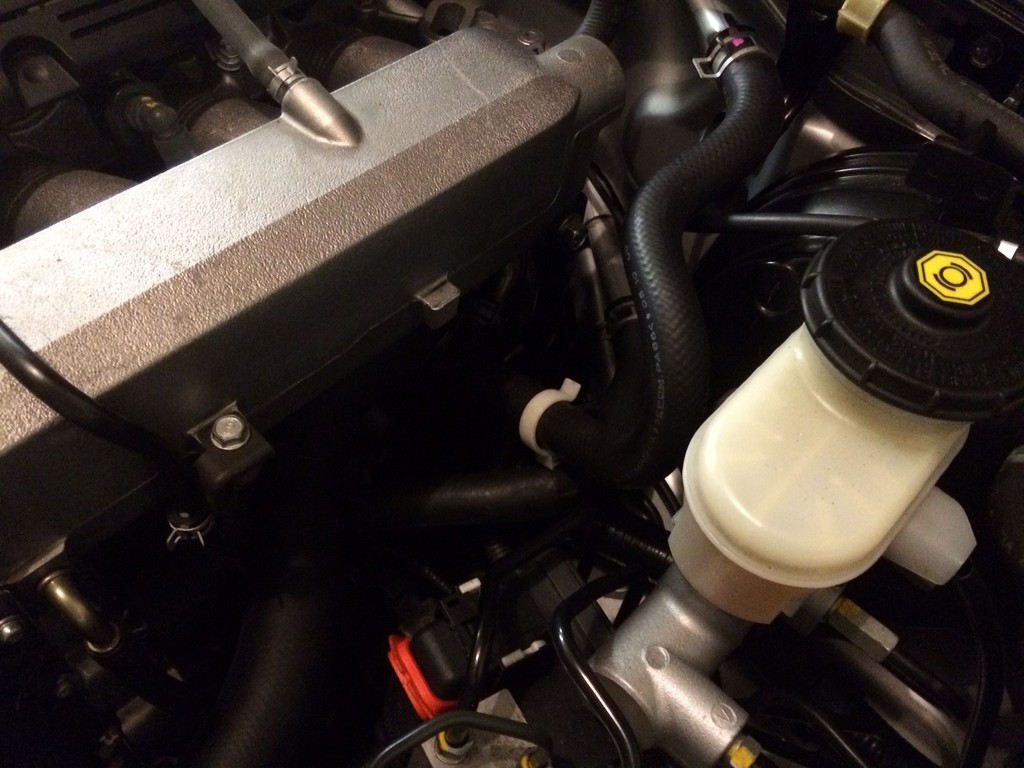
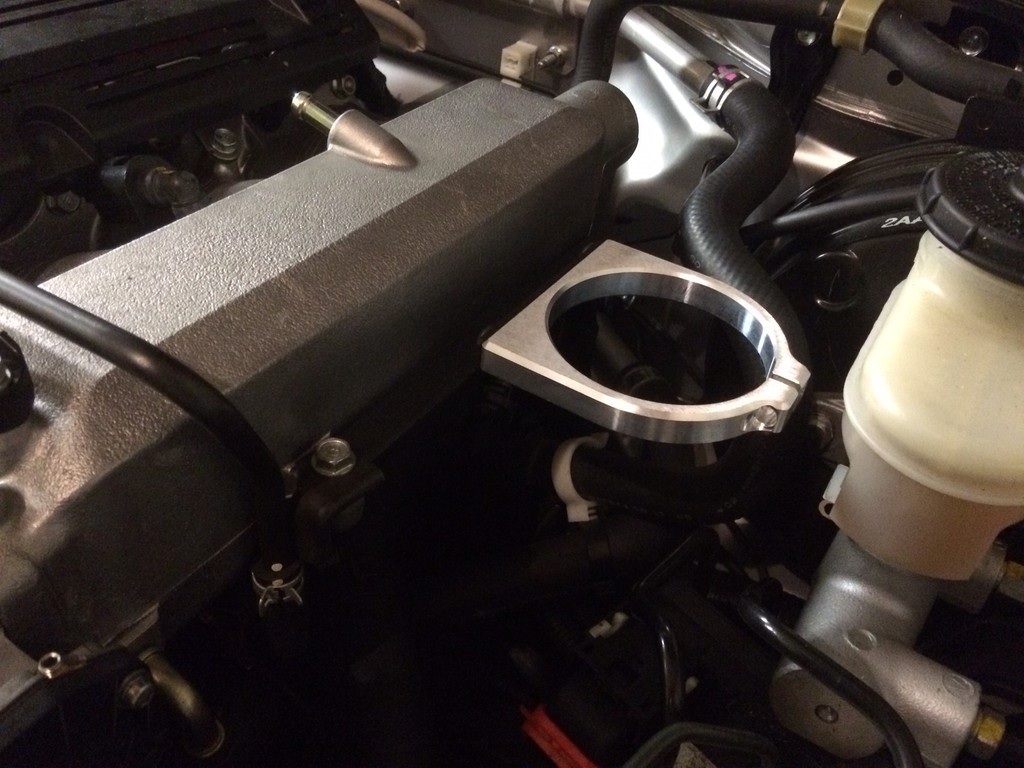
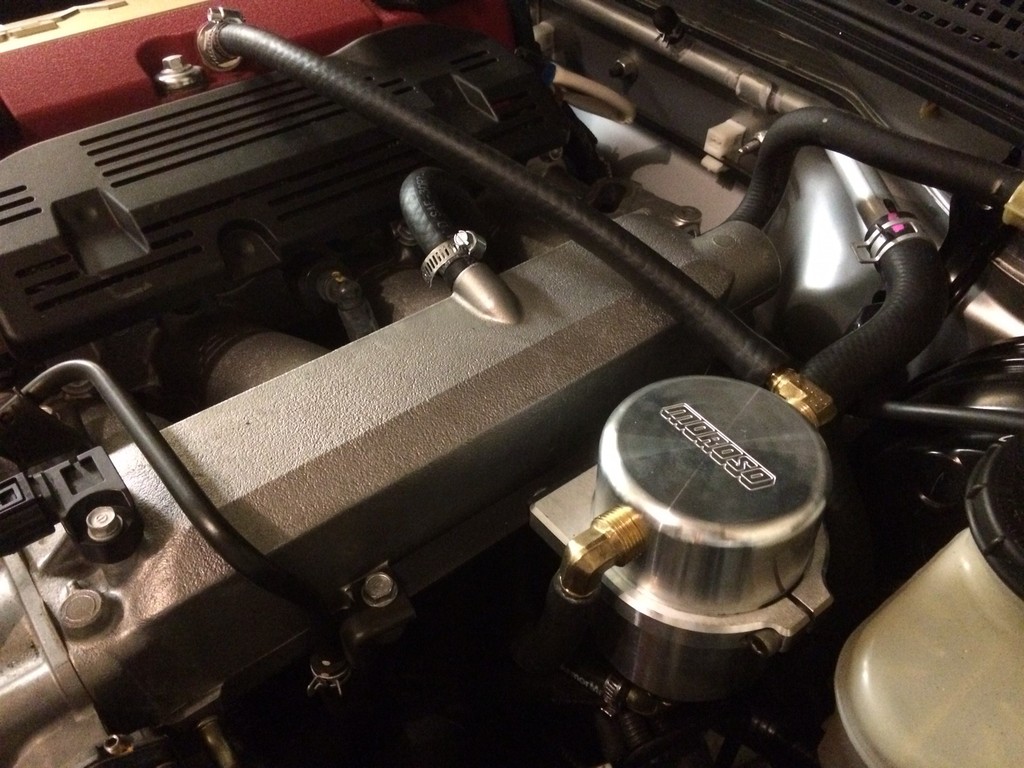
Now where to put it. I see a lot of these things installed all over the engine bay, with hoses crisscrossing all over the engine, and I wanted to avoid that. So I found this empty spot between the intake manifold and brake master cylinder that would work perfect.
I had an aluminum bracket cut & bent to shape (emachineshop.com is awesome). The bracket takes advantage of two existing bolts on the '06+ intake manifold.
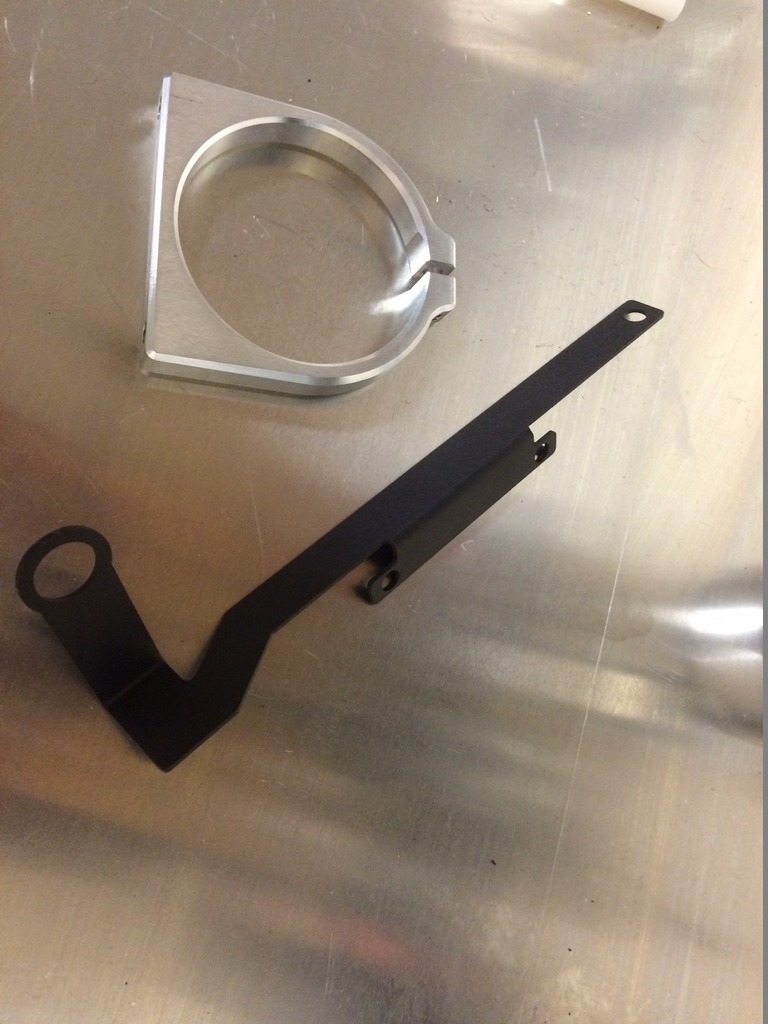
The can holder thingy that came with the catch can bolted up like so, with the included hardware
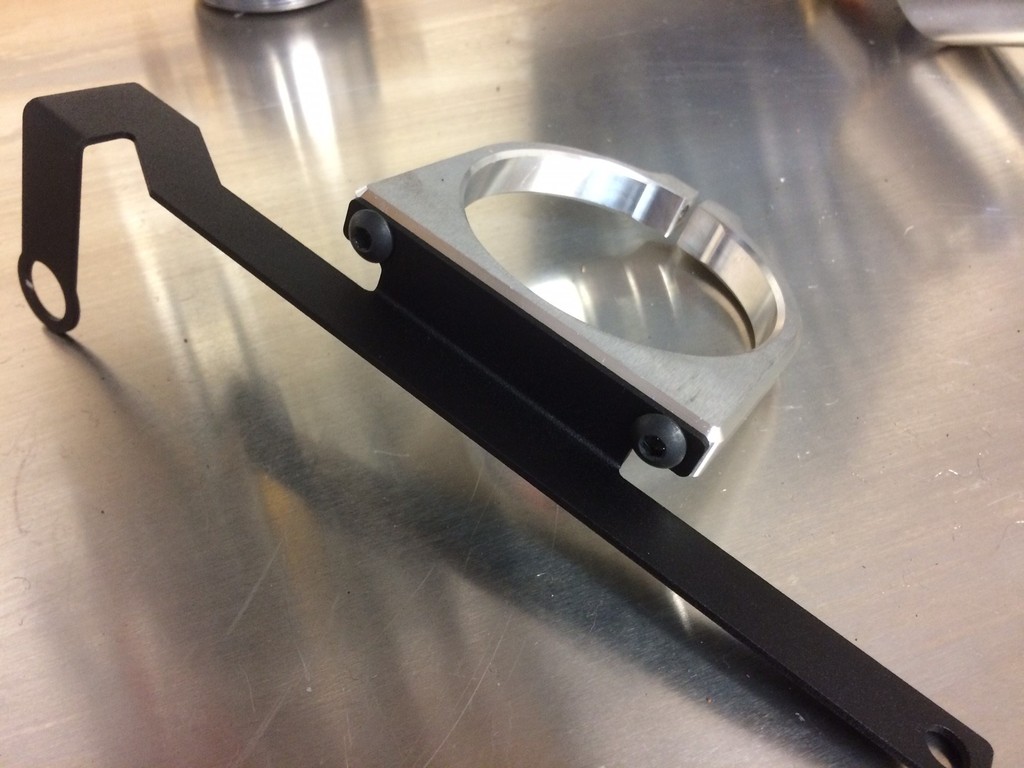
The bracket uses the 10mm bolt close to the throttle body that holds a coolant line, and the larger 14mm bolt at the back that holds the intake manifold bracket. Because the support bracket bolt is set back under the manifold a bit, I needed a spacer and a longer bolt. No sweat.
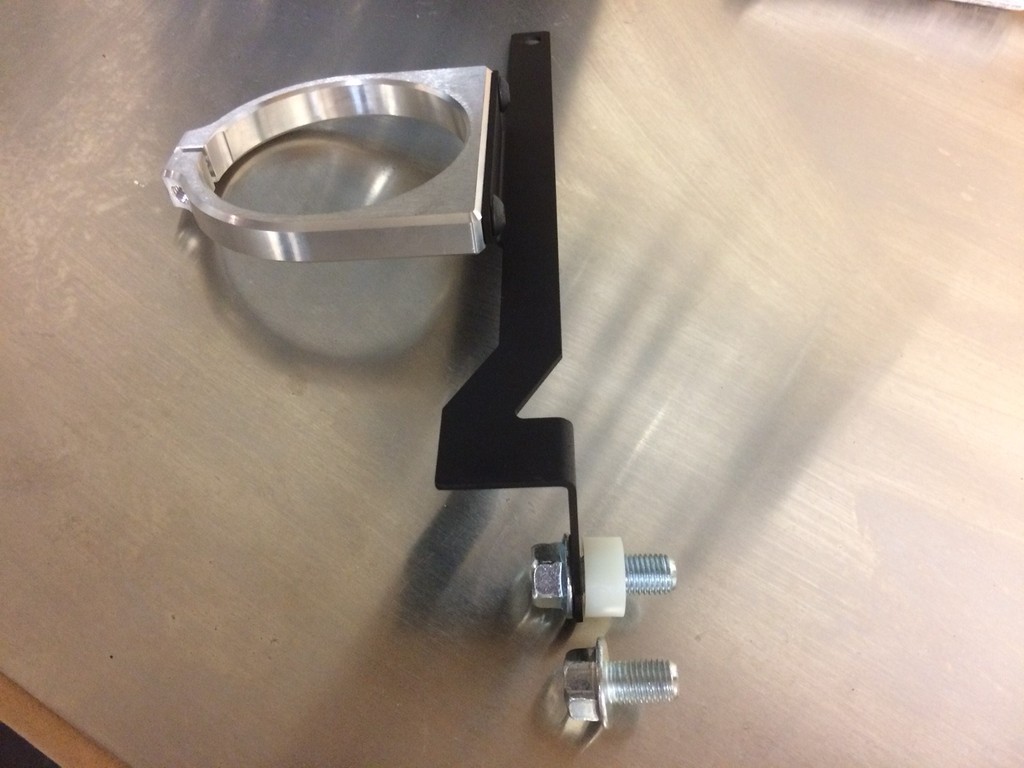
Bracket installed
Before dropping the can in, I attached a 2' long breather hose. This hose would be routed down to the bottom of the engine so that when I change my oil, I can drain the catch can at the same time.
Installed. The PCV attaches to the can via a hose across the top, and then the line from the can exit to the manifold routes up under the manifold and to the port on the manifold. I didn't put clamps on the hoses on the can, as I'd like to be able to pull them off quickly and unscrew the lid to look inside. They are secure enough.
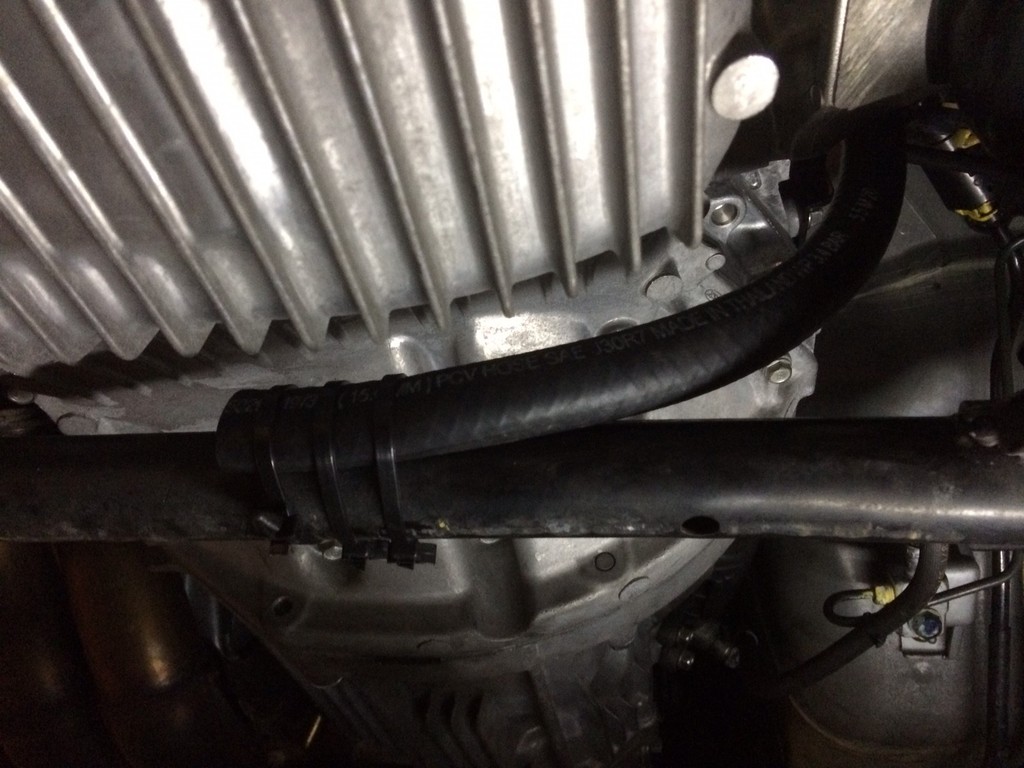
For now I have secured the drain hose to the crossmember at the back of the engine. I think I will need to find a way to plug this line. When I drain it, there will be a coating of oil inside the line and even when I close the drain, I think it will continue to drip when parked overnight. So I'll find a bolt to screw into it, or something like that. It would not be ideal to have this drain back into the pan in my opinion, as the oil that collects in the can will be a milky nastiness that contains impurities, like fuel and even water.
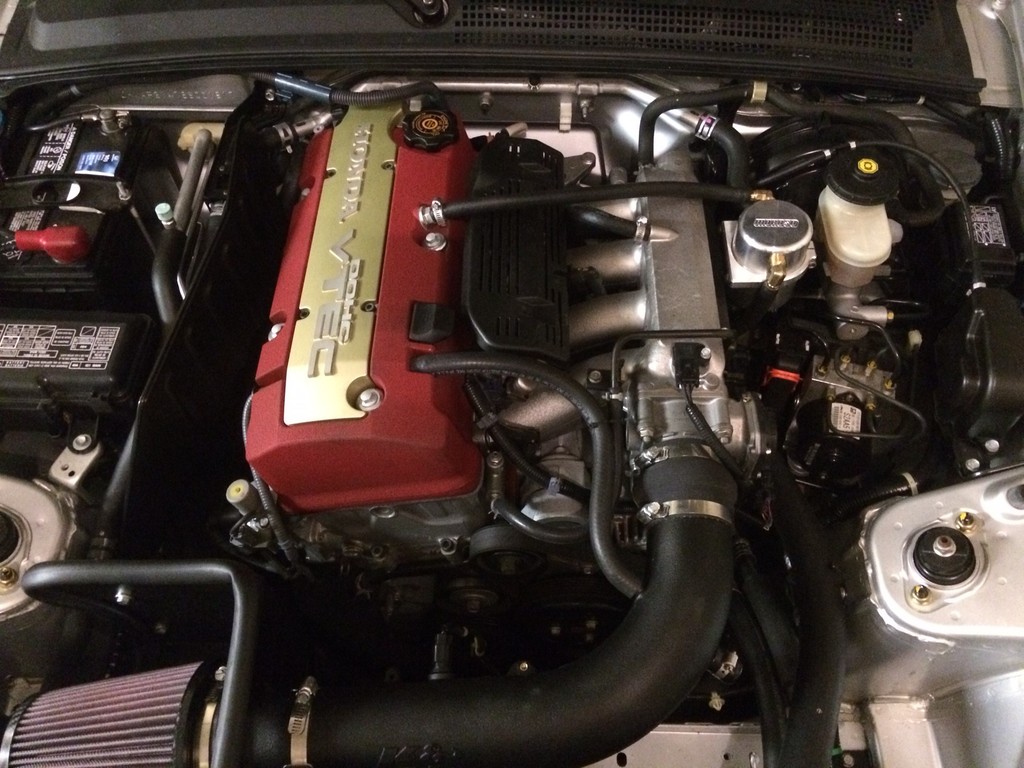
Overall I am happy with the install. The bracket holds the can firmly. I will report back after 1,000 miles or so and share how much oil I've collected in the can. I have a track day in about 5 weeks, that will be a whole other experiment...
Lastly, I ended up with two of my brackets. If anyone wants to do this same install, let me know, and I'll sell you this bracket. It will only work with the morroso can.
So just a little refresher on the valve cover vents we have:
Not the stock lines, but the stock layout. The PCV runs off the valve cover to the top of the intake manifold. This pulls crankcase gases out in high vacuum conditions, which is pretty much any off throttle moment. Particularly when decelerating in gear.
The Second line off the valve cover to the intake pipe assists with crankcase pressure venting in high throttle conditions.
There is a long thread sticky'ed in the road race forum detailing how in long right turns on track, oil is getting trapped up in the valve cover and just dumping into the intake manifold. The two big problems that result are A) a huge plume of smoke out the back in right turns and B) consuming a quart of oil in a 20 minute session.
My air / oil separator setup is NOT an ideal solution to this.
The capacity of the catch can is not enough to hold all the oil that an S2000 is capable of dumping into the PCV on track with sticky tires. One would be better off drilling the holes in the valve cover baffling described in that thread.
My solution is for a daily driver, that will see infrequent or no track use. My primary goal is to keep oil residue out of the intake manifold in daily driving conditions. When I DO get to the track with this car, I am hoping that the fact that I have an '06 (with a supposedly improved PCV / valve cover?) and that I am not on R-compound tires will result in minimal oil in the catch can after each session. I am accepting the cost of having to add oil after each session, as this car won't see the track too often.
Time will tell.
This install is just modifying the PCV setup. I might try a temporary setup on the breather line to the intake pipe just to see how much oil I get in there, but in daily driving I am expecting it would be VERY little. Driving around town, the intake manifold is nearly always under a fair amount of vacuum, so my guess is most crankcsae gunk gets sucked out the PCV.
Anyway, so I ordered me a Morroso air / oil separator. They come in 3 sizes, this is the largest.
It's quite nice. The can has two ports that are part of the lid. The brass fittings are included. Shown here is the can all assembled with everything it comes with.
What makes this an air / oil separator is the filter inside. The lid is baffled, and each side is packed with steel wool. This causes the oil and water (yes, water) particles to get filtered out of the air before getting sucked out the other side.
Now where to put it. I see a lot of these things installed all over the engine bay, with hoses crisscrossing all over the engine, and I wanted to avoid that. So I found this empty spot between the intake manifold and brake master cylinder that would work perfect.
I had an aluminum bracket cut & bent to shape (emachineshop.com is awesome). The bracket takes advantage of two existing bolts on the '06+ intake manifold.
The can holder thingy that came with the catch can bolted up like so, with the included hardware
The bracket uses the 10mm bolt close to the throttle body that holds a coolant line, and the larger 14mm bolt at the back that holds the intake manifold bracket. Because the support bracket bolt is set back under the manifold a bit, I needed a spacer and a longer bolt. No sweat.
Bracket installed
Before dropping the can in, I attached a 2' long breather hose. This hose would be routed down to the bottom of the engine so that when I change my oil, I can drain the catch can at the same time.
Installed. The PCV attaches to the can via a hose across the top, and then the line from the can exit to the manifold routes up under the manifold and to the port on the manifold. I didn't put clamps on the hoses on the can, as I'd like to be able to pull them off quickly and unscrew the lid to look inside. They are secure enough.
For now I have secured the drain hose to the crossmember at the back of the engine. I think I will need to find a way to plug this line. When I drain it, there will be a coating of oil inside the line and even when I close the drain, I think it will continue to drip when parked overnight. So I'll find a bolt to screw into it, or something like that. It would not be ideal to have this drain back into the pan in my opinion, as the oil that collects in the can will be a milky nastiness that contains impurities, like fuel and even water.
Overall I am happy with the install. The bracket holds the can firmly. I will report back after 1,000 miles or so and share how much oil I've collected in the can. I have a track day in about 5 weeks, that will be a whole other experiment...
Lastly, I ended up with two of my brackets. If anyone wants to do this same install, let me know, and I'll sell you this bracket. It will only work with the morroso can.


Joined: Oct 2009
Posts: 29,758
Likes: 5,389
From: Ontario Canada
I love the custom work on this, great job. Maybe you can find drain petcock to install on the end of the hose, then just drain it as needed, a few catch cans use those. Is the steel wool in the catch can stainless ?, if not it will rust due to condensation/water, and you could be sucking some rust residue into the intake, not a huge deal but it is best to have stainless mesh. Great work on this.
Thread Starter
Joined: Jan 2013
Posts: 98
Likes: 7
Thanks!
ya know I hadn't thought about that at all... I would assume they thought of that, but I'll peek inside every few months for a while to look for oxidation.
Adding the drain valve to the end of the hose is a good idea. That way I could leave the valve on the bottom of the can open, and the line would add a noticeable amount of total capacity. (3/8th's ID x 24" long...)

Thread Starter
Joined: Jan 2013
Posts: 98
Likes: 7
After I've checked inside the can a couple of times and am happy with the results, I'll secure the lines better.
I've received a bit of interest from a few members about the other bracket...
Turns out if 7 of you want one, I can do $35 shipped. It will include the longer bolt for the intake manifold, but you'll need to source your own spacer.
I've received a bit of interest from a few members about the other bracket...
Turns out if 7 of you want one, I can do $35 shipped. It will include the longer bolt for the intake manifold, but you'll need to source your own spacer.

Joined: Feb 2013
Posts: 76
Likes: 3
Nicely done
I had the same location in mind when i looked for a catch can set up.
After some research I ended up ordering the Radium dual catch can kit althouth I didn't wanted to spend that much money.
And I also thought they are a little to far away for '06+ models. It turned out that the catch cans work better if they are further away from heat and placed in a colder area.
Since i wanted both (breather and PCV) covered, It made sense to went with Radium.
Trending Topics


Joined: Nov 2007
Posts: 8,842
Likes: 1,700
From: Illnoise. WAY downtown, jerky.
Ehhh I'd say there's a good chance of hydrolocking if the can over flows (on a manifold vacuum assisted catch can setup). It would likely be on a big downshift when there's massive vacuum.
Oil mist from the valve cover and crank case can cause a ton of smoke at a track. Think of how much oil can be ingested through what is basically a straw going into a full can of oil with a giant vacuum source pulling it in.
A ported vacuum source (in the intake elbow, for example) is a safer bet..but not as effective, and you may see some extra crankcase pressure.
Its best to empty the can often.
Nice setup though, OP!
If youre still seeing oil clouds at the track...the breather hose that goes to the intake elbow also dumps a fair amount of oil into the air stream. That's attached to ported vacuum for a reason, unfortunately. So it kinda needs its own can.

Thread
Thread Starter
Forum
Replies
Last Post
austincrx
S2000 Modifications and Parts
26
Dec 7, 2016 06:44 AM