Hard Dog w/ interior & 6-point Install (max pics)
 02-24-2011, 07:04 PM
#1

Thread Starter

Join Date: Apr 2006
Location: Atlanta, GA
Posts: 464
Likes: 0
Received 0 Likes
on
0 Posts
Figured I would post this in a huge install thread since I have had so many people PM'ing me for pics and information on my roll bar install.
In this thread I will cover mainly holes that I did not see in the directions or other thread pics of the rollbar install. A few may be repeats of other threads. I will also cover some pics of the harness and seat install.
Note: I chose this particular application, which will allow all interior and comply under SCCA STR rules.
Items installed:
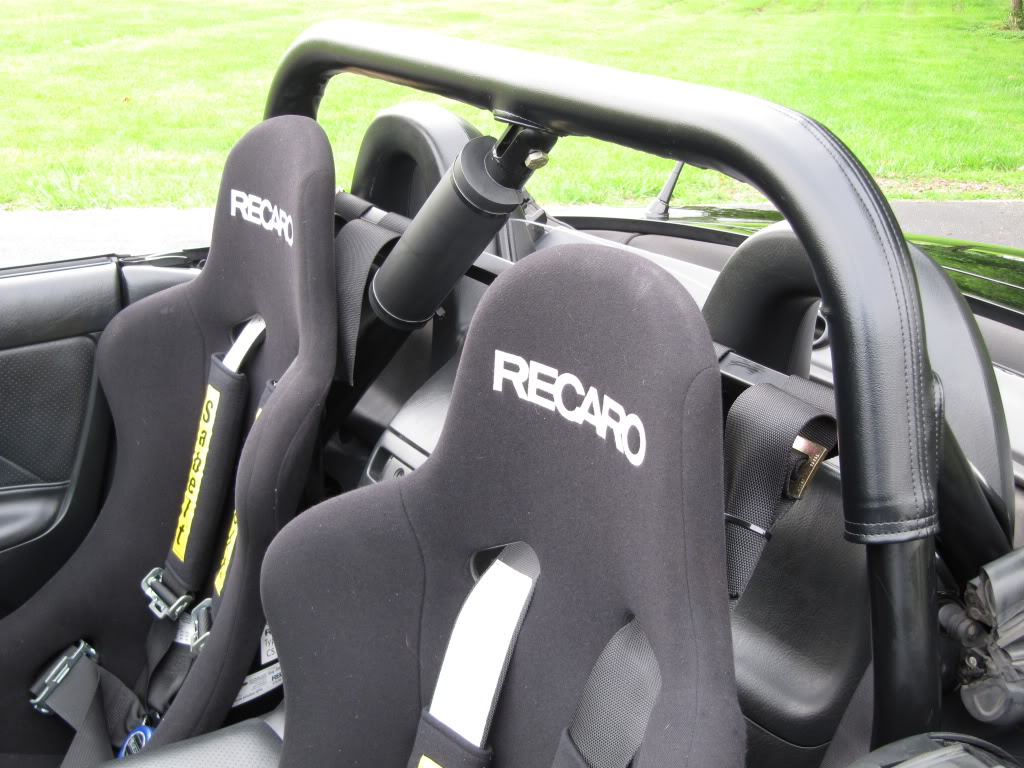
-Hard Dog/Bethania Garage Roll Bar w/ removable diagonal & harness Bar
-Custom HD Foam padding and vinyl cover
-Recaro Pole Position Seats on buddy club rails
-Sabelt/Sparco 6-point Harness
Roll Bar Install
Basic directions can be found here: http://www.bethania-garage.com/docum...00_install.pdf
A few notes I found to go with their directions.
-I wrapped all my flat head screw drivers in electrical tape to help not damage anything
-I also highly recommend putting everything in baggies with labels. you will have a ton out of the car
-Listen to them to no disconnect the belt tensioners unless you plan to reset the SRS
-Be careful when removing interior tabs, trees, push pins they brake easily
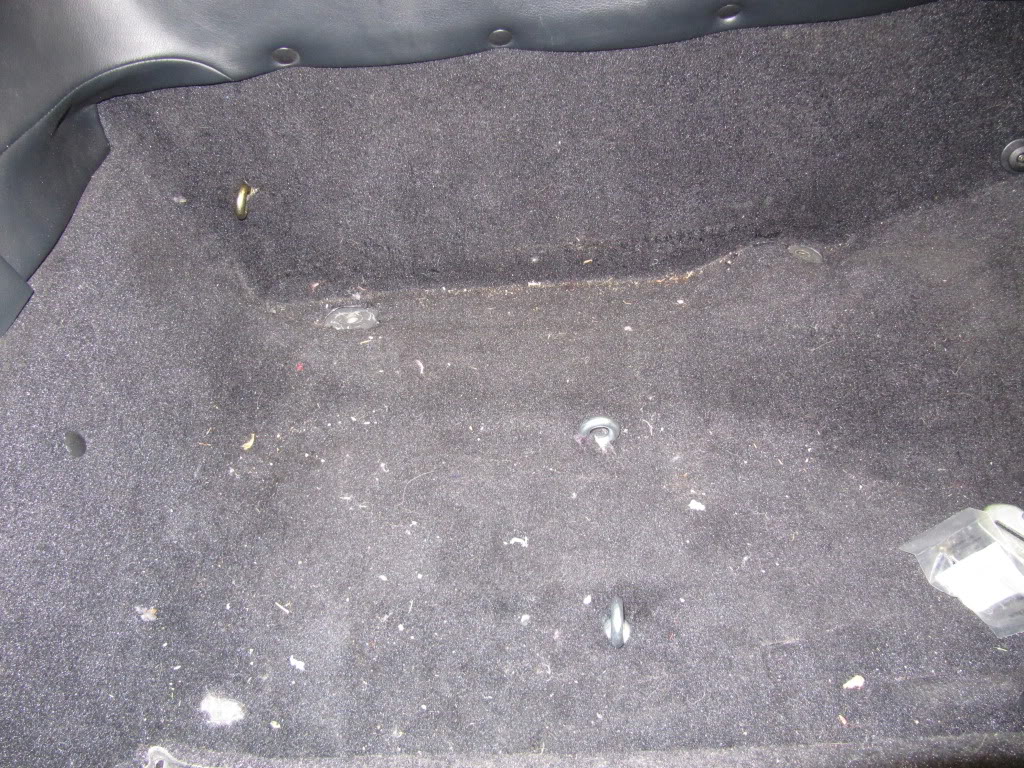
To start this is where you are left with all interior removed. Its mostly explanatory in the directions so go from there.
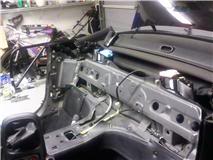
Once everything is removed, get a friend to help lift the bar into the car. I made sure the lip on the mounting plates, and front lip was clean against the body. put in the 10mm screws and check soft top clearance at all positions in its operation. Mark the bolt holes and check again (the bar moved when I did it and my first "clearance check" was not where I orig. had the bolts marked). I was super paranoid about this, since you can only drill once!
As you are drilling stick the bolts in the just drilled holes. This gives you an idea how mine fit and clearance.
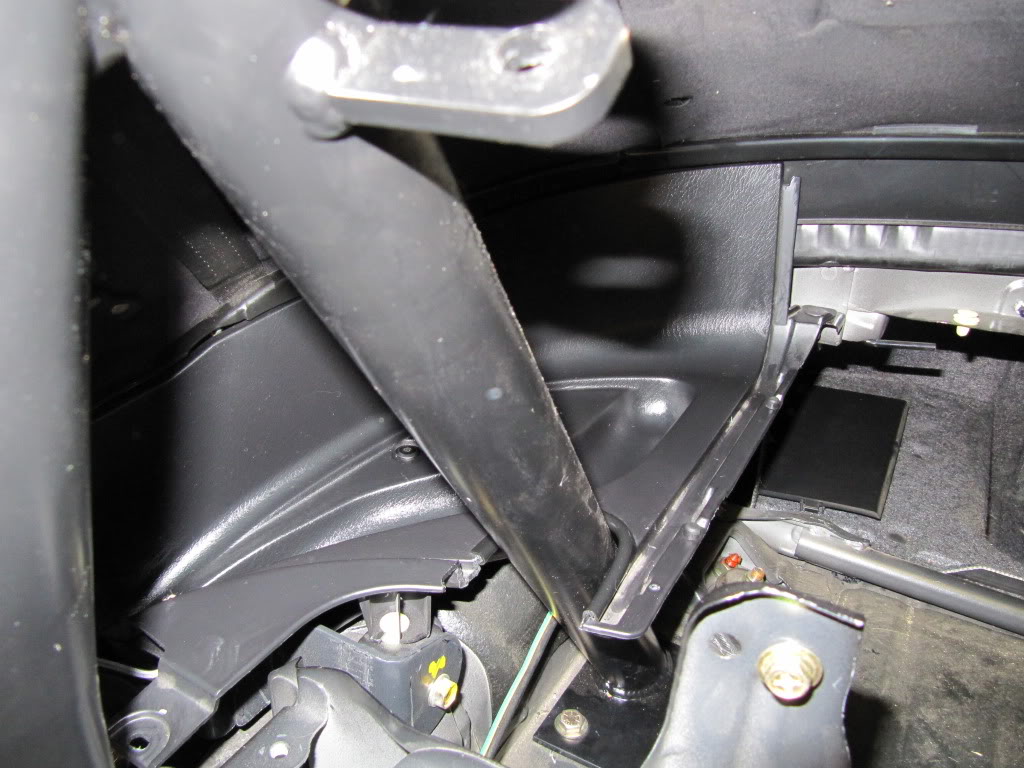
Next the part that everyone is hesitant about. cutting the body!
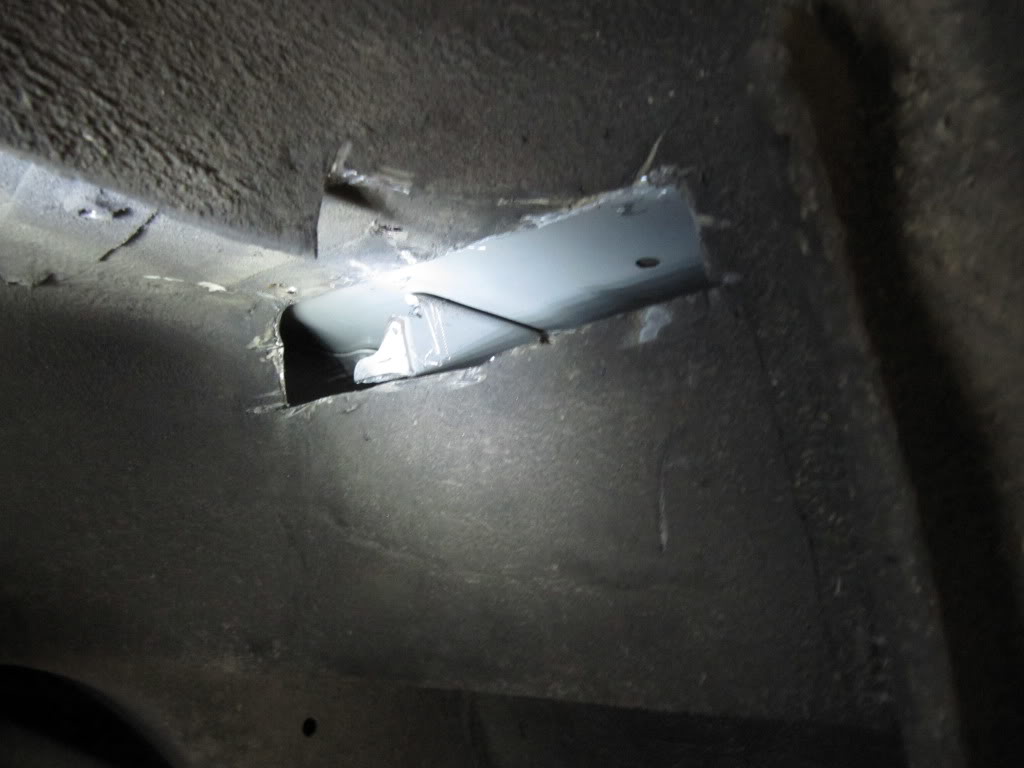
I cut close to the top of the body, but I didn't want to risk cutting into the interior compartment so I got about 1/8 close and then used dremel and grinding wheel to grind it down the rest of the way. Let me say the heavy duty cut off wheels and grinding stones will be your friend on this project. If you want a reference for how wide to cut the opening you can use the backing plates by lining them up with the rib and slit accordingly. There will be a lip/ layer of metal on the inside of the box you cut. I did my best to grind this flat so the backing plate would sit flush. Here was my cut:
Some people forget to put the bulkhead (unbolted) under the bar once they fit it in. It won't fit in after you bolt in the bar
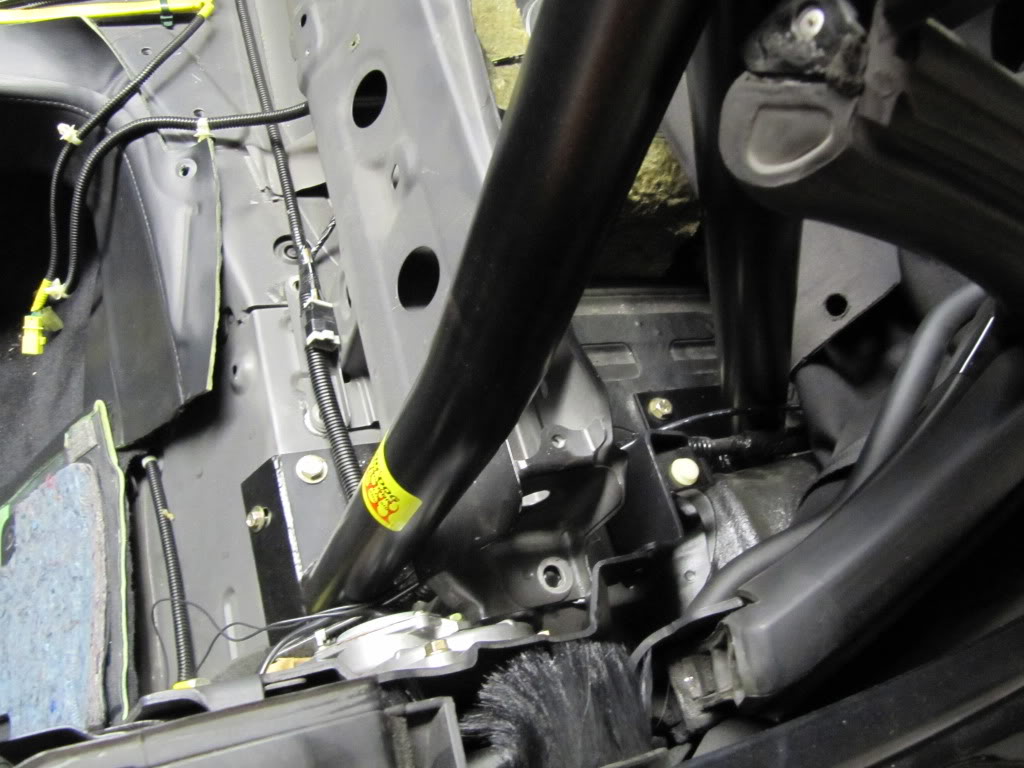
I found it helpful to have a friend help me bolt the backing plates in. he was under the car holding a wrench while I torqued the top of the bolts. I found it best to slightly tighten each of the bolts around the plate, since if you did one more than the other it could tighten at a funny angle. Be sure to use the blue loctite!
Don't forget to thoroughly check clearance once bolted down.
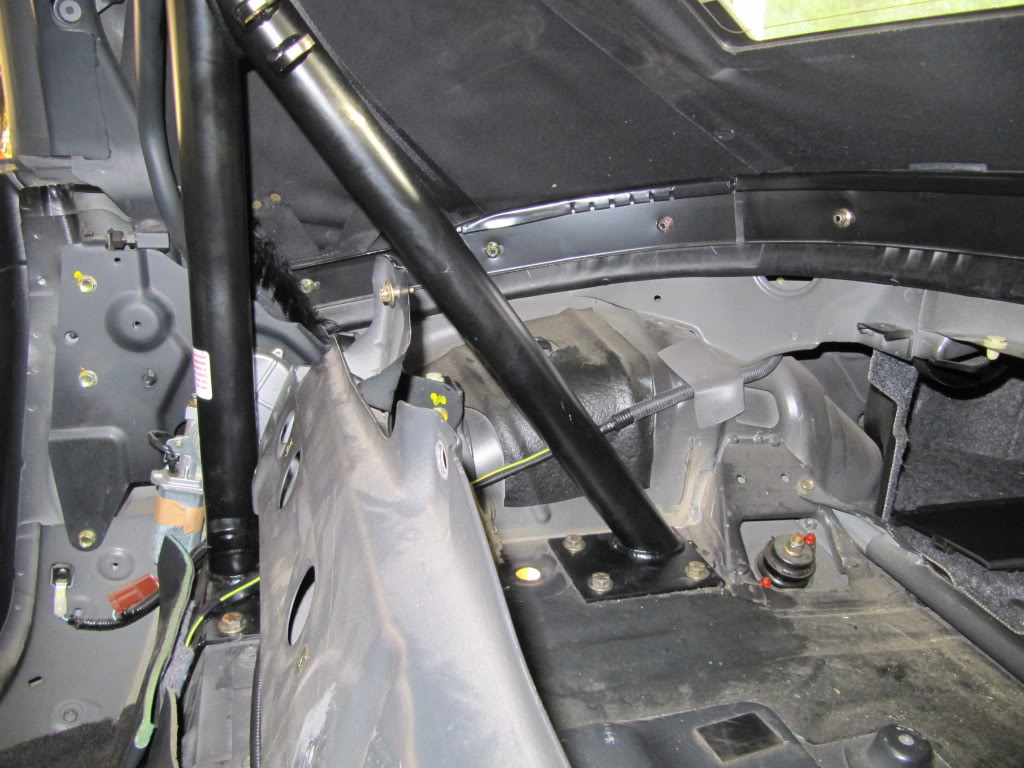
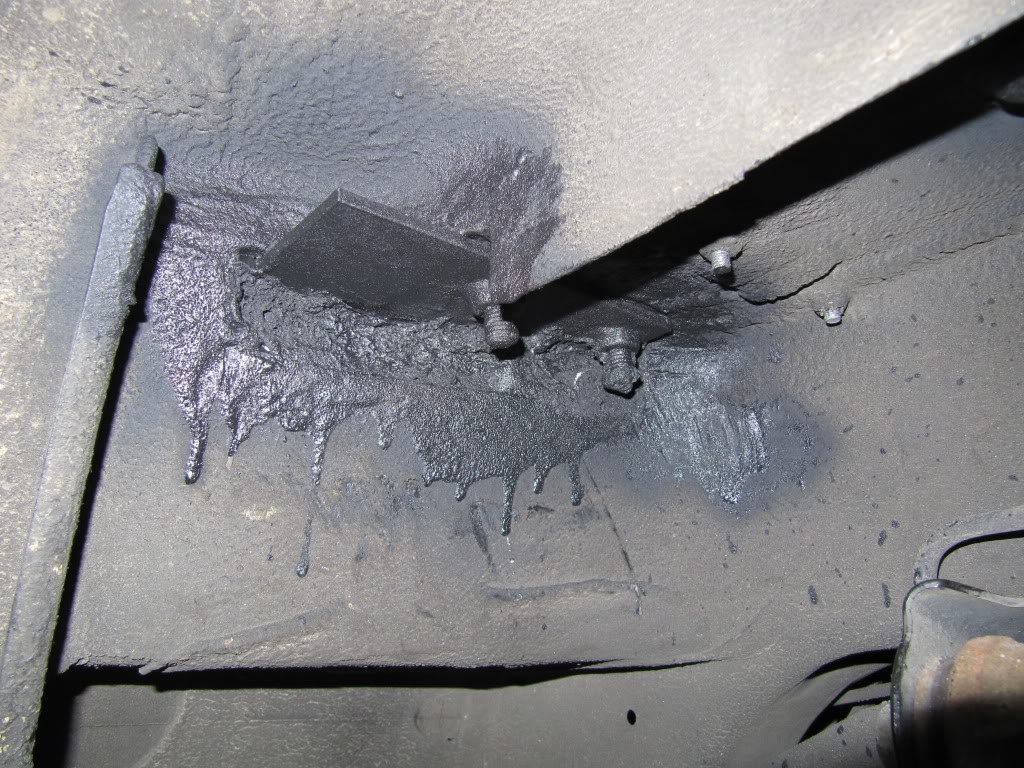
Once its all snug and clearance is good. Spray some expanding foam into the whole you created and give it all a thorough spray of under car coating:
bolt all the hardware back in the car together per the instructions.
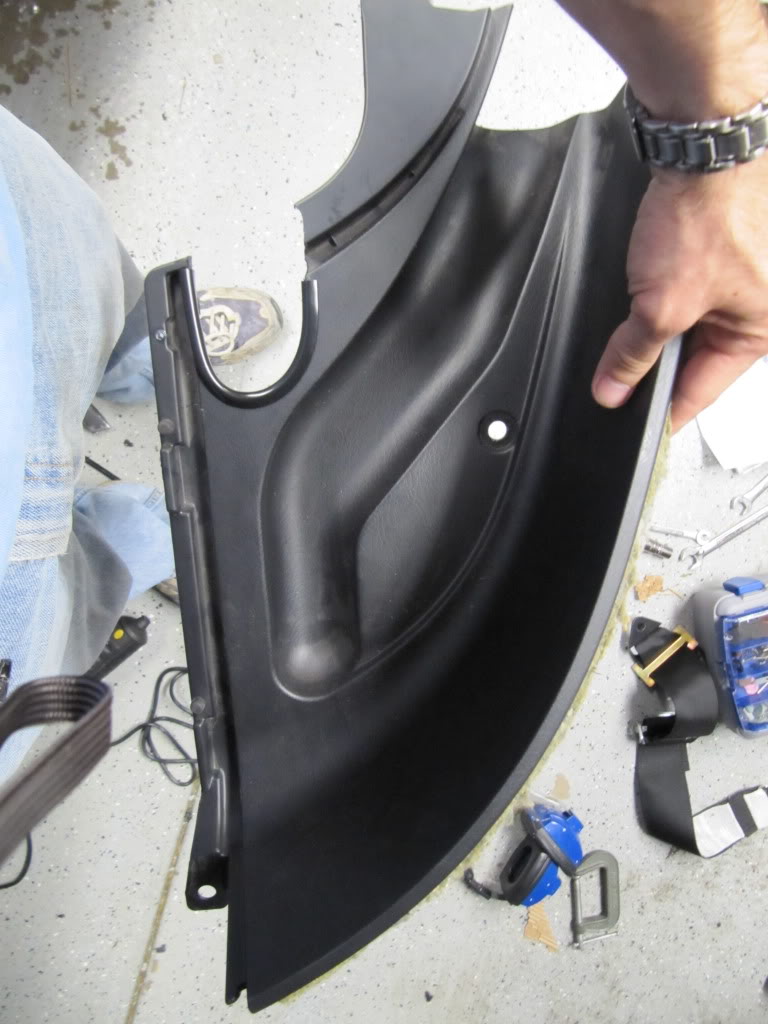
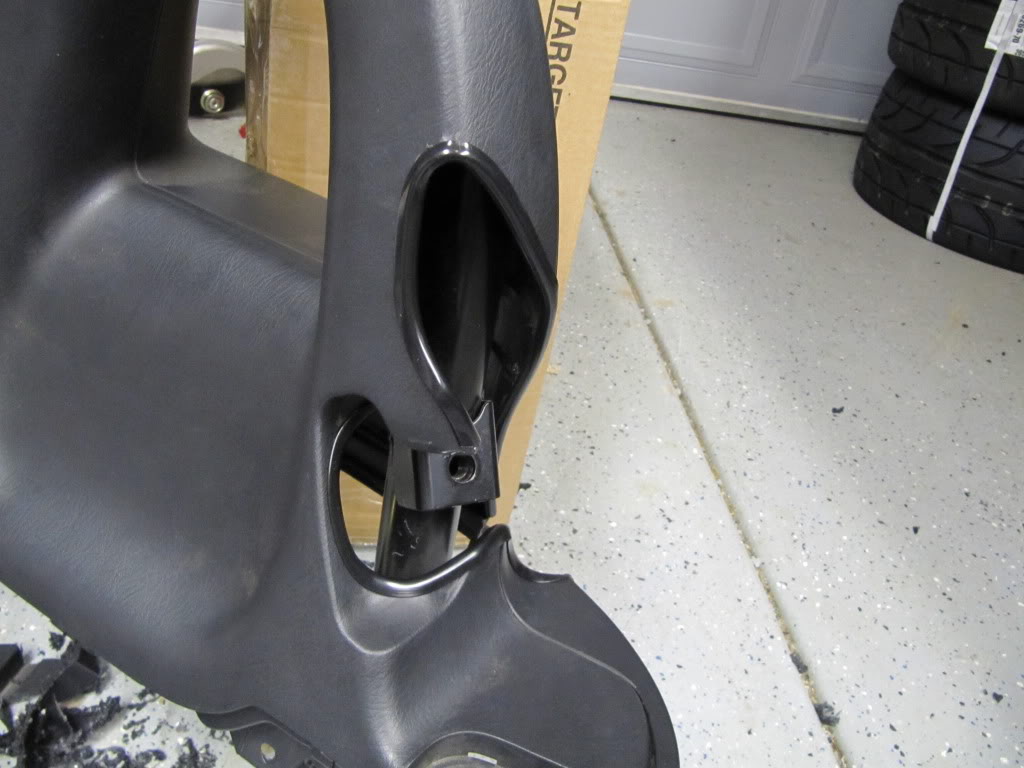
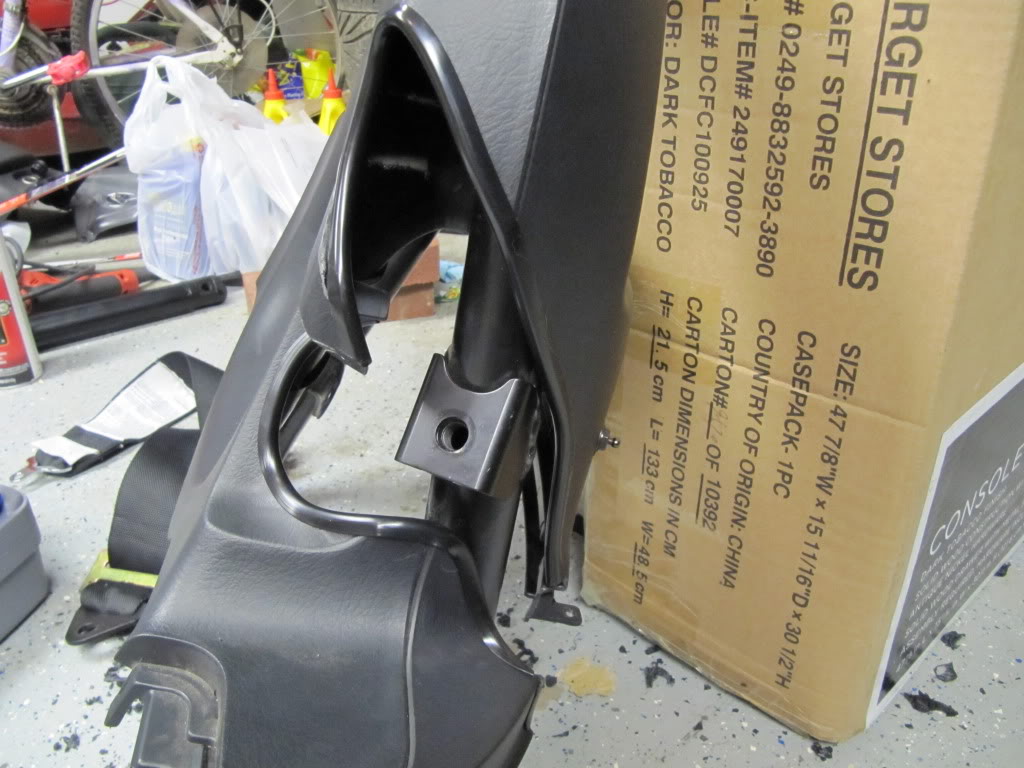
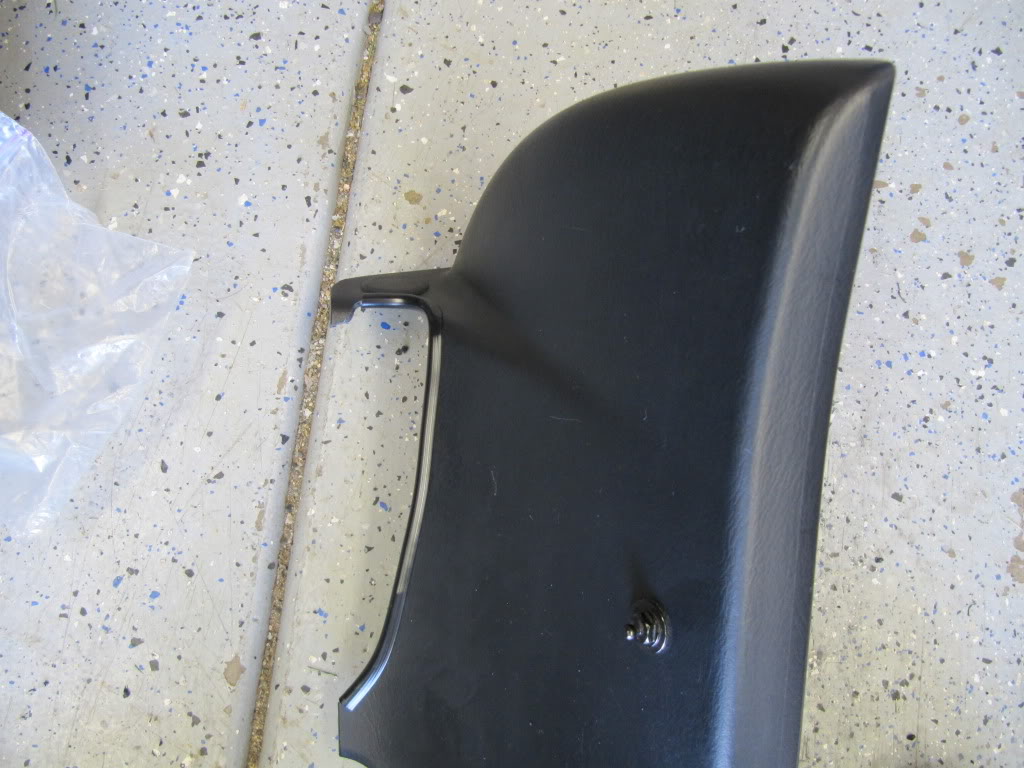
Now comes the fun part. interior trimming!
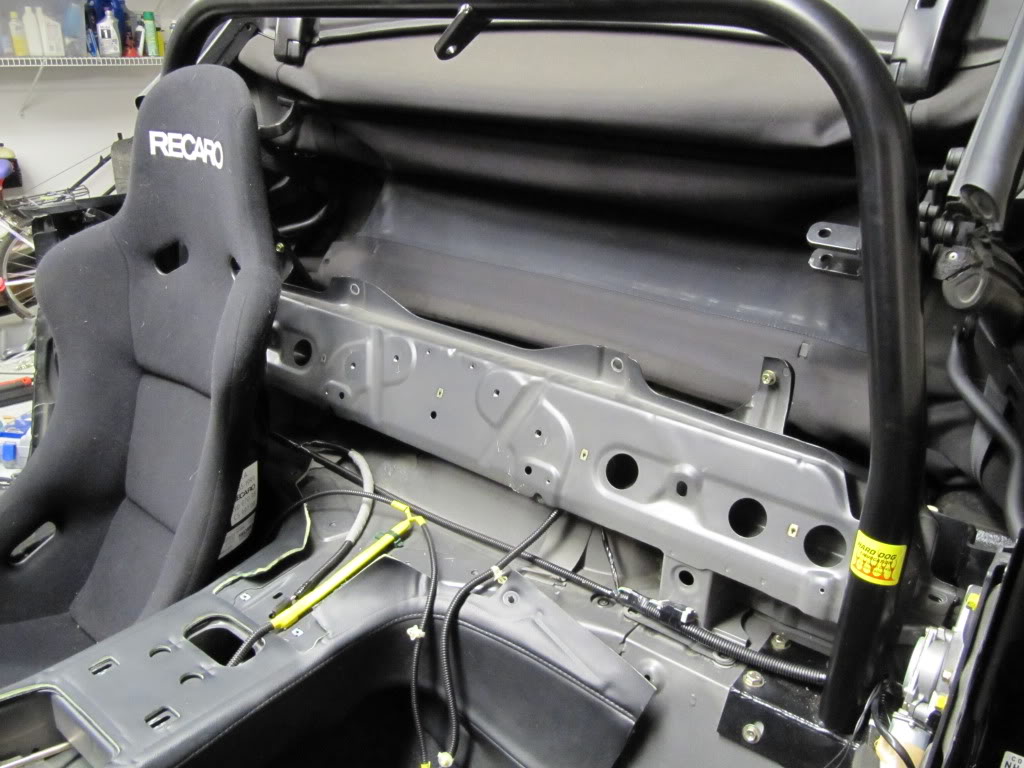
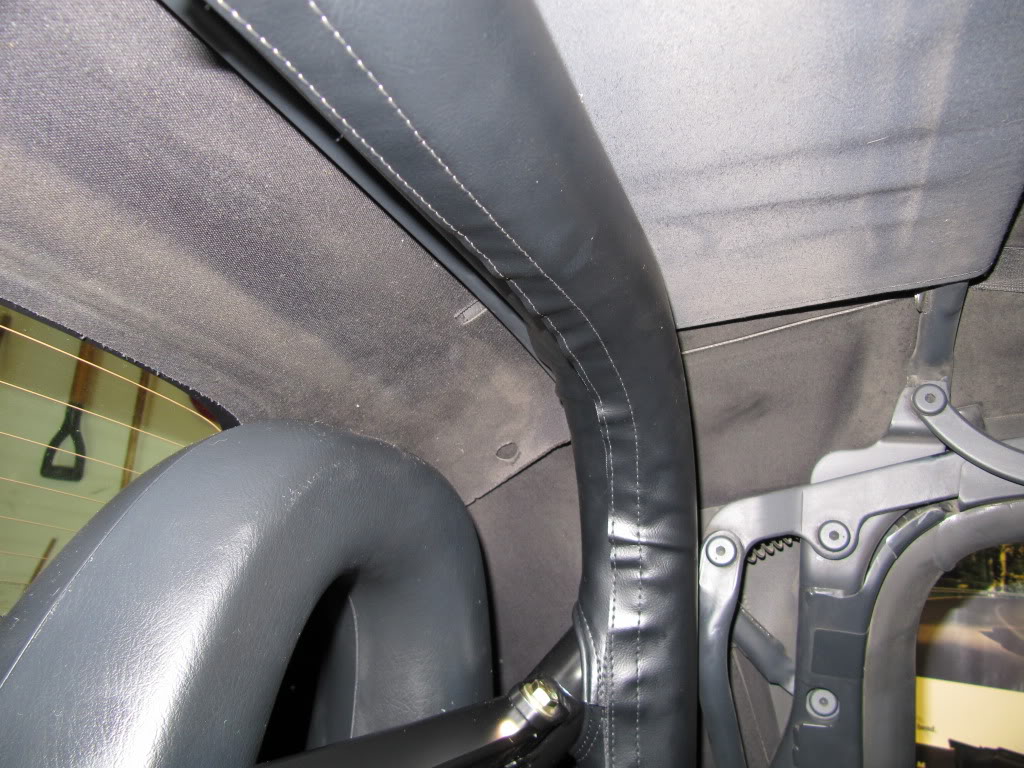
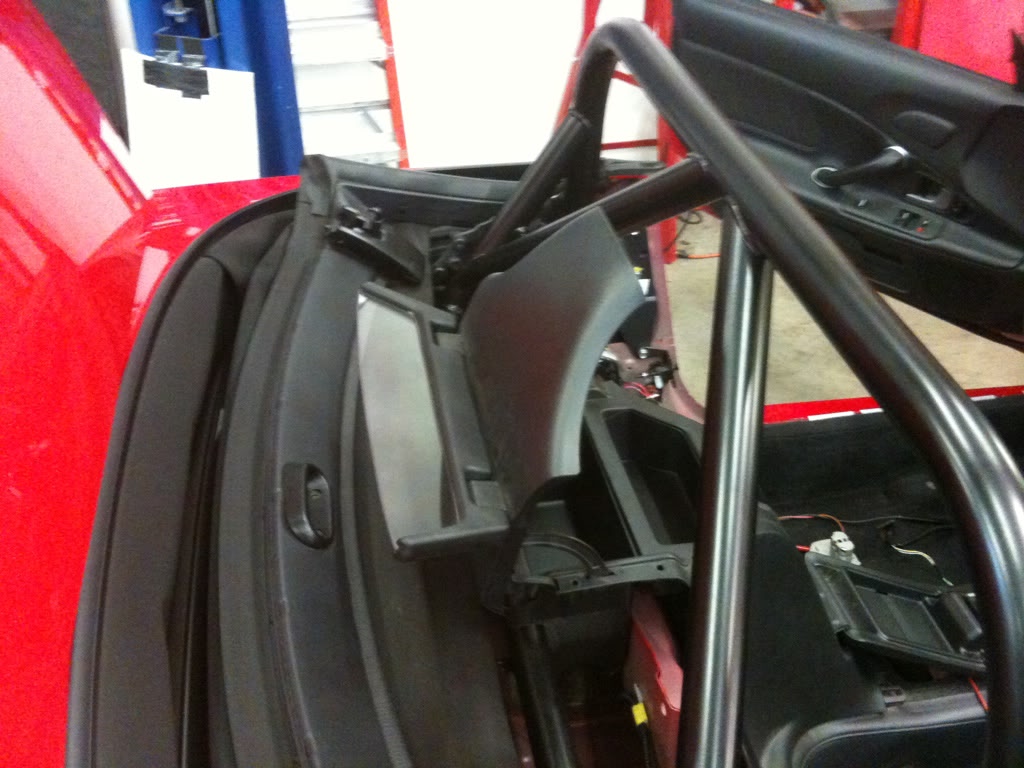
My method was to look at reference pictures, like below, to get a general start. I would then fit the part, mark with a marker where there was rubbing and re-trim. It took a pretty long process, but I found better than taking too much material off. I also used door bump guard around my cut edges to give it a cleaner look. I highly recommend! Also keep in mind; your trimming could be different depending on how your bar is aligned.
water drainage trim
Factory hoops
Side panels
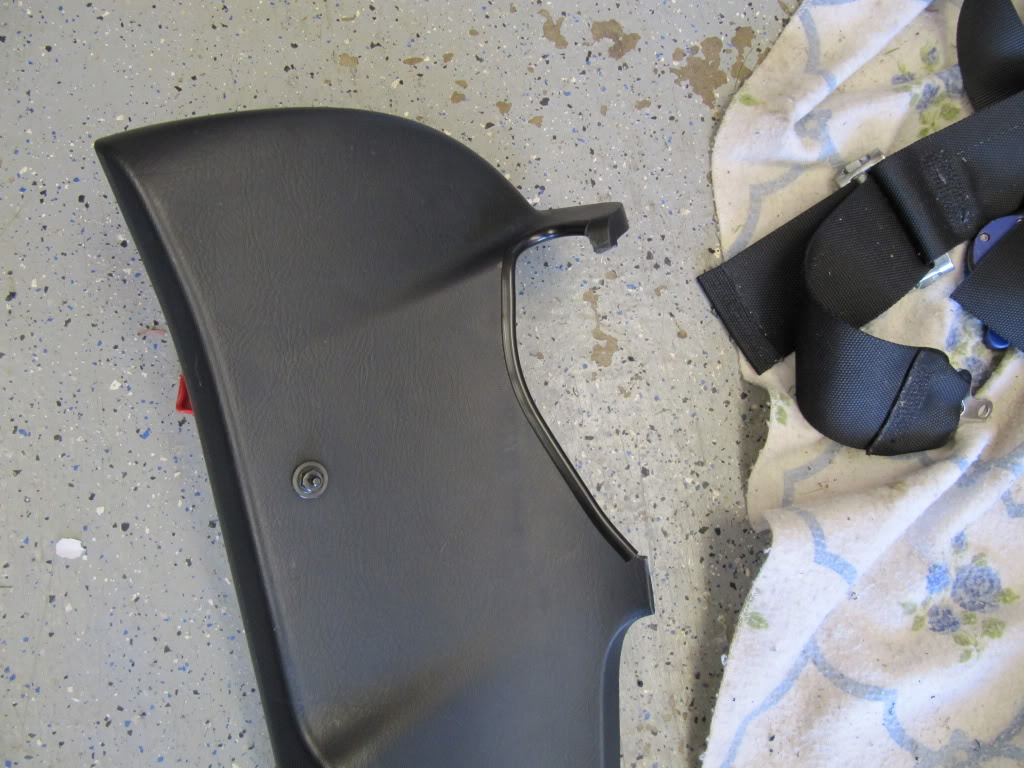
I got lucky enough not to trim the driver side passage panel
On a side note per rules I had to put in the factory belts, but I didn't plan to use them so just routed them around the bar
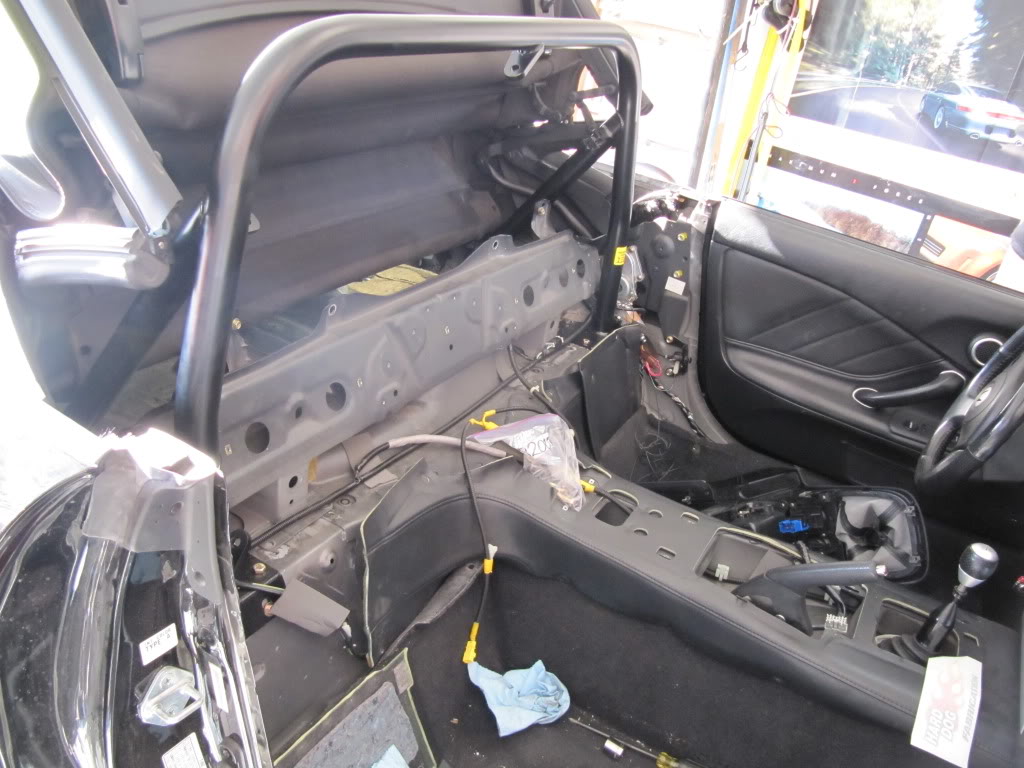
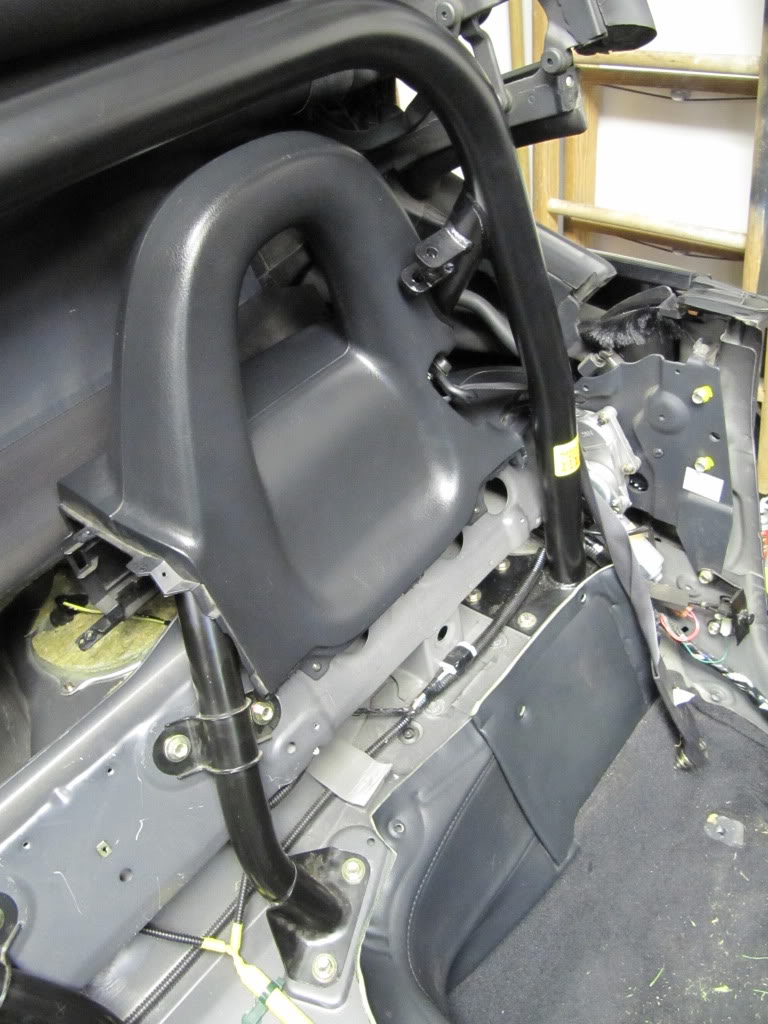
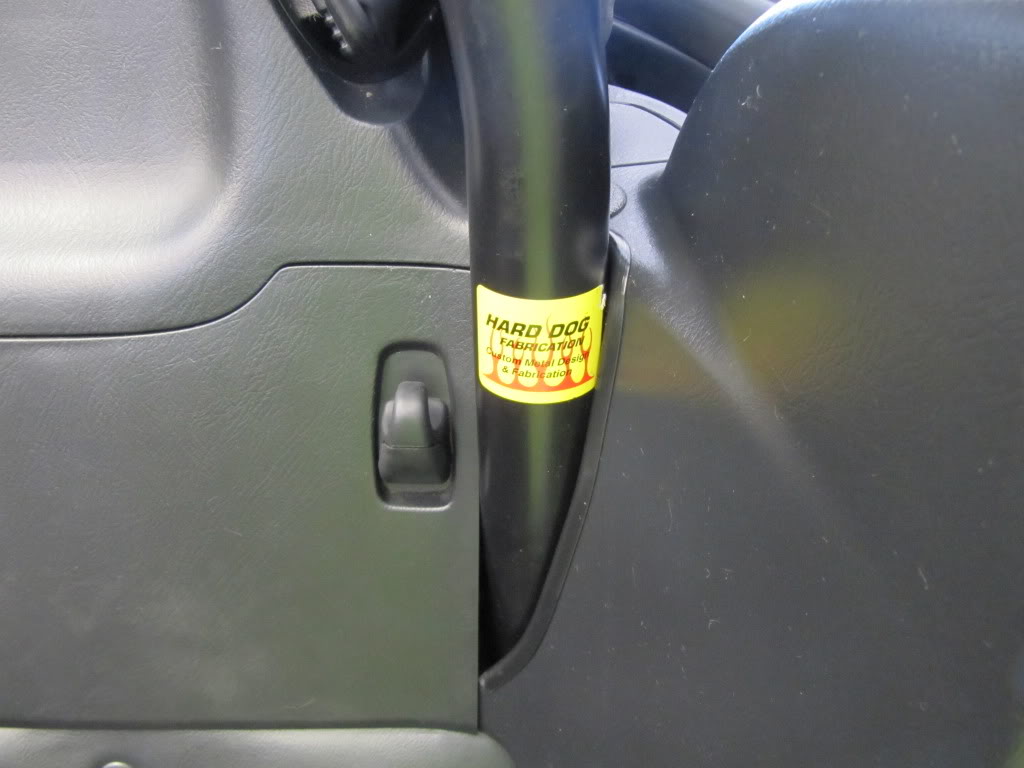
All trimmed up
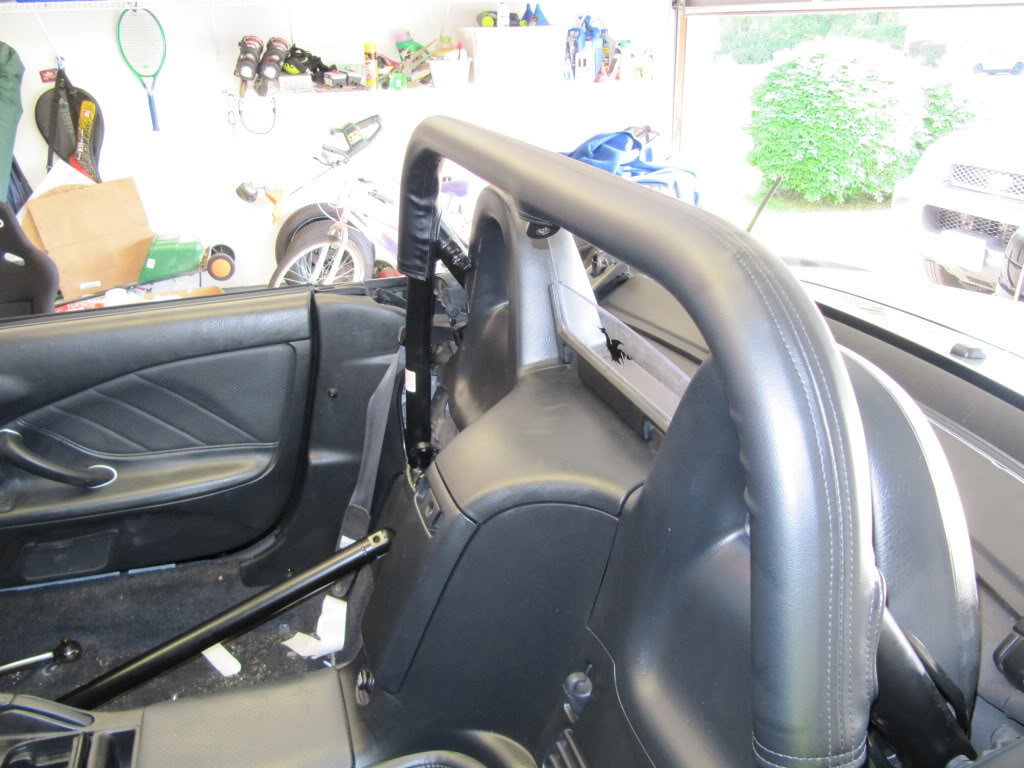
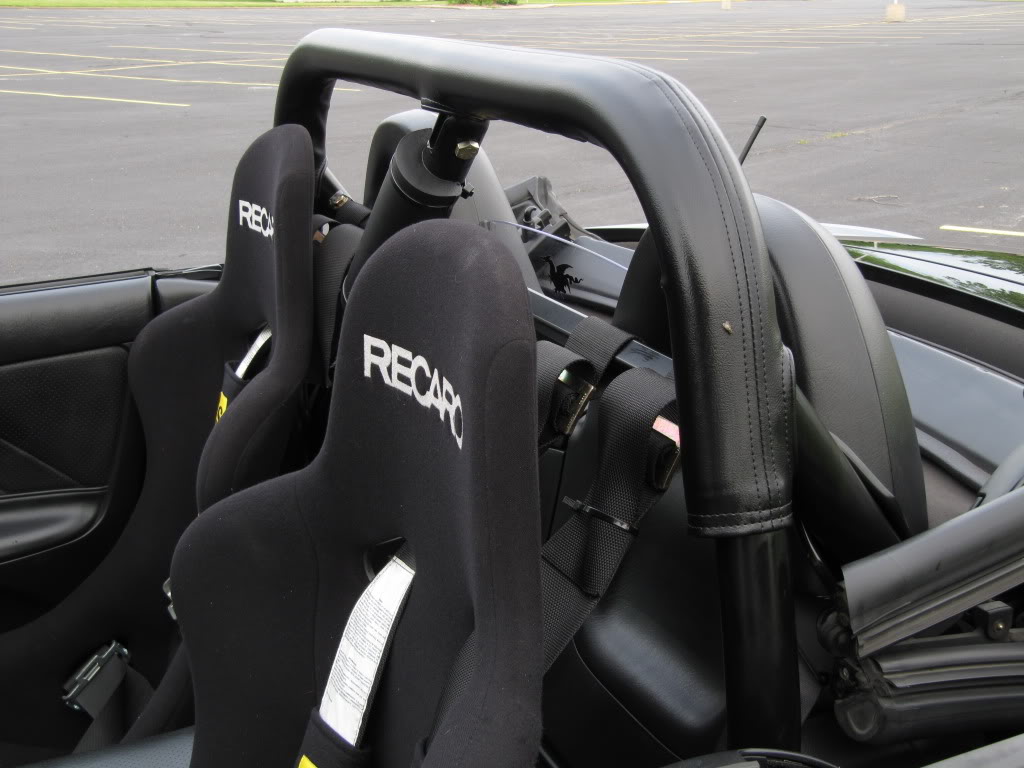
I also had the custom HD foam and vinyl wrap. I would highly recommend both since it looks very "stock" and also saves time cutting hd foam to fit with the soft top.
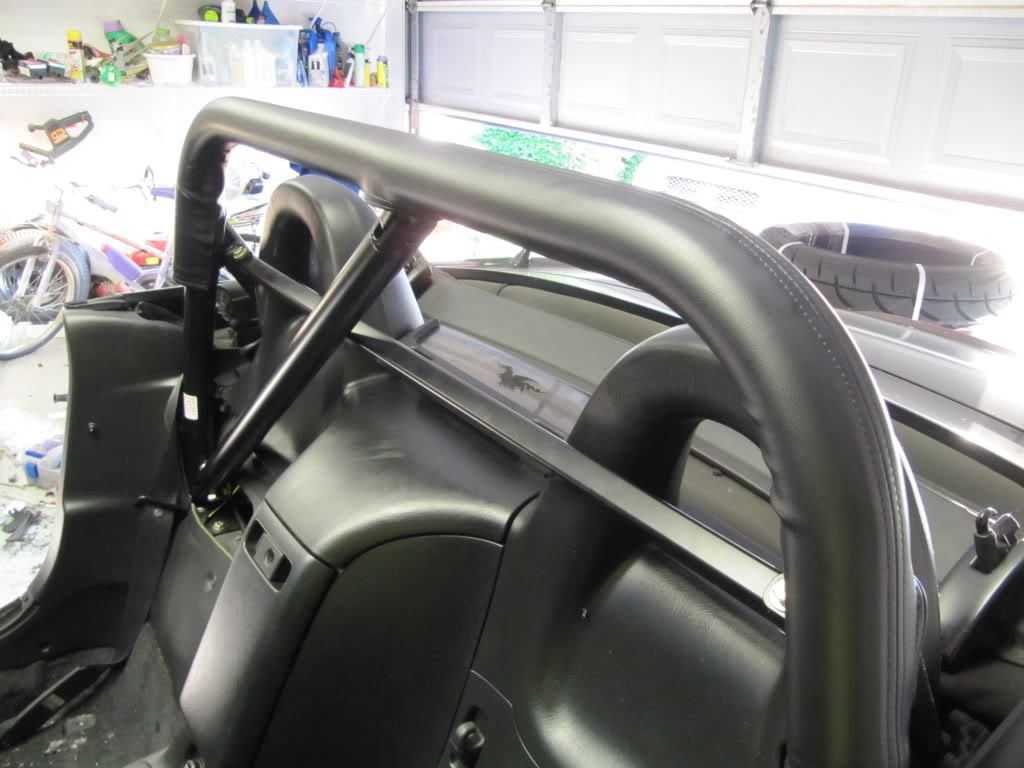
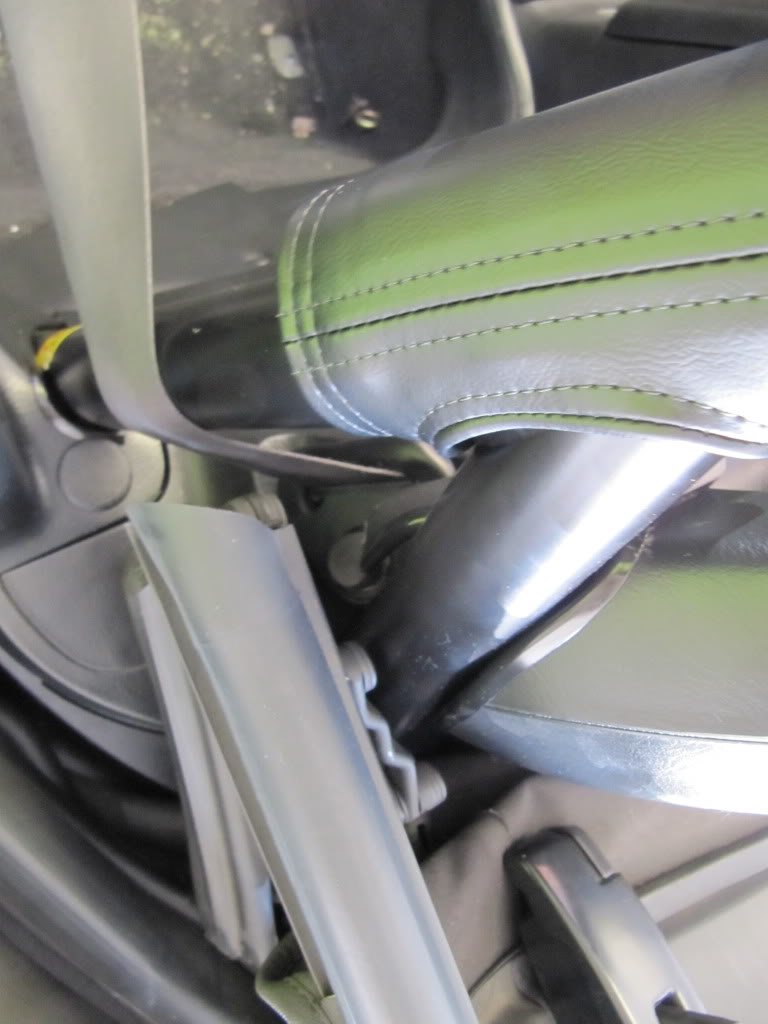
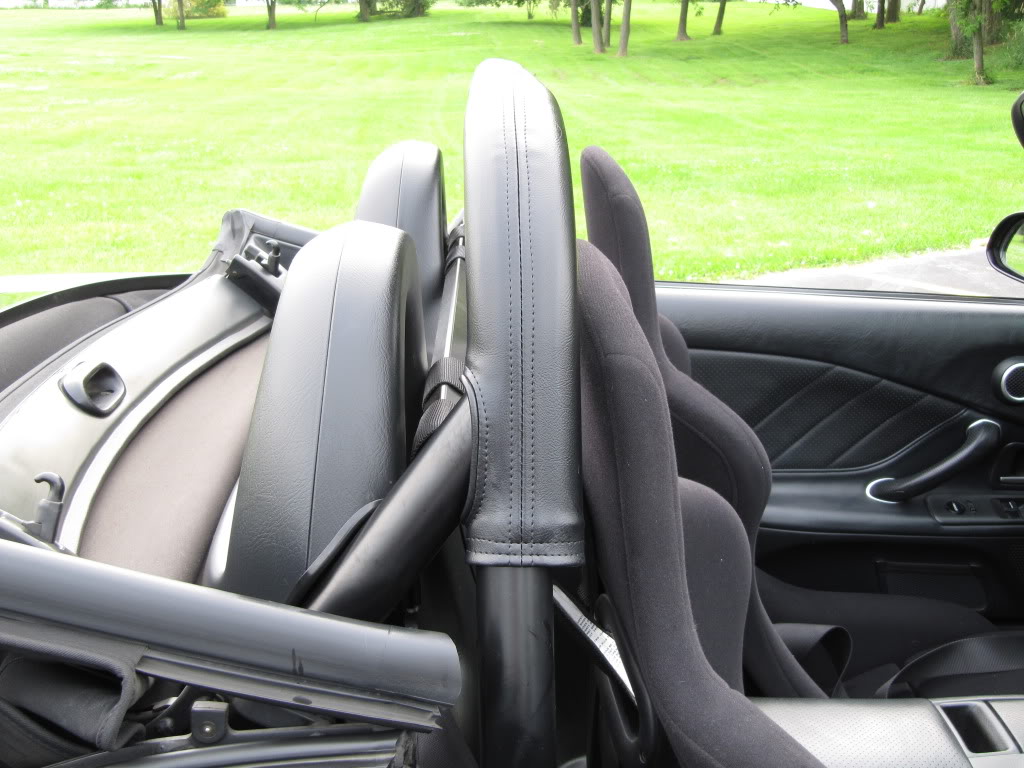
Clearance with top:
The rest of the re-assembly is straight forward. I found it a little tricky to get the rear tray back in. I found it best to put the top 1/2 up, slide the tray over the hoop and into the back and then afix.
Note your spare tire may hit on the roll bar legs now.
I ended up putting HD foam on my diagonal too juuuust in case your head went that way in a wreck.
I originally bought the removable components to take out on the street, but I found I didn't want to run the stock belt due to head impact risk, and I found the diagonal bar a PITA to get out with a non-adjustable passenger seat. I would probably get the welded units if I did it again.
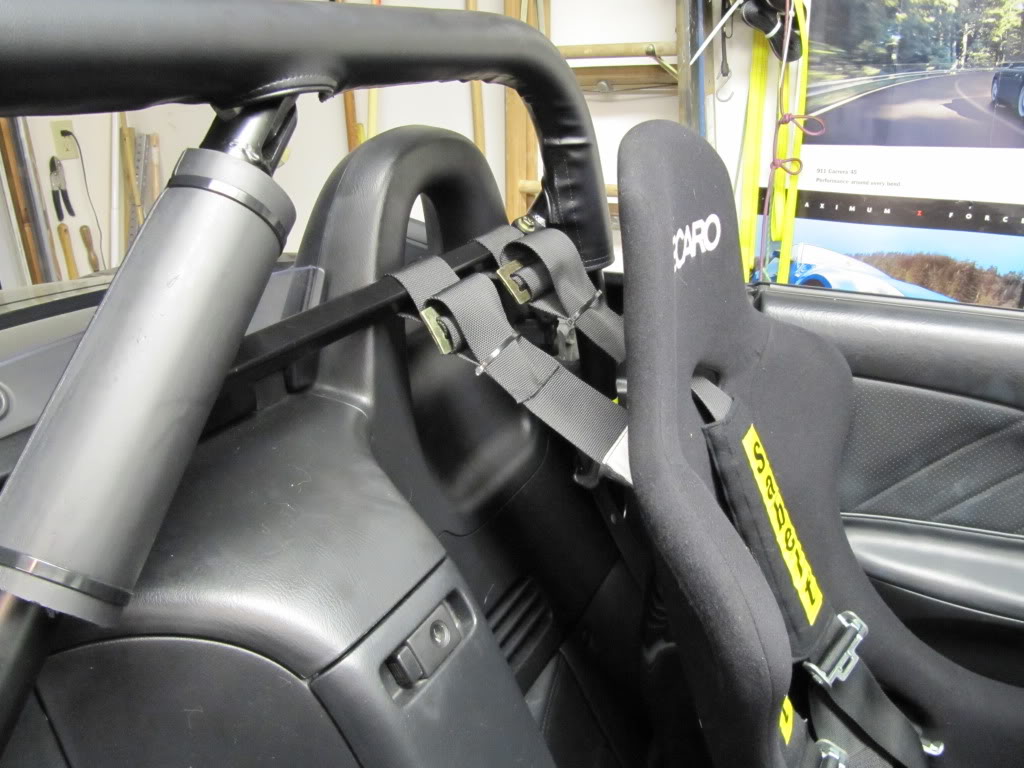
6-point Harness Install
I don't have a ton of pictures here and I prefer not to give input on proper harness install, as I am not a safety engineer. I realize I made some concessions to fit into autocross class rules, but that was my choice. Choice your own application accordingly.
If you can I recommend you get a lowered harness bar and gut the rear interior to have the "proper" setup and avoid spinal compression in a wreck. For those that need to comply to STR rules or need to keep interior you can take my setup into account.
I also recommend you make this your harness installation bible:
http://www.schroth.com/installation-instru...s/en/index.html I will fill in the mounting gaps for the s2000 with pictures.
I personally chose the sabelt 6-point. (they also make the sparco units). As you probably read on here 5-points will not provide proper sub belt mounting location. The sub belts basically strattle the frame rail.
The locations I chose to mount the belts eye holes, were a combination of my seating position, seat height, and proper belt angle per the guide. Your exact locations may differ based on these.
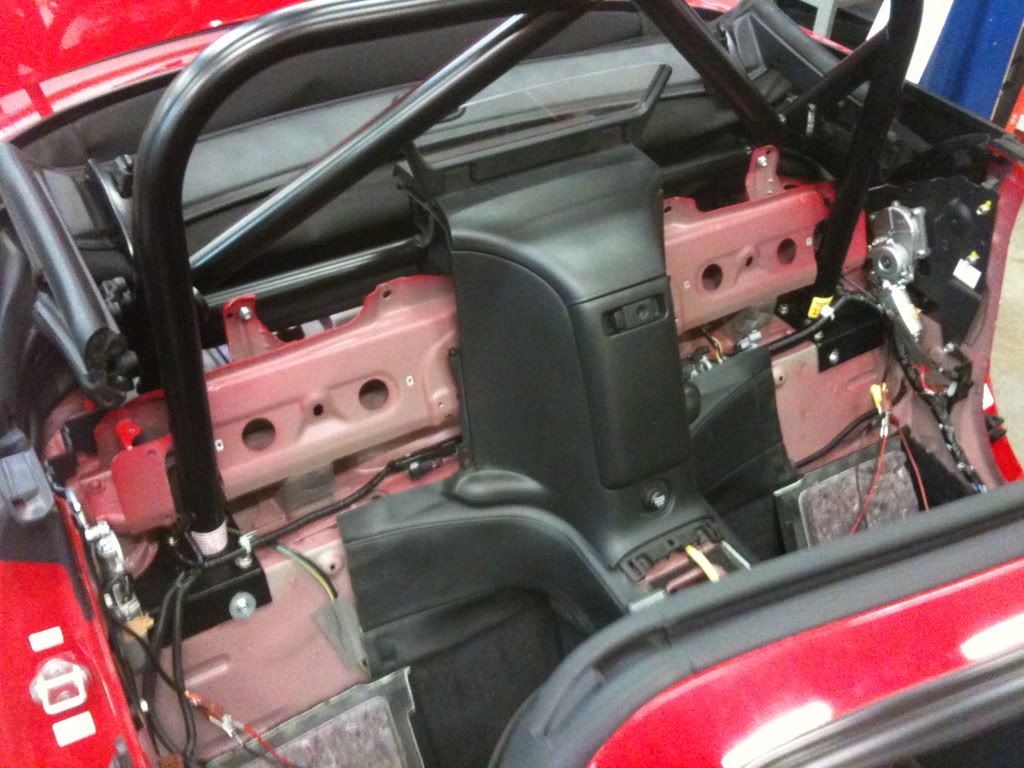
I found that finding a reference point to measure where to drill for the locations is critical. Some choose to wrap tape all the way around the car/sill for a reference. I found that I used this and also a combination of the seat mounting holes (two can be seen under the car) to measure from worked well. I then measure the distance while in the cockpit and translated this to underneath the car.
Here is a reference for where all my eye hooks were located for my setup. I also used the stock belt location for the outside belts mounts. Note: if you plan to also keep the stock seat belts here you will need to trip the rubber surrounding the bolt.
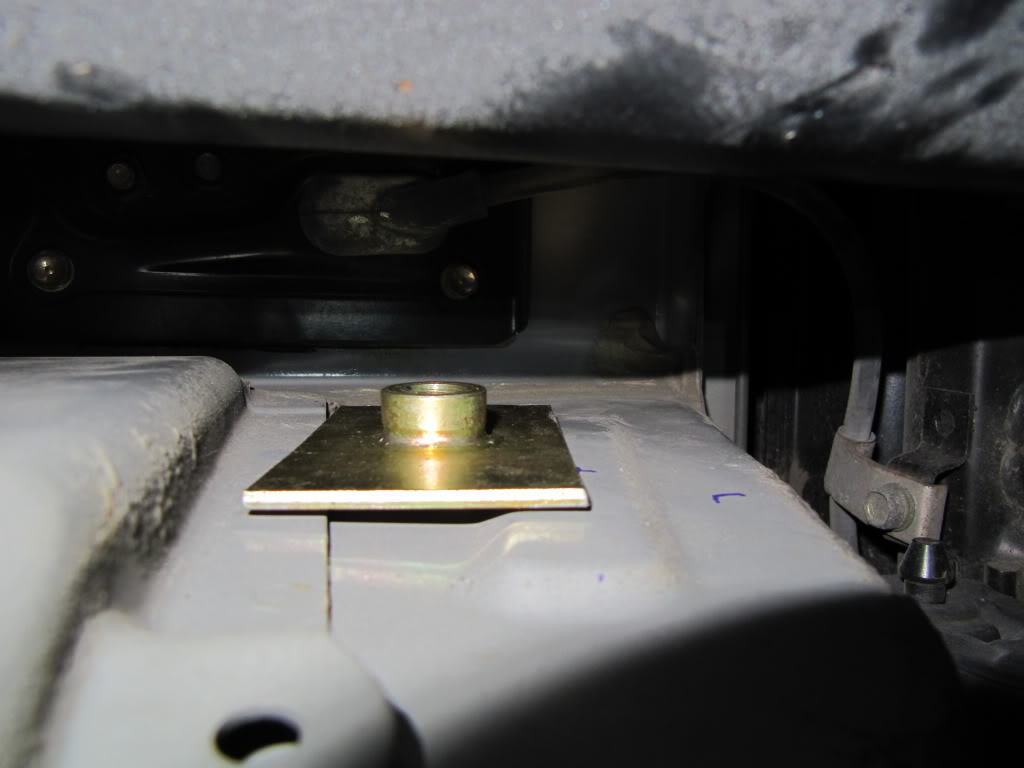
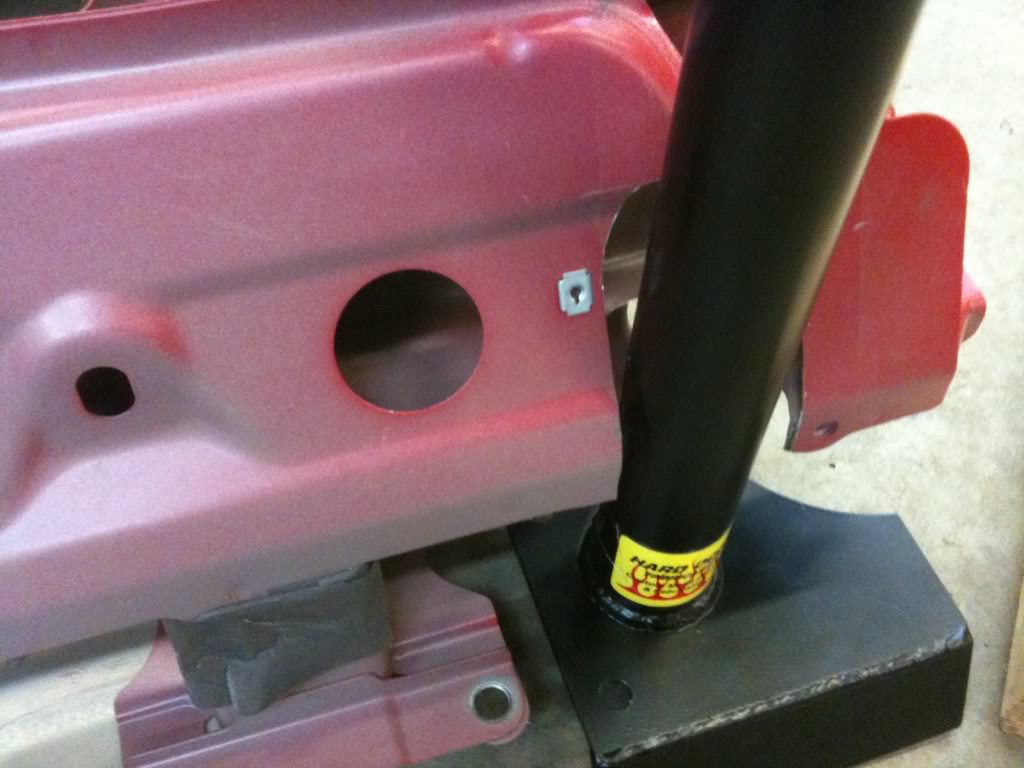
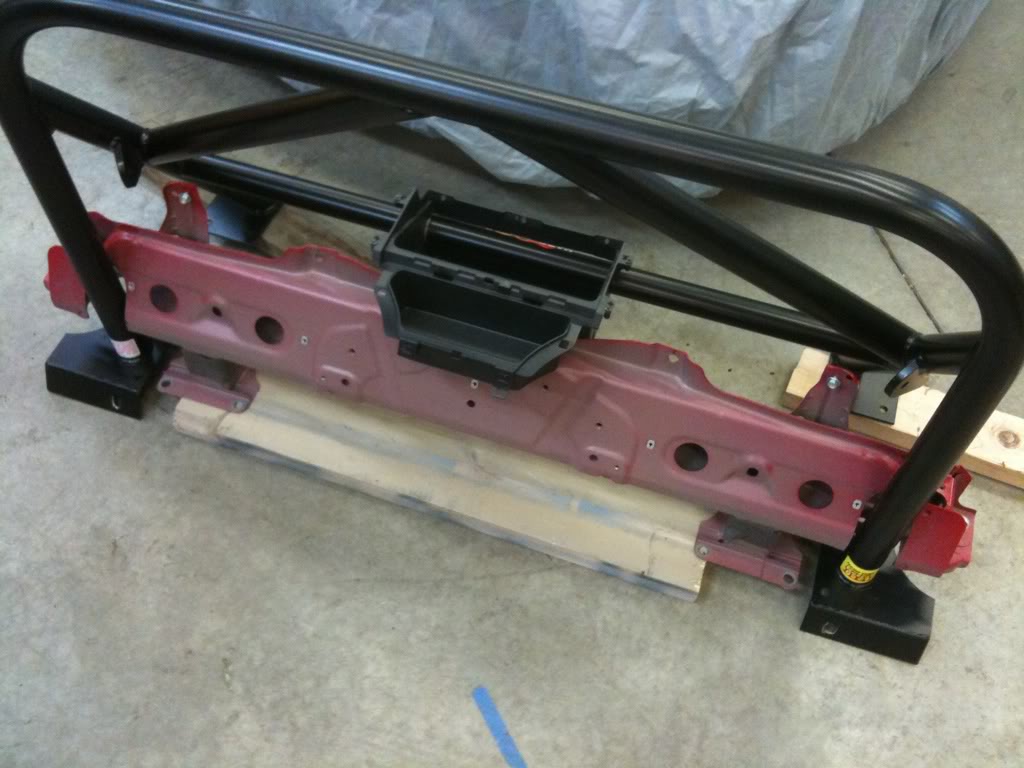
For backing plates many people use either the very large washers or a weld nut to a plate. I found these great OMP chassis backing plates from hrpworld.com. I would recommend them due to great build quality. I put gasket maker between all my backing plates and body to ensure no water would get up in there.
One problem I ran into is one of my plates "ideal geometry" locations ran between two ribs on the body. In this case, you could flatten this metal but what I did instead was get a big zinc washer and cut this to fit in between the rib, essentially filling the gap so it wouldn't pull the body ribs and provide a flat and large surface to mount against. However, if possible I would recommend finding a flat spot to mount your backing plates to.
Prior to filling the gap
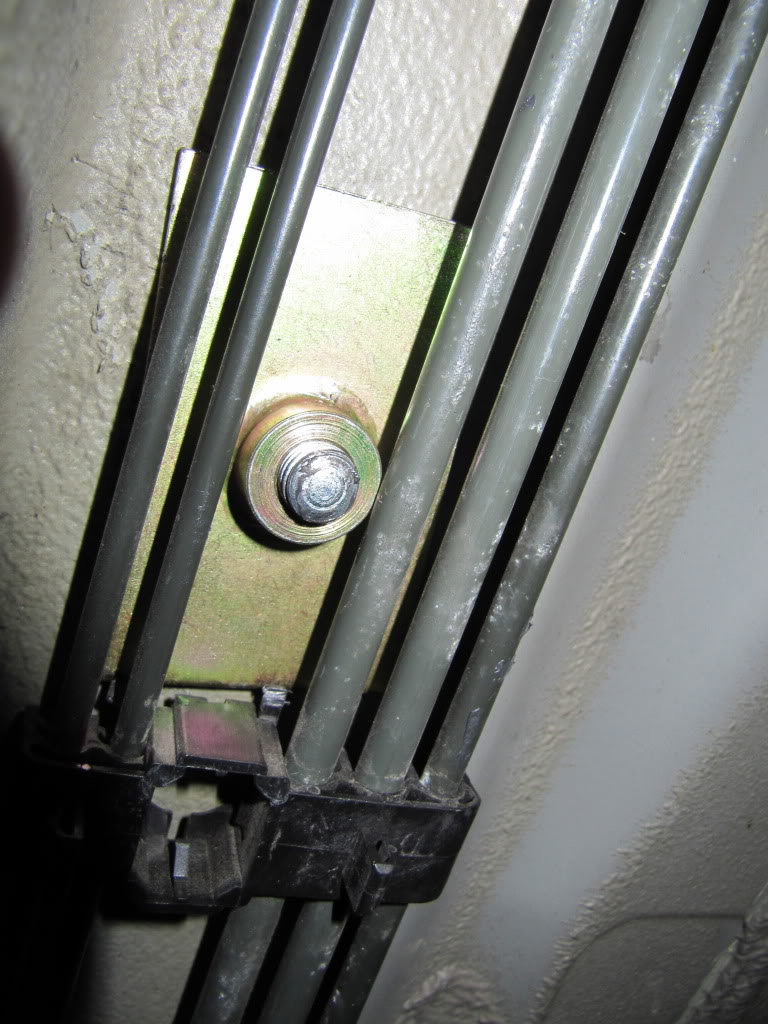
This is the tricky one to drill since it is between fuel and brake lines
After all bolts are torqued I figured I would spray the backing plates with underbody coating for good measure and to seal them a bit more
This gives you an idea how the are mounted
-For belt mounting/wrapping instructions please refer to the scroth guide.
Race buckets
I don't have a ton of pics of this part, but I figured I would put my notes.
I used the Recaro Pole Position seats and Buddy Club rails since I wanted something that wouldn't rub and allowed me to open the secret compartment.
Don't forget to use grade 8 or class 10.9 or higher bolts and not the hardware store bolts when installing safety components.
Notes:
I found I pulled the seats in and out a ton to find the proper seat mount alignment. Since the buddy clubs are not connected across the middle (like taitecs) they are especially trick to get lined up. They MUST be parallel if you want the seat to slide easily
Note that on my driver seat I could not get the stock bolt to both slide between the rail, to allow the seat to travel all the way back and not have the seat lightly contact the door. I decide to make a sacrifice and not have the seat slide all the way back so it would work. For me this was OK and most my co drivers this range of travel works. I probably lost 3/4 in. seat travel through this choice.
The passenger seat does not seem to be possible to get to work with this setup and slide. The slide "release" bar hits on the transmission/exhaust tunnel and my seat was too low to get it to work. I chose to mount the seat fixed in the fully back position (passengers don't need adjustment right?!?!). This was tricky and required a super long extension to get the bolts torqued right since I couldn't easily reach them.
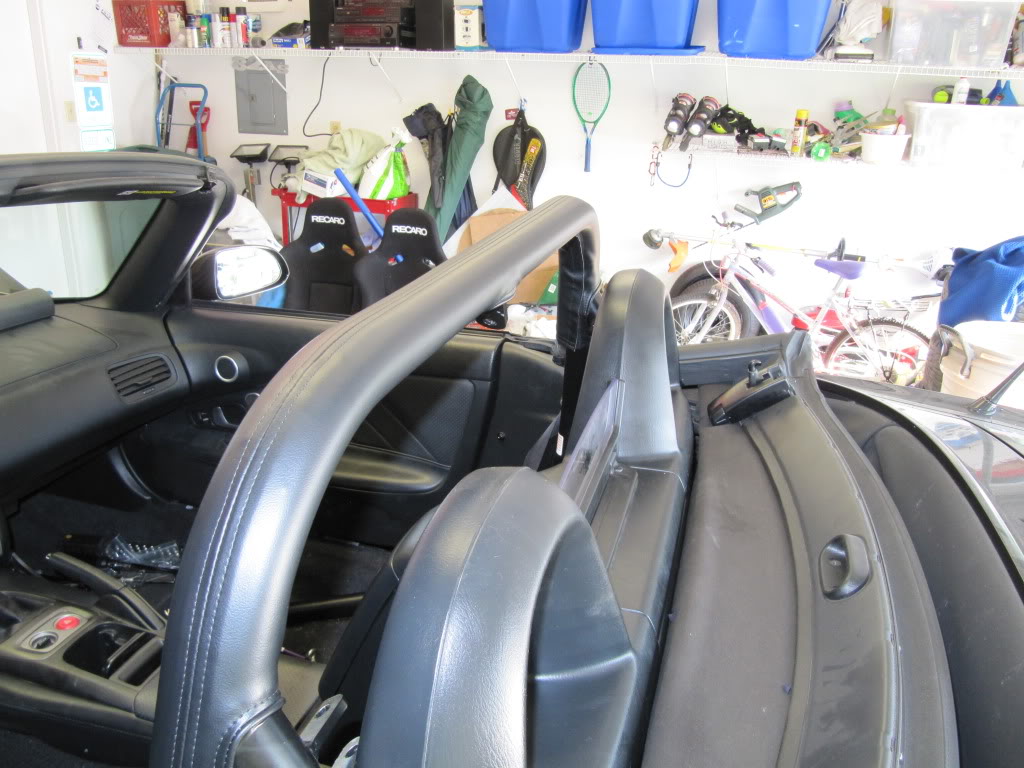
Here is generally how they look:
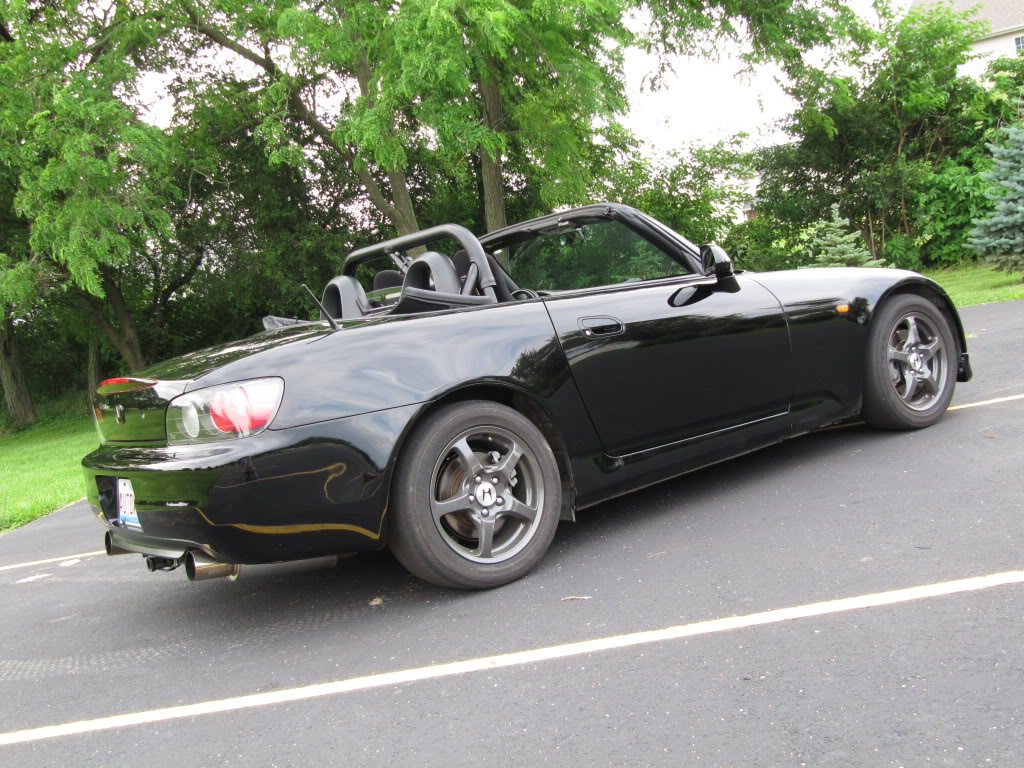
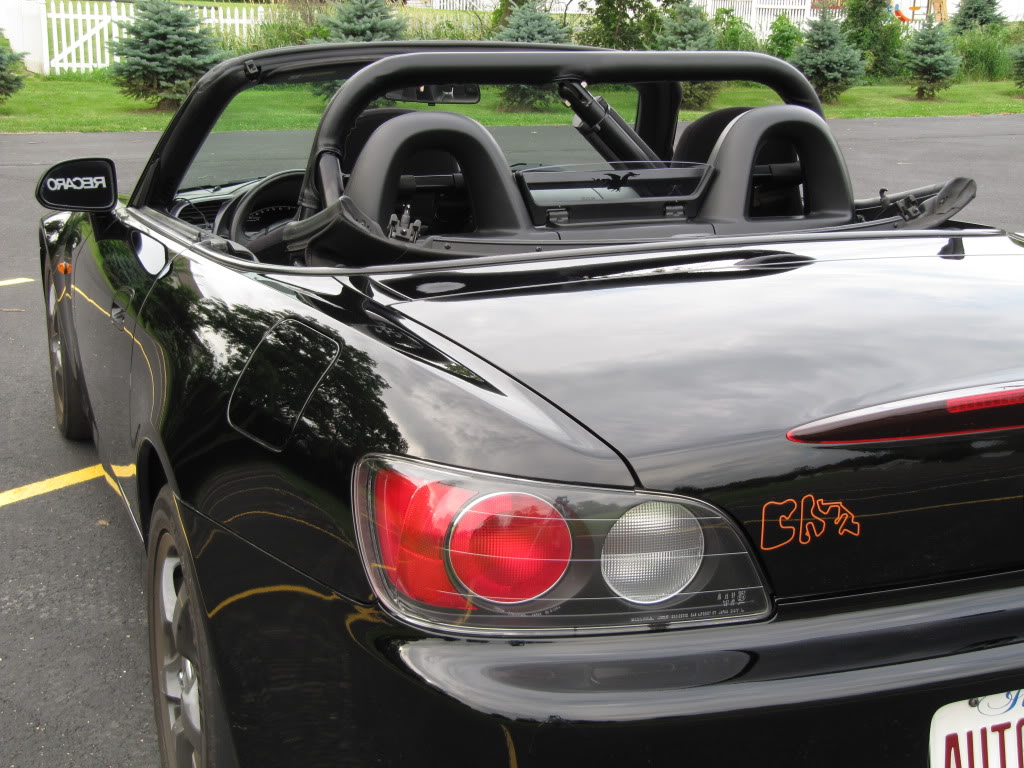
And here are my final shots!
I hope this may have helped at least a few of you. It sure was a fun project and not too daunting if you take your time.
For more build info check out my site!
www.shenanigansracing.com
In this thread I will cover mainly holes that I did not see in the directions or other thread pics of the rollbar install. A few may be repeats of other threads. I will also cover some pics of the harness and seat install.
Note: I chose this particular application, which will allow all interior and comply under SCCA STR rules.
Items installed:
-Hard Dog/Bethania Garage Roll Bar w/ removable diagonal & harness Bar
-Custom HD Foam padding and vinyl cover
-Recaro Pole Position Seats on buddy club rails
-Sabelt/Sparco 6-point Harness
Roll Bar Install
Basic directions can be found here: http://www.bethania-garage.com/docum...00_install.pdf
A few notes I found to go with their directions.
-I wrapped all my flat head screw drivers in electrical tape to help not damage anything
-I also highly recommend putting everything in baggies with labels. you will have a ton out of the car
-Listen to them to no disconnect the belt tensioners unless you plan to reset the SRS
-Be careful when removing interior tabs, trees, push pins they brake easily
To start this is where you are left with all interior removed. Its mostly explanatory in the directions so go from there.
Once everything is removed, get a friend to help lift the bar into the car. I made sure the lip on the mounting plates, and front lip was clean against the body. put in the 10mm screws and check soft top clearance at all positions in its operation. Mark the bolt holes and check again (the bar moved when I did it and my first "clearance check" was not where I orig. had the bolts marked). I was super paranoid about this, since you can only drill once!
As you are drilling stick the bolts in the just drilled holes. This gives you an idea how mine fit and clearance.
Next the part that everyone is hesitant about. cutting the body!
I cut close to the top of the body, but I didn't want to risk cutting into the interior compartment so I got about 1/8 close and then used dremel and grinding wheel to grind it down the rest of the way. Let me say the heavy duty cut off wheels and grinding stones will be your friend on this project. If you want a reference for how wide to cut the opening you can use the backing plates by lining them up with the rib and slit accordingly. There will be a lip/ layer of metal on the inside of the box you cut. I did my best to grind this flat so the backing plate would sit flush. Here was my cut:
Some people forget to put the bulkhead (unbolted) under the bar once they fit it in. It won't fit in after you bolt in the bar
I found it helpful to have a friend help me bolt the backing plates in. he was under the car holding a wrench while I torqued the top of the bolts. I found it best to slightly tighten each of the bolts around the plate, since if you did one more than the other it could tighten at a funny angle. Be sure to use the blue loctite!
Don't forget to thoroughly check clearance once bolted down.
Once its all snug and clearance is good. Spray some expanding foam into the whole you created and give it all a thorough spray of under car coating:
bolt all the hardware back in the car together per the instructions.
Now comes the fun part. interior trimming!
My method was to look at reference pictures, like below, to get a general start. I would then fit the part, mark with a marker where there was rubbing and re-trim. It took a pretty long process, but I found better than taking too much material off. I also used door bump guard around my cut edges to give it a cleaner look. I highly recommend! Also keep in mind; your trimming could be different depending on how your bar is aligned.
water drainage trim
Factory hoops
Side panels
I got lucky enough not to trim the driver side passage panel
On a side note per rules I had to put in the factory belts, but I didn't plan to use them so just routed them around the bar
All trimmed up
I also had the custom HD foam and vinyl wrap. I would highly recommend both since it looks very "stock" and also saves time cutting hd foam to fit with the soft top.
Clearance with top:
The rest of the re-assembly is straight forward. I found it a little tricky to get the rear tray back in. I found it best to put the top 1/2 up, slide the tray over the hoop and into the back and then afix.
Note your spare tire may hit on the roll bar legs now.
I ended up putting HD foam on my diagonal too juuuust in case your head went that way in a wreck.
I originally bought the removable components to take out on the street, but I found I didn't want to run the stock belt due to head impact risk, and I found the diagonal bar a PITA to get out with a non-adjustable passenger seat. I would probably get the welded units if I did it again.
6-point Harness Install
I don't have a ton of pictures here and I prefer not to give input on proper harness install, as I am not a safety engineer. I realize I made some concessions to fit into autocross class rules, but that was my choice. Choice your own application accordingly.
If you can I recommend you get a lowered harness bar and gut the rear interior to have the "proper" setup and avoid spinal compression in a wreck. For those that need to comply to STR rules or need to keep interior you can take my setup into account.
I also recommend you make this your harness installation bible:
http://www.schroth.com/installation-instru...s/en/index.html I will fill in the mounting gaps for the s2000 with pictures.
I personally chose the sabelt 6-point. (they also make the sparco units). As you probably read on here 5-points will not provide proper sub belt mounting location. The sub belts basically strattle the frame rail.
The locations I chose to mount the belts eye holes, were a combination of my seating position, seat height, and proper belt angle per the guide. Your exact locations may differ based on these.
I found that finding a reference point to measure where to drill for the locations is critical. Some choose to wrap tape all the way around the car/sill for a reference. I found that I used this and also a combination of the seat mounting holes (two can be seen under the car) to measure from worked well. I then measure the distance while in the cockpit and translated this to underneath the car.
Here is a reference for where all my eye hooks were located for my setup. I also used the stock belt location for the outside belts mounts. Note: if you plan to also keep the stock seat belts here you will need to trip the rubber surrounding the bolt.
For backing plates many people use either the very large washers or a weld nut to a plate. I found these great OMP chassis backing plates from hrpworld.com. I would recommend them due to great build quality. I put gasket maker between all my backing plates and body to ensure no water would get up in there.
One problem I ran into is one of my plates "ideal geometry" locations ran between two ribs on the body. In this case, you could flatten this metal but what I did instead was get a big zinc washer and cut this to fit in between the rib, essentially filling the gap so it wouldn't pull the body ribs and provide a flat and large surface to mount against. However, if possible I would recommend finding a flat spot to mount your backing plates to.
Prior to filling the gap
This is the tricky one to drill since it is between fuel and brake lines
After all bolts are torqued I figured I would spray the backing plates with underbody coating for good measure and to seal them a bit more
This gives you an idea how the are mounted
-For belt mounting/wrapping instructions please refer to the scroth guide.
Race buckets
I don't have a ton of pics of this part, but I figured I would put my notes.
I used the Recaro Pole Position seats and Buddy Club rails since I wanted something that wouldn't rub and allowed me to open the secret compartment.
Don't forget to use grade 8 or class 10.9 or higher bolts and not the hardware store bolts when installing safety components.
Notes:
I found I pulled the seats in and out a ton to find the proper seat mount alignment. Since the buddy clubs are not connected across the middle (like taitecs) they are especially trick to get lined up. They MUST be parallel if you want the seat to slide easily
Note that on my driver seat I could not get the stock bolt to both slide between the rail, to allow the seat to travel all the way back and not have the seat lightly contact the door. I decide to make a sacrifice and not have the seat slide all the way back so it would work. For me this was OK and most my co drivers this range of travel works. I probably lost 3/4 in. seat travel through this choice.
The passenger seat does not seem to be possible to get to work with this setup and slide. The slide "release" bar hits on the transmission/exhaust tunnel and my seat was too low to get it to work. I chose to mount the seat fixed in the fully back position (passengers don't need adjustment right?!?!). This was tricky and required a super long extension to get the bolts torqued right since I couldn't easily reach them.
Here is generally how they look:
And here are my final shots!
I hope this may have helped at least a few of you. It sure was a fun project and not too daunting if you take your time.
For more build info check out my site!
www.shenanigansracing.com
 02-24-2011, 08:12 PM
#2

NICE !
I'm in the process of doing mine right now too. I went with the dual bend main hoop (not the 4 bend) double diagonal. It sits a bit further back on the bulkhead, so it requires notching. The reason I went with that is that I only lose one click of seat recline and still get full seat travel too.
A few of my pics...
I'm going to build some retractor covers from some hoop shells based loosely on something like this...

Congrats on your roll bar. The cover looks awesome too.
I'm in the process of doing mine right now too. I went with the dual bend main hoop (not the 4 bend) double diagonal. It sits a bit further back on the bulkhead, so it requires notching. The reason I went with that is that I only lose one click of seat recline and still get full seat travel too.
A few of my pics...
I'm going to build some retractor covers from some hoop shells based loosely on something like this...
Congrats on your roll bar. The cover looks awesome too.


Thread
Thread Starter
Forum
Replies
Last Post
ITRbroham
California - Bay Area S2000 Owners
9
06-09-2004 07:55 PM