
Rotrex C38 Kraftwerks log


Thread Starter
Registered User
Joined: Mar 2010
Posts: 698
Likes: 0
This log will capture the full experience with the kit,from unboxing to performance evaluation. Testing will be done via dyno and Laguna Seca lap times using a controlled environment (as best as I can).
Car specifics: 2001, 70k miles, stock (except ap2 banjo bolts, baffled oil pan, wheel/tire package).
Kit specifics: Ems version, as it is new out of the box
Car specifics: 2001, 70k miles, stock (except ap2 banjo bolts, baffled oil pan, wheel/tire package).
Kit specifics: Ems version, as it is new out of the box
Thread Starter
Registered User
Joined: Mar 2010
Posts: 698
Likes: 0
Real time installation. Note, that I am very much a beginner at this.
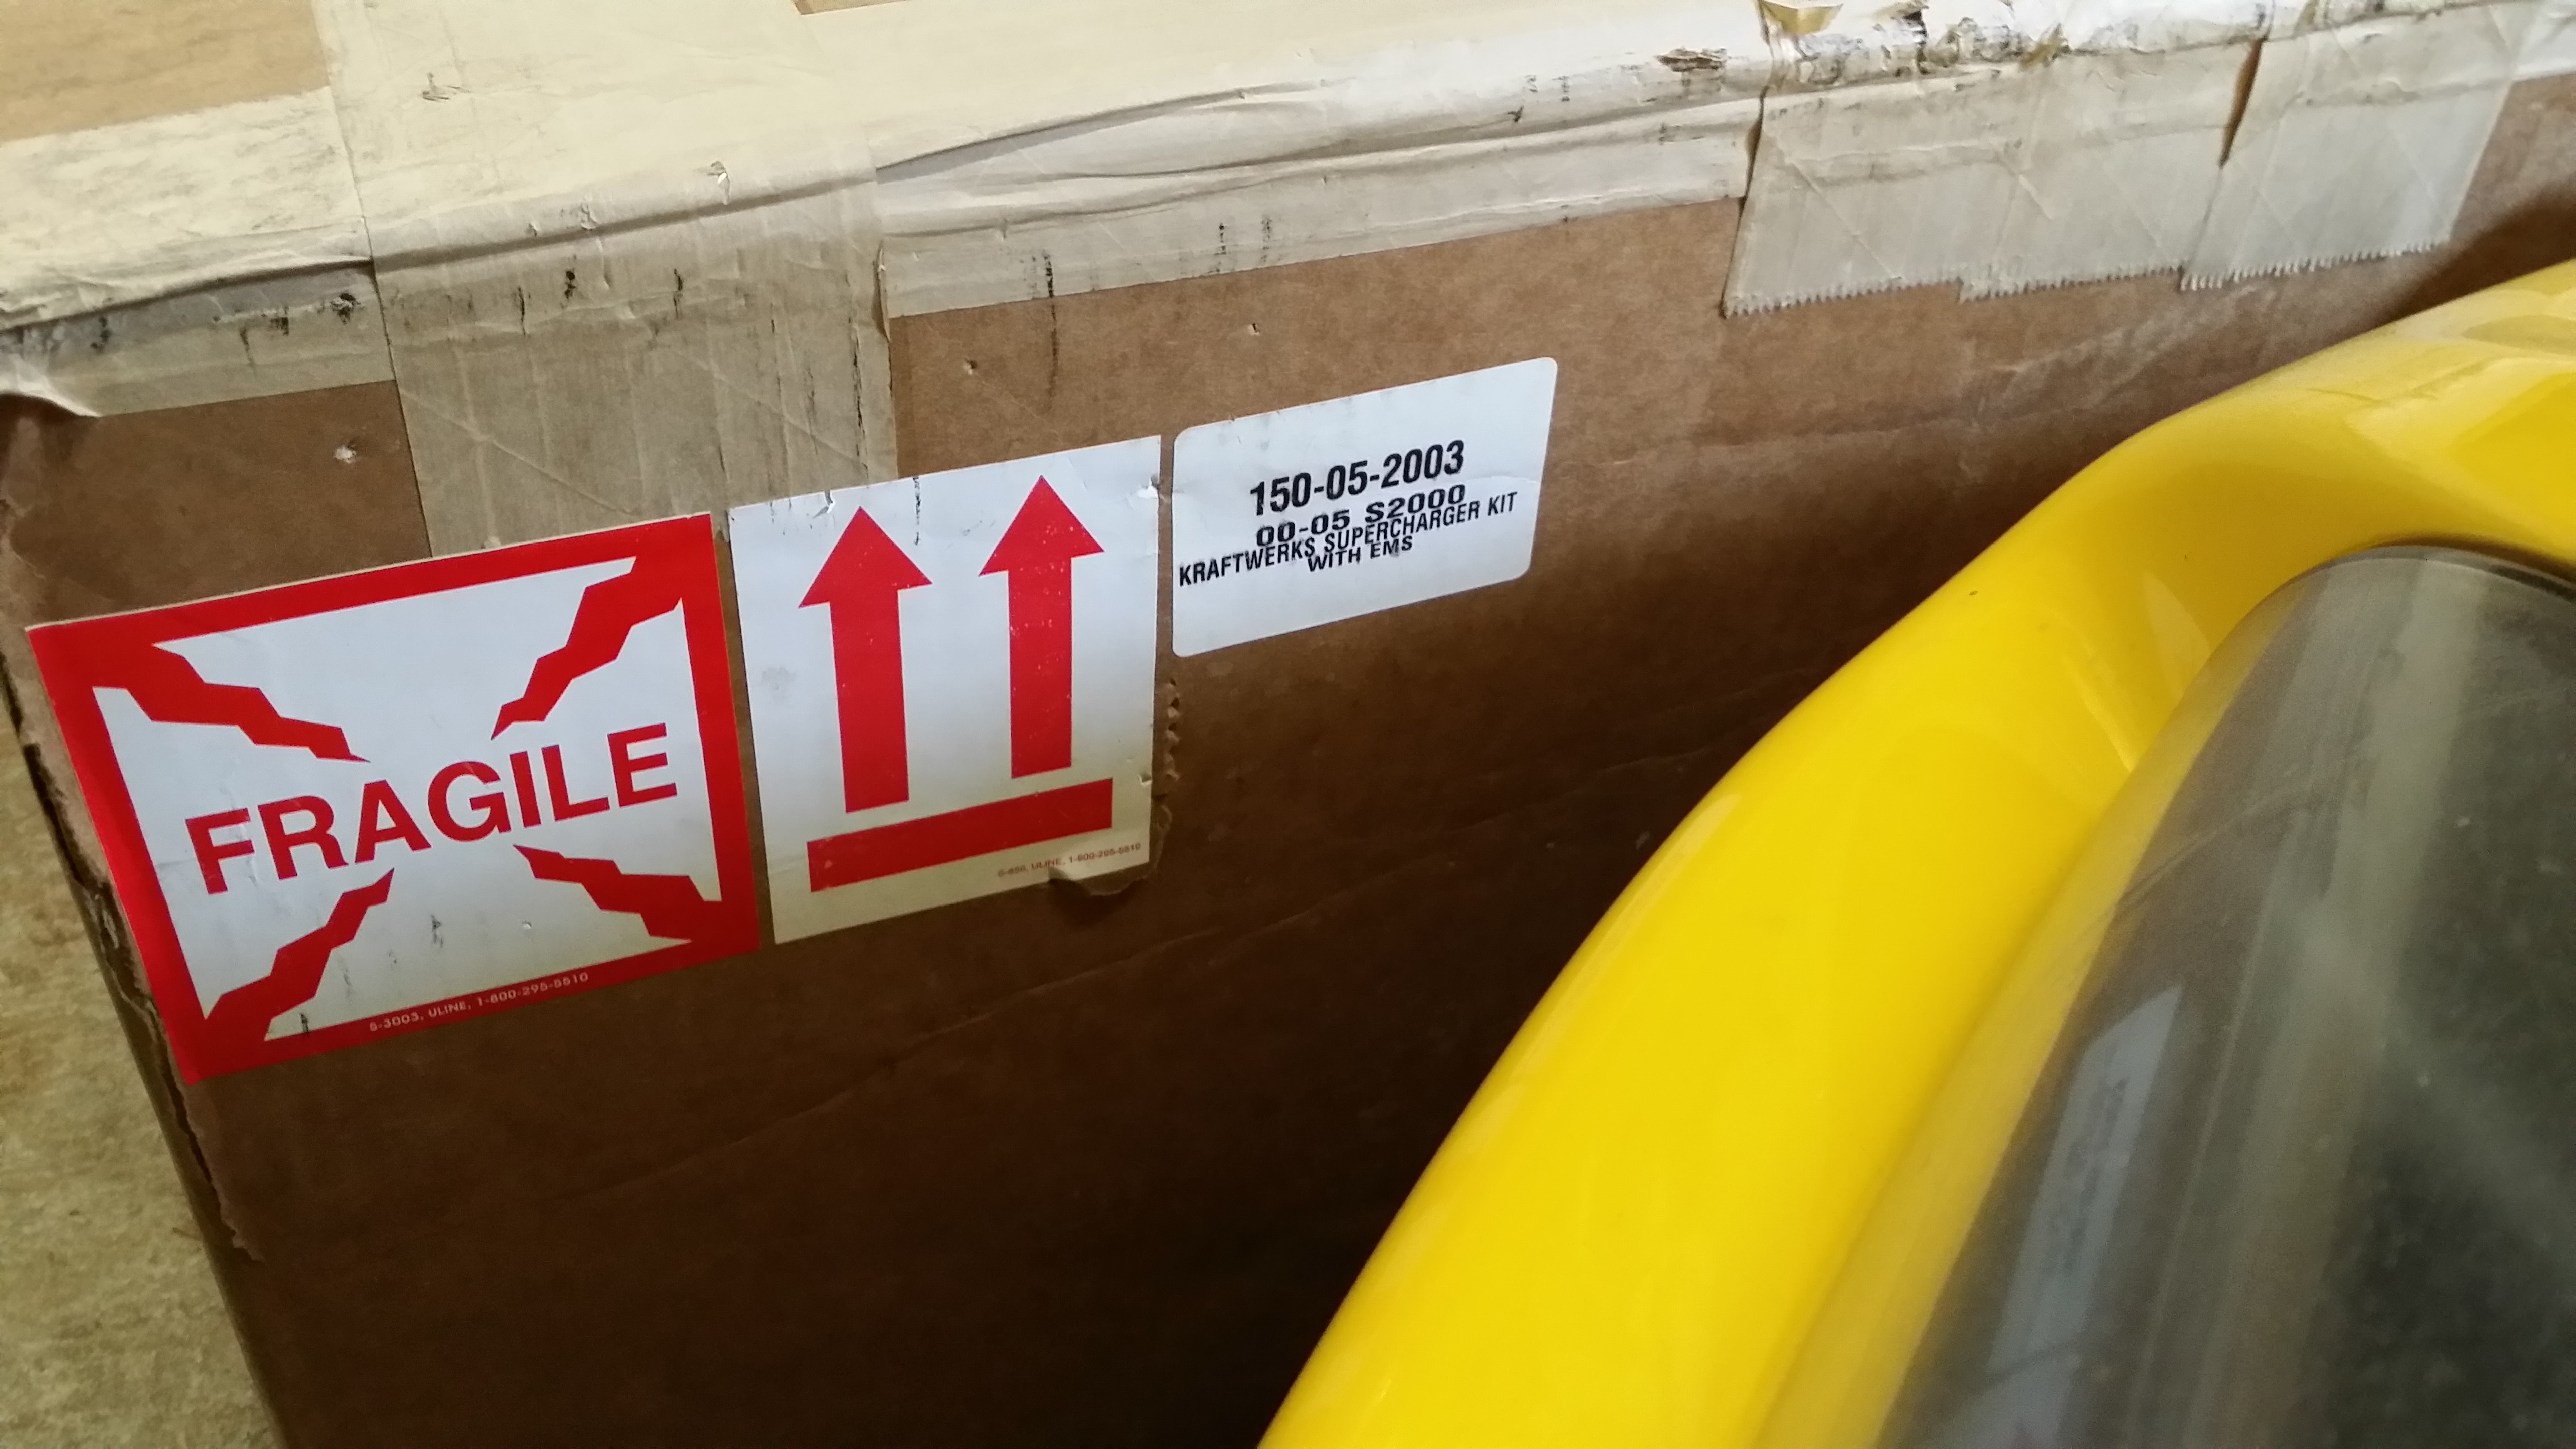
The box as it came in the mail, shipping weight is 86lbs:

Currently at step 10/60 of the installation. There have been a few issues. One, the instructions tell of an air temperature sensor in the intake tube. There is no sensor on the intake in this car. Upon further research it appears that on my model year it is placed only in the throttle body. See here for more info:
https://www.s2ki.com/s2000/topic/804...sor-on-intake/
The other pitfall was that the bumper removal directions did not direct taking out both screws at the side as viewed from the top. There is a small metal mount on both sides and depending on how you pull the bumper out it can scratch the paint fairly easily.
Coolant fluid was not on the list of materials needed. I suppose one could use the old one but let's be honest, might as well change it. I'd put this on the list of materials needed.
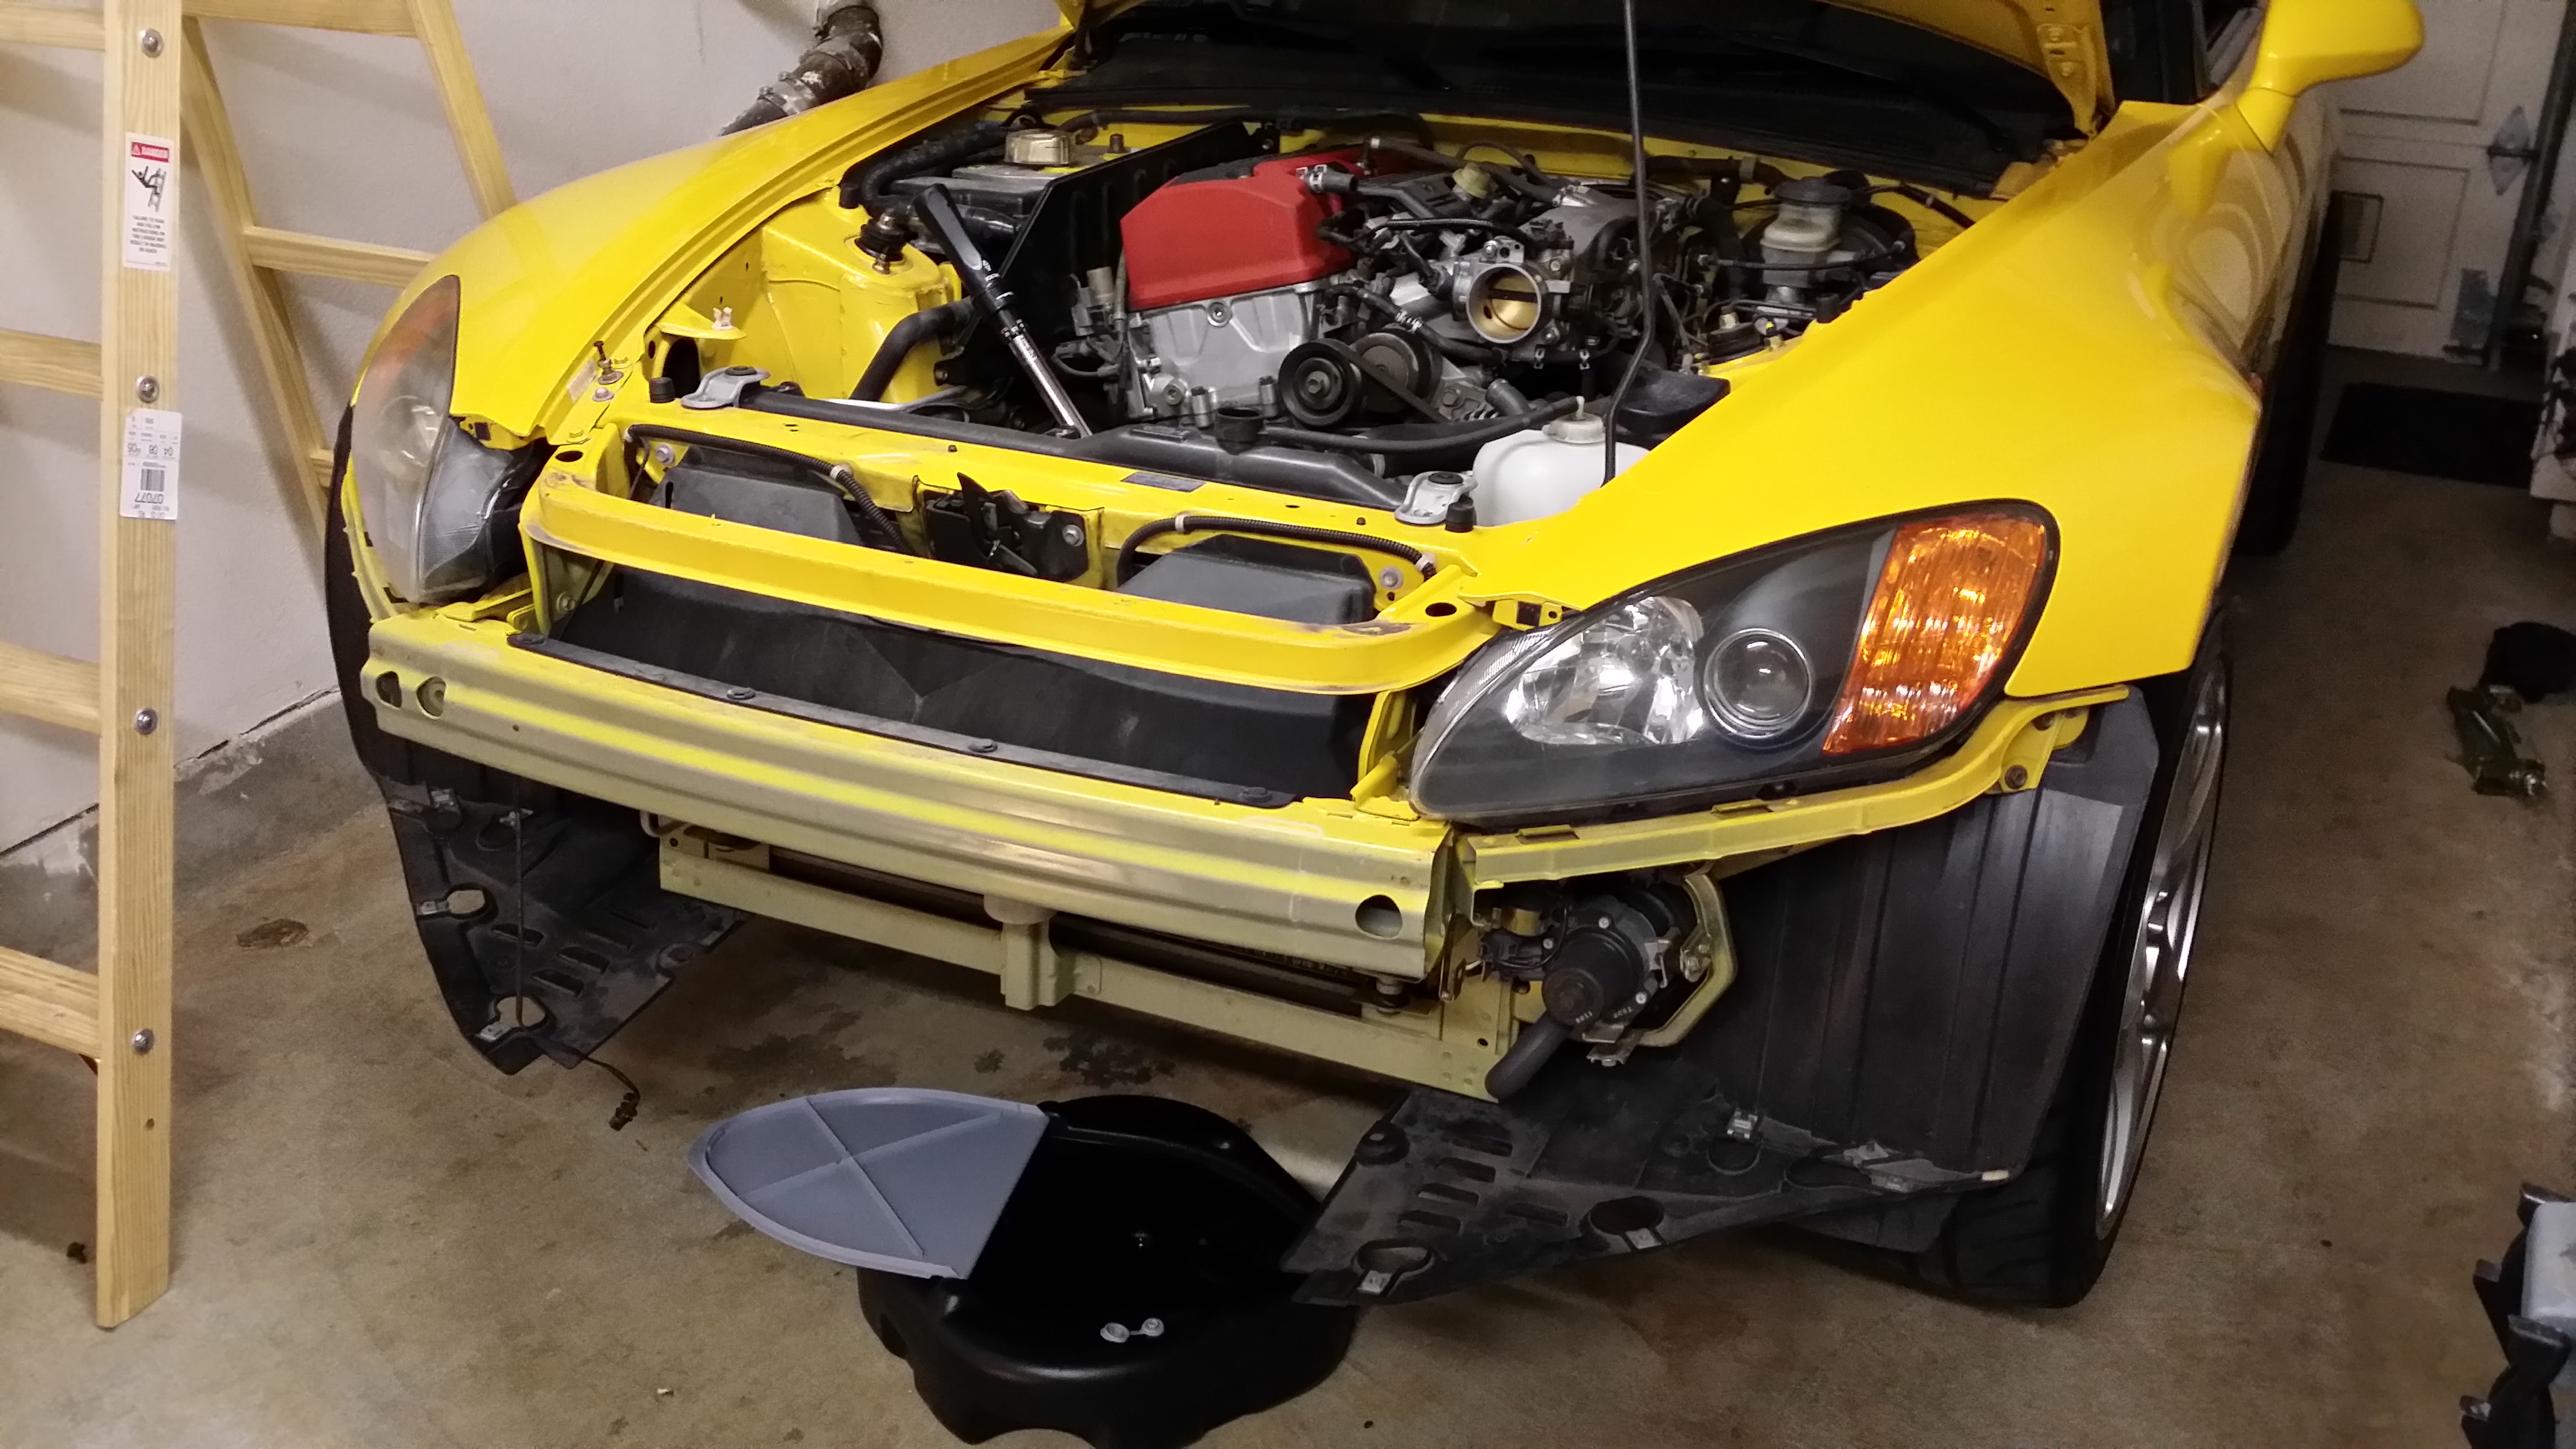
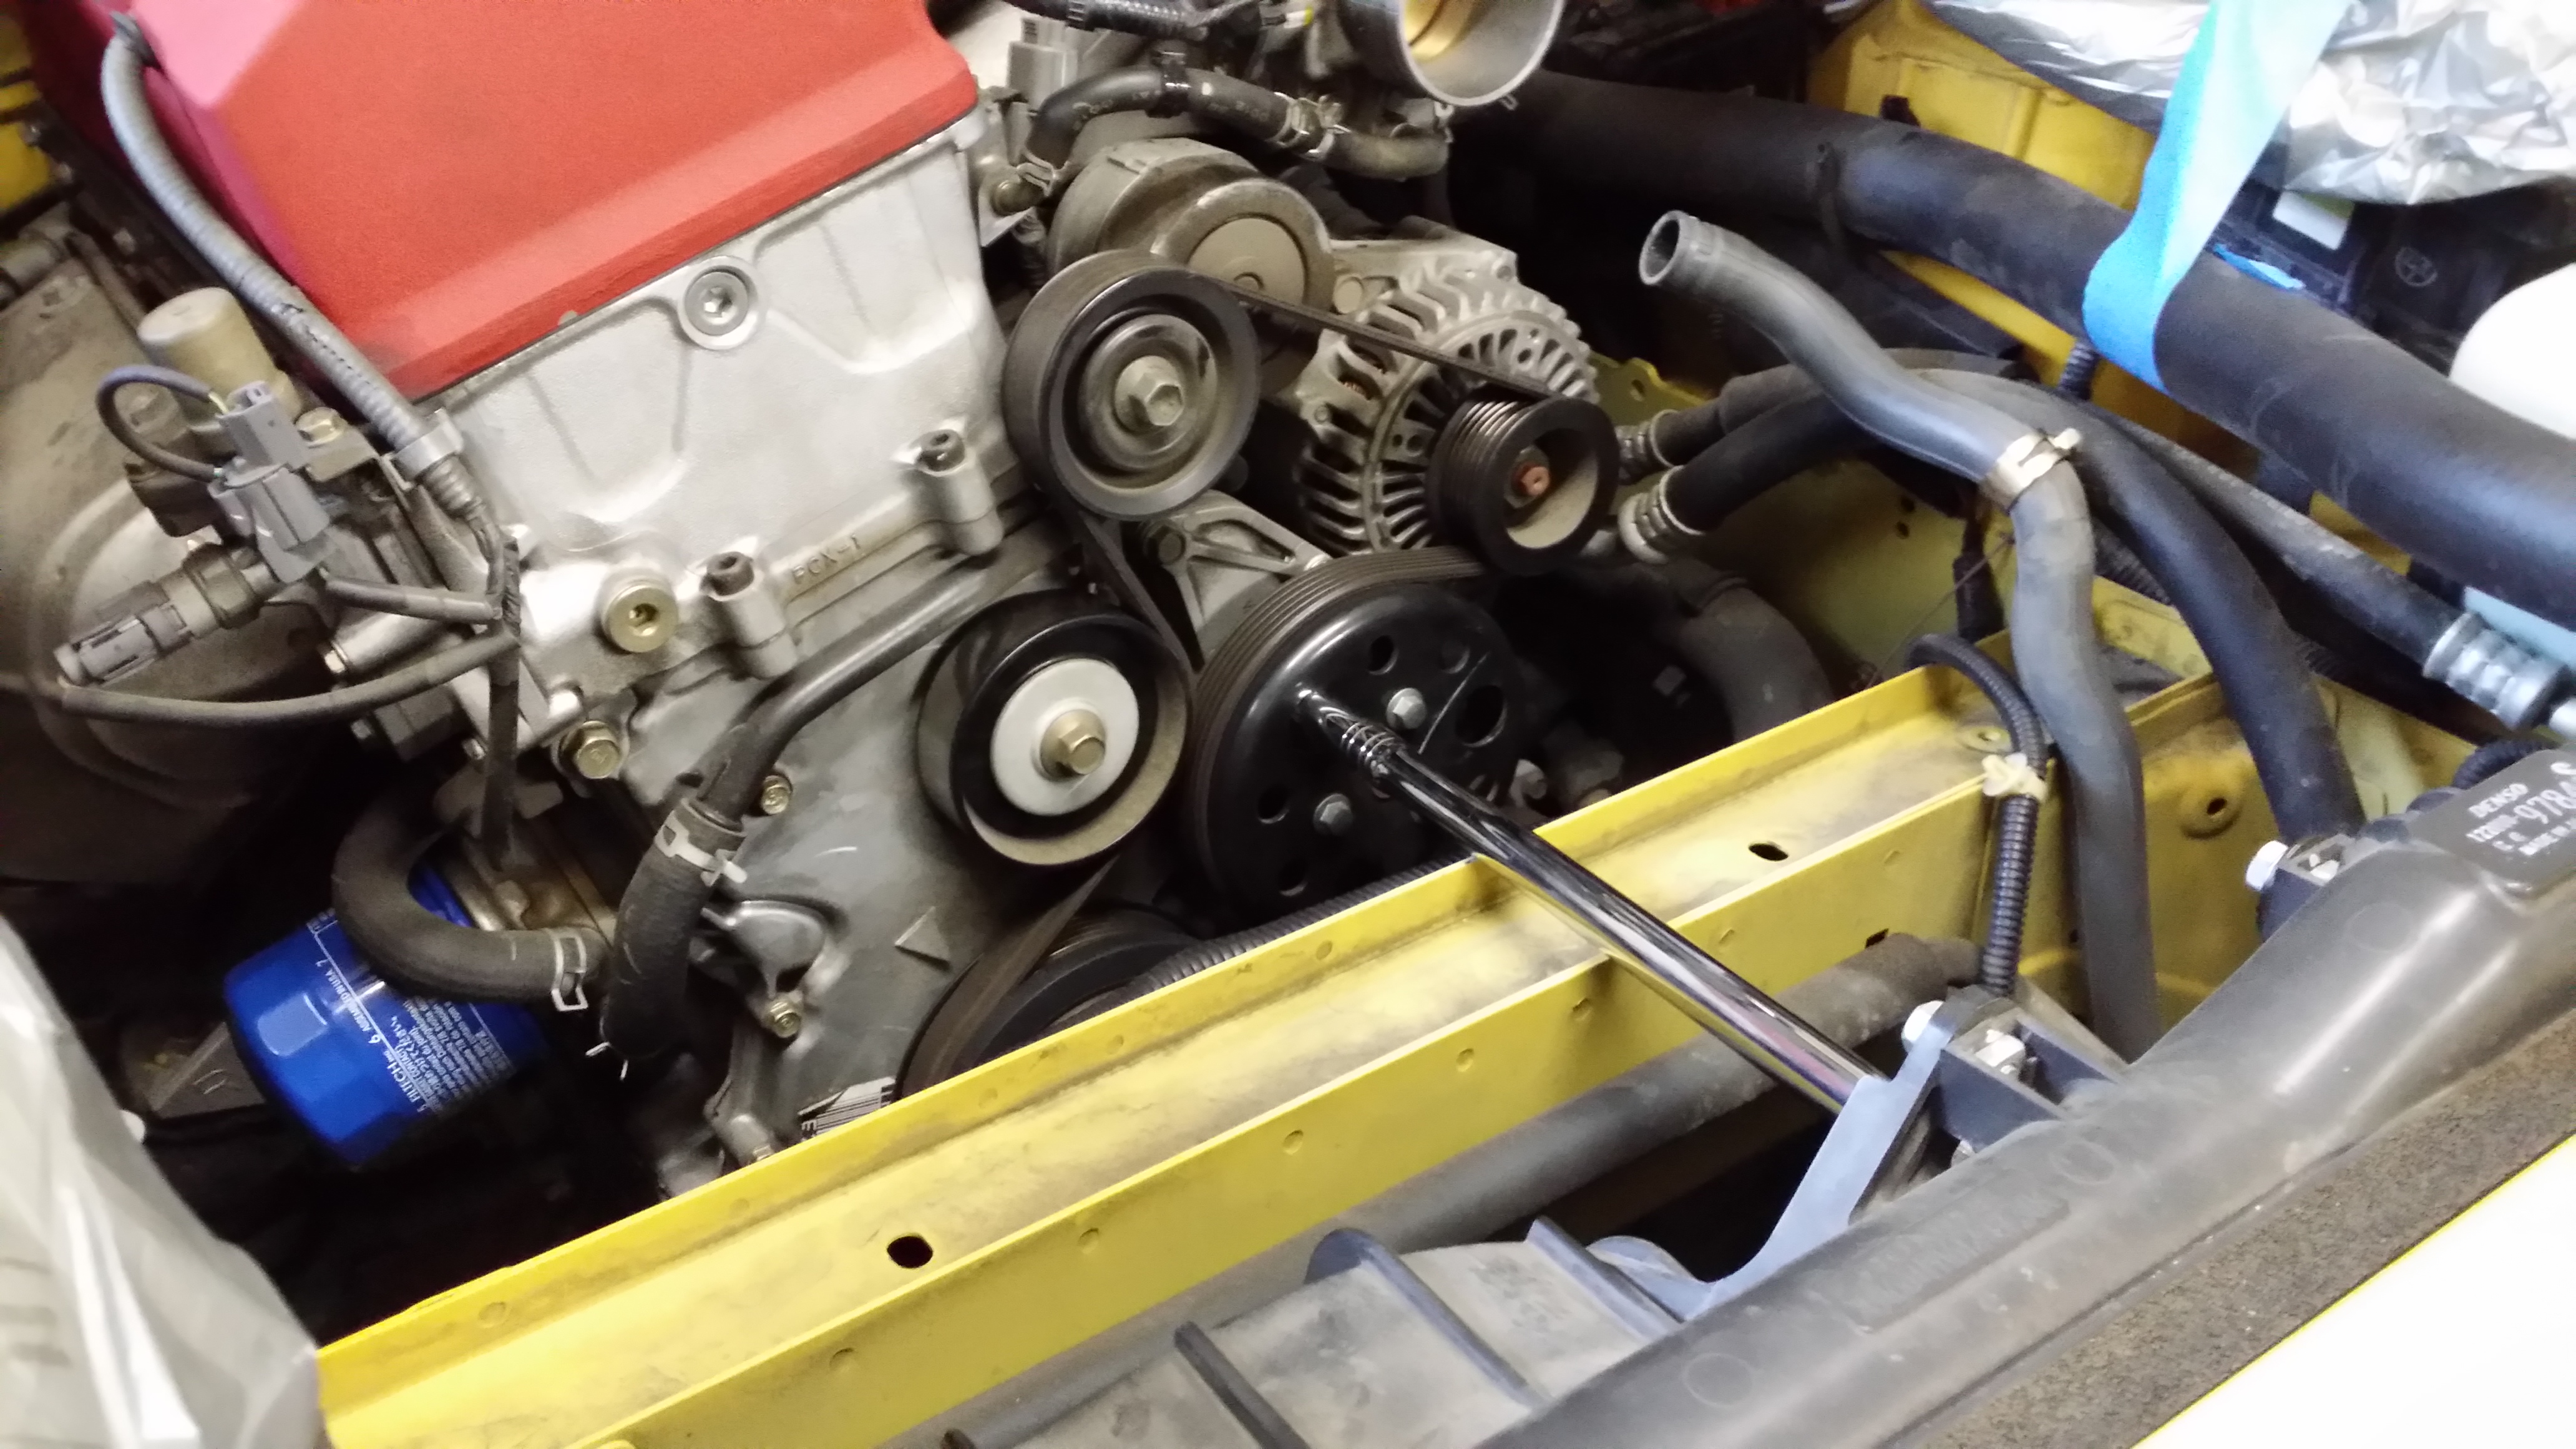
Removing the tubular vacuum line was a pain in the but. Instead of pulling on the hoses I recommend pushing them off the line with a screwdriver. My car is 13 years old and those clamps had some time to dig in. I'm also a bit confused as to which hose goes where upon removal. This is how the car looks like now, on the step where I have to remove the crank bolt.

The box as it came in the mail, shipping weight is 86lbs:
Currently at step 10/60 of the installation. There have been a few issues. One, the instructions tell of an air temperature sensor in the intake tube. There is no sensor on the intake in this car. Upon further research it appears that on my model year it is placed only in the throttle body. See here for more info:
https://www.s2ki.com/s2000/topic/804...sor-on-intake/
The other pitfall was that the bumper removal directions did not direct taking out both screws at the side as viewed from the top. There is a small metal mount on both sides and depending on how you pull the bumper out it can scratch the paint fairly easily.
Coolant fluid was not on the list of materials needed. I suppose one could use the old one but let's be honest, might as well change it. I'd put this on the list of materials needed.
Removing the tubular vacuum line was a pain in the but. Instead of pulling on the hoses I recommend pushing them off the line with a screwdriver. My car is 13 years old and those clamps had some time to dig in. I'm also a bit confused as to which hose goes where upon removal. This is how the car looks like now, on the step where I have to remove the crank bolt.


Thread Starter
Registered User
Joined: Mar 2010
Posts: 698
Likes: 0
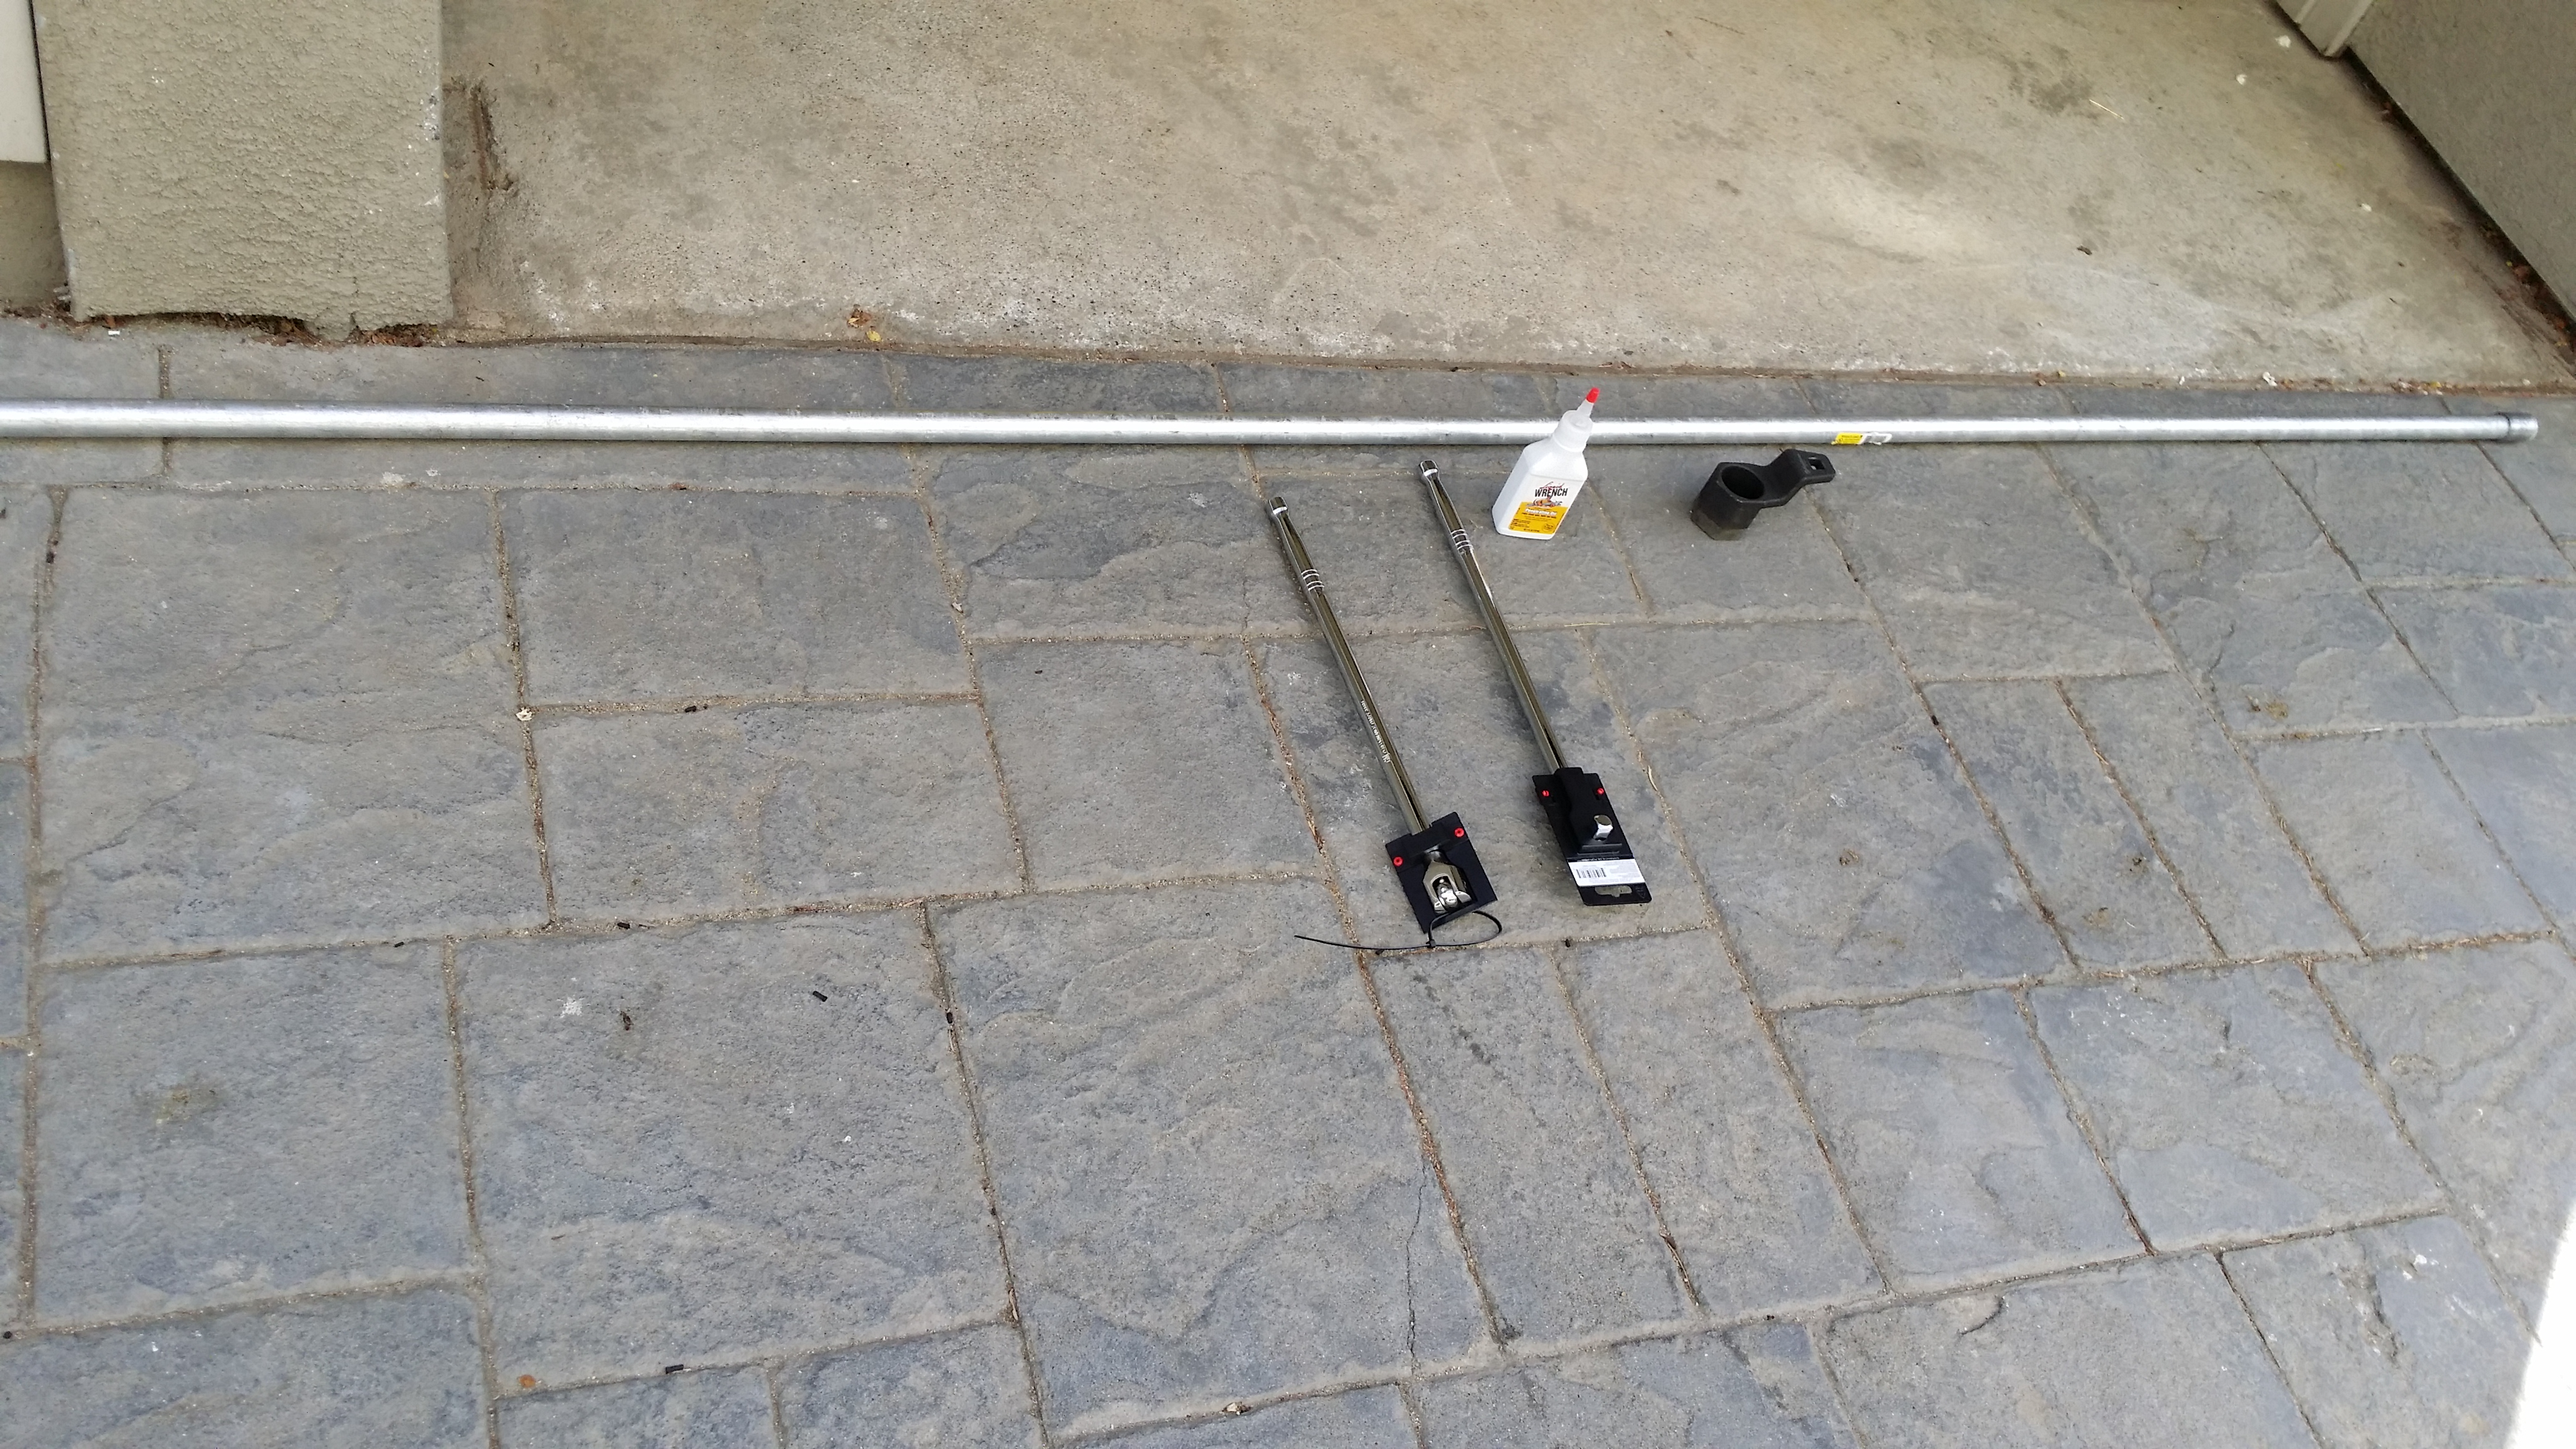
I came up with a solution for the crank bolt involving: two 1/2 braker bars, 10ft conduit pipe, penetrating oil, HONDA crank pulley holder, and a hammer. Still working on cutting the conduit pipe with a handsaw...

Trending Topics


Thread Starter
Registered User
Joined: Mar 2010
Posts: 698
Likes: 0


Thread Starter
Registered User
Joined: Mar 2010
Posts: 698
Likes: 0
Crank bolt off and new bolt back on! This was intense. Here is how it went.
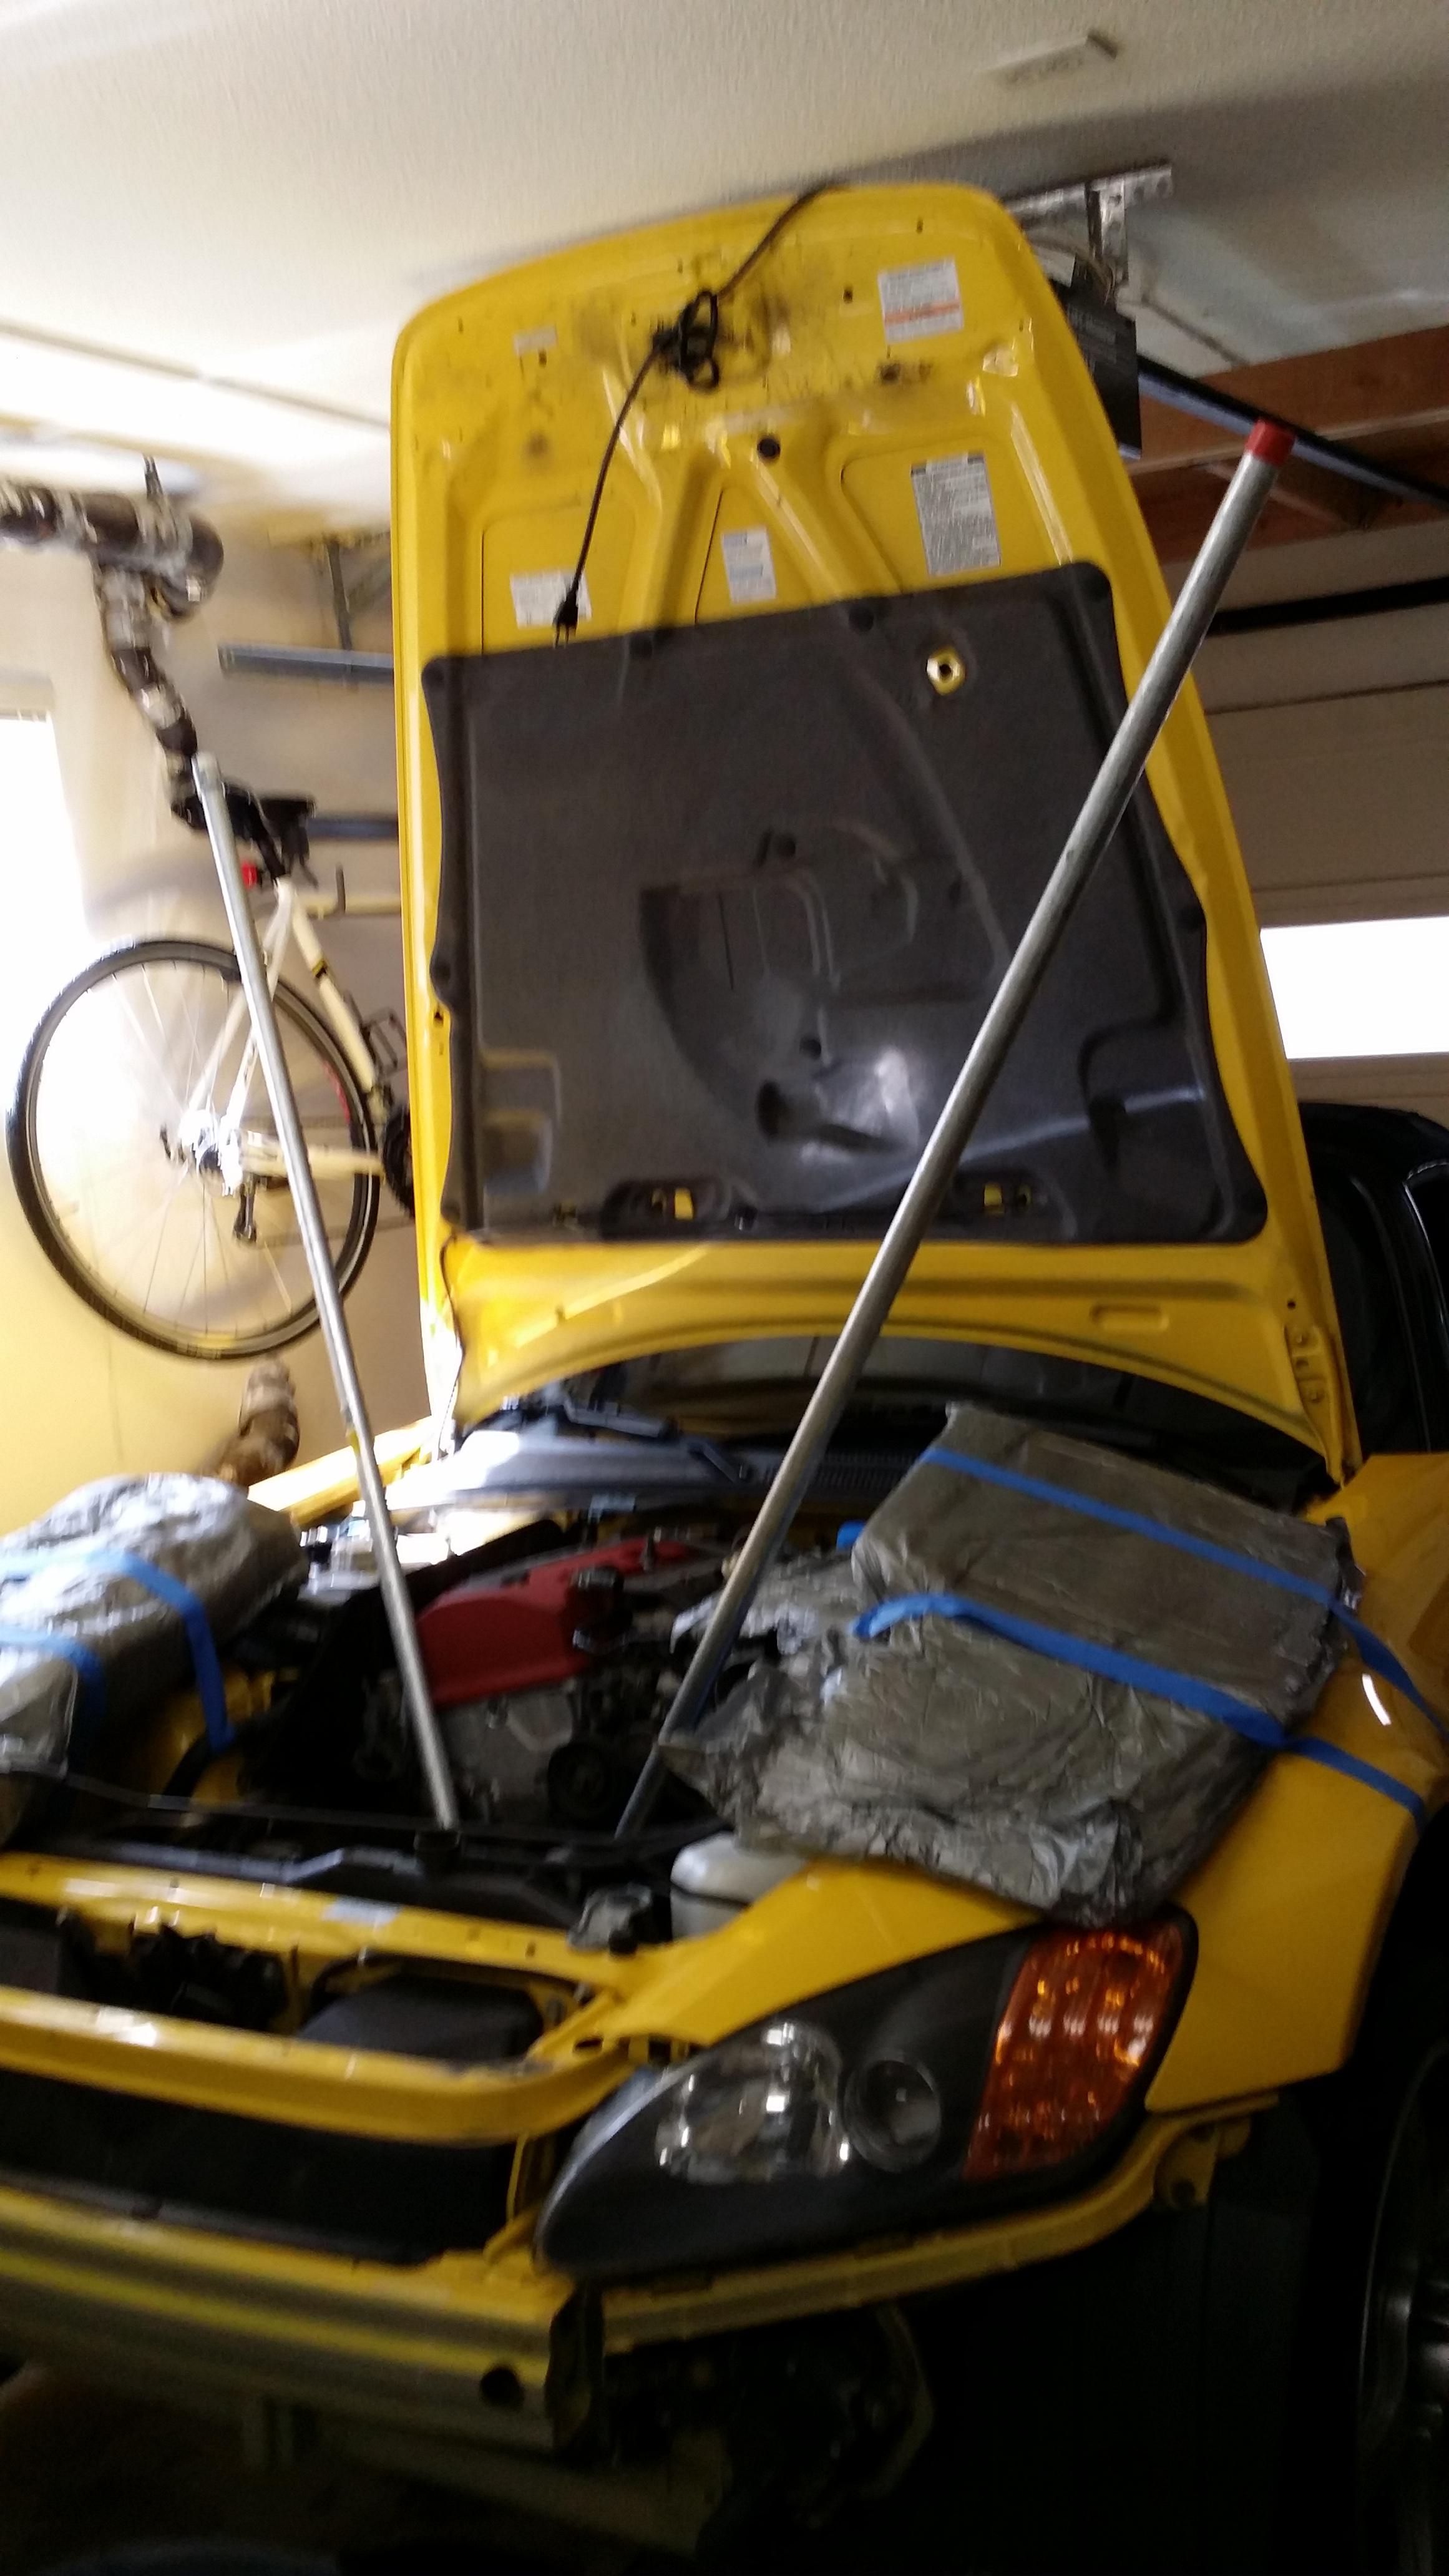
To remove the crankbolt I cut the pipe in half. I had one 200lb guy hold on to one end. I yanked on the other. The shape formed box packing came in handy to protect the car fenders in an oopsie moment. I had to literally through all my 180lbs on the bar to undo the bolt. When it came loose it make a loud pop and I thought I broke the breaker bar again. The bolt was loose. I'd say don't skip on the bar extensions here. This was thick steel and it was bending like a pretzel. Barely did the job. Note the novel hood holder. I know there is a trick to doing this without a garage opener but there is virtually no stress on the cable, just enough to hold the hood from falling either way. This is a 2 person job.
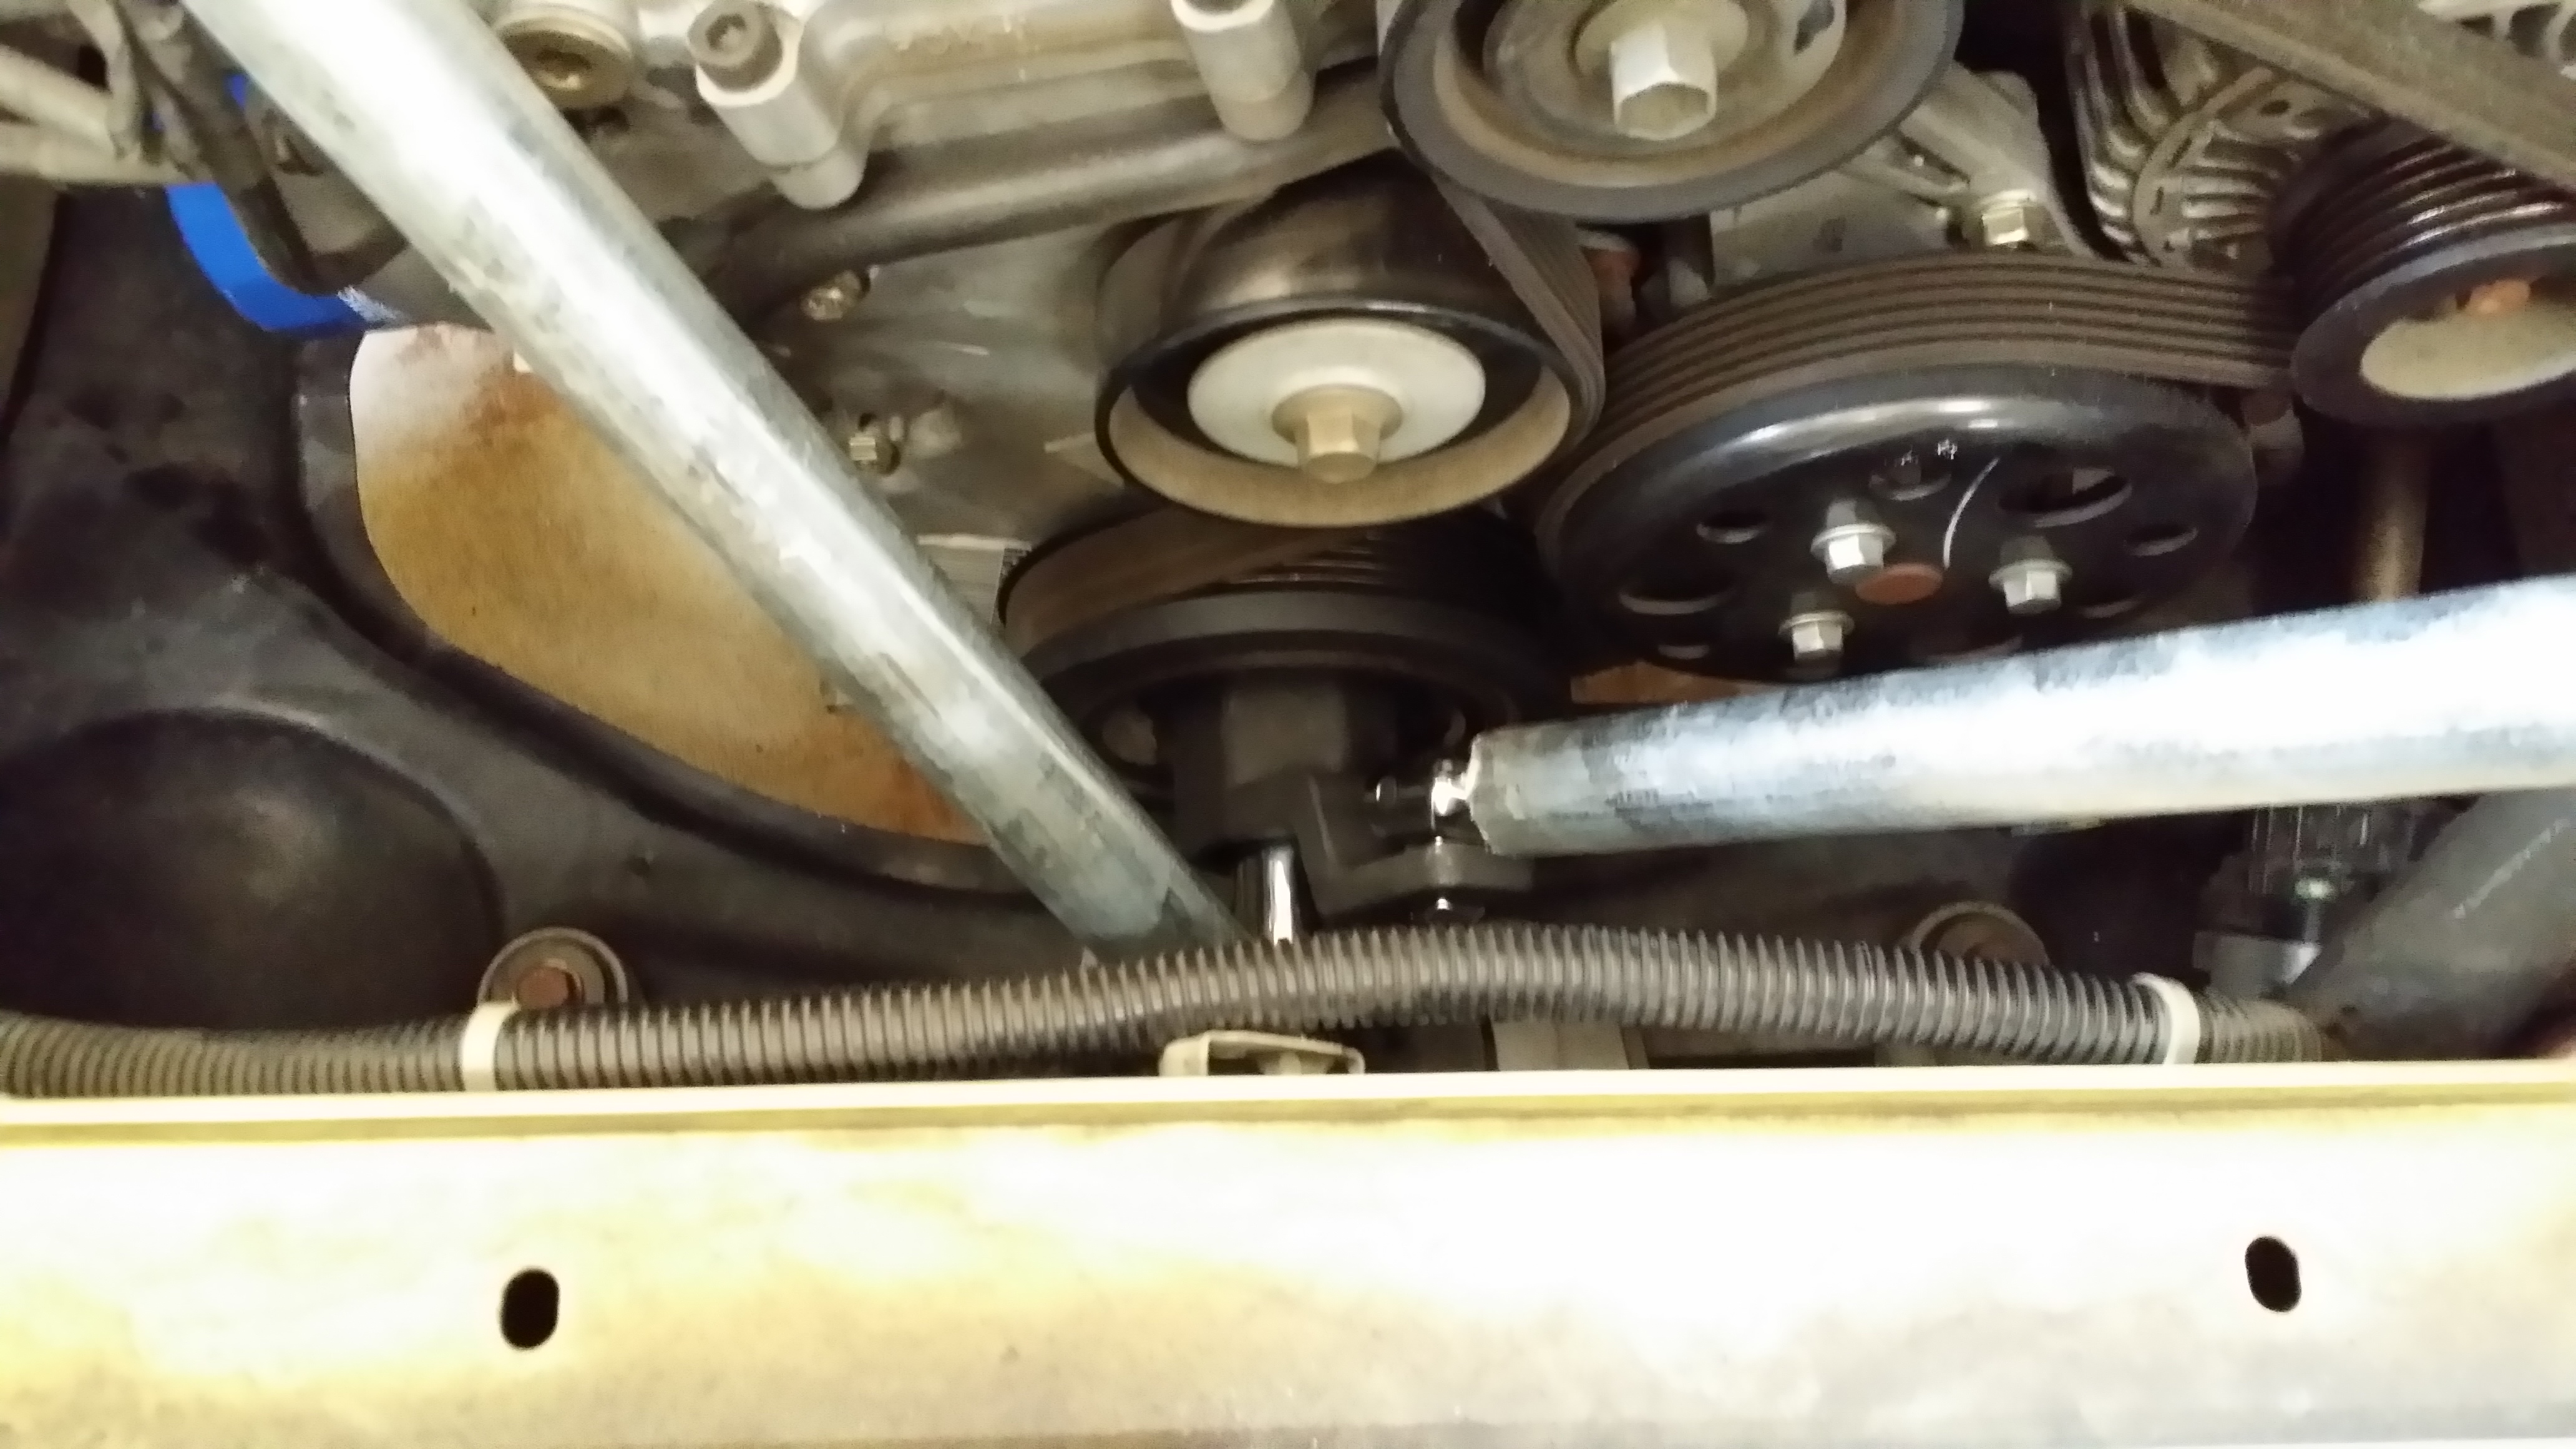
The tough cookie was the new 21mm bolt. BTW Kraftwerks instructs to have keys up to 19mm. You need at least one 21mm socket to tighten this baby up. Here was the most difficult job so far. Unlike loosening where you get to use a pulley holder, tightening is not as easy. KW did not reinvent a way for the holder to fit in. That means you are out of luck tightening the pulley to 181 ft/lbs because the whole assembly rotates. I tried many ways to go about this. Some included two 5mm alen keys stuffed in the KW pulley propped against the chassis with a breaker bar. I realized quickly in that 181 ft/lbs was too much for this method so proceeded to think a workaround before stripping the bolts. Then I came up with this, breaker bar slotted into a pulley relying on the belt system to hold. If you get the breaker par just right against the block and frame this works. Hearing the torque wrench click at 181 ft/lbs was one of the best moments of my life haha.
Found new respect for guys that can tighten this crank bolt to spec without a key and without breaking something. Cheers.
To remove the crankbolt I cut the pipe in half. I had one 200lb guy hold on to one end. I yanked on the other. The shape formed box packing came in handy to protect the car fenders in an oopsie moment. I had to literally through all my 180lbs on the bar to undo the bolt. When it came loose it make a loud pop and I thought I broke the breaker bar again. The bolt was loose. I'd say don't skip on the bar extensions here. This was thick steel and it was bending like a pretzel. Barely did the job. Note the novel hood holder. I know there is a trick to doing this without a garage opener but there is virtually no stress on the cable, just enough to hold the hood from falling either way. This is a 2 person job.
The tough cookie was the new 21mm bolt. BTW Kraftwerks instructs to have keys up to 19mm. You need at least one 21mm socket to tighten this baby up. Here was the most difficult job so far. Unlike loosening where you get to use a pulley holder, tightening is not as easy. KW did not reinvent a way for the holder to fit in. That means you are out of luck tightening the pulley to 181 ft/lbs because the whole assembly rotates. I tried many ways to go about this. Some included two 5mm alen keys stuffed in the KW pulley propped against the chassis with a breaker bar. I realized quickly in that 181 ft/lbs was too much for this method so proceeded to think a workaround before stripping the bolts. Then I came up with this, breaker bar slotted into a pulley relying on the belt system to hold. If you get the breaker par just right against the block and frame this works. Hearing the torque wrench click at 181 ft/lbs was one of the best moments of my life haha.
Found new respect for guys that can tighten this crank bolt to spec without a key and without breaking something. Cheers.