When you click on links to various merchants on this site and make a purchase, this can result in this site earning a commission. Affiliate programs and affiliations include, but are not limited to, the eBay Partner Network.
Vinyl wrapping isn't new, I am definitely late to the vinyl wrapping party. Mostly what entices me is the ability to change color without much risk or devaluing the vehicle, for relatively cheap. I finally decided to price it out, and vinyl, even high quality vinyl, seems to be only getting better and better as time goes on, but doesn't seem to be getting any more expensive. If anything, it's cheaper for better vinyl. I priced out the S2000 and found I could do it for $450 for premium quality vinyl. At that price, I felt like I could even do a pretty bad job of things, and still be happy with it.... and I did make tons of mistakes, probably will re-do some parts, but I did it, and I feel it was totally worth the time and effort, even with my mistakes.
I spent the last week vinyl wrapping my car, and was taking notes along the way because I knew I was going to revisit and change my color again. Vinyl wraps are supposed to last ~3ish years, but I was pretty sure I would want to change color more like every 6-12 months.
I cannot stress enough that I am no vinyl wrapping expert, and that you should take all my thoughts and experiences with a grain of salt. Do your own research into methods and feel free to correct me or suggest improvements.
After having completed the entire process, I can still say that I would do it again, plus I know I could do it much faster and better a 2nd time around Each time I did a 2nd panel, I could do it in half or less of the time of the first one. Most of the job is not labor intensive, its just time-consuming squeegeeing and trimming. I found it almost therapeutic to do it. Throw on a podcast, audiobook, or some music, and get to work!
I have never vinyl wrapped anything before, and had no help doing any of it, besides the occasional youtube video, but it's really hard to learn about how to manipulate the film any other way than just doing it.
Here's a before pic:
And some afters:
I had found this thread here: https://www.s2ki.com/forums/s2000-mo...ap-diy-866415/, but the OP unfortunately scrapped the entire project, and there were a few mistakes I see he made that I can hopefully stop you from making.
If you want to vinyl wrap your S2K, here are the extreme cliff notes that I plan to further illustrate in the full write-up:
You should buy ~250sqft of material (50x5ft) at minimum for your first wrap (assuming you're not doing a hardtop). Cost is ~$450 for high quality vinyl. Consider maybe buying some extra for your first wrap, maybe 60'x5' to just have plenty to work with, but you can complete the job with 50x5, you just might be like me and want to replace some parts. If you need to do a hard top too, make sure its 60x5.
Your first wrap may (will) take 30-40 hours total, including prepping and such. Your 2nd wrap will probably take half...or even less...of that.
You want to cut most pieces to have 4+ inches excess on all sides, without any stretching.
You do not need the heat gun for *anything* other than the rear bumper, front bumper, and mirrors (and post-heating of course). That's it. Your goal should be to use the heat gun as little as possible. Resist the urge!
Post-heat extreme bends/stretches. Different vinyls have different specifications, look up yours. At least the 3M 1080 says a mere 100*F is all you need, which seems low. I did more like 190*F. I didn't mean to, the heat gun just does that quickly. I feel like you could do 100*F with a hair drier, but go ahead and get the heat gun, they heat up super fast and are much easier to use, plus they are something like $35 or so.
Roll out, cut, and peel the backing from the piece for the panel in full, stretch, without heat, as much as you can horizontally on all panels, then fix ripples by pulling up vertically. Sometimes, you might need to then pull horizontally then vertically again. Squeegee. Trim. Done...after ~2-4 hrs per panel
You can do it all alone. There were a few times where having extra hands would have made things easier, but I did it all alone, so it can be done even for a total first timer.
Alright, not scared off by 30-40 hours? Here we go!
Step 1: Buy Vinyl and other basic tools.
I did some brief research, you've got 3M, Avery, and VviViD seem to be the big names I found. I just went around to websites looking at colors, and found I was a fan mostly of 3M colors. I ordered about 20 samples of vinyl from Metro Restyling - Leader in Color Change Wrap Vinyl. I am not affiliated in any way, that's just who I used. I ended up going with the "Frozen Vanilla" 3M Scotchprint Series 1080 SP240 Satin Frozen Vanilla Vinyl Wrap. Shop Online or Call 888-488-4695 NOW!. It's basically white satin with gold flakes under light... but there was a blue, a black, a green, and others I liked too. I know I am going to be back doing this again. Cost was $450, but prices vary depending on which you go with. There are some cheaper, some more expensive. In my opinion, ~$500 total in supplies is super cheap for what you're getting here. You can get cheaper vinyl, but I would seriously think twice about it. At least the 3M I worked with was incredible. The vinyl breaths and stretches very nice. You can easily work out pretty large bubbles with a squeegee. They do not need to get to an edge of the vinyl to come out, you just go over them lightly and they just seep out through the vinyl itself. Cheaper vinyl wont be so kind to you. If anything, the newer you are, the higher the quality brand of vinyl you should buy.
It would also help to have an air compressor to blow off panels right before application. My garage is filled with sawdust and all sorts of other dusts, but I had no issue if I just quickly used the compressor and put on the film initially. If you don't have a compressor, you could use canned air, or nothing at all. I forgot to use compressed air on one of my panels and I can't tell. I forget which panel it even was.
Here's the vinyl when it arrives:
Not bad, it came with 2 plastic pieces on the edges that fit to the box, making it roll in the box so you can easily pull out pieces to cut.
Other tools you should have: A heatgun, vinyl magnets, 3x squeegees, Exacto knife with like... 50 blades, automotive adhesive if you intend to put badges back on, painters tape, knifeless tape, philips screwdriver, socket wrench with with 8mm and 10mm sockets, and various extensions and joints for the real fun that is taking off the mirrors, and alcohol peroxide.
You might also find it helpful to put your car up on jackstands. If you can do this, I would recommend it, then you can do a lot of work sitting down or at least with less bending over. When doing your bumper...etc, it'd also be super useful to have plenty of room to pull down. My bumper has 4.5 inches of clearance. That would have been very challenging to wrap without lifting the car up.
Step 2: Clean the car.
I just washed off my car all at once, then, before each panel I would more closely detail it, then wipe it down with a 2:1 ratio of alcohol peroxide to water. Finally, compressed air that panel, and then immediately apply the vinyl... so wait to use compressed air, if you have it, until after you've cut the piece and you're right about to put it on.
Here's a "before:"
The bumper has TONS of rock chips, the entire car still has tons of rubber marks that you couldn't tell were there if your eyes were closed and you rubbed your hand over them. I just simply couldn't get many of them out. This is a track car, so it just had hundreds if not thousands of rubber marks. Some came off, some didn't. The entire paint and body of this car is... maybe a 7/10. It's not horrible, but it's not showroom, especially the front. I imagine I could have spent another 20 hours working on these, but it just wasn't important to me. From what I could tell, the vinyl still stuck just fine to the residual marks. We'll see how it holds up over time.
Before doing each panel: Wipe it off again with 2:1 peroxide:water. If you have some form of compressed air, use it on the panel to be certain it's all clean.
If you can get to the inside edge of what you're wrapping, remember to clean this too. For example, the inside of the hood, doors, trunk, wheel wells.... anything you can reach, wipe that down too. It's easy to overlook this and then forget when you're wrapping around the edges trying to stick to grime, or get to that point and try to clean it with vinyl right there.
After this, use either painters tape to mask off all the opposing edges where you will be cutting with a knife, or use knifeless tape. I only found out that knifeless tape existed when I just had the bumpers left, but, next time, I will just use this for all of the trimming. The cuts you can make with knifeless tape are just so much better for panel cuts. For some trimming, you still will need an exacto-knife, like cutting around the antenna base for example. Anyway, just assume this prep stuff for every step below.
Step 3: Get started. The hood is a good place to start. I used a 5'x5' piece, which required some stretching to make fit, but, on this large of a panel, and something that should be easy, this is okay.
Normally, you want to cut pieces with plenty of slack on all edges. Slack gives the paper plenty of space to bunch up in areas that wont be touching your car, and it gives you areas to grab and get your oily hands on, without, again, being areas that will touch your panels. For example, here's a picture from the other wrap thread (https://www.s2ki.com/forums/s2000-mo...ap-diy-866415/)
You can avoid this, by having far more slack. Once you find yourself in a position like this, I really don't see how you're getting out of it. Also, just for notes, that window seam comes off super easily. it's just held on by a bolt on the inner part of the door, and then brackets along the whole thing that holds it in place. Pop out that smaller bolt on the inside of the door, then slowly pop up this entire seam, then you can wrap to the real edge, cut it, then this seam goes over it.
He's not the only one to mess things up. I did both my hood and passenger front quarter panel poorly... so here's how NOT to do it:
I watched various videos and such on people applying vinyl to cars, and, for whatever reason, this method stuck with me, it seemed like a good idea to do this to take it slow, basically applying the vinyl and slowly peeling back the paper. This is dumb. Don't do this.
Peel the back of the vinyl off entirely off, place the vinyl on the surface. Securely apply and use your hand or squeege to make the vinyl connection wrong. This wont be your "final" attachment, you just want something secure so you can pull the other side. Then pull the vinyl piece horizontally hard across the panel, across from your securely attached spot. For the average male, probably almost as hard as you can pull without risking injury if something were to slip. I don't know the actual foot pounds... just pull it hard. Actual stretching of the vinyl when you're stretching an entire piece should be no more than ~10%. If you're strong enough to stretch a 3x5 piece evenly 10%, nice, but stop. Do not use heat. Then go and pull the vinyl vertically from here. When you pull horizonally, you'll get stress ripples vertically, but the vinyl is also stretched, so, when you go to pull horizonally, poof, relief of the stress ripples, but there should still be tension the other direction too, so new stress ripples shouldn't be there, and the vinyl is flat and ready to be squeegeed. Often, you will need to pull some horizontally, some vertically, then some more horizontally, then again vertically.
Many times you will need to also do this, then start squeegeeing at the CENTER of the panel, and begin to work out from the center, repeating this process every time you find the vinyl is beginning to bunch up as you squeegee out from the center.
Regardless, I did finish the hood:
It looks okay in pictures, but there were many mistakes and uses of the heatgun that caused slight discolorations. No one has noticed in person, but I know. I plan to just re-do this. If you are applying and slowly peeling back the vinyl, there will be inconsistencies in the tensions, causing the film to slowly but surely get bunched up and rippled, and you will be required to use a heatgun constantly. Eventually, you're going to overheat or overstretch and just create problems. Put the whole sheet on and pull sides, and this will cause things to be far more uniform. If you do enough research, you should find that this appears to be the "pro method." I just thought I could go either way, but no, you cannot.
Step 4: Front passenger quarter panel. 5' x 5.5' piece, but you can cut away a large amount of this around the tire. Cut it before you peel the paper, so you can use these pieces for scrap. At the very least, you could use these to do the mirrors, for example.
I cut around the blinker light. C'mon, that was stupid. Take the light off. It's super easy, it's a simple clip... and it's probably seized and ready to snap off as soon as you touch it. Be prepared to buy replacements. I didn't care, the yellow/orange looked horrible on the white, so I bought clear light housings.
Take off the "S2000" badge obviously prior to wrapping. The heatgun helps, then goo-gone, wd-40, elbow grease, and an old towel that's not soft anymore.... have fun.
...I still did this the old way:
It still worked:
But still has a few flaws that I would like to correct at some point.
Step 5: Driver front quarter panel. 5'x5.5' piece
This time I learned. This entire panel I did with no heat at all, just stretching horizontally, then vertically, then working center out, stretching horizontally and then vertically as needed to get things to work without any heat or ripples. I also pulled out the side blinker light prior to wrapping. Looked great, and finally I was getting the hang of what could be squeegeed away and what couldn't. Here's an example:
Marked in green are bubbles you should be able to easily squeegee out. Yellow is worth a try, but probably wont work. Red is don't risk trying. Generally, tall-ish, but skinny bubbles will just cause fold marks. They look JUST like bad scratches, only they also catch light really well, and are really hard to remedy. Its not worth creating one. Getting the pattern recognition down for what you can squeegee and what you can't just takes some time. At first, I thought none of those woulda been capable of being squeegeed, then I started thing I could squeegee out anything, then I finally started to figure it out. If you're like me, you've just never worked with material like this, there's no previous experiences to really reference.
Step 6: Trunk. 5'x3.5' piece
Remove the 3rd brake light. Pop your trunk, disconnect the light, use a socket wrench with 8mm socket, there are 5 bolts. The middle one is annoying to get off, but can be done relatively easily. When I put the light back, I just left this bolt off. Remove the Honda H emblem. Super easy to get off...unlike the other one. If you need to, there are lots of videos and writeups for removing this.
To do the trunk, it's kind of a challenge. I started by doing the top using typical tactics, then I pulled over the crease, and then repeated. It wasn't easy, but not as hard as people were claiming trunks to be. At this point, I was beginning to think the S2000 might be an easier car for wrapping.
All done:
Obviously, you will cut out the holes here for the brake light to go back. I generally just cut a hole almost as big as the hole was in the vinyl, cutting into the corners a bit, then wrapping around the back. All these holes will be covered, so it doesn't need to be perfect looking, but you do want it to hold long term.
Step 7: Passenger door 5'x3' piece
Take off the mirrors. I have no idea how, but if it was easy to take off the handles, that might be nice to do too. I tried to figure it out, but it looked like you might need to take off not only the door cards, but actually some of that interior metal to get to it. I decided it wasn't worth it.
Mirror off:
Okay...clean that too.
Getting the passenger mirror off wasn't too hard. Take off the door card, take out the speaker, or just go into the opening near the mirror. There are youtube videos that cover how to do it, just look at those, because there are 2 bolts that might convince you that they are for the mirror but they are NOT, there are 3 bolts hiding from you. I could get passenger mirror off without going through the speaker. I almost couldn't get the driver's side off at all, including going through the speaker. I ended up needing a way to wrench between the door's metal panels, so I made a makeshift small wrench off extensions and a joint.
This was honestly the hardest part of the process for me. I could not understand why I could reach the passenger 3rd bolt so easily, but not the driver's side. I hope you don't have as much trouble as me... because wrapping the doors with the mirrors on would be very challenging without abusing a lot of heat and likely having failure/pull back issues.
My makeshift wrench to fit in between metal door panels
Also, take off the seal between the window and the outside of the panel. There's a tiny bolt on the inside of the door that you can pop out with a flat-head screwdriver, then you can slowly pull up. It's secured by a bunch of tabs, and take note: These tabs just freely slide around. When you go to put it back, if they aren't lined up and you're confused, they slid. Slide them back. I broke a tab before realizing they just freely slid around. Taking these seals up lets you wrap all the way to the inside of the panel almost, then exacto knife or knifeless-tape along the edge, then, when you put the seal back on, it goes OVER the existing vinyl for a nice clean look.
Process of wrapping the door:
Then trim the handle. I considered not trimming the outlines around the handles at all (not cutting the seams), those seams are so thin, it's really challenging to make this look good. Good luck! Just make sure you're using fresh blades here. The blades are cheap. Fresh blades did such clean cuts. Maybe I just had horrible quality blades, but I was using a new blade per panel, and I would be CERTAIN you are using brand new blades for these thin seams. If someone has a suggestion for doing these better, I am all ears. Next time, I might just heat the film to 150*, and squeegee in the vinyl nice and snug, then post-heat it there and hope it stays. I suspect this would look the best if it was successful.
Step 8: Drivers door 5'x3' piece
Same as #7.
Also, I didnt really do much trimming inside the door area. If this bothers you, go for it, just cut pieces and mold to the door. Use heat to mold to all the curves, and be certain you also POST HEAT these, as they'll almost certainly rise up on you in a day or two.
At the end of this project, you will have lots of scraps to do this with if you must.
Step 9: Passenger rear quarter panel 5'x3' piece
Unscrew the antenna if you haven't yet.
Whew, this one was super easy. No inside curving at all, this one felt really easy.
With just stretching and very light squeegeeing:
For the antenna, I just cut a slight hole, one that WAS NOT as big as the antenna, just enough to add some relief, and allow me to squeegee to the base of the antenna, then just exacto knife away the vinyl, do some final squeegeeing...and you're set:
No serious stretching happens to the vinyl when you do it this way, so there wont be any pull-back or failure issues.
At this point, the car is really coming together!
Step 10: Driver rear quarter panel 5'x3' piece
Same as #9
Step 11: Bumpers! 5'x10' piece ... for BOTH bumpers... but we'll start with the rear for step 10, which, from that 5'x10', we use 2'x'10
I started with the rear, because I thought it would be easier than the front. I don't think this is the case, I think the rear bumper is the hardest part of the entire car, due to the extreme angle changes.
For the pieces, I measured things and the rear bumper needs ~ 10 feet long, and the front needs about 7.5. I measured vertically and found the rear bumper to need really only 2 feet with a few inches of slack and the front to need about 3 feet with a few inches of slack. Since the paper comes 5' wide, I decided I'd rather to 5'x10' and then cut off 2 feet, having a 2.5'x5' scrap piece, rather than cutting another 7'x5' piece. I just figured that'd be waaaaaaaaay too wasteful. I didn't regret this decision and still had plenty of material to work with to actually apply to both bumpers.
Create, cut, and apply all inlay pieces BEFORE the main piece. I failed at this, never getting any inlays really right. In the case of the bumper, just vinyl wrap the entire license plate area first. Wrap 100% of the recessed areas, cutting the edges off with knifeless tape. When you wrap the full bumper, cut out just inside of the edges, and wrap slightly in. This will be minimal stretching, you should still post heat it, but it should look good, and be reliable.
I thought i could just wrap the edges, then use the cut out part to finish the back, this didn't work, and I needed to re-apply some inlay stuff. Anyway, here's what I did first:
...but you should do that AND do the entire license plate backing and bottom area too, and get closer to the edges with it.
Whew, that's ... a big piece. Hope it goes well.
...and voila:
Simple! ...just kidding. Took a lot of heat and stretching for the part of the bumper above the license plate area as it comes into the trunk, but also goes around the edge. Yikes, this is a big ol crumply mess, and where having some good excess comes in handy. That said, I do not regret the 2' tall piece. It actually turned out looking quite nice though. I was never really a big fan of the rear end of the s2000, I just sort of live with it, but maaaaaan does it look great in white. I also used to have a spoiler, but I left it off, I just found I REALLY liked the way this looked.
Step 12: Front bumper. Use the 3'x10' left over from the 5'x10' bumper piece.
Cut and place all of your inlays FIRST. Any recessed part, make an inlay..except the main area if it's like mine. You really can just cut a large circle out from the bumper, then heat gun your way through the middle. It doesnt take much material, BUT this will be an extreme stretch. I have no idea if this will hold. I have post-heated mine, and it appears to hold up even to up-to 200 degrees F. I have faith, but we'll see long term. If it does fail, I will just put an inlay strip over it.
Remove the front honda emblem.
You CAN vinyl wrap around it... but this looks cheesy to me. I wanted to take it off.
Bad news though: Unless you drive a MY00, it's NOT coming off without breaking it.
Now, I am a pragmatist. If it works, I will do it. The brackets behind this emblem are solid, and they're strong. I knew they'd have to be broken, and I knew I wasn't a fan of the honda emblem on the front anyways. People pay bodyshops to remove these front emblems, fill the hole, and paint match over... but, if you're wrapping, why not... saw it off?
I took a squeegee and wedged it under the emblem. Then, I needed something skinny, but sharp, to saw at it. None of the saws I had could really do it. I was at a loss...but then, lightbulb! A kitchen knife. One of the old ones that the wife might not kill me with for using it. So, I used an old, cheap, kitchen steak knife and sawed that thing off. Again, with the squeegee between the knife and my original paint.
In the end, I have:
The remaining marks are from the automotive adhesive. Somehow I actually didn't mess up my paint with this bad idea.
If you wanted, you could push these hard enough and they'd pop out. You could also use wire cutters or something on the inside of the bumper on the brackets and break them that way, but I liked the idea of keeping the holes filed... and this worked out well. The job is done, and my eyes are never drawn to the missing emblem or these holes being covered.
I didn't but you should do the inlays first. Any recessed parts on the bumper, go ahead and place parts on these spots.
You COULD use heat and not do this. I doubt that'd last long term, it will probably pull back and fail eventually. The less stretching you do, the better, but do whatever you want. If it does fail you can also just cut away the failure and "patch" the inlays, so it's not like you would have to re-do the entire bumper.
Prepping the bumper:
Mainly either mask off the lights where ull cut or use knifeless tape. I didn't even know about knifeless tape until I was doing the bumpers. Wish I knew sooner!
It can be hard to see, but look at those green lines. That's the knifeless tape. You lay it down, then pull the string up, it'll cut the vinyl, and then you slowly pull out the green tape. Not once did the tape rip on me or leave me in trouble. Loved this stuff.
Place entire film on bumper and begin the vertical/horizontal pulling, squeegee from center out
I cut that hole for relief and tried by best to figure out the inlay. Wished I would've just wrapped the recessed parts first!
Instead, basically I did:
Then I wrapped over the exposed parts. Just do the reverse, first wrap the inlays, then do this over it. Anyway, it still finished:
Step 13: Other parts...use scraps
After this, I still needed to wrap my front lip, spoiler, and mirrors. I *really* liked the rear end without the spoiler, so I actually decided to leave off the spoiler.
I also decided to liked the no-badge look, so I've left all of mine off, despite buying the automotive adhesive to put them back.
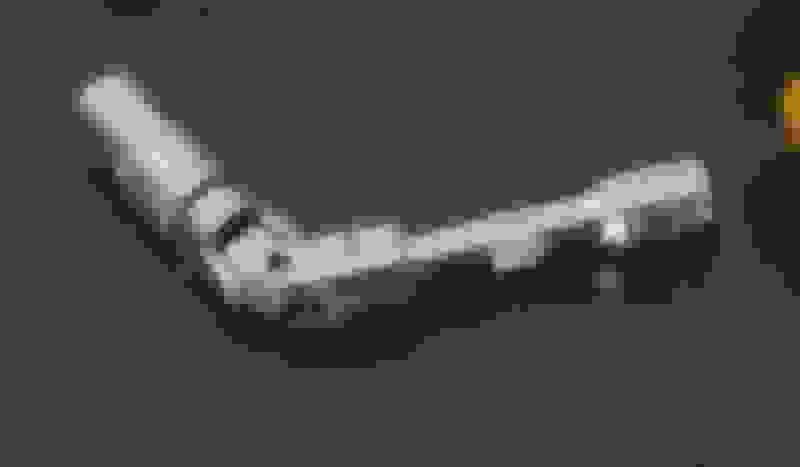
For most of you, you will need to do your mirrors. Now would be a good time to buy after-market mirrors if you want them. APR GT3 mirrors are popular for the S2K, check them out. I just couldn't justify their price tag, and I actually kind of like the S2K mirrors, I just think they go with the car well. Anyway, if you dig those apr gt3 ones, go for them!
Otherwise, wrap the mirror. It MIGHT be easiest to wrap the base of the mirror off the car:
...and then put the mirror on the car, and wrap the rest of it. I wrapped the mirror off the car and had a hell of a time with only 2 hands and nothing securing the mirror. Lots of heat used. Who knows how these will turn out. See youtube videos and stuff for doing mirrors. ATM, mine look fine, but I have no idea if they'll hold up. Super annoying to wrap these, but it can be done with scraps.
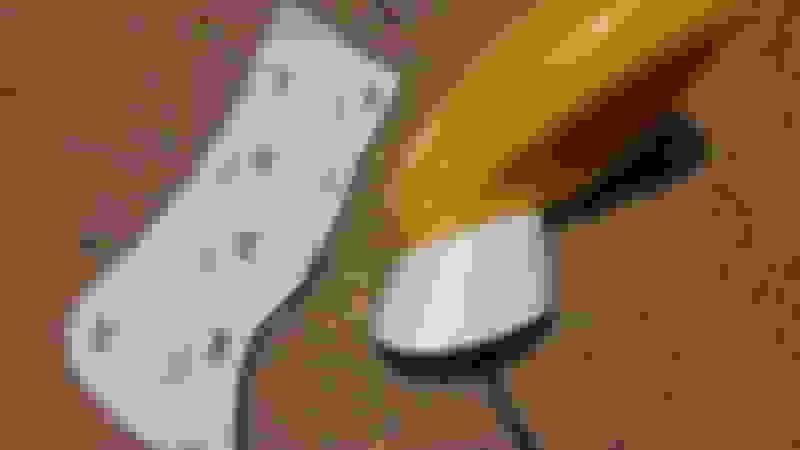
I wrapped my front lip, but I am uncertain how this will work out. My car is lowered quite a bit, and the front lip gets scraped frequently. I currently have 4.5" of clearance for the lip to the ground. Already after ~5 trips I have:
For this reason, I didn't put a 7 foot piece to wrap the front lip, I did it with scraps, because I wasn't certain how the vinyl would handle being scraped. Would it just flake off the scraped parts but hold well otherwise like paint would, or would it just get worse and worse over time for parts near the scrapes slowly branching out to the whole thing? No clue. My near-term plan is let it get scraped up a bit, then come in with an exacto knife and clean up the edges that are always scraped. I think that, if I just do this, obviously it'll be black from the scrapes, (but it was of course this way when it was painted, as you can see it's black under ALL of these scrapes, despite the lip actually being painted yellow).
I figured I might wind up pulling the lip, taking off the vinyl, and painting just the lip black if it doesn't hold up to the abuse, but I think it can, hold in the other areas despite the scrapes, but well see.
Also, seeing as this is the first closeup, the vinyl doesnt actually look like this with the bumps all over. This front lip was at least 20%-30% white or black from all the rock chips, scratches, and scrapes. If your entire car is beat to crap, sure, it'll look like that. Otherwise, here's a photo from the trunk close up:
It looks like flawless paint, except where your original paint.... wasn't flawless, or you made a mistake.
I also had plenty of scraps and thought I could wrap my roll-bar. I really just like the cross bars on the rollbar, so I wondered about just wrapping those and how it would look. I am pretty happy with it:
Might still go with doing the rest of the bars, I have tons of scraps till left over
Now, I know someone is going to ask about the inside of the doors and how they look. I didn't wrap them. I didn't want to bother, because it doesn't bother me, but I am sure many people it would. You could use some scraps to do these parts, just using lots of heat and post-heating. Here's mine:
Okay, that's all. Finished pics are at the top, so I wont re-post them here. I am confident I could do this job a 2nd time around in under 20 hours, and then maybe again to get my time around 13-15 hours for the entire car. Every 2nd panel I did, I was able to do in about half of the time. I could probably re-do the hood in a quarter of the time.
Got any questions? Any suggestions for me? I made lots of mistakes, and I am still a complete noob to vinyl wrapping. Just sharing my experiences and thoughts.
If you're thinking of doing your S2000 I say go for it, or you find some new tricks to doing things like the recessed areas, I would love to hear your recipes!
Thanks. Your write up makes me want to try it on one of my other cars.
You should do it! Just make sure the car can be down for a decent amount of time while you work, so maybe a backup car is a good idea.
Originally Posted by jfmoots
Really nice write up! Thanks for taking the time and documenting it. I'm gonna need you to do the insides of the doors... it's bugging me
Hah, yeah, I am sure it's going to make a lot of people uncomfortable
Originally Posted by Midnightdennis
Kudos to you for stepping outside of your comfort zone. Bookmarking this.
Thanks!
Originally Posted by alSpeed2k
Nice work!
How tall is your ceiling and how high can you lift your S2 on your MaxJax?
my ceiling is ~8 feet. Due to that, I cant put it in on the highest settings of course. Obviously you can have it any height, but you're relying on the hydraulics, so the maxjax has various holes where you push a steel beam thru to hold it in place. I tend to use the lowest one, which is 2 feet, putting it perfect height for my shop seat, but there's another that I can use to get 3.5 feet. I rarely use that one, but sometimes it comes in handy.
If you find yourself doing brakes/oil/swapping around tires a lot, the lift just makes things go by so much quicker. I really enjoy having them. Kind of a pain to install, get a nice rotary hammer drill with a bunch of good bits if you do it!
I'm about to redo the wrap on mine. I've had it on for about 4 years. Car is garaged but is daily driven thru the winter ect. The vinyl in the rear section is not holding up at all and looks far worse than the rest of the vinyl on the car. Colorado winters ftl.
Front bumper has taken some abuse through the past winter and i havent had a chance to rewrap it yet. CR lip is the most recent addition to the bumper.
 09-30-2017, 10:33 AM