
had a go at light painting


Thread Starter
Registered User
Joined: Feb 2014
Posts: 387
Likes: 0
I've had my first DSLR camera around a couple of weeks now. This was my 2nd time trying out light painting. I've used some of the advice i got off here to take the picture. i didn't shoot it in raw which i now know i should have lol. also used lightroom to touch it up a little...
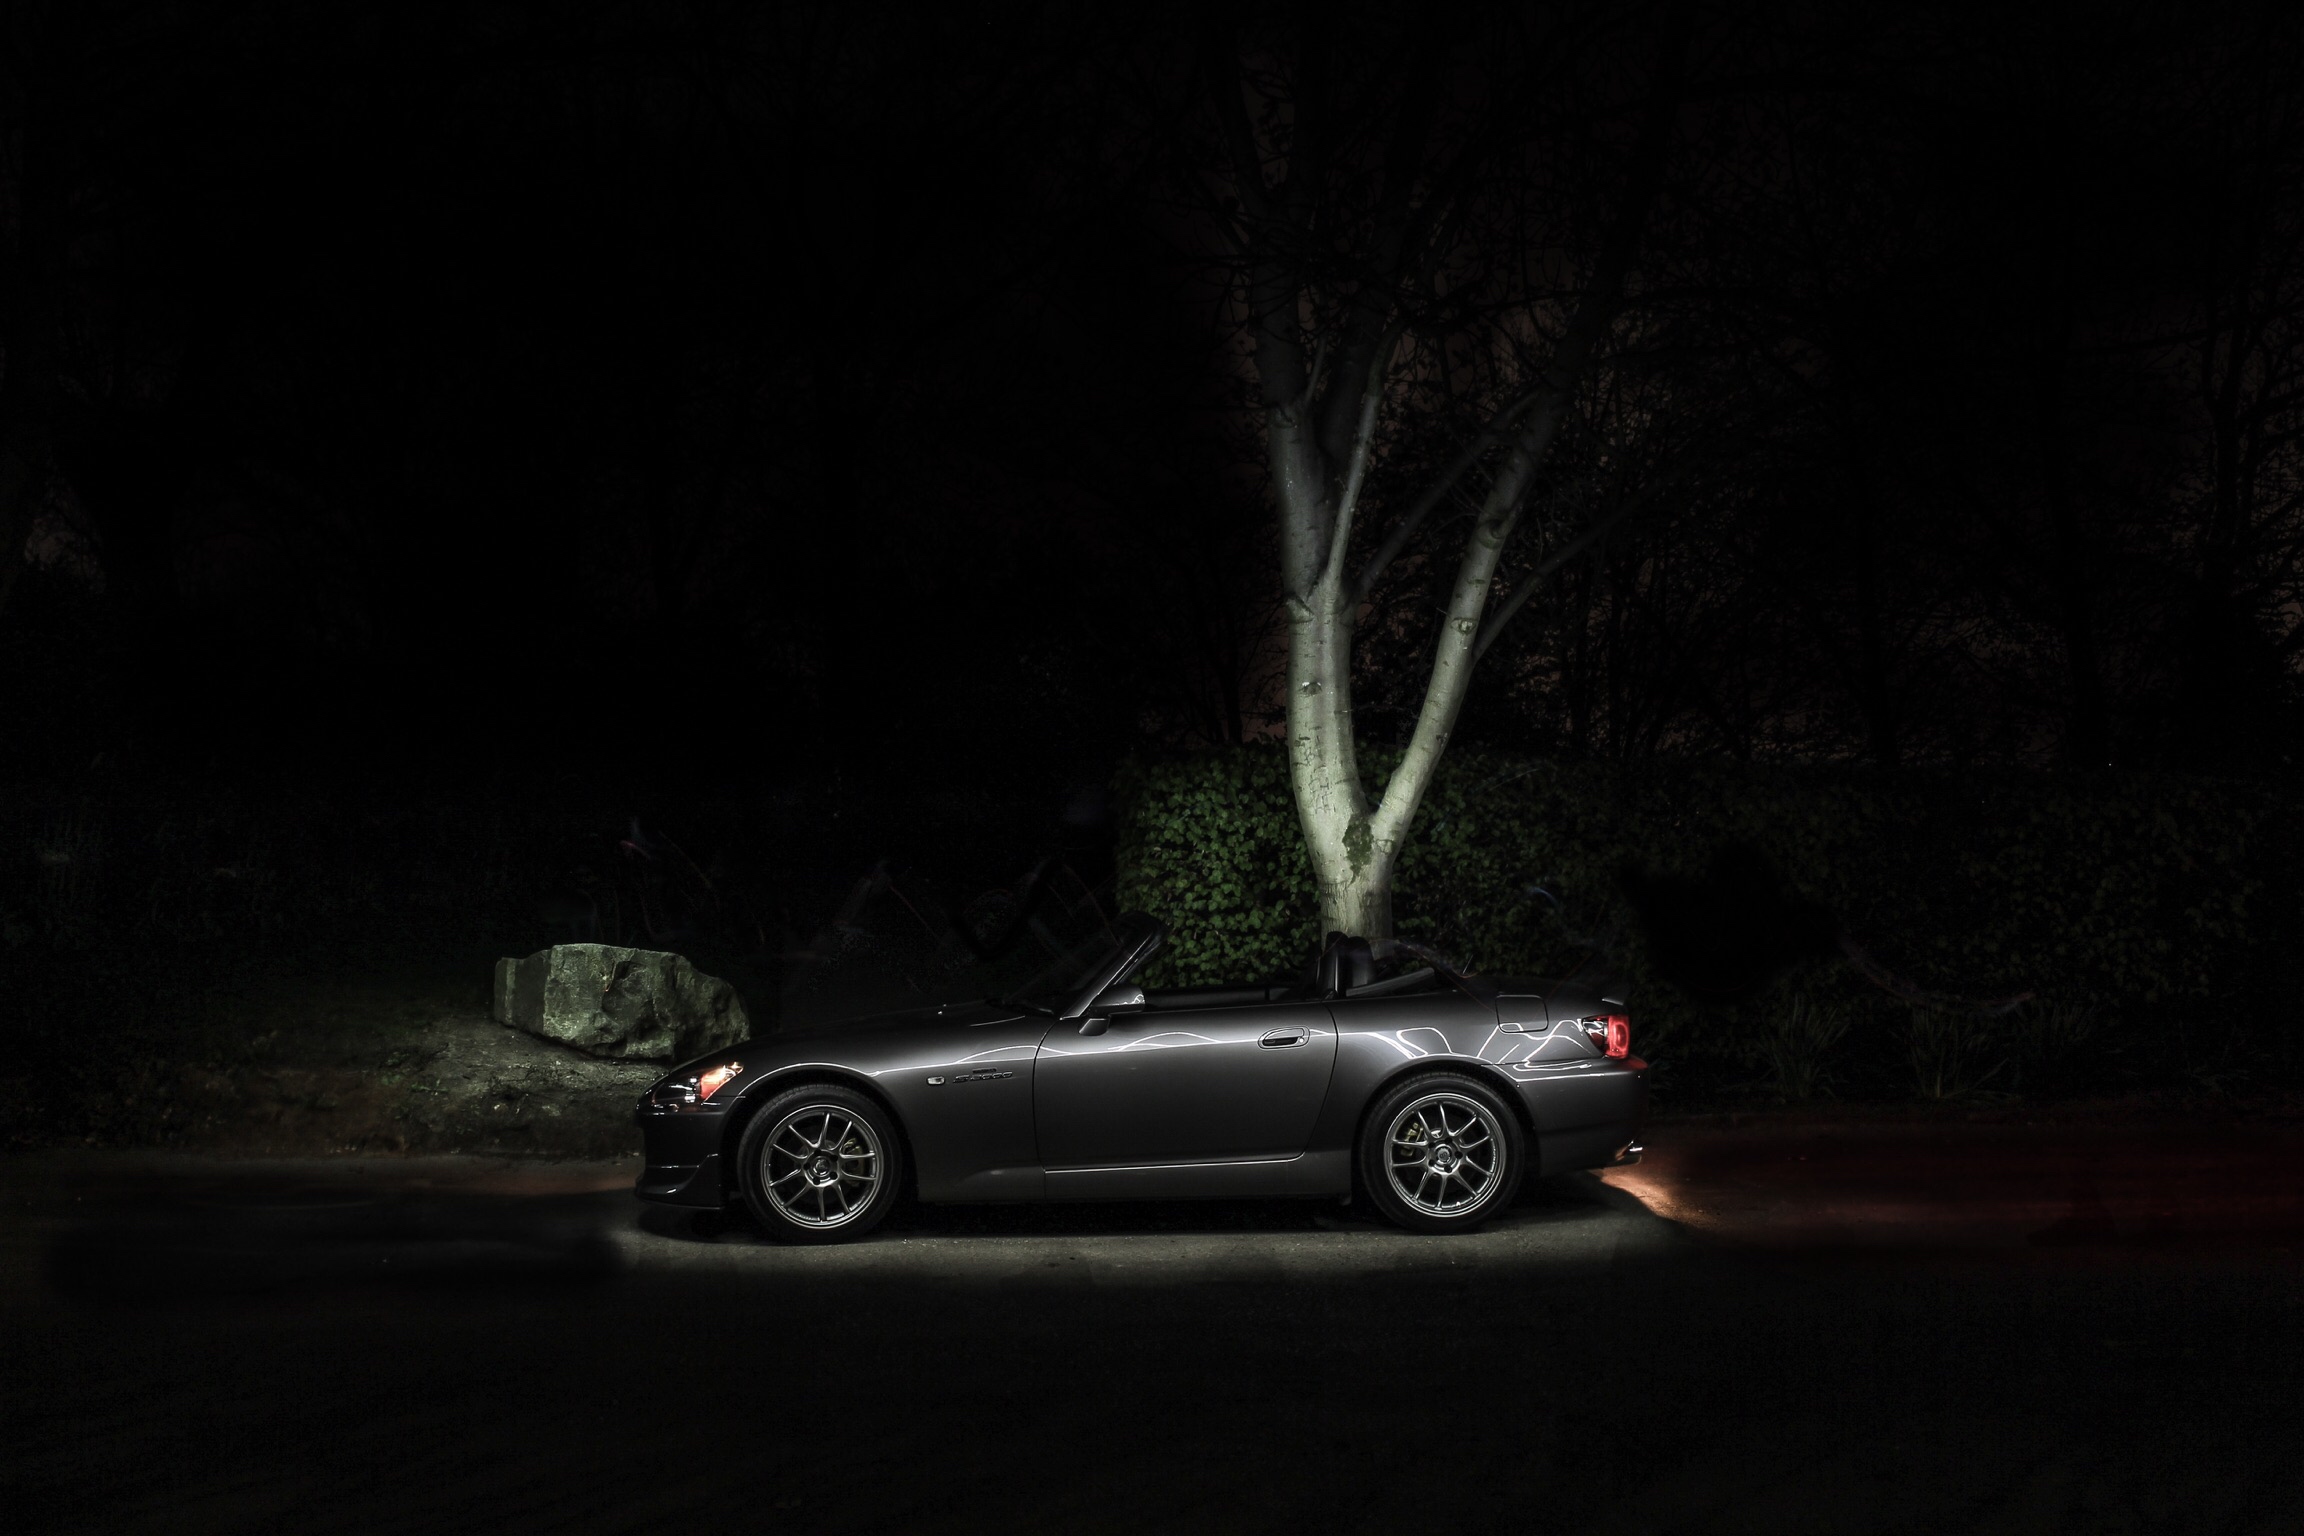 She lays in beauty like the night, of cloudless climes and starry skies. by bjw_2k, on Flickr
She lays in beauty like the night, of cloudless climes and starry skies. by bjw_2k, on Flickr


Joined: Oct 2010
Posts: 4,059
Likes: 129
For shooting, I would say light more of the car, or use a brighter light, or longer exposure. Get closer to the car, too much negative space, or light up more of the background to give more context.
For editing, you should crop it. A lot of negative space (which is just blackness, so it doesn't contribute to the photo any). I would adjust the temperature of the photo, seems too green. Always shoot in raw, I never shoot in anything but raw, the way photos edit in raw is so much better than jpg.
For editing, you should crop it. A lot of negative space (which is just blackness, so it doesn't contribute to the photo any). I would adjust the temperature of the photo, seems too green. Always shoot in raw, I never shoot in anything but raw, the way photos edit in raw is so much better than jpg.
Thread Starter
Registered User
Joined: Feb 2014
Posts: 387
Likes: 0
For shooting, I would say light more of the car, or use a brighter light, or longer exposure. Get closer to the car, too much negative space, or light up more of the background to give more context.
For editing, you should crop it. A lot of negative space (which is just blackness, so it doesn't contribute to the photo any). I would adjust the temperature of the photo, seems too green. Always shoot in raw, I never shoot in anything but raw, the way photos edit in raw is so much better than jpg.
For editing, you should crop it. A lot of negative space (which is just blackness, so it doesn't contribute to the photo any). I would adjust the temperature of the photo, seems too green. Always shoot in raw, I never shoot in anything but raw, the way photos edit in raw is so much better than jpg.

yeah i read about the benefits of raw shooting after i took this. I will shoot raw from now on

Joined: Oct 2010
Posts: 4,059
Likes: 129
Yeah, it is definitely a fun process and will take a few times to learn the most efficient way to do it.
Phone lights don't have enough output, I have used LED work lights as a cheaper option (range from $40-$100) compared to professional light bars.
Something similar to this:

Here is some of my light painting work:
https://www.flickr.com/photos/938559...7648975004939/
Phone lights don't have enough output, I have used LED work lights as a cheaper option (range from $40-$100) compared to professional light bars.
Something similar to this:
Here is some of my light painting work:
https://www.flickr.com/photos/938559...7648975004939/
Thread Starter
Registered User
Joined: Feb 2014
Posts: 387
Likes: 0
lovely pictures in that album mate. I'll check out the those light bar type lights then if they are the best kind to use.
ive got plenty of lighting for detailing like LED floods and PAR38 led bulbs but unfortunately all are mains fed so cant take them out with me
ive got plenty of lighting for detailing like LED floods and PAR38 led bulbs but unfortunately all are mains fed so cant take them out with me
Joined: Oct 2010
Posts: 4,059
Likes: 129
yeah the work lights I use are all battery power and come with chargers. I think they work great and it is much cheaper than the $500 Ice light (professional photography light bar). The Snap-On light bar is by far my favorite one to use ($100)


Joined: Oct 2002
Posts: 1,492
Likes: 0
From: Bay Area
Im not an expert but if flickr data is right, you dont need F8 in such a situation where theres not much depth. Try a little lower like F5.6 and you'll get sharper with the front headlights. That or its just poor Jpeg compression.
That or maybe your tripod is unstable or maybe windy? looking at the other pics at night on flickr titled "moonrock" you can see the vibration having some effect on the sharpness. A timer shutter and some sand bags can help with that. Also a gray market 50mm 1.8 are going for less than $100 these days and are prob sharper than the kit lens
But great pics either way. hope we see more in the future
Trending Topics
Registered User
Joined: Jul 2011
Posts: 89
Likes: 0
From: Miami
looks like you may have stood still for a second near the rear of the car, remember you need to keep moving when you're light painting. Also I agree with a better lighting solution.
Also try and keep your light path in a straight line, it looks nicer when it reflects off the car. When you get good you'll even be able to remove the light streak reflection in photoshop too.
Excuse the rice, also this was lightpainted with an iphone camera lol
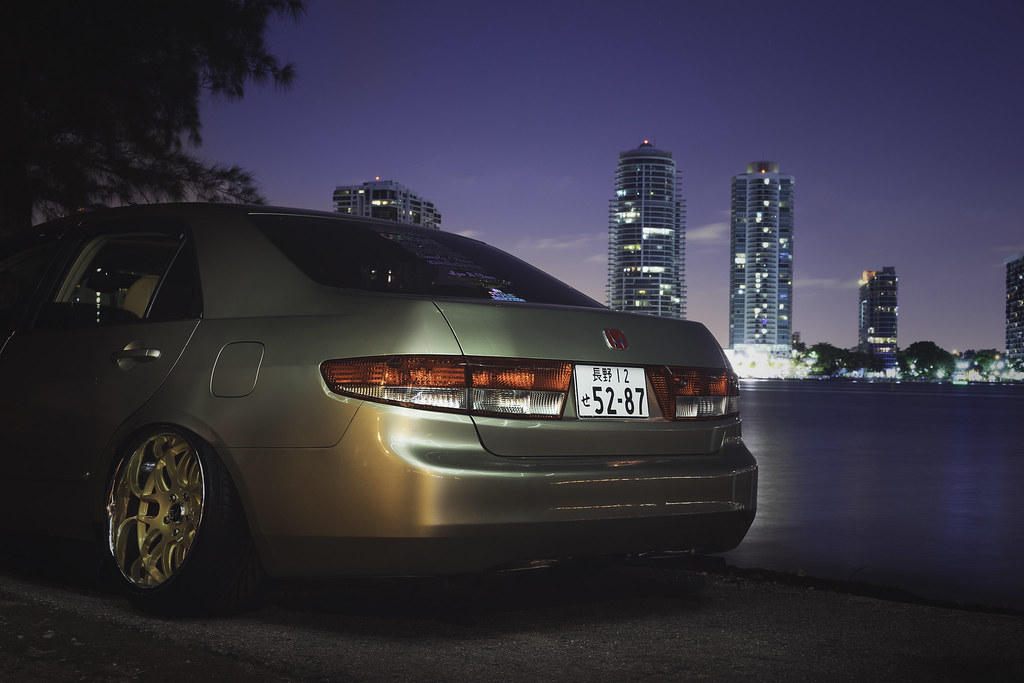
I could have spent more time under the headlights but this car isn't nice enough to justify that lol
Also try and keep your light path in a straight line, it looks nicer when it reflects off the car. When you get good you'll even be able to remove the light streak reflection in photoshop too.
Excuse the rice, also this was lightpainted with an iphone camera lol
I could have spent more time under the headlights but this car isn't nice enough to justify that lol
Thread Starter
Registered User
Joined: Feb 2014
Posts: 387
Likes: 0
Im not an expert but if flickr data is right, you dont need F8 in such a situation where theres not much depth. Try a little lower like F5.6 and you'll get sharper with the front headlights. That or its just poor Jpeg compression.
That or maybe your tripod is unstable or maybe windy? looking at the other pics at night on flickr titled "moonrock" you can see the vibration having some effect on the sharpness. A timer shutter and some sand bags can help with that. Also a gray market 50mm 1.8 are going for less than $100 these days and are prob sharper than the kit lens
But great pics either way. hope we see more in the future
That or maybe your tripod is unstable or maybe windy? looking at the other pics at night on flickr titled "moonrock" you can see the vibration having some effect on the sharpness. A timer shutter and some sand bags can help with that. Also a gray market 50mm 1.8 are going for less than $100 these days and are prob sharper than the kit lens
But great pics either way. hope we see more in the future
it was a jpeg output not raw, so maybe it was that. no Idea why I chose f8 either... i'm new to all this

Joined: Oct 2010
Posts: 4,059
Likes: 129
Your right on the tripod mate. I used one I normally use with my GoPro, a little gorilla pod, not the sturdiest of things. I now have a proper tripod at the ready for future pics!
it was a jpeg output not raw, so maybe it was that. no Idea why I chose f8 either... i'm new to all this
it was a jpeg output not raw, so maybe it was that. no Idea why I chose f8 either... i'm new to all this
But the main reason to play with aperture during light painting is exposure of light. So if you wanted more light exposing the sensor, you would have a lower aperture because it opens up the lens more so more light hits the sensor. So technically M-type is right about using a lower f/, but not for a sharper image, but for more light exposure. This also plays in tangent with your shutter speed, so lower aperture you can have a faster shutter speed and higher aperture you will need a slower shutter speed to get the same light exposure, but images will differ, sometimes big, depending on the difference of change in aperture.
A wobbly tripod definitely doesn't help, especially if you don't use a timer or remote. Whenever I light paint, I always use a timer. The reason for this is because the small movement for pressing the shutter, can cause a blur in your photo, this is even more so with the tripod issue. I also use a timer so that I don't lose any light painting time walking from camera to car, as soon as the shutter goes off, I am by the car ready to light paint.
Hope this helps!