
The project goes on.. Color...


Thread Starter
Registered User
Joined: Dec 2009
Posts: 393
Likes: 1
ok.. update.. the bumper will have to be put on hold and an ap2 oem will be put on so make it to the paint booth on time..
The rear diffuser is 90% done. The rest will be done when the car is in paint.
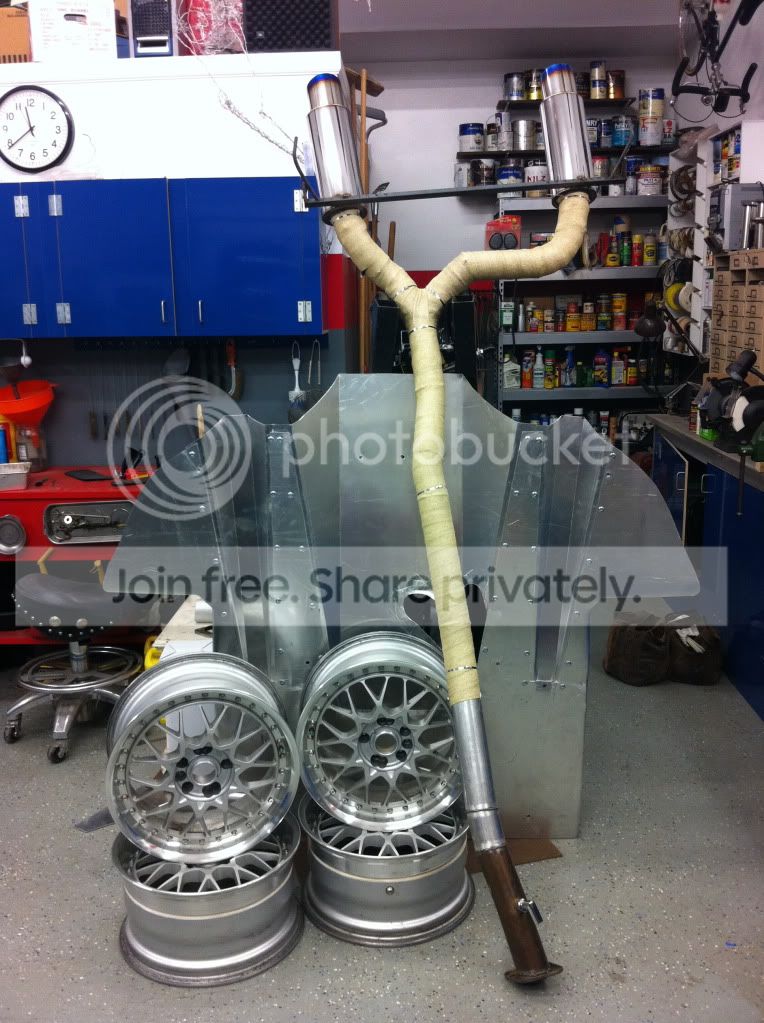
The exhaust is done. Almost fully rapped but I ran out. I didnt want the aluminum diffuser getting really hot.
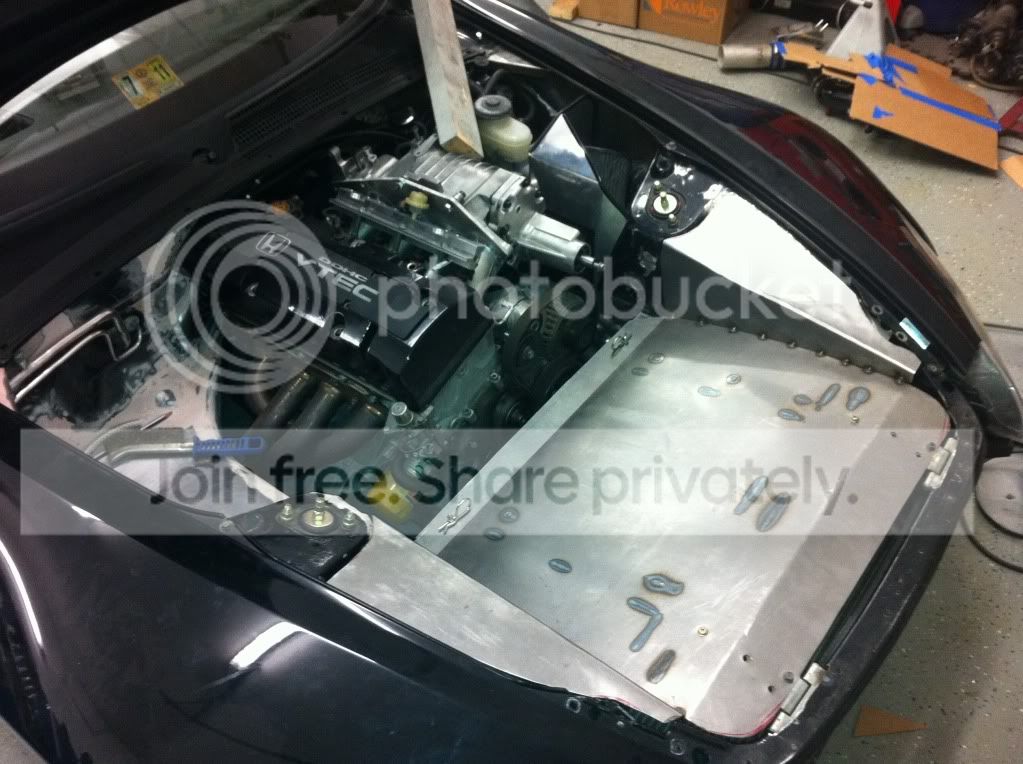
In the engine bay I am finishing up the props on the cooling plate and then I can pull the motor in the morning and put the metal glaze goes on and thne sanding on the engine bay..
For the body since I will be getting an ap2 bumper the only body work I need to do is an intake on the hood and the rear bumper.. Not to much.
Here you can see what the exhaust is looking like.
The rear diffuser is 90% done. The rest will be done when the car is in paint.
The exhaust is done. Almost fully rapped but I ran out. I didnt want the aluminum diffuser getting really hot.
In the engine bay I am finishing up the props on the cooling plate and then I can pull the motor in the morning and put the metal glaze goes on and thne sanding on the engine bay..
For the body since I will be getting an ap2 bumper the only body work I need to do is an intake on the hood and the rear bumper.. Not to much.
Here you can see what the exhaust is looking like.

Registered User
Joined: Mar 2008
Posts: 292
Likes: 0
Maybe I missed an earlier post but why have the large cross bar connecting the two canisters on the exhaust? And also with the front bumper im seeing alot more weight added to the car, is this a show or track whore? Or a whore that does little of each? 
Thread Starter
Registered User
Joined: Dec 2009
Posts: 393
Likes: 1
That cross bar was just tacked on to the canisters to keep them in place as I was making the exhaust.. And the mufflers are closer to the center of the car then the normal location and that cross bar happened to stick out just far enough to where I could use the factory exhaust mounts.. And since it is not seen or anything I was like well why not.
And as for the track or show. Id like to say its both. haha. Its just going to be my daily driver so I dont really have any plan on it doing anything yet.
And as for the track or show. Id like to say its both. haha. Its just going to be my daily driver so I dont really have any plan on it doing anything yet.


Joined: Sep 2006
Posts: 10,445
Likes: 8
From: Allentown, PA 18103