When you click on links to various merchants on this site and make a purchase, this can result in this site earning a commission. Affiliate programs and affiliations include, but are not limited to, the eBay Partner Network.
This is a DIY to create your own trunk lid liner on an S2000. If you have ever felt that the trunk lid was left a little “unfinished”, you too can create your own liner in about 2 hours with about $35 is supplies.
Step 0: Parts/Supplies
The first thing you need to do is get your supplies. I used the following for this project:
- 1 SQ YD of gray fabric resembling the trunk liner (about $6.50 at a local JoAnn’s)
- 1 can of spray-on Gorilla Glue
- 1 pack of Velcro – heavy duty stuff that will handle changing temps and bumps
- Plywood, corrugated sign plastic or other substrate for the liner (2’ x 4’ is more than enough)
- If you plan to embellish it, something for a logo or embellishment, like poster board or the extra/scrap plywood from above
Tools:
- Jigsaw (for cutting out the plywood)
- SHARP razor (for cutting the poster board (if using) and/or fabric
- Scissors for cutting the fabric, if you don’t have a razor handy
- Tunes (who does anything without some Blue October blaring)
Step 1: Template
The first step is to create a template so you can easily cut an accurate substrate for the liner. The trunk lid area where this goes is relatively simple – a trapezoid with a cutout at the top for the trunk latch and a small wire harness. I used cardboard because I have a plethora of Amazon shipment boxes laying around. I rough-cut a piece of cardboard that was roughly half the width of the trunk and trimmed it up to align with the indented area around the trunk lid. Creating something that was half of the trunk allowed me to easily flip it over on another piece of cardboard and have an exact mirror – no need to calculate angles and have a hard time getting it exact. Once I had the two pieces, I just lined them up inside of the area for the liner and taped them together. Here you can see the template I created, with the tape down the middle. It took a few times to get it exact – and take your time here… and accurate template makes the rest go smoothly.
Step 2: Rough Cut the Substrate
The next step is to rough-cut the substrate of your choice. I used 1/8” Luan plywood, but you can use anything – I’ve seen folks use foam poster board, or that corrugated plastic used for lawn signs, etc. I used plywood to have some good structure to it. It’s lightweight enough that is adds negligible weight.
Lay the template on the wood (or your choice) and trace it out. Then start cutting – I used a jigsaw and it made quick work of it. And when I say rough-cut, I mean an accurate cut from the template, but don’t be very concerned about corners, etc. You will need to test-fit it to get the final adjustments right.
Once you have it cut out, fit it into the space, and see where you might want to shape it. All I ended up doing was using a sander to round out the corners so I wouldn’t have anything poking through the fabric. I rounded out the edges, cleaned up splinters and corners and just gave it a good once-over.
Step 3: Embellishment (optional)
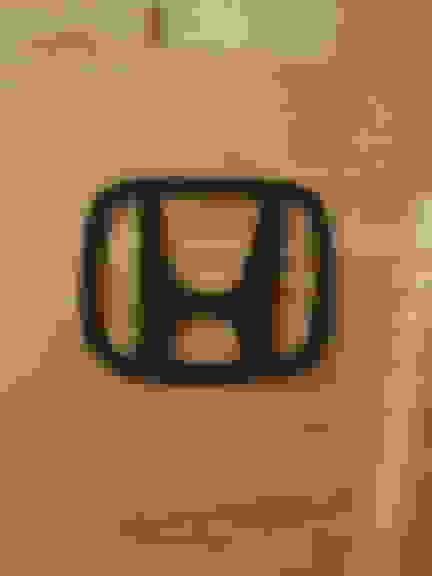
If you plan to add something to it like a logo (I did the Honda logo), print out a logo from the interweb, sized for however large you want it (mine was about 5” wide). You will place this on your material (like foam board, plywood, etc.) to cut/trace it out. I used foam board, and I taped it to the board and just cut if out with a razor. Take your time and be accurate with the cuts, but you don’t need to be overly clean as the fabric will cover any rough areas. Here you can see the logo partially cut and the hole in the foam board where it was:
Here’s my logo cut out from the black foam board:
Once you cut out the logo, glue it to the substrate wherever you want it. I centered mine, so I measured the width, marked the center point and just eyeballed it. I sprayed the immediate area of the plywood where the logo was going with the Gorilla Glue and pressed the logo to it – easy-peasy.
This stuff sets up quickly, and give it about 15 mins to dry before moving on.
Step 4: Gluing the Fabric
Once the logo is in place, I focused on getting the fabric glued and set up around the logo before doing any other area. You will spray the logo with the Gorilla Glue, making sure you get the sides/edges so you can get the fabric to stick well. A word of advice – don’t put too much on, as it will soak through the fabric and you will be fighting with sticky hands while you are trying to get the fabric in place. In my case, I used too much, which also started to dissolve the foam board, so one side was slightly flatter than the other – go easy. Doing this again, I might choose plywood to do the logo, but I was concerned it would be too thick.
Go ahead and spray it on and focus only on the area of the logo. You don’t want the fabric sticking to the wood everywhere just yet – only the area around and inside the logo. After spraying, lay the fabric on it and start working the fabric into the logo. This took a while to get it right. The glue takes some time to set up – about 5 mins, so as you are working it in, it will pop back up. I almost got discouraged, thinking it wasn’t going to stick, but I just needed to keep working it in while the glue set up. As it got tackier, it started setting in nicely. Work in the depressions with your fingers. Use your fingernail to trace in the corners where the logo meets the wood. Keep working it – I did this for about 5 mins, pressing, detailing with my fingernail, going back over, rinse, repeat, etc. After 5-7 mins, it was sticking nicely (and it was soaking through the fabric, so my fingers were getting tacky also). Once I was happy with it staying down, I let this set up for about 30 mins before moving on.
Once the logo is well-set, just spray the glue on the board and press it in place. I fanned it from the center-out to avoid any wrinkles – this part went super-fast. Press, fan, done. I let this set up for 5 mins before flipping it over and gluing the rear. I trimmed the fabric overlapping the rear so it was only about an inch or two overlapped. It just makes it easier to make the corners. Here’s a trick to getting the corners clean (and kudos to someone on the Internet, from whom I stole learned this trick) – wrap the fabric over the corner and pinch the intersection, then trim it with scissors:
I let the whole thing set overnight before installing it.
Step 5: Trunk Prep
Once you are ready to install it, wipe down the underside of the trunk with rubbing alcohol where you will place the Velcro (around the edges). I used 8 pieces of Velcro – four across the bottom, two at the top and one at each side – you can’t see the ones on each side because I slipped them in as an afterthought, so on my finished picture they are there (hidden), but this prep picture doesn’t have them:
I also added the last of my Noico 170mil closed-cell foam in the indents. I don’t expect it to do a whole lot of good, but I will be happy knowing I finished my sound-deadening job with the trunk. (that’s the gray pieces in the three center-thingys of the trunk lid). I put the male and female (?) sides of the Velcro together and stuck it to the trunk lid side. This way I didn’t need to torture myself aligning the Velcro with one side on the trunk and one side already on the liner.
Step 6: Install
To install it, peel the sticky side off the Velcro left on the trunk lid, and press the liner in place. Make sure to press it into place well – on mine, the Velcro glue adhered right to the fabric over-wrap on the back side of the liner. Remember I said to get heavy-duty Velcro? This is why – the glue is thicker and will stick really well to the fabric.
Step 7: Step back and admire your work:
This was a fun little project while I painfully awaited the warmer weather here in NJ. Feel free to suggest improvements – this was my first one, so hopefully others will improve on it.
Last edited by datadr; Mar 29, 2019 at 04:36 AM.
Reason: Clarification
Looks decent.
Shame you didn't incorporate some sound proofing into that though... or did I miss that?
I like the H logo. Coulnd't you have just gotten an old H badge from a scrap yard instead? May have cut down on time?
I added some to the trunk lid behind it, but not 100%. I can easily pull it and add more, but I didn't want to purchase another box for such a small area. Once she's back on the road next month, I'll see how what I did seems to work.
I did consider getting an emblem, but I wanted it bigger. Cutting it out only took 6 or 7 mins.
Would you consider making and selling them? I’d be interested if you did. Don’t have the time or the tools.
I'm flattered, slam, but unfortunately I would not feel right building these as I wouldn't consider my workmanship "professional" enough to charge for it. While the front looks good, the back trimming isn't terribly clean. Plus... time - never seems to be enough. But thank you for asking.
however FYI, spray tack adheasive has a setup time. one should spray the embellishment and the fabric where the embellishment is located, and allow 3-5 minutes to form a tack, once tack is met forming around features is quite easy.
Utilize some old news paper or packing paper to guard the fabric while spraying the rest. again waiting the setup time.
Spray tack adheasive is basically unworkable if you don't allow the setup time.
Thanks, Deckoz - that makes sense and probably would have made it easier.