
Dome light switch not working. Lights work


Registered User
Joined: Oct 2006
Posts: 21
Likes: 0

Registered User
Joined: Dec 2002
Posts: 109
Likes: 1
From: San Diego
I just did this. Thanks to MP2k for the very clear instructions. A couple of things. Mine is a MY 2001 and the inside of the light didn't look exactly the same but it was of no consequence, the instructions worked perfectly. When lifting out the slider switch I did lose a ball bearing, they come out of the side of the switch and are spring loaded. If I were doing it again I'd do it over a tray to catch them. Also I recommend plastic upholstery tools so you don't damage your trim. At 10 bucks from amazon they'll save you scratching and denting the inside plastics on jobs like this. http://www.amazon.com/Astro-Pneumati...5722443&sr=1-1
Thanks again MP2k
Thanks again MP2k

Joined: Oct 2007
Posts: 489
Likes: 13
From: Lincoln, CA
I just did this. Thanks to MP2k for the very clear instructions. A couple of things. Mine is a MY 2001 and the inside of the light didn't look exactly the same but it was of no consequence, the instructions worked perfectly. When lifting out the slider switch I did lose a ball bearing, they come out of the side of the switch and are spring loaded. If I were doing it again I'd do it over a tray to catch them. Also I recommend plastic upholstery tools so you don't damage your trim. At 10 bucks from amazon they'll save you scratching and denting the inside plastics on jobs like this. http://www.amazon.com/Astro-Pneumati...5722443&sr=1-1
Thanks again MP2k
Thanks again MP2k


Registered User
Joined: Aug 2008
Posts: 1,380
Likes: 1
From: 'Merica
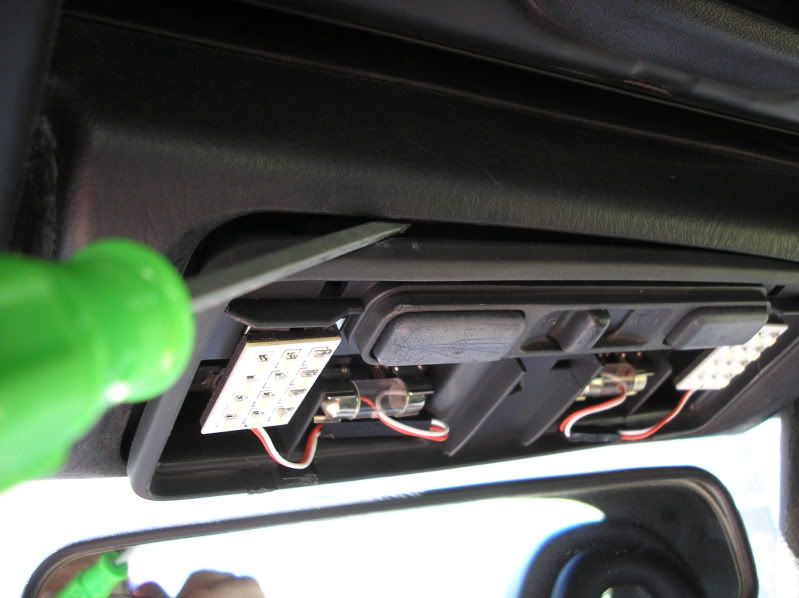
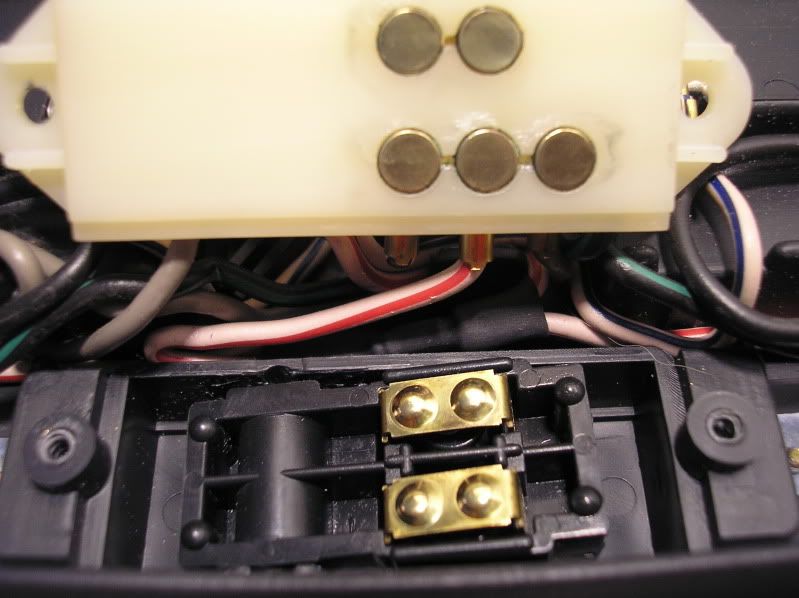
Pop the light cover off.
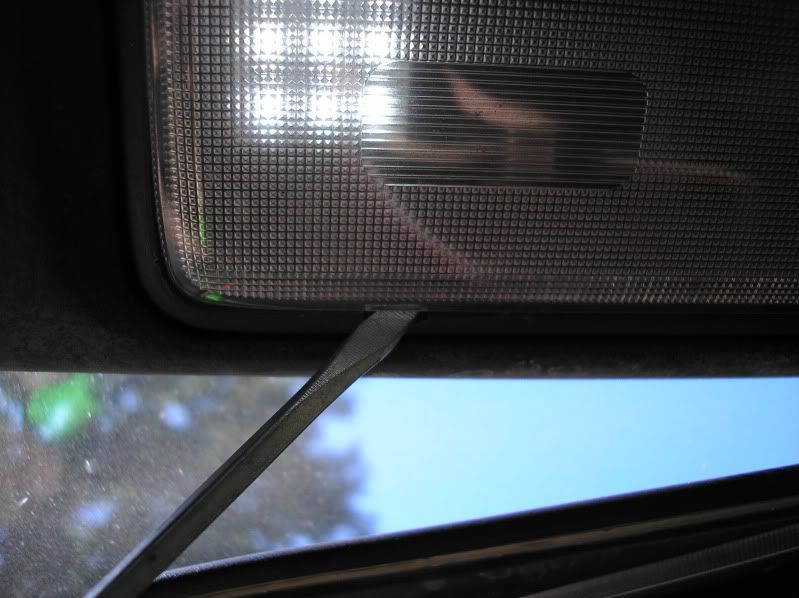
Remove the two gold screws on each side of the fixture.
There are two small clips at the front of the light to pop off, then the light fixture comes down.
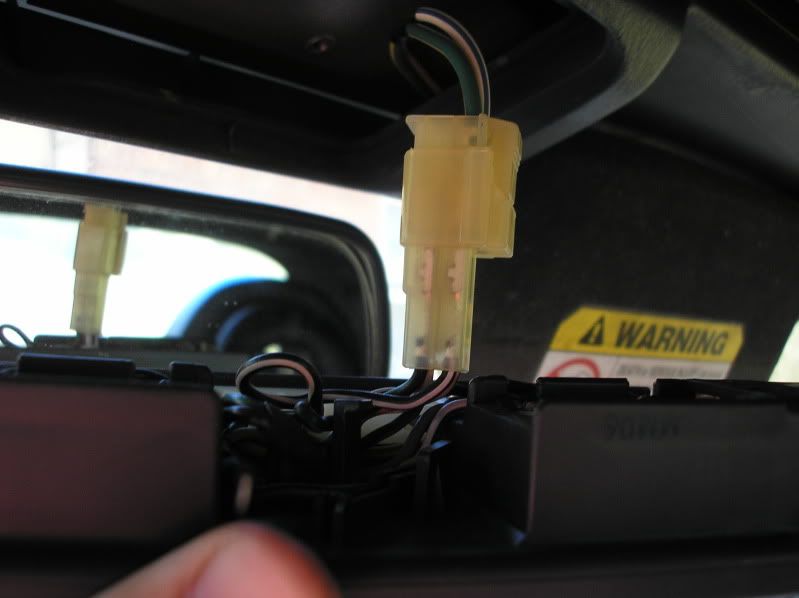
Remove the electrical connector
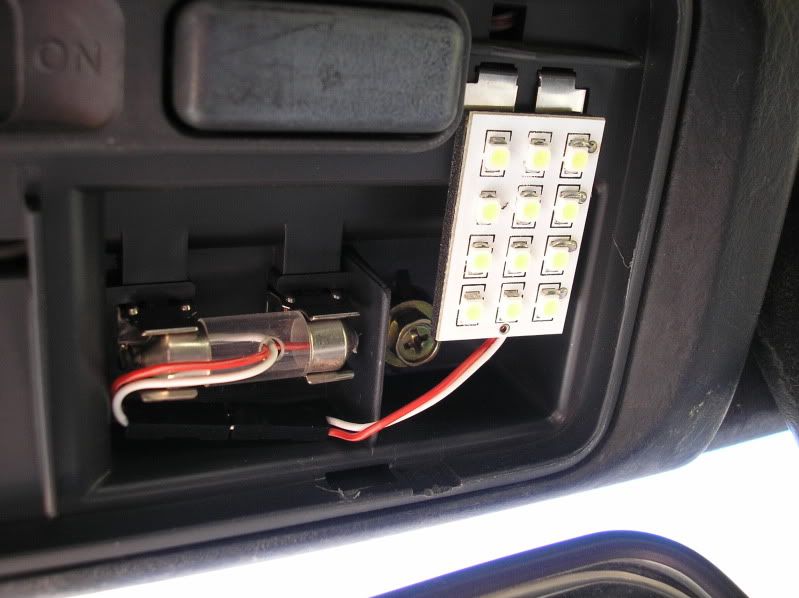
Take the fixture inside and remove the two gold screws holding the white thing down.
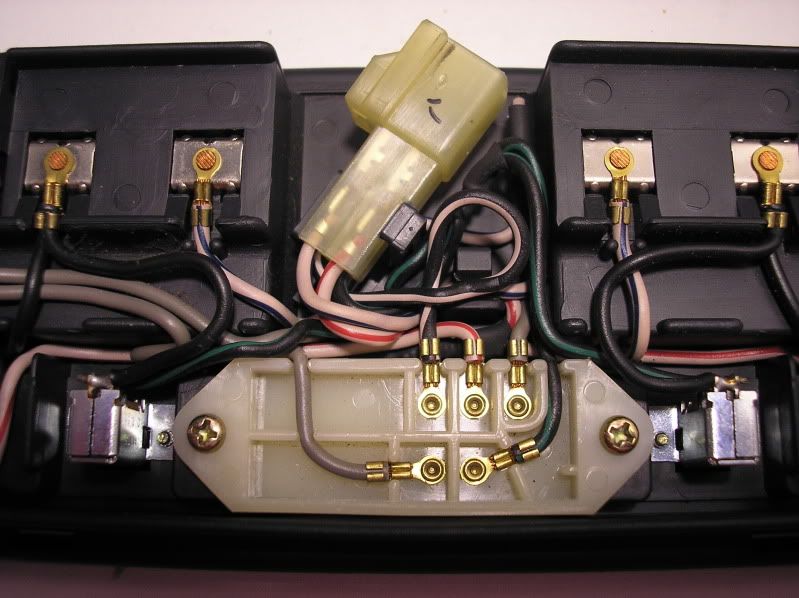
This is what mine looked like. It kinda worked when it wanted to.
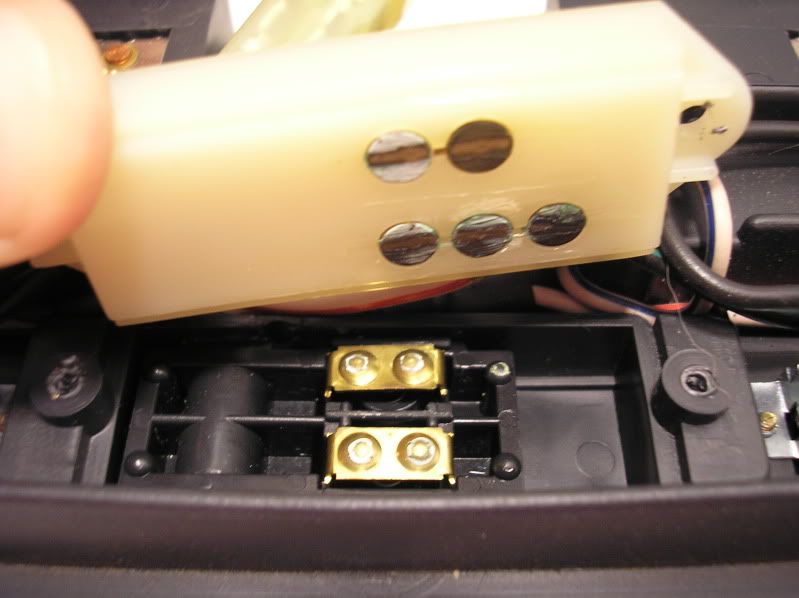
Remove the slide switch but BE CAREFUL, it's easy to lose the little ball bearing detent balls.
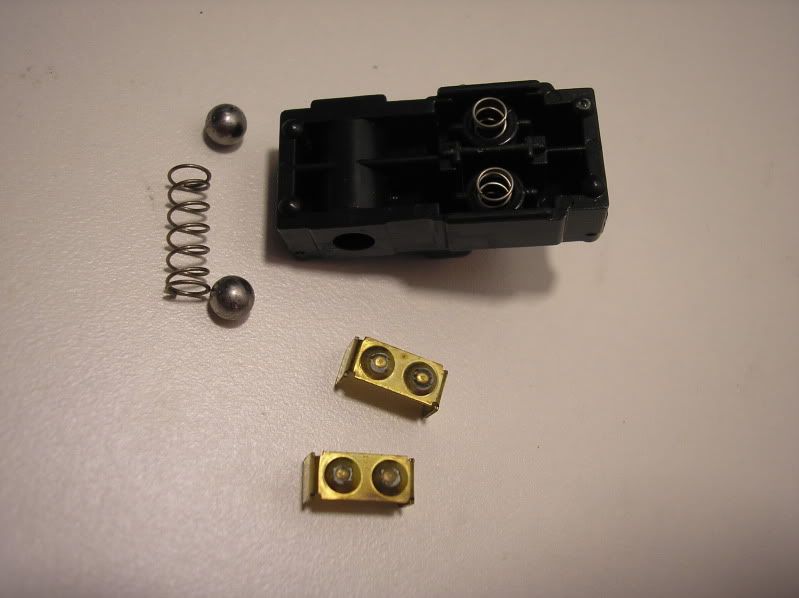
I cleaned mine up with a brass brush in my Dremel at the lowest speed.
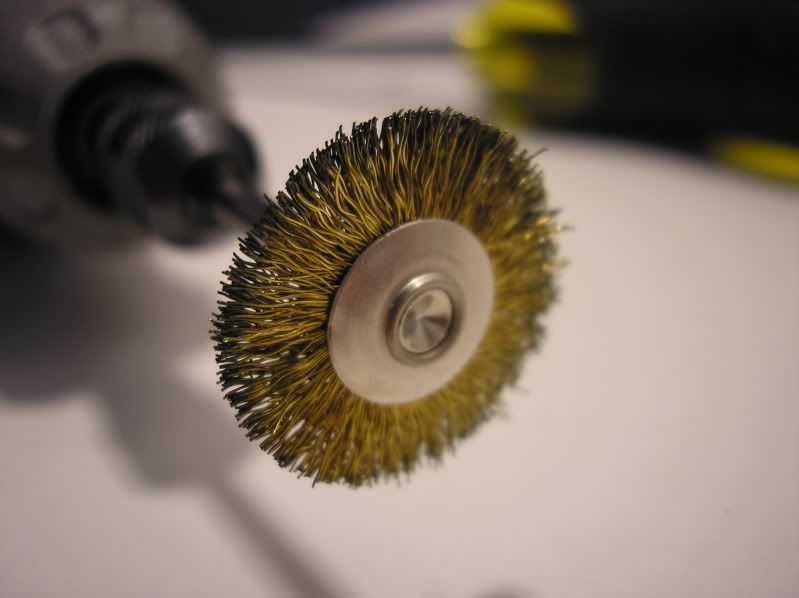
Works great now.
Remove the two gold screws on each side of the fixture.
There are two small clips at the front of the light to pop off, then the light fixture comes down.
Remove the electrical connector
Take the fixture inside and remove the two gold screws holding the white thing down.
This is what mine looked like. It kinda worked when it wanted to.
Remove the slide switch but BE CAREFUL, it's easy to lose the little ball bearing detent balls.
I cleaned mine up with a brass brush in my Dremel at the lowest speed.
Works great now.

Registered User
Joined: May 2012
Posts: 137
Likes: 0
Good stuff! mine stopped working two weeks ago. i never touched the sliding switch but something got into me and as soon as i touched it nothing came on!
after checking the fuse i looked up there. i took a look around s2ki to if there was anything special to removing the assembly - no there is not
i took it off, and was able to clean the contacts with a bit of ScotchBride* pad, that worked like a charm.
Thanks for the DIY
after checking the fuse i looked up there. i took a look around s2ki to if there was anything special to removing the assembly - no there is not
i took it off, and was able to clean the contacts with a bit of ScotchBride* pad, that worked like a charm.
Thanks for the DIY


Joined: Dec 2000
Posts: 4,307
Likes: 13
From: Ogden
Just did mine. 70% Isopropyl (rubbing alchohol) cleaned the contacts completely. It appears to be flux residue and not corrosion. Been bugging me for years. Best 10 minutes I've spent on the car!
Thanks for the DIY!!
Utah
Thanks for the DIY!!
Utah