A Conundrum , Why Did I start


Joined: Aug 2010
Posts: 511
Likes: 2
From: RETFORD
YES! Bagels are fine. Red Line CV-2 Grease can be used in a wide range of applications at temperatures ranging between -100°F to 500°F
so it seems OK even if your tea goes cold.
Like the pic! I have a vice just like yours!!!!!!!!!! Tea that is.
so it seems OK even if your tea goes cold.
Like the pic! I have a vice just like yours!!!!!!!!!! Tea that is.
Thread Starter


Joined: Sep 2001
Posts: 6,525
Likes: 88
From: Soham Cambridgeshire
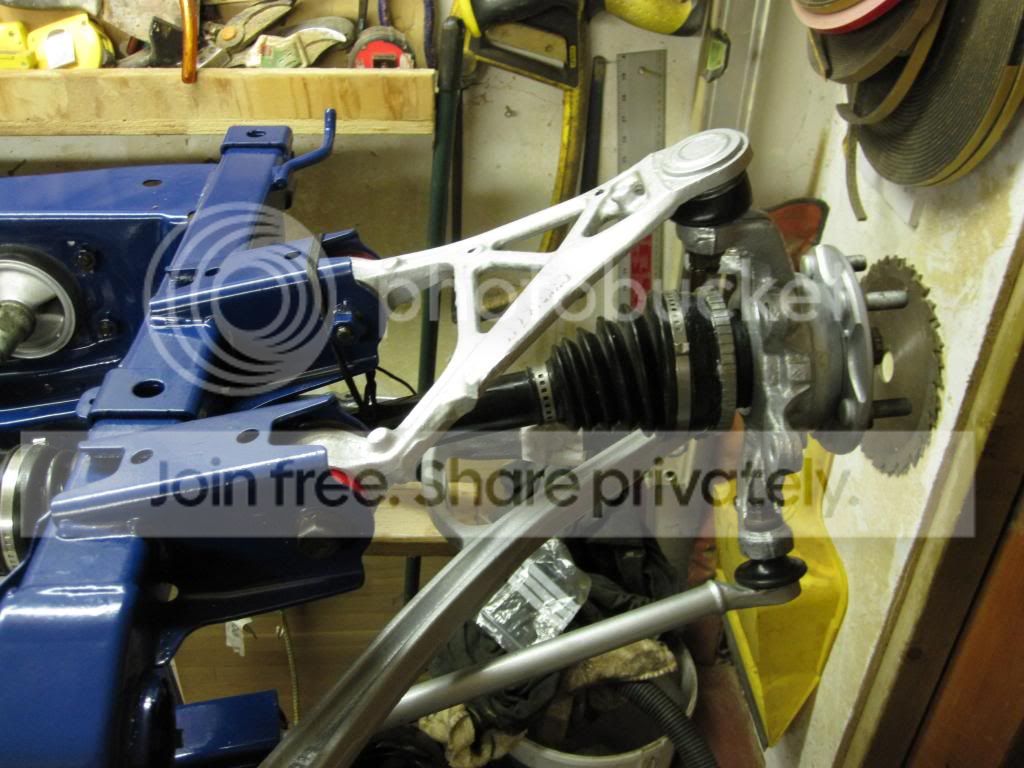
Slowly making progress , started to fit poly bushes into all the arms etc yesterday , and also rebuilt the drive shafts after painting and cleaning all old grease out. Boots were in fine condition and I only fitted new clamps. And £40 pounds worth of Moly Disulfide Titan CV grease
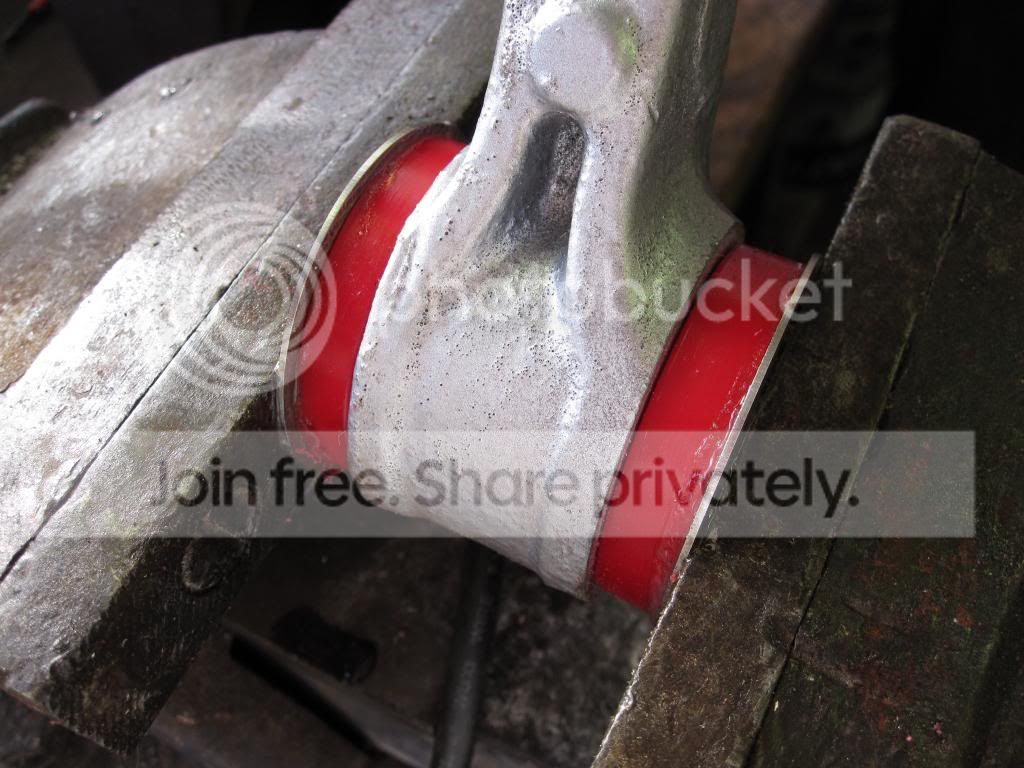
Heres a little video of how i have fitted the bushes with my Stainless steel washers, we turned about 0.5mm of each end of each bush to accommodate these. I lubricated between the bush and crush tube with some very stiff Silicone food grade grease, highly water proof and wash out resistant. The bushes went into the housing's dry as they should NOT move in the housing ( well that what my research has told me, and my logic suggests this is the correct way to go.
In the video you can see there is little friction in the joints , when i assembly the lot on the subframe we will see how free the suspension system is, hopefully it will make a nonsenses of the idea you have to preload the bushes prior to tightening the bolts !
At this time I am now going to retain the OEM suspension units for the time being ( the cost of all the bits and bobs etc is mounting !!! ) and now am definetly considering a respray once this under body work is complete, colour prefered at the moment is the creamy white like the guy in island although not with the crazy wheels and camber. So coil overs later in the year which will then be a doodle to fit.
Just click on the pick below , should run video

Banned
Joined: May 2002
Posts: 31,739
Likes: 69
From: Survivalist enclave


Joined: Sep 2012
Posts: 2,908
Likes: 56
Slowly making progress , started to fit poly bushes into all the arms etc yesterday , and also rebuilt the drive shafts after painting and cleaning all old grease out. Boots were in fine condition and I only fitted new clamps. And £40 pounds worth of Moly Disulfide Titan CV grease
Heres a little video of how i have fitted the bushes with my Stainless steel washers, we turned about 0.5mm of each end of each bush to accommodate these. I lubricated between the bush and crush tube with some very stiff Silicone food grade grease, highly water proof and wash out resistant. The bushes went into the housing's dry as they should move in the housing ( well that what my research has told me, and my logic suggests this is the correct way to go.
In the video you can see there is little friction in the joints , when i assembly the lot on the subframe we will see how free the suspension system is, hopefully it will make a nonsenses of the idea you have to preload the bushes prior to tightening the bolts !
At this time I am now going to retain the OEM suspension units for the time being ( the cost of all the bits and bobs etc is mounting !!! ) and now am definetly considering a respray once this under body work is complete, colour prefered at the moment is the creamy white like the guy in island although not with the crazy wheels and camber. So coil overs later in the year which will then be a doodle to fit.
Just click on the pick below , should run video
 Love the attention to detail when fitting the bushes,


Banned
Joined: Feb 2005
Posts: 1,130
Likes: 0
From: Weston-s-Mare
Ant , I am not sure if you are with me on this. The collars are those aftermarket jobbies that go between the subframes and the chassis rails to prevent the subframe wandering around on the OEM bolts that pass through huge clearance holes in the subframe. They are like structural steel work tolerances, 12mm bolt through a 14 diameter hole. Steel is ok or, ali although will suffer from corrosion being in close proximity with steel and a lot of nice salt water.
Looks like your cracking on well with the work, cant wait until I have finished my house renovation so I can give mine a refresh.
Regarding the above I am with you on this and have fitted a number of the kits. IMO the material definitely does matter. The original patent on the product specifies this in some depth. The material the genuine kits are made from in a Ally base, but is "classified". Use a material that is too hard and you run the risk of loading the chassis like a spring and potentially damaging the location holes. Use a material too soft and it wont last or do what its intended for. The material must be malleable otherwise you will not get the full benefit. Check out the video below. You may see what I mean then.
http://www.youtube.com/watch?v=L_h-2X6FWcw

Thread Starter
Joined: Sep 2001
Posts: 6,525
Likes: 88
From: Soham Cambridgeshire
Yes I can see the Point , the material needs to deform under the load when the bolt is tightened, this deformation into the tubes and between the chassis rail and the subframe rail will remove all posibility movement between the two parts , its almost being used like a malleable dowl. The trouble i think with fitting them is the matrix of the holes in the chassis and the subframe must be a very good match, so after 12 years i might have trouble getting them to engage. If i made my own i was going to taper the top and bottom of the tube to give it a lead like the spoon ones. As you can see in the video the bolt is useless in help to as they are rolled bolts with a reduced shank size.
Thread Starter
Joined: Sep 2001
Posts: 6,525
Likes: 88
From: Soham Cambridgeshire
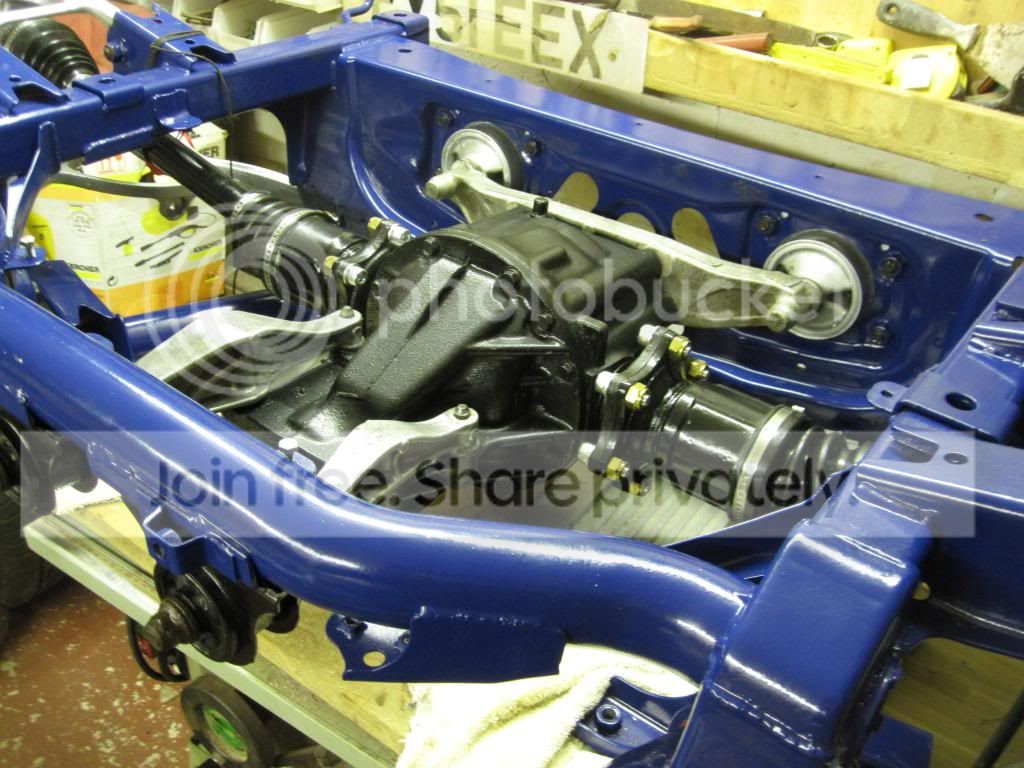
Nearly assembled the rear subframe ready for fitting back on car once rust and underseal dealt with, a few pictures this evening, lost the 2 8mm fine pitch bolts for the bracket on the nearside lower wishbone for the headlight adjuster bracket, numb nuts!