My 1999 Honda s2000 Project
 12-31-2021, 06:08 AM
#61
Registered User

Thread Starter
Hi Guys,
The strange times just keep on continuing.
I hope you all made it through the toughest of the covid times.
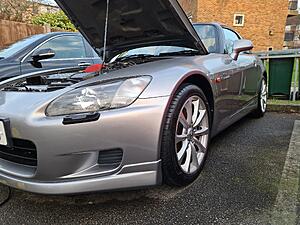
With covid restrictions still around, that stupid petrol crisis malarkey a few months back, and that Omicron variant, the s2000 hasn’t seen much use than I hoped.
However, a few issues have cropped up this year and on a few occasions I did manage to take it out.
--------------------------------------------------------------------------------------------------------------------------
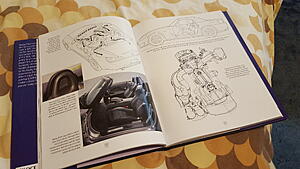
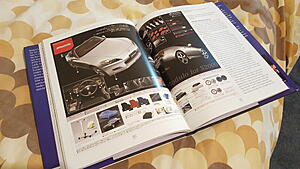
Task 90 – Purchasing that S2000 Book
11-02-21
There were lots of talk about Brian Long releasing a book of the Honda s2000.
He also did a book on the Honda NSX which has long been discontinued I believe.
This was a book documenting the story of the s2000, with the full cooperation from the factory where the car was manufactured.
For any Honda s2000 enthusiast, it was a book to have.
With the release date of the book originally being 15-07-2020, it was continuously being pushed back.
I finally got my hands on one direct from Veloce Publishing on the 11th January 2020.
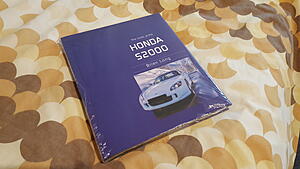
What a fabulous book.
Great material to cherish when the time does come one day when the s2000 has to go.
Parts Purchased:
Part: The Honda s2000 Book
Part Number: ISBN13: 9781787112148
Supplier: Veloce Publishing.
Or can be purchased from any good book store.
Services Used:
None
Resources used
None
--------------------------------------------------------------------------------------------------------------------------
Task 91 – Deep Clean after Snow
21-02-2021
The s2000 never saw any action throughout the winter months, with only giving her a quick wash every other week.
I also fire up that F20 engine every week, just to keep the battery from depleting itself and giving the engine a run for 20 or so minutes.
Moving the car very slightly in its parking spot so help prevent flat spotting the tyres.
February saw some heavy snowfall too.
After the snow cleared and the temperatures started to increase alittle, a warm late February weekend I decided to give the s2000 a well-deserved deep clean.
The s2000 just sits out in the communal car park and it is not covered, therefore keeping it clean with washes every other week was important to stop moss and algae growing.
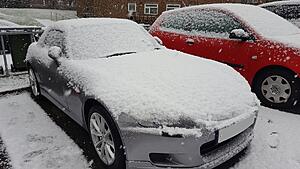

It took a whole Saturday to deep clean her, leaves and debris finds its way within the engine bay.
Enjoyable nonetheless
She came out pretty nice afterwards.
Parts Purchased:
None
Services Used:
None
Resources used
None
--------------------------------------------------------------------------------------------------------------------------
Task 92 – MOT Time
27-02-2021
It was that time again, the dreaded day for the MOT.
We all dread MOT day, due to the fear of a fault being exposed and money having to be spent.
Although as s2000’s are getting on a bit now, so it’s always a good thing to have any faults flagged.
After an hour or so, the tester gave it a clean bill of health for 3 years running within my ownership.
I guess I must be doing something right : )
Here’s to another year of magical vtec motoring.
Parts Purchased:
None
Services Used:
None
Resources used
None
--------------------------------------------------------------------------------------------------------------------------
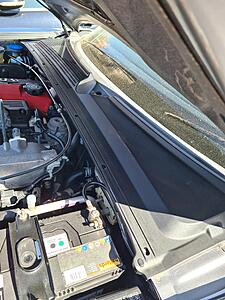
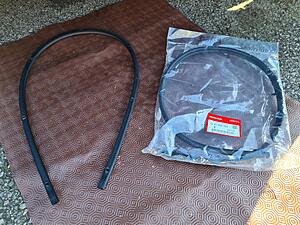
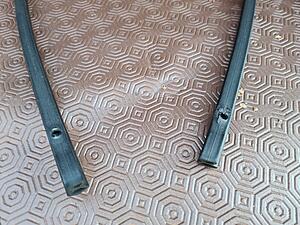
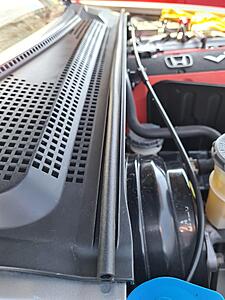
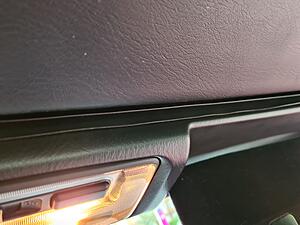
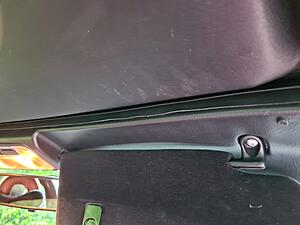
Task 93 – Wiper Cowling Seal and Pollen Filter Housing Replacement
04-04-21
A few purchases made from the 2020 black Friday promo led me to purchase a few bits that needed tidying.
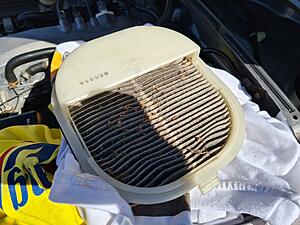
When the car was first purchased, the pollen filter was replaced way back in TASK 2, when the pollen filter housing was inspected it was found that its seal was slightly perished.
There was no debris inside the heater matrix, but it was something that ideally should be replaced.
I wrapped the pollen filter in a self-adhesive sponge seal at the time as a temp repair.
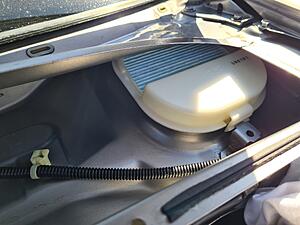
Today was the day for its replacement, with the wiper cowling needing to come off it proved handy as its upper seal also required a replacement.
The clips hook into it on the under side and in various places it was ripped, so the seal would also be flapping around on occasions.
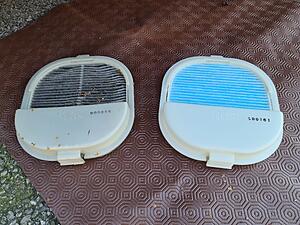
With the cowling removed, the pollen filter housing was swiftly replaced along with a brand new pollen filter.
Blue print brand which fitted perfectly within the new housing.
Abit of a clean-up was performed within the wiper area and the cowling cover was clipped back into place with its new seal and clips.
Nice and simple small jobs completed.
Easy as pie.
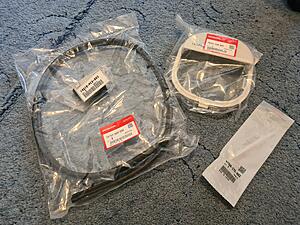
Parts Purchased:
Part: Pollen Filter Housing
Part Number: 74221-S2A-003
Supplier: Tegiwa
Part: Wiper Cowling Seal Including Clips
Part Number: 74143-S2A-000
Supplier: Tegiwa
Part: Pollen Filter (Blue Print Brand)
Part Number: ADH22512
Supplier: Amazon UK
Services Used:
None
Resources used
None
--------------------------------------------------------------------------------------------------------------------------
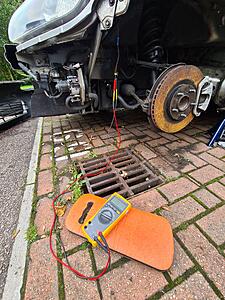
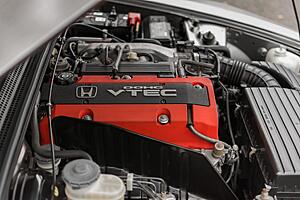
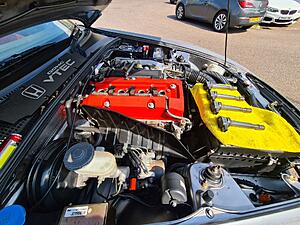
Task 94 – Oil Service, Brake Fluid and Battery Check
25-04-21
It was that time of the year again. Service time.
The usual oil and filter changed was performed even though I had only done around 3000 miles within the year.
Oil of choice is still Castrol Edge 5w/40 coupled with the genuine Honda s2000 Oil Filter.
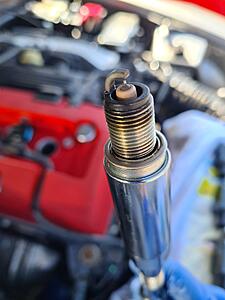
Spark plugs were checked and looked good.
These spark plugs have a very long service life so not needing a replacement is always handy for your wallet.
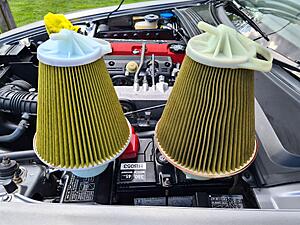
A quick check of the original air filter shows it being in great condition despite being 3 years old now.
Only having covered around 7k miles, there is still lots of life left in it.
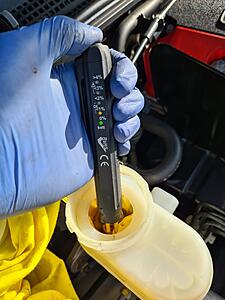
Brake fluid check using a Laser fluid checker showed that the fluid has less than 1% water content and still in serviceable condition.
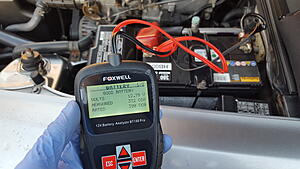
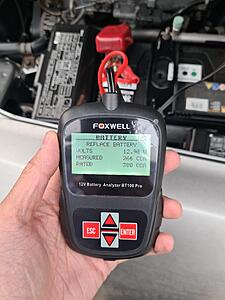
Finally a battery check, using my Foxwell BT100 analyser.
Results shows:
SOH (state of health): 73%
SOC (state of charge): 100%
Measured Cold Cranking Amps: 332
Result: Battery is Good.
All good for another year of driving
Parts Purchased:
Part: Castrol Edge Oil 5W/40 (5 Litres)
Part Number: 5W/40
Supplier: Coxmotorparts
Web:
Part: Genuine Honda Oil Filter
Part Number: 15400-PCX-004
Supplier: Honda247
Services Used:
None
Resources used
None
Equipment Used
Brake Fluid Checker
Model: Laser 4875
Battery Anaylzer
Model: Foxwell BT100
--------------------------------------------------------------------------------------------------------------------------
Task 95 – Passenger Sun Visor Rattle
16-05-21
After using the s2000 for a Friday commute to work, I noticed that on uneven roads there was a slight vibration/rattle coming from the sun visor.
On a warm Sunday afternoon I set about looking into it as it was quite annoying.
Granted the s2000 is not a refined quiet car, but a loud rattle vibration in the cabin can get quite annoying.
After having removed the sun visor and upper map light cowling there was nothing really apparent.
I did have a lot of rubber lining left overs from when I wrapped the edges of the plastic panels on the hard top trim sections.
The rubber lining would be ideal to cover the plastic edges which sits quite close to the wind shield section and may be the cause of the vibrations.
Both edges (back and forth) of the map light sun visor cowling were covered, and the rubber edge trim fitted pretty nicely.
Almost looks like it was an OEM part.
Hard top brackets were checked and tightened and the cowling map light and sun visors were reassembled.
On the next drive, the vibration/ rattle had gone.
Not too sure if the whole disassembly and reassembly process was the cause, or if the rubber trim lining stopped the vibration/rattle but I was happy either way.
The rubber lining edge trim stuff from tegiwa is good stuff, and very handy indeed.

Parts Purchased:
Part: Rubber Edge Trim
Part Number: T-9925018
Supplier: Tegiwa
Web:
Services Used:
None
Resources used
None
--------------------------------------------------------------------------------------------------------------------------
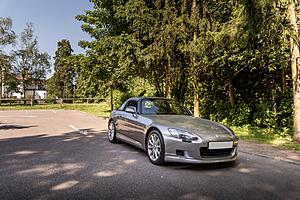
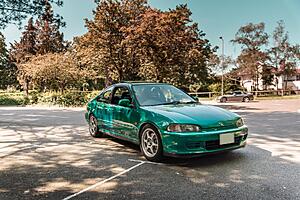
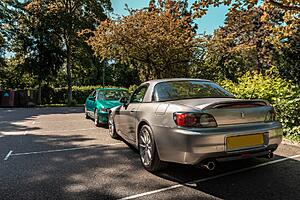
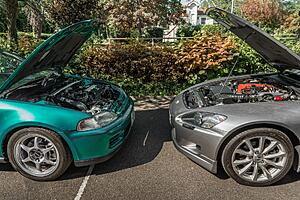
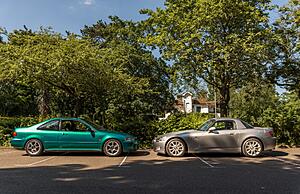
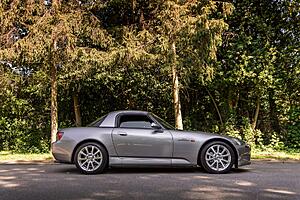
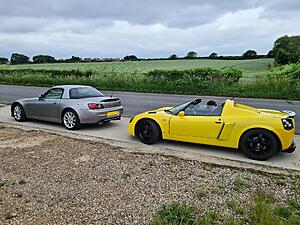
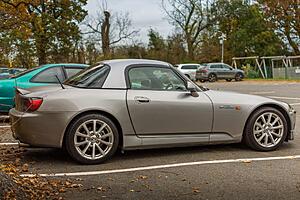
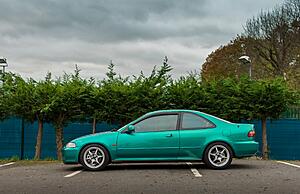
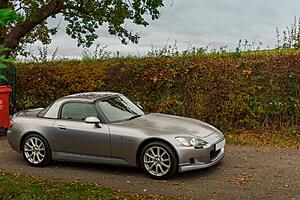
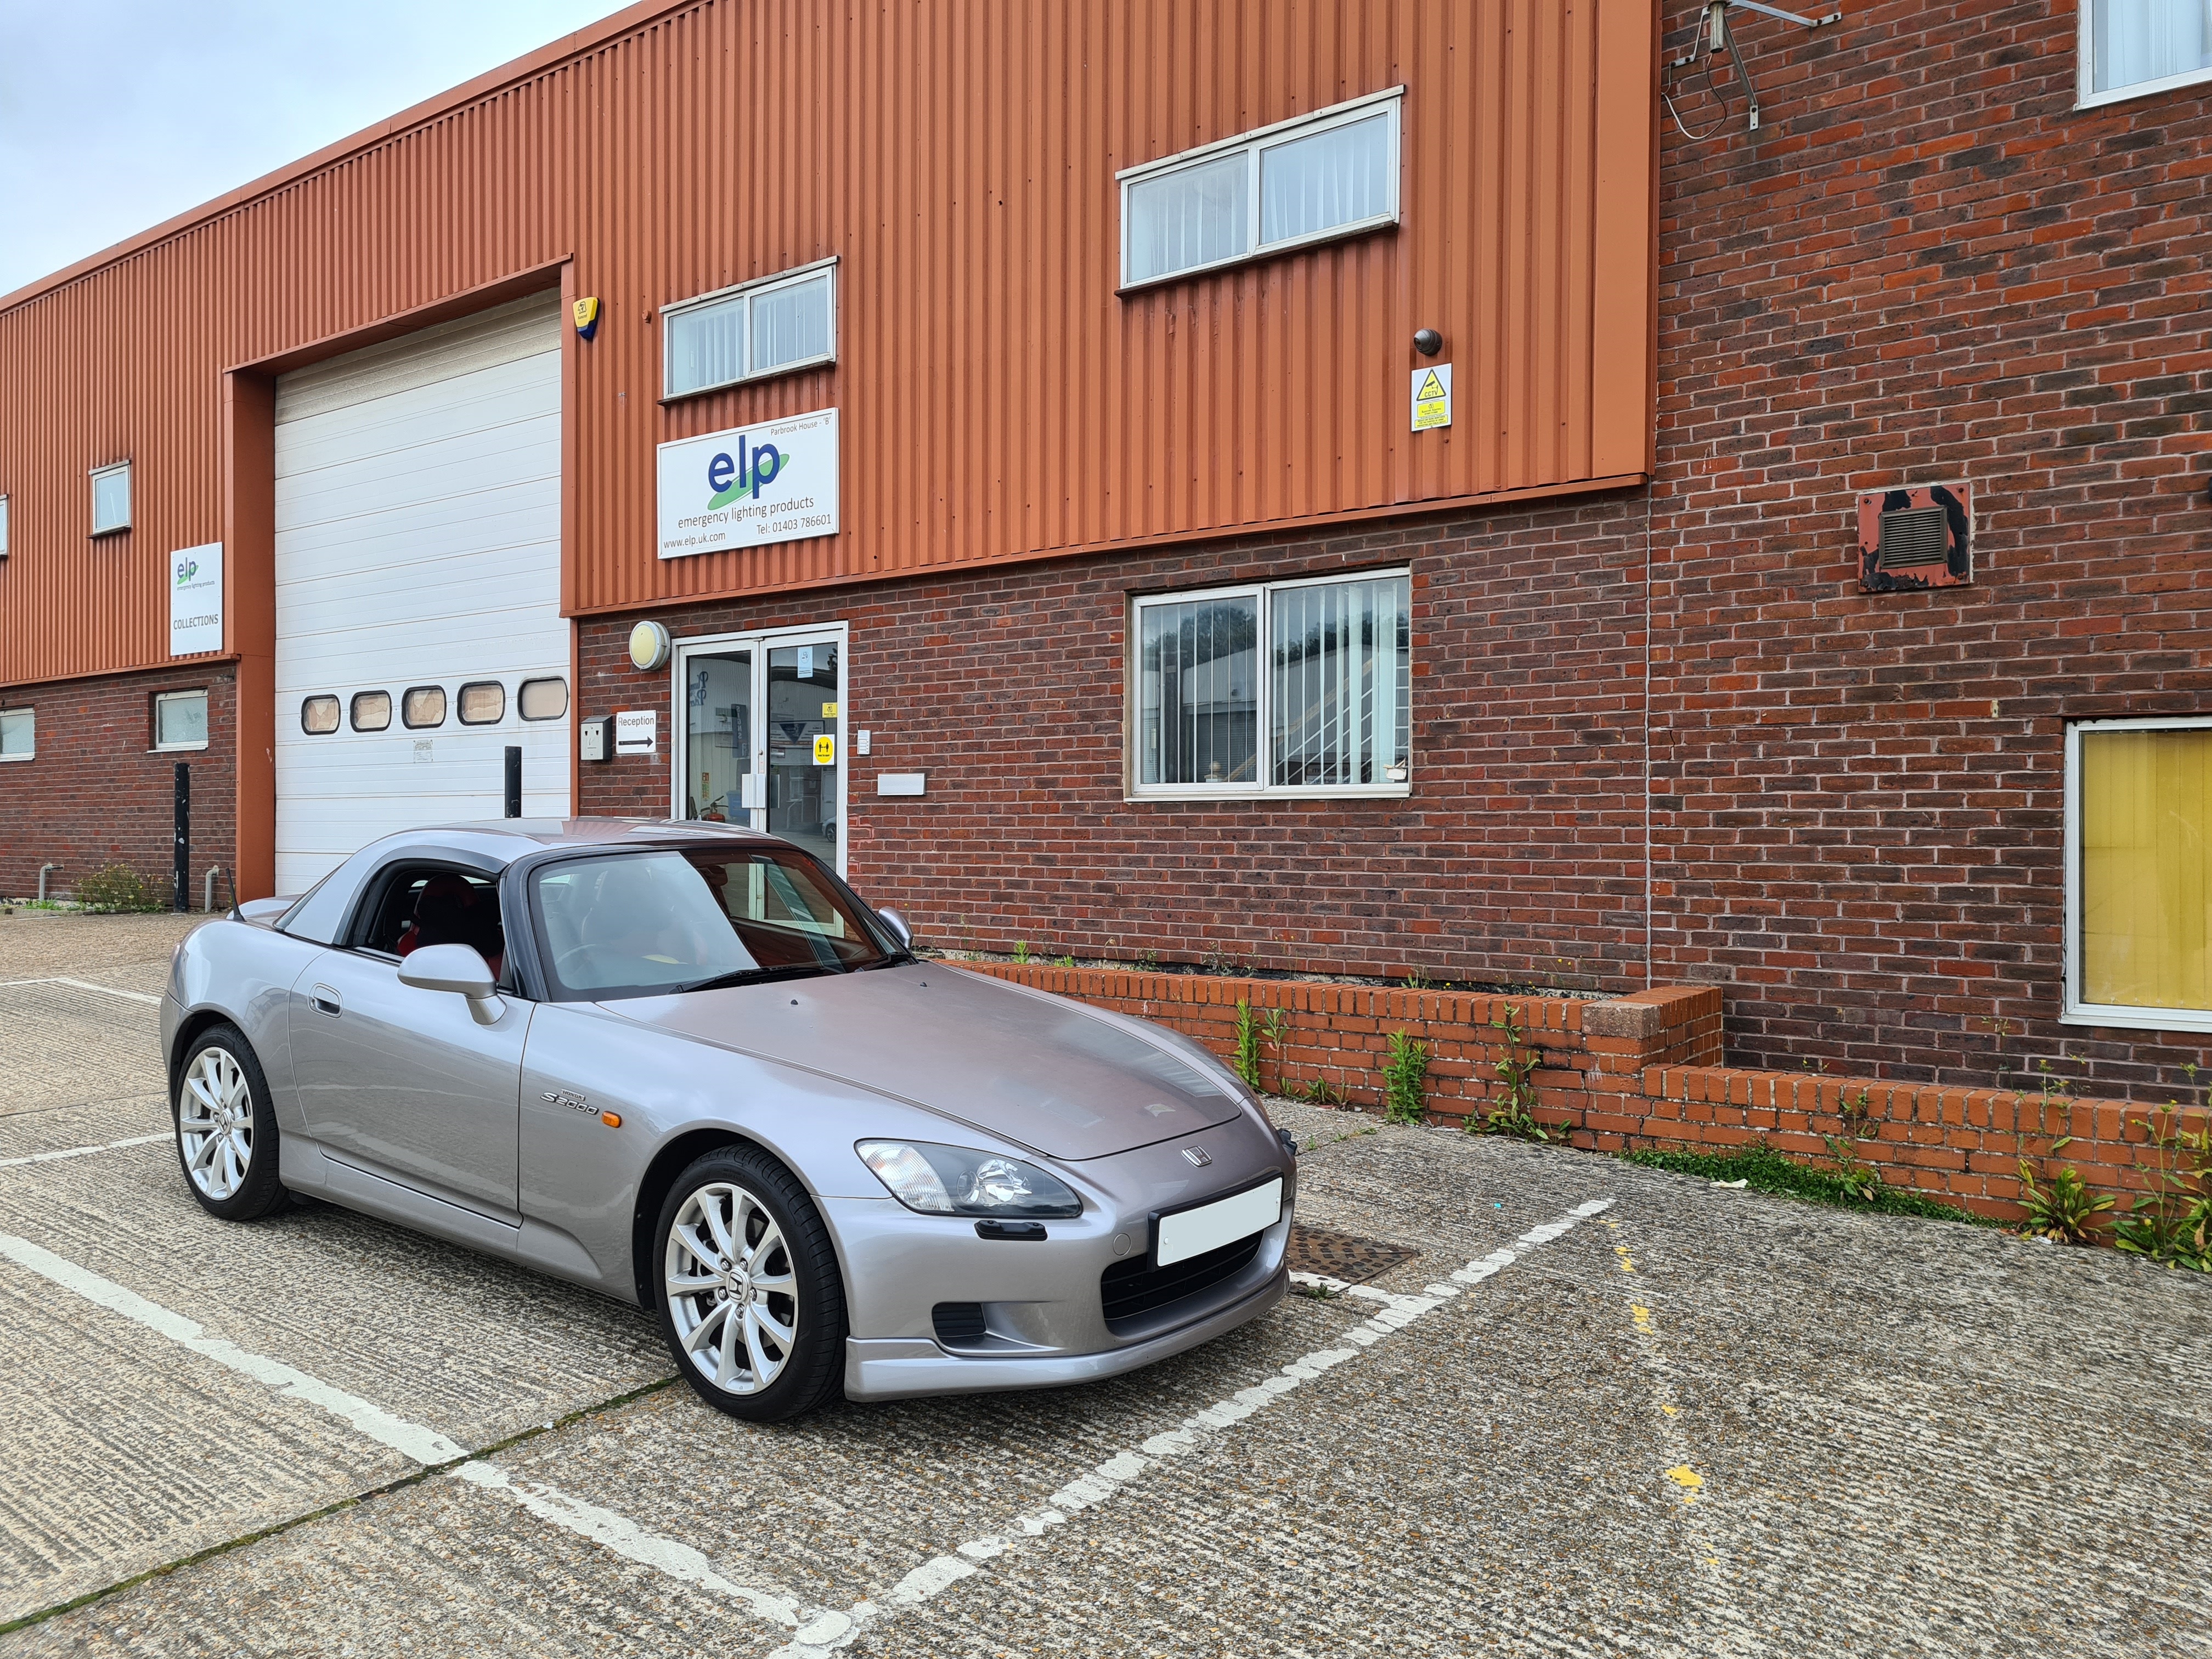
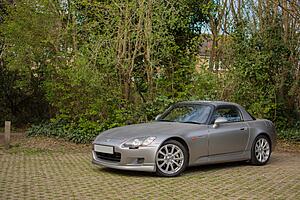
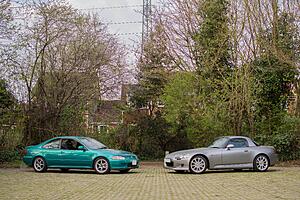
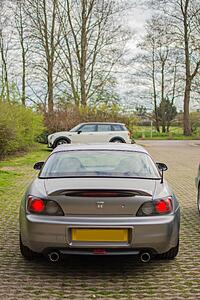
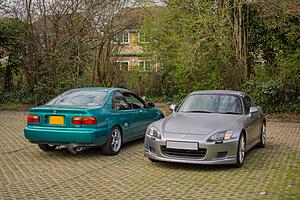
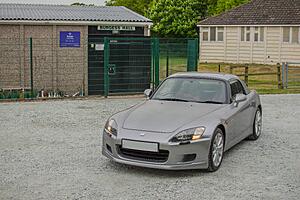
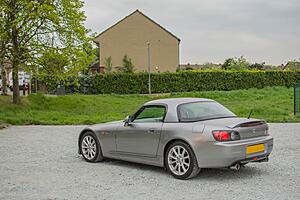
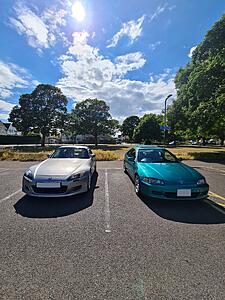
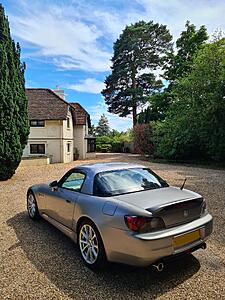
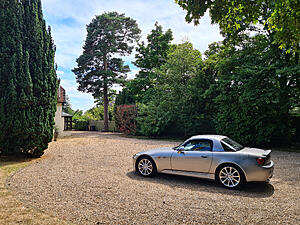
Task 96 – Mini Photo Shoot
13-06-21
Long overdue, it was time for small get together with my brother for alittle bonding time.
A lovely empty car park my brother managed to take some great photos of both cars.
The s2000 still looks fantastic.
Parts Purchased:
None
Services Used:
None
Resources used
None
--------------------------------------------------------------------------------------------------------------------------
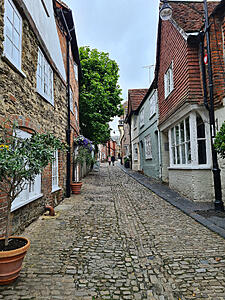
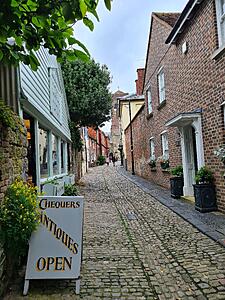
Task 97 – A Drive to Good Wood
19-06-21
With no real plans for the year for any real adventures due to Covid, I was itching for a long drive with the s2000 anywhere.
With my brother not available, an old friend was, so we decided to just drive to the Good Wood circuit and explore some of the great roads in the area.
We set off mid-morning and arrived at Good Wood just after lunch time, unfortunately there was an event at Good Wood so we couldn’t enter the area. Would have been nice to eat at the on-site café.
It was then decided to just drive around and enjoy the surrounding roads.
We found ourself in the small town of Petworth where we found a nice pub for a some late lunch before heading back for the drive home.
The rain stayed away for the day with it only starting to rain on the way home.
Thoroughly enjoyed the s2000 and being able to stretch its legs.


Parts Purchased:
None
Services Used:
None
Resources used
None
--------------------------------------------------------------------------------------------------------------------------
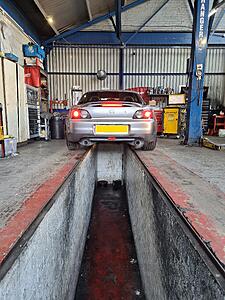
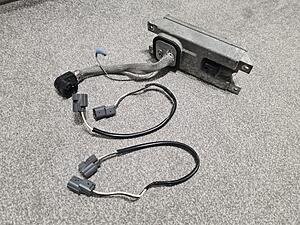
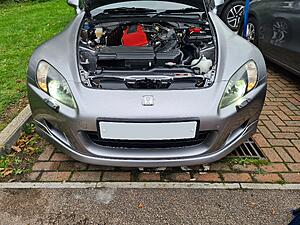
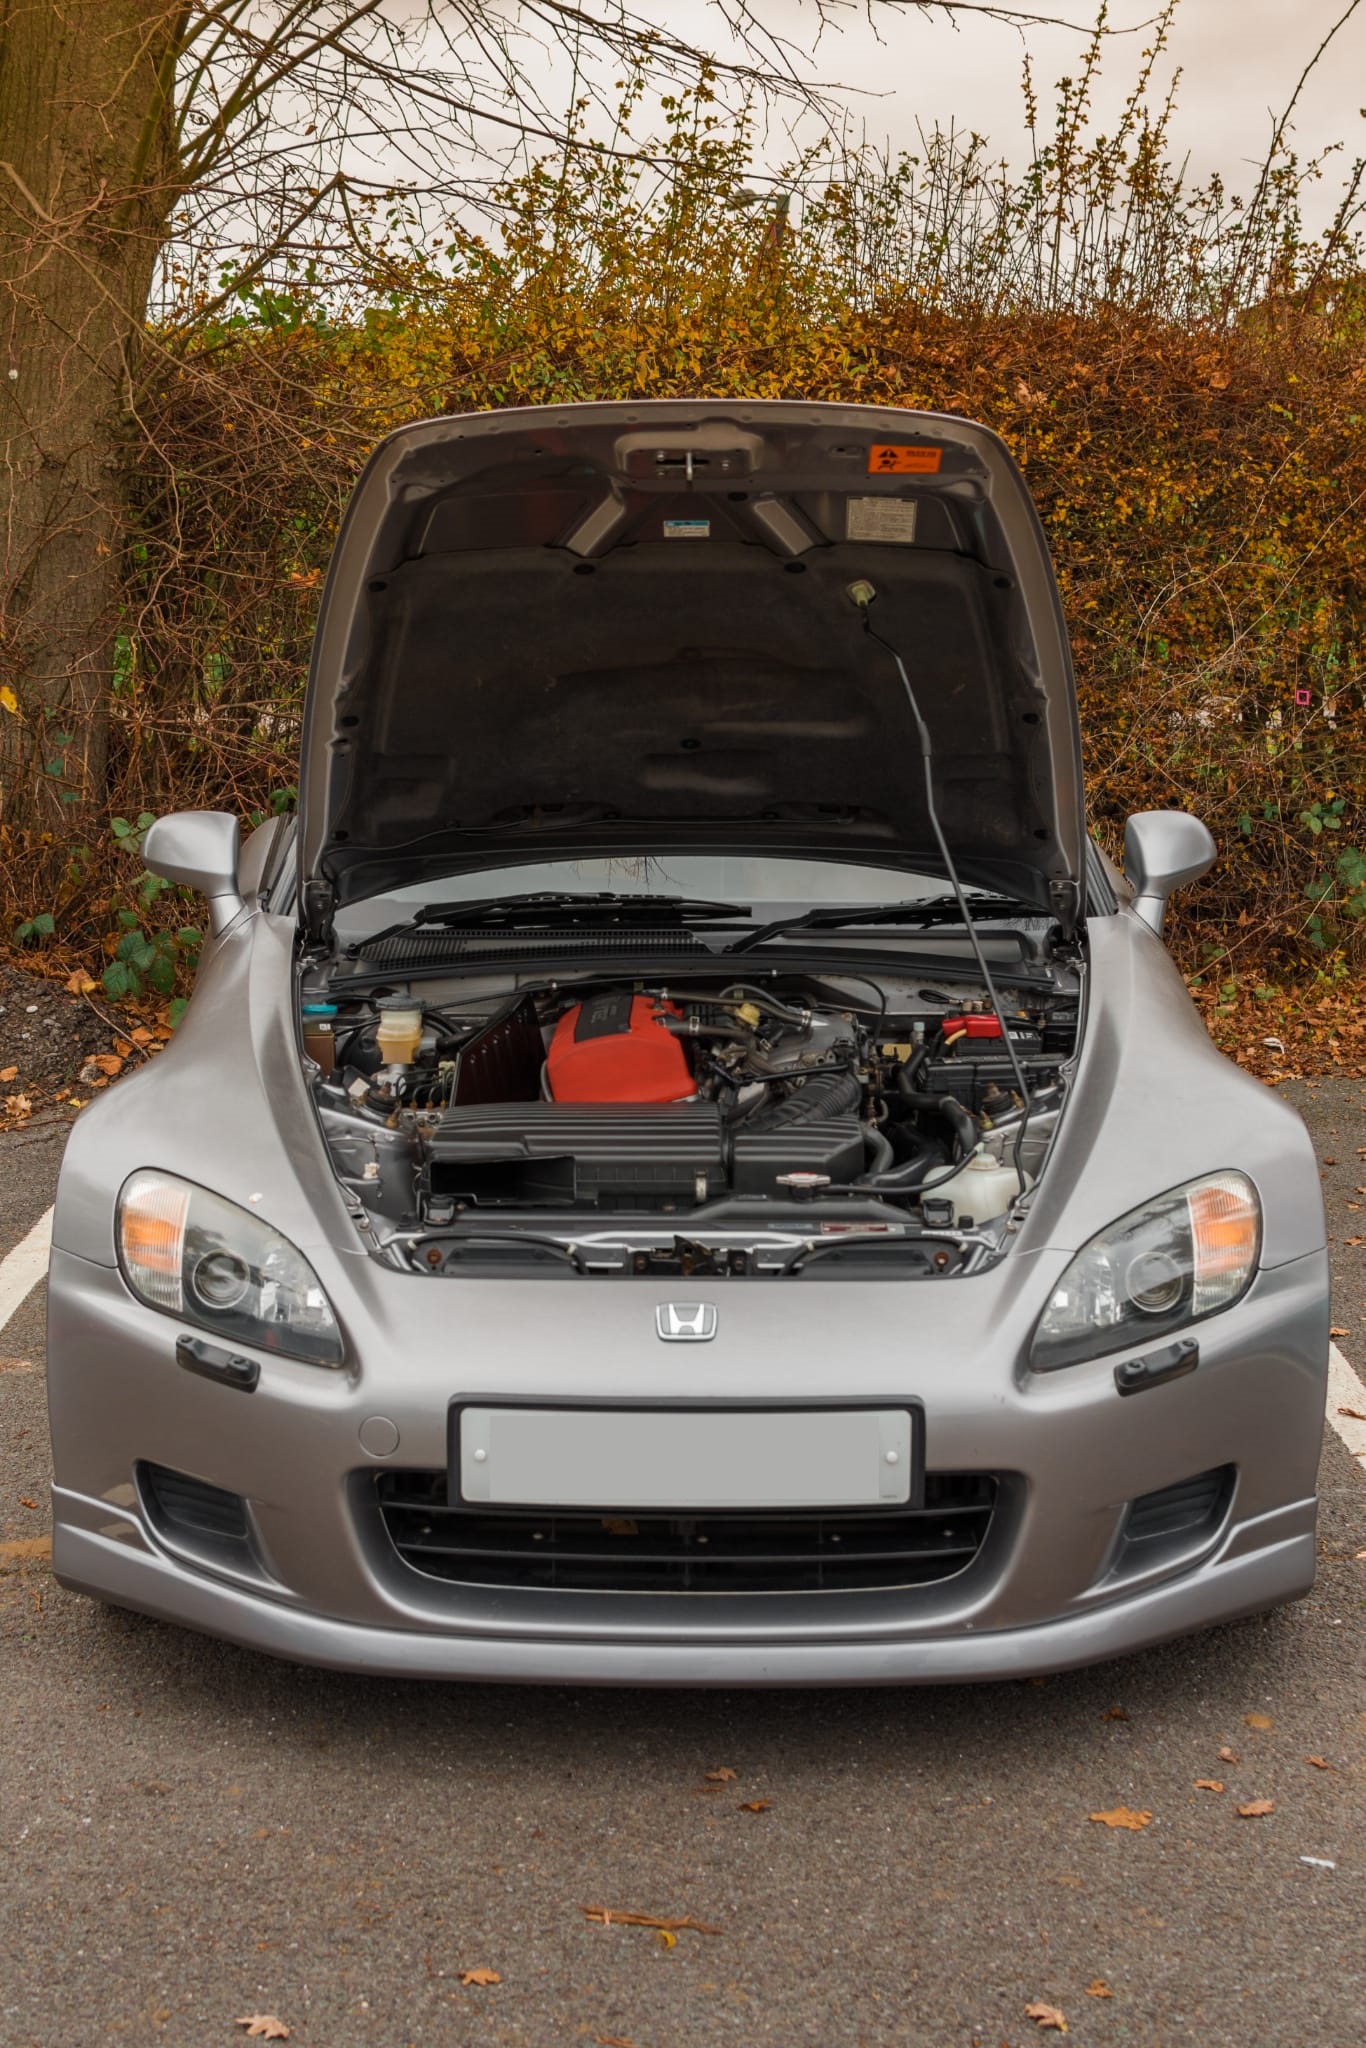
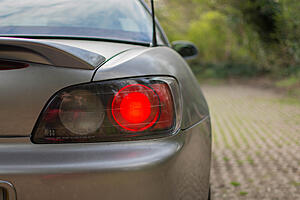
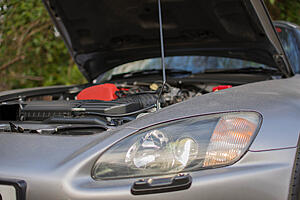
Task 98 – Xenon HID Ballast Replacement
08-10-21
During a visit to my brothers place whilst using the s2000, it was noticed that one of my main beam xenon headlights was not functioning.
It dawned on me that it was the ballast that had given up.
I checked the fuse for the right xenon headlamp and it had indeed blown.
This would probably be the most involved job I would be doing on the s2000 this year.
On a few occasions in the past, where the bumpers had been removed for various jobs it was noticed that the passenger side HID ballast was an aftermarket unit and poorly installed.
It was inevitable that it would eventually go, I guess that time was now. Haha.
It could have been the xenon bulb, but I was 99% sure it was the ballast.
The cheapest option was to buy the same after market HID ballast and replace it.
However, I wanted to put the whole installation right, which meant sourcing the original connector from the headlight loom.
The previous owner just cut, removed it and attached some of those cheap blue crimp connectors.
I guess it worked, but it was pretty awful.
I really can’t believe they chopped and removed the OEM connector.
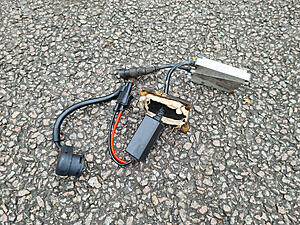
Having studied what the original OEM HID ballast looked like and how it was installed using the Lings parts explosion website, I realised what I needed.
The original ballast was manufactured by Mitsubishi (be aware that the ballast for the pre facelift and face lift s2000’s are different and are not interchangeable)
There are always second hand OEM ballasts available on the second hand market ranging from £70 to £150.
The ballast are still available direct from Honda, but at around £700 each it wasn’t really an option.
The component that might be tricky to source is the jumper extension cable, these aren’t available separately from Honda and only come with the ballast as a complete assembly.
I would need to find it second hand from somewhere.
Here is what was required to restore everything back to OEM
-OEM Mitsubishi HID Ballast
-Jumper extension cable from ballast to headlight loom
-Another jumper extension cable – I would need to cut this in half and utilize the opposite gender of the connector to restore the main headlight wiring loom (where it was cut)
-Heat shrink
-20A micro fuse (to restore the blown fuse in the fuse box)
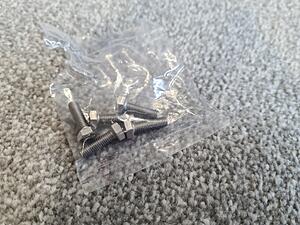
-M8x16 bolt head machine screws x4 (to attach ballast to underside of headlamp) (Spec of bolt taken from Lings Honda Parts Explosion bills of materials)
-Xenon Bulb (Osram xenarc) – Only if current bulb is blown/damaged
The search began for the parts, there were a few ballasts listed on ebay, but one listed for £75 delivered.
A quick email to the seller asking if they had the jumper extension cables.
They had two sets available – Great result.
A deal was had with both jumper cables and the ballast for £95 posted.
With no way of testing the ballast, I had to rely on the sellers word that the ballast was fully working.
The bolts direct from Honda were £7 each, so an alternative was needed.
The machine bolt screws were purchased from a seller on ebay.
Stainless M8x16 screws x5 for £2.99 posted. The Lings Honda parts diagram had the spec of the bolt listed, so that was a great help.
A warm day at the end of September was chosen, I wanted to do the job before the winter.
With also ideally done before my MOT in Feb/Mar time, as it would fail an MOT having a headlight out.
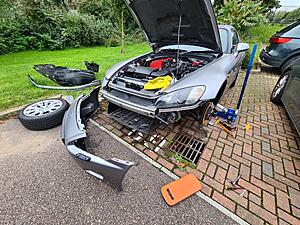
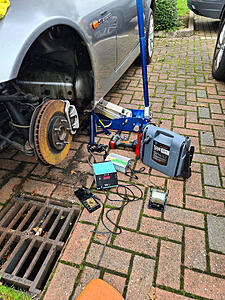
I set to work and removed the front passenger wheel, front lip, front bumper and arch liner.
Having done this numerous times and with all fixings copper greased previously, it all came off with ease.
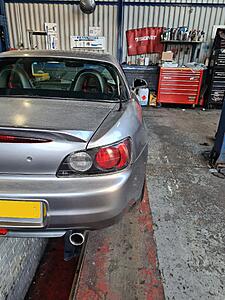
Once everything was off, I took a closer look at the aftermarket ballast and its install.
It looked pretty straight forward to remove and change over.
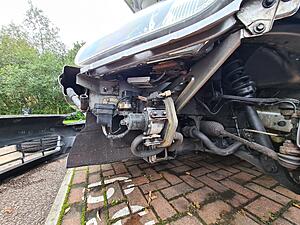
Thankfully the previous owner did no further damage to the underside of the headlamp housing.
The previous owner used some sort of rubber pad to cover the cable passage into the actual headlamp and used silicone to seal it.
What a mess.
It was time to get out my Soldering Iron, with no mains power outside in the car park I had to use my SIP1600 Battery booster pack connected to an DC to AC inverter.
The inverter was 150 watts so it was more than capable of powering the soldering iron station.
Any good soldering iron will do the job, however I have a Weller WSD81 soldering iron station. Lovely bit of kit.
Not too sure how long the battery booster pack can power the iron for, but I wouldn’t need it too long as it is only a couple of wires.
The first job was to make sure that the headlight circuit was functioning and its output is 12v when the headlights are on.
So I completely removed the after market HID ballast and attached my multimeter to the aftermarket plug end.
I replaced the 20A fuse and switched on my headlights.
Result, 12v was showing on the meter when the headlight were switched on and 0 volts when the headlights were switched off.
This meant the main OEM circuit was all intact and had no issues.
This also meant the job could continue. The HID ballast then up’s the voltage to usually 120v or 250v to power up the xenon bulb.
At this point, the main battery terminals were disconnected for safety.
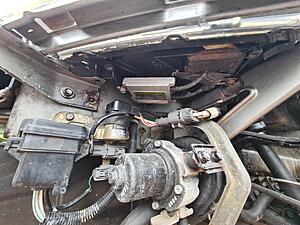
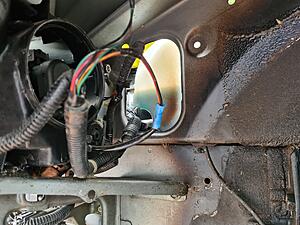
The after market crimps were chopped off and the OEM plug connector was hard soldered and wrapped with heat shrink for a neat OEM finish.
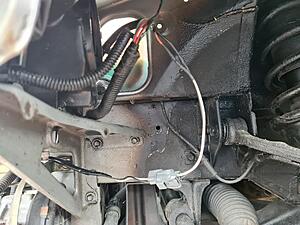
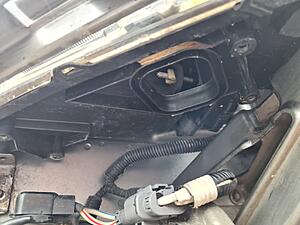
With the after market ballast already removed, a quick clean up and visual check was performed within and around the area to make sure there were no other surprises. Once satisfied, the OEM Mitsubishi ballast bolted in place perfectly.
Note: The far corner bolt is tricky to screw in, the Denso heavy duty relay (x2 10mm bolts) and its connector clip would need to be removed in order to free up some space to get a socket wrench in that area.
When installing the pre face lift OEM ballast, make sure the rubber seal is present which fits around the access hole for the cables to pass through into the headlamp on the underside.
This is a weather seal and prevents water and moisture ingress into the headlamp.
The HID xenon bulb was removed, checked and seemed ok, and then reinstalled.
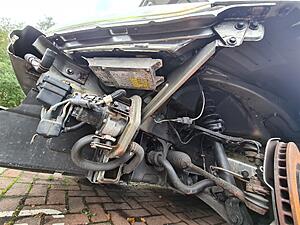
The jumper extension cables were connected up to the ballast and into the main headlight loom connector and it was time to test everything out.

Battery was reconnected, and the headlights were switched on.
The passenger headlight came to life.
I was so relieved and happy.
Even better is that the xenon bulb was fully operational and didn’t need replacing.
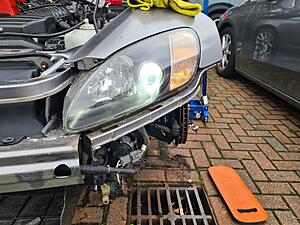
I left the headlight on for around 10 to 15 minutes and then the engine was started up to ensure there were no other additional issues.
What a fantastic result. It turned out to be quite an enjoyable job, knowing that a previous owner bodge job has been fully rectified back to OEM.
Parts Purchased:
Part: Genuine Honda HID Ballast Unit
Part Number: 33109-S2A-013
Supplier: Ebay (2nd Hand)
Part: Genuine Honda HID Ballast Jumper Extension Cable x2
Part Number: N/A (Usually comes with ballast)
Supplier: Ebay (2nd Hand)
Part: M8x16 Machine Bolt Head Screws
Part Number: M5x16 Set Screws Hex Head Bolt
Supplier: Ebay (Seller: a2zfast65)
Other items already to hand
-Soldering iron
-Heat shrink
-20A fuse (micro type)
-Mulitmeter
Services Used:
None
Resources used
Lings Honda Parts Website
--------------------------------------------------------------------------------------------------------------------------
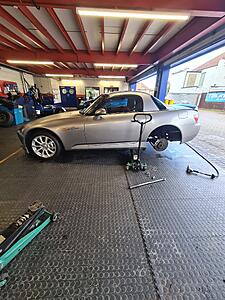
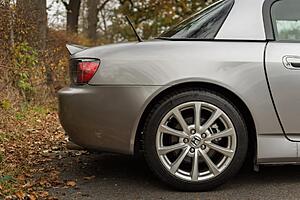
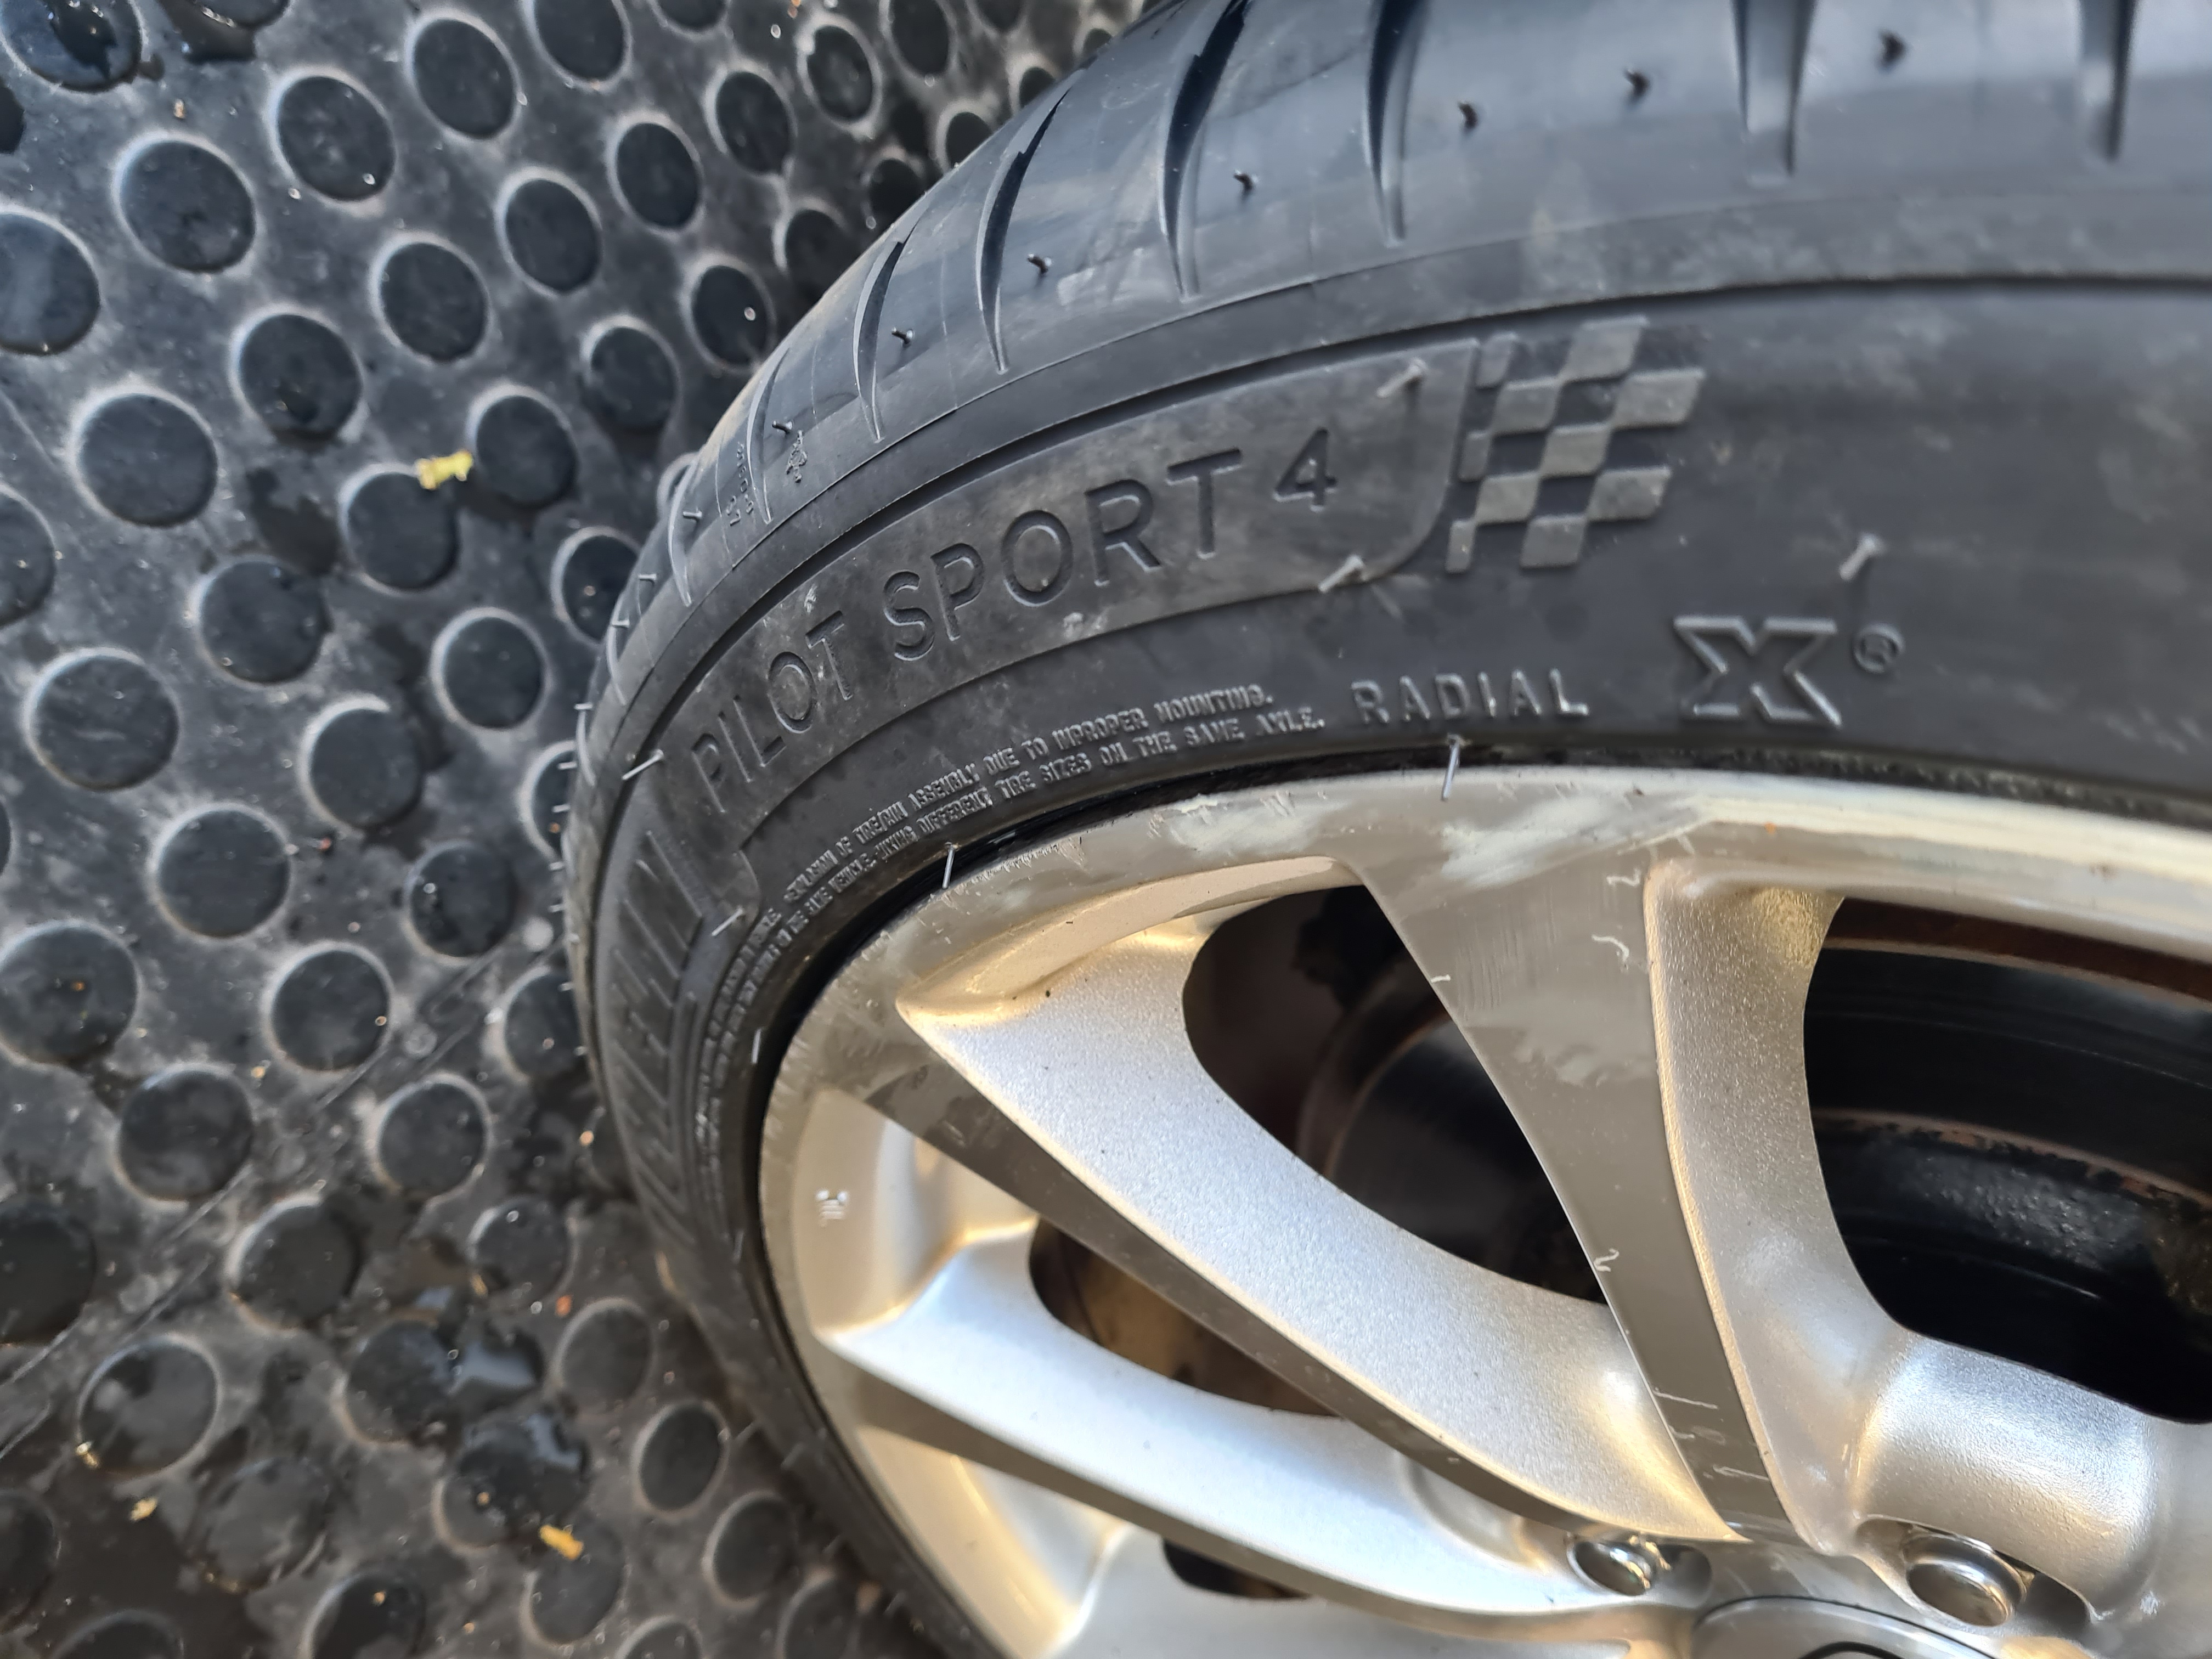
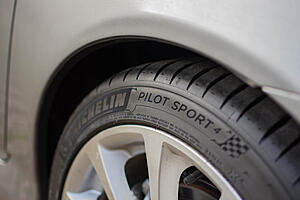
Task 99 – Rear Tyre Change
30-10-21
After approximately 9,000 miles, the rear tyres were due a replacement.
The tyres seemed to have worn out quite evenly, and I was pretty happy that the tyres had achieved 9000 miles over the 4 years.
As the s2000 wasn’t going to see much use over the winter, I was looking to get them replaced in the early spring time.
However, whilst browsing Black Circles one evening they had a 15% off promo for Michelin tyres so I decided to just get the rears done.
The tyres I was eyeing up as the replacement was the Michelin Pilot Sport 4.
I have heard great things about this tyre, and was keen to give them a go.
They have 2 different versions of the Pilot Sport 4.
Pilot Sport 4 and the Pilot Sport 4S.
The S variant giving a much more stiffer sidewall thus providing more stability and control at a cost of comfort, noise and longevity.
The S variant is a much more performance focused tyre, but as the s2000 spends 95% of its time on the road it made more sense in my situation to have a more road going focused tyre.
It should be a much more improved tyre compared to the Good Year Eagle F1 Asymmetric 3 tyre, which had to be pumped to around 34 PSI to overcome its softer side wall even with the Extra Load version.
An easy purchase online, I got them fitted the same week at my local Protyre Tyre garage.
The front tyres still has around 6mm thread left so plenty of life, however due to the tyres being mismatched it would be wise to also change them to the Michelins so they all match.
Mismatching tyres can have side effects with handling, especially with a rear wheel drive car like the s2000. I will change the fronts in the spring time, this will allow me to save some money for them.
Once the rear tyres were installed, I immediately found a nice back road to scrub them in and see what they were like.
The difference was night and day.
The rear end felt more planted and stable, the slight wobble/flex that the Good Years suffered from had disappeared.
Cant wait to get the front changed over so it would be a full matching set.
A highly recommended tyre, and pretty glad I went for them.
It would be interesting to see how long they last, how good they are when driven hard, and how they perform on a light track day.

Parts Purchased:
Part: 245/40/R17 Rear Tyres “Michelin Pilot Sport 4”
Part Number: Michelin Pilot Sport 4
Supplier: Black Circles (but fitted at a Protyre Garage)
Services Used:
Tyre Garage: Protyre
www.protyre.co.uk
Resources used
Tyre Review Video
--------------------------------------------------------------------------------------------------------------------------
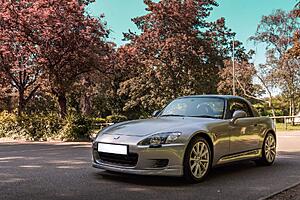
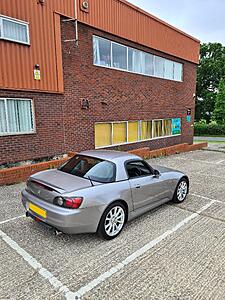
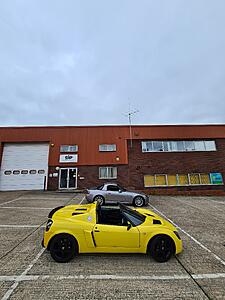
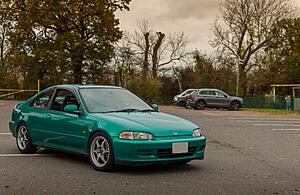
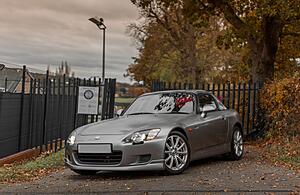
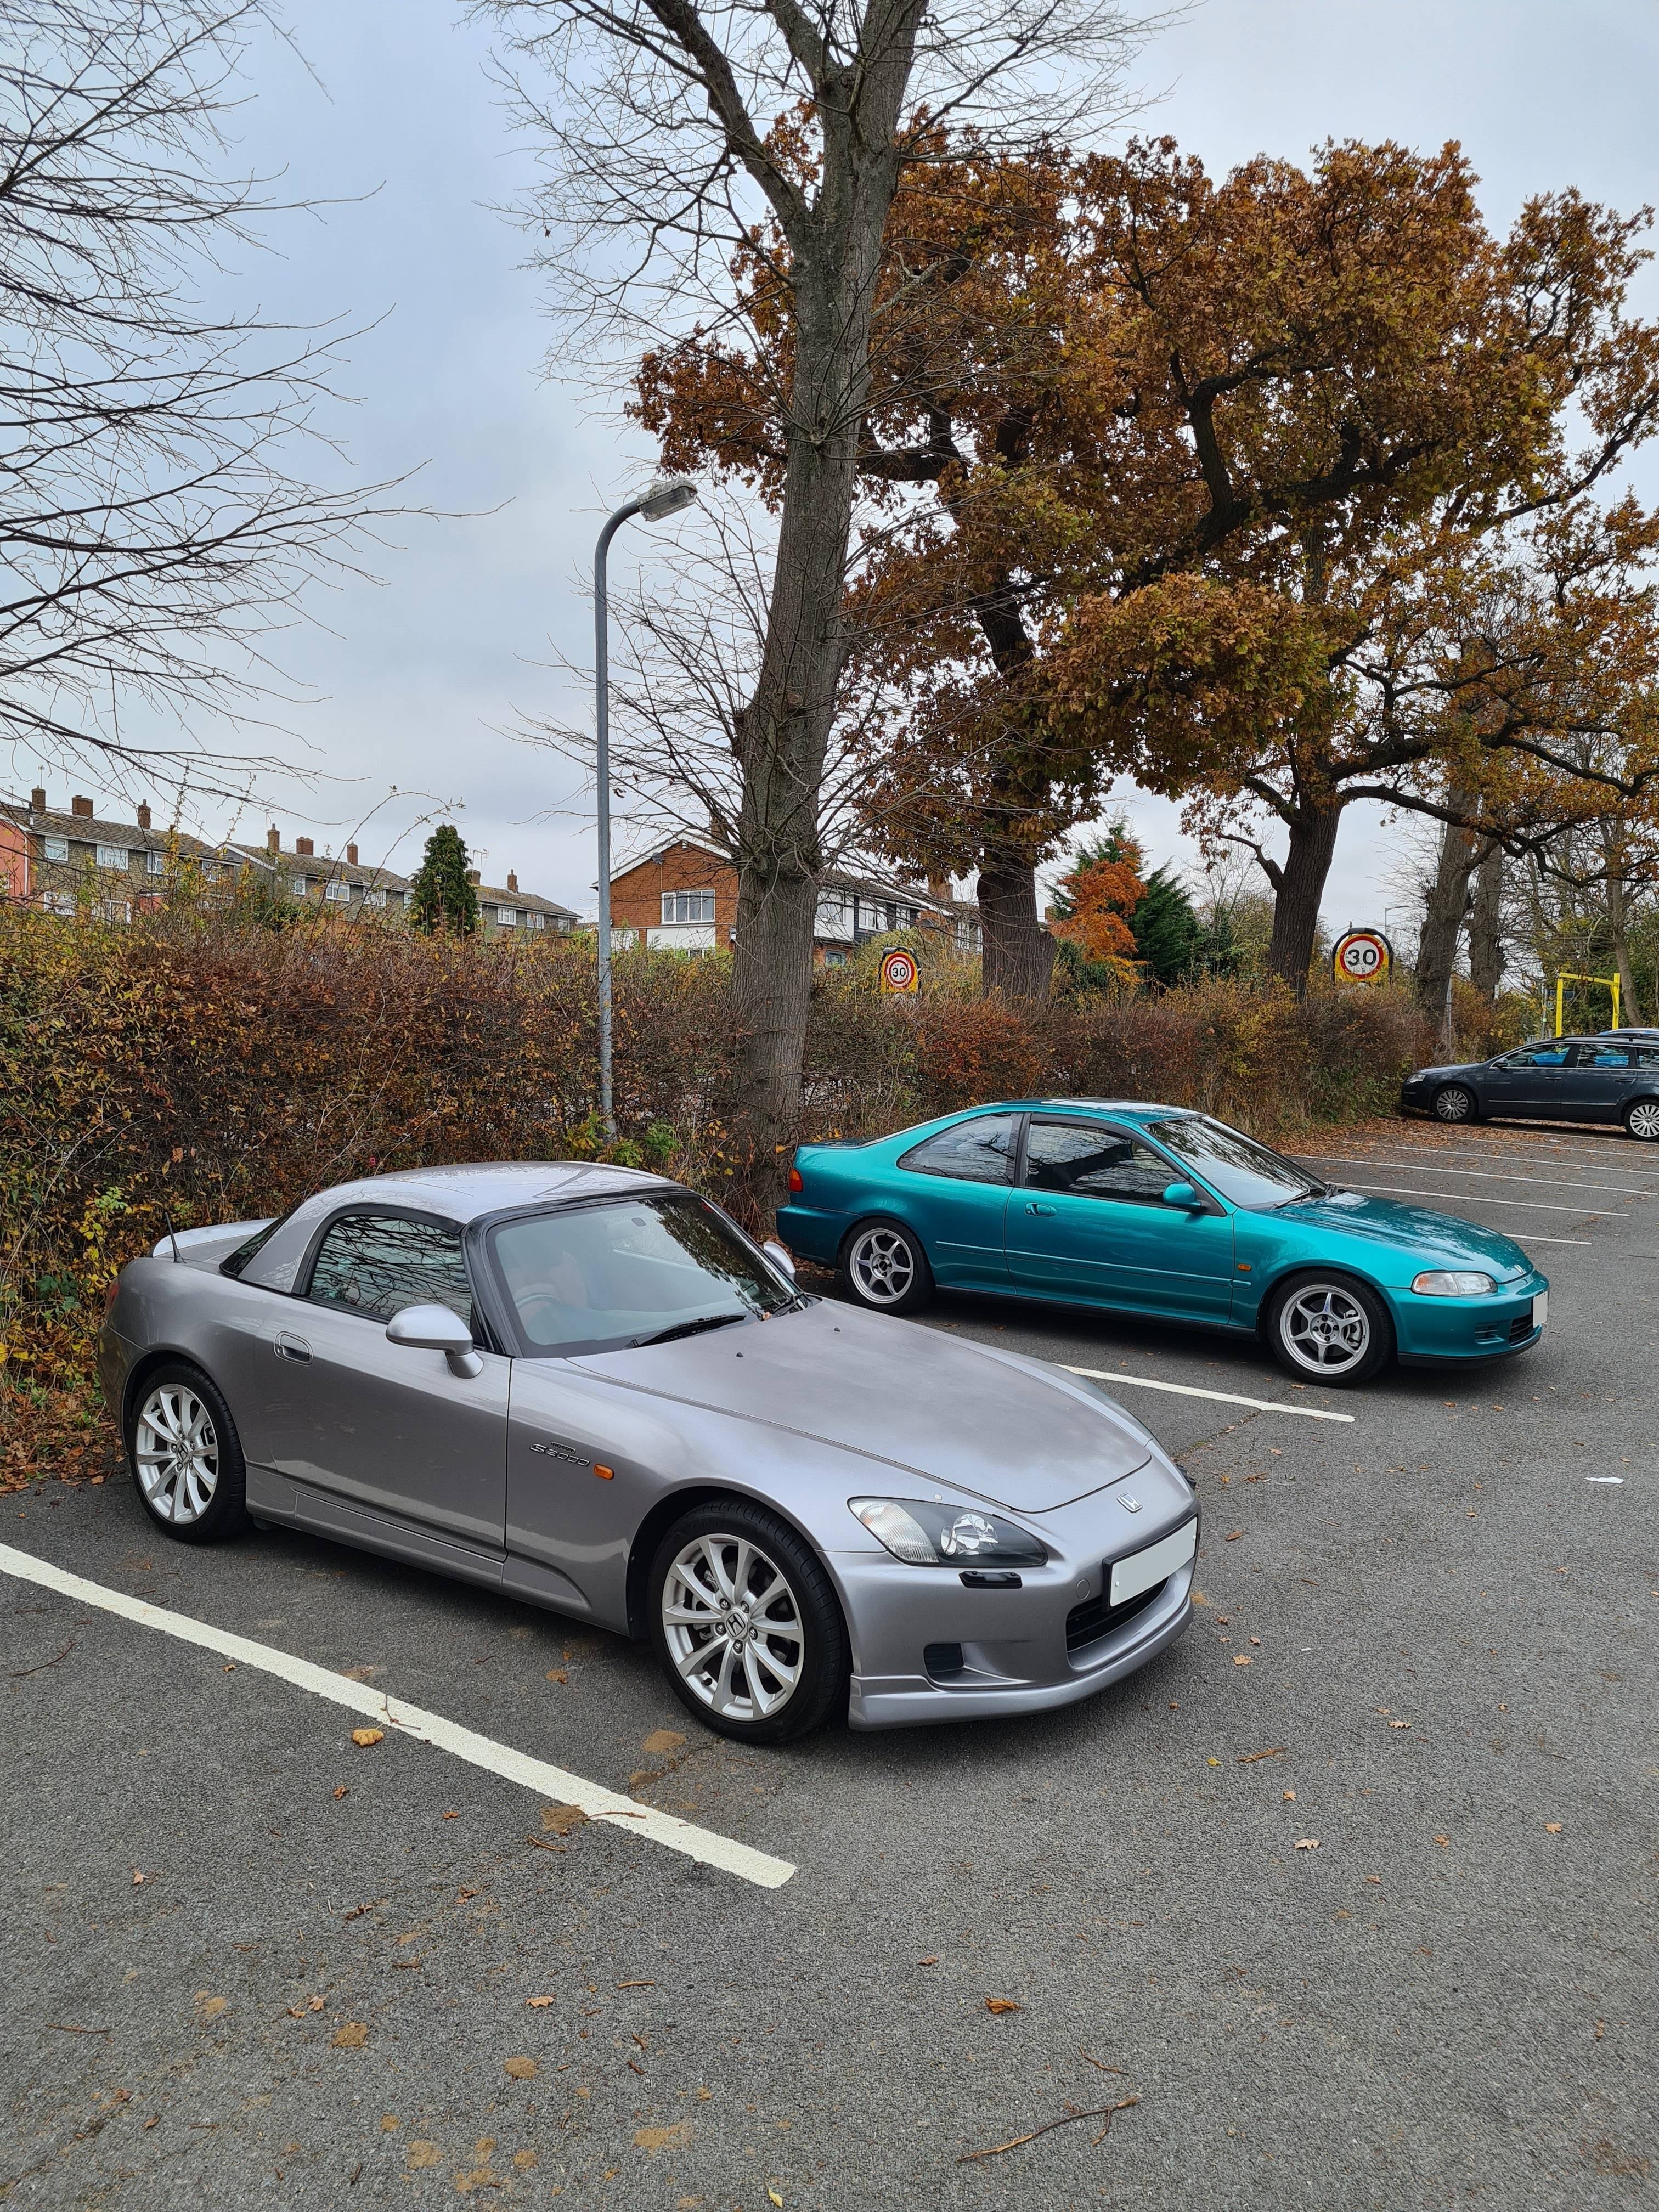
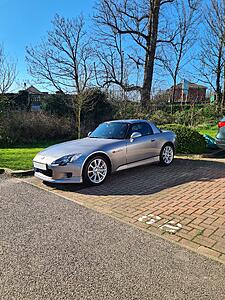
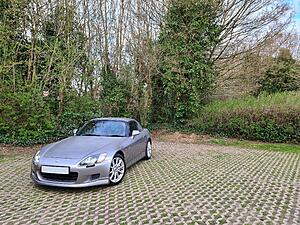
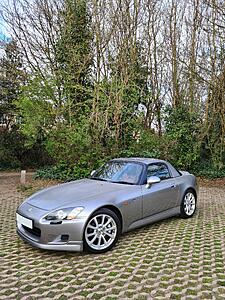
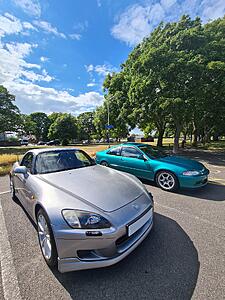
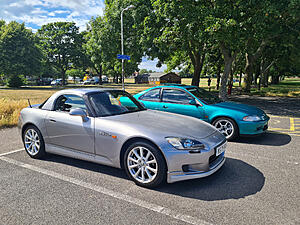
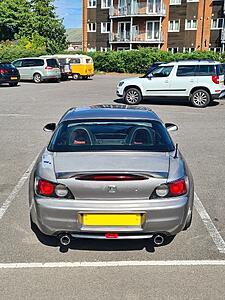
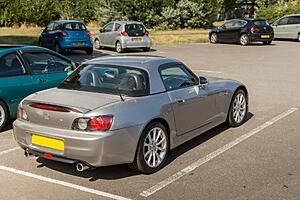
Cars & Coffee with Brother & End of Year Photoshoot
18-11-21
Just before the temperature’s dropped, the weekly forecast for the week commencing 15th November looked quite mild.
Particularly on the Thursday 18th November.
So me my brother decided to have a half day and meet up in the afternoon for coffee and a meet up/photos with the cars.
One last meet up with the cars before the salt goes on the roads.
I decided to take the s2000 to work and it was a nice drive.
We drove around on some local back roads which reminded me how fun the s2000 is to drive.
Later on that day, we met up and using my brother’s Nikon D7200 camera we took some great photos.


Parts Purchased:
None
Services Used:
None
Resources used
None
--------------------------------------------------------------------------------------------------------------------------
End of Year 2021
31-12-21
Another year drawing to a close and with Covid-19 still attacking us, the s2000 still didn’t get the use as I hoped.
With having just purchased a new place and now having a mortgage, expenditure with the s2000 had slowed.
However, with a parking issue now sorted in my new apartment, it seems that the s2000 can now stay. Woohoo.
Things with the new place are now settled so one more major final to-do is left on the s2000.
The body work on the s2000 needs attention, so hopefully a full respray is on the cards.
Here's to more adventures in 2022.
Thanks for reading guys
Happy New Year
31-12-21
The strange times just keep on continuing.
I hope you all made it through the toughest of the covid times.
With covid restrictions still around, that stupid petrol crisis malarkey a few months back, and that Omicron variant, the s2000 hasn’t seen much use than I hoped.
However, a few issues have cropped up this year and on a few occasions I did manage to take it out.
--------------------------------------------------------------------------------------------------------------------------
Task 90 – Purchasing that S2000 Book
11-02-21
There were lots of talk about Brian Long releasing a book of the Honda s2000.
He also did a book on the Honda NSX which has long been discontinued I believe.
This was a book documenting the story of the s2000, with the full cooperation from the factory where the car was manufactured.
For any Honda s2000 enthusiast, it was a book to have.
With the release date of the book originally being 15-07-2020, it was continuously being pushed back.
I finally got my hands on one direct from Veloce Publishing on the 11th January 2020.


What a fabulous book.
Great material to cherish when the time does come one day when the s2000 has to go.
Parts Purchased:
Part: The Honda s2000 Book
Part Number: ISBN13: 9781787112148
Supplier: Veloce Publishing.
Or can be purchased from any good book store.
Services Used:
None
Resources used
None
--------------------------------------------------------------------------------------------------------------------------
Task 91 – Deep Clean after Snow
21-02-2021
The s2000 never saw any action throughout the winter months, with only giving her a quick wash every other week.
I also fire up that F20 engine every week, just to keep the battery from depleting itself and giving the engine a run for 20 or so minutes.
Moving the car very slightly in its parking spot so help prevent flat spotting the tyres.
February saw some heavy snowfall too.
After the snow cleared and the temperatures started to increase alittle, a warm late February weekend I decided to give the s2000 a well-deserved deep clean.
The s2000 just sits out in the communal car park and it is not covered, therefore keeping it clean with washes every other week was important to stop moss and algae growing.


It took a whole Saturday to deep clean her, leaves and debris finds its way within the engine bay.
Enjoyable nonetheless
She came out pretty nice afterwards.
Parts Purchased:
None
Services Used:
None
Resources used
None
--------------------------------------------------------------------------------------------------------------------------
Task 92 – MOT Time
27-02-2021
It was that time again, the dreaded day for the MOT.
We all dread MOT day, due to the fear of a fault being exposed and money having to be spent.
Although as s2000’s are getting on a bit now, so it’s always a good thing to have any faults flagged.

After an hour or so, the tester gave it a clean bill of health for 3 years running within my ownership.
I guess I must be doing something right : )
Here’s to another year of magical vtec motoring.
Parts Purchased:
None
Services Used:
None
Resources used
None
--------------------------------------------------------------------------------------------------------------------------
Task 93 – Wiper Cowling Seal and Pollen Filter Housing Replacement
04-04-21
A few purchases made from the 2020 black Friday promo led me to purchase a few bits that needed tidying.
When the car was first purchased, the pollen filter was replaced way back in TASK 2, when the pollen filter housing was inspected it was found that its seal was slightly perished.
There was no debris inside the heater matrix, but it was something that ideally should be replaced.
I wrapped the pollen filter in a self-adhesive sponge seal at the time as a temp repair.
Today was the day for its replacement, with the wiper cowling needing to come off it proved handy as its upper seal also required a replacement.
The clips hook into it on the under side and in various places it was ripped, so the seal would also be flapping around on occasions.
With the cowling removed, the pollen filter housing was swiftly replaced along with a brand new pollen filter.
Blue print brand which fitted perfectly within the new housing.
Abit of a clean-up was performed within the wiper area and the cowling cover was clipped back into place with its new seal and clips.
Nice and simple small jobs completed.
Easy as pie.


Parts Purchased:
Part: Pollen Filter Housing
Part Number: 74221-S2A-003
Supplier: Tegiwa
Part: Wiper Cowling Seal Including Clips
Part Number: 74143-S2A-000
Supplier: Tegiwa
Part: Pollen Filter (Blue Print Brand)
Part Number: ADH22512
Supplier: Amazon UK
Services Used:
None
Resources used
None
--------------------------------------------------------------------------------------------------------------------------
Task 94 – Oil Service, Brake Fluid and Battery Check
25-04-21
It was that time of the year again. Service time.
The usual oil and filter changed was performed even though I had only done around 3000 miles within the year.
Oil of choice is still Castrol Edge 5w/40 coupled with the genuine Honda s2000 Oil Filter.
Spark plugs were checked and looked good.
These spark plugs have a very long service life so not needing a replacement is always handy for your wallet.
A quick check of the original air filter shows it being in great condition despite being 3 years old now.
Only having covered around 7k miles, there is still lots of life left in it.
Brake fluid check using a Laser fluid checker showed that the fluid has less than 1% water content and still in serviceable condition.
Finally a battery check, using my Foxwell BT100 analyser.
Results shows:
SOH (state of health): 73%
SOC (state of charge): 100%
Measured Cold Cranking Amps: 332
Result: Battery is Good.
All good for another year of driving


Parts Purchased:
Part: Castrol Edge Oil 5W/40 (5 Litres)
Part Number: 5W/40
Supplier: Coxmotorparts
Web:
Part: Genuine Honda Oil Filter
Part Number: 15400-PCX-004
Supplier: Honda247
Services Used:
None
Resources used
None
Equipment Used
Brake Fluid Checker
Model: Laser 4875
Battery Anaylzer
Model: Foxwell BT100
--------------------------------------------------------------------------------------------------------------------------
Task 95 – Passenger Sun Visor Rattle
16-05-21
After using the s2000 for a Friday commute to work, I noticed that on uneven roads there was a slight vibration/rattle coming from the sun visor.
On a warm Sunday afternoon I set about looking into it as it was quite annoying.
Granted the s2000 is not a refined quiet car, but a loud rattle vibration in the cabin can get quite annoying.
After having removed the sun visor and upper map light cowling there was nothing really apparent.
I did have a lot of rubber lining left overs from when I wrapped the edges of the plastic panels on the hard top trim sections.
The rubber lining would be ideal to cover the plastic edges which sits quite close to the wind shield section and may be the cause of the vibrations.
Both edges (back and forth) of the map light sun visor cowling were covered, and the rubber edge trim fitted pretty nicely.
Almost looks like it was an OEM part.
Hard top brackets were checked and tightened and the cowling map light and sun visors were reassembled.
On the next drive, the vibration/ rattle had gone.
Not too sure if the whole disassembly and reassembly process was the cause, or if the rubber trim lining stopped the vibration/rattle but I was happy either way.
The rubber lining edge trim stuff from tegiwa is good stuff, and very handy indeed.


Parts Purchased:
Part: Rubber Edge Trim
Part Number: T-9925018
Supplier: Tegiwa
Web:
Services Used:
None
Resources used
None
--------------------------------------------------------------------------------------------------------------------------
Task 96 – Mini Photo Shoot
13-06-21
Long overdue, it was time for small get together with my brother for alittle bonding time.
A lovely empty car park my brother managed to take some great photos of both cars.
The s2000 still looks fantastic.


Parts Purchased:
None
Services Used:
None
Resources used
None
--------------------------------------------------------------------------------------------------------------------------
Task 97 – A Drive to Good Wood
19-06-21
With no real plans for the year for any real adventures due to Covid, I was itching for a long drive with the s2000 anywhere.
With my brother not available, an old friend was, so we decided to just drive to the Good Wood circuit and explore some of the great roads in the area.
We set off mid-morning and arrived at Good Wood just after lunch time, unfortunately there was an event at Good Wood so we couldn’t enter the area. Would have been nice to eat at the on-site café.
It was then decided to just drive around and enjoy the surrounding roads.
We found ourself in the small town of Petworth where we found a nice pub for a some late lunch before heading back for the drive home.
The rain stayed away for the day with it only starting to rain on the way home.
Thoroughly enjoyed the s2000 and being able to stretch its legs.


Parts Purchased:
None
Services Used:
None
Resources used
None
--------------------------------------------------------------------------------------------------------------------------
Task 98 – Xenon HID Ballast Replacement
08-10-21
During a visit to my brothers place whilst using the s2000, it was noticed that one of my main beam xenon headlights was not functioning.
It dawned on me that it was the ballast that had given up.
I checked the fuse for the right xenon headlamp and it had indeed blown.
This would probably be the most involved job I would be doing on the s2000 this year.

On a few occasions in the past, where the bumpers had been removed for various jobs it was noticed that the passenger side HID ballast was an aftermarket unit and poorly installed.
It was inevitable that it would eventually go, I guess that time was now. Haha.
It could have been the xenon bulb, but I was 99% sure it was the ballast.
The cheapest option was to buy the same after market HID ballast and replace it.
However, I wanted to put the whole installation right, which meant sourcing the original connector from the headlight loom.
The previous owner just cut, removed it and attached some of those cheap blue crimp connectors.
I guess it worked, but it was pretty awful.
I really can’t believe they chopped and removed the OEM connector.
Having studied what the original OEM HID ballast looked like and how it was installed using the Lings parts explosion website, I realised what I needed.
The original ballast was manufactured by Mitsubishi (be aware that the ballast for the pre facelift and face lift s2000’s are different and are not interchangeable)
There are always second hand OEM ballasts available on the second hand market ranging from £70 to £150.
The ballast are still available direct from Honda, but at around £700 each it wasn’t really an option.
The component that might be tricky to source is the jumper extension cable, these aren’t available separately from Honda and only come with the ballast as a complete assembly.
I would need to find it second hand from somewhere.
Here is what was required to restore everything back to OEM
-OEM Mitsubishi HID Ballast
-Jumper extension cable from ballast to headlight loom
-Another jumper extension cable – I would need to cut this in half and utilize the opposite gender of the connector to restore the main headlight wiring loom (where it was cut)
-Heat shrink
-20A micro fuse (to restore the blown fuse in the fuse box)
-M8x16 bolt head machine screws x4 (to attach ballast to underside of headlamp) (Spec of bolt taken from Lings Honda Parts Explosion bills of materials)
-Xenon Bulb (Osram xenarc) – Only if current bulb is blown/damaged
The search began for the parts, there were a few ballasts listed on ebay, but one listed for £75 delivered.
A quick email to the seller asking if they had the jumper extension cables.
They had two sets available – Great result.
A deal was had with both jumper cables and the ballast for £95 posted.
With no way of testing the ballast, I had to rely on the sellers word that the ballast was fully working.
The bolts direct from Honda were £7 each, so an alternative was needed.
The machine bolt screws were purchased from a seller on ebay.
Stainless M8x16 screws x5 for £2.99 posted. The Lings Honda parts diagram had the spec of the bolt listed, so that was a great help.


A warm day at the end of September was chosen, I wanted to do the job before the winter.
With also ideally done before my MOT in Feb/Mar time, as it would fail an MOT having a headlight out.
I set to work and removed the front passenger wheel, front lip, front bumper and arch liner.
Having done this numerous times and with all fixings copper greased previously, it all came off with ease.

Once everything was off, I took a closer look at the aftermarket ballast and its install.
It looked pretty straight forward to remove and change over.

Thankfully the previous owner did no further damage to the underside of the headlamp housing.
The previous owner used some sort of rubber pad to cover the cable passage into the actual headlamp and used silicone to seal it.
What a mess.


It was time to get out my Soldering Iron, with no mains power outside in the car park I had to use my SIP1600 Battery booster pack connected to an DC to AC inverter.
The inverter was 150 watts so it was more than capable of powering the soldering iron station.
Any good soldering iron will do the job, however I have a Weller WSD81 soldering iron station. Lovely bit of kit.
Not too sure how long the battery booster pack can power the iron for, but I wouldn’t need it too long as it is only a couple of wires.

The first job was to make sure that the headlight circuit was functioning and its output is 12v when the headlights are on.
So I completely removed the after market HID ballast and attached my multimeter to the aftermarket plug end.
I replaced the 20A fuse and switched on my headlights.

Result, 12v was showing on the meter when the headlight were switched on and 0 volts when the headlights were switched off.
This meant the main OEM circuit was all intact and had no issues.
This also meant the job could continue. The HID ballast then up’s the voltage to usually 120v or 250v to power up the xenon bulb.
At this point, the main battery terminals were disconnected for safety.
The after market crimps were chopped off and the OEM plug connector was hard soldered and wrapped with heat shrink for a neat OEM finish.

With the after market ballast already removed, a quick clean up and visual check was performed within and around the area to make sure there were no other surprises. Once satisfied, the OEM Mitsubishi ballast bolted in place perfectly.
Note: The far corner bolt is tricky to screw in, the Denso heavy duty relay (x2 10mm bolts) and its connector clip would need to be removed in order to free up some space to get a socket wrench in that area.
When installing the pre face lift OEM ballast, make sure the rubber seal is present which fits around the access hole for the cables to pass through into the headlamp on the underside.
This is a weather seal and prevents water and moisture ingress into the headlamp.
The HID xenon bulb was removed, checked and seemed ok, and then reinstalled.

The jumper extension cables were connected up to the ballast and into the main headlight loom connector and it was time to test everything out.

Battery was reconnected, and the headlights were switched on.
The passenger headlight came to life.
I was so relieved and happy.
Even better is that the xenon bulb was fully operational and didn’t need replacing.

I left the headlight on for around 10 to 15 minutes and then the engine was started up to ensure there were no other additional issues.
What a fantastic result. It turned out to be quite an enjoyable job, knowing that a previous owner bodge job has been fully rectified back to OEM.

Parts Purchased:
Part: Genuine Honda HID Ballast Unit
Part Number: 33109-S2A-013
Supplier: Ebay (2nd Hand)
Part: Genuine Honda HID Ballast Jumper Extension Cable x2
Part Number: N/A (Usually comes with ballast)
Supplier: Ebay (2nd Hand)
Part: M8x16 Machine Bolt Head Screws
Part Number: M5x16 Set Screws Hex Head Bolt
Supplier: Ebay (Seller: a2zfast65)
Other items already to hand
-Soldering iron
-Heat shrink
-20A fuse (micro type)
-Mulitmeter
Services Used:
None
Resources used
Lings Honda Parts Website
--------------------------------------------------------------------------------------------------------------------------
Task 99 – Rear Tyre Change
30-10-21
After approximately 9,000 miles, the rear tyres were due a replacement.
The tyres seemed to have worn out quite evenly, and I was pretty happy that the tyres had achieved 9000 miles over the 4 years.
As the s2000 wasn’t going to see much use over the winter, I was looking to get them replaced in the early spring time.
However, whilst browsing Black Circles one evening they had a 15% off promo for Michelin tyres so I decided to just get the rears done.
The tyres I was eyeing up as the replacement was the Michelin Pilot Sport 4.
I have heard great things about this tyre, and was keen to give them a go.
They have 2 different versions of the Pilot Sport 4.
Pilot Sport 4 and the Pilot Sport 4S.
The S variant giving a much more stiffer sidewall thus providing more stability and control at a cost of comfort, noise and longevity.
The S variant is a much more performance focused tyre, but as the s2000 spends 95% of its time on the road it made more sense in my situation to have a more road going focused tyre.
It should be a much more improved tyre compared to the Good Year Eagle F1 Asymmetric 3 tyre, which had to be pumped to around 34 PSI to overcome its softer side wall even with the Extra Load version.
An easy purchase online, I got them fitted the same week at my local Protyre Tyre garage.
The front tyres still has around 6mm thread left so plenty of life, however due to the tyres being mismatched it would be wise to also change them to the Michelins so they all match.
Mismatching tyres can have side effects with handling, especially with a rear wheel drive car like the s2000. I will change the fronts in the spring time, this will allow me to save some money for them.
Once the rear tyres were installed, I immediately found a nice back road to scrub them in and see what they were like.
The difference was night and day.
The rear end felt more planted and stable, the slight wobble/flex that the Good Years suffered from had disappeared.
Cant wait to get the front changed over so it would be a full matching set.
A highly recommended tyre, and pretty glad I went for them.
It would be interesting to see how long they last, how good they are when driven hard, and how they perform on a light track day.

Parts Purchased:
Part: 245/40/R17 Rear Tyres “Michelin Pilot Sport 4”
Part Number: Michelin Pilot Sport 4
Supplier: Black Circles (but fitted at a Protyre Garage)
Services Used:
Tyre Garage: Protyre
www.protyre.co.uk
Resources used
Tyre Review Video
--------------------------------------------------------------------------------------------------------------------------
Cars & Coffee with Brother & End of Year Photoshoot
18-11-21
Just before the temperature’s dropped, the weekly forecast for the week commencing 15th November looked quite mild.
Particularly on the Thursday 18th November.
So me my brother decided to have a half day and meet up in the afternoon for coffee and a meet up/photos with the cars.
One last meet up with the cars before the salt goes on the roads.
I decided to take the s2000 to work and it was a nice drive.
We drove around on some local back roads which reminded me how fun the s2000 is to drive.
Later on that day, we met up and using my brother’s Nikon D7200 camera we took some great photos.


Parts Purchased:
None
Services Used:
None
Resources used
None
--------------------------------------------------------------------------------------------------------------------------
End of Year 2021
31-12-21
Another year drawing to a close and with Covid-19 still attacking us, the s2000 still didn’t get the use as I hoped.
With having just purchased a new place and now having a mortgage, expenditure with the s2000 had slowed.
However, with a parking issue now sorted in my new apartment, it seems that the s2000 can now stay. Woohoo.
Things with the new place are now settled so one more major final to-do is left on the s2000.
The body work on the s2000 needs attention, so hopefully a full respray is on the cards.
Here's to more adventures in 2022.
Thanks for reading guys
Happy New Year
31-12-21
 12-23-2022, 02:51 AM
#62
Registered User
Thread Starter
Hi Guys,
Another year of s2000 ownership is almost done.
With Covid now passed, cost of living and fuel prices continue to plague us.
The s2000 hasn’t really been any trouble at all and proving to be such a reliable machine usually sitting in its parking spot for most of the year.
The body work is getting worse though.
It really does need a new paint job, although relationship and life commitments have now put this on the back burner.
Even with the high fuel prices I managed to enjoy the s2000 this year.
Again, not as much as I hoped, it really isn’t cheap to run the s2000 anymore.
A very small update to summarise the year, but I wanted to add and keep this thread going.
-------------------------------------------------------------------------
-------------------------------------------------
Task 100 – Deep Clean and MOT Prep
11-03-2022
Similar to last year the s2000 never saw any action throughout the winter months, with only
giving her a quick wash every other week.
I didn’t want to expose the s2000 to the winter road salt unless I really had too. (i.e. emergency car for work)
Not being parked under a tree anymore in my previous place, the s2000 doesn’t get too dirty now.
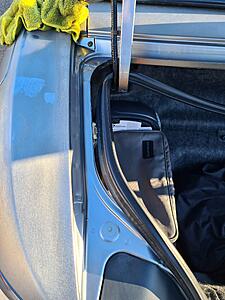
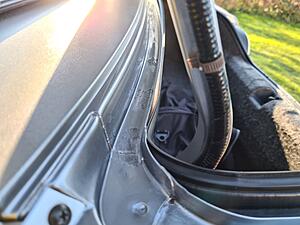
A full deep clean was performed including all the rear boot gutters too.
The F20 engine struggled to fire up due to the battery being rather weak.
A lovely spring weekend to get her deep cleaned.
She is now all ready for her MOT test.
Parts Purchased:
None
Services Used:
None
Resources used
None
-------------------------------------------------------------------------
-------------------------------------------------
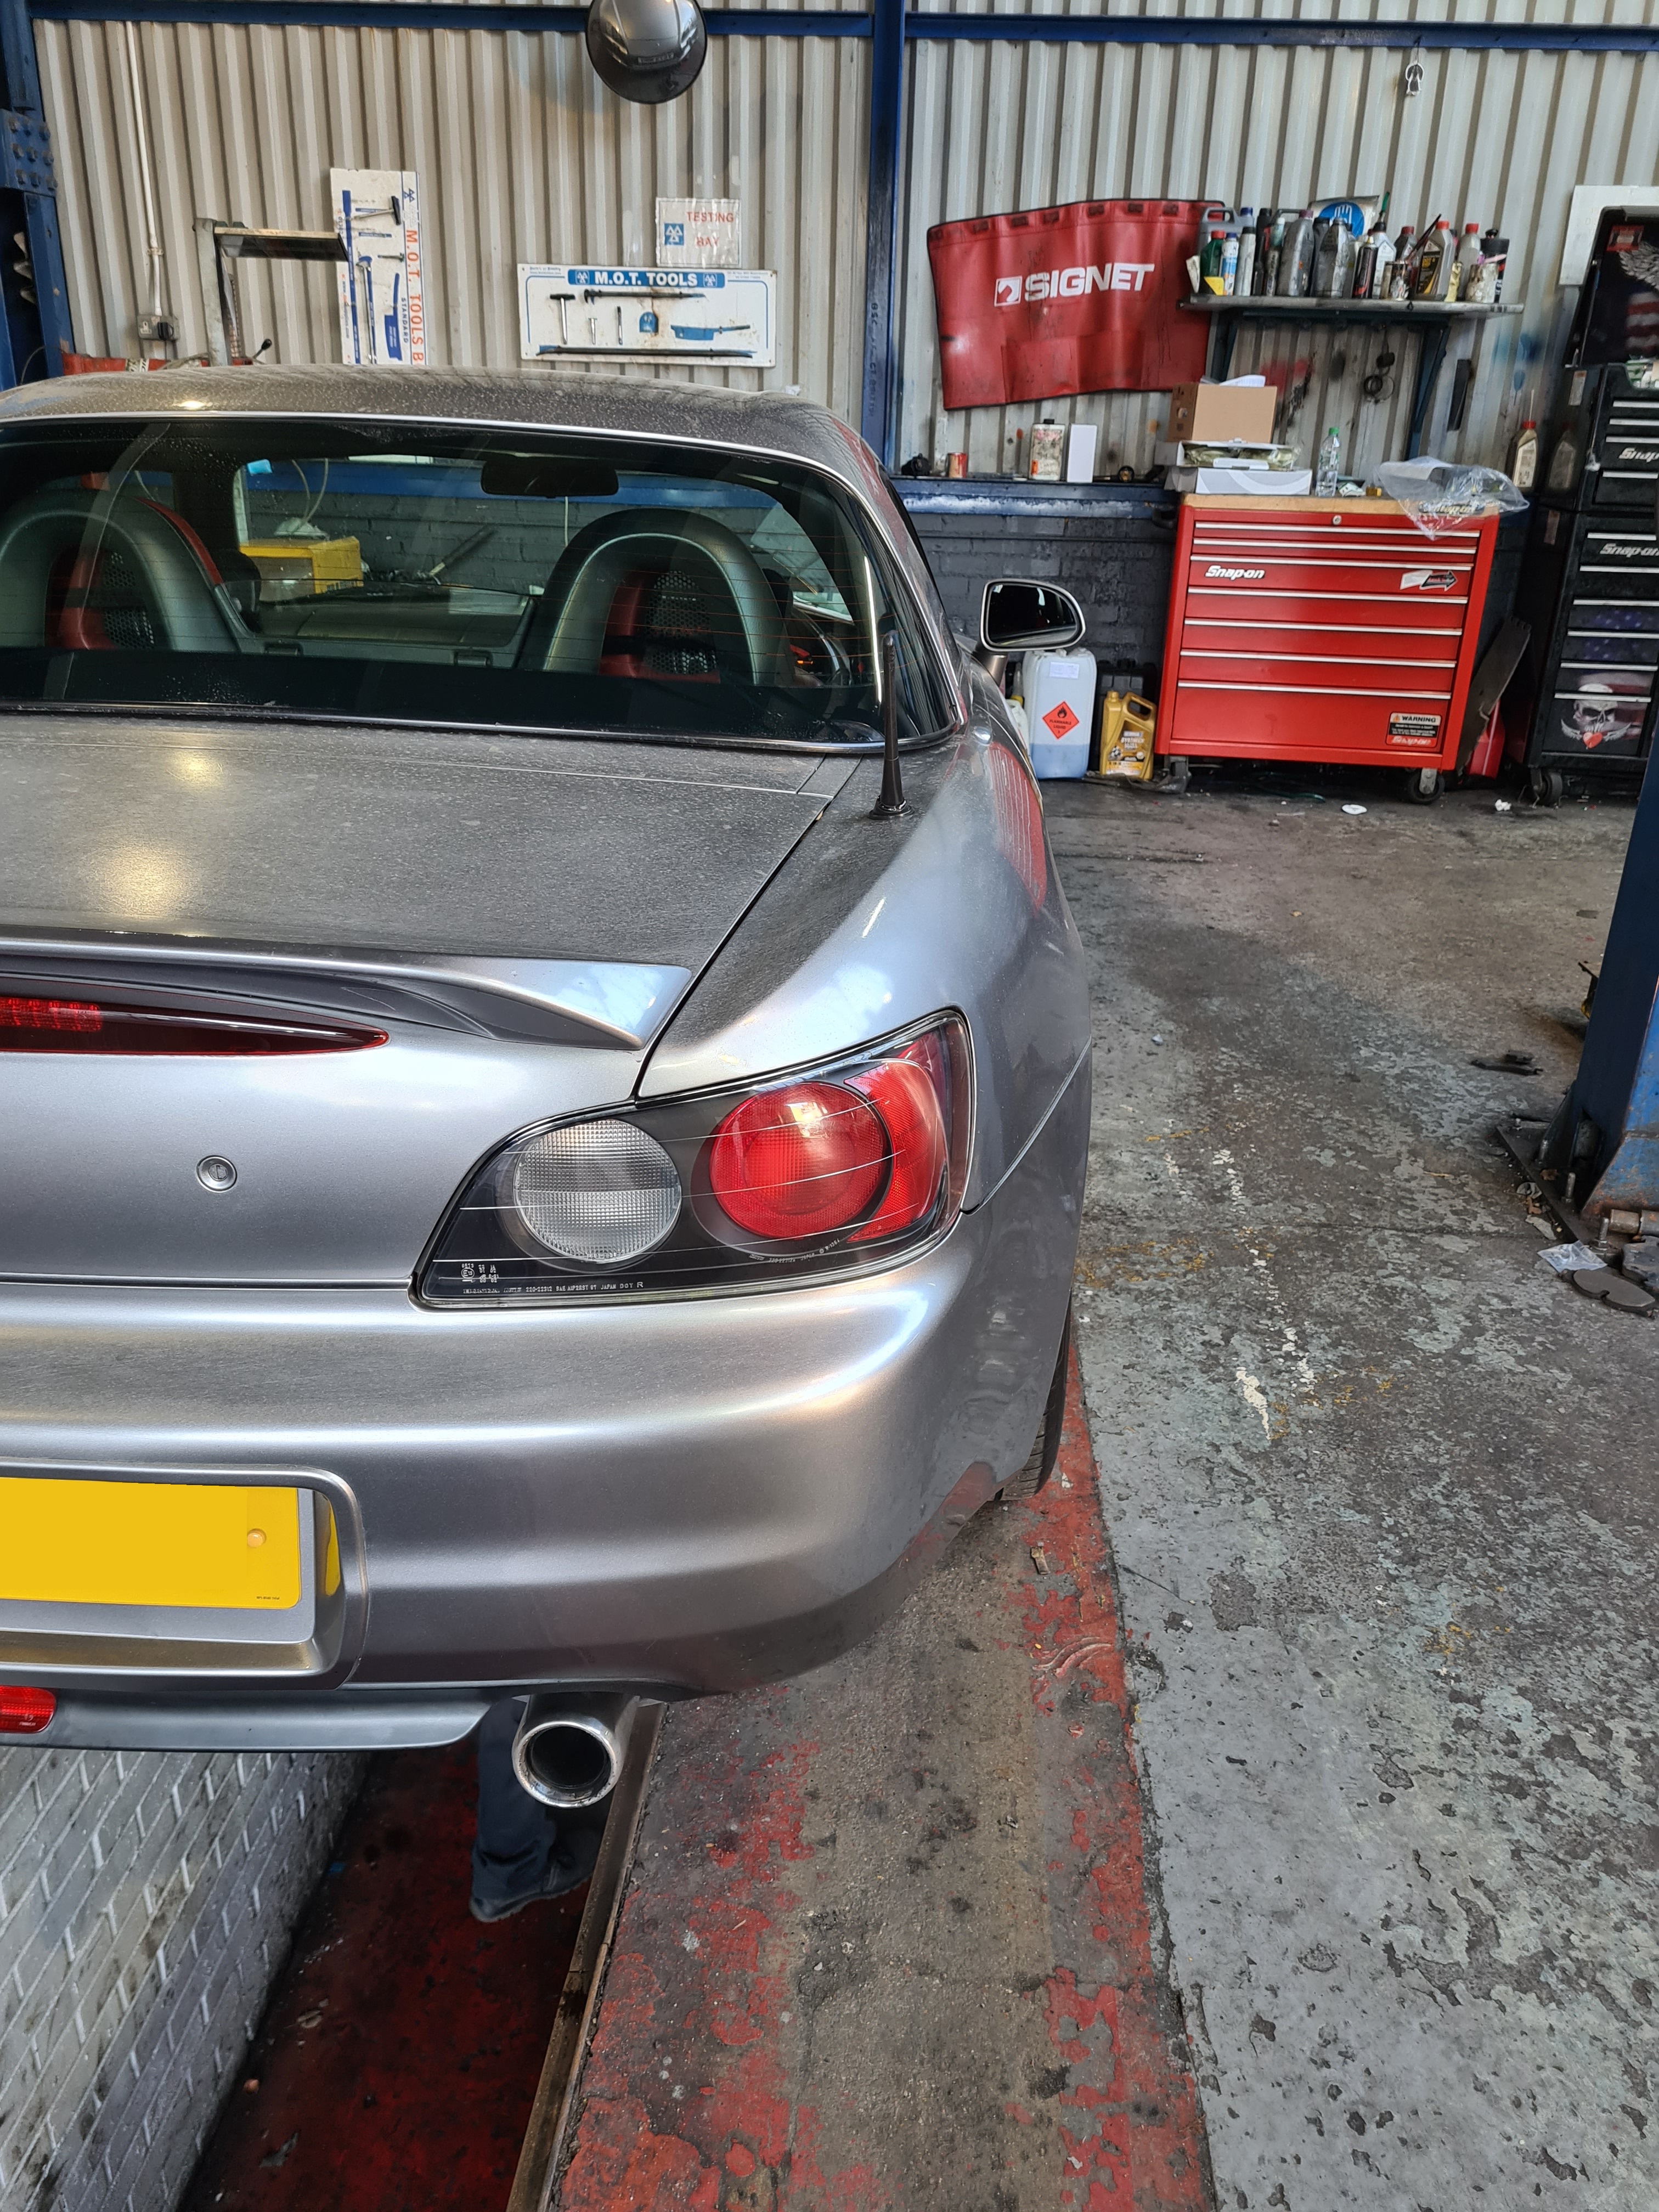
Task 101 – MOT Time
13-03-2022
The next day it was time for the MOT
When a car stands parked for most of the year problems always tend to arise.
Car’s don’t like not being used.
Thankfully being Japanese engineered, Honda’s aren’t too bad with only suffering from rust issues. Haha.
After an hour or so, the tester gave it the all pass.
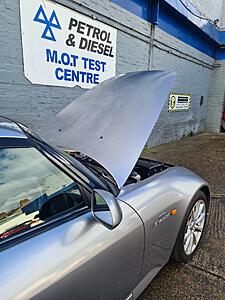
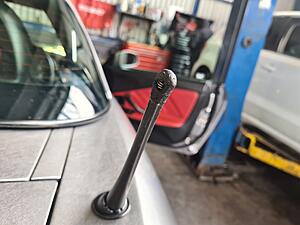
With only a comment of my radio aerial tip being chewed up and lower bottom arch section now starting to rust abit now.
Here’s to another year of magical vtec motoring.
Parts Purchased:
None
Services Used:
None
Resources used
None
-------------------------------------------------------------------------
-------------------------------------------------
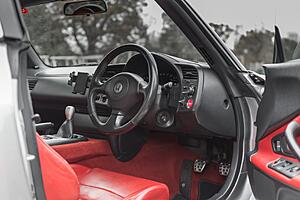
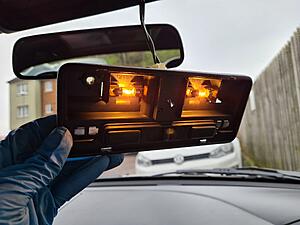
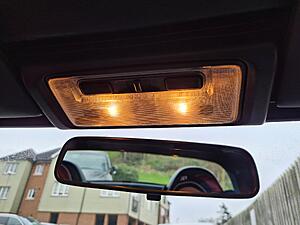
Task 102 – Interior Light Repair
27-03-22
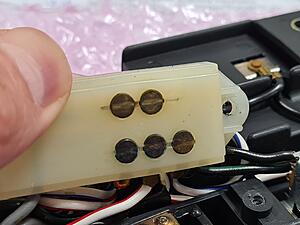
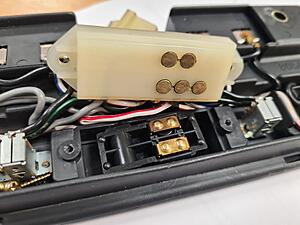
Throughout my s2000 ownership, the cabin interior light had always been somewhat intermittent and occasionally it wouldn’t illuminate.
When sliding the switch to off and door control, the illumination sometimes would not operate.
Replacements for this part is pretty non-existent, and if you did find one, the prices would be extortionate to say the least.
Being Honda, these assemblies are easy to remove and take apart.
On a sunny spring weekend I set about to sort this small issue out.
The assembly was easy to take apart, carefully prying the edges and not scratching the plastic.
The fault was immediately apparent when the slide contacts were exposed.
Carbon like deposits on the surface, causing poor contact and continuity thus causing intermittent operation.
By simply using some fine sand paper and lightly scratching the surface to remove some of the heavy deposits it cleaned up really well.
Once reassembled, full function was restored.
Nice and simple small job completed.
Parts Purchased:
None
Services Used:
None
Resources used
None
-------------------------------------------------------------------------
-------------------------------------------------
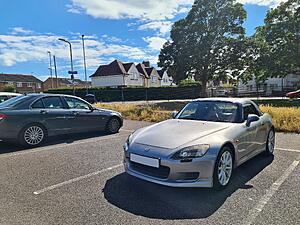
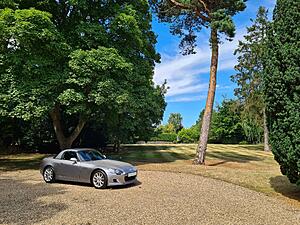
Task 103 – Small Photo Shoot 1
03-04-22
Finally time for the first photoshoot of the year.
I met up with my brother for a few hours at our local park, the usual car chat and photos.

-------------------------------------------------------------------------
-------------------------------------------------
Task 104 – Service Time
15-04-22
Only having done around 2500 miles it was oil change time.
Always love servicing the s2000, it’s so nice to work on with everything being so accessible.
The usual oil and filter changed was performed.
Oil of choice was still Castrol Edge 5w/40 coupled with a genuine Honda
s2000 Oil Filter.
I decided to replace all spark plugs this year even though they were not due.
Having additional extra spare funds to spend on the s2000 this year was nice.
I last changed them back in 2018 when I first got the car.
I managed to get a great price on a genuine Honda air filter for the s2000.
So I decided to get that replaced too.
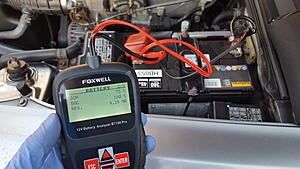
Finally a battery check, using my Foxwell BT100 analyser.
Results shows:
SOH (state of health): 59%
SOC (state of charge): 100%
Measured Cold Cranking Amps: 266 out of 380
Result: Battery replacement recommended
The battery does need replacing, but will schedule a replacement likely end of the year.
All good for another year of driving


Parts Purchased:
Part: Castrol Edge Oil 5W/40 (5 Litres)
Part Number: 5W/40
Supplier: Coxmotorparts
Web:
Part: Genuine Honda Oil Filter
Part Number: 15400-PCX-004
Supplier: Honda247
Part: Genuine Honda Air FIlter
Part Number: 17220PCX003
Supplier: partsperthhondaltd on Ebay
Part: NKG Spark Plugs
Part Number: PFR7G-11S
Supplier: AutopartsWarehouse on Ebay
Services Used:
None
Resources used
None
Equipment Used
Battery Anaylzer
Model: Foxwell BT100
-------------------------------------------------------------------------
-------------------------------------------------
Task 105 – Photoshoot 2
03-07-22
On a lovely sunny afternoon I got a call from my brother saying he had a few hours free, and asked if I wanted a quick drive.
So we decided to meet up locally for a quick vtec blast, some photos and more car chat.
What a machine, the s2000 looks fantastic.


Parts Purchased:
None
Services Used:
None
Resources used
None
-------------------------------------------------------------------------
-------------------------------------------------
Task 106 – Road trip to Portsmouth
10-07-22
Pretty randomly me and my brother decided to take a drive somewhere. Not too far and not too local.
Bournemouth was the choice as it allowed us to drive through the South Downs National Park and have something to eat on the coast.
With a couple of our friends not available, it was just me and my brother.
We set off early morning and we were in Portsmouth within a few hours.
We had reservations at the Briny on the coast for lunch.
We then drove back up the South Downs National Park where we took some quick photos.
We drove so much that day, we didn’t take many photos, overall a very enjoyable trip.
Parts Purchased:
None
Services Used:
None
Resources used
None
-------------------------------------------------------------------------
-------------------------------------------------
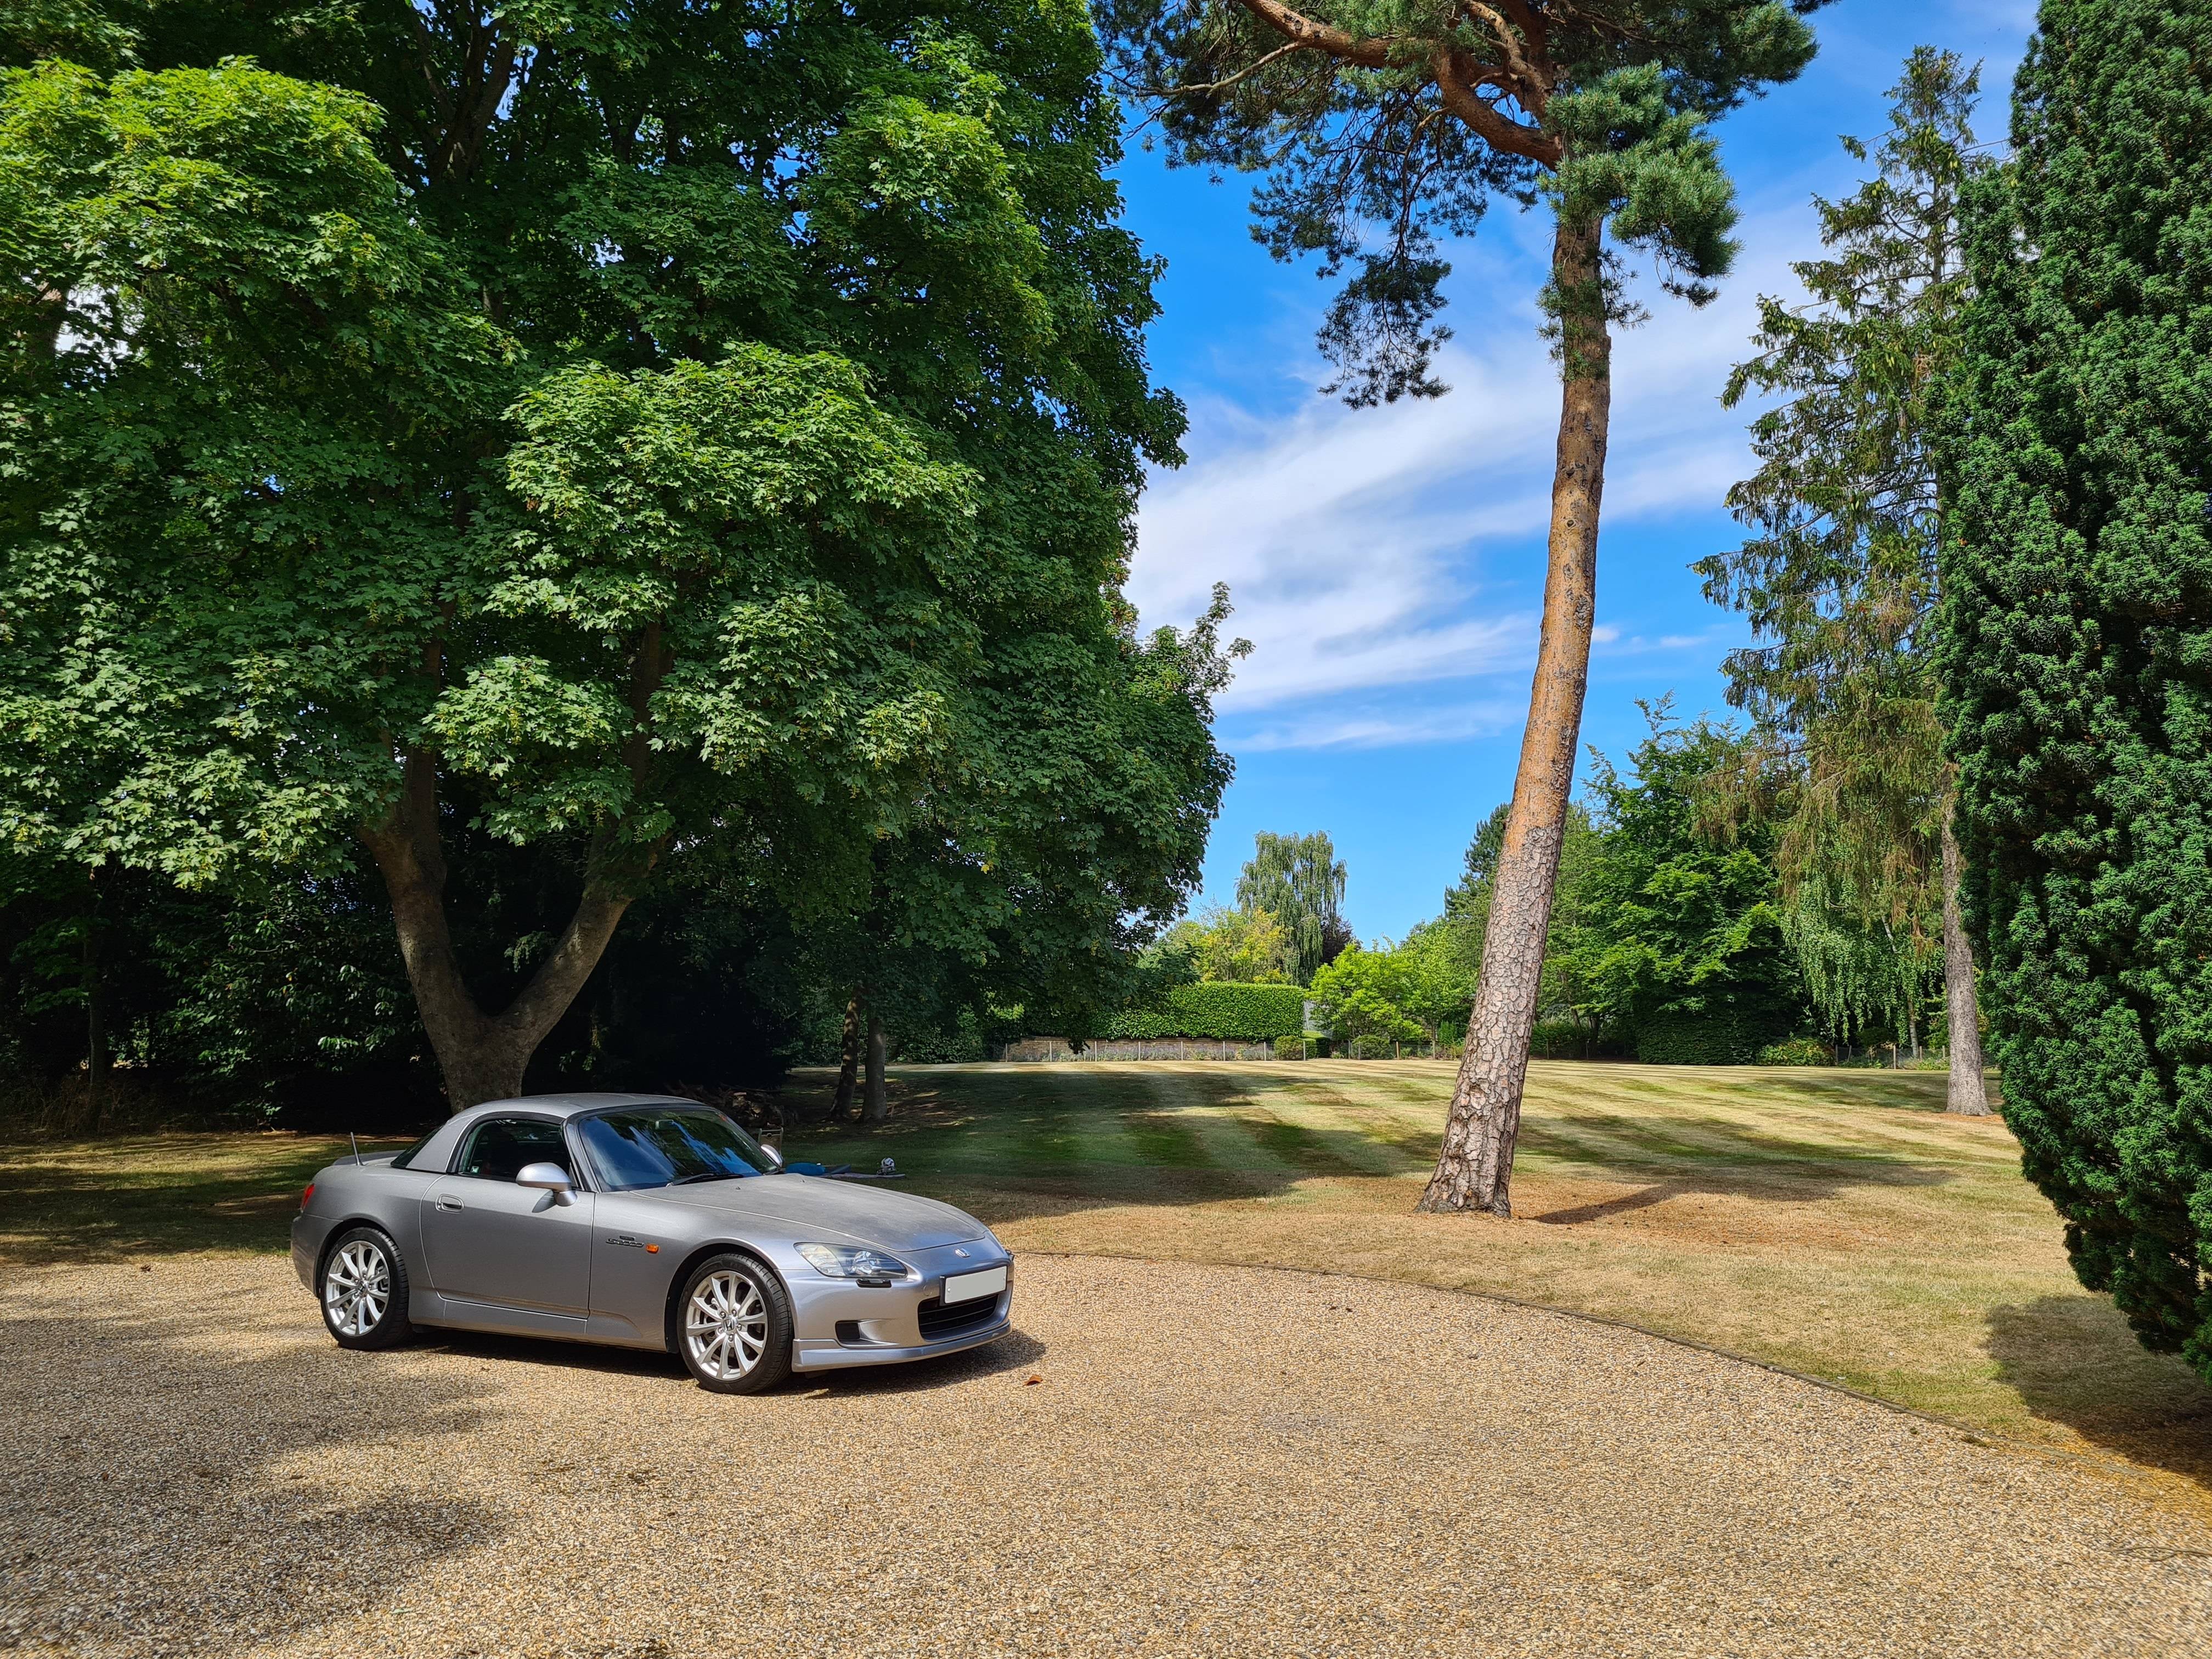
Task 108 – Sister In-Law New Home
23-08-22
A few quick photos at my sisters in-laws new house.
A place many of us dream of owning. A stunning gravel driveway and so much open land.
The rear had a super large double garage too.
A few quick shots of the s2000 on their drive way.
Parts Purchased:
None
Services Used:
None
Resources used
None
-------------------------------------------------------------------------
-------------------------------------------------
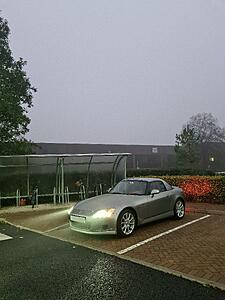
Task 109 – Final Drive of the Year
14-11-22
With the year coming to an end and a warmer than usual November, there was news about a cold snap approaching by this date.
So I decided to take the s2000 for the work commute on a last drive of the year. Not cheap being a 125 mile round trip per day.
It was so enjoyable I drove it to work for the whole week. It cost me a fortune but the smiles per miles were priceless.
This was the last drive of the year, after this date the cold snap and snow came and the roads started to get salted and gritted.
Parts Purchased:
None
Services Used:
None
Resources used
None
-------------------------------------------------------------------------
-------------------------------------------------
End of Year 2022
23-12-22
Another year drawing to a close and with the cost of living crisis and fuel prices on the rise, it’s getting more expensive owning an s2000 these days.
Who knows how long I can keep the s2000 for, so this may well be my last post.
I am now engaged and a small wedding is on the horizon in the new year, the s2000 has now taken a back seat.
The body work and respray is now on the back burner, it seems life has now taken priority which is a shame for the s2000.
Hopefully one day I can get the funds and complete the project, however maintenance will and always be a top priority.
From the limited road trips and drives I have had with the s2000 this year, it has been enjoyable as ever.
A super reliable sports car, always starts and dependable giving you those smiles every time vtec kicks in.
Even with the crazy fuel prices, here's to more adventures in 2023.
Thanks for reading guys
23-12-22
Another year of s2000 ownership is almost done.
With Covid now passed, cost of living and fuel prices continue to plague us.
The s2000 hasn’t really been any trouble at all and proving to be such a reliable machine usually sitting in its parking spot for most of the year.
The body work is getting worse though.
It really does need a new paint job, although relationship and life commitments have now put this on the back burner.
Even with the high fuel prices I managed to enjoy the s2000 this year.
Again, not as much as I hoped, it really isn’t cheap to run the s2000 anymore.
A very small update to summarise the year, but I wanted to add and keep this thread going.
-------------------------------------------------------------------------
-------------------------------------------------
Task 100 – Deep Clean and MOT Prep
11-03-2022
Similar to last year the s2000 never saw any action throughout the winter months, with only
giving her a quick wash every other week.
I didn’t want to expose the s2000 to the winter road salt unless I really had too. (i.e. emergency car for work)
Not being parked under a tree anymore in my previous place, the s2000 doesn’t get too dirty now.
A full deep clean was performed including all the rear boot gutters too.
The F20 engine struggled to fire up due to the battery being rather weak.
A lovely spring weekend to get her deep cleaned.
She is now all ready for her MOT test.


Parts Purchased:
None
Services Used:
None
Resources used
None
-------------------------------------------------------------------------
-------------------------------------------------
Task 101 – MOT Time
13-03-2022
The next day it was time for the MOT
When a car stands parked for most of the year problems always tend to arise.
Car’s don’t like not being used.
Thankfully being Japanese engineered, Honda’s aren’t too bad with only suffering from rust issues. Haha.
After an hour or so, the tester gave it the all pass.
With only a comment of my radio aerial tip being chewed up and lower bottom arch section now starting to rust abit now.
Here’s to another year of magical vtec motoring.


Parts Purchased:
None
Services Used:
None
Resources used
None
-------------------------------------------------------------------------
-------------------------------------------------
Task 102 – Interior Light Repair
27-03-22
Throughout my s2000 ownership, the cabin interior light had always been somewhat intermittent and occasionally it wouldn’t illuminate.
When sliding the switch to off and door control, the illumination sometimes would not operate.
Replacements for this part is pretty non-existent, and if you did find one, the prices would be extortionate to say the least.
Being Honda, these assemblies are easy to remove and take apart.
On a sunny spring weekend I set about to sort this small issue out.
The assembly was easy to take apart, carefully prying the edges and not scratching the plastic.
The fault was immediately apparent when the slide contacts were exposed.
Carbon like deposits on the surface, causing poor contact and continuity thus causing intermittent operation.
By simply using some fine sand paper and lightly scratching the surface to remove some of the heavy deposits it cleaned up really well.
Once reassembled, full function was restored.
Nice and simple small job completed.


Parts Purchased:
None
Services Used:
None
Resources used
None
-------------------------------------------------------------------------
-------------------------------------------------
Task 103 – Small Photo Shoot 1
03-04-22
Finally time for the first photoshoot of the year.
I met up with my brother for a few hours at our local park, the usual car chat and photos.


-------------------------------------------------------------------------
-------------------------------------------------
Task 104 – Service Time
15-04-22
Only having done around 2500 miles it was oil change time.
Always love servicing the s2000, it’s so nice to work on with everything being so accessible.
The usual oil and filter changed was performed.
Oil of choice was still Castrol Edge 5w/40 coupled with a genuine Honda
s2000 Oil Filter.
I decided to replace all spark plugs this year even though they were not due.
Having additional extra spare funds to spend on the s2000 this year was nice.
I last changed them back in 2018 when I first got the car.
I managed to get a great price on a genuine Honda air filter for the s2000.
So I decided to get that replaced too.
Finally a battery check, using my Foxwell BT100 analyser.
Results shows:
SOH (state of health): 59%
SOC (state of charge): 100%
Measured Cold Cranking Amps: 266 out of 380
Result: Battery replacement recommended
The battery does need replacing, but will schedule a replacement likely end of the year.
All good for another year of driving


Parts Purchased:
Part: Castrol Edge Oil 5W/40 (5 Litres)
Part Number: 5W/40
Supplier: Coxmotorparts
Web:
Part: Genuine Honda Oil Filter
Part Number: 15400-PCX-004
Supplier: Honda247
Part: Genuine Honda Air FIlter
Part Number: 17220PCX003
Supplier: partsperthhondaltd on Ebay
Part: NKG Spark Plugs
Part Number: PFR7G-11S
Supplier: AutopartsWarehouse on Ebay
Services Used:
None
Resources used
None
Equipment Used
Battery Anaylzer
Model: Foxwell BT100
-------------------------------------------------------------------------
-------------------------------------------------
Task 105 – Photoshoot 2
03-07-22
On a lovely sunny afternoon I got a call from my brother saying he had a few hours free, and asked if I wanted a quick drive.
So we decided to meet up locally for a quick vtec blast, some photos and more car chat.
What a machine, the s2000 looks fantastic.


Parts Purchased:
None
Services Used:
None
Resources used
None
-------------------------------------------------------------------------
-------------------------------------------------
Task 106 – Road trip to Portsmouth
10-07-22
Pretty randomly me and my brother decided to take a drive somewhere. Not too far and not too local.
Bournemouth was the choice as it allowed us to drive through the South Downs National Park and have something to eat on the coast.
With a couple of our friends not available, it was just me and my brother.
We set off early morning and we were in Portsmouth within a few hours.
We had reservations at the Briny on the coast for lunch.
We then drove back up the South Downs National Park where we took some quick photos.
We drove so much that day, we didn’t take many photos, overall a very enjoyable trip.


Parts Purchased:
None
Services Used:
None
Resources used
None
-------------------------------------------------------------------------
-------------------------------------------------
Task 108 – Sister In-Law New Home
23-08-22
A few quick photos at my sisters in-laws new house.
A place many of us dream of owning. A stunning gravel driveway and so much open land.
The rear had a super large double garage too.
A few quick shots of the s2000 on their drive way.


Parts Purchased:
None
Services Used:
None
Resources used
None
-------------------------------------------------------------------------
-------------------------------------------------
Task 109 – Final Drive of the Year
14-11-22
With the year coming to an end and a warmer than usual November, there was news about a cold snap approaching by this date.
So I decided to take the s2000 for the work commute on a last drive of the year. Not cheap being a 125 mile round trip per day.
It was so enjoyable I drove it to work for the whole week. It cost me a fortune but the smiles per miles were priceless.
This was the last drive of the year, after this date the cold snap and snow came and the roads started to get salted and gritted.

Parts Purchased:
None
Services Used:
None
Resources used
None
-------------------------------------------------------------------------
-------------------------------------------------
End of Year 2022
23-12-22
Another year drawing to a close and with the cost of living crisis and fuel prices on the rise, it’s getting more expensive owning an s2000 these days.
Who knows how long I can keep the s2000 for, so this may well be my last post.
I am now engaged and a small wedding is on the horizon in the new year, the s2000 has now taken a back seat.
The body work and respray is now on the back burner, it seems life has now taken priority which is a shame for the s2000.
Hopefully one day I can get the funds and complete the project, however maintenance will and always be a top priority.
From the limited road trips and drives I have had with the s2000 this year, it has been enjoyable as ever.
A super reliable sports car, always starts and dependable giving you those smiles every time vtec kicks in.
Even with the crazy fuel prices, here's to more adventures in 2023.
Thanks for reading guys
23-12-22
The following users liked this post:
martin j (12-23-2022)
12-24-2022, 02:34 PM
#63

Very detailed thread. The way you take photos makes me think they are US rather than here, no idea what gives me that impression
Just store it over winter, I do that with my stock ish one. Saves a few £ when you aren't driving it so much
Just store it over winter, I do that with my stock ish one. Saves a few £ when you aren't driving it so much
The following users liked this post:
rizzllzahid (12-24-2022)
12-28-2022, 06:57 AM
#64
Registered User
Thread Starter
Very detailed thread. The way you take photos makes me think they are US rather than here, no idea what gives me that impression
Just store it over winter, I do that with my stock ish one. Saves a few £ when you aren't driving it so much
Just store it over winter, I do that with my stock ish one. Saves a few £ when you aren't driving it so much
haha - Your not the only one who said that to me about the photos making the car look like a US model.
I was thinking about storage. If the car was super mint and low mileage then maybe I would, but storage is quite expensive in my area

 12-30-2022, 01:11 PM
#66

I paid £100 a month at boxedclassics, there are many similar places
My own car, 2001, 60k, was probably worth £5k at one point several years ago, £14k now. They are appreciating so net.. who knows?
Pisses me off I now have a single garage and no space to change it. I want them both out of the weather
Good S2000s are only getting rarer.. a mint low miles one is now worth more than it cost new

Thread
Thread Starter
Forum
Replies
Last Post
rukawa88
California - Bay Area S2000 Owners
0
10-23-2002 03:53 PM