DIY wiring install for fog lights
 02-26-2012, 06:02 AM
#1
Registered User

Thread Starter

Join Date: May 2011
Posts: 170
Likes: 0
Received 0 Likes
on
0 Posts
I was wondering if anybody is able to provide a DIY on how to install fog lights (hope this is the right subforum).
I bought the oddyssey fogs, have the fogs installed into the bumper, but have no idea what to do with the wiring.
Help please !
I bought the oddyssey fogs, have the fogs installed into the bumper, but have no idea what to do with the wiring.
Help please !

 02-26-2012, 08:58 AM
#3
I did a custom system on mine using LED's (mainly for DRL purpose), but your odyssey system should come with all the wiring, fuses , relays, fuses, and switches ?.
On mine I affixed the lights on the front bumper, I ran a ground and power wire from the two lights from the bumper through the engine bay and through the firewall rubber grommet that is just above the pedals in the underdash driver side. I attached the ground wire from the lights to one of the many ground areas underdash (a few to choose from). I installed an aftermarket switch on the dash. The power wire from the lights plugged into the switch, and I ran a power wire from the switch to the spare 12v ignition spade in the underdash driver side fuse box. The underdash fuse box driver side has 3 spare spades, one is a 12-volt source 24/7, one is a 12-volt source while the ignition is on only, and one is a ground. The three spare spades are already fused but I have a fuse in the wiring of the lights as well. That is all I needed, simple and works as needed.
On mine I affixed the lights on the front bumper, I ran a ground and power wire from the two lights from the bumper through the engine bay and through the firewall rubber grommet that is just above the pedals in the underdash driver side. I attached the ground wire from the lights to one of the many ground areas underdash (a few to choose from). I installed an aftermarket switch on the dash. The power wire from the lights plugged into the switch, and I ran a power wire from the switch to the spare 12v ignition spade in the underdash driver side fuse box. The underdash fuse box driver side has 3 spare spades, one is a 12-volt source 24/7, one is a 12-volt source while the ignition is on only, and one is a ground. The three spare spades are already fused but I have a fuse in the wiring of the lights as well. That is all I needed, simple and works as needed.
02-26-2012, 12:49 PM
#5
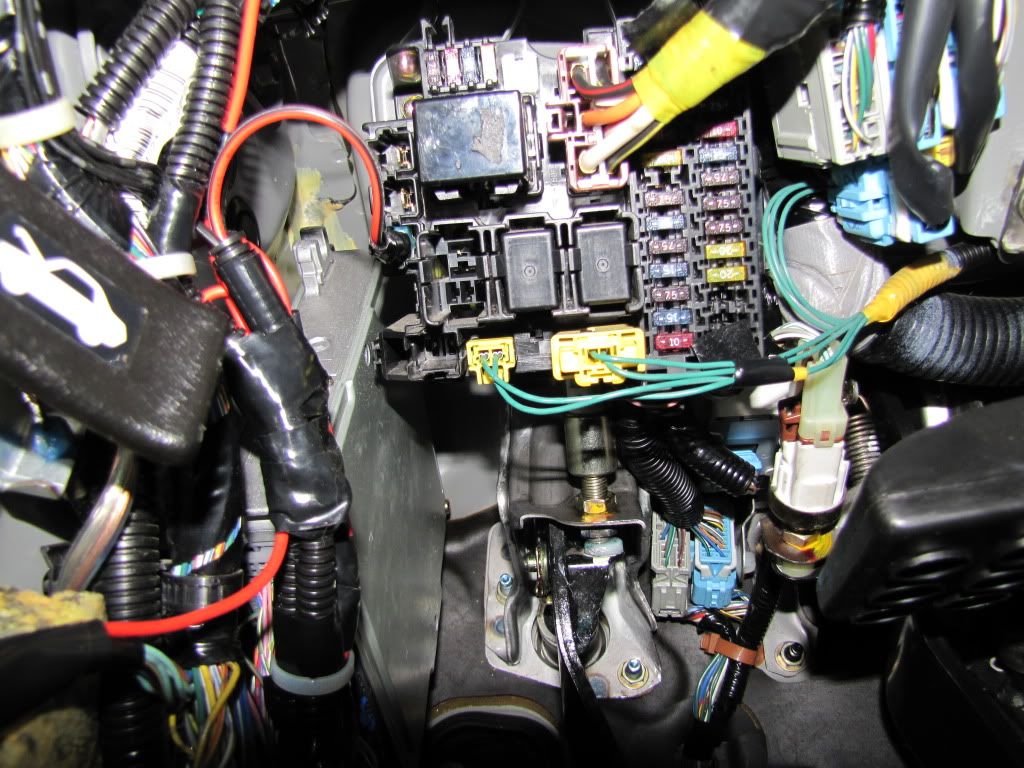
Here are some pics below. In the first pic you will see my red/black (black stripe) power wire that runs from the spare fuse slot power supply up to my dash mounted switch. Just above the slot that I am using there are two other spare slots. The one I'm using is 12 volts with ignition in the on position. The other slot is ground, and the third slot is 12 volts 24/7 even with ignition off (so you don't want to use that one). The pic is looking up from under the driver side dash.

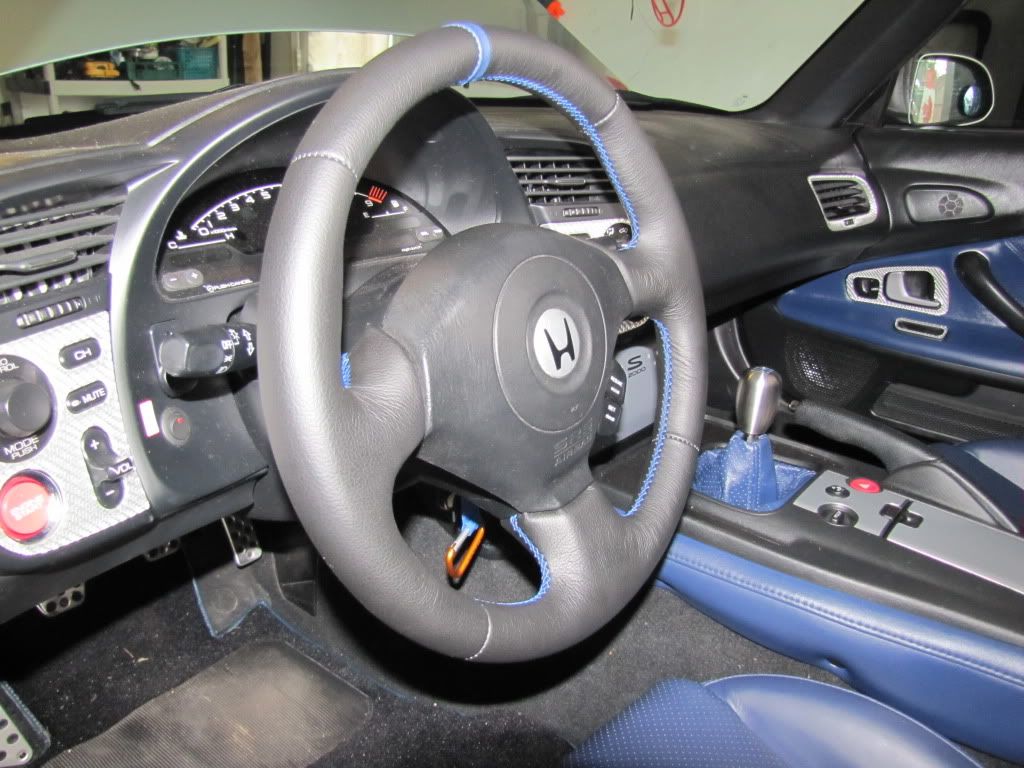
Here is a pic of where I have mounted my switch currently, hidden and out of the way, suits me fine. The positive wire from the lights runs to the dash mounted switch, the ground wire from the lights bolted to a ground location under dash.

Once you get the bumper removed an out of the way you will see that it is fairly easy to run wiring. Run the wires around the air pump (ap1) driver side corner which allows the wiring to pop up beside the coolant overflow tank. I then ran the wiring along the driver side engine bay, around the cruise control module, around the shock tower, abs pump, and down to the rubber grommet driver side firewall, into the driver side underdash cabin area. I think it took me at least 12 feet of wiring to cross the bumper and through the engine bay and do the underdash fuse panel and dashboard.
To get the wiring from the engine bay through the firewall rubber grommet plug I just used a drill to drill a hole through the rubber, I then taped the engine bay wiring to a piece of metal coat hanger, then I inserted the coat hanger through the rubber grommet and exiting into the underdash driver location just above the pedals. I was then able to pull all of the wiring through the firewall. I put in a good blob of silicone sealant around the grommet once I was all done to keep it weather-sealed.
This is a Pic of my bumper wiring
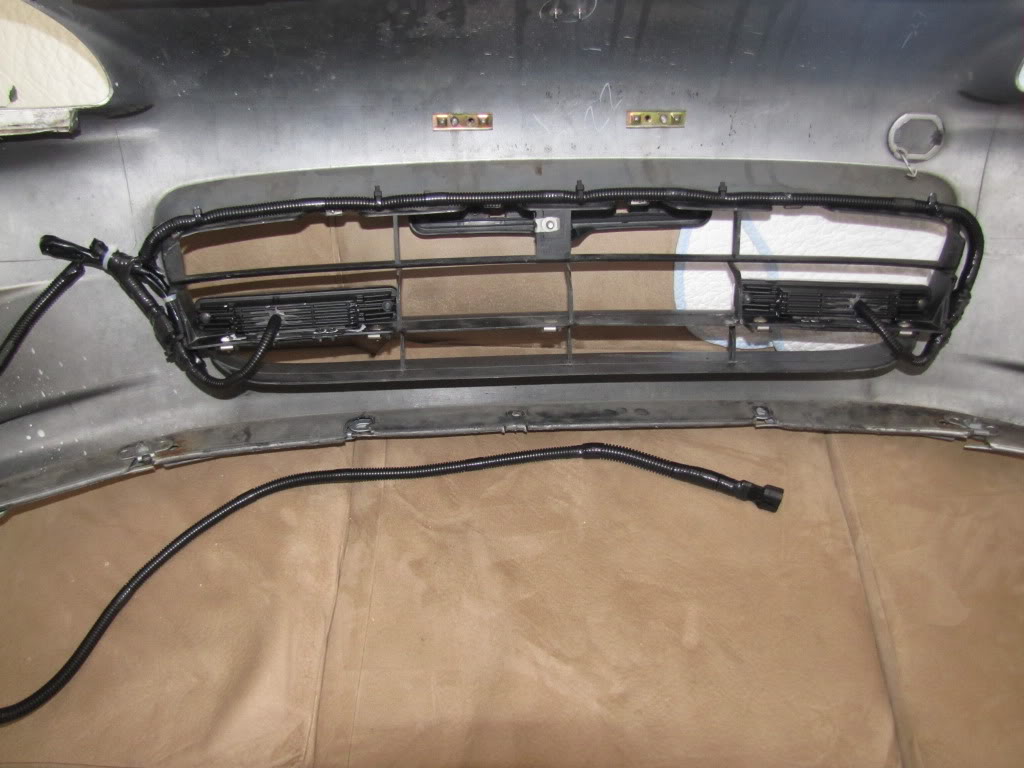
My finished product below, these are meant to be my DRL lights, not fogs. My setup will be different than yours but the basic principles are the same, use lots of wire ties, electrical tape, plastic wiring loom to keep things neat, tight, and tidy. Good luck.

Here is a pic of where I have mounted my switch currently, hidden and out of the way, suits me fine. The positive wire from the lights runs to the dash mounted switch, the ground wire from the lights bolted to a ground location under dash.
Once you get the bumper removed an out of the way you will see that it is fairly easy to run wiring. Run the wires around the air pump (ap1) driver side corner which allows the wiring to pop up beside the coolant overflow tank. I then ran the wiring along the driver side engine bay, around the cruise control module, around the shock tower, abs pump, and down to the rubber grommet driver side firewall, into the driver side underdash cabin area. I think it took me at least 12 feet of wiring to cross the bumper and through the engine bay and do the underdash fuse panel and dashboard.
To get the wiring from the engine bay through the firewall rubber grommet plug I just used a drill to drill a hole through the rubber, I then taped the engine bay wiring to a piece of metal coat hanger, then I inserted the coat hanger through the rubber grommet and exiting into the underdash driver location just above the pedals. I was then able to pull all of the wiring through the firewall. I put in a good blob of silicone sealant around the grommet once I was all done to keep it weather-sealed.
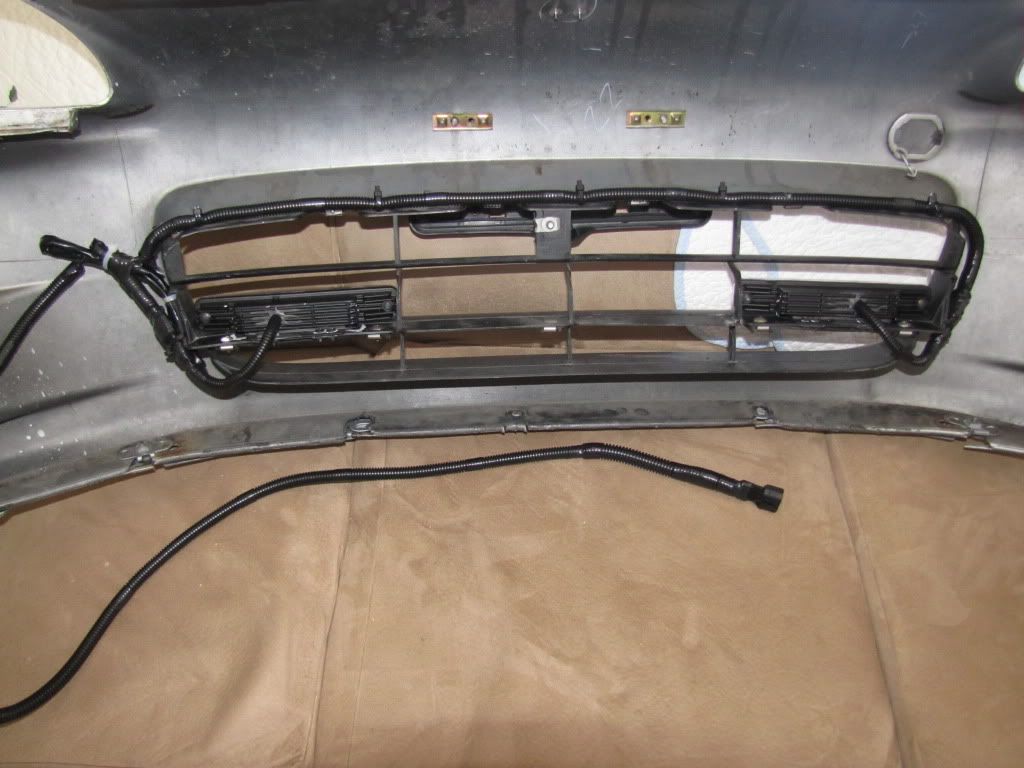
This is a Pic of my bumper wiring
My finished product below, these are meant to be my DRL lights, not fogs. My setup will be different than yours but the basic principles are the same, use lots of wire ties, electrical tape, plastic wiring loom to keep things neat, tight, and tidy. Good luck.
02-26-2012, 04:48 PM
#6
Registered User
Join Date: Oct 2011
Posts: 215
Likes: 0
Received 0 Likes
on
0 Posts
Thanks for the DIY! I honestly didnt know about the 12v slots...I've always had ugly wires going through my engine bay to the battery. I cant wait to get my fogs! Gonna get some Odyssey ones. Not sure if I want yellow or clear lenses though. If clear, I'll do yellow lights. (Silverstone AP1)
02-26-2012, 05:13 PM
#7
Originally Posted by ans2k' timestamp='1330289392' post='21452886
Can you a picture of which fuses in the fuse box you are referring to?
Here is a pic of where I have mounted my switch currently, hidden and out of the way, suits me fine. The positive wire from the lights runs to the dash mounted switch, the ground wire from the lights bolted to a ground location under dash. The other pic below is where I had my switch mounted previously but I have since moved it lower, bottom portion of dash.

Once you get the bumper removed an out of the way you will see that it is fairly easy to run wiring. Run the wires around the air pump (ap1) driver side corner which allows the wiring to pop up beside the coolant overflow tank. I then ran the wiring along the driver side engine bay, around the cruise control module, around the shock tower, abs pump, and down to the rubber grommet driver side firewall, into the driver side underdash cabin area. I think it took me at least 12 feet of wiring to cross the bumper and through the engine bay and do the underdash fuse panel and dashboard.
To get the wiring from the engine bay through the firewall rubber grommet plug I just used a drill to drill a hole through the rubber, I then taped the engine bay wiring to a piece of metal coat hanger, then I inserted the coat hanger through the rubber grommet and exiting into the underdash driver location just above the pedals. I was then able to pull all of the wiring through the firewall. I put in a good blob of silicone sealant around the grommet once I was all done to keep it weather-sealed.
This is a Pic of my bumper wiring
My finished product below, these are meant to be my DRL lights, not fogs. My setup will be different than yours but the basic principles are the same, use lots of wire ties, electrical tape, plastic wiring loom to keep things neat, tight, and tidy. Good luck.

Trending Topics
02-26-2012, 05:49 PM
#8
Originally Posted by JFUSION' timestamp='1330292980' post='21453035
[quote name='ans2k' timestamp='1330289392' post='21452886']
Can you a picture of which fuses in the fuse box you are referring to?
Can you a picture of which fuses in the fuse box you are referring to?
Here is a pic of where I have mounted my switch currently, hidden and out of the way, suits me fine. The positive wire from the lights runs to the dash mounted switch, the ground wire from the lights bolted to a ground location under dash. The other pic below is where I had my switch mounted previously but I have since moved it lower, bottom portion of dash.
Once you get the bumper removed an out of the way you will see that it is fairly easy to run wiring. Run the wires around the air pump (ap1) driver side corner which allows the wiring to pop up beside the coolant overflow tank. I then ran the wiring along the driver side engine bay, around the cruise control module, around the shock tower, abs pump, and down to the rubber grommet driver side firewall, into the driver side underdash cabin area. I think it took me at least 12 feet of wiring to cross the bumper and through the engine bay and do the underdash fuse panel and dashboard.
To get the wiring from the engine bay through the firewall rubber grommet plug I just used a drill to drill a hole through the rubber, I then taped the engine bay wiring to a piece of metal coat hanger, then I inserted the coat hanger through the rubber grommet and exiting into the underdash driver location just above the pedals. I was then able to pull all of the wiring through the firewall. I put in a good blob of silicone sealant around the grommet once I was all done to keep it weather-sealed.
This is a Pic of my bumper wiring
My finished product below, these are meant to be my DRL lights, not fogs. My setup will be different than yours but the basic principles are the same, use lots of wire ties, electrical tape, plastic wiring loom to keep things neat, tight, and tidy. Good luck.
[/quote]
The spare fuse box slots have a male metal spade in them, so you just put on a female wire connector on the end of the wire and it will then just slide onto the male fuse box spade. I can't remember exactly what size they are but it is a pretty standard size, if I can find some extra ones lying around my place I'll post them up.

Thread
Thread Starter
Forum
Replies
Last Post