

DIY: Door Window Moulding


Thread Starter
Joined: Jun 2012
Posts: 646
Likes: 8
From: Lombard, IL
Tired of your friends pointing out your worn window mouldings??
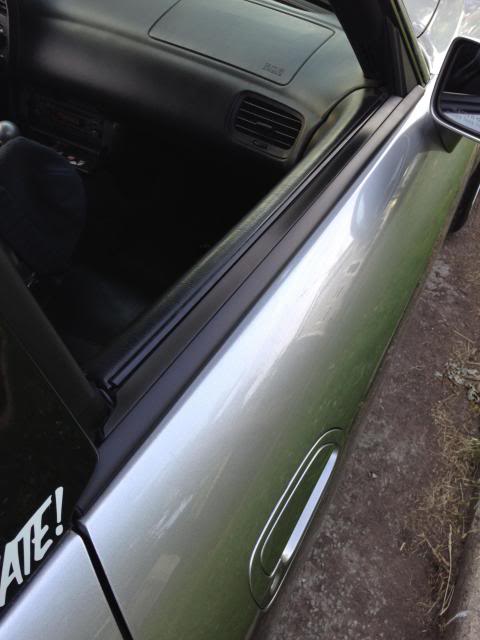
After a couple years of daily driving your S2000, you may have experienced the fading/wear of your window door moulding. Also, I believe the previous owner tried to remove these when he had the car resprayed so most of the clips on the driver's side were already broken. Here is a DIY on how to replace it, however easy it may be.
Total removal/install time: approximately 20 minutes.
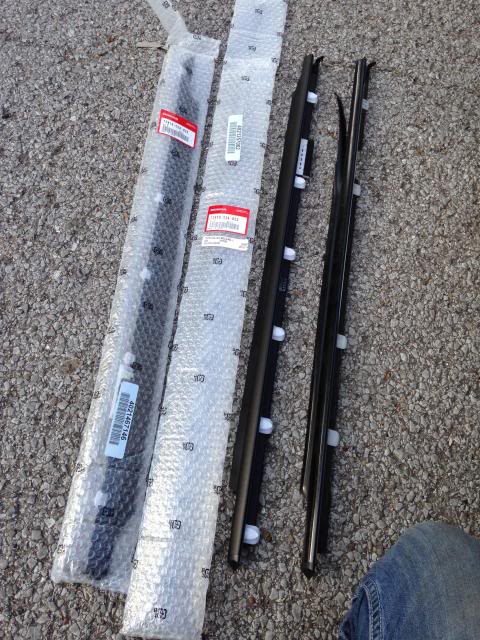
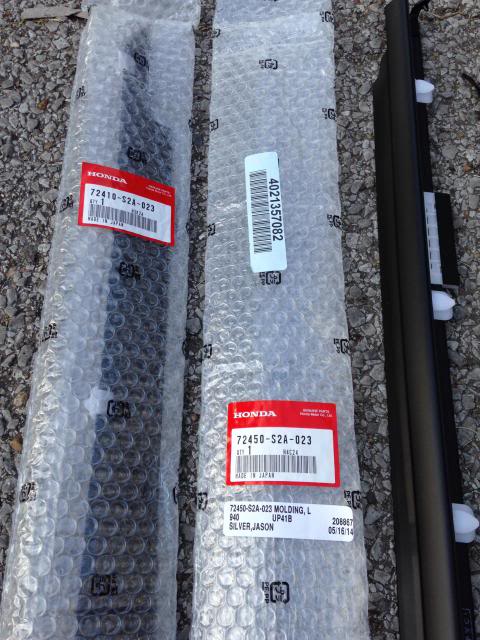
Tools needed: flat head screwdriver, Some detailer/cleaning solution (optional), Seals from honda. Part #s- 72410S2A023 and 72450S2A023
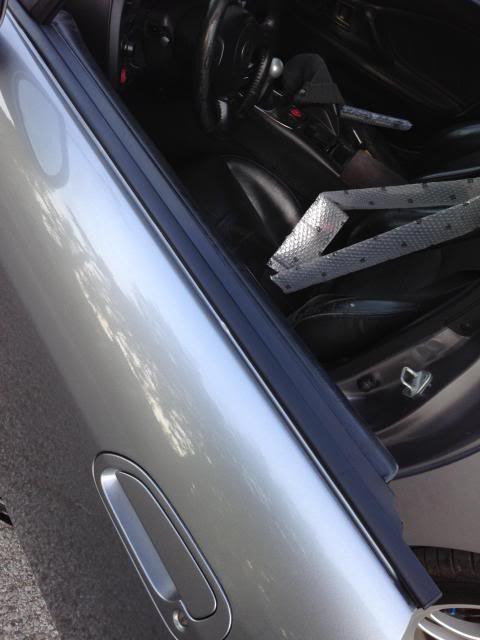
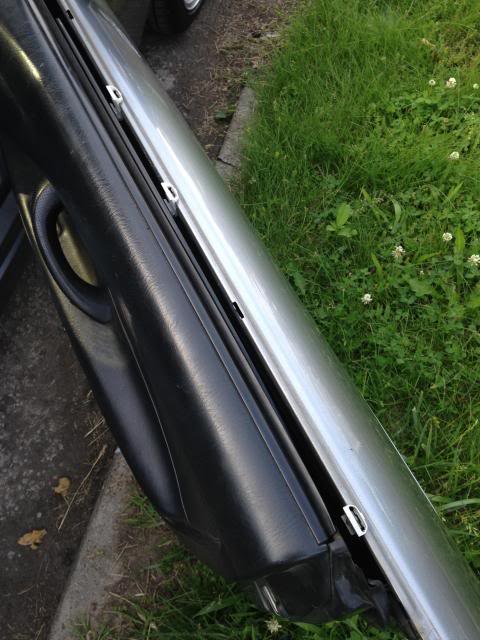
This is the seal I am referring to


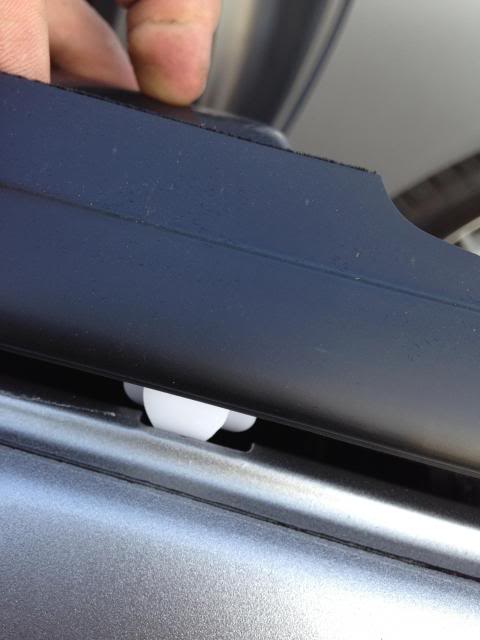
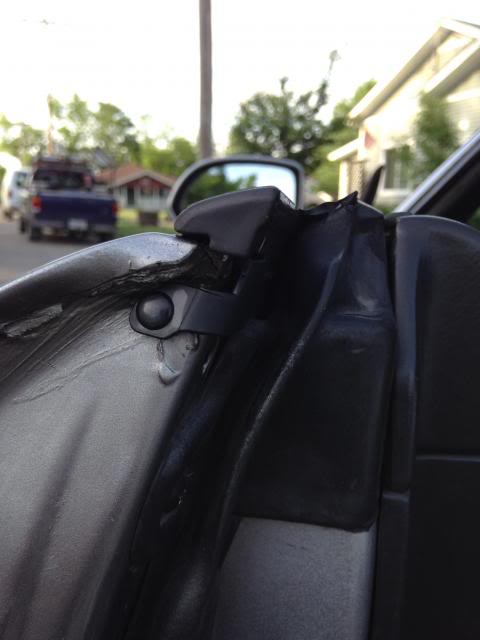
First thing is to remove the circular tab at the end of the strip (latch side of the door) Just use your flat head screwdriver.
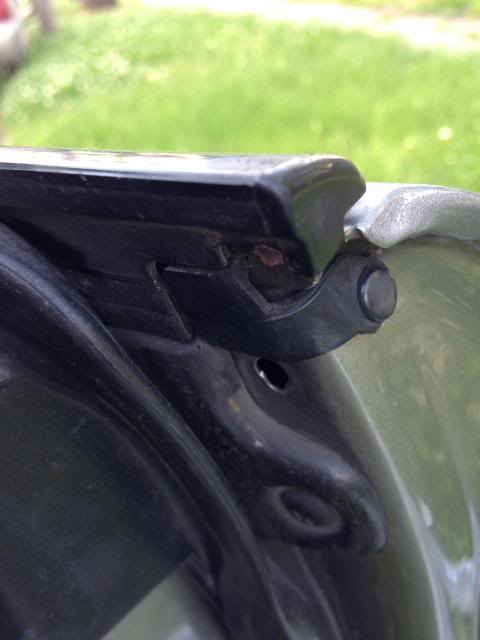
(I switched to the driver's side because it was easiest and I wanted to use the extra looseness to ensure I was doing it correctly)
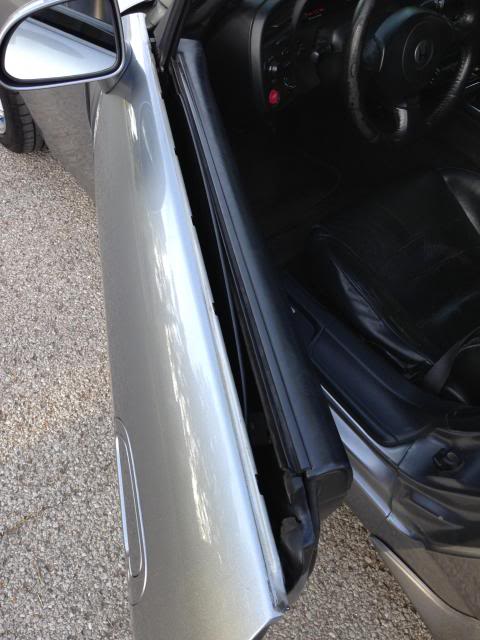
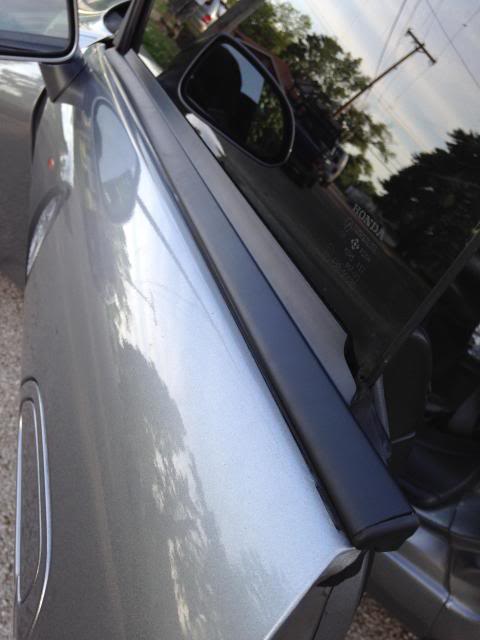
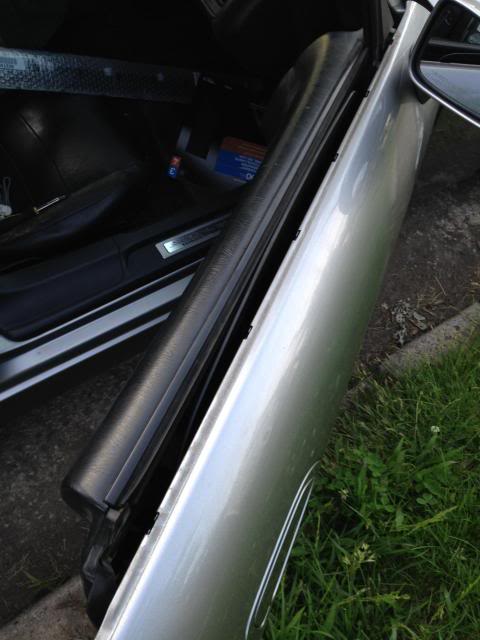
Grab the seal and pull straight up. DON'T WORRY!! Yank that sucker right up. Any snapping you may hear is just the old clips breaking. You won't be reusing these. Just retrieve the remnants later one when you have the door panel off. New clips come already on the new moulding.
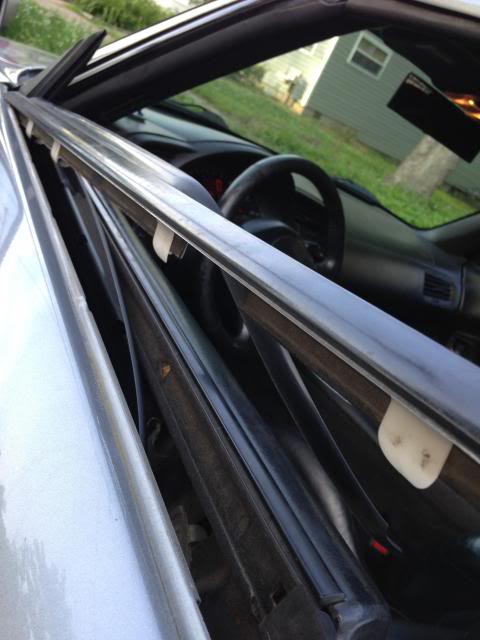
Seal removed. Now is the time to use that cleaning solution to clean the years of road grime that was trapped underneath.
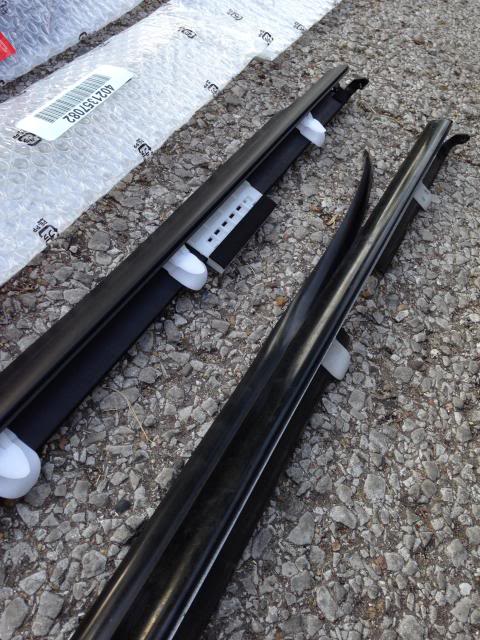
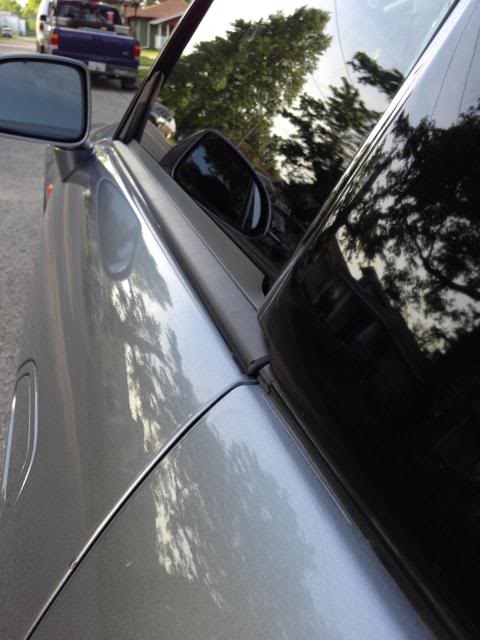
New moulding compared to the old moulding
contd...
After a couple years of daily driving your S2000, you may have experienced the fading/wear of your window door moulding. Also, I believe the previous owner tried to remove these when he had the car resprayed so most of the clips on the driver's side were already broken. Here is a DIY on how to replace it, however easy it may be.
Total removal/install time: approximately 20 minutes.
Tools needed: flat head screwdriver, Some detailer/cleaning solution (optional), Seals from honda. Part #s- 72410S2A023 and 72450S2A023
This is the seal I am referring to


First thing is to remove the circular tab at the end of the strip (latch side of the door) Just use your flat head screwdriver.

(I switched to the driver's side because it was easiest and I wanted to use the extra looseness to ensure I was doing it correctly)
Grab the seal and pull straight up. DON'T WORRY!! Yank that sucker right up. Any snapping you may hear is just the old clips breaking. You won't be reusing these. Just retrieve the remnants later one when you have the door panel off. New clips come already on the new moulding.

Seal removed. Now is the time to use that cleaning solution to clean the years of road grime that was trapped underneath.

New moulding compared to the old moulding

contd...
Thread Starter
Joined: Jun 2012
Posts: 646
Likes: 8
From: Lombard, IL
New mouldings
As you can see, mine didn't even have the brush for holding the glass from rattling. (I think that's what it's used for)
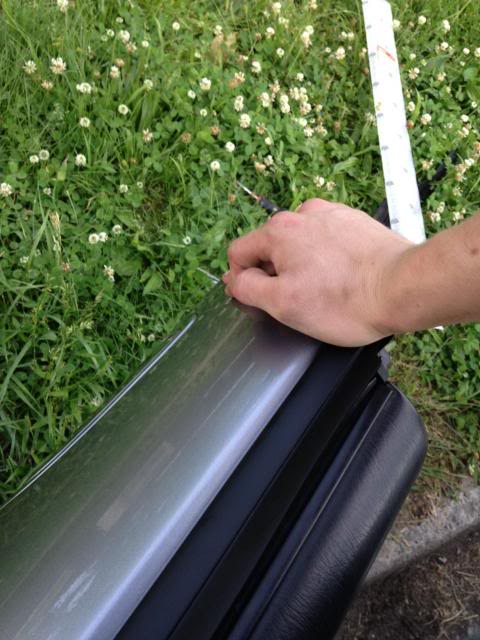
Start at the front of the door (Hinge side) and start sliding the clips into the slots
the "triangular" section of each clip is what slides into the slot. It will pretty much even itself out at this point.
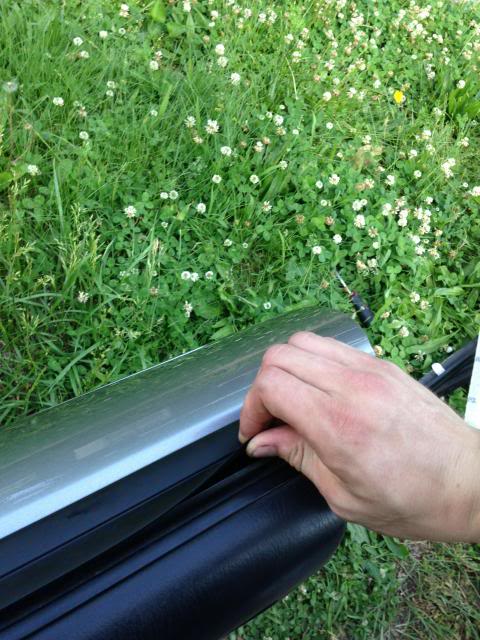
I pressed the seal down almost all the way with my fingers. Then I used the palm of my hand on the thickest part of the seal to snap the clips into place.
Then just pop that end clip back into it's hole
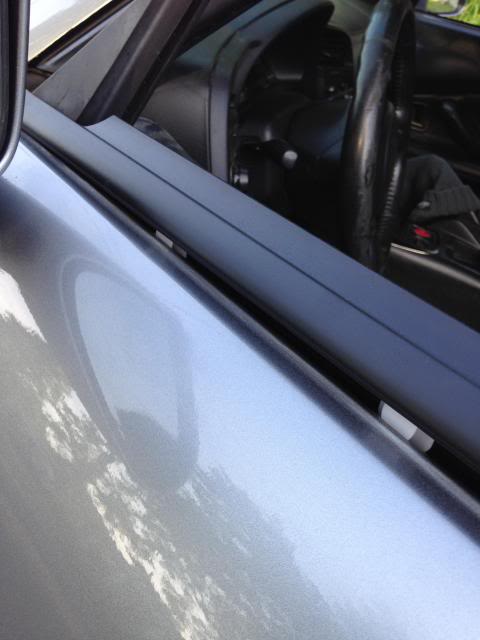
and voila!

As you can see, mine didn't even have the brush for holding the glass from rattling. (I think that's what it's used for)

Start at the front of the door (Hinge side) and start sliding the clips into the slots

the "triangular" section of each clip is what slides into the slot. It will pretty much even itself out at this point.

I pressed the seal down almost all the way with my fingers. Then I used the palm of my hand on the thickest part of the seal to snap the clips into place.

Then just pop that end clip back into it's hole

and voila!

Thread Starter
Joined: Jun 2012
Posts: 646
Likes: 8
From: Lombard, IL
Mine was a tad too close to the rear moulding but with just a little bump from the rear it lined up perfectly.

Same procedure for the other side. Mine had a few stubborn clips
Just work those bad boys with with a flat head screwdriver. Or break them. However you wish to do it.

bam. Don't forget to clean the door before installing the new moulding!!
Just using my palm to secure the clips..
give it a slide tug to make sure it is snug. (haha, I rhymed..)
Check out that bad boy.


Same procedure for the other side. Mine had a few stubborn clips

Just work those bad boys with with a flat head screwdriver. Or break them. However you wish to do it.

bam. Don't forget to clean the door before installing the new moulding!!

Just using my palm to secure the clips..

give it a slide tug to make sure it is snug. (haha, I rhymed..)

Check out that bad boy.


Thread Starter
Joined: Jun 2012
Posts: 646
Likes: 8
From: Lombard, IL
Bout $52 a piece. Here is the link.
http://www.hondapartscheap.com/auto-...6-speed-manual
#2 and #6.
http://www.hondapartscheap.com/auto-...6-speed-manual
#2 and #6.


