
Regrease shifter DIY


Joined: Sep 2004
Posts: 4,894
Likes: 9
From: Tampa, FL
For anyone coming across this (great) DIY, I wanted to give my 2 cents.
I didn't bother trying to order the Honda grease. I picked up some Mobil 1 high temp grease for $9 at Autozone and went to town. My car is an 01 with 89k and definitely felt like it needed the service. I'm happy to report that afterwards, it was a night and day difference in shifting feel.
Also, do not be intimidated by the plastic retaining ring on the rubber boot. If you follow this tip:
It will come off in NO TIME with zero issues!
In the pic, the new Mobil 1 grease is red
I didn't bother trying to order the Honda grease. I picked up some Mobil 1 high temp grease for $9 at Autozone and went to town. My car is an 01 with 89k and definitely felt like it needed the service. I'm happy to report that afterwards, it was a night and day difference in shifting feel.
Also, do not be intimidated by the plastic retaining ring on the rubber boot. If you follow this tip:
just a little tip on how to remove plastic ring for the rubber boot, if you by any chance have a very tiny flat screw driver for opening iphone or for watches or glasses, it will be a very good tool. start by pulling the rubber inside the ring, you will see a little opening at the buttom of the plastic ring, then you just poke the screw driving into there, and give a little pull on the outside of the ring, it should came off easily, then you do the same for two more side, the last side will just came off itself. and i did not remove the plastic ring from the rubber, they came off in one piece.
In the pic, the new Mobil 1 grease is red
Last edited by spectacle; Jan 27, 2017 at 04:58 AM.

Joined: Jan 2015
Posts: 269
Likes: 0
I am going to be doing this at some point as well. My car has 127k on the clock and I'm not sure if any of the previous owners have ever cleaned and regreased. Sometimes shifting between 1st and 2nd is nice and smooth, but the majority of the time it is very notchy. Trans fluid was just recently changed as well when the new clutch was installed.

Registered User
Joined: May 2011
Posts: 108
Likes: 6
From: Colorado
A couple negative reviews for HPU on Facebook saying shipping/delivery of their part took forever, but there's three 5-star review ratings too... I'll report back on how they do for me:
https://www.facebook.com/pages/Honda...95506140598096


Joined: Sep 2013
Posts: 295
Likes: 0
From: White Rock Lake
Long story short, then a question. Followed this write up and it worked for a while... then the shifter would no longer "pop up" from reverse. Replaced the spring...then the wonderful plastic bearing cracked and got lodged in place. Replaced the whole shifter assembly with an Axial Flow & Moddiction knob. Absolutely wonderful... for about 2 weeks. Now the shifter will no longer pop up (again) and takes some force to unstick. I have looked into an upgraded shifter spring, and found a company called Mtec that makes upgraded shifter springs for the K series. It works perfectly for the K20\24 guys, so...
Are K & F shifter springs interchangeable(or at least the same diameter)?
Are K & F shifter springs interchangeable(or at least the same diameter)?

Registered User


Joined: Jul 2012
Posts: 169
Likes: 4
Finally completed this last Sunday. When I bought the car last year, the shifting felt notchy (especially 1st gear / into 2nd gear)
The car has ~70K miles and this is what it looked like.
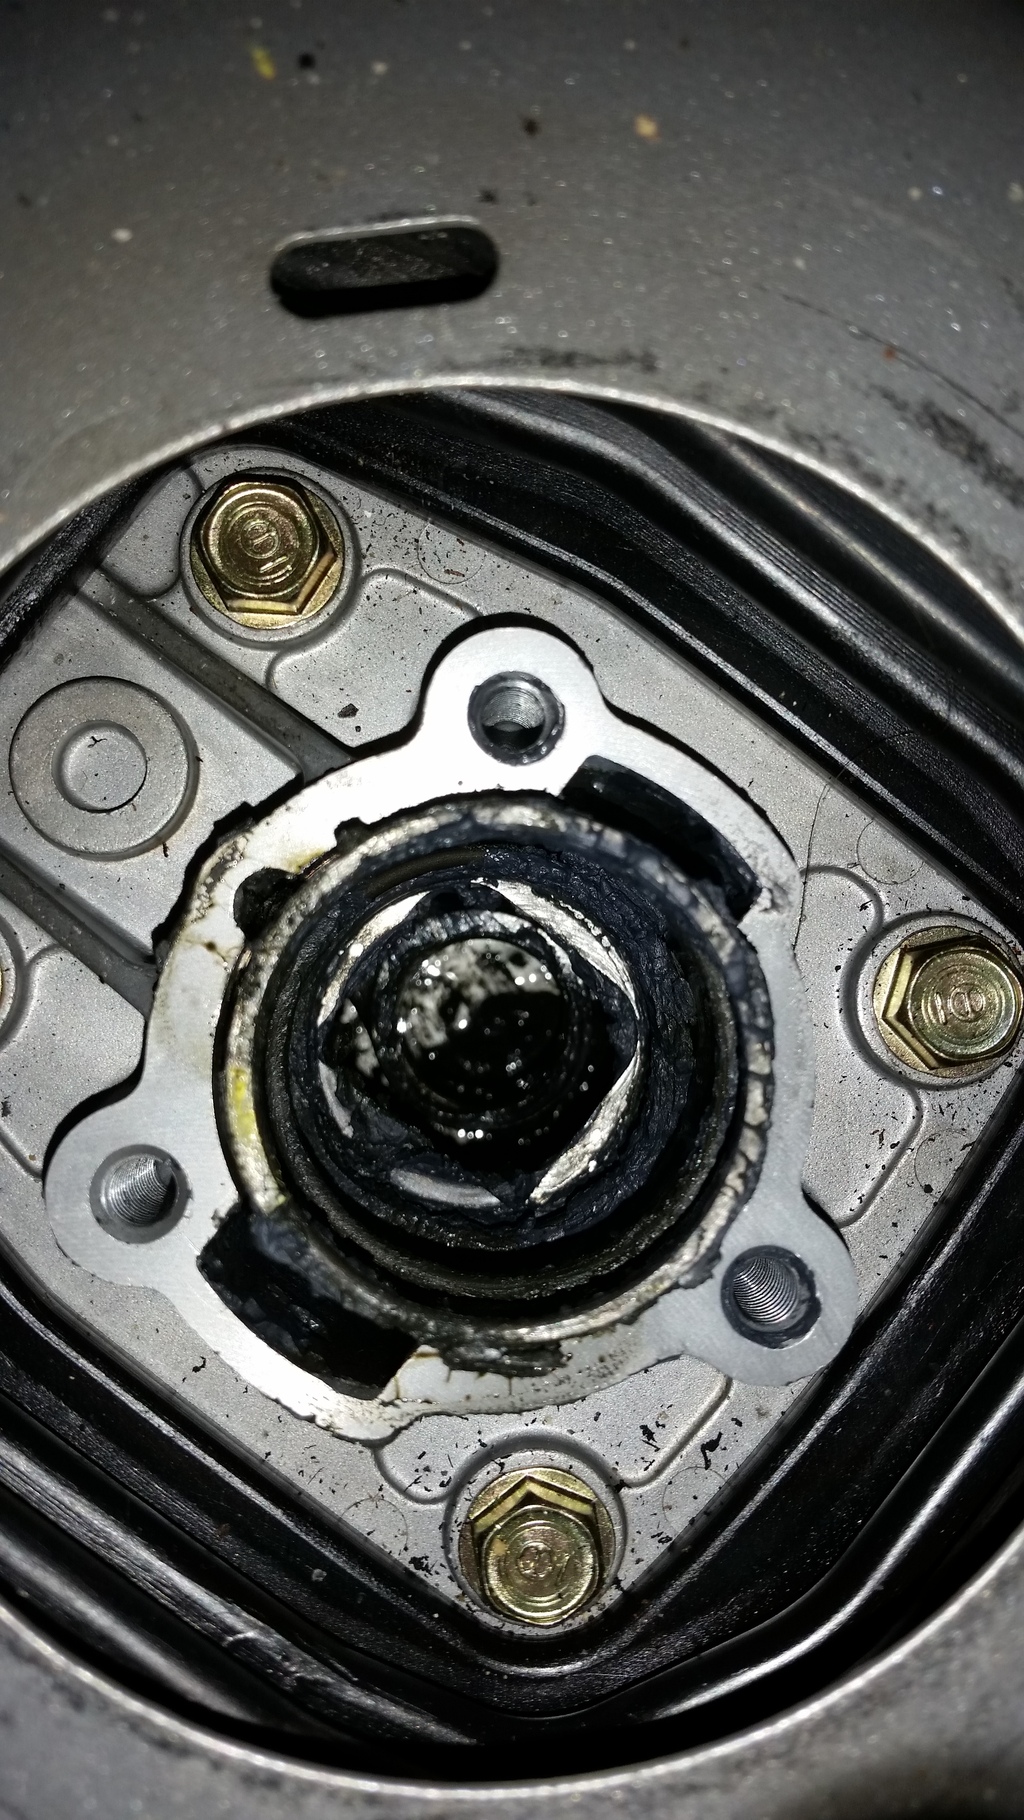
While it still seems a little notchy, it is certainly better. It also seems to be improving each and every day as the grease moves around.
For others that may do this, I used about 2/3 of the Urea grease.
The car has ~70K miles and this is what it looked like.
While it still seems a little notchy, it is certainly better. It also seems to be improving each and every day as the grease moves around.
For others that may do this, I used about 2/3 of the Urea grease.


Joined: Feb 2001
Posts: 35,982
Likes: 211
From: 262 miles N of the Dragon
Just did this..... not difficult at all.
The foam insulation ring on my car had deteriorated to the point of just being "mush", and was all over the place.
Would recommend having the shifter in neutral when you take it apart. Goes back together a lot easier.
For re-assembly I used 3 thin phillips screwdrivers to get the holes lined up, then took one out, pushed down on the assembly (easier on the hand with the knob on the shifter) and got the first bolt in and most of the way tightened, then put in the other two (to keep the bolt in the socket, just put a little grease on the bolt and it will stay in the socket!).
Took maybe 30-45 minutes to do.
Really can tell the difference when done!!
 to the OP for the DIY!!!!
The foam insulation ring on my car had deteriorated to the point of just being "mush", and was all over the place.
Would recommend having the shifter in neutral when you take it apart. Goes back together a lot easier.
For re-assembly I used 3 thin phillips screwdrivers to get the holes lined up, then took one out, pushed down on the assembly (easier on the hand with the knob on the shifter) and got the first bolt in and most of the way tightened, then put in the other two (to keep the bolt in the socket, just put a little grease on the bolt and it will stay in the socket!).
Took maybe 30-45 minutes to do.
Really can tell the difference when done!!
to the OP for the DIY!!!!