
Regrease shifter DIY

Registered User


Joined: Sep 2016
Posts: 48
Likes: 1
Like everyone else is saying OP; thanks for posting. Completely got rid of the AWFUL shifter vibration I had and shift feel is so much better. But my foam also turned to mush. It was like the weird play sand you can get from brookstone that retains it's shape. I had to pull it out in roughly 9376 pieces.
Now maybe I can help some people since I could have used a little better instructions on getting the plastic ring off. So here goes:
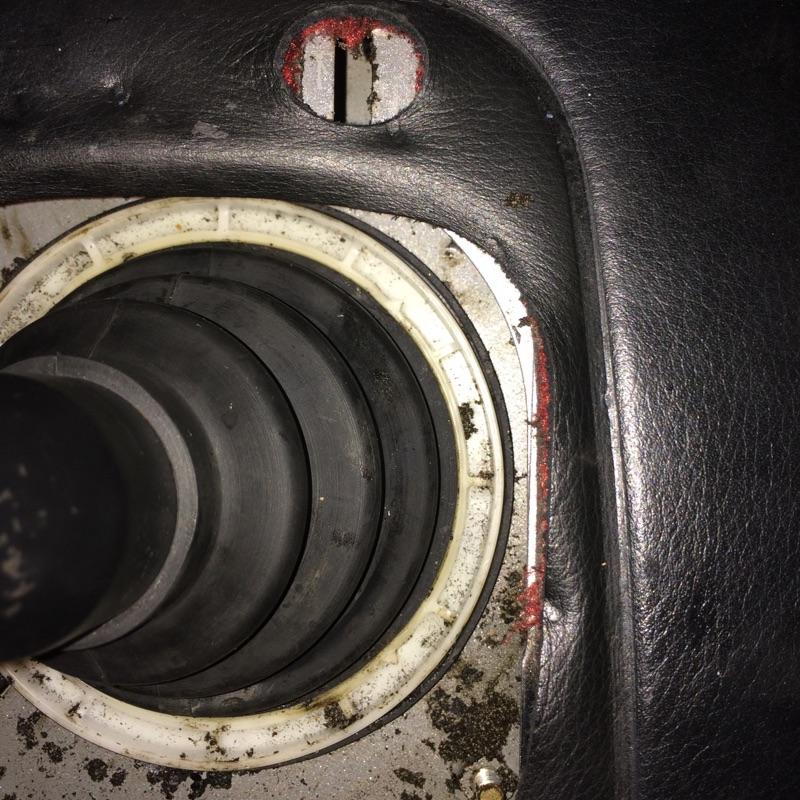
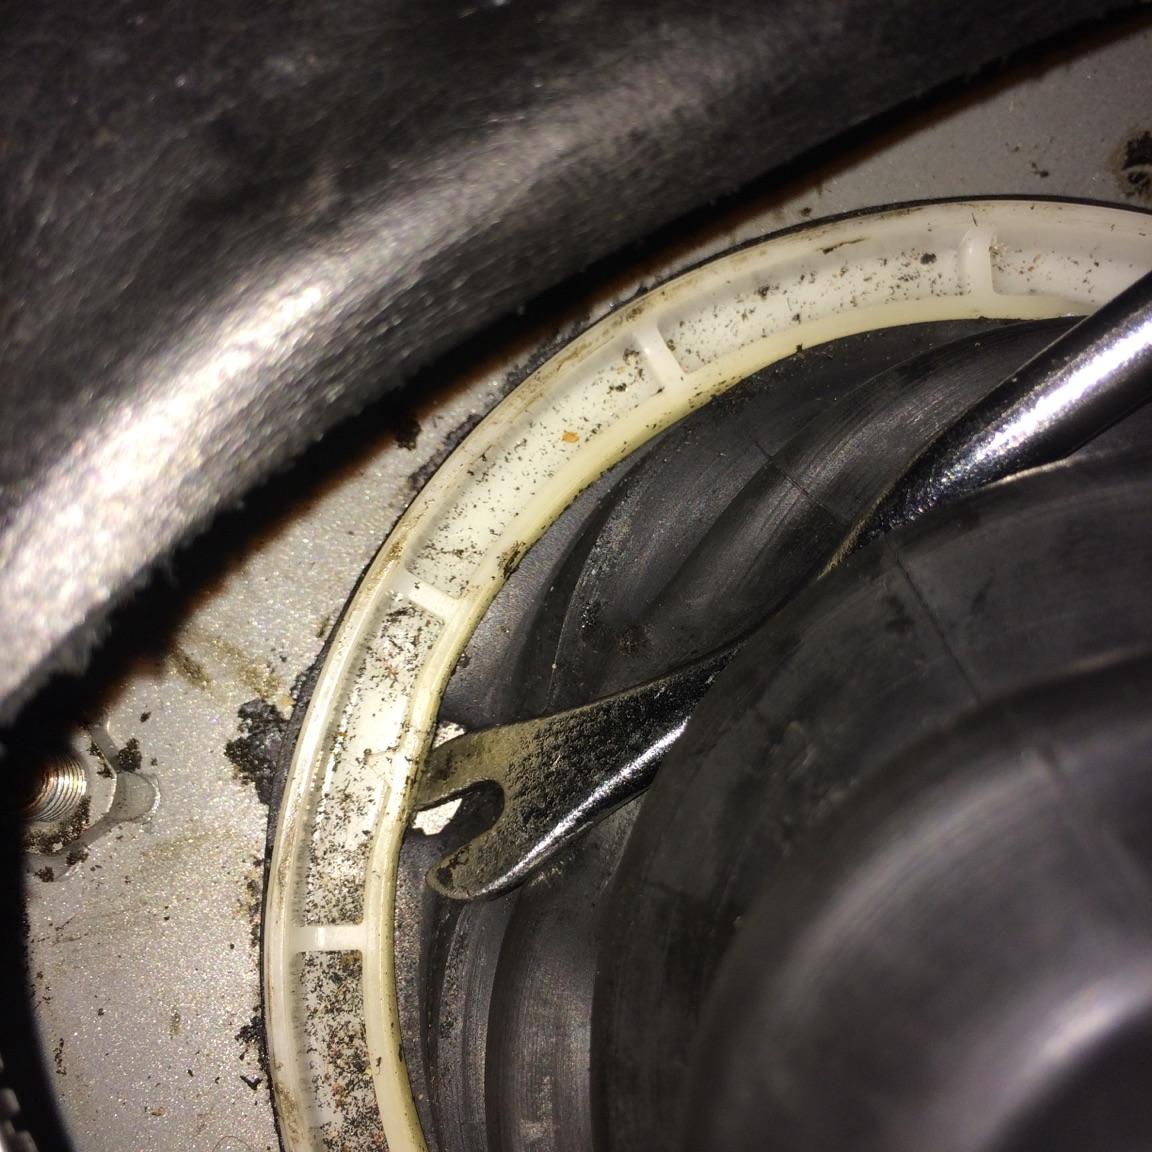
Here is a picture looking down on the plastic ring. At each of the 4 corners of the rectangular opening of the shifter there is an arrow pointing away from the shifter. It's easy to see the arrows in person but I don't think it came out great in the pictures.
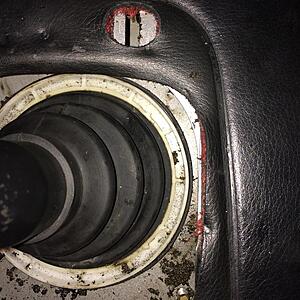
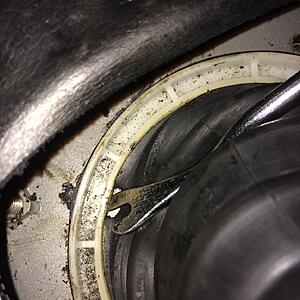
Pushing the the boot in toward the shifter you can see a cutout in the boot right next to the arrow. That's where you're going to be prying from the inside like I show in the next pic.

I used a trim clip removal tool and recommend you do the same over a flat head screwdriver IF you have one. Push outward away from the shifter and pull up but don't go crazy. you'll be able to tell when that clip is out. Now just do the rest and you're good.
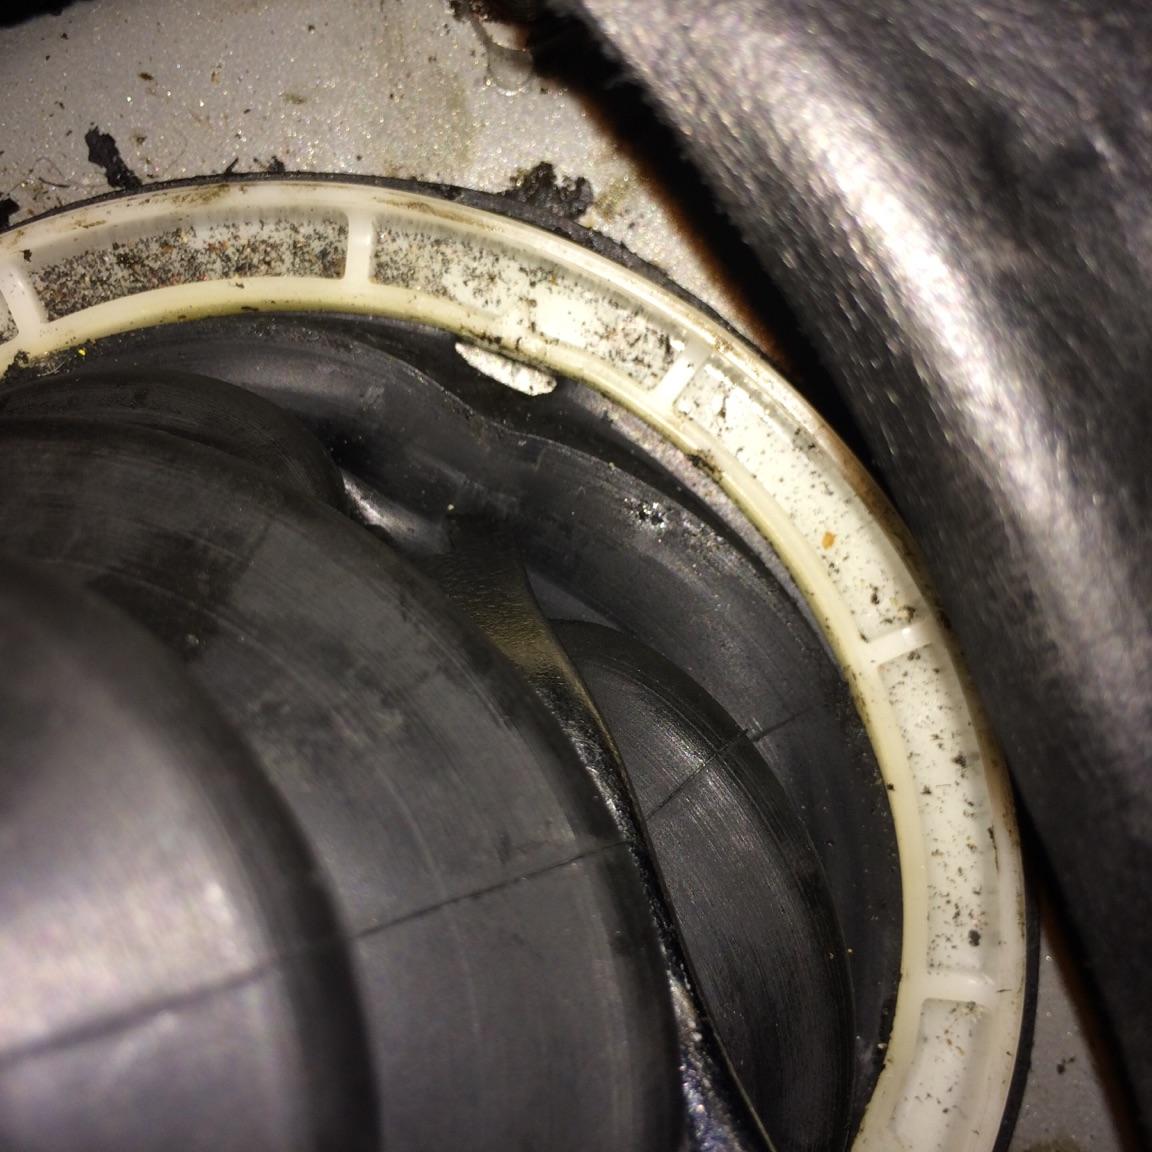
It took me a while to get it out because I didn't know how (I started by prying from the outside in! Don't do that!). Once I figured it out and did this I was able to put it on and take it off 2 more times in seconds with no problems. These pictures are from the 3rd time.
Good luck and don't worry!
Now maybe I can help some people since I could have used a little better instructions on getting the plastic ring off. So here goes:
Here is a picture looking down on the plastic ring. At each of the 4 corners of the rectangular opening of the shifter there is an arrow pointing away from the shifter. It's easy to see the arrows in person but I don't think it came out great in the pictures.
Pushing the the boot in toward the shifter you can see a cutout in the boot right next to the arrow. That's where you're going to be prying from the inside like I show in the next pic.
I used a trim clip removal tool and recommend you do the same over a flat head screwdriver IF you have one. Push outward away from the shifter and pull up but don't go crazy. you'll be able to tell when that clip is out. Now just do the rest and you're good.
It took me a while to get it out because I didn't know how (I started by prying from the outside in! Don't do that!). Once I figured it out and did this I was able to put it on and take it off 2 more times in seconds with no problems. These pictures are from the 3rd time.
Good luck and don't worry!


Joined: Jul 2014
Posts: 13,836
Likes: 1,552
From: Chesterfield VA
Best way to not break the ring is to have a spare on hand before starting the job. Murphy's Law of Available Spare Parts in action. Plastic parts get brittle with age and heat so breaking them is easy.
-- Chuck
-- Chuck
Joined: Apr 2015
Posts: 278
Likes: 0
From: Jax FL
Did this recently as well and my foam was mush, as described in previous posts. 2006 with 32k miles.
Ended up ordering all new plastic for the shift lever joints and new "mush". Thanks to all your posts, I did not break the plastic ring!
I only used 1/4 to 1/2 of the OEM grease tub, and I adjusted the parking brake as suggested. Thanks for that tip/reminder OP
Ended up ordering all new plastic for the shift lever joints and new "mush". Thanks to all your posts, I did not break the plastic ring!
I only used 1/4 to 1/2 of the OEM grease tub, and I adjusted the parking brake as suggested. Thanks for that tip/reminder OP
Last edited by fast_eddy; Jan 27, 2017 at 09:28 AM.
Joined: Jun 2016
Posts: 3,296
Likes: 260
From: Vermont
I'm wondering if this is an age related issue or a mileage related issue, or both? I have 02 with 18K miles. Shifter is a bit stiff and notchy feeling when shifting from 1st to 2nd and from 2nd to 3rd but once it gets warmed up that goes away completely and it is a dream. Should i do this re-grease? Or leave it alone.

Joined: Jan 2006
Posts: 4,953
Likes: 25
From: 17 ft below sea level.

Registered User
Joined: May 2016
Posts: 11
Likes: 0
From: Champaign, IL
I performed this DIY this weekend - thanks so much for the detailed write up, pictures, and all of the comments that followed. Really made this job a lot easier than it could be. Biggest bear to me was getting the bolts back in - that was tough.

Registered User
Joined: Aug 2011
Posts: 158
Likes: 3
From: sOCal
All 3 tabs on the white ring were still intact... made my shifter feel only a little bit better. Next is the trans fluid.

Joined: Nov 2012
Posts: 5
Likes: 0
hey guys,
I finally got around to doing this DIY. Everything on this thread helped me get through it without much problem. Grease on shifter on my 2007 was dirty and getting dried up.
I replaced the ball cap and it was easy to pop it back in by using heat gun to get it warm. I imagine hair dryer would work well as well.
Shifting was definitely smoother but I still had some notchiness. I'm hoping it will get better.
thanks!

Registered User
Joined: May 2016
Posts: 27
Likes: 0
Had a question about applying Shin Etsu. Where exactly do we apply it - on the metal shifter column under the rubber boot? Pictures would be welcome :-)
I cracked both the original and the spare pivot cover (plastic ball) I bought from Majestic Honda.. Forgot to place it in hot water. Had no choice but to order another one for $22 - WTF, that part cost $2 a couple of years ago, and still costs less than that in the UK.
I cracked both the original and the spare pivot cover (plastic ball) I bought from Majestic Honda.. Forgot to place it in hot water. Had no choice but to order another one for $22 - WTF, that part cost $2 a couple of years ago, and still costs less than that in the UK.