When you click on links to various merchants on this site and make a purchase, this can result in this site earning a commission. Affiliate programs and affiliations include, but are not limited to, the eBay Partner Network.
I haven't seen many threads about extended pedals and how to install them. This is my DIY guide to how I installed mine.
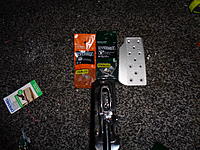
TOOLS:
- Drill with metal cutting bits (to include 3/16 inch)
- Rotary tool with grinding stone
- Ratchet wrench (I used 3/4 inch drive
- Extension for ratchet (I used 4 inch)
- 9mm box end wrench
- 9mm socket
- 12mm socket
- Needle nose pliers (a thin one is best)
- Center punch
- Hammer
- Vacuum to clean the metal shrapnel
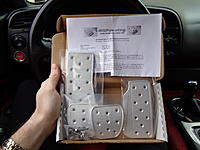
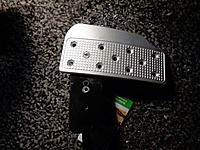
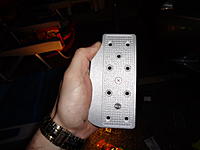
These are the pedals to be installed. Made from billet aluminum in the USA!
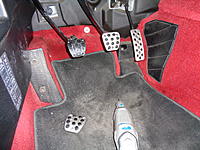
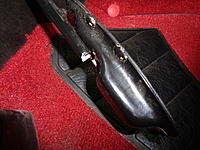
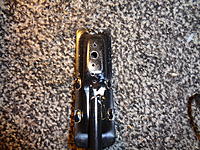
Removal is pretty straight forward. drill out the rivets and removed the pedals.
Three on the brake and clutch, four on the gas.
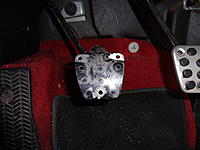
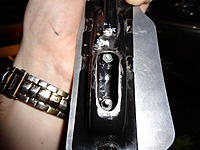
So the gas pedal was a bit tricky due to it not being just flat steel. Some modification was required.
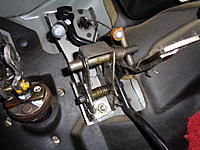
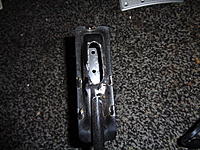
I first removed the pedal box. The throttle cable and cruise control cable are held in with a snap retainer. Pull straight up and out the slot on the side.
The cable guides are attached to the pedal box. You can make out the cruise control one in the picture above.
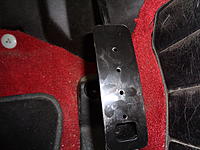
Use thin needle nose and squeeze the clips and turn 90 degrees CW or CCW. Whichever direction is easiest.
Now how to attach this...
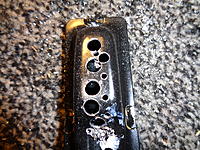
I used a cordless drill and some hard metal drill bits.
I drilled holes and stepped up each time. Yes I know, it's not the cleanest drilling. I cleaned it up later.
That looks better. No sharp edges.
Pedal still retains structure and now I can secure the screws with self locking nylon nuts.
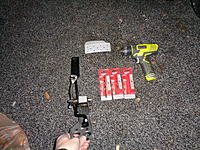
Speaking of which, the kit only came with six beveled screws and nuts. I had to get more unfortunately.
I bought 3/4 inch and 1/2 inch screws with matching nylon nuts. You'll see why I chose two sizes later.
I used the bottom most rivet hole as my root and widened it to accommodate the screw.
I then eyeballed the new hole that had to be drilled using the gas pedal held in with one of the screws.
After checking the pedal was to my liking, I punched a mark, turned the pedal to the side and drilled the hole needed. 3/16 inch for all holes btw.
Now you can sorta see why I used two different screw sizes. At the bottom of the pedal I used the 3/4 inch and up higher I used the 1/2 inch.
There was a clearance constraint due the shape. Probably could have used 1/2 inch for both, but whatever.
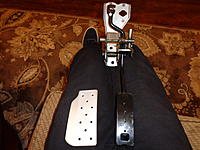
Tada! Gas pedal mounted on the pedal box. Now just reinstall the pedal box.
Re-installation was a bit of a PITA so prepare yourself for cursing, awkward limb placement, and possibly blood.
At last the install is complete! Go for a drive and heel toe like a boss!
I chose not install the foot rest for now, but it goes in with self tapping screws that are included with the kit
I hope this is helpful to people who are, like me, hesitant to modify a very important part of the human to machine interface.
S2KI has always been a great deal of help and knowledge to me and I wanted to give back to the community.
Thanks for reading!
Last edited by Stigs American Cousin; 02-19-2017 at 04:58 PM.
Reason: Engrish correction
Many thanks for the detailed post. I’m not installing yet but looking at a couple of options. I really appreciate your posting. I also have a few questions:
1) why did you choose srp racing versus other substitutes?
2) over the oem pedals, how much easier do you find these pedals to heel-toe?
Hope to hear from you on these queries. Thank you once again!
Its built from a thin strip of aluminum from Home Despot, and a sheet of pvc plastic from Amazon, both materials I already had laying around.
I didn't want to change the basic look of stock pedals by replacing with something aftermarket. So I jist made something that can work with stock pedal, not replace or.cover it.
I attached it to the back of stock pedal using 3M double sided tape. It sits flush with pedal surface.
I cut the aluminum to shape, then bent it to the correct curve to match pedal. Then I cut a few pieces of the abs, a little larger than needed, and used heat gun and bent them to same curve. Then I layered the pieces, using pvc cement from Home Despot plumbing isle, not worrying about perfectly aligning each to each other. Once cement dried, I machined of the excess to get shape that matched aluminum.
Then I used very, very small screws from the back side, to secure plastic to aluminum. Then I used the 3M stuff to attach it to back of pedal.
I removed pedal Assembly from car. If I had it to do over, I would leave pedal in place, and sandwich the aluminum part between silver pedal cover and black pedal itself. Drill out the 4 rivets holding cover in place, then trace black pedal shape onto aluminum, but leave a bump out for the extension, and cut aluminum to shape. Then cut a few more pieces of aluminum to stack to right of pedal, so end result sits flush to pedal height. Bend it all to match curve of pedal, rivet the stacked side pieces in place, then drill a few decorative holes so finished effect matches stock pedal (but with holes instead of rubber studs). Then rivet together the whole thing, pedal, extension, and stock pedal cover.
That would be faster, easier, closer to stock aesthetic, and more secure.
You could build above for just a couple of dollars plus your fab time. Finished quality will match your fab skills.
I did my gas pedal yesterday but instead of using the supplied bolts and nuts which I had to drill super big holes for I used rivets like oem style made life so much easier and looks great and I know it won’t come off. Going wait till my steering wheel and lower seat bracket to come in before I decide to do the other ones.
 02-19-2017, 03:05 PM