My 1999 Honda s2000 Project
 11-03-2018, 07:38 AM
#21
Registered User

Thread Starter
Task 25 - Radiator Fans Constantly On
27-08-2018
From the past couple weeks, it had been noticed that the radiator and A/C radiator fans turn on immediately after pre ignition, engine start and on a cold engine. The engine temperature would be ok and no overheating was present.
The radiator fan should only switch on when the coolant reaches a certain temperature, I think around 93-95 degrees. I set about to find out what was wrong.
Thanks to a few old s2ki forum threads, I performed a few tests to find a root cause to the problem.
The threads pin pointed the radiator fan switch to be the most likely problem.
I performed a few tests to confirm this:
-Swapped over the radiator fan switch relay (there is an identical relay within the fuse box)
Result: No difference
-Disconnect the radiator fan switch itself
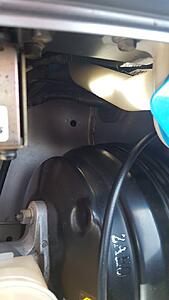
(fan switch is located on the left hand bottom section of the radiator)
Result: On pre-ignition, engine start and cold engine, the radiator fans do not switch on.
With the above findings it concluded that the existing radiator fan switch is stuck in the closed position.
I am all for sourcing and using genuine Honda parts but for something quite relatively easy to change, several members have recommended a good after market brand.
The Honda OEM part, cheapest I found was £67.00 (Usual RRP £94.00)
After market type: £13.00
The brand of the aftermarket type was Canbiare which is a well known European brand.
I decided to go for this one.
The switch was relatively easy to access, and from several threads it required no coolant bleeding when swapping it out within the radiator which was a plus point.
The lower under tray was a tad tricky to remove with most of its clips crumbling upon removal.
It would seem that it had never been removed.
With the under tray removed, a good general clean was also performed.
The radiator fan switch has a size 24mm hex and a deep socket was required to remove it.
I realised this quite late and didn't have one in the tool box.
A trip to Halfords solved this.
Just a little spillage of coolant during the quick swap over and that was it.
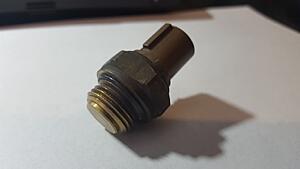
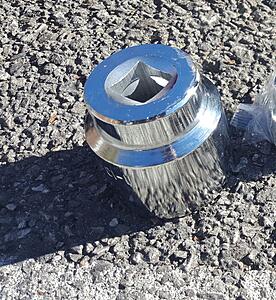
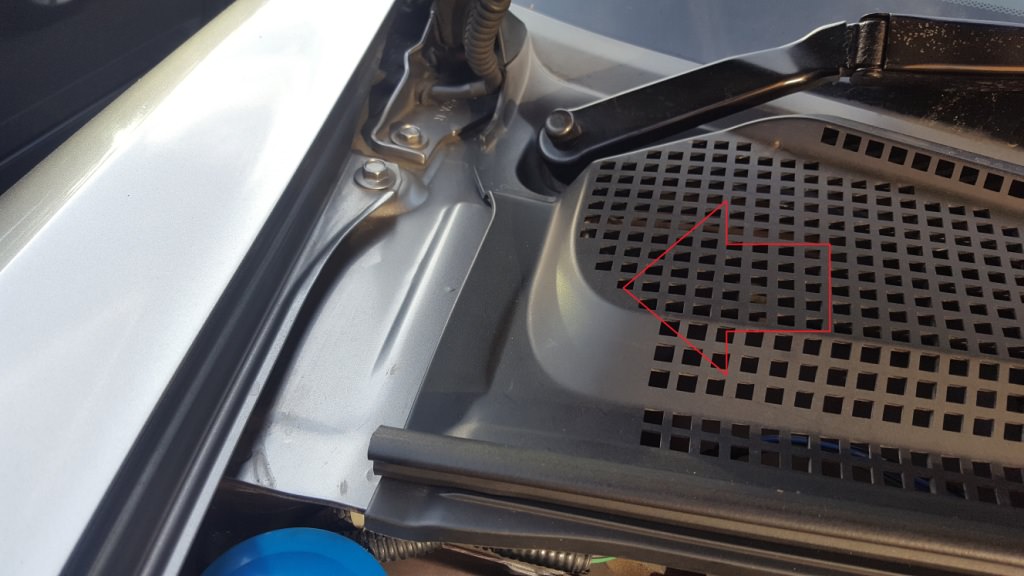
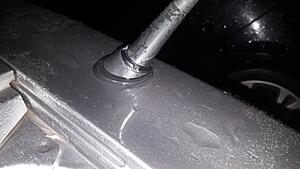
The radiator fan switch is located at the bottom of the radiator when the red arrow is pointing.

Upon engine start and warm-up the fans kicked in as normal and switched off as expected.
A long 40 min drive confirmed full function had been restored.
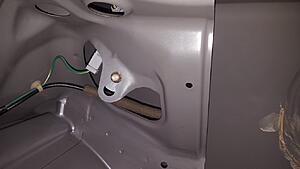
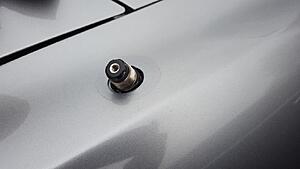
The old radiator fan switch removed
Parts Purchased:
Part: Radiator Fan Switch
Honda Part Number: 37760-P00003
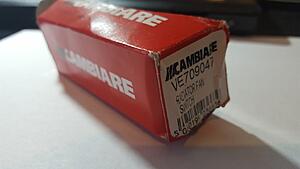
Canbiare Part Number: VE709047
Supplier: Car Parts In Motion (Ebay Seller)
Tool: 24mm Deep 1/2 inch Socket
Supplier: Halfords
https://www.halfords.com/workshop-to...24mm-1-2-drive
Services Used:
None
Resources used
S2ki Thread: Fans Always on
https://www.s2ki.com/forums/uk-irela...lways-1131621/
Thread I Started
https://www.s2ki.com/forums/uk-irela...arket-1187554/
--------------------------------------------------------------------------------------------------------------------------
TASK 26 - Remove Rear Bumper & Lights (Clean and Under Seal)
28-08-2018
The next task on the agenda was to remove the rear bumper, this would give the opportunity to have a peek behind and see the condition of the rear beam and chassis area.
The bumper removal was pretty straight forward and with the process fairly common with most Honda's. Two screws on either side into the rear quarter, clips on top of the rear bumper, three clips on the bottom section of the rear bumper and two clips either side of the arch.
Once the bumper was off the condition of the rear beam and chassis sections weren't too bad. Few light rust spots with the rear beam rusty in a few places. From research, it seems the rear beam is common to rust due to its location and having no protection from any stone chips.
All sections were cleaned and the wire brush came out, light rust spots were brushed with the rear beam also being tidied up the best it could.
Hammerite rust remover was applied on required areas and then followed a coat of dinitrol under seal spray.
A general clean and wipe down was given to all other areas.
Rear number plate bulbs were replaced and terminals greased up to prevent corrosion
The rear lights were removed inspected and cleaned.
All sections behind the lights were in great condition with no leaks or rust.
The connectors were checked and no signs of corrosion was present.
No moisture or leaks were present behind the boot trim.
The light cluster gaskets were checked and cleaned.
The rear bumper was re-installed and new clips were used in all locations.
Parts Purchased:
Part: Dinitrol Under seal Spray 500ml x3
Part Number: 4941
Supplier: MTS Trading (on ebay)
Part: Hammerite rust remover (gel)
Part Number: 5092868
Supplier: Halfords
Services Used:
None
Resources used
None
--------------------------------------------------------------------------------------------------------------------------
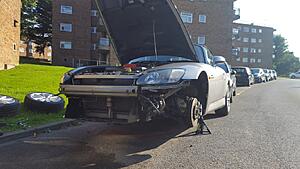
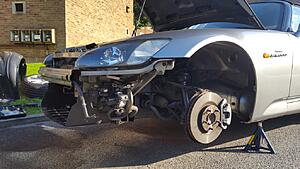
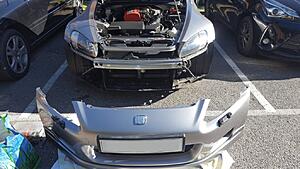
TASK 26 - Remove Front Bumper (Clean and Rust Treat as Required)
02-09-2018
It made sense that the next task was to perform a front bumper removal.
This would also be an opportunity to check for any rust or damage within this area.
Again, the front bumper removal is similar to all Honda's, two screws either side of the front arch, several bolts on the top section of the bumper, two hidden 10mm bolts either side facing the headlamps and several bolts on the underside of the bumper.
Both front arch liners were also removed to aid in access.
Once the bumper was carefully removed the condition of the front sections of the car were also in pretty good condition, with a few rust spots on the front cross beam and various brackets as one would expect.
The rust spots were rubbed down and Hammerite rust remover was applied, followed by a quick coat of touch up paint.
An overall wipe down of all areas were performed and it was looking really fresh.
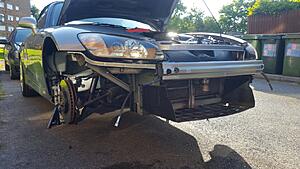
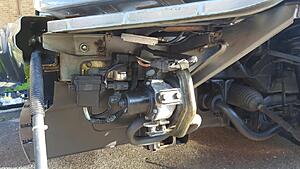
The air pump was checked and seemed in good clean condition, the previous owner had not tempered with it.
It is common for owners to delete this component if it fails, as it is in good working condition it will be left alone.
The air pump is designed to blow air into the exhaust system upon a cold engine start to quickly heat up the catalytic converter and thus reduce emissions from cold starting.
If you're air pump has failed, you would get a MIL (malfunction indicator lamp) appear on your dash cluster.
If your fault code has detected that the air pump has failed, you can delete it with a special kit from a company called "Delta Lima"
There will be no operating issues, only slightly higher emissions when the car is started from cold.
This will not affect your MOT as the car will be fully warmed and up to operating temperatures when emissions are tested.
The kit has been proven by many s2000 members on this forum.
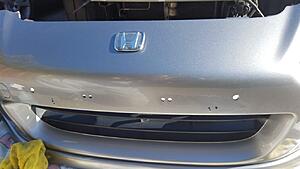
The bumper itself was checked for damage and also cleaned.
The front number plate and holder were examined, all bolts mounting the holder were clean and not seized.
Due to some cosmetic damage to the number plate holder and number plate itself, I will be replacing both these items later on so it was good to see it will be hassle free.
Parts Purchased:
Part: Hammerite rust remover (gel)
Part Number: 5092868
Supplier: Halfords
Services Used:
None
Resources used
None
If required - Air Pump Delete Kit from Deltalima
https://www.s2ki.com/forums/european...e-kit-1139689/
EGR-Airpump delete (English) – Deltalima-S2000.nl
------------------------------------------------------------------------------------------------------------------------
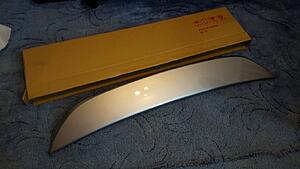
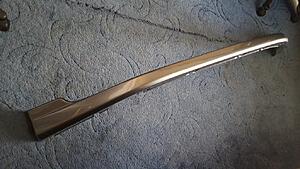
Task 27 - Rear Mid Level Spoiler
07-09-2018
The s2000 does look fantastic as standard, but I have always loved the look of the mid level spoiler that comes on a few models. This spoiler is an upgrade accessory and apparently still available from Honda, the only issue with the genuine part is that it is quite expensive and requires holes to be drilled within the boot lid to attach it which I refuse to do.
After a search on the forum, there is an aftermarket cheaper and easy to fit solution.
A highly recommended seller which goes by the name of "BMWchop" (a seller on eBay)
From reviews and feedback from many threads on s2k UK, the shape of the spoiler, quality and paint match is amazing.
Many members have reported nothing but good things and from all the images posted up it looks and fits fantastic.
I was convinced by this so had to try it for myself, an order was placed for NH630 pre-painted version and with a handy 10% eBay voucher at the time it worked out even cheaper.
The seller was very efficient with it arriving in just two days and no import duty charge! Great result.
He spoke good English and kept me up to date.
Arrival of the spoiler
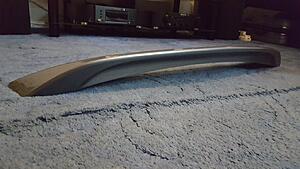
Once arrived, a test fit was performed. The colour match was fantastic and the fitment was excellent.
Very impressed indeed, given its price.
On fitment I tried the supplied double sided adhesive tape, but I didn't feel confident that it would stick well despite various reports from other members that it was fine.
I decided to purchase some 3M automotive Vey High Bond adhesive.
I purchased the longer thinner strip (1.5mm thick tape 3M Automotive very High bond Adhesive) for the top and bottom edges of the spoiler.
https://www.ebay.co.uk/itm/3M-VHB-Do...53.m2749.l2649
For the spoiler end sections I used slightly thicker (2.3mm 3M Automotive very High bond Adhesive)
(These came in a small square 100mm x 50mm size which I cut up into two strips of 50mm x 25mm and positioned them either side of the spoiler.
https://www.ebay.co.uk/itm/3M-VHB-10...53.m2749.l2649
The reason why I went for a slightly thicker tape on the end sections is the recess is slightly deeper where the spoiler curves into the ends of the boot edge.
The underside of the spoiler was sanded down to provide an abraded surface for the double sided adhesive to adhere well too.
Once all the tapes was positioned on the spoiler, I got to work to fit it.
The boot lid surface was cleaned with fairy liquid to ensure a clean grease free surface.
I didn't have any masking tape so I just used what I had in my tool box.
Electrical tape was used to provide me with a guide for fitment as this would be a onetime action.
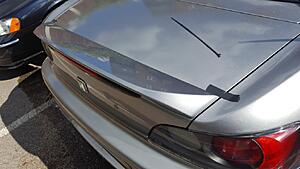
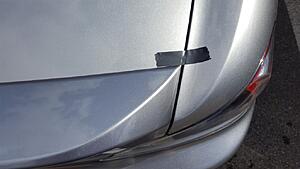
Once suitably aligned within the position marked, the self adhesive backing was removed and the spoiler was pressed into position.
Attachment 152447
The bond of the tape is fantastic, It definitely gives that confidence of a good adhesion to the boot lid.
The spoiler looks fantastic and definitely gives the s2000 a much sportier look.
Extremely happy with the look, quality and results, highly recommended.
Attachment 152448

Parts Purchased
Part: s2000 Mid Level Spoiler
Part Number: N/A
Supplier: BMWchop (on ebay)
Part: 3M Automotive Very High Bond Double Sided Tape (Reel) (1.5mm Thick)
Part Number: RP62
Supplier: fasttapes (on ebay)
Part: 3M Automotive Very High Bond Double Sided Tape (2.3mm Thick)
Part Number: 3M VHB 4991
Supplier: happy-london-tapes (on ebay)
Services Used:
None
Resources used
S2k Thread - Spoiler Recommendation
https://www.s2ki.com/forums/uk-irela...dvice-1103781/
S2k Thread - Adhesive tape for Spoiler
https://www.s2ki.com/forums/uk-irela...kness-1187765/
------------------------------------------------------------------------------------------------------------------------
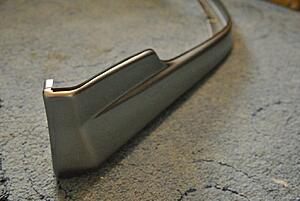
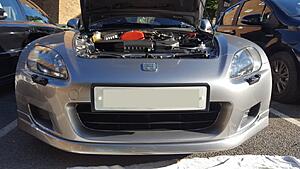
Task 28 - Genuine Front Pre-Face Bumper Lip
07-09-2018
I've always loved the look of the pre facelift s2000 with a front lip as it added a subtle aggression to the s2000 without going over the top.
I had an urge to source one but wasn't sure if they were still available.
After several enquiries it became apparent that Honda still had stock of them and they were available in my pre painted Silverstone metallic colour
Fantastic result.
Unfortunately, the price of this part had increased dramatically over the years and I had to decide whether or not it was worth to pay such a price for one.
I tried to search for alternatives just like with the mid level spoiler.
There were replica's available but from reviews/feedback, the fitment is not great and unless you have a body shop to hand to help fit, paint and attach it, alot of people say to avoid them as the costs and hassle involved isn't worth it.
The genuine part comes pre-painted and attaches as any genuine part does. Utilising existing mounting points with the supplied hardware it takes on average 20mins to fit and the fitment should be perfect.
I contemplated long and hard about it, and thought what the hell. This would most likely be my last upgrade to the car.
Let's go for it.
I placed an order and within 3 days it arrived. The paint finish and quality is as you would expect from a genuine part, flawless. I was glad a genuine part was purchased.
The box was huge!
Fitting the lip was straight forward, with the supplied instructions it just needed the removal of the three centre bolts from the underside of the bumper and a couple of pilot holes drilled on either side of the bumper edges for self tapping screws for the front lip end attachment.
A further 2 bolts per side on the underside were required with the supplied fastening bolts.
A hint of copper grease was used on all bolts and screws for easy removal in the future.
The lip wrapped around the bumper perfectly like a glove and with all the bolts securing it, installation was complete within 30mins and that was me taking my time including adding a layer of wax behind the bumper section that will be covered by the lip.
Fantastic transformation, the front lip does really look good on the pre-face lift s2000.
Fully installed

A great buy and highly recommended to any pre-face lift owner.
Parts Purchased
Part: Genuine Front Under Lip (pre painted in Silverstone metallic)
Part Number: 08F01-S2A-681F
Supplier: Coxmotorparts
Services Used:
None
Resources used
Supplied Instruction Manual for Front Lip Fitting
Also can be found online here
https://www.handa-accessories.com/S2000/s2kfuspoil.pdf
------------------------------------------------------------------------------------------------------------------------
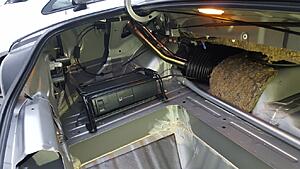
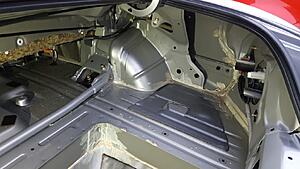
TASK 29 - Investigate Water Leak into Driver Footwell - (PROBLEM 2)
10-09-2018
In the early months of my s2000 ownership, it was noticed that a small water leak was apparent.
This was resolved my repairing the rubber seal on the A-pillar which now re-directs the water as it should out into the door channel recesses.
After a few more heavy rainfalls it was noticed that a slight trickle of water was still entering the cabin and making the carpet underneath the drivers pedals slightly wet. The water seemed to also be absorbed up within the insulation in this area underneath the main floor carpet.
The previous owner never really suffered from this as the car was stored under a car port.
This was on the agenda and was vital I resolve this before winter approaches.
Even getting additional help from a garage to completely strip the interior to find the root cause if required .
I set aside a full day of diagnosis and went about eliminating various sections just to make sure I covered all areas.
Not having any access to a hose pipe or running water I relied on my battery powered portable jet washer to simulate rainfall. Known as the Mobi V17, other similar models are known and manufactured by Sealey or Aqua2go if interested.
Fantastic bit of kit, stores around 18 litres of water and provides excellent suitable pressure.
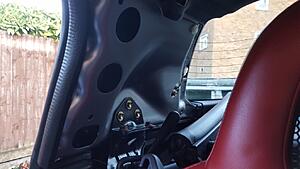
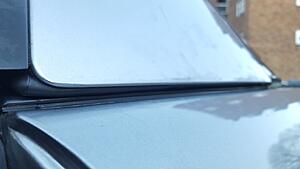
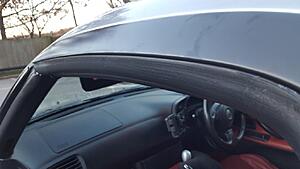
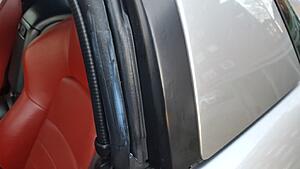
I checked all the seals around the windows and roof. Moving towards the front and around the A-pillars.
This included all drain points in the engine bay and the drain point under the windscreen wiper cowling
I double checked and removed all the A-pillar plastic mouldings.
No sign of any water entering.
The rear roof drains were checked and confirmed water was draining fine in this section.
The next stage was to remove the wind screen wiper cowling section.
(this will also be documented separately on the next task for inspection and clean)
With the cowling removed, the wind screen seal was inspected with no defects apparent.
The windscreen is still the original Honda part which gave a good sigh of relief it had not be tampered with or previously replaced.
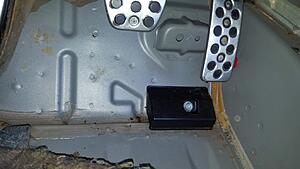
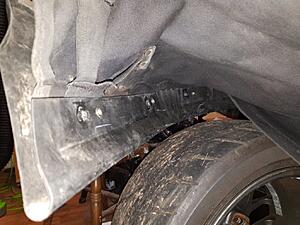
Back into the driver's footwell, I removed the x2 bolts holding the foot rest and the lower right side panel which sits over the bonnet release catch (the driver's door side sill) needs to be unclipped and removed first.
In this state, water can be sprayed and hopefully monitor its point of entrance.
Water drain points are located in the upper corner of the drivers engine bay and another one under the bonnet hinge area.
I used my battery powered pressure washer to direct water at these drain points whilst monitoring.
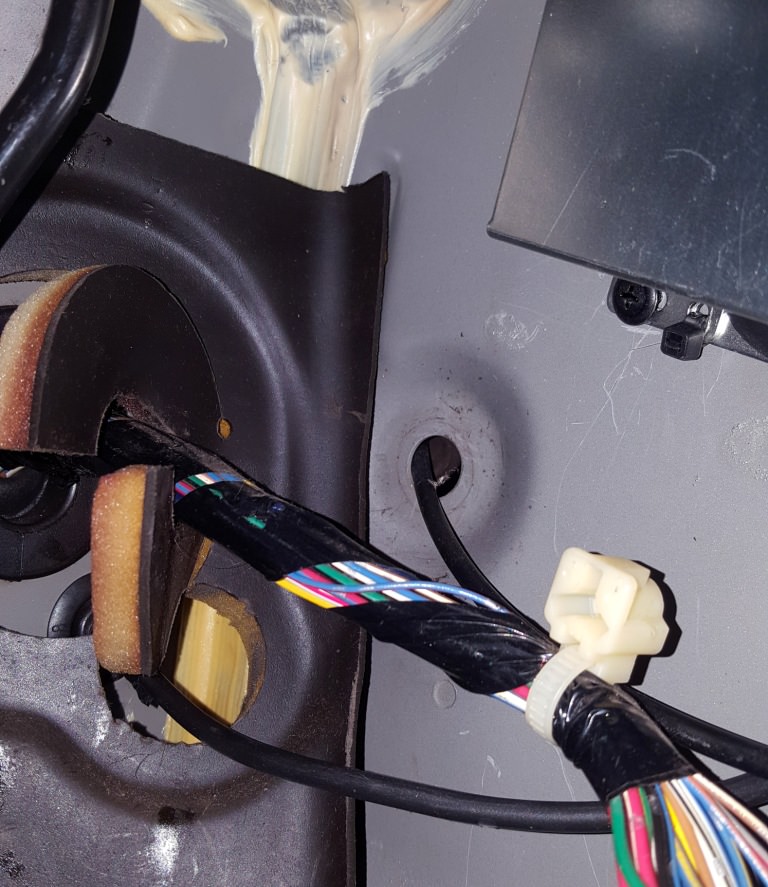
To my amazement, the water was found trickling into the cabin very slowly. The area where it entered was to the right hand side where the bonnet release cable exits the cabin.
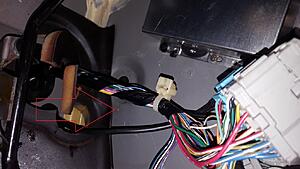
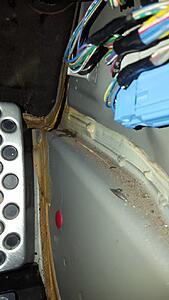
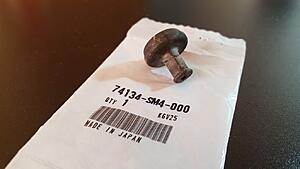
There seemed to be a missing seal or grommet surrounding this cable, a brief look later through the receipts proved that the bonnet release cable was replaced in 2009 and the garage who replaced it did not re-fit the grommet seal.
Item 10 required


The part is still readily available from Honda and only around £4.54.
An order was replaced with a very quick lead time of a few days.
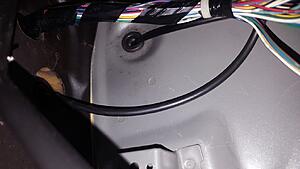
Once the part arrived the fitting was straight forward, the carpets were given a good scrubbing with autoglym shampoo. All underlay sections of the carpet was ensured fully dry using my hobby heat gun.
Some copper grease (all I had at the time)was used on the cable and grommet to allow the grommet to feed itself easily through the cable. It was quite tricky but with alittle patients the grommet secured itself nicely within the aperture sealing it perfectly.
Grommet installed
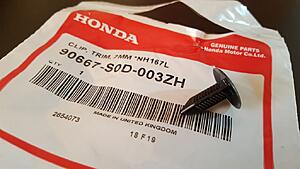
The end clip to hold the bonnet release plastic panel in place was also purchased as this was original missing when the car was purchased.
All components fully reassembled
Hopefully this saga can now be put to rest.
A fantastic result, I couldn't have asked for a better outcome
Parts Purchased
Part: Grommet Seal for Bonnet Release Cable
Part Number: 74134-SM-4000
Supplier: Coxmotorparts
Part: 7mm Clip to Secure Side Panel
Part Number: 90667-S0D-003ZH
Supplier: Coxmotorparts
Services Used:
None
Resources used
My Mobi V17 Portable Pressure Washer.
Now known as Aqua2go.
https://www.aqua2go.eu/en/overview.html
--------------------------------------------------------------------------------------------------------------------------
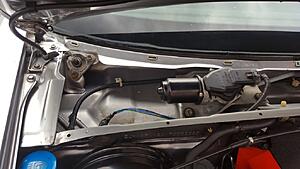
TASK 30 - Remove Windscreen Wiper Cowling (Inspect and Clean)
09-09-2018
During the above investigation and after it was solved, it made sense to also inspect and clean this area of the car. With the cowling assumed not having been removed throughout the car's lifetime it definitely showed.
Cobwebs, debris and leaves were everywhere and as expected.
A quick hose down using the portable jet washer removed most of the dirt
(Special care was taken not to soak or get the cabin filter wet)
With the cowling removed, the filter panel and the fan housing down into the heater matrix was fully inspected and checked.
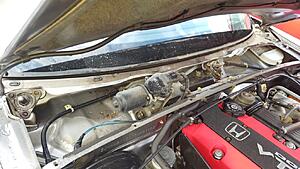
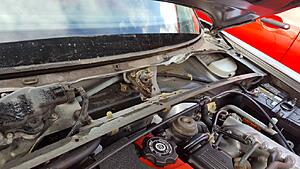
Additional wiping down of various sections continued the clean.
All fittings and cables were inspected with no evidence of any tampering or modifications.
Small surface rust was rubbed down and treated on the centre clip section.
A slight hint of copper grease was used on the wiper motor attachments so the wiper arms do not seize up in the future. (they were quite tricky to remove initially but came off with a little force)
The wiper arms are looking pretty tired with most of its black finish being chipped off, these will be replaced sometime in the future.
A great contrast from before and after, looking fabulously clean.
Parts Purchased
None
Services Used:
None
Resources used
None
--------------------------------------------------------------------------------------------------------------------------
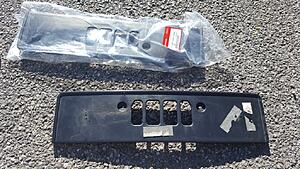
TASK 31 - Replace Front Number Plate Mount and Renew Front & Rear Number Plates
27-09-2018
One of the small little tasks to do was to refresh the front number plate mount.
There is quite a considerable graze on the right hand side of the mount with the front number plate beings scratched also.
I was thinking of sanding down the mount and refreshing it with flexible external trim paint, however a brand new part from Honda was only £36.00 and they are easy to fit having previously removed the bumper to check its current status and to ensure nothing was seized up.
An order was placed for a new genuine front number plate mount.
Both number plates were looking rather tired too so an order was placed for brand new front and rear number plates.
The rear plate was fitted with ease, using the old number plate as a template for the mount holes.
A 2.5mm pilot hole was drilled first followed by 4.8mm drill size to accept the suitable self tapping screw.
Yellow screw caps were used to hide the screws for a tidy finish.
The front number plate mount required the front bumper to be removed.
Already having performed this previously, it was straight forward.
With the front bumper removed, the number plate mount fixings can be loosened.
The mount was held in by x2 10mm flanged bolts
A couple of retaining clips had to be pryed away but the mount came away cleanly.
The area behind the mount was given a good clean and polish.
The installation was a breeze and was the reverse of removal.
Once installed, the new front number plate was measured up with new holes
(the old holes were through a character either side of the registration number which was not acceptable)
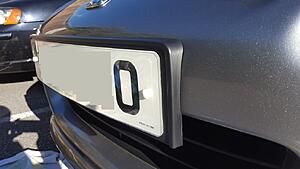
The screw holes were marked up to the unused section of the number plate near the edges.
A 2.5mm pilot hole was drilled first followed by 4.8mm drill size to accept the suitable self tapping screw.
White screw caps were used to hide the screws for a tidy finish.
Once finished, the bumper was re-installed.
The new plates and mount completes the front end refresh.
Parts Purchased
Part: Genuine Honda Number Plate Mount Holder
Part Number: 71180-S2A-G00
Supplier: Coxmotorparts
Part: Front and Rear Number Plates with fixing kit
Part Number: N/A
Supplier: In Car Products (on ebay)
Services Used:
None
Resources used
None
--------------------------------------------------------------------------------------------------------------------------
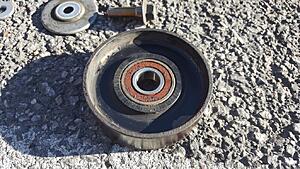
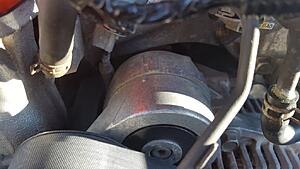
TASK 32 - Remove and Replace Auxiliary Belt, Idler and Tensioner Pulley Bearings
21-10-2018
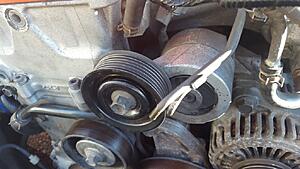
One of the last maintenance tasks that needed doing was to replace the auxiliary belt, there is a stretch indicator on the belt tensioner which indicates the current belt is way past its best.
The car still started up fine with no squeal or belt slipping, but it was the right time to renew this assembly.
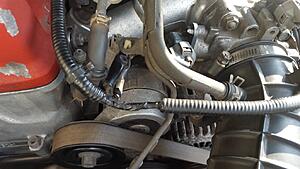
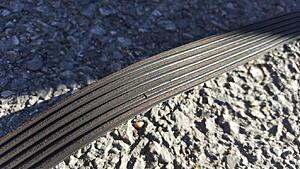
As shown from the image below, the current belt is way out of specification and pretty stretched out.
The belt is most likely the original one.
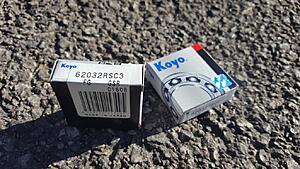
With that in mind, it was also a good opportunity to replace the idler and tensioner pulley bearings.
I was going to buy the full idler and tensioner pulleys with their bearings direct from Honda, however a fantastic video from DIYguys on Youtube showed that the bearings themselves can easily be hammered out and replaced.
The pulleys themselves take the common 6203 size bearing with the 2RS model being the recommended low cost alternative.
With this info, I set about ordering the parts.
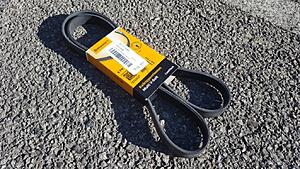
The auxiliary belt from Honda was over £65.00, again I am all for genuine parts but the price for a belt is pretty ridiculous. Various threads on s2ki showed that the Contitech and gates make excellent alternatives and at a fraction of the cost. The belt change is really straight forward so if this aftermarket belt doesn't last that long they can be replaced easily in 5 mins.
I decided to purchase a Contitech belt from Eurocarparts, with their usual promotional discount it came to £12.39 posted. Absolute bargain.
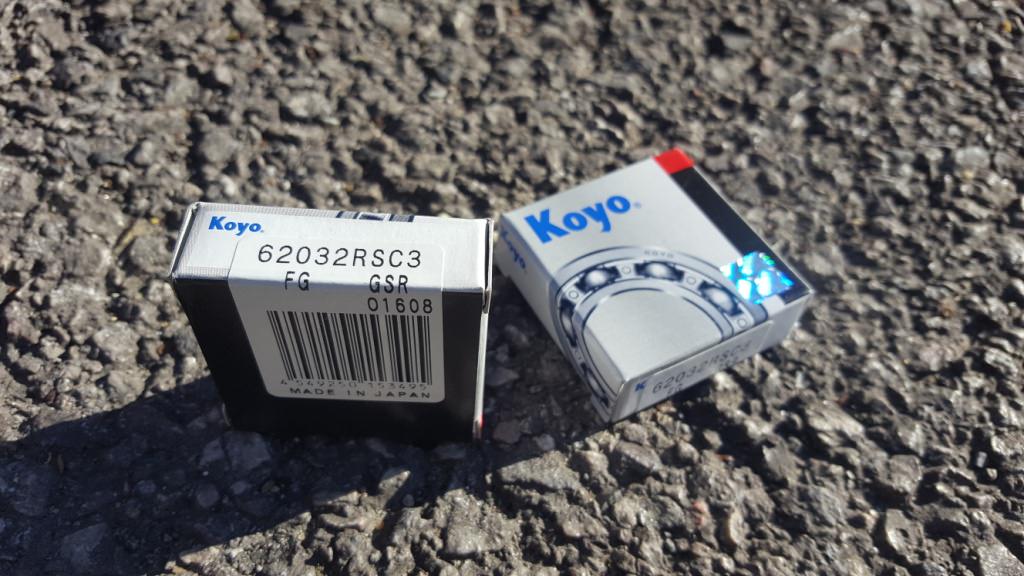
There were several manufacturers for the bearings, like SRF and Koyo. I decided to purchase a pair of Koyo 6203-2RS bearings. The seller sent me the 2RS-C3 version which has the additional internal radial clearance.
However this should still be fine, it has been installed and operating well so far after 300 miles of driving.
The process was pretty straight forward and enjoyable too.
Everything came apart as expected with no major issues encountered.
Before removing the idler and tensioner pulleys, they were checked to see how worn they were.
Notice how much side to side play the tensioner bearing had and how worn the idler bearing was.
It kept on spinning with a ticking type sound.
See videos below
My Worn Idler Pulley
My Worn Tensioner Pulley
The original belt had seen better days, various chips in the belt grooves can be seen.
This was noticed all over the belt.
There were also small cracks in the ribbed grooves too.
From DIYguys video, the only socket I didn't have was the large 1-13/16" socket to rest the tensioner pulley on.
I had to purchase this.
Whilst you are in this area, it is also worth checking the condition of the alternator pulley, water pump pulley and air con compressor.
Ensure the water pump pulley spins freely in both directions with no side to side play and ensure no leaks are present. Ensure the alternator pulley also spins freely and check for play and movement. Perform the same checks to the air con compressor.
Give the surrounding areas a good clean and wipe down before reassembling.
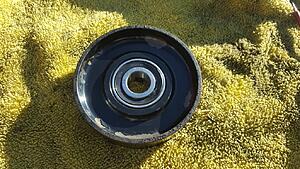
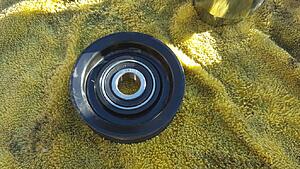
Close up of Idler and Tensioner pulley
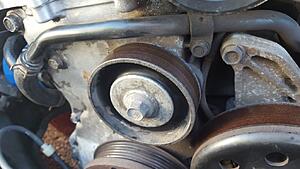
Close up of ilder pulley and its original bearing
New bearings installed into Idler and tensioner pulleys
With new belt installed

Belt stretch indicator now within specification
A fantastic result and a job that is well worth doing on the s2000.
Things to note
-Unless you have a super fancy torque wrench, it was noticed that my torque wrench doesn't torque up in reverse, so this would need to be done manually.
-As stated on DIYguys video, don't forget the bolt holding the tensioner pulley is a reverse thread
-As mentioned above, perform checks on the water pump, alternator and air con compressor.
-If you have alittle more time, you can refurbish (i.e sand and quickly spray paint the pulleys to smarten them up alittle)
Parts Purchased
Part: Koyo 6203-2RS Bearings (x2)
Part Number: 6203-2RS
Supplier: D.cjohnsonltd (Ebay seller)
Part: 1-13/16" 3/4 Inch Square Drive Socket
Part Number: 1-13/16"
Supplier: Toolvillage (Ebay seller)
Part: ContiTech Drive Auxiliary belt (s2000)
Contitech Part Number: 6PK1468
Supplier: Eurocarparts
For reference (Aux belt part numbers)
Eurocaparts Part Number: 202770585
Genuine Honda Part Number: 38920-PCX-024
Services Used:
None
Resources used
DIYGuys Video (Pulley Replacement)
S2ki Thread - Auxiliary Belt Options
https://www.s2ki.com/forums/uk-irela...nions-1188187/
--------------------------------------------------------------------------------------------------------------------------
This brings the car up to date, I have tried to cover as much I could in such a short space of time and before the winter arrives.
I am happy with the way the car drives and looks and now need to drive it more.
This is a small remaining to-do list and will fulfil them with funds allow.
To-do List
-Renew or Refurbish Front Windshield Wiper Arms
-Upgrade Front Pads to Ferrodo DS2500 Type
Long Term To-Do
-Full Geometry Alignment
-Upgrade Oil Jet Bolts (Was a TSB on my year of s2000)
Maybe's
-Refurbish All Wheels
Thanks for reading
03-11-2018
27-08-2018
From the past couple weeks, it had been noticed that the radiator and A/C radiator fans turn on immediately after pre ignition, engine start and on a cold engine. The engine temperature would be ok and no overheating was present.
The radiator fan should only switch on when the coolant reaches a certain temperature, I think around 93-95 degrees. I set about to find out what was wrong.
Thanks to a few old s2ki forum threads, I performed a few tests to find a root cause to the problem.
The threads pin pointed the radiator fan switch to be the most likely problem.
I performed a few tests to confirm this:
-Swapped over the radiator fan switch relay (there is an identical relay within the fuse box)
Result: No difference
-Disconnect the radiator fan switch itself
(fan switch is located on the left hand bottom section of the radiator)
Result: On pre-ignition, engine start and cold engine, the radiator fans do not switch on.
With the above findings it concluded that the existing radiator fan switch is stuck in the closed position.
I am all for sourcing and using genuine Honda parts but for something quite relatively easy to change, several members have recommended a good after market brand.
The Honda OEM part, cheapest I found was £67.00 (Usual RRP £94.00)
After market type: £13.00
The brand of the aftermarket type was Canbiare which is a well known European brand.
I decided to go for this one.
The switch was relatively easy to access, and from several threads it required no coolant bleeding when swapping it out within the radiator which was a plus point.
The lower under tray was a tad tricky to remove with most of its clips crumbling upon removal.
It would seem that it had never been removed.
With the under tray removed, a good general clean was also performed.
The radiator fan switch has a size 24mm hex and a deep socket was required to remove it.
I realised this quite late and didn't have one in the tool box.
A trip to Halfords solved this.
Just a little spillage of coolant during the quick swap over and that was it.
The radiator fan switch is located at the bottom of the radiator when the red arrow is pointing.
Upon engine start and warm-up the fans kicked in as normal and switched off as expected.
A long 40 min drive confirmed full function had been restored.
The old radiator fan switch removed

Parts Purchased:
Part: Radiator Fan Switch
Honda Part Number: 37760-P00003
Canbiare Part Number: VE709047
Supplier: Car Parts In Motion (Ebay Seller)
Tool: 24mm Deep 1/2 inch Socket
Supplier: Halfords
https://www.halfords.com/workshop-to...24mm-1-2-drive
Services Used:
None
Resources used
S2ki Thread: Fans Always on
https://www.s2ki.com/forums/uk-irela...lways-1131621/
Thread I Started
https://www.s2ki.com/forums/uk-irela...arket-1187554/
--------------------------------------------------------------------------------------------------------------------------
TASK 26 - Remove Rear Bumper & Lights (Clean and Under Seal)
28-08-2018
The next task on the agenda was to remove the rear bumper, this would give the opportunity to have a peek behind and see the condition of the rear beam and chassis area.
The bumper removal was pretty straight forward and with the process fairly common with most Honda's. Two screws on either side into the rear quarter, clips on top of the rear bumper, three clips on the bottom section of the rear bumper and two clips either side of the arch.
Once the bumper was off the condition of the rear beam and chassis sections weren't too bad. Few light rust spots with the rear beam rusty in a few places. From research, it seems the rear beam is common to rust due to its location and having no protection from any stone chips.
All sections were cleaned and the wire brush came out, light rust spots were brushed with the rear beam also being tidied up the best it could.
Hammerite rust remover was applied on required areas and then followed a coat of dinitrol under seal spray.


A general clean and wipe down was given to all other areas.
Rear number plate bulbs were replaced and terminals greased up to prevent corrosion
The rear lights were removed inspected and cleaned.
All sections behind the lights were in great condition with no leaks or rust.
The connectors were checked and no signs of corrosion was present.
No moisture or leaks were present behind the boot trim.
The light cluster gaskets were checked and cleaned.


The rear bumper was re-installed and new clips were used in all locations.
Parts Purchased:
Part: Dinitrol Under seal Spray 500ml x3
Part Number: 4941
Supplier: MTS Trading (on ebay)
Part: Hammerite rust remover (gel)
Part Number: 5092868
Supplier: Halfords
Services Used:
None
Resources used
None
--------------------------------------------------------------------------------------------------------------------------
TASK 26 - Remove Front Bumper (Clean and Rust Treat as Required)
02-09-2018
It made sense that the next task was to perform a front bumper removal.
This would also be an opportunity to check for any rust or damage within this area.
Again, the front bumper removal is similar to all Honda's, two screws either side of the front arch, several bolts on the top section of the bumper, two hidden 10mm bolts either side facing the headlamps and several bolts on the underside of the bumper.
Both front arch liners were also removed to aid in access.
Once the bumper was carefully removed the condition of the front sections of the car were also in pretty good condition, with a few rust spots on the front cross beam and various brackets as one would expect.
The rust spots were rubbed down and Hammerite rust remover was applied, followed by a quick coat of touch up paint.
An overall wipe down of all areas were performed and it was looking really fresh.


The air pump was checked and seemed in good clean condition, the previous owner had not tempered with it.
It is common for owners to delete this component if it fails, as it is in good working condition it will be left alone.
The air pump is designed to blow air into the exhaust system upon a cold engine start to quickly heat up the catalytic converter and thus reduce emissions from cold starting.
If you're air pump has failed, you would get a MIL (malfunction indicator lamp) appear on your dash cluster.
If your fault code has detected that the air pump has failed, you can delete it with a special kit from a company called "Delta Lima"
There will be no operating issues, only slightly higher emissions when the car is started from cold.
This will not affect your MOT as the car will be fully warmed and up to operating temperatures when emissions are tested.
The kit has been proven by many s2000 members on this forum.


The bumper itself was checked for damage and also cleaned.
The front number plate and holder were examined, all bolts mounting the holder were clean and not seized.
Due to some cosmetic damage to the number plate holder and number plate itself, I will be replacing both these items later on so it was good to see it will be hassle free.
Parts Purchased:
Part: Hammerite rust remover (gel)
Part Number: 5092868
Supplier: Halfords
Services Used:
None
Resources used
None
If required - Air Pump Delete Kit from Deltalima
https://www.s2ki.com/forums/european...e-kit-1139689/
EGR-Airpump delete (English) – Deltalima-S2000.nl
------------------------------------------------------------------------------------------------------------------------
Task 27 - Rear Mid Level Spoiler
07-09-2018
The s2000 does look fantastic as standard, but I have always loved the look of the mid level spoiler that comes on a few models. This spoiler is an upgrade accessory and apparently still available from Honda, the only issue with the genuine part is that it is quite expensive and requires holes to be drilled within the boot lid to attach it which I refuse to do.
After a search on the forum, there is an aftermarket cheaper and easy to fit solution.
A highly recommended seller which goes by the name of "BMWchop" (a seller on eBay)
From reviews and feedback from many threads on s2k UK, the shape of the spoiler, quality and paint match is amazing.
Many members have reported nothing but good things and from all the images posted up it looks and fits fantastic.
I was convinced by this so had to try it for myself, an order was placed for NH630 pre-painted version and with a handy 10% eBay voucher at the time it worked out even cheaper.
The seller was very efficient with it arriving in just two days and no import duty charge! Great result.
He spoke good English and kept me up to date.
Arrival of the spoiler


Once arrived, a test fit was performed. The colour match was fantastic and the fitment was excellent.
Very impressed indeed, given its price.
On fitment I tried the supplied double sided adhesive tape, but I didn't feel confident that it would stick well despite various reports from other members that it was fine.
I decided to purchase some 3M automotive Vey High Bond adhesive.
I purchased the longer thinner strip (1.5mm thick tape 3M Automotive very High bond Adhesive) for the top and bottom edges of the spoiler.
https://www.ebay.co.uk/itm/3M-VHB-Do...53.m2749.l2649
For the spoiler end sections I used slightly thicker (2.3mm 3M Automotive very High bond Adhesive)
(These came in a small square 100mm x 50mm size which I cut up into two strips of 50mm x 25mm and positioned them either side of the spoiler.
https://www.ebay.co.uk/itm/3M-VHB-10...53.m2749.l2649
The reason why I went for a slightly thicker tape on the end sections is the recess is slightly deeper where the spoiler curves into the ends of the boot edge.
The underside of the spoiler was sanded down to provide an abraded surface for the double sided adhesive to adhere well too.
Once all the tapes was positioned on the spoiler, I got to work to fit it.
The boot lid surface was cleaned with fairy liquid to ensure a clean grease free surface.
I didn't have any masking tape so I just used what I had in my tool box.
Electrical tape was used to provide me with a guide for fitment as this would be a onetime action.

Once suitably aligned within the position marked, the self adhesive backing was removed and the spoiler was pressed into position.

Attachment 152447
The bond of the tape is fantastic, It definitely gives that confidence of a good adhesion to the boot lid.
The spoiler looks fantastic and definitely gives the s2000 a much sportier look.
Extremely happy with the look, quality and results, highly recommended.
Attachment 152448

Parts Purchased
Part: s2000 Mid Level Spoiler
Part Number: N/A
Supplier: BMWchop (on ebay)
Part: 3M Automotive Very High Bond Double Sided Tape (Reel) (1.5mm Thick)
Part Number: RP62
Supplier: fasttapes (on ebay)
Part: 3M Automotive Very High Bond Double Sided Tape (2.3mm Thick)
Part Number: 3M VHB 4991
Supplier: happy-london-tapes (on ebay)
Services Used:
None
Resources used
S2k Thread - Spoiler Recommendation
https://www.s2ki.com/forums/uk-irela...dvice-1103781/
S2k Thread - Adhesive tape for Spoiler
https://www.s2ki.com/forums/uk-irela...kness-1187765/
------------------------------------------------------------------------------------------------------------------------
Task 28 - Genuine Front Pre-Face Bumper Lip
07-09-2018
I've always loved the look of the pre facelift s2000 with a front lip as it added a subtle aggression to the s2000 without going over the top.
I had an urge to source one but wasn't sure if they were still available.
After several enquiries it became apparent that Honda still had stock of them and they were available in my pre painted Silverstone metallic colour
Fantastic result.
Unfortunately, the price of this part had increased dramatically over the years and I had to decide whether or not it was worth to pay such a price for one.
I tried to search for alternatives just like with the mid level spoiler.
There were replica's available but from reviews/feedback, the fitment is not great and unless you have a body shop to hand to help fit, paint and attach it, alot of people say to avoid them as the costs and hassle involved isn't worth it.
The genuine part comes pre-painted and attaches as any genuine part does. Utilising existing mounting points with the supplied hardware it takes on average 20mins to fit and the fitment should be perfect.
I contemplated long and hard about it, and thought what the hell. This would most likely be my last upgrade to the car.
Let's go for it.
I placed an order and within 3 days it arrived. The paint finish and quality is as you would expect from a genuine part, flawless. I was glad a genuine part was purchased.
The box was huge!


Fitting the lip was straight forward, with the supplied instructions it just needed the removal of the three centre bolts from the underside of the bumper and a couple of pilot holes drilled on either side of the bumper edges for self tapping screws for the front lip end attachment.
A further 2 bolts per side on the underside were required with the supplied fastening bolts.
A hint of copper grease was used on all bolts and screws for easy removal in the future.
The lip wrapped around the bumper perfectly like a glove and with all the bolts securing it, installation was complete within 30mins and that was me taking my time including adding a layer of wax behind the bumper section that will be covered by the lip.
Fantastic transformation, the front lip does really look good on the pre-face lift s2000.
Fully installed


A great buy and highly recommended to any pre-face lift owner.
Parts Purchased
Part: Genuine Front Under Lip (pre painted in Silverstone metallic)
Part Number: 08F01-S2A-681F
Supplier: Coxmotorparts
Services Used:
None
Resources used
Supplied Instruction Manual for Front Lip Fitting
Also can be found online here
https://www.handa-accessories.com/S2000/s2kfuspoil.pdf
------------------------------------------------------------------------------------------------------------------------
TASK 29 - Investigate Water Leak into Driver Footwell - (PROBLEM 2)
10-09-2018
In the early months of my s2000 ownership, it was noticed that a small water leak was apparent.
This was resolved my repairing the rubber seal on the A-pillar which now re-directs the water as it should out into the door channel recesses.
After a few more heavy rainfalls it was noticed that a slight trickle of water was still entering the cabin and making the carpet underneath the drivers pedals slightly wet. The water seemed to also be absorbed up within the insulation in this area underneath the main floor carpet.
The previous owner never really suffered from this as the car was stored under a car port.
This was on the agenda and was vital I resolve this before winter approaches.
Even getting additional help from a garage to completely strip the interior to find the root cause if required .
I set aside a full day of diagnosis and went about eliminating various sections just to make sure I covered all areas.
Not having any access to a hose pipe or running water I relied on my battery powered portable jet washer to simulate rainfall. Known as the Mobi V17, other similar models are known and manufactured by Sealey or Aqua2go if interested.
Fantastic bit of kit, stores around 18 litres of water and provides excellent suitable pressure.
I checked all the seals around the windows and roof. Moving towards the front and around the A-pillars.
This included all drain points in the engine bay and the drain point under the windscreen wiper cowling

I double checked and removed all the A-pillar plastic mouldings.
No sign of any water entering.
The rear roof drains were checked and confirmed water was draining fine in this section.
The next stage was to remove the wind screen wiper cowling section.
(this will also be documented separately on the next task for inspection and clean)
With the cowling removed, the wind screen seal was inspected with no defects apparent.
The windscreen is still the original Honda part which gave a good sigh of relief it had not be tampered with or previously replaced.
Back into the driver's footwell, I removed the x2 bolts holding the foot rest and the lower right side panel which sits over the bonnet release catch (the driver's door side sill) needs to be unclipped and removed first.

In this state, water can be sprayed and hopefully monitor its point of entrance.
Water drain points are located in the upper corner of the drivers engine bay and another one under the bonnet hinge area.
I used my battery powered pressure washer to direct water at these drain points whilst monitoring.
To my amazement, the water was found trickling into the cabin very slowly. The area where it entered was to the right hand side where the bonnet release cable exits the cabin.


There seemed to be a missing seal or grommet surrounding this cable, a brief look later through the receipts proved that the bonnet release cable was replaced in 2009 and the garage who replaced it did not re-fit the grommet seal.
Item 10 required

The part is still readily available from Honda and only around £4.54.
An order was replaced with a very quick lead time of a few days.

Once the part arrived the fitting was straight forward, the carpets were given a good scrubbing with autoglym shampoo. All underlay sections of the carpet was ensured fully dry using my hobby heat gun.
Some copper grease (all I had at the time)was used on the cable and grommet to allow the grommet to feed itself easily through the cable. It was quite tricky but with alittle patients the grommet secured itself nicely within the aperture sealing it perfectly.
Grommet installed

The end clip to hold the bonnet release plastic panel in place was also purchased as this was original missing when the car was purchased.

All components fully reassembled

Hopefully this saga can now be put to rest.
A fantastic result, I couldn't have asked for a better outcome
Parts Purchased
Part: Grommet Seal for Bonnet Release Cable
Part Number: 74134-SM-4000
Supplier: Coxmotorparts
Part: 7mm Clip to Secure Side Panel
Part Number: 90667-S0D-003ZH
Supplier: Coxmotorparts
Services Used:
None
Resources used
My Mobi V17 Portable Pressure Washer.
Now known as Aqua2go.
https://www.aqua2go.eu/en/overview.html
--------------------------------------------------------------------------------------------------------------------------
TASK 30 - Remove Windscreen Wiper Cowling (Inspect and Clean)
09-09-2018
During the above investigation and after it was solved, it made sense to also inspect and clean this area of the car. With the cowling assumed not having been removed throughout the car's lifetime it definitely showed.
Cobwebs, debris and leaves were everywhere and as expected.
A quick hose down using the portable jet washer removed most of the dirt
(Special care was taken not to soak or get the cabin filter wet)
With the cowling removed, the filter panel and the fan housing down into the heater matrix was fully inspected and checked.


Additional wiping down of various sections continued the clean.
All fittings and cables were inspected with no evidence of any tampering or modifications.
Small surface rust was rubbed down and treated on the centre clip section.
A slight hint of copper grease was used on the wiper motor attachments so the wiper arms do not seize up in the future. (they were quite tricky to remove initially but came off with a little force)
The wiper arms are looking pretty tired with most of its black finish being chipped off, these will be replaced sometime in the future.
A great contrast from before and after, looking fabulously clean.


Parts Purchased
None
Services Used:
None
Resources used
None
--------------------------------------------------------------------------------------------------------------------------
TASK 31 - Replace Front Number Plate Mount and Renew Front & Rear Number Plates
27-09-2018
One of the small little tasks to do was to refresh the front number plate mount.
There is quite a considerable graze on the right hand side of the mount with the front number plate beings scratched also.

I was thinking of sanding down the mount and refreshing it with flexible external trim paint, however a brand new part from Honda was only £36.00 and they are easy to fit having previously removed the bumper to check its current status and to ensure nothing was seized up.
An order was placed for a new genuine front number plate mount.
Both number plates were looking rather tired too so an order was placed for brand new front and rear number plates.


The rear plate was fitted with ease, using the old number plate as a template for the mount holes.
A 2.5mm pilot hole was drilled first followed by 4.8mm drill size to accept the suitable self tapping screw.
Yellow screw caps were used to hide the screws for a tidy finish.
The front number plate mount required the front bumper to be removed.
Already having performed this previously, it was straight forward.
With the front bumper removed, the number plate mount fixings can be loosened.
The mount was held in by x2 10mm flanged bolts
A couple of retaining clips had to be pryed away but the mount came away cleanly.

The area behind the mount was given a good clean and polish.

The installation was a breeze and was the reverse of removal.
Once installed, the new front number plate was measured up with new holes
(the old holes were through a character either side of the registration number which was not acceptable)


The screw holes were marked up to the unused section of the number plate near the edges.
A 2.5mm pilot hole was drilled first followed by 4.8mm drill size to accept the suitable self tapping screw.
White screw caps were used to hide the screws for a tidy finish.
Once finished, the bumper was re-installed.
The new plates and mount completes the front end refresh.
Parts Purchased
Part: Genuine Honda Number Plate Mount Holder
Part Number: 71180-S2A-G00
Supplier: Coxmotorparts
Part: Front and Rear Number Plates with fixing kit
Part Number: N/A
Supplier: In Car Products (on ebay)
Services Used:
None
Resources used
None
--------------------------------------------------------------------------------------------------------------------------
TASK 32 - Remove and Replace Auxiliary Belt, Idler and Tensioner Pulley Bearings
21-10-2018
One of the last maintenance tasks that needed doing was to replace the auxiliary belt, there is a stretch indicator on the belt tensioner which indicates the current belt is way past its best.
The car still started up fine with no squeal or belt slipping, but it was the right time to renew this assembly.

As shown from the image below, the current belt is way out of specification and pretty stretched out.
The belt is most likely the original one.
With that in mind, it was also a good opportunity to replace the idler and tensioner pulley bearings.
I was going to buy the full idler and tensioner pulleys with their bearings direct from Honda, however a fantastic video from DIYguys on Youtube showed that the bearings themselves can easily be hammered out and replaced.
The pulleys themselves take the common 6203 size bearing with the 2RS model being the recommended low cost alternative.
With this info, I set about ordering the parts.
The auxiliary belt from Honda was over £65.00, again I am all for genuine parts but the price for a belt is pretty ridiculous. Various threads on s2ki showed that the Contitech and gates make excellent alternatives and at a fraction of the cost. The belt change is really straight forward so if this aftermarket belt doesn't last that long they can be replaced easily in 5 mins.
I decided to purchase a Contitech belt from Eurocarparts, with their usual promotional discount it came to £12.39 posted. Absolute bargain.

There were several manufacturers for the bearings, like SRF and Koyo. I decided to purchase a pair of Koyo 6203-2RS bearings. The seller sent me the 2RS-C3 version which has the additional internal radial clearance.
However this should still be fine, it has been installed and operating well so far after 300 miles of driving.
The process was pretty straight forward and enjoyable too.
Everything came apart as expected with no major issues encountered.
Before removing the idler and tensioner pulleys, they were checked to see how worn they were.
Notice how much side to side play the tensioner bearing had and how worn the idler bearing was.
It kept on spinning with a ticking type sound.
See videos below
My Worn Idler Pulley
My Worn Tensioner Pulley
The original belt had seen better days, various chips in the belt grooves can be seen.
This was noticed all over the belt.
There were also small cracks in the ribbed grooves too.

From DIYguys video, the only socket I didn't have was the large 1-13/16" socket to rest the tensioner pulley on.
I had to purchase this.

Whilst you are in this area, it is also worth checking the condition of the alternator pulley, water pump pulley and air con compressor.
Ensure the water pump pulley spins freely in both directions with no side to side play and ensure no leaks are present. Ensure the alternator pulley also spins freely and check for play and movement. Perform the same checks to the air con compressor.
Give the surrounding areas a good clean and wipe down before reassembling.

Close up of Idler and Tensioner pulley


Close up of ilder pulley and its original bearing

New bearings installed into Idler and tensioner pulleys


With new belt installed

Belt stretch indicator now within specification

A fantastic result and a job that is well worth doing on the s2000.
Things to note
-Unless you have a super fancy torque wrench, it was noticed that my torque wrench doesn't torque up in reverse, so this would need to be done manually.
-As stated on DIYguys video, don't forget the bolt holding the tensioner pulley is a reverse thread
-As mentioned above, perform checks on the water pump, alternator and air con compressor.
-If you have alittle more time, you can refurbish (i.e sand and quickly spray paint the pulleys to smarten them up alittle)
Parts Purchased
Part: Koyo 6203-2RS Bearings (x2)
Part Number: 6203-2RS
Supplier: D.cjohnsonltd (Ebay seller)
Part: 1-13/16" 3/4 Inch Square Drive Socket
Part Number: 1-13/16"
Supplier: Toolvillage (Ebay seller)
Part: ContiTech Drive Auxiliary belt (s2000)
Contitech Part Number: 6PK1468
Supplier: Eurocarparts
For reference (Aux belt part numbers)
Eurocaparts Part Number: 202770585
Genuine Honda Part Number: 38920-PCX-024
Services Used:
None
Resources used
DIYGuys Video (Pulley Replacement)
S2ki Thread - Auxiliary Belt Options
https://www.s2ki.com/forums/uk-irela...nions-1188187/
--------------------------------------------------------------------------------------------------------------------------
This brings the car up to date, I have tried to cover as much I could in such a short space of time and before the winter arrives.
I am happy with the way the car drives and looks and now need to drive it more.
This is a small remaining to-do list and will fulfil them with funds allow.
To-do List
-Renew or Refurbish Front Windshield Wiper Arms
-Upgrade Front Pads to Ferrodo DS2500 Type
Long Term To-Do
-Full Geometry Alignment
-Upgrade Oil Jet Bolts (Was a TSB on my year of s2000)
Maybe's
-Refurbish All Wheels
Thanks for reading
03-11-2018
Last edited by s2000_f20; 11-03-2018 at 12:46 PM.

The following users liked this post:
Arussto (12-23-2021)
11-03-2018, 09:04 AM
#22

Nice work! Can I give you a couple of heads up? First with the rear bumper off you seem to have the towing eye extension screwed into the bar, it should be taken out and stored in the tool tray, reason being if the bumper gets a nudge it will pop the cover out.
Secondly if fitting parts with tape don't rough up the surface, adhesive tape needs a smooth surface to adhere best, shouldn't be a problem but it might fall off in 30 years time! Only rough up a surface when using liquid glues like epoxy etc.
Secondly if fitting parts with tape don't rough up the surface, adhesive tape needs a smooth surface to adhere best, shouldn't be a problem but it might fall off in 30 years time! Only rough up a surface when using liquid glues like epoxy etc.
11-04-2018, 08:02 AM
#23

Left hand thread did not know that for the pulley may of saved a major issue 
11-04-2018, 10:27 AM
#24
Registered User
Thread Starter
Thanks Richmc,
Cheers for the heads up, I didnt know that about the towing eye extension. My tool set for the s2000 is all complete and nothing is missing.
You sure this is not standard to have it on there for the early s2000's?
Duly noted with regards to the rough and smooth surfaces. It should be ok, it is firmly attached and it is definitely not going anywhere.
Cheers Noodels - Your welcome. Have to thank DIYguys though. Couldn't have done it without his video.
03-03-2019, 06:47 AM
#25
Registered User
Thread Starter
Hi Guys,
Here’s the next update on the s2000
--------------------------------------------------------------------------------------------------------------------------
Task 33 - Starter Motor Grind in Cold Conditions
19-11-2018
As soon as the temperatures started to drop I noticed something very odd with the s2000. I occasionally will use the s2000 for work and upon engine start I noticed a slight grind just after the engine fired up.
At first I didn't think anything of it, and thought it was me having my finger on the push start button longer than I should have. As the mornings got colder, I noticed it occurring alot more.
I quickly did a search on the forum, and unfortunately it is a common known issue with the starter motors of all s2000's. It affected all years. (apparently it also affects all k20 engines too)
I was quite disappointed at this, with the s2000 being a flagship car for Honda in its hay day, things like this shouldn't occur. The starter motor part is not cheap with a genuine Honda part coming up at £400. From reading up on several threads, most people tend to just live with it. It does not occur at all in milder or summer weather conditions and as the majority of people tend to only use their s2000's in the summer months it is quite often overlooked.
The issue I have is that the constant grind will eventually cause long term damage to the flywheel, and the grinding sound is truly awful.
The basic reason for the grind is a sticking bendix gear mechanism, the sticking causes a slight delay in retracting the pinion gear after engine start which causes the slight grind.
It is not known if Honda ever knew about this issue, and it is believed the starter motor from Honda was never up-issued or superseded to address the problem at all. So inevitably, if you did change the starter motor it would be only a matter of time until the problem returned again.
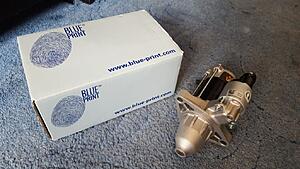
With this knowledge, I was intending to just live it with it and not use the car as much during the winter months. However a brand new blueprint s2000 starter motor popped up on eBay, a quick message to the seller I decided to take a punt and did a deal.
I manage to bag it for £35 delivered

Several DIY guides showed that the process to remove and fit a starter motor was quite tricky, doable but tricky. With winter in full motion I decided not to tackle it and have my trusty garage to take care of it.
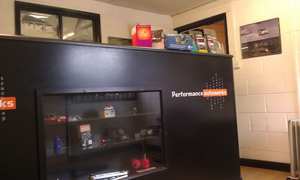
A quick message to Performance Autoworks, a slot was booked in and the job was done within a couple of hours.
The starter motor worked well upon initial fire, several tests over the next coming days proved that the initial grind had disappeared. A great result all at a great price.
Thanks again to Rich at Performance Autoworks and to the fellow members of s2ki UK forum for help and advice.
Parts Purchased:
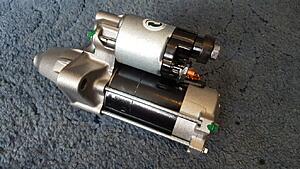
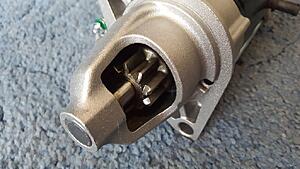
Part: s2000 Starter Motor (Blueprint Version)
Blueprint Part Number: ADH21255
Private Ebay Sale: EBay seller "proud2help"
For reference
Genuine Honda Part Number for Starter Motor: 31200-PCX-A02
Services Used:
Performance Autoworks
Performance Autoworks (Fairford/Gloucestershire GL7 4BX)
Contact: Richard Voaden
Tel: 01285 711 733
Email: info@performance-autoworks.co.uk
https://www.facebook.com/pages/Performa ... 1547611908
Resources used
S2ki Thread: "Starter motor grind on cold mornings"
https://www.s2ki.com/forums/uk-irela...nings-1189121/
--------------------------------------------------------------------------------------------------------------------------
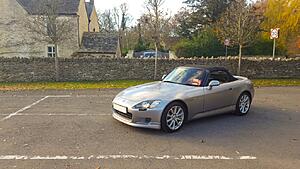
Task 34 - Quick Photo Shoot, Somewhere in Fairford.
19-11-2018
Just after the starter motor was replaced, we decided to have a quick blast around the surrounding roads.
A lovely rural car park was found so there was only one thing to do
A quick photo shoot of the car as she stands today.
I didn't have my DLSR camera, so the shots were taken using my Samsung galaxy S6 phone.

Parts Purchased:
None
Services Used:
None
Resources used
None
--------------------------------------------------------------------------------------------------------------------------
Task 35 - Investigate Water Leak into Boot - (PROBLEM 3)
(Water Ingress Through Soft Top Hood Drainage Channel)
24-11-2018
Whilst I was washing the s2000 on the weekend, it was noticed that the boot floor on the right hand corner was slightly wet. It was at this instant, I knew I was another victim of the s2000 dreaded water in the boot syndrome.
First task was to strip the boot entirely of its interior trim, all interior trim came out with ease.
There was one tricky bolt securing the OEM CD changer, this attaches the cradle from underneath the chassis. Once removed the main floor trim came out with ease.
Once all the trim was removed, the water also found its way into the main centre section of the boot floor where it had just started to rust.
A quick mop up of the standing water, wire brush with my cordless drill and a couple coats of hammertite paint quickly removed the rust and further protected it.
The condition of the boot was in pretty good shape and there seemed to be no evidence of any crash damage.
With that sorted, the next task was to try and locate the water leak. A quick spray over the hood showed that the water was entering the boot on the back section of the soft top hood. It appeared to be entering with a slow drip just in the corner from the drain gutter channel.
The leak was now located but it would be the furthest I could go without dismantling the hood.
It would seem there is a U shaped gutter channel surrounding the back edge of the hood, rain water collects in these channels and directs it to the side of the car.
Photos courtesy of user: Mike’s
With that in mind, my options were either to replace the hood or find a hardtop.
I made some enquiries for the best places for hood replacements, the top ones being Jack Smiths or Monsoon Hoods. I really wanted a hardtop, so the search continued to see if I could get one.
Parts Purchased:
None
Services Used:
None
Resources used
Monsoon Car Hoods
https://www.monsooncarhoods.co.uk/
Jack smith Hoods
https://www.facebook.com/JackRSmithMotorTrimmers/
(Jack smiths does not have a website nor does he communicate via email)
Note: telephone is his only form of communication
--------------------------------------------------------------------------------------------------------------------------
Task 36 - Hardtop Purchase
02-12-2018
Whilst browsing the forums and eBay, an s2000 hardtop in Silverstone silver popped up on eBay.
From the images it looked in fabulous condition.
Further enquiries led to additional images and some very minor scratches to the right had side of the hardtop.
There was some minor scratches on the inside upper interior on the passenger side which I didn't mind.
We discussed its pricing and then we struck an agreement.
Overall, for the price it was a fantastic deal, and it would have been too good of a price to pass even with the slight defects.
This would now solve my immediate water leaking issues, I intend to keep the hardtop on until I find the additional funds to replace the hood at a later date.
I've always loved the look of the hardtop, it just completes the fantastic lines of the s2000.
I had a quick look at the original Honda instructions for installing the hardtop, just to be familiar with the process.
The day came to pick up the hardtop. They were based near Bournemouth so it was approx 2 hour drive from home.
It was constantly raining on and off throughout the day, nevertheless, I got there with no drama's or hold ups on the roads and it was great drive. There are some fab roads down there.
The seller was very pleasant and was gutted to let the hardtop go, he had his s2000 for 12 years until he was a victim of the s2000 twitchy rear end. His s2000 was written off.
The hardtop was more fiddly to install than I expected, but the spike brackets lined up great and the front strikers were clamped securely, the revised hardtop strikers will most likely be needed but I will purchase these at a later date. The install was definitely a two person job.
It needs a good clean having been in their garage for many years, but overall I was very pleased with the results.

With the s2000 being a 1999 model, I did not have the circuitry for the rear heater demister, my next task would be to possibly find out if I can get this feature all up and running.
After a few rainy days, it had been confirmed that no further water leakage was entering the boot via the roof area.
However, before re-installing the boot trim the common rear bumper vent will be siliconed up as a precaution.
This to follow at a later task.
Further research shows that a specific loom for the rear heater circuitry has now been discontinued from Honda.
This is specific for the 1999-2001 model of the s2000.
In light of this information, I will be dropping the plans of commissioning the rear demister setup.
Parts Purchased:
Part: s2000 Genuine Hardtop Roof
Honda Part Number: Unknown
Private Sale: EBay seller 2nd Hand
Services Used:
None
Resources used
PDF of hardtop installation Instructions
https://www.handa-accessories.com/s2000/s2k2top.pdf
S2ki thread - Rear Heater Demister Circuitry
https://www.s2ki.com/forums/uk-irela...r-my00-916782/
--------------------------------------------------------------------------------------------------------------------------
Task 37 - Investigate Water Leak into Boot - (PROBLEM 4)
(Water Ingress Through Antenna)
07-12-2018
After a few heavy rainfalls I kept monitoring the boot for any further water ingress, to my disappointment another pool of water was present on the right hand side of the boot.
Further checks showed clearly that it was now entering through the rear antenna.
Placing my hand up around the base of the antenna inside the boot, it showed water had been dripping through.
This seemed to be another common water entrance point for the s2000.
To remove the fastening nut that secures the antenna mount and seals, a special tool was required.
The special tool that is required seems to be similar to a 90 degree bent pliers used for removing circlips.
However, within my tool box I located a tool to remove rear back cases of watches.
This was ideal for the job and fitted the fastening nut perfectly.
The fastening nut and all seals were removed and inspected.
All seals were in good condition and no rips or tears were present.
A good clean were given to all components, including the surrounding area of the body work where the seals are positioned.
Shin entsui silicone grease was used to coat the seals to restore its suppleness and flexibility.

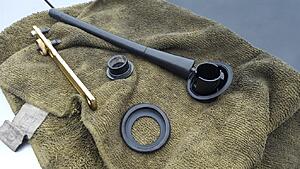
Re-assembly was straight forward.
After several rainfalls, no further water ingress was present.
It may have seemed that the cause of the water leakage was a loose fastening nut.
New seals and components were still readily available from Honda and were reasonably priced.
However, the current components were in such good condition, I felt there was no need for replacements.
Parts Purchased:
None
Services Used:
None
Resources used
None
--------------------------------------------------------------------------------------------------------------------------
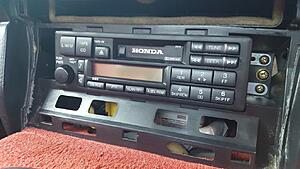
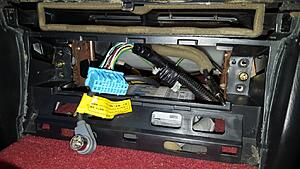
Task 38 - Stereo Removal & Check
18-12-2018
One of the quick easy tasks on the list was to remove the head unit to check for any issues.
The stereo system worked fine, but as this was a very easy task it would be an ideal opportunity to check to see if any dodgy modifications were performed. Especially after seeing the poor execution of the speaker upgrade a while back.
Dealing with anything electronic, it's always ideal to disconnect the main car's battery.
Being an original stereo head unit in known good operating condition, it is not 100% necessary but that is up to you.
The front stereo cover was removed by gently applying outward pressure to the lower section of the cover. The cover pops out revealing the head unit installation screws, 2 self tapers either side of the head unit.
Simply unscrew these and the head unit can be removed. It was that easy.
Thankfully on inspection, it would seem that the head unit has never been touched.
All cabling and wiring are all original, no cutting or splicing was present on any of the ISO block wires.
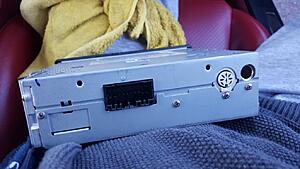
The head unit's main ISO connector and CD changer connector was unplugged and all its terminals wire brushed and cleaned.
Re-installation was straight forward and a breeze.
Don't forget to re-connect the battery if you disconnected it.
I have no plans in upgrading the stereo, the original system with its original CD changer works fantastic.
Parts Purchased:
None
Services Used:
None
Resources used
Note: If you plan to remove or disconnect the head unit,
Ensure you have the head unit security code to hand, as this will be required upon power up.
(As far as I am aware, all OEM s2000 head units will require a security code if the battery has been disconnected)
--------------------------------------------------------------------------------------------------------------------------
Task 39 - Hardtop Clean
18-12-2018
One of the tasks was to deep clean the hardtop, with the previous owner having stored this hardtop in their garage it needed a good clean.
The first task was to hose down and clean the hardtop as normal, detailing brushes were used to remove dirt and grime from the side crevices and all rubber seals and gaskets were wiped down. The latches were thoroughly cleaned with brushes and the headliner was also wiped down.
Being on my own, the hardtop cannot just be removed and placed on the floor to clean, so I had to do what I could with the hardtop slightly unbolted.
Once the hardtop was clean, the rear side interior inner panels were removed, this area was covered in spider webs and dead spiders, it wasn't a pleasant sight. I didn't take a pic of this as I just plodded on in hoovering it all up.
Area now completely clean
Once I was happy with the cleanliness of the hardtop, it was now a case to quickly DA polish the paint work.
I don't have mains power out in the car park, so I had to make use of a DA attachment to a cordless drill.
It is not to bad and useful in removing light marks and blemishes. Meqguries compound polish was used.
After the polishing session, all seals were coated in Shin Entsui silicone grease.
This included the seal which mates to the rear boot lid deck and the seal which mates to the front top section of the windshield. A hardtop will always make noises due to the fact it is not physically part of the car, however siliconing all these seals is highly recommended to help prevent annoying squeaks and rubbing noises.
A rattling noise was also present which was due to the front strikers being the original version and worn out.
Hardtop front striker upgrade will be purchased and installed later to further reduce this hardtop rattling sound.
Parts Purchased:
None
Services Used:
None
Resources used
Meguires DA Drill Attachment Polisher
--------------------------------------------------------------------------------------------------------------------------
Task 40 - Investigate Water Leak into Boot - (PROBLEM 5)
(Water Ingress Through Rear Bumper Vent)
28-12-2018
From the previous water ingress issue (Problem 4), the boot was still in a stripped down state as this allowed me to monitor and see if there were any further water ingress issues.
After several checks ,it was confirmed that a very small drip was coming from the rear bumper's one way vent after several heavy rain falls.
Again, this is another common water entry point on all s2000's.
The gasket seal around this vent perishes over time, and can allow water ingress filling up the base pan of the boot.
Due to the tool set being on top of this area, owners tend not to realise that water has been settling underneath for quite some time.
The s2000 is now 20 years old, so it was understandable that this gasket has lost its ability to seal.
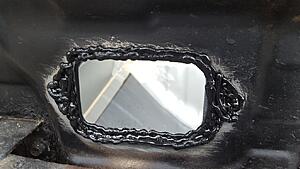
To resolve the issue it required the rear bumper to be removed.
On a mild winter's day during the Christmas holidays, I set about to get this sorted.
The rear bumper was removed easily as it was removed on a previous task.
Once the bumper was removed, the vent can be seen. It is unclipped from inside the boot area.
(note: Boot trim to the rear of the car needs to be removed if not already done so)
Once unclipped, the vent can be removed with ease.
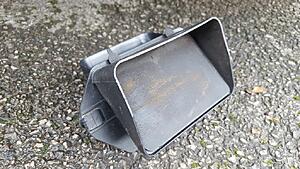
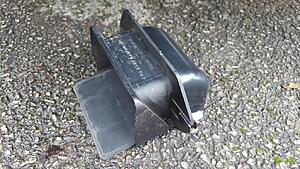
The gasket seal was still intact but it was starting to loose its adhesion.
The gasket was peeled away and removed completely.
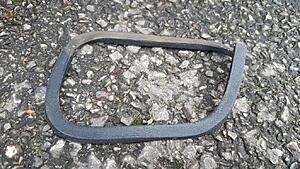
With the gasket removed, the vent was thoroughly cleaned and checked for any other defects.
Once I was happy no other defects was present, I continued to prep the mating area. This was cleaned and lightly abraded to allow the silicone to adhere to it.
The side clips have to be discarded to allow a flush fit between the vent and chassis.
The silicone chosen for the job was a marine grade type, there are many types of silicone variants available so I wanted one that will last and be a one time job.
I choose Geocel's marine grade type silicone in black.
It was applied to the chassis section and on the vent itself, once applied, the vent was mated up to the chassis.
Force was applied for several minutes to keep it in place and then it held on by itself.
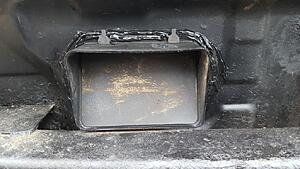
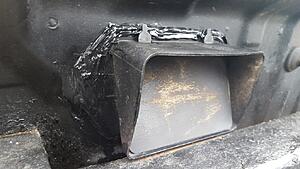
Once cured (24 hours), it gave a superb excellent long lasting seal.
It was then tested and confirmed water tight.
An easy DIY that has now hopefully ended my water ingress issues.
Parts Purchased:
Part: Geocel Marine Silicone (Black Colour)
Part: N/A
Ebay Link
https://www.ebay.co.uk/itm/Geocel-Ma...53.m2749.l2649
Services Used:
None
Resources used
s2ki Thread - "Sealing Rear Bumper Vent"
https://www.s2ki.com/forums/s2000-un...cs-fix-465581/
--------------------------------------------------------------------------------------------------------------------------
Task 41 - Further Rust Proof Base Pan of Boot
28-12-2018
As soon as the bumper vent was completed, I decided to further protect the base pan of the boot just in case water does find its way into the centre section of the boot for long periods of time.
There were many rust proofing options, however I decided to use the left over Dinitrol 4941 underseal spray I used on the rear bumper undersealing.
I had just over half a can of the stuff so it was ideal.
The base pan of the boot was thoroughly wiped down and cleaned to ensure no grease or oils were on the surface. All debris was also hovered up.
The upper boot floor sections were masked off to prevent any over spray, and a suitable boundary was masked off on the section to the rear of the car. (Just above where the welds are)
It was then just a matter of applying several even light coats and allowing each coat to dry for around 15 minutes.
Once the area was evenly covered the results looked good.
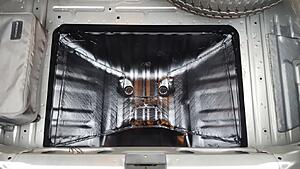
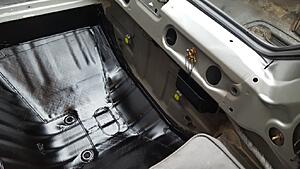
This was left to fully cure and dry.
Note: If applying, the odour of the undersealing application will find its way and affect the main cabin of the car.
This will last several weeks.
Parts Purchased:
Part: Dinitrol Under seal Spray 500ml
Part Number: 4941
Supplier: MTS Trading (on ebay)
Services Used:
None
Resources used
s2ki Thread - "Sealing Rear Bumper Vent"
https://www.s2ki.com/forums/s2000-un...cs-fix-465581/
--------------------------------------------------------------------------------------------------------------------------
Task 42 - Re-install Boot Trim Interior & Hardtop Interior Side Sections
28-12-2018
After several rainfalls and a session of spraying at all angles of the boot, rear bumper panel gaps, rear antenna and the hardtop seals with my portable jet washer, I was confident no further water ingress into the boot area was possible.
It was now time to re-install all the boot trim.
Firstly, the CD changer was removed, as this would make the floor trim easier to install without fighting in and around the CD changer. The spare wheel was also removed.
The CD changer has one troublesome fastening nut which is located underneath the car.
The tie straps were screwed back into place on the rear section of the boot and then the floor interior trim was placed with ease.
All the original clips were still in good condition and so were re-used.
With the floor trim in place, all the surrounding trim can be fitted easily and clipped back into place.
New clips were purchased for the side panel and rear centre section panels as these crumbled when away when they were removed.
The CD changer was re-installed, and the tool set was placed back into the centre section.
The interior pieces for the hardtop was also re-installed, side edging rubber lining was installed on the end section of these interior pieces. This edge is in close proximity to the metal surface of the hardtop so it should help prevent any squeaks or additional interior noises.
High quality stuff from Tegiwa, it installs on the edge of the trim very nicely.
Great for other areas of the car.
Job Done!
Parts Purchased:
Part: Interior Clip
Part Number: Equivalent to Honda 91505-SL0-003, 91505-ST3-E01ZC and 91505-ST7-003ZA
Supplier: 227sparts (Seller on eBay)
https://www.ebay.co.uk/itm/10x-8mm-H...53.m1438.l2649
Part: Rubber Edging for Interior trim
Part Number: 1-2MM Rubber Edging
Supplier: Tegiwa
Tegiwa 1-2mm Rubber trim Edging
https://www.ebay.co.uk/itm/UNIVERSAL...53.m2749.l2649
Services Used:
None
Resources used
My Mobi V17 Portable Pressure Washer.
Now also known as Aqua2go.
--------------------------------------------------------------------------------------------------------------------------
Task 43 - End of Year 2018 Photo Shoot, Somewhere in Hertfordshire Ware.
29-12-2018
Another year has drawn to a close and with after 8 months of s2000 ownership I can definitely say it has been both a joy and a troublesome experience. However, I guess you can say that is what a project is all about. Despite the issues, the s2000 has stayed true to itself - being a reliable sports car, mechanically It has never let me down.
A quiet disserted industrial estate was found somewhere in Ware, Hertfordshire, to perform an end of year photo shoot.
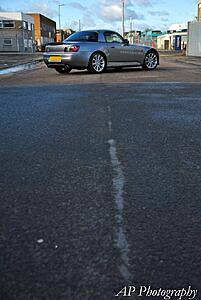


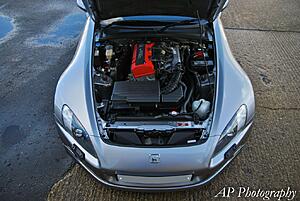
Parts Purchased:
None
Services Used:
None
Resources used
None
--------------------------------------------------------------------------------------------------------------------------
Task 44 - Upgrade OEM Airbox with LHT Modified Version
09-02-2019
From stock, the s2000 does sound great. However, there has always been an urge for that slight air induction growl.
Not wanting to purchase or change the OEM setup, I looked and researched for alternatives.
By removing the top lid cover of the airbox, the intake noise can be achieved but with a sacrifice of power.
The hot temperatures within the engine bay would just be sucked into the air filter, and result in a distinct noticeable loss in power.
As a stock system, the OEM s2000 airbox, despite its size and the fact that it can suck hot air from the radiator is probably one of the best airbox designs.
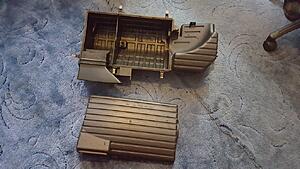
In my opinion, the stock system looks great and suits the engine bay really well.
I am not keen on those long arm types like the long ram K&N version, it is not very cheap for what it is and it would seem heat soak would be much more worse when compared to the stock airbox. The only upgraded airbox I do like is the JDM password type, but costing nearly £1000 that was definitely a no go.
Several threads and a youtube video describing a small modification to the standard airbox could be the answer.
This youtube video shows this modification step by step in great detail.
I will name it the LHT Airbox Mod.
By utilizing the existing airbox and setup, 20% more intake noise can be achieved by simply cutting away the middle partition wall of the main section of the air filter box, blocking up the hole for the additional resonator compartment and removing the air duct guide on the top lid of the cover. These areas are there simply to reduce intake noise.
As my airbox is in mint condition I did not want to hack it up, so I searched for a 2nd hand used one.
It was quite a shock to see that 2nd hand airboxes still fetch good money, with some reaching over the £100 mark.
I managed to source one for £35 posted which was I thought was a great price.
Once received I got to work and performed the modifications.
Removing the partition wall was quite tricky, I created four slots downwards in the partition with a hack saw and just snapped the plastic with a pair of pliers as I moved downwards.
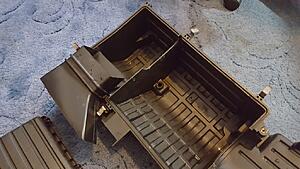
I continued to snap away bits of plastic until I got to the bottom edge. I left around a 10 to 15mm lip, so water can stay within their compartments and drain away as normal.
I didn't have a dremel sander, which would have been super useful and provide a much cleaner finish. However, I did what I could manually with a bit of sand paper.
Once the modifications were complete, I was happy with the results.
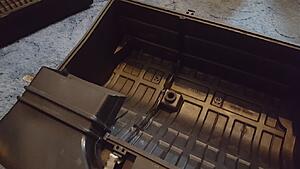
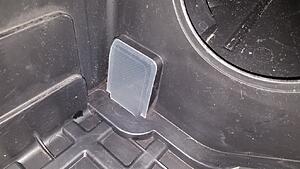
The 2nd hand airbox itself was pretty cheap so it was in quite poor condition in terms of aesthetics.
The top lid section was pretty scratched up.
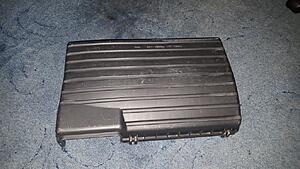
Firstly I had to refurb it a little as it would basically take over as my main airbox, so it had to look good.
The airbox was thoroughly washed and cleaned, with the top lid section sanded down briefly with 1200 grade sand paper to help eliminate the scratches.
Once this was done, the lid was given a coat of spray paint to restore its finish. The spray paint was also used to restore the main airbox body too.
The paint used was Halfords black bumper spray which gave the airbox a distinct matt black finish, very close to OEM. It sprayed and covered the area well.
Once dried, I was really happy with the finished article. It looked neat and tidy for very little effort.
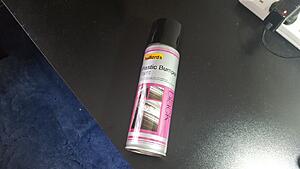
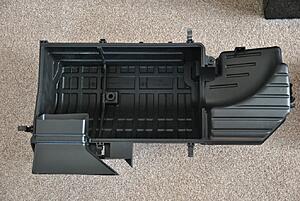
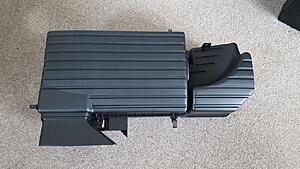
With the airbox being held in by 3 bolts, the swap over was painless and easy. By retaining the original unmodified airbox I could swap over back to stock anytime.
The drop in K&N filter was purchased way back in November during the black Friday discounted deals.
Installation was easy and the filter fitted as perfect as the original.
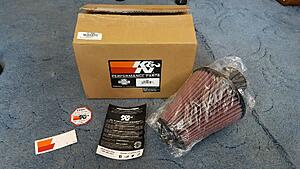
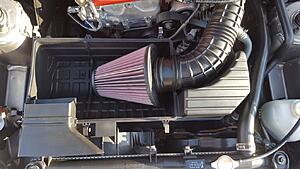
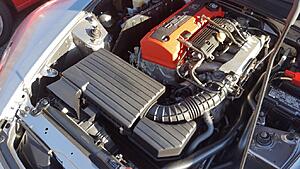
Job done!
The results are fantastic, I would happily report that there is an approx 20% increase in intake noise compared to the stock airbox. It is not over the top and gives a lovely subtle increase of noise.
Due to the K&N filter having a better air flow than the original paper type, it would seem noise also increases further with this filter.
By retaining the stock airbox, the OEM look with a slight increase in noise and no loss of power, this was exactly what I was looking for.
Parts Purchased:
Part: Genuine Original OEM s2000 Airbox
Part Number: n/a
Supplier: Ebay
Part: K&N Drop In Filter
Part Number: E-2435
Supplier: Tegiwa
Part: Halfords Black Bumper Spray
Part Number: n/a
Supplier: Halfords
https://www.halfords.com/motoring/pa...nt-black-300ml
Services Used:
None
Resources used
Youtube Video
LHT Airbox Mod
Article Comparing Stock Airbox/Lid Removal and LHT Mod
https://motoiq.com/project-s2000-par...oing-faster/3/
--------------------------------------------------------------------------------------------------------------------------
Task 45 - Investigate Water Leak Through Speaker - (PROBLEM 6)
(Water Ingress Through Speaker Grill)
09-02-2019
On a quick Saturday afternoon drive it was noticed that there was some droplets of water appearing through the passenger side speaker grill.
I couldn't believe it ,yet another water ingress issue on the s2000.
A quick search proved yet again this was another common issue on the s2000.
Not being too bad, it wasn't causing any serious issues within the cabin of the s2000. Carpets were not wet which did show that there wasn't a direct water path and it does seem a slow trickle.
Being a simple design, the door card was swiftly removed. The moisture barrier membrane was still in place with no tears and the speaker itself seemed intact.
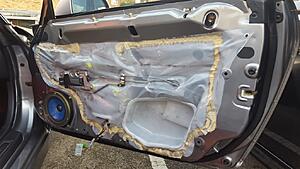
No evidence of any apparent water trials to suggest the water was flowing on the back side of the door card. The door card itself was dry with no water damage apparent.
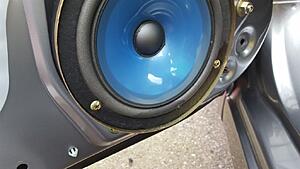
The speaker was removed via 4 self tappers and disconnected.

Water does flow inside the door naturally hence their being drain holes inside the door, however it would appear that water is flowing towards the lower section of the speaker.
(The car is generally parked on an angle in our communal car park, this may aid the flow of water inside the door car towards the speaker)
Further inspection show that the speaker basket contains a gasket seal which should compress against the metal door when positioned in placed. However the gasket fails to seal and a gap is present allow water within the door to flow outwards towards the door card.
Confident that this was the issue, I set about finding a suitable gasket to suitably seal and mate up the speaker basket and door frame.
A good quality neoprene gasket was sourced from work, these are readily available online.
An example link is below.
https://www.ebay.co.uk/itm/NEOPRENE-...b68g:rk:1:pf:0
The gasket was cut to long strips similar to the original gasket and then installed around the speaker basket, it compressed well when the speaker was installed.
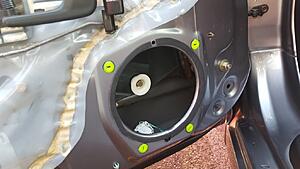
A quick long water test confirmed that no more water was entering through the speaker grill.
A great result.
Parts Purchased:
Part: Neoprene Foam Gasket
Part Number: n/a
Supplier: Ebay
https://www.ebay.co.uk/itm/NEOPRENE-...b68g:rk:1:pf:0
Services Used:
None
Resources used
S2ki thread - Water Through Speaker Grills
https://www.s2ki.com/forums/s2000-ta...grills-211309/
My Mobi V17 Portable Pressure Washer.
Now also known as Aqua2go.
--------------------------------------------------------------------------------------------------------------------------
Task 46 - Refurb Wiper Arms
16-02-2019
As my brother was getting a few of his car parts powder coated, I thought I would grab this opportunity to refurb the wiper arms. New wiper arms are approximately £70 each, with nothing wrong with the current ones it made sense to get them refurbed.
For £10.00 for the pair, it was a no brainer.
A company based in Bovingdon called BJV
(which usually refurbs alloy wheels were the chosen company)
My brother dropped them off on the way to work and with a week's lead time, the process was simple with no hassle.
Once fully fitted, the wipers attached perfectly.
A smear of copper grease was used for the wiper motor's shaft and underside of the wiper arm attachment to prevent any seizing for the future.
The powder coated finish was smooth and consistent throughout the arm, all crevices were evenly covered. A Fantastic result.
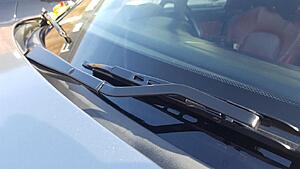
Parts Purchased:
None
Services Used:
BJV Engineering
Unit 3, Hatton House, Flaunden Lane, Flaunden, Herts, HP3 0PQ
Tel: 01442 834 169
Email: info@wheelrefurbishing.co.uk
Web: www.wheelrefurbishing.co.uk/
Resources used
None
--------------------------------------------------------------------------------------------------------------------------
Task 47 – MOT Time
23-02-2019
Time came for the s2000 to have its first MOT test within my ownership.
Hopefully all the work and checks I have performed have eliminated any chances of a fail.
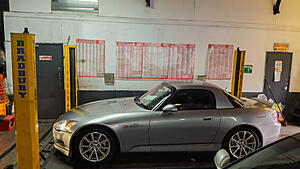
Great news, the car passed without any advisories.
The emissions were excellent which showed that the catalytic converter and Lambda sensor were working well.
The dude did mention that I had a bolt missing from my catalytic converter heat shield, this was great news as I did hear a slight exhaust rattle at high rpm.
Overall a great result
Parts Purchased:
None
Services Used:
MOT station
Resources used
None
--------------------------------------------------------------------------------------------------------------------------
Task 48 - As She Stands
24-02-2019
With the one of the warmest Februaries upon us, there was no excuse to get the car out for a drive on this beautiful Sunday afternoon.
Spirited drive around Hertfordshire's country roads, thoroughly enjoyed every moment.
I didn't have my DLSR camera, so the shots were taken using my Samsung galaxy S6 phone.
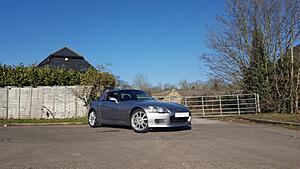
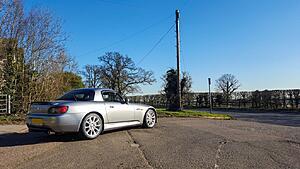
Parts Purchased:
None
Services Used:
None
Resources used
None
--------------------------------------------------------------------------------------------------------------------------
This brings the car up to date.
There is a small remaining to-do list
To-do List
-Upgrade front brake pads to DS2500 type
-Upgrade front windshield roof latches to hardtop type
-Replace engine and gearbox mounts
Long Term To-Do
-Full Geometry Alignment (once funds allow)
-Upgrade Oil Jet Bolts (Was a TSB on my year of s2000)
Maybe's
-Refurbish All Wheels
Thanks for reading guys
03-03-19
Here’s the next update on the s2000
--------------------------------------------------------------------------------------------------------------------------
Task 33 - Starter Motor Grind in Cold Conditions
19-11-2018
As soon as the temperatures started to drop I noticed something very odd with the s2000. I occasionally will use the s2000 for work and upon engine start I noticed a slight grind just after the engine fired up.
At first I didn't think anything of it, and thought it was me having my finger on the push start button longer than I should have. As the mornings got colder, I noticed it occurring alot more.
I quickly did a search on the forum, and unfortunately it is a common known issue with the starter motors of all s2000's. It affected all years. (apparently it also affects all k20 engines too)
I was quite disappointed at this, with the s2000 being a flagship car for Honda in its hay day, things like this shouldn't occur. The starter motor part is not cheap with a genuine Honda part coming up at £400. From reading up on several threads, most people tend to just live with it. It does not occur at all in milder or summer weather conditions and as the majority of people tend to only use their s2000's in the summer months it is quite often overlooked.
The issue I have is that the constant grind will eventually cause long term damage to the flywheel, and the grinding sound is truly awful.
The basic reason for the grind is a sticking bendix gear mechanism, the sticking causes a slight delay in retracting the pinion gear after engine start which causes the slight grind.
It is not known if Honda ever knew about this issue, and it is believed the starter motor from Honda was never up-issued or superseded to address the problem at all. So inevitably, if you did change the starter motor it would be only a matter of time until the problem returned again.
With this knowledge, I was intending to just live it with it and not use the car as much during the winter months. However a brand new blueprint s2000 starter motor popped up on eBay, a quick message to the seller I decided to take a punt and did a deal.
I manage to bag it for £35 delivered

Several DIY guides showed that the process to remove and fit a starter motor was quite tricky, doable but tricky. With winter in full motion I decided not to tackle it and have my trusty garage to take care of it.
A quick message to Performance Autoworks, a slot was booked in and the job was done within a couple of hours.

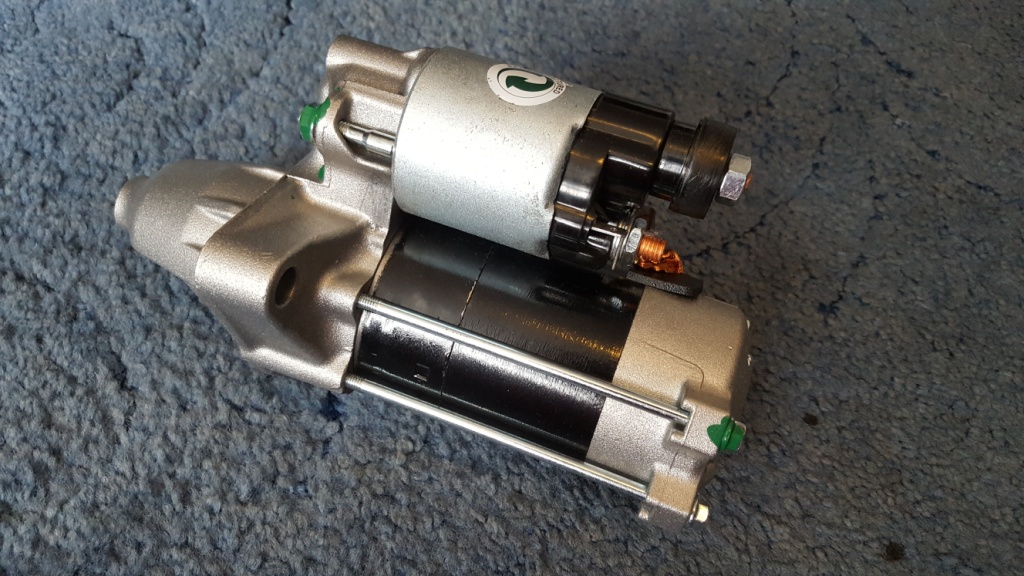


The starter motor worked well upon initial fire, several tests over the next coming days proved that the initial grind had disappeared. A great result all at a great price.
Thanks again to Rich at Performance Autoworks and to the fellow members of s2ki UK forum for help and advice.
Parts Purchased:
Part: s2000 Starter Motor (Blueprint Version)
Blueprint Part Number: ADH21255
Private Ebay Sale: EBay seller "proud2help"
For reference
Genuine Honda Part Number for Starter Motor: 31200-PCX-A02
Services Used:
Performance Autoworks
Performance Autoworks (Fairford/Gloucestershire GL7 4BX)
Contact: Richard Voaden
Tel: 01285 711 733
Email: info@performance-autoworks.co.uk
https://www.facebook.com/pages/Performa ... 1547611908
Resources used
S2ki Thread: "Starter motor grind on cold mornings"
https://www.s2ki.com/forums/uk-irela...nings-1189121/
--------------------------------------------------------------------------------------------------------------------------
Task 34 - Quick Photo Shoot, Somewhere in Fairford.
19-11-2018
Just after the starter motor was replaced, we decided to have a quick blast around the surrounding roads.
A lovely rural car park was found so there was only one thing to do
A quick photo shoot of the car as she stands today.
I didn't have my DLSR camera, so the shots were taken using my Samsung galaxy S6 phone.


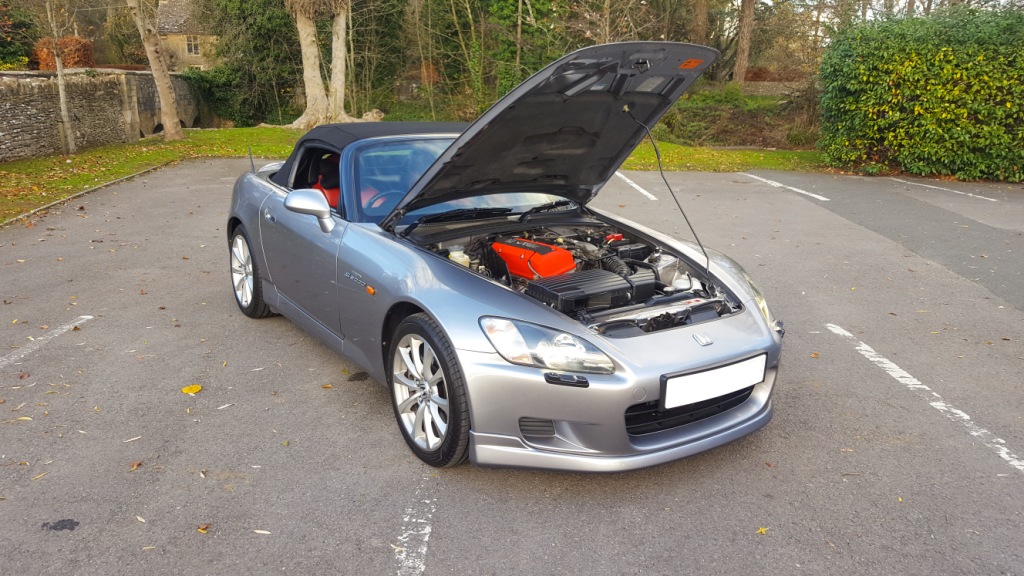
Parts Purchased:
None
Services Used:
None
Resources used
None
--------------------------------------------------------------------------------------------------------------------------
Task 35 - Investigate Water Leak into Boot - (PROBLEM 3)
(Water Ingress Through Soft Top Hood Drainage Channel)
24-11-2018
Whilst I was washing the s2000 on the weekend, it was noticed that the boot floor on the right hand corner was slightly wet. It was at this instant, I knew I was another victim of the s2000 dreaded water in the boot syndrome.
First task was to strip the boot entirely of its interior trim, all interior trim came out with ease.
There was one tricky bolt securing the OEM CD changer, this attaches the cradle from underneath the chassis. Once removed the main floor trim came out with ease.
Once all the trim was removed, the water also found its way into the main centre section of the boot floor where it had just started to rust.

A quick mop up of the standing water, wire brush with my cordless drill and a couple coats of hammertite paint quickly removed the rust and further protected it.
The condition of the boot was in pretty good shape and there seemed to be no evidence of any crash damage.


With that sorted, the next task was to try and locate the water leak. A quick spray over the hood showed that the water was entering the boot on the back section of the soft top hood. It appeared to be entering with a slow drip just in the corner from the drain gutter channel.
The leak was now located but it would be the furthest I could go without dismantling the hood.
It would seem there is a U shaped gutter channel surrounding the back edge of the hood, rain water collects in these channels and directs it to the side of the car.
Photos courtesy of user: Mike’s


With that in mind, my options were either to replace the hood or find a hardtop.
I made some enquiries for the best places for hood replacements, the top ones being Jack Smiths or Monsoon Hoods. I really wanted a hardtop, so the search continued to see if I could get one.
Parts Purchased:
None
Services Used:
None
Resources used
Monsoon Car Hoods
https://www.monsooncarhoods.co.uk/
Jack smith Hoods
https://www.facebook.com/JackRSmithMotorTrimmers/
(Jack smiths does not have a website nor does he communicate via email)
Note: telephone is his only form of communication
--------------------------------------------------------------------------------------------------------------------------
Task 36 - Hardtop Purchase
02-12-2018
Whilst browsing the forums and eBay, an s2000 hardtop in Silverstone silver popped up on eBay.
From the images it looked in fabulous condition.
Further enquiries led to additional images and some very minor scratches to the right had side of the hardtop.
There was some minor scratches on the inside upper interior on the passenger side which I didn't mind.
We discussed its pricing and then we struck an agreement.
Overall, for the price it was a fantastic deal, and it would have been too good of a price to pass even with the slight defects.
This would now solve my immediate water leaking issues, I intend to keep the hardtop on until I find the additional funds to replace the hood at a later date.
I've always loved the look of the hardtop, it just completes the fantastic lines of the s2000.


I had a quick look at the original Honda instructions for installing the hardtop, just to be familiar with the process.
The day came to pick up the hardtop. They were based near Bournemouth so it was approx 2 hour drive from home.
It was constantly raining on and off throughout the day, nevertheless, I got there with no drama's or hold ups on the roads and it was great drive. There are some fab roads down there.
The seller was very pleasant and was gutted to let the hardtop go, he had his s2000 for 12 years until he was a victim of the s2000 twitchy rear end. His s2000 was written off.
The hardtop was more fiddly to install than I expected, but the spike brackets lined up great and the front strikers were clamped securely, the revised hardtop strikers will most likely be needed but I will purchase these at a later date. The install was definitely a two person job.
It needs a good clean having been in their garage for many years, but overall I was very pleased with the results.
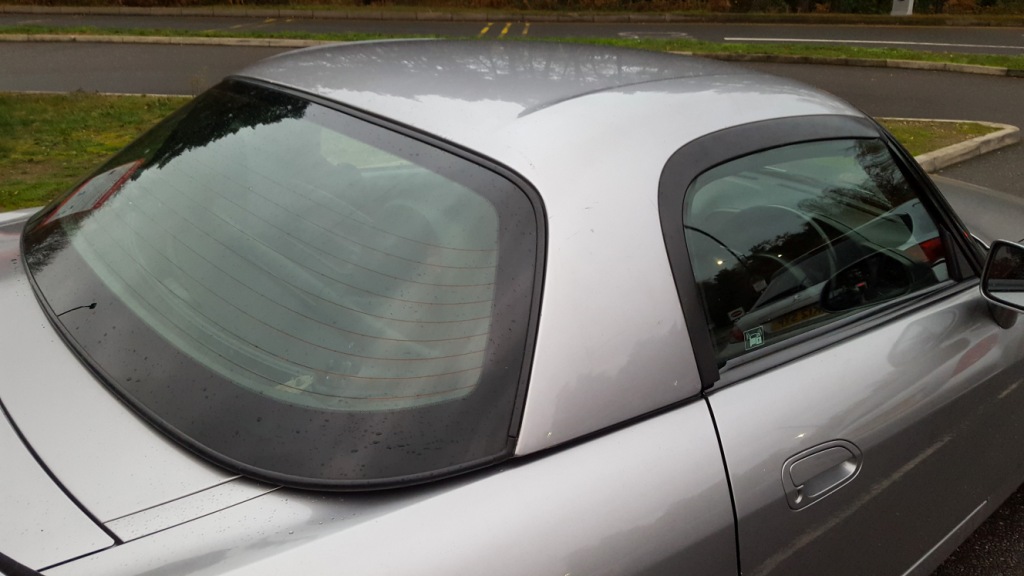


With the s2000 being a 1999 model, I did not have the circuitry for the rear heater demister, my next task would be to possibly find out if I can get this feature all up and running.
After a few rainy days, it had been confirmed that no further water leakage was entering the boot via the roof area.
However, before re-installing the boot trim the common rear bumper vent will be siliconed up as a precaution.
This to follow at a later task.
Further research shows that a specific loom for the rear heater circuitry has now been discontinued from Honda.
This is specific for the 1999-2001 model of the s2000.
In light of this information, I will be dropping the plans of commissioning the rear demister setup.
Parts Purchased:
Part: s2000 Genuine Hardtop Roof
Honda Part Number: Unknown
Private Sale: EBay seller 2nd Hand
Services Used:
None
Resources used
PDF of hardtop installation Instructions
https://www.handa-accessories.com/s2000/s2k2top.pdf
S2ki thread - Rear Heater Demister Circuitry
https://www.s2ki.com/forums/uk-irela...r-my00-916782/
--------------------------------------------------------------------------------------------------------------------------
Task 37 - Investigate Water Leak into Boot - (PROBLEM 4)
(Water Ingress Through Antenna)
07-12-2018
After a few heavy rainfalls I kept monitoring the boot for any further water ingress, to my disappointment another pool of water was present on the right hand side of the boot.
Further checks showed clearly that it was now entering through the rear antenna.
Placing my hand up around the base of the antenna inside the boot, it showed water had been dripping through.


This seemed to be another common water entrance point for the s2000.
To remove the fastening nut that secures the antenna mount and seals, a special tool was required.
The special tool that is required seems to be similar to a 90 degree bent pliers used for removing circlips.
However, within my tool box I located a tool to remove rear back cases of watches.
This was ideal for the job and fitted the fastening nut perfectly.

The fastening nut and all seals were removed and inspected.
All seals were in good condition and no rips or tears were present.
A good clean were given to all components, including the surrounding area of the body work where the seals are positioned.
Shin entsui silicone grease was used to coat the seals to restore its suppleness and flexibility.


Re-assembly was straight forward.
After several rainfalls, no further water ingress was present.
It may have seemed that the cause of the water leakage was a loose fastening nut.
New seals and components were still readily available from Honda and were reasonably priced.
However, the current components were in such good condition, I felt there was no need for replacements.
Parts Purchased:
None
Services Used:
None
Resources used
None
--------------------------------------------------------------------------------------------------------------------------
Task 38 - Stereo Removal & Check
18-12-2018
One of the quick easy tasks on the list was to remove the head unit to check for any issues.
The stereo system worked fine, but as this was a very easy task it would be an ideal opportunity to check to see if any dodgy modifications were performed. Especially after seeing the poor execution of the speaker upgrade a while back.
Dealing with anything electronic, it's always ideal to disconnect the main car's battery.
Being an original stereo head unit in known good operating condition, it is not 100% necessary but that is up to you.
The front stereo cover was removed by gently applying outward pressure to the lower section of the cover. The cover pops out revealing the head unit installation screws, 2 self tapers either side of the head unit.
Simply unscrew these and the head unit can be removed. It was that easy.
Thankfully on inspection, it would seem that the head unit has never been touched.
All cabling and wiring are all original, no cutting or splicing was present on any of the ISO block wires.


The head unit's main ISO connector and CD changer connector was unplugged and all its terminals wire brushed and cleaned.
Re-installation was straight forward and a breeze.
Don't forget to re-connect the battery if you disconnected it.
I have no plans in upgrading the stereo, the original system with its original CD changer works fantastic.
Parts Purchased:
None
Services Used:
None
Resources used
Note: If you plan to remove or disconnect the head unit,
Ensure you have the head unit security code to hand, as this will be required upon power up.
(As far as I am aware, all OEM s2000 head units will require a security code if the battery has been disconnected)
--------------------------------------------------------------------------------------------------------------------------
Task 39 - Hardtop Clean
18-12-2018
One of the tasks was to deep clean the hardtop, with the previous owner having stored this hardtop in their garage it needed a good clean.
The first task was to hose down and clean the hardtop as normal, detailing brushes were used to remove dirt and grime from the side crevices and all rubber seals and gaskets were wiped down. The latches were thoroughly cleaned with brushes and the headliner was also wiped down.
Being on my own, the hardtop cannot just be removed and placed on the floor to clean, so I had to do what I could with the hardtop slightly unbolted.
Once the hardtop was clean, the rear side interior inner panels were removed, this area was covered in spider webs and dead spiders, it wasn't a pleasant sight. I didn't take a pic of this as I just plodded on in hoovering it all up.
Area now completely clean

Once I was happy with the cleanliness of the hardtop, it was now a case to quickly DA polish the paint work.
I don't have mains power out in the car park, so I had to make use of a DA attachment to a cordless drill.
It is not to bad and useful in removing light marks and blemishes. Meqguries compound polish was used.
After the polishing session, all seals were coated in Shin Entsui silicone grease.
This included the seal which mates to the rear boot lid deck and the seal which mates to the front top section of the windshield. A hardtop will always make noises due to the fact it is not physically part of the car, however siliconing all these seals is highly recommended to help prevent annoying squeaks and rubbing noises.


A rattling noise was also present which was due to the front strikers being the original version and worn out.
Hardtop front striker upgrade will be purchased and installed later to further reduce this hardtop rattling sound.
Parts Purchased:
None
Services Used:
None
Resources used
Meguires DA Drill Attachment Polisher
--------------------------------------------------------------------------------------------------------------------------
Task 40 - Investigate Water Leak into Boot - (PROBLEM 5)
(Water Ingress Through Rear Bumper Vent)
28-12-2018
From the previous water ingress issue (Problem 4), the boot was still in a stripped down state as this allowed me to monitor and see if there were any further water ingress issues.
After several checks ,it was confirmed that a very small drip was coming from the rear bumper's one way vent after several heavy rain falls.
Again, this is another common water entry point on all s2000's.
The gasket seal around this vent perishes over time, and can allow water ingress filling up the base pan of the boot.
Due to the tool set being on top of this area, owners tend not to realise that water has been settling underneath for quite some time.
The s2000 is now 20 years old, so it was understandable that this gasket has lost its ability to seal.
To resolve the issue it required the rear bumper to be removed.
On a mild winter's day during the Christmas holidays, I set about to get this sorted.
The rear bumper was removed easily as it was removed on a previous task.
Once the bumper was removed, the vent can be seen. It is unclipped from inside the boot area.
(note: Boot trim to the rear of the car needs to be removed if not already done so)
Once unclipped, the vent can be removed with ease.


The gasket seal was still intact but it was starting to loose its adhesion.
The gasket was peeled away and removed completely.
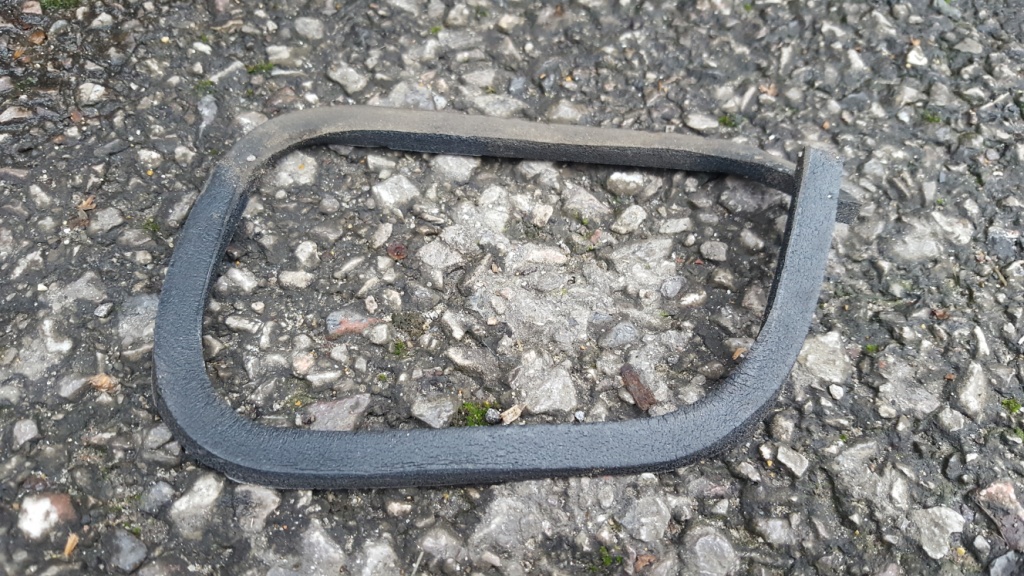
With the gasket removed, the vent was thoroughly cleaned and checked for any other defects.
Once I was happy no other defects was present, I continued to prep the mating area. This was cleaned and lightly abraded to allow the silicone to adhere to it.
The side clips have to be discarded to allow a flush fit between the vent and chassis.
The silicone chosen for the job was a marine grade type, there are many types of silicone variants available so I wanted one that will last and be a one time job.
I choose Geocel's marine grade type silicone in black.
It was applied to the chassis section and on the vent itself, once applied, the vent was mated up to the chassis.
Force was applied for several minutes to keep it in place and then it held on by itself.


Once cured (24 hours), it gave a superb excellent long lasting seal.
It was then tested and confirmed water tight.
An easy DIY that has now hopefully ended my water ingress issues.
Parts Purchased:
Part: Geocel Marine Silicone (Black Colour)
Part: N/A
Ebay Link
https://www.ebay.co.uk/itm/Geocel-Ma...53.m2749.l2649
Services Used:
None
Resources used
s2ki Thread - "Sealing Rear Bumper Vent"
https://www.s2ki.com/forums/s2000-un...cs-fix-465581/
--------------------------------------------------------------------------------------------------------------------------
Task 41 - Further Rust Proof Base Pan of Boot
28-12-2018
As soon as the bumper vent was completed, I decided to further protect the base pan of the boot just in case water does find its way into the centre section of the boot for long periods of time.
There were many rust proofing options, however I decided to use the left over Dinitrol 4941 underseal spray I used on the rear bumper undersealing.
I had just over half a can of the stuff so it was ideal.
The base pan of the boot was thoroughly wiped down and cleaned to ensure no grease or oils were on the surface. All debris was also hovered up.
The upper boot floor sections were masked off to prevent any over spray, and a suitable boundary was masked off on the section to the rear of the car. (Just above where the welds are)
It was then just a matter of applying several even light coats and allowing each coat to dry for around 15 minutes.
Once the area was evenly covered the results looked good.


This was left to fully cure and dry.
Note: If applying, the odour of the undersealing application will find its way and affect the main cabin of the car.
This will last several weeks.
Parts Purchased:
Part: Dinitrol Under seal Spray 500ml
Part Number: 4941
Supplier: MTS Trading (on ebay)
Services Used:
None
Resources used
s2ki Thread - "Sealing Rear Bumper Vent"
https://www.s2ki.com/forums/s2000-un...cs-fix-465581/
--------------------------------------------------------------------------------------------------------------------------
Task 42 - Re-install Boot Trim Interior & Hardtop Interior Side Sections
28-12-2018
After several rainfalls and a session of spraying at all angles of the boot, rear bumper panel gaps, rear antenna and the hardtop seals with my portable jet washer, I was confident no further water ingress into the boot area was possible.
It was now time to re-install all the boot trim.

Firstly, the CD changer was removed, as this would make the floor trim easier to install without fighting in and around the CD changer. The spare wheel was also removed.
The CD changer has one troublesome fastening nut which is located underneath the car.
The tie straps were screwed back into place on the rear section of the boot and then the floor interior trim was placed with ease.
All the original clips were still in good condition and so were re-used.
With the floor trim in place, all the surrounding trim can be fitted easily and clipped back into place.
New clips were purchased for the side panel and rear centre section panels as these crumbled when away when they were removed.
The CD changer was re-installed, and the tool set was placed back into the centre section.

The interior pieces for the hardtop was also re-installed, side edging rubber lining was installed on the end section of these interior pieces. This edge is in close proximity to the metal surface of the hardtop so it should help prevent any squeaks or additional interior noises.
High quality stuff from Tegiwa, it installs on the edge of the trim very nicely.
Great for other areas of the car.
Job Done!
Parts Purchased:
Part: Interior Clip
Part Number: Equivalent to Honda 91505-SL0-003, 91505-ST3-E01ZC and 91505-ST7-003ZA
Supplier: 227sparts (Seller on eBay)
https://www.ebay.co.uk/itm/10x-8mm-H...53.m1438.l2649
Part: Rubber Edging for Interior trim
Part Number: 1-2MM Rubber Edging
Supplier: Tegiwa
Tegiwa 1-2mm Rubber trim Edging
https://www.ebay.co.uk/itm/UNIVERSAL...53.m2749.l2649
Services Used:
None
Resources used
My Mobi V17 Portable Pressure Washer.
Now also known as Aqua2go.
--------------------------------------------------------------------------------------------------------------------------
Task 43 - End of Year 2018 Photo Shoot, Somewhere in Hertfordshire Ware.
29-12-2018
Another year has drawn to a close and with after 8 months of s2000 ownership I can definitely say it has been both a joy and a troublesome experience. However, I guess you can say that is what a project is all about. Despite the issues, the s2000 has stayed true to itself - being a reliable sports car, mechanically It has never let me down.
A quiet disserted industrial estate was found somewhere in Ware, Hertfordshire, to perform an end of year photo shoot.


Parts Purchased:
None
Services Used:
None
Resources used
None
--------------------------------------------------------------------------------------------------------------------------
Task 44 - Upgrade OEM Airbox with LHT Modified Version
09-02-2019
From stock, the s2000 does sound great. However, there has always been an urge for that slight air induction growl.
Not wanting to purchase or change the OEM setup, I looked and researched for alternatives.
By removing the top lid cover of the airbox, the intake noise can be achieved but with a sacrifice of power.
The hot temperatures within the engine bay would just be sucked into the air filter, and result in a distinct noticeable loss in power.
As a stock system, the OEM s2000 airbox, despite its size and the fact that it can suck hot air from the radiator is probably one of the best airbox designs.

In my opinion, the stock system looks great and suits the engine bay really well.
I am not keen on those long arm types like the long ram K&N version, it is not very cheap for what it is and it would seem heat soak would be much more worse when compared to the stock airbox. The only upgraded airbox I do like is the JDM password type, but costing nearly £1000 that was definitely a no go.
Several threads and a youtube video describing a small modification to the standard airbox could be the answer.
This youtube video shows this modification step by step in great detail.
I will name it the LHT Airbox Mod.
By utilizing the existing airbox and setup, 20% more intake noise can be achieved by simply cutting away the middle partition wall of the main section of the air filter box, blocking up the hole for the additional resonator compartment and removing the air duct guide on the top lid of the cover. These areas are there simply to reduce intake noise.
As my airbox is in mint condition I did not want to hack it up, so I searched for a 2nd hand used one.
It was quite a shock to see that 2nd hand airboxes still fetch good money, with some reaching over the £100 mark.
I managed to source one for £35 posted which was I thought was a great price.
Once received I got to work and performed the modifications.
Removing the partition wall was quite tricky, I created four slots downwards in the partition with a hack saw and just snapped the plastic with a pair of pliers as I moved downwards.

I continued to snap away bits of plastic until I got to the bottom edge. I left around a 10 to 15mm lip, so water can stay within their compartments and drain away as normal.
I didn't have a dremel sander, which would have been super useful and provide a much cleaner finish. However, I did what I could manually with a bit of sand paper.
Once the modifications were complete, I was happy with the results.
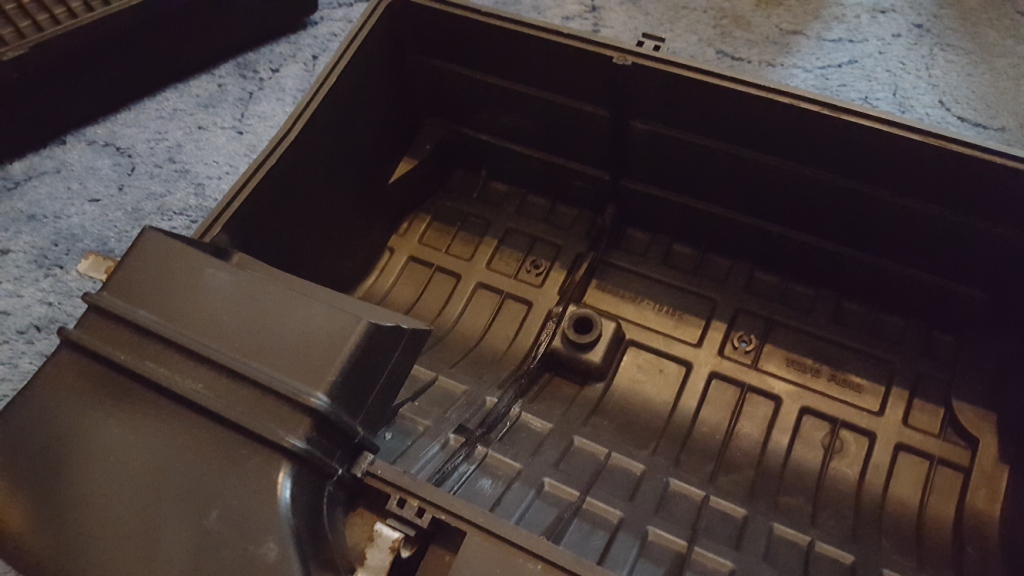

The 2nd hand airbox itself was pretty cheap so it was in quite poor condition in terms of aesthetics.
The top lid section was pretty scratched up.

Firstly I had to refurb it a little as it would basically take over as my main airbox, so it had to look good.
The airbox was thoroughly washed and cleaned, with the top lid section sanded down briefly with 1200 grade sand paper to help eliminate the scratches.
Once this was done, the lid was given a coat of spray paint to restore its finish. The spray paint was also used to restore the main airbox body too.
The paint used was Halfords black bumper spray which gave the airbox a distinct matt black finish, very close to OEM. It sprayed and covered the area well.
Once dried, I was really happy with the finished article. It looked neat and tidy for very little effort.
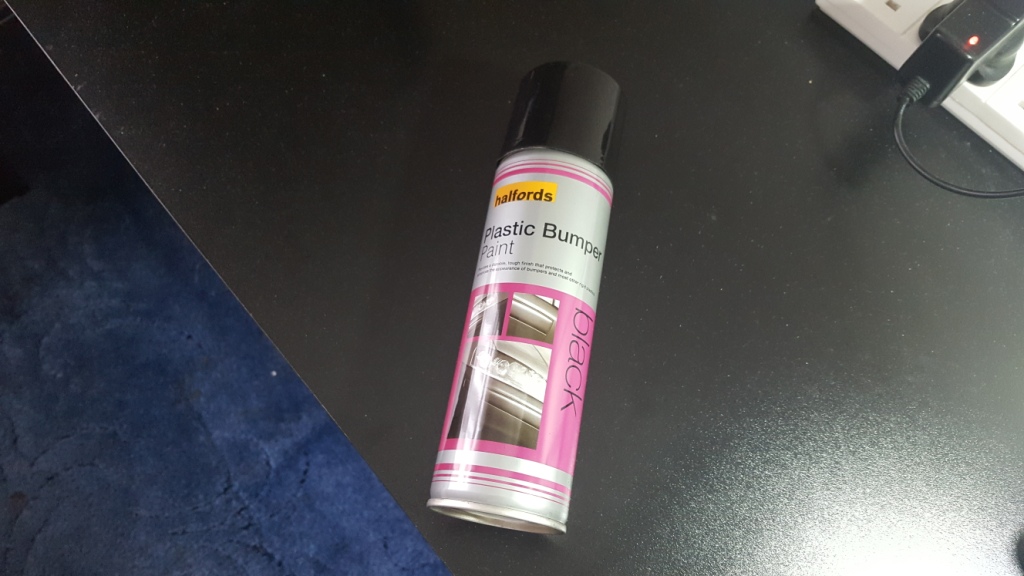


With the airbox being held in by 3 bolts, the swap over was painless and easy. By retaining the original unmodified airbox I could swap over back to stock anytime.
The drop in K&N filter was purchased way back in November during the black Friday discounted deals.
Installation was easy and the filter fitted as perfect as the original.


Job done!
The results are fantastic, I would happily report that there is an approx 20% increase in intake noise compared to the stock airbox. It is not over the top and gives a lovely subtle increase of noise.
Due to the K&N filter having a better air flow than the original paper type, it would seem noise also increases further with this filter.
By retaining the stock airbox, the OEM look with a slight increase in noise and no loss of power, this was exactly what I was looking for.
Parts Purchased:
Part: Genuine Original OEM s2000 Airbox
Part Number: n/a
Supplier: Ebay
Part: K&N Drop In Filter
Part Number: E-2435
Supplier: Tegiwa
Part: Halfords Black Bumper Spray
Part Number: n/a
Supplier: Halfords
https://www.halfords.com/motoring/pa...nt-black-300ml
Services Used:
None
Resources used
Youtube Video
LHT Airbox Mod
Article Comparing Stock Airbox/Lid Removal and LHT Mod
https://motoiq.com/project-s2000-par...oing-faster/3/
--------------------------------------------------------------------------------------------------------------------------
Task 45 - Investigate Water Leak Through Speaker - (PROBLEM 6)
(Water Ingress Through Speaker Grill)
09-02-2019
On a quick Saturday afternoon drive it was noticed that there was some droplets of water appearing through the passenger side speaker grill.
I couldn't believe it ,yet another water ingress issue on the s2000.
A quick search proved yet again this was another common issue on the s2000.
Not being too bad, it wasn't causing any serious issues within the cabin of the s2000. Carpets were not wet which did show that there wasn't a direct water path and it does seem a slow trickle.
Being a simple design, the door card was swiftly removed. The moisture barrier membrane was still in place with no tears and the speaker itself seemed intact.

No evidence of any apparent water trials to suggest the water was flowing on the back side of the door card. The door card itself was dry with no water damage apparent.

The speaker was removed via 4 self tappers and disconnected.
Water does flow inside the door naturally hence their being drain holes inside the door, however it would appear that water is flowing towards the lower section of the speaker.
(The car is generally parked on an angle in our communal car park, this may aid the flow of water inside the door car towards the speaker)
Further inspection show that the speaker basket contains a gasket seal which should compress against the metal door when positioned in placed. However the gasket fails to seal and a gap is present allow water within the door to flow outwards towards the door card.
Confident that this was the issue, I set about finding a suitable gasket to suitably seal and mate up the speaker basket and door frame.
A good quality neoprene gasket was sourced from work, these are readily available online.
An example link is below.
https://www.ebay.co.uk/itm/NEOPRENE-...b68g:rk:1:pf:0
The gasket was cut to long strips similar to the original gasket and then installed around the speaker basket, it compressed well when the speaker was installed.

A quick long water test confirmed that no more water was entering through the speaker grill.
A great result.
Parts Purchased:
Part: Neoprene Foam Gasket
Part Number: n/a
Supplier: Ebay
https://www.ebay.co.uk/itm/NEOPRENE-...b68g:rk:1:pf:0
Services Used:
None
Resources used
S2ki thread - Water Through Speaker Grills
https://www.s2ki.com/forums/s2000-ta...grills-211309/
My Mobi V17 Portable Pressure Washer.
Now also known as Aqua2go.
--------------------------------------------------------------------------------------------------------------------------
Task 46 - Refurb Wiper Arms
16-02-2019
As my brother was getting a few of his car parts powder coated, I thought I would grab this opportunity to refurb the wiper arms. New wiper arms are approximately £70 each, with nothing wrong with the current ones it made sense to get them refurbed.
For £10.00 for the pair, it was a no brainer.
A company based in Bovingdon called BJV
(which usually refurbs alloy wheels were the chosen company)
My brother dropped them off on the way to work and with a week's lead time, the process was simple with no hassle.
Once fully fitted, the wipers attached perfectly.
A smear of copper grease was used for the wiper motor's shaft and underside of the wiper arm attachment to prevent any seizing for the future.
The powder coated finish was smooth and consistent throughout the arm, all crevices were evenly covered. A Fantastic result.

Parts Purchased:
None
Services Used:
BJV Engineering
Unit 3, Hatton House, Flaunden Lane, Flaunden, Herts, HP3 0PQ
Tel: 01442 834 169
Email: info@wheelrefurbishing.co.uk
Web: www.wheelrefurbishing.co.uk/
Resources used
None
--------------------------------------------------------------------------------------------------------------------------
Task 47 – MOT Time
23-02-2019
Time came for the s2000 to have its first MOT test within my ownership.
Hopefully all the work and checks I have performed have eliminated any chances of a fail.

Great news, the car passed without any advisories.
The emissions were excellent which showed that the catalytic converter and Lambda sensor were working well.
The dude did mention that I had a bolt missing from my catalytic converter heat shield, this was great news as I did hear a slight exhaust rattle at high rpm.
Overall a great result
Parts Purchased:
None
Services Used:
MOT station
Resources used
None
--------------------------------------------------------------------------------------------------------------------------
Task 48 - As She Stands
24-02-2019
With the one of the warmest Februaries upon us, there was no excuse to get the car out for a drive on this beautiful Sunday afternoon.
Spirited drive around Hertfordshire's country roads, thoroughly enjoyed every moment.
I didn't have my DLSR camera, so the shots were taken using my Samsung galaxy S6 phone.


Parts Purchased:
None
Services Used:
None
Resources used
None
--------------------------------------------------------------------------------------------------------------------------
This brings the car up to date.
There is a small remaining to-do list
To-do List
-Upgrade front brake pads to DS2500 type
-Upgrade front windshield roof latches to hardtop type
-Replace engine and gearbox mounts
Long Term To-Do
-Full Geometry Alignment (once funds allow)
-Upgrade Oil Jet Bolts (Was a TSB on my year of s2000)
Maybe's
-Refurbish All Wheels
Thanks for reading guys
03-03-19
Last edited by s2000_f20; 03-03-2019 at 12:48 PM. Reason: UPDATE
The following 3 users liked this post by s2000_f20:
03-10-2019, 11:21 AM
#26
Wow, your dedication and eye for detail is inspirational!! I wonder if all your water leaks are AP1 specific?
At times after driving in the rain and parked indoors, my AP2 interior does smell a little mildew like.
Anyways, I'll be subscribing and bookmark this thread for future reference!
At times after driving in the rain and parked indoors, my AP2 interior does smell a little mildew like.
Anyways, I'll be subscribing and bookmark this thread for future reference!
06-10-2019, 01:22 PM
#27
Registered User
Thread Starter
Wow, your dedication and eye for detail is inspirational!! I wonder if all your water leaks are AP1 specific?
At times after driving in the rain and parked indoors, my AP2 interior does smell a little mildew like.
Anyways, I'll be subscribing and bookmark this thread for future reference!
At times after driving in the rain and parked indoors, my AP2 interior does smell a little mildew like.
Anyways, I'll be subscribing and bookmark this thread for future reference!
I think the main water leak due to the bonnet cable grommet was soley due to the previous owner and the garage.
The rear bumper vent is quite common to leak on all s2000's over time when the seal perishes.
I would definitely pull up the carpet on both sides of the footwells in your s2000, and also check for any standing water underneath the tool tray.
sometimes water can seep through and rest behind the seats due to leaks in the hood.
06-10-2019, 01:24 PM
#28
Registered User
Thread Starter
Hi Guys,
Here’s another update on the s2000.
Enjoy
--------------------------------------------------------------------------------------------------------------------------
Task 50 - Engine & Gearbox Mount Replacement
29-04-2019
For quite a while it has been noticed that there is always a slight vibration upon low rev heavy load acceleration.
The vibration symptom often occurs under load, i.e when engine is on idle and the clutch is lifted to provide load.
A rattle type vibration is heard, of course most car engine's vibrate when the engine is loaded like this, but it definitely was not a normal sound and vibrations seemed to be felt quite perceptible in the cabin.
This did not affect the way the car drove so it was not really a priority to rectify. Some basic checks were performed to see if the mounts were confirmed bad.
These checks are:
-Inspect both front engine mounts.
These mounts are fluid filled, they can rip or tear causing an orange type fluid to leak out of them.
Once the mounts are in this state, vibration can occur.
-Use a crow bar and balance it on the top suspension turret mount and lower engine mount
This can check for any excess engine movement indicating a worn or damage mount
-Exhaust assembly checked for any loose components or hangers.
The vibration can also point towards worn rear drive axles. However this particular symptom only occurs at higher acceleration speeds. Therefore this can be ruled out.
If you are experiencing a symptom like this, the solution is to swap over the drive axles.
Link in the "resources used section" below for more info.
The engine mounts on an s2000 are notoriously quite week, and even after performing all the checks above proving that the mounts are fine I was convinced they were not. The car is now 20 years old so it would benefit from having new mounts.
Once black Friday approached (Nov 2018), it was my opportunity to purchase a set of OEM Honda mounts at a discounted price. An order was placed for a set of x2 front engine mounts and x2 rear gearbox mounts.
The existing rear gearbox mounts looked fine but it made sense to replace them all.
The supplier took an age to deliver them, almost 4 months.
However, once they arrived they looked the part.
After viewing several DIY videos on the installation, the procedure looked pretty straight forward.
The only thing is that my trolley jack just doesn't go high enough, living in a flat my choice of tools are quite limited.
The trolley jack I have is the low type Clarke 1.25 ton jack which is the light weight version. Purely so I can carry it back upstairs.
So with this dilemma, I had to call my mechanic friend to help out. The same guy who helped install the facelift s2000 suspension set.
A lovely warm spring day arrived, I took the day off and grabbed the opportunity to get them installed.
I booked him in and we both got to work. He has a nice heavy duty trolley jack which lifted the s2000 pretty high up.
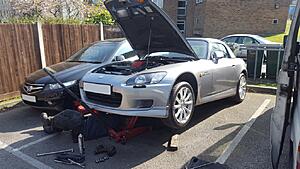
The process was pretty straight forward with no issues or seized bolts.
The replacement OEM mounts fitted perfectly.
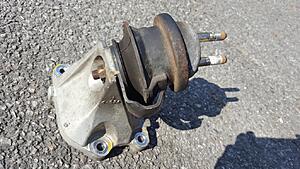
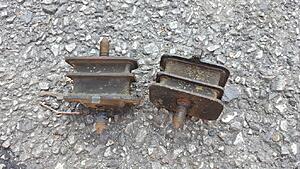
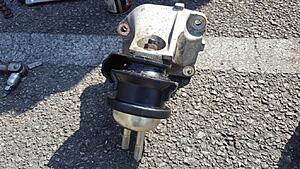
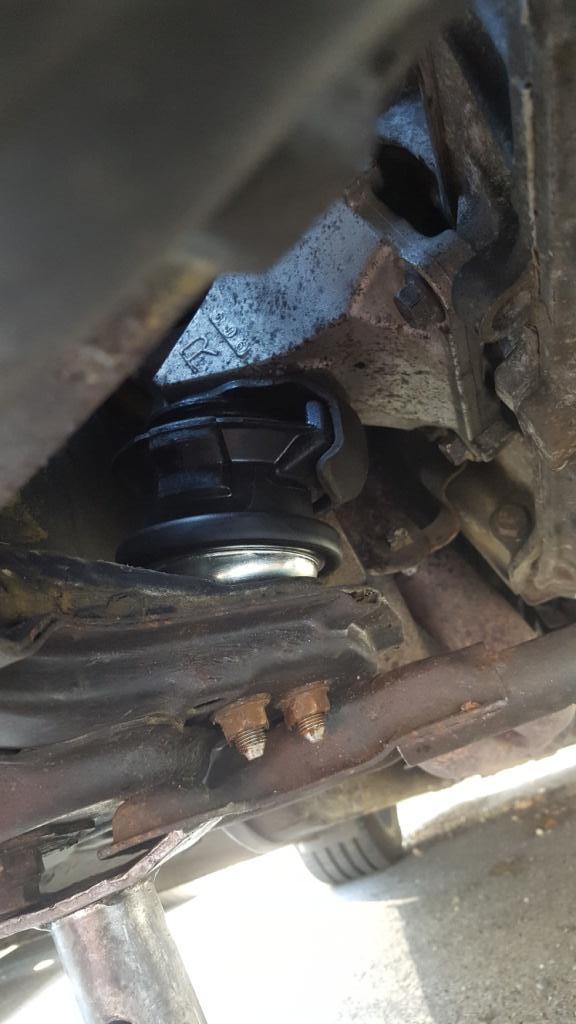
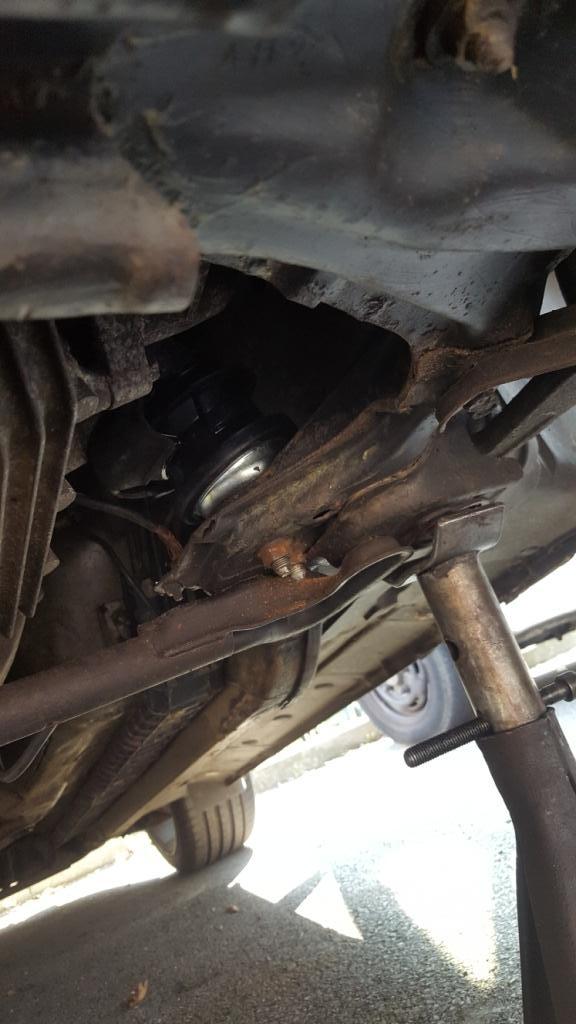
Once the installation was complete the vibration was eliminated, and made the car much more pleasurable to drive at low speeds under load.
It was also noticed that the gearshift did not vibrate as much, so replacing the gearbox mounts was also a great benefit too.
A fantastic result.
Parts Purchased:
Part: Front Engine Mounts (x2 required for left and right side) (Part fits both sides)
Genuine Honda Part Number: 50810-S2A-003
Supplier: Htune
Part: Gearbox Engine Mounts (x2 required for left and right side) (Part fits both sides)
Genuine Honda Part Number: 50806-S2A-000
Supplier: Htune
Services Used:
Hometune Mechanic
Contact: Rody
Tel: 07831 196 494
(North London Area)
Resources used
DIY GUYS YouTube Video
"Replace engine mounts on s2000"
Youtube Video
"Testing s2000 Engine Mounts"
For info
s2ki Thread - "Vibration Upon Acceleration" (Swapping Drive Axles)
https://www.s2ki.com/forums/uk-irela...ation-1000340/
--------------------------------------------------------------------------------------------------------------------------
Task 51 - Oil Service 2019
30-03-2019
It has almost been one year since the last oil service, so the second service was now due.
With only having driven approximately 3000 miles within this time, a basic oil and oil filter service was all that was needed.
The oil used this time round was Shell's Helix Ultra fully synthetic 5w40, and a genuine Honda s2000 filter was purchased.
Grabbed a bottle at a great price so I couldn't complain.
The previous oil used was "motul x-cess 5w40" which was also a great oil.
The next time I will try out Castrol's Edge 5w40 FST type oil.

There is alot of debate on what oil to use, check the s2ki FAQ threads.
For the oil grade, stick to Honda's recommendation or S2ki FAQ thread, or the oil grade that the car has been running on previously from its service history if it states it.
There is generally no bad or good brand of oil. The best advice is to change it regularly.
The oil change was straight forward, when finalizing and torqing up the new oil filter, a witness mark was placed on the oil filter and oil filter engine block plate. This is a clear easy indication to tell me if the oil filter starts loosening.
There have been reports of oil filters coming loose due to the high revving nature of the f20 engine.
This witness marking is a simple easy way to tell if the oil filter moves at all.
There are special clamps which can be purchased to lock the filters in place (pretty expensive for what it is), however after removing the old oil filter and with that being pretty secured, I felt that the clamp was not required. If a clamp is seen 2nd hand at a good price it will be purchased.
Whilst the service was underway, I also decided to remove and check all spark plugs.
Being the iridium type and only replaced last year, they had a mountain of life ahead of them.
All spark plugs were checked and none of them were loose prior to removal.
(There also had been reports of spark plugs coming loose, Honda has since revised the torque specs of the spark plug to combat this)
A quick wire brush showed that all spark plugs were in good condition and sparking well.
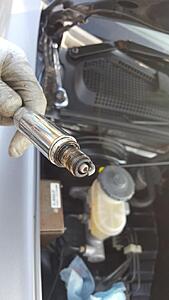
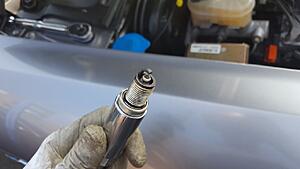
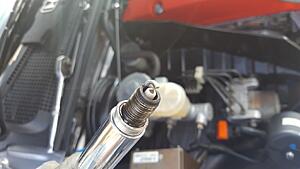
The PCV valve was also removed , checked and cleaned.
If shaken, you should be able to hear a rattle which confirms that the PCV valve is in good working order.
The rattle was present, a quick spray of brake cleaner and it was re-installed.
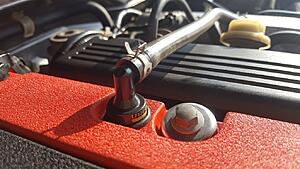
The map sensor was also removed, checked and clean.
Special CRC cleaning spray was used for this component. Brake cleaner will be too harsh and can possibly damage this device.
Everything looked good, with only 3000 miles it was hardly surprising but it was good to see everything in good functional order.
Parts Purchased:
Part: Shell Helix 5w40 Fully Synthetic Oil (5 litres)
Part Number: Helix Ultra 5w40
Supplier: Opie OIls
Part: Genuine s2000 Honda OEM Oil Filter
Honda Part Number: 15400-PCX-004
Supplier: Htune
Part: CRC Sensor Spray
Part Number: 30498
Supplier: Ebay
Part: Brake Cleaner (normfest Mc1)
Part Number: NOR2897333500
Supplier: Eurocarparts
Services Used:
None
Resources used
Potential Oil Filter Clamp (from tegiwa)
https://www.tegiwaimports.com/tegiwa...FQRV0wodGcgD-Q
Info on Spark Plugs coming loose
https://www.s2ki.com/forums/s2000-un...k-plug-366812/
TSB from Honda: https://www.s2ki.com/public/library/...-042/index.htm
Info on Oil Filters coming loose
https://www.s2ki.com/forums/uk-irela...-912859/page6/
Info on PCV Valve
https://www.s2ki.com/forums/s2000-un...-valve-367066/
s2000 Oil/Oil Filter Change
https://www.s2ki.com/forums/s2000-un...change-558203/
Spark Plug Change
https://www.s2ki.com/forums/s2000-un...ge-diy-765375/
Correct oil for your s2000
https://www.s2ki.com/forums/uk-irela...t-etc-1085229/
--------------------------------------------------------------------------------------------------------------------------
Task 52 - Upgrade Front Pads to Ferrodo DS2500
30-03-2019
The brakes on the s2000 are adequate to say the least and could do with some improvements.
At the moment, the brake setup is completely stock, although all brake callipers, brake discs and pads including the fluid were overhauled/replaced last year.
You could spend thousands on brake upgrades but a great upgrade is improving the brake pads.
Wanting abit more bite, I decided to go for a set of upgraded pads.
Having previously used Ferrodo's DS2500 type brake pad on my previously owned 1999 Honda Prelude 2.2 vti, I found them to have excellent bite when working hard and fantastic bite from cold. A great all rounder.
The only downfall was alot more brake dusting compared to OEM pads.

I managed to pick them up at a great price, again on black Friday (Nov 2018), but waited until now to get them fitted once the weather improved.
Brake pad change on the s2000 is super simple, with DIYguys YouTube video reminding me of the procedure.
The calliper and carrier setup is almost identical to my facelift 2006 Honda Accord ictdi.
Sliders were checked, cleaned and re-greased and all pad shims from the OEM brake pad were re-used on the ds2500 version to help stop any squealing.
Silicone grease used for the sliders and copper grease used for the rear of pads and shims.
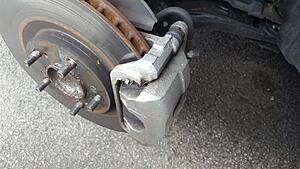
Original OEM pads removed
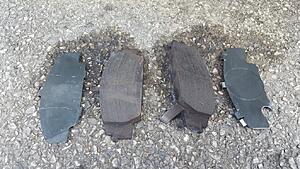
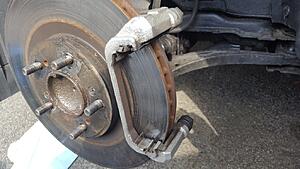
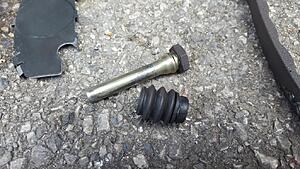
DS2500 pads fitted
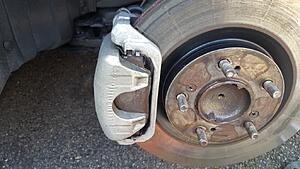
The results was a vast improvement over the stock OEM pads, and a highly recommended upgrade.
If additional funds allow, the brake lines would benefit from an upgrade to stainless items to further help in improving the brake feel. If even more funds allow, it would be nice to upgrade the brake discs to Stop-Tech grooved type.
Parts Purchased:
Part: Ferrodo DS2500 Brake Pad Set
Part Number: FCP1444H
Supplier: JJC Race and Rally (via ebay)
Services Used:
None
Resources used
DIY GUYS YouTube Video
"Replacing Front Brake Pads on s2000"
--------------------------------------------------------------------------------------------------------------------------
Task 53 - Replace Missing Catalytic Heat Shield Bolt
30-03-2019
A metallic high pitched vibration was found during high speed acceleration, and it was confirmed during last month's MOT session.
The cause of the vibration is the catalytic converter heat shield has a missing fastening bolt.
A quick check on s2ki confirmed the hole size and recommended sized bolt to use to re-fasten the heat shield.
Once the size was confirmed, a quick check on for a suitable nut and bolt was sourced.
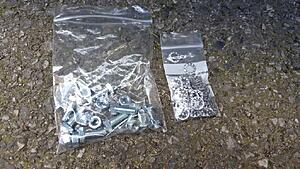
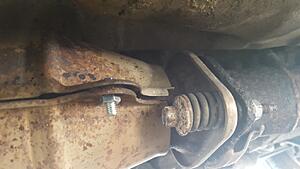
Parts Purchased:
Part: M6 Nut and Bolt (Stainless)
Part Number: n/a
Supplier: https://www.ebay.co.uk/itm/283194357921
Part: M6 Shake Proof Washer
Part Number: n/a
Supplier: https://www.ebay.co.uk/itm/221304059508
Services Used:
None
Resources used
s2ki Thread - "Catalytic Converter Heat Shield Bolt Size"
https://www.s2ki.com/forums/uk-irela...hield-1026049/
--------------------------------------------------------------------------------------------------------------------------
Task 54 - Upgrade to AP2 Valve Retainers/Keepers on Intake
Upgrade Oil jet Bolts and Upgrade Brake Line to Stainless Type
04-05-2019
With the s2000 being an early model and one of the first ones manufactured, there were a number of TSB (technical service bulletins). I believe it only affected s2000's manufactured between 1999 and 2000. Later models already had the changes implemented within their build.
These service bulletins flagged a few issues with the s2000 F20 engine.
The bulletins were the rectification of the valve retainers on the intake side of the engine (Upgrade to AP2 type), and the upgrade of the oil jet bolts from twin port to quad port outlet for better cooling.
Service Bulletin number:
Cause and Symptom: If mechanically over revved, valve retainers can crack.
(Mechanically over rev is where you drop down into the incorrect gear and you over rev) not to be confused by just revving out the engine and letting it bounce on the limiter)
Results: Cracked retainers and fall into the chamber and destroy the engine.
Solution: Install stronger AP2 type retainers/keepers for intake side only.
Service Bulletin number:
Cause and Symptom: If car is run at high RPM's for long periods of time, overheating of the lower section of the engine can occur.
Results: Severe engine damage to bottom end.
Solution: Install revised 4 port oil jet bolt for better cooling.
Currently the engine runs smoothly with no issues what so ever. However, with the car being 20 years old and having had several previous owners there has always been a possibility that that the car may have been over revved at some point in its life. For peace of mind, it would make sense to get this work done.
Due to how the cracks appear, they tend to occur on the underside of the retainer so generally very difficult to see on a visual inspection when the rocker cover is off.
It is only recommended to upgrade the retainers of the intake side of the engine. Due to the heavier weight of the AP2 if the exhaust side is also upgraded this can cause valve float.
Rich at performance Autoworks explains "Valve Float" below and the issues surrounding the retainers on the early f20c engine.
“Valve Float occurs when the valve spring can no longer control the valve, which means the valve can still be open when it is off the cam lobe.
This can happen for various reasons such as
-On stock valve trains when over revved,
-If replacement heavier valves and retainers are used with stock valve springs (mostly at higher rpms)
-If high lift cams are installed without uprated valve springs.
The AP2 retainers are heavier than the AP1 items but the stock Intake valve springs can cope with this, the exhaust side springs are softer and with high rpms can allow the valve to float (with AP2 retainers).
As the exhaust side isn’t really an issue on the AP1 it makes sense to only do the intake retainer”
In hindsight, this should have been performed at my first visit to Performance Autoworks where they checked and adjusted all the clearances.
With the above in mind, I also decided to get the oil jet bolt upgrade performed too.
Upon reading many threads online, the oil jet bolt upgrade is not generally 100% required.
You would not expose the engine to a prolonged high rpm use on a normal road unless you did it deliberately.
Honda decided to release this TSB most likely to protect themselves, and for different countries as they would have different driving habits.
If you are running a turbo or super charger then it would be 100% required.
I wanted peace of mind, so this would be a great opportunity to get this work done at the same time as the retainer upgrade. It would also be an opportunity to have a peer around the bottom end of the engine for any noticeable issues.
Once these two jobs are complete, the original f20c flaw's should now be covered.
(with the exception of the infamous TCT "timing chain tensioner") It's still holding up pretty well.
From a visual inspection of it, it seems it is the original tensioner unit.
With the oil jet bolt upgrade, the oil sump would have to be removed so fresh oil would be needed.
Again, in hindsight I should have held back on the oil service last month.
Not to worry, I can now try out Castrol Edge FST 5w40 oil.
I decided that the retainer and oil jet bolt upgrade is to be performed by Performance Autoworks.
There would be no chance of me performing this type of work in an open car park.
Whilst the car is in, Performance Autoworks will also upgrade the brake lines. The original rubber brake lines have definitely seen better days so I thought instead of replacing them why not upgrade them to stainless versions. This would also match well with the Ferrodo DS2500 pad setup currently on the car.
The brake lines I have chosen are the Goodridge Stainless Brake Line Kit.
An order for the genuine Honda retainers and oil jet bolts were placed.
The Goodridge stainless brake lines were also ordered and arrived within a few days.
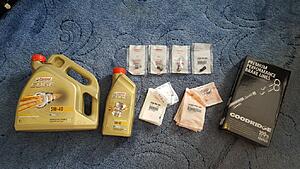

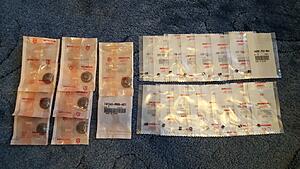
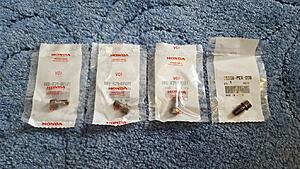
My brother also needed some maintenance work performing on his 1994 B16 powered Honda Civic coupe.
We dropped that one off first and then mine a week later.
Rich at Performance Autoworks reported no issues, and all jobs went well without a hitch.
He reported that the engine is very healthy, with no debris or any cause for concern after performing a full inspection with the oil sump removed. It was also noticed that the engine runs much more smoother, although it could be due to the Castrol edge oil being used or the fresh valve adjustment that was performed.
The original retainers and oil jet bolts were closely examined after they were removed.
It was confirmed that the oil jet bolts were the original 2 port design.
It was also confirmed that the original retainers had no signs of cracking or defects, and were in overall excellent condition. This was also confirmation that the engine had not had a mechanical over rev within its history.
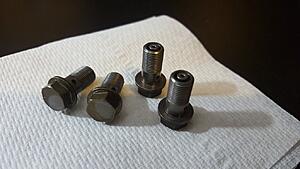
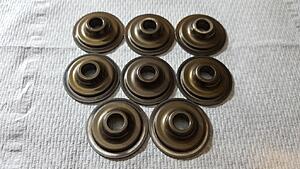

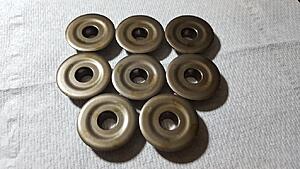
Stainless Steel Lines
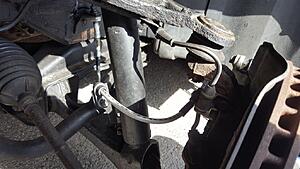
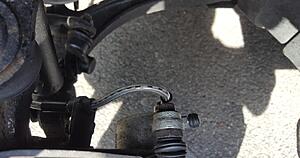
As always, Rich did a fantastic job.
A great result.
Parts Purchased:
Part: Castrol React Brake Fluid (1 litre)
Part Number: React Brake Fluid
Supplier: Rich at Performance Autoworks Supplied this for me.
Part: Castrol Edge FST 5w/40 Fully Synthetic Oil (5 litres)
Part Number: Edge 5w40
Supplier: Opie Oils
Part: Genuine Honda AP2 Retainer (x8) & Keeper Upgrade (x16)
Honda Part Number: 14765-PRB-A01 & 14781-PCX-004
Supplier: Htune
Part: Genuine Honda Oil Jet Bolt Upgrade
Part Number: 15290-PCX-000
Supplier: Htune
Part: Goodridge Stainless Brake Line Kit (in Black)
Part Number: SHD1010-4P
Supplier: Tegiwa
Services Used:
Performance Autoworks
Unit 13
Horcott Industrial Estate
Horcott Road
Fairford
Gloucestershire
GL7 4BX
Phone: 01285 711 733
Email: info@performance-autoworks.co.uk
Performance Autoworks
Resources used
s2ki Thread - "AP2 Retainer Upgrade"
https://www.s2ki.com/forums/s2000-ta...t-ap1-1191578/
s2ki Thread - "Oil Jet Bolt Info"
https://h-tune.co.uk/club/threads/oi...2ym.12746/live
--------------------------------------------------------------------------------------------------------------------------
Task 55 - Upgrade Front Roof Latches to Hardtop Version
12-05-2019
The existing front roof latches are the original for the soft top, and therefore they are pretty worn out.
Since the hardtop roof had been fitted, the roof has a tendency to rattle quite abit whilst driving over rough or bumpy roads. Honda offered the hard top version of the latch which is slightly thicker and provides a more tighter clamp thus eliminating the hardtop rattle.
Here are photos showing soft top latch vs the hard top latch
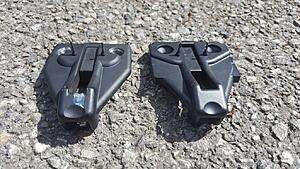

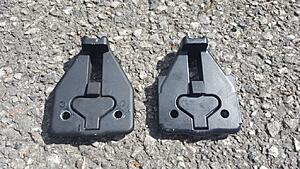
Many members just perform the washer mod, basically a couple of washers to lift the latch further away from the roof line to provide a tighter clamping force. The issue here is that it can cause some distortion due to the rigidity of the hard top roof. The soft top is quite flexible hence why you can get away with it for soft top use.
I preferred to do it properly as the hardtop roof would be semi permanent for now, or until a suitable storage solution can be found for the hardtop itself in the future.
A pair was ordered and they came within good time.

Installation was super easy. I recently installed the washer mod last year (Task 7) to help eliminate the soft top wind noise. DIY guys provided an excellent easy to follow guide in removing the trim to gain access to these latches.
Installation was a breeze and using the existing screws, reinstallation of all the trim was straight forward with no issues.
New strikers installed
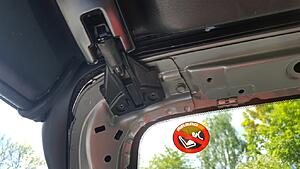
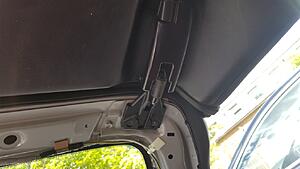
All trim re-installed
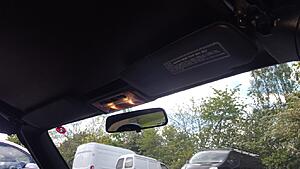
Whilst performing this task, the hardtop roof seals were all re-greased using shin enstui silicon rubber grease to help reduce rubbing sounds and also keep all seals supple.
Once the latches were installed, the hardtop was clamped in place. There was a noticeable stiffer feeling in clamping giving that sense of greater strength in pulling down the hardtop roof. This was a positive feeling as it was looking very likely this would resolve my hardtop rattling issues.
Finally, no more rattling. There are some very minor noises, as it is a removable roof you will always get some noises due to the fact the roof is not a part of the car. However it is a night and day difference as the rattling noises were super annoying and would drive you mad on a long drive.
All trims were re-installed.
Very happy with a fantastic result.
Parts Purchased:
Part: Genuine Honda Hard Top Front Roof Latches
Part Number: 86270-S2A-902 (x2 required)
Supplier: Tegiwa
Services Used:
None
Resources used
s2ki Thread - "s2000 soft top roof washer Mod"
--------------------------------------------------------------------------------------------------------------------------
Task 56 - Strip Down OEM Head unit and Reflow Connector Terminals
15-05-2019
On a random drive to work, it was noticed that the sound system had a slight issue.
The issue was with the left side speaker, the speaker would slightly crackle with a reduce volume on random occasions. On a previous task, the head unit was just removed and checked. However the issue was not experienced at the time and everything looked in good condition.
This time round, I thought it would be a good time to dive alittle further.
With the head unit so easy to remove, I brought it indoors to have a little diagnosis session.
The head unit came apart nicely, with every part of the assembly well thought out to aid ease of production.
It really was a nice unit to work on.
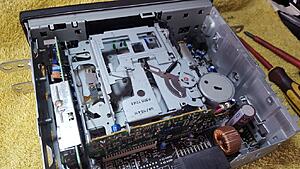
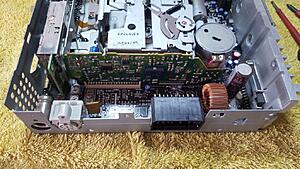
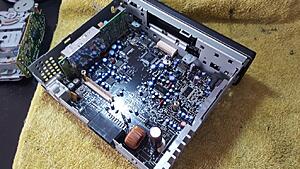

With the head unit fully stripped down, I could remove the main PCB from the chassis.
A visual inspection of the main input connector and CD changer terminals was performed, along with the terminals of the main power output MOSFET component. The solder fillets looked generally ok, although it would benefit from a reflow on the main connector.
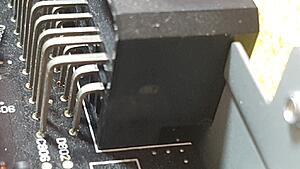
I got out my Weller WSD81 soldering station and some flux, and got to work reflowing these 3 main areas.
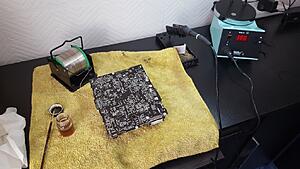
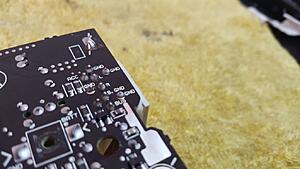
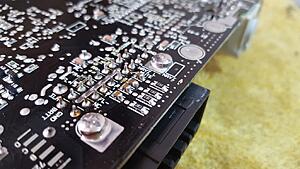
After reflowing, all terminals looked good.
Re-assembly was a breeze and the head unit was re-installed back into the car without any issues.
Upon power up, everything worked fine with the issue not being present.
The situation will be monitored to see if it re-occurred but so far so good.
It may be worth checking out the CD changer at a later date to see if any issues are apparent on this assembly.
I know it is probably easier to just buy a modern head unit, but I just love the OEM originality.
With the car not being the daily, a modern head unit is not really required.
Parts Purchased:
None
Services Used:
None
Resources used
None
--------------------------------------------------------------------------------------------------------------------------
Task 57 - Revert Air Filter from K&N Back to OEM
19-05-2019
After a good amount of time using the K&N drop in filter, my conclusion is that it provides very little benefits.
With the original air box modified slightly in task 52 to provide alittle more sound without compromising on power, there was very little or none at all differences between the two filters.
The K&N filter does increase bhp by 1 or2 horse power, but has to sacrifice some filtration.
To be fair, 1 or 2 horse power would be very hard to feel, especially with there being so many factors and variations in driving conditions, air temperatures and state of the car.
There also has been reports of K&N filters damaging MAP sensors, although I am unable to confirm if this is true.
The only real benefit of having the K&N filter is that it is washable and re-usable. However seeing that the s2000 is not a daily and only used sparingly, the OEM paper filter would not need to be changed as often.
Even if the car was used as a daily, I would be quite concerned about letting in more debris everyday on your commute for the sake of negligible increase in response.
To this degree, I have decided that the original Honda OEM filter will be re-installed.
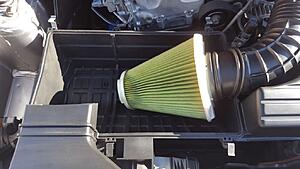
Parts Purchased:
None
Services Used:
None
Resources used
None
--------------------------------------------------------------------------------------------------------------------------
Task 58 – Novice Track Day Preparation
01-06-2019
Earlier in the year, me and brother decided that it was time to get the cars out on a track day.
Not wanting the track day to be too aggressive, we both decided to do a novice evening.
The track I have always wanted to do was Brands Hatch, together with the s2000 it would be a personal bucket list moment.
Together with this, my s2000 is 20 years old this year. What an event to celebrate its 20th birthday.
The track day was booked for the 5th June 2019.
All the tasks leading up to the track day help prepare the car, and cover all the basics to ensure the car stayed reliable on the day.
Final checks were done which included
-Torque on all Spark plugs
-All fluid checks
-Brake fluid moisture content check (less than 1%) – Pass
(using a Laser 4875 brake fluid tester)
-Engine visual inspection (no leaks or loose clips or connectors)
-All wheels removed, visual inspection performed
-All body works secured
-Exhaust items secured, no loose bolts
-Wheel bolts torqued up
-Tyre pressures checked
-Front tow hook check and fitted
-All tools/equipment and trolley jack loaded in boot
-Car cleaned
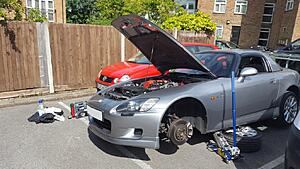
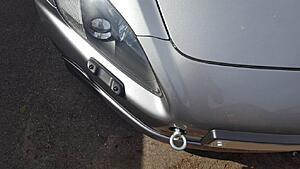

Parts Purchased:
None
Services Used:
None
Resources used
None
--------------------------------------------------------------------------------------------------------------------------
Task 59 – Novice Track Day Evening @ Brand Hatch
05-06-2019
The day finally arrived.
With all the works performed on the s2000, it was ready for some fun.
In attendance was:
-Myself in my 1999 Honda s2000
-My brother in his B16a powered 1994 Honda Civic Coupe
-An old friend in his 2013 BMW M135i
-Another old friend tagging along as a passenger in my s2000.
Due to the nature of these events and the value of the s2000, I decided on getting track day insurance.
From sky insurance it was a reasonable £97 cover for the day.
Incidents on track day events are usually quite rare, but it is great peace of mind just in case anything were to happen.
Great website, purchase online and receive your certificate in minutes
https://www.skyinsurance.co.uk/track...surance//quote
Absolutely epic day, fun was had by all and I did not want it to end.
Naturally we all felt slightly nervous at the beginning, but we all gained confidence in our cars as the evening went on.
The Honda s2000 performed flawlessly throughout all 4 sessions.
What a machine the s2000 is, Honda was on top of their game back in 1999 when they designed this car.
The chassis inspired confidence on every turn, coupled with its lovely gearbox, rev match on the down shift was a joy to execute when I could.
That f20 engine never missed a beat and revved flawlessly to 9k rpm every time I asked it too. What an engine, what a machine!
The s2000 stayed flat around the corners and flex of the whole car was barely noticeable. Just goes to show that x-bone frame was a master piece of design and engineering.
I was amazed at the capability of such a standard stock OEM car on road tyres (with the exception of slightly upgraded pads and stainless brake lines)
The brake performance was fantastic, no fade was felt and bite was excellent. It does goes to show all you need is good brake fluid (Castrol React Performance) and better than OEM pads (in this case ds2500 pads).
There were some lovely cars on track, most of which were alot faster than the s2000. Some were also alot slower consisting of a standard mini cooper and even a standard tdci Mondeo.
I think the closest competition I had was with a 2003 Porsche Boxster. His car seemed quite serious as it had a roll cage, but the s2000 kept up with it even around the corners despite the s2000 being stock.
The s2000 just felt at home on circuit, I am really glad I managed to take my s2000 on track as it was intended for.
I know track days aren’t for everyone. The pitfalls and expensive drama’s that can result in such event, but I would highly recommend it to anyone to fully feel the capability of the s2000.
Thanks to Matt Clay for taking the photos on the first session whilst we were queuing in the pit lane and out on track.
What an incredible day.


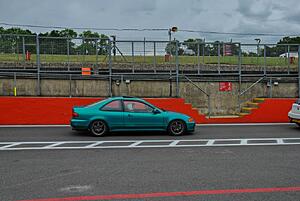


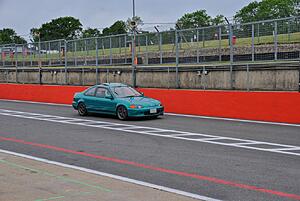


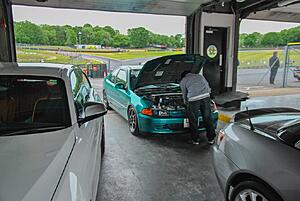
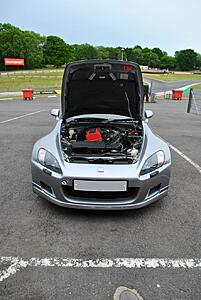

Parts Purchased:
None
Services Used:
MSV Track Days
https://www.msvtrackdays.com/car
Track Day Insurance
https://www.skyinsurance.co.uk/track...surance//quote
Resources used
None
--------------------------------------------------------------------------------------------------------------------------
This brings the car up to date.
There is a small remaining to-do list
To-do List
-Full Geometry Alignment (once funds allow)
Long Term To-Do
-Rectify lower arch rust issues
-Respray bonnet and boot lid due to paint surface defects
-Maybe colour code headlight washers and rear bumper lower lip section
Maybe's
-Refurbish All Wheels
Thanks for reading guys
10-06-19
Here’s another update on the s2000.
Enjoy
--------------------------------------------------------------------------------------------------------------------------
Task 50 - Engine & Gearbox Mount Replacement
29-04-2019
For quite a while it has been noticed that there is always a slight vibration upon low rev heavy load acceleration.
The vibration symptom often occurs under load, i.e when engine is on idle and the clutch is lifted to provide load.
A rattle type vibration is heard, of course most car engine's vibrate when the engine is loaded like this, but it definitely was not a normal sound and vibrations seemed to be felt quite perceptible in the cabin.
This did not affect the way the car drove so it was not really a priority to rectify. Some basic checks were performed to see if the mounts were confirmed bad.
These checks are:
-Inspect both front engine mounts.
These mounts are fluid filled, they can rip or tear causing an orange type fluid to leak out of them.
Once the mounts are in this state, vibration can occur.
-Use a crow bar and balance it on the top suspension turret mount and lower engine mount
This can check for any excess engine movement indicating a worn or damage mount
-Exhaust assembly checked for any loose components or hangers.
The vibration can also point towards worn rear drive axles. However this particular symptom only occurs at higher acceleration speeds. Therefore this can be ruled out.
If you are experiencing a symptom like this, the solution is to swap over the drive axles.
Link in the "resources used section" below for more info.
The engine mounts on an s2000 are notoriously quite week, and even after performing all the checks above proving that the mounts are fine I was convinced they were not. The car is now 20 years old so it would benefit from having new mounts.
Once black Friday approached (Nov 2018), it was my opportunity to purchase a set of OEM Honda mounts at a discounted price. An order was placed for a set of x2 front engine mounts and x2 rear gearbox mounts.
The existing rear gearbox mounts looked fine but it made sense to replace them all.
The supplier took an age to deliver them, almost 4 months.
However, once they arrived they looked the part.

After viewing several DIY videos on the installation, the procedure looked pretty straight forward.
The only thing is that my trolley jack just doesn't go high enough, living in a flat my choice of tools are quite limited.
The trolley jack I have is the low type Clarke 1.25 ton jack which is the light weight version. Purely so I can carry it back upstairs.
So with this dilemma, I had to call my mechanic friend to help out. The same guy who helped install the facelift s2000 suspension set.
A lovely warm spring day arrived, I took the day off and grabbed the opportunity to get them installed.
I booked him in and we both got to work. He has a nice heavy duty trolley jack which lifted the s2000 pretty high up.

The process was pretty straight forward with no issues or seized bolts.
The replacement OEM mounts fitted perfectly.


Once the installation was complete the vibration was eliminated, and made the car much more pleasurable to drive at low speeds under load.
It was also noticed that the gearshift did not vibrate as much, so replacing the gearbox mounts was also a great benefit too.
A fantastic result.
Parts Purchased:
Part: Front Engine Mounts (x2 required for left and right side) (Part fits both sides)
Genuine Honda Part Number: 50810-S2A-003
Supplier: Htune
Part: Gearbox Engine Mounts (x2 required for left and right side) (Part fits both sides)
Genuine Honda Part Number: 50806-S2A-000
Supplier: Htune
Services Used:
Hometune Mechanic
Contact: Rody
Tel: 07831 196 494
(North London Area)
Resources used
DIY GUYS YouTube Video
"Replace engine mounts on s2000"
Youtube Video
"Testing s2000 Engine Mounts"
For info
s2ki Thread - "Vibration Upon Acceleration" (Swapping Drive Axles)
https://www.s2ki.com/forums/uk-irela...ation-1000340/
--------------------------------------------------------------------------------------------------------------------------
Task 51 - Oil Service 2019
30-03-2019
It has almost been one year since the last oil service, so the second service was now due.
With only having driven approximately 3000 miles within this time, a basic oil and oil filter service was all that was needed.
The oil used this time round was Shell's Helix Ultra fully synthetic 5w40, and a genuine Honda s2000 filter was purchased.
Grabbed a bottle at a great price so I couldn't complain.
The previous oil used was "motul x-cess 5w40" which was also a great oil.
The next time I will try out Castrol's Edge 5w40 FST type oil.
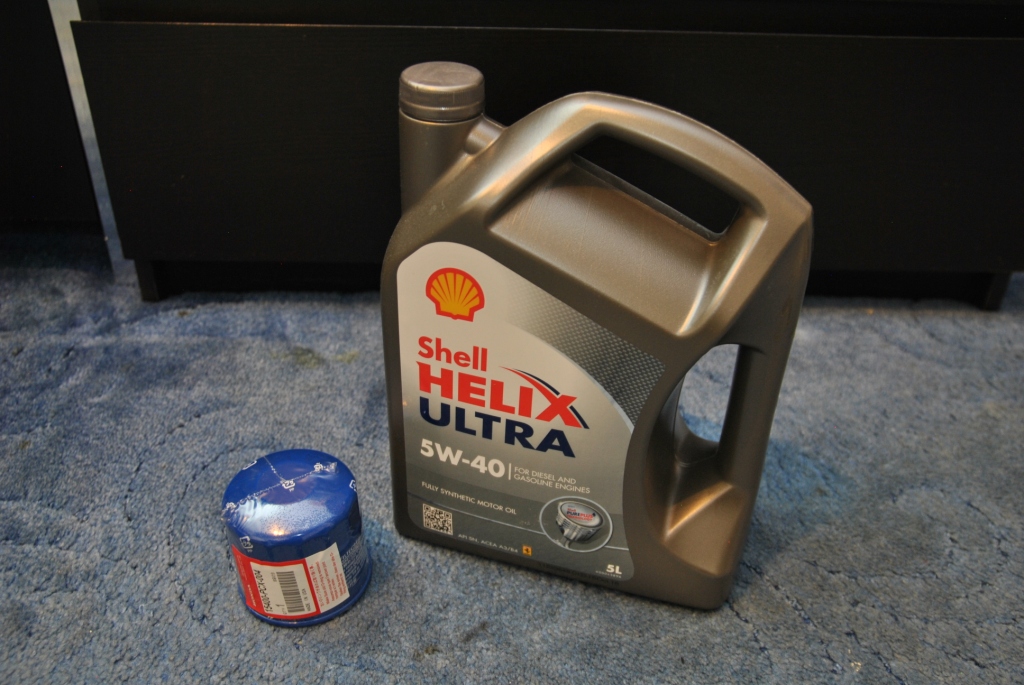
There is alot of debate on what oil to use, check the s2ki FAQ threads.
For the oil grade, stick to Honda's recommendation or S2ki FAQ thread, or the oil grade that the car has been running on previously from its service history if it states it.
There is generally no bad or good brand of oil. The best advice is to change it regularly.
The oil change was straight forward, when finalizing and torqing up the new oil filter, a witness mark was placed on the oil filter and oil filter engine block plate. This is a clear easy indication to tell me if the oil filter starts loosening.

There have been reports of oil filters coming loose due to the high revving nature of the f20 engine.
This witness marking is a simple easy way to tell if the oil filter moves at all.
There are special clamps which can be purchased to lock the filters in place (pretty expensive for what it is), however after removing the old oil filter and with that being pretty secured, I felt that the clamp was not required. If a clamp is seen 2nd hand at a good price it will be purchased.
Whilst the service was underway, I also decided to remove and check all spark plugs.
Being the iridium type and only replaced last year, they had a mountain of life ahead of them.
All spark plugs were checked and none of them were loose prior to removal.
(There also had been reports of spark plugs coming loose, Honda has since revised the torque specs of the spark plug to combat this)
A quick wire brush showed that all spark plugs were in good condition and sparking well.


The PCV valve was also removed , checked and cleaned.
If shaken, you should be able to hear a rattle which confirms that the PCV valve is in good working order.
The rattle was present, a quick spray of brake cleaner and it was re-installed.


The map sensor was also removed, checked and clean.
Special CRC cleaning spray was used for this component. Brake cleaner will be too harsh and can possibly damage this device.
Everything looked good, with only 3000 miles it was hardly surprising but it was good to see everything in good functional order.
Parts Purchased:
Part: Shell Helix 5w40 Fully Synthetic Oil (5 litres)
Part Number: Helix Ultra 5w40
Supplier: Opie OIls
Part: Genuine s2000 Honda OEM Oil Filter
Honda Part Number: 15400-PCX-004
Supplier: Htune
Part: CRC Sensor Spray
Part Number: 30498
Supplier: Ebay
Part: Brake Cleaner (normfest Mc1)
Part Number: NOR2897333500
Supplier: Eurocarparts
Services Used:
None
Resources used
Potential Oil Filter Clamp (from tegiwa)
https://www.tegiwaimports.com/tegiwa...FQRV0wodGcgD-Q
Info on Spark Plugs coming loose
https://www.s2ki.com/forums/s2000-un...k-plug-366812/
TSB from Honda: https://www.s2ki.com/public/library/...-042/index.htm
Info on Oil Filters coming loose
https://www.s2ki.com/forums/uk-irela...-912859/page6/
Info on PCV Valve
https://www.s2ki.com/forums/s2000-un...-valve-367066/
s2000 Oil/Oil Filter Change
https://www.s2ki.com/forums/s2000-un...change-558203/
Spark Plug Change
https://www.s2ki.com/forums/s2000-un...ge-diy-765375/
Correct oil for your s2000
https://www.s2ki.com/forums/uk-irela...t-etc-1085229/
--------------------------------------------------------------------------------------------------------------------------
Task 52 - Upgrade Front Pads to Ferrodo DS2500
30-03-2019
The brakes on the s2000 are adequate to say the least and could do with some improvements.
At the moment, the brake setup is completely stock, although all brake callipers, brake discs and pads including the fluid were overhauled/replaced last year.
You could spend thousands on brake upgrades but a great upgrade is improving the brake pads.
Wanting abit more bite, I decided to go for a set of upgraded pads.
Having previously used Ferrodo's DS2500 type brake pad on my previously owned 1999 Honda Prelude 2.2 vti, I found them to have excellent bite when working hard and fantastic bite from cold. A great all rounder.
The only downfall was alot more brake dusting compared to OEM pads.

I managed to pick them up at a great price, again on black Friday (Nov 2018), but waited until now to get them fitted once the weather improved.
Brake pad change on the s2000 is super simple, with DIYguys YouTube video reminding me of the procedure.
The calliper and carrier setup is almost identical to my facelift 2006 Honda Accord ictdi.
Sliders were checked, cleaned and re-greased and all pad shims from the OEM brake pad were re-used on the ds2500 version to help stop any squealing.
Silicone grease used for the sliders and copper grease used for the rear of pads and shims.

Original OEM pads removed


DS2500 pads fitted

The results was a vast improvement over the stock OEM pads, and a highly recommended upgrade.
If additional funds allow, the brake lines would benefit from an upgrade to stainless items to further help in improving the brake feel. If even more funds allow, it would be nice to upgrade the brake discs to Stop-Tech grooved type.
Parts Purchased:
Part: Ferrodo DS2500 Brake Pad Set
Part Number: FCP1444H
Supplier: JJC Race and Rally (via ebay)
Services Used:
None
Resources used
DIY GUYS YouTube Video
"Replacing Front Brake Pads on s2000"
--------------------------------------------------------------------------------------------------------------------------
Task 53 - Replace Missing Catalytic Heat Shield Bolt
30-03-2019
A metallic high pitched vibration was found during high speed acceleration, and it was confirmed during last month's MOT session.
The cause of the vibration is the catalytic converter heat shield has a missing fastening bolt.
A quick check on s2ki confirmed the hole size and recommended sized bolt to use to re-fasten the heat shield.
Once the size was confirmed, a quick check on for a suitable nut and bolt was sourced.


Parts Purchased:
Part: M6 Nut and Bolt (Stainless)
Part Number: n/a
Supplier: https://www.ebay.co.uk/itm/283194357921
Part: M6 Shake Proof Washer
Part Number: n/a
Supplier: https://www.ebay.co.uk/itm/221304059508
Services Used:
None
Resources used
s2ki Thread - "Catalytic Converter Heat Shield Bolt Size"
https://www.s2ki.com/forums/uk-irela...hield-1026049/
--------------------------------------------------------------------------------------------------------------------------
Task 54 - Upgrade to AP2 Valve Retainers/Keepers on Intake
Upgrade Oil jet Bolts and Upgrade Brake Line to Stainless Type
04-05-2019
With the s2000 being an early model and one of the first ones manufactured, there were a number of TSB (technical service bulletins). I believe it only affected s2000's manufactured between 1999 and 2000. Later models already had the changes implemented within their build.
These service bulletins flagged a few issues with the s2000 F20 engine.
The bulletins were the rectification of the valve retainers on the intake side of the engine (Upgrade to AP2 type), and the upgrade of the oil jet bolts from twin port to quad port outlet for better cooling.
Service Bulletin number:
Cause and Symptom: If mechanically over revved, valve retainers can crack.
(Mechanically over rev is where you drop down into the incorrect gear and you over rev) not to be confused by just revving out the engine and letting it bounce on the limiter)
Results: Cracked retainers and fall into the chamber and destroy the engine.
Solution: Install stronger AP2 type retainers/keepers for intake side only.
Service Bulletin number:
Cause and Symptom: If car is run at high RPM's for long periods of time, overheating of the lower section of the engine can occur.
Results: Severe engine damage to bottom end.
Solution: Install revised 4 port oil jet bolt for better cooling.
Currently the engine runs smoothly with no issues what so ever. However, with the car being 20 years old and having had several previous owners there has always been a possibility that that the car may have been over revved at some point in its life. For peace of mind, it would make sense to get this work done.
Due to how the cracks appear, they tend to occur on the underside of the retainer so generally very difficult to see on a visual inspection when the rocker cover is off.
It is only recommended to upgrade the retainers of the intake side of the engine. Due to the heavier weight of the AP2 if the exhaust side is also upgraded this can cause valve float.
Rich at performance Autoworks explains "Valve Float" below and the issues surrounding the retainers on the early f20c engine.
“Valve Float occurs when the valve spring can no longer control the valve, which means the valve can still be open when it is off the cam lobe.
This can happen for various reasons such as
-On stock valve trains when over revved,
-If replacement heavier valves and retainers are used with stock valve springs (mostly at higher rpms)
-If high lift cams are installed without uprated valve springs.
The AP2 retainers are heavier than the AP1 items but the stock Intake valve springs can cope with this, the exhaust side springs are softer and with high rpms can allow the valve to float (with AP2 retainers).
As the exhaust side isn’t really an issue on the AP1 it makes sense to only do the intake retainer”
In hindsight, this should have been performed at my first visit to Performance Autoworks where they checked and adjusted all the clearances.
With the above in mind, I also decided to get the oil jet bolt upgrade performed too.
Upon reading many threads online, the oil jet bolt upgrade is not generally 100% required.
You would not expose the engine to a prolonged high rpm use on a normal road unless you did it deliberately.
Honda decided to release this TSB most likely to protect themselves, and for different countries as they would have different driving habits.
If you are running a turbo or super charger then it would be 100% required.
I wanted peace of mind, so this would be a great opportunity to get this work done at the same time as the retainer upgrade. It would also be an opportunity to have a peer around the bottom end of the engine for any noticeable issues.
Once these two jobs are complete, the original f20c flaw's should now be covered.
(with the exception of the infamous TCT "timing chain tensioner") It's still holding up pretty well.
From a visual inspection of it, it seems it is the original tensioner unit.
With the oil jet bolt upgrade, the oil sump would have to be removed so fresh oil would be needed.
Again, in hindsight I should have held back on the oil service last month.
Not to worry, I can now try out Castrol Edge FST 5w40 oil.
I decided that the retainer and oil jet bolt upgrade is to be performed by Performance Autoworks.
There would be no chance of me performing this type of work in an open car park.
Whilst the car is in, Performance Autoworks will also upgrade the brake lines. The original rubber brake lines have definitely seen better days so I thought instead of replacing them why not upgrade them to stainless versions. This would also match well with the Ferrodo DS2500 pad setup currently on the car.
The brake lines I have chosen are the Goodridge Stainless Brake Line Kit.
An order for the genuine Honda retainers and oil jet bolts were placed.
The Goodridge stainless brake lines were also ordered and arrived within a few days.


My brother also needed some maintenance work performing on his 1994 B16 powered Honda Civic coupe.
We dropped that one off first and then mine a week later.
Rich at Performance Autoworks reported no issues, and all jobs went well without a hitch.
He reported that the engine is very healthy, with no debris or any cause for concern after performing a full inspection with the oil sump removed. It was also noticed that the engine runs much more smoother, although it could be due to the Castrol edge oil being used or the fresh valve adjustment that was performed.
The original retainers and oil jet bolts were closely examined after they were removed.
It was confirmed that the oil jet bolts were the original 2 port design.
It was also confirmed that the original retainers had no signs of cracking or defects, and were in overall excellent condition. This was also confirmation that the engine had not had a mechanical over rev within its history.


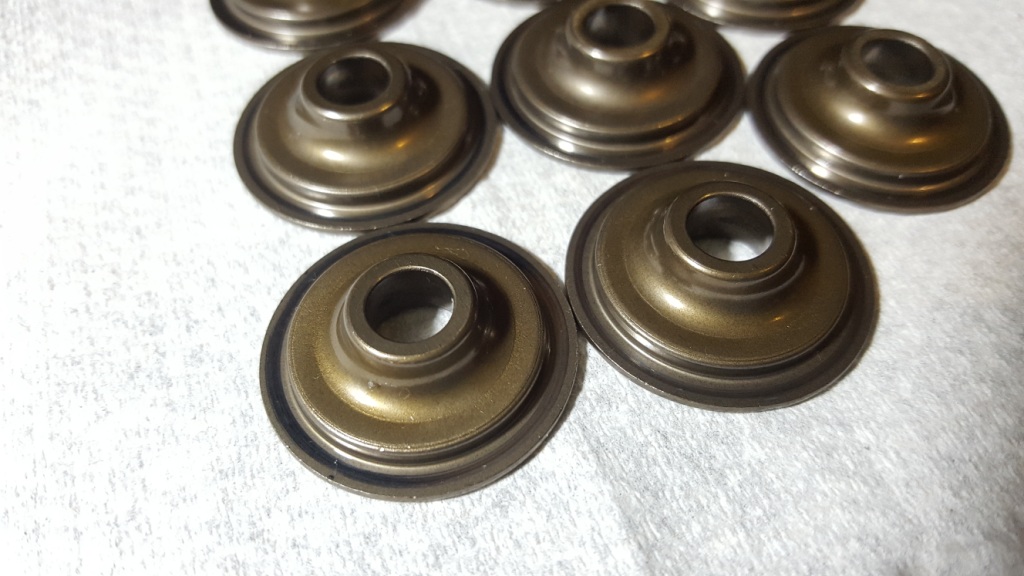

Stainless Steel Lines


As always, Rich did a fantastic job.
A great result.
Parts Purchased:
Part: Castrol React Brake Fluid (1 litre)
Part Number: React Brake Fluid
Supplier: Rich at Performance Autoworks Supplied this for me.
Part: Castrol Edge FST 5w/40 Fully Synthetic Oil (5 litres)
Part Number: Edge 5w40
Supplier: Opie Oils
Part: Genuine Honda AP2 Retainer (x8) & Keeper Upgrade (x16)
Honda Part Number: 14765-PRB-A01 & 14781-PCX-004
Supplier: Htune
Part: Genuine Honda Oil Jet Bolt Upgrade
Part Number: 15290-PCX-000
Supplier: Htune
Part: Goodridge Stainless Brake Line Kit (in Black)
Part Number: SHD1010-4P
Supplier: Tegiwa
Services Used:
Performance Autoworks
Unit 13
Horcott Industrial Estate
Horcott Road
Fairford
Gloucestershire
GL7 4BX
Phone: 01285 711 733
Email: info@performance-autoworks.co.uk
Performance Autoworks
Resources used
s2ki Thread - "AP2 Retainer Upgrade"
https://www.s2ki.com/forums/s2000-ta...t-ap1-1191578/
s2ki Thread - "Oil Jet Bolt Info"
https://h-tune.co.uk/club/threads/oi...2ym.12746/live
--------------------------------------------------------------------------------------------------------------------------
Task 55 - Upgrade Front Roof Latches to Hardtop Version
12-05-2019
The existing front roof latches are the original for the soft top, and therefore they are pretty worn out.
Since the hardtop roof had been fitted, the roof has a tendency to rattle quite abit whilst driving over rough or bumpy roads. Honda offered the hard top version of the latch which is slightly thicker and provides a more tighter clamp thus eliminating the hardtop rattle.
Here are photos showing soft top latch vs the hard top latch


Many members just perform the washer mod, basically a couple of washers to lift the latch further away from the roof line to provide a tighter clamping force. The issue here is that it can cause some distortion due to the rigidity of the hard top roof. The soft top is quite flexible hence why you can get away with it for soft top use.
I preferred to do it properly as the hardtop roof would be semi permanent for now, or until a suitable storage solution can be found for the hardtop itself in the future.
A pair was ordered and they came within good time.

Installation was super easy. I recently installed the washer mod last year (Task 7) to help eliminate the soft top wind noise. DIY guys provided an excellent easy to follow guide in removing the trim to gain access to these latches.
Installation was a breeze and using the existing screws, reinstallation of all the trim was straight forward with no issues.
New strikers installed


All trim re-installed

Whilst performing this task, the hardtop roof seals were all re-greased using shin enstui silicon rubber grease to help reduce rubbing sounds and also keep all seals supple.
Once the latches were installed, the hardtop was clamped in place. There was a noticeable stiffer feeling in clamping giving that sense of greater strength in pulling down the hardtop roof. This was a positive feeling as it was looking very likely this would resolve my hardtop rattling issues.
Finally, no more rattling. There are some very minor noises, as it is a removable roof you will always get some noises due to the fact the roof is not a part of the car. However it is a night and day difference as the rattling noises were super annoying and would drive you mad on a long drive.
All trims were re-installed.
Very happy with a fantastic result.
Parts Purchased:
Part: Genuine Honda Hard Top Front Roof Latches
Part Number: 86270-S2A-902 (x2 required)
Supplier: Tegiwa
Services Used:
None
Resources used
s2ki Thread - "s2000 soft top roof washer Mod"
--------------------------------------------------------------------------------------------------------------------------
Task 56 - Strip Down OEM Head unit and Reflow Connector Terminals
15-05-2019
On a random drive to work, it was noticed that the sound system had a slight issue.
The issue was with the left side speaker, the speaker would slightly crackle with a reduce volume on random occasions. On a previous task, the head unit was just removed and checked. However the issue was not experienced at the time and everything looked in good condition.
This time round, I thought it would be a good time to dive alittle further.
With the head unit so easy to remove, I brought it indoors to have a little diagnosis session.
The head unit came apart nicely, with every part of the assembly well thought out to aid ease of production.
It really was a nice unit to work on.


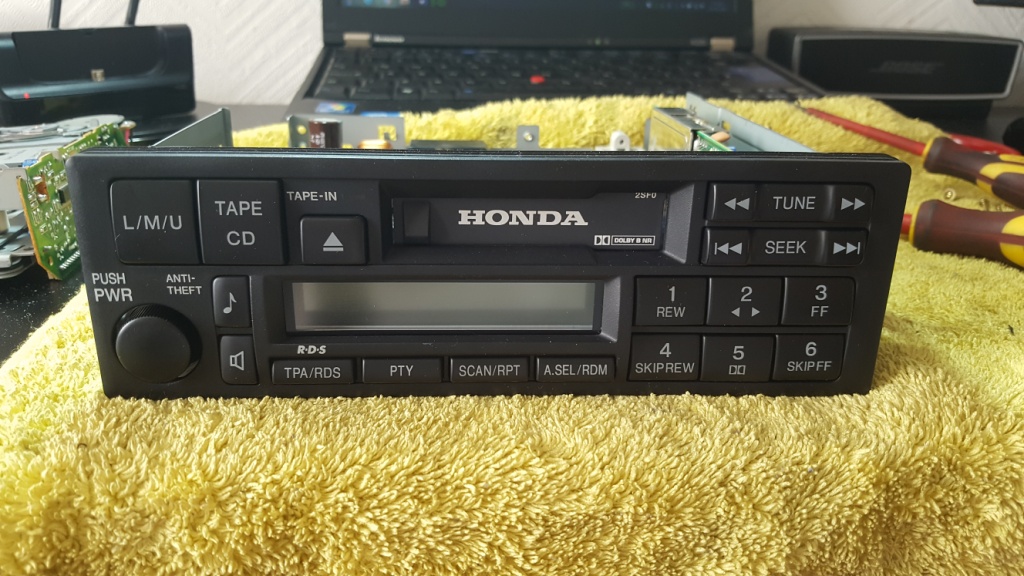
With the head unit fully stripped down, I could remove the main PCB from the chassis.
A visual inspection of the main input connector and CD changer terminals was performed, along with the terminals of the main power output MOSFET component. The solder fillets looked generally ok, although it would benefit from a reflow on the main connector.

I got out my Weller WSD81 soldering station and some flux, and got to work reflowing these 3 main areas.


After reflowing, all terminals looked good.
Re-assembly was a breeze and the head unit was re-installed back into the car without any issues.
Upon power up, everything worked fine with the issue not being present.
The situation will be monitored to see if it re-occurred but so far so good.
It may be worth checking out the CD changer at a later date to see if any issues are apparent on this assembly.
I know it is probably easier to just buy a modern head unit, but I just love the OEM originality.
With the car not being the daily, a modern head unit is not really required.
Parts Purchased:
None
Services Used:
None
Resources used
None
--------------------------------------------------------------------------------------------------------------------------
Task 57 - Revert Air Filter from K&N Back to OEM
19-05-2019
After a good amount of time using the K&N drop in filter, my conclusion is that it provides very little benefits.
With the original air box modified slightly in task 52 to provide alittle more sound without compromising on power, there was very little or none at all differences between the two filters.
The K&N filter does increase bhp by 1 or2 horse power, but has to sacrifice some filtration.
To be fair, 1 or 2 horse power would be very hard to feel, especially with there being so many factors and variations in driving conditions, air temperatures and state of the car.
There also has been reports of K&N filters damaging MAP sensors, although I am unable to confirm if this is true.
The only real benefit of having the K&N filter is that it is washable and re-usable. However seeing that the s2000 is not a daily and only used sparingly, the OEM paper filter would not need to be changed as often.
Even if the car was used as a daily, I would be quite concerned about letting in more debris everyday on your commute for the sake of negligible increase in response.
To this degree, I have decided that the original Honda OEM filter will be re-installed.

Parts Purchased:
None
Services Used:
None
Resources used
None
--------------------------------------------------------------------------------------------------------------------------
Task 58 – Novice Track Day Preparation
01-06-2019
Earlier in the year, me and brother decided that it was time to get the cars out on a track day.
Not wanting the track day to be too aggressive, we both decided to do a novice evening.
The track I have always wanted to do was Brands Hatch, together with the s2000 it would be a personal bucket list moment.
Together with this, my s2000 is 20 years old this year. What an event to celebrate its 20th birthday.
The track day was booked for the 5th June 2019.
All the tasks leading up to the track day help prepare the car, and cover all the basics to ensure the car stayed reliable on the day.
Final checks were done which included
-Torque on all Spark plugs
-All fluid checks
-Brake fluid moisture content check (less than 1%) – Pass
(using a Laser 4875 brake fluid tester)
-Engine visual inspection (no leaks or loose clips or connectors)
-All wheels removed, visual inspection performed
-All body works secured
-Exhaust items secured, no loose bolts
-Wheel bolts torqued up
-Tyre pressures checked
-Front tow hook check and fitted
-All tools/equipment and trolley jack loaded in boot
-Car cleaned


Parts Purchased:
None
Services Used:
None
Resources used
None
--------------------------------------------------------------------------------------------------------------------------
Task 59 – Novice Track Day Evening @ Brand Hatch
05-06-2019
The day finally arrived.
With all the works performed on the s2000, it was ready for some fun.
In attendance was:
-Myself in my 1999 Honda s2000
-My brother in his B16a powered 1994 Honda Civic Coupe
-An old friend in his 2013 BMW M135i
-Another old friend tagging along as a passenger in my s2000.
Due to the nature of these events and the value of the s2000, I decided on getting track day insurance.
From sky insurance it was a reasonable £97 cover for the day.
Incidents on track day events are usually quite rare, but it is great peace of mind just in case anything were to happen.
Great website, purchase online and receive your certificate in minutes
https://www.skyinsurance.co.uk/track...surance//quote
Absolutely epic day, fun was had by all and I did not want it to end.
Naturally we all felt slightly nervous at the beginning, but we all gained confidence in our cars as the evening went on.
The Honda s2000 performed flawlessly throughout all 4 sessions.
What a machine the s2000 is, Honda was on top of their game back in 1999 when they designed this car.
The chassis inspired confidence on every turn, coupled with its lovely gearbox, rev match on the down shift was a joy to execute when I could.
That f20 engine never missed a beat and revved flawlessly to 9k rpm every time I asked it too. What an engine, what a machine!
The s2000 stayed flat around the corners and flex of the whole car was barely noticeable. Just goes to show that x-bone frame was a master piece of design and engineering.
I was amazed at the capability of such a standard stock OEM car on road tyres (with the exception of slightly upgraded pads and stainless brake lines)
The brake performance was fantastic, no fade was felt and bite was excellent. It does goes to show all you need is good brake fluid (Castrol React Performance) and better than OEM pads (in this case ds2500 pads).
There were some lovely cars on track, most of which were alot faster than the s2000. Some were also alot slower consisting of a standard mini cooper and even a standard tdci Mondeo.
I think the closest competition I had was with a 2003 Porsche Boxster. His car seemed quite serious as it had a roll cage, but the s2000 kept up with it even around the corners despite the s2000 being stock.
The s2000 just felt at home on circuit, I am really glad I managed to take my s2000 on track as it was intended for.
I know track days aren’t for everyone. The pitfalls and expensive drama’s that can result in such event, but I would highly recommend it to anyone to fully feel the capability of the s2000.
Thanks to Matt Clay for taking the photos on the first session whilst we were queuing in the pit lane and out on track.
What an incredible day.


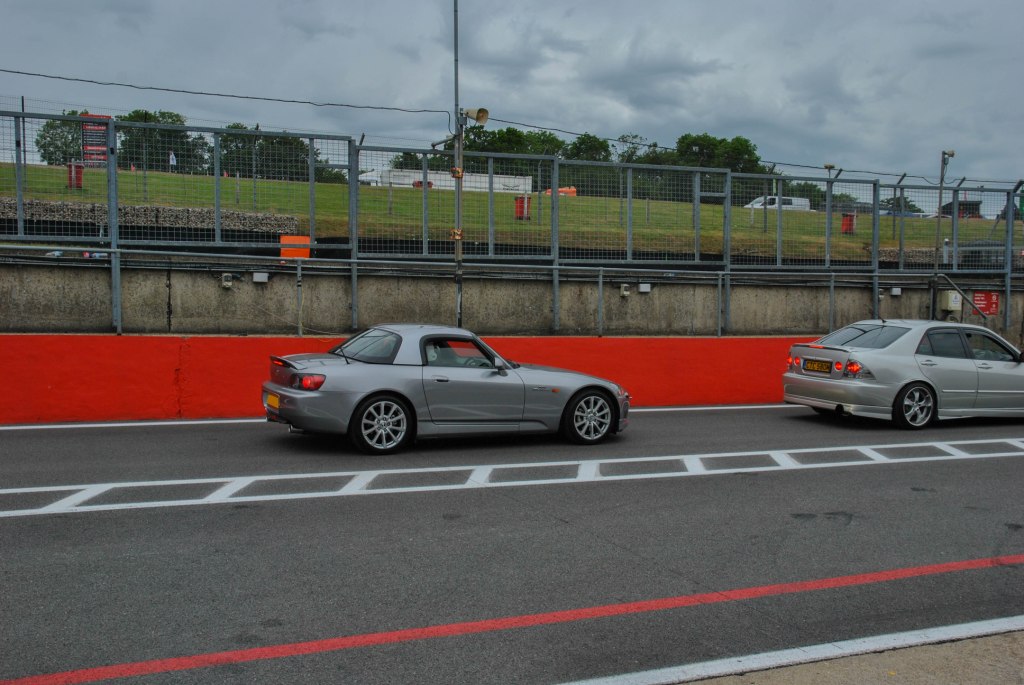


Parts Purchased:
None
Services Used:
MSV Track Days
https://www.msvtrackdays.com/car
Track Day Insurance
https://www.skyinsurance.co.uk/track...surance//quote
Resources used
None
--------------------------------------------------------------------------------------------------------------------------
This brings the car up to date.
There is a small remaining to-do list
To-do List
-Full Geometry Alignment (once funds allow)
Long Term To-Do
-Rectify lower arch rust issues
-Respray bonnet and boot lid due to paint surface defects
-Maybe colour code headlight washers and rear bumper lower lip section
Maybe's
-Refurbish All Wheels
Thanks for reading guys
10-06-19
The following 2 users liked this post by s2000_f20:
Arussto (12-23-2021),
Vortexhunter (06-11-2019)


The following users liked this post:
Arussto (12-23-2021)